GreenWorks Tools 26027 User manual

950W Electric Snow Thrower
26027

English (Original instructions)
1
Your product has been engineered and
manufactured to Greenworks tools’ high standard
for dependability, ease of operation, and operator
safety. When properly cared for, it will give you
years of rugged, trouble-free performance.
Thank you for buying a Greenworks tools
product. Save this manual for future reference.
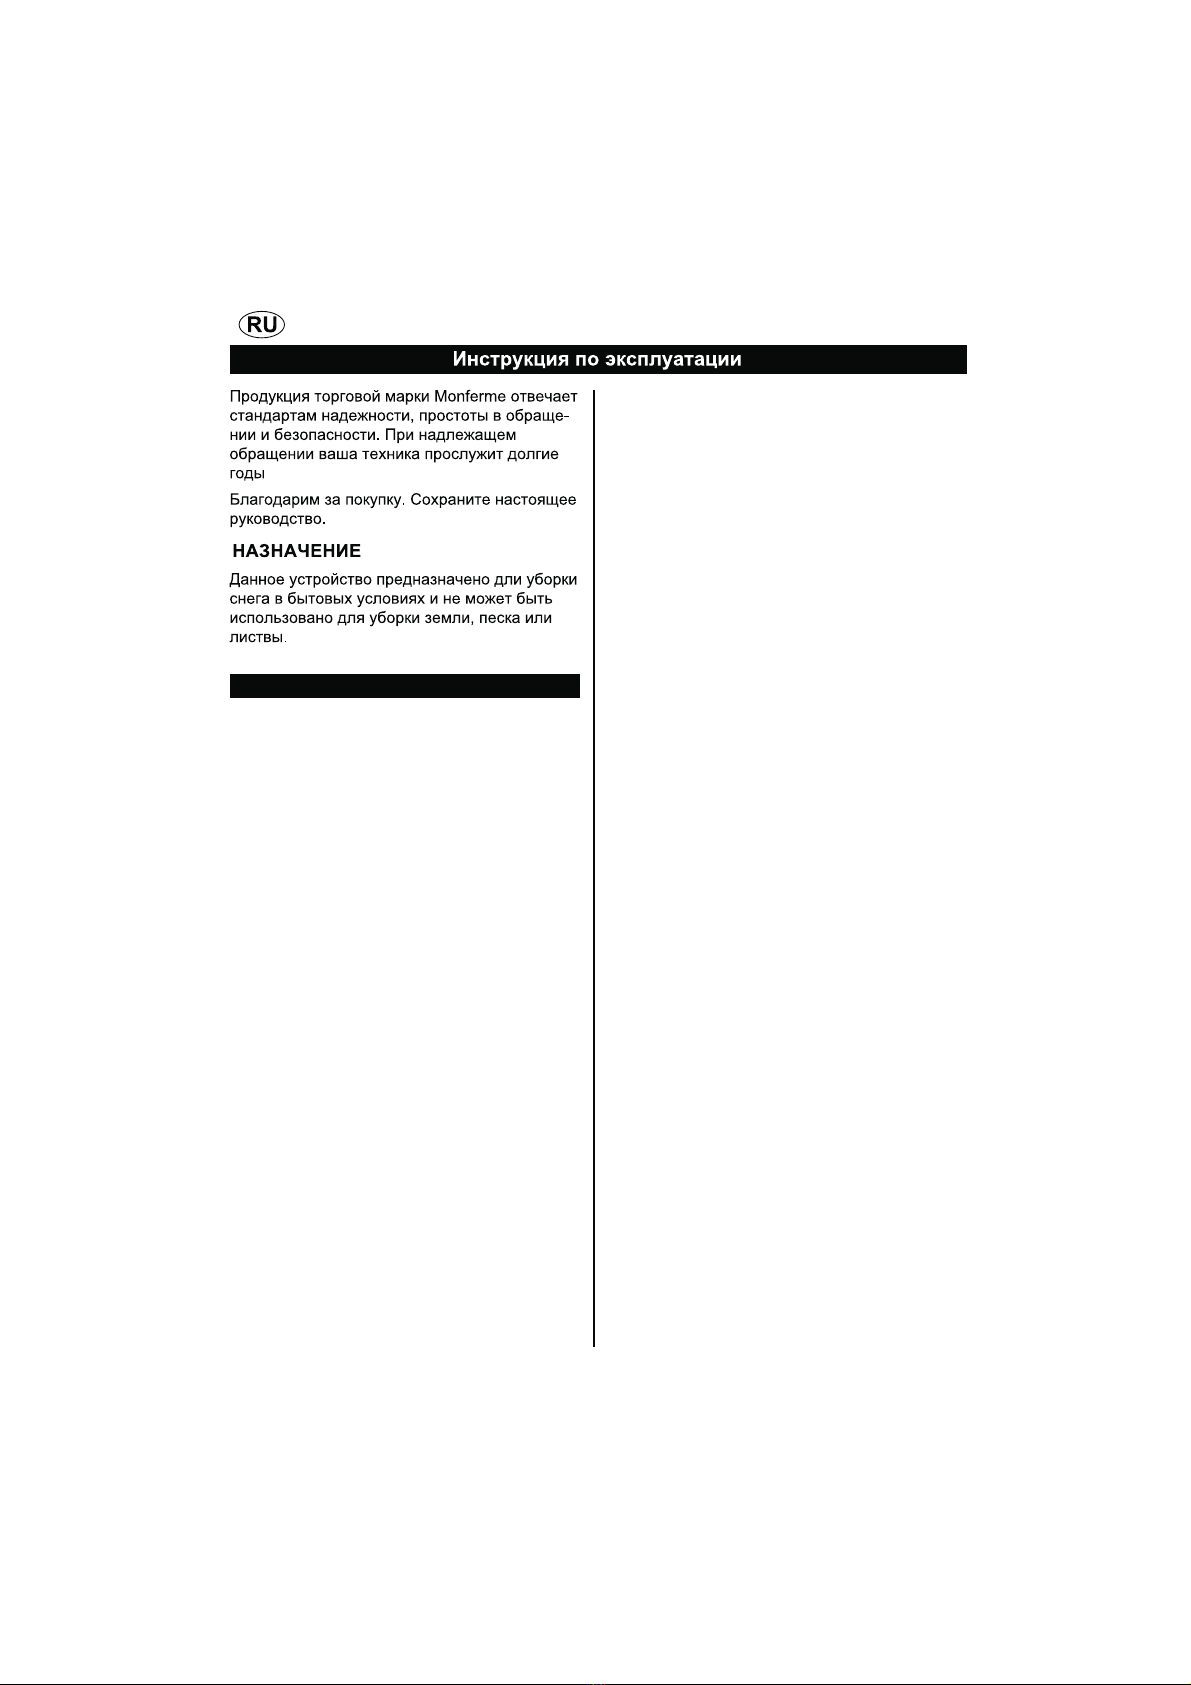
INTENDED USE
This snow shovel is intended for throwing snow
for domestic use, it is not intended to use for
throwing soil, sand or leaf.
This appliance can be used by
children aged from 8 years and
above and persons with reduced
physical, sensory or mental
capabilities or lack of experience
and knowledge if they have been
given supervision or instruction
concerning use of the appliance
in a safe way and understand
the hazards involved. Children
shall not play with the appliance.
Cleaning and user maintenance
shall not be made by children
without supervision.
TRAINING
Read the operating and service
instruction manual carefully.
Be thoroughly familiar with the
controls and the proper use of
the equipment. Know to stop the
unit and disengage the controls
quickly.
EN
SAFETY RULES
Never allow children to operate
the equipment. Never allow
adults to operate the equipment
without proper instruction.
Keep the area of operation clear
of all persons, particularly small
children, and pets.
E xer cise c aut ion to avoi d
slipping or falling, especially
when operating in reverse.
PREPARATION
Thoroughly inspect the area
where the equipment is to be
used and remove all doormates,
sleds, boards, wires, and other
foreign objects.
Disengage all clutches and shift
into neutral before starting the
motor.
Do not operate the equipment
without wearing adequate winter
garments. Wear footwear, which
will improve footing on slippery
surfaces.
OPERATION
Do not put hands or feet near or
under rotating parts. Keep clear
of the discharge opening at all
times.
Exercise extreme caution when
operating on or crossing gravel

English (Original instructions)
EN
drives, walks, or roads. Stay
alert for hidden hazards or
After striking a foreign object,
stop the motor, remove the wire
from the spark-plug, thoroughly
inspect the snow thrower for any
damage, and repair the damage
before restarting and operating
the snow thrower.
If the unit should start to vibrate
abnormally, stop the motor
and check immediately for the
cause. Vibration is generally a
warning of trouble.
Stop the motor whenever you
leave the operating position,
before unclogging the collector/
impeller housing or discharge
guide, and when making
any repairs, adjustments, or
inspections.
When cleaning, repairing, or
inspecting, make certain the
collector/impeller and all moving
parts have stopped.
Do not clear snow across
the face of slopes. Exercise
extreme caution when changing
direction on slopes. Do not
attempt to clear steep slopes.
Never operate the snow thrower
without proper guards, plates or
other safety protective devices
in place.
Never operate the snow
thrower near glass enclosures,
automobiles, window wells, offs,
ect. without proper adjustment
of the snow discharge angle.
Keep children and pets away.
Do not overload the machine
capacity by attempting to clear
snow at too fast a rate.
Never operate the machine
at high transport speeds on
slippery sufaces. Use care when
reversing.
Never direct discharge at
bystanders or allow anyone in
front of the unit.
Disengage power to the
collector/impeller when snow
thrower is transported or not in
use.
Use only attachments and
accessories approved by the
manufacturer of snow thrower
(such as wheel weights,
counterweights, cabs, etc.).
Never operate the snow thrower
without good visibility or light.
Always be sure of your footing,
and keep a firm hold on the
2

handles. Walk; never run.
Do not carry passengers.
Never operate the snow thrower
without good visibility or light.
Take all possible precautions
when leaving the machine
unattended. Disengage the
power take-off, lower the
attachments, shift into neutral,
set the parking brake, stop the
motor.
MAINTENANCE AND STORAGE
Check shear bolts; engine-
mounted bolt, ect., at frequent
intervals for proper tightness to
be sure the equipment is in safe
working condition.
Always refer to owner's guide
instructions for important details
if the snow thrower is to be
stored for an extended period.
Maintain or replace safety
and instructions labels, as
necessary.
Run the machine a few minutes
after throwing snow to prevent
freeze-up of the collector/
impeller.
appropriate safety warnings shall
be provided with the equipment
for those maintenance
operations recommended by
the manufacturer that must
be performed with the motor
running. General maintenance
written instructions shall be
provided with the equipment
for maintenance operations
recommended by the
manufacturer to maintain the
equipment in safe operating
condition.
Some of the following symbols may be used on
this product. Please study them and learn their
meaning. Proper interpretation of these symbols
will allow you to operate the product better and
safer.
V Volts
A Amperes
Hz Hertz
W Watts
Hrs Hours
Precautions that involve your safety.
To reduce the risk of injury, user must
read and understand user’s manual
before using this product.
Keep all bystanders (especially
children and pets) at least 15 m away
from the work area.
Pay attention that bystanders are not
injured through foreign objects thrown
from the mower.
English (Original instructions)
EN
3
SYMBOL

English (Original instructions)
EN
Do not operate on inclines greater
than 15º. Mow across the face of
slopes, never up and down.
Keep hands and feet away from
rotating parts.
Wear ear protection when operating
this machine.
Wear eye protection when operating
this machine.
Waste electrical products should not
be disposed of with household waste.
Recycle where facilities exist.
Keep hands away from the collector/
impeller.
Danger - Keep feet away from the
collector/impeller.
The power supply must be disconnected
before carrying out cleaning or
maintenance. Shut off the motor before
unclogging the discharge shute.
Tool in which protection against electric
shock rely on double insulation or
reinforced insulation.
SERVICE
Servicing requires extreme care and knowledge
and should be performed only by a qualified
service technician. For service we suggest you
return the product to your nearest AUTHORIZED
SERVICE CENTER for repair. When servicing,
use only identical replacement parts.
If the supply cord is damaged, it must replaced
by the manufacturer, its service agent or similarly
This product has many features for making its
use more pleasant and enjoyable.
Safety, performance, and dependability have
been given top priority in the design of this
product making it easy to maintain and operate.
1. Trigger switch
2. Lock-out button
3. Auxiliary handle
4. Cord retainer
5. Belt drive cover
6. Impeller
7. Scraper
8. Holes
9. Bolt
10. Lock knob
4
WARNING
WARNING
To avoid serious personal injury, do not attempt
to use this product until you have read this
Owner's Manual thoroughly and understand it
completely.
The operation of any power tool can
result in foreign objects being thrown
into your eyes, which can result in
severe eye damage. Before beginning
power tool operation, always wear
safety goggles or safety glasses
with side shields and, when needed,
a full face shield. We recommend
Wide Vision Safety Mask for use over
eyeglasses or standard safety glasses
with side shields. Always use eye
protection which is marked to comply
with EN 166.
DESCRIPTION

English (Original instructions)
EN
5
SPECIFICATIONS
Motor
No-load speed
Vibration
Sound pressure level
Sound power level
Clearing width
Clearing depth
Impeller size
Discharge distance
Net weight
220-240V~, 50Hz, 950W
Up to 2600 RPM
2.5 m/s2, K = 1.5 m/s2
LpA 82 dB, K = 3 dB
LwA 99 dB
30 cm
10.2 cm
25.4 cm
Up to 6 m
6.3 kg
ASSEMBLY
WARNING
Do not use this product if any parts on the
packing list are already assembled to your
product when you unpack it. Parts on this
list are not assembled to the product by the
manufacturer and require customer installation.
Use of a product that may have been
improperly assembled could result in serious
personal injury.
This product requires assembly.
Carefully remove the product and any
accessories from the box. Make sure that all
items listed in the packing list are included.
Inspect the product carefully to make sure no
breakage or damage occurred during shipping.
Do not discard the packing material until you
have carefully inspected and satisfactorily
operated the product.
If any parts are damaged or missing, please
call your Greenworks tools service centre for
assistance.
Snow shovel
Owner's Manual
CONNECTING THE POLES
Carefully remove the product and any
accessories from the box. Make sure that all
items listed are included.
Remove packaging material from cord and
discard immediately.
PACKING LIST
WARNING
WARNING
WARNING
WARNING
If any parts are damaged or missing, do
not operate this product until the parts are
replaced. Failure to heed this warning could
result in serious personal injury.
Do not connect to power supply until assembly
is complete. Failure to comply could result
in accidental starting and possible serious
personal injury.
Do not allow familiarity with this product to
make you careless. Remember that a careless
fraction of a second is sufficient to inflict
serious injury.
Do not attempt to modify this product or create
accessories not recommended for use with this
product. Any such alteration or modification
is misuse, and could result in a hazardous
condition leading to possible serious personal
injury.

English (Original instructions)
EN
6
WARNING
WARNING
Make sure not to pin the power cord ; Make
certain all nuts and bolts are tightened securely.
The double insulated system is intended to
protect the user from shock resulting from
a break in the product’s internal insulation.
Observe all normal safety precautions to avoid
electrical shock.
Align the holes on the handle pole and the
lower pole. Insert the bolt and tighten them
using the lock knob provided.
USING THE CORD RETAINER
This Snow Shovel is equipped with a cord
retainer in order to prevent the extension cord
from disconnecting from the power cord while the
Snow Shovel is in use.
NOTE: Do not plug the extension cord into the
outlet until it has been connected to the cord
retainer and plugged into the Snow Shovel.
To use the cord retainer:
Fold the extension cord to form a tight loop
near the retainer.
Push the loop through the bottom hole in the
retainer.
Slide the loop over the retaining clip, and pull
down until the cord is secured.
DOUBLE INSULATION
Double insulation means that exposed metal
parts are isolated from the internal metal motor
components with protecting insulation. Double
insulated products do not need to be grounded.
NOTE: Servicing of a product with double
insulation requires extreme care and knowledge
of the system and should be performed only by
a qualified service technician. For service, we
suggest you return the product to your nearest
authorized service centre for repair. Always
use original factory replace ment parts when
servicing.
ELECTRICAL CONNECTION
This product has a precision-built electric motor.
It should be connected to a power supply that is
220-240 volts, 50 Hz, AC only (normal household
current). Do not operate this product on direct
current (DC). A substantial voltage drop will cause
a loss of power and the motor will overheat. If the
product does not operate when plugged into an
outlet, double-check the power supply.
EXTENSION CORDS
See Figure 4.
The cross-section of any extension cables used
must be proportional to their length, i.e. the
longer the extension cable, the greater the cross-
section; cables with a protection level of “IPX4”
must be used.
Use the chart to determine the minimum wire size
required in an extension cord.
STARTING THE SNOW SHOVEL
Avoid accidental start-ups. Verify that the
operator is in the starting position when using
the snow shovel. In order to avoid serious injury,
the operator and unit must be in a stable position
when starting the Snow Shovel.
Follow this sequence exactly in order to start the
Snow Shovel.
Motor
Voltage Extension
cable up to
25m
Section
3x1.5 mm2
Section
3x2.5 mm2
Extension
cable up to
50m
220-240V
OPERATION
ELECTRICAL

English (Original instructions)
EN
7
WARNING
The snow thrower must never be rinsed with
water. Risk of damage to the electrical system
and risk of electric shocks.
Verify that the Snow Shovel is plugged in.
Press and hold the lock-out button.
While holding the lock-out button, press and
hold the trigger switch.
NOTE: The Snow Shovel will not start if the lock-
out button is not held until the trigger switch is
lifted.
Hold the handles and begin to use the Snow
Shovel.
STOPPING THE SNOW SHOVEL
Release the trigger switch.
The lock-out button will pop out, and the Snow
Shovel will stop.
USING THE SNOW SHOVEL
Start the Snow Shovel by following the Starting
instructions. The depth and weight of the snow
will determine the forward speed.
Push the Snow Shovel forward so that it rides
on the scraper.
Verify that the power cord is attached to the
cord retainer. The power cord should trail to
the side of the operator.
OPERATING TIPS
Clear away the snow immediately after
snowfall.
For complete snow clearance, slightly overlap
each clearance pass.
If possible, discharge the snow downwind.
For safety and to prevent damage to the snow
thrower, keep the area to be cleared free of
stones, toys and other foreign objects.
AFTER USE
Stop the motor.
Disconnect the electric cable from the snow
thrower and the property’s power socket.
Allow the snow thrower to cool for 30 minutes.
Clean the inside and outside of the snow
thrower with a suitable brush.
Check that there are no damaged or loose
parts. Repair/replace parts if necessary.
STORAGE
Allow the motor to cool down before storing.
Store the Snow Shovel in a locked location in
order to prevent unauthorized use or damage.
Store the Snow Shovel in a dry, well-ventilated
area.
Store the Snow Shovel out of the reach of
children.
CLEANING
Use a small brush to clean the outside of the
Snow Shovel. Do not use strong detergents.
Household cleaners that contain aromatic oils
such as pine and lemon, and solvents such as
kerosene can damage the plastic housing and
handles. Wipe off any moisture using a soft cloth.
TRANSPORTING THE SNOW SHOVEL
Allow the motor to cool down before transporting.
Secure the Snow Shovel while transporting.
When moving the Snow Shovel, grasp it by the
top and auxiliary handles.
WARNING
In order to avoid serious personal injury, turn
the Snow Shovel off and unplug it before
cleaning or servicing.
MAINTENANCE

English (Original instructions)
EN
8
TROUBLESHOOTING
PROBLEM POSSIBLE CAUSE SOLUTION
The snow shovel The Snow Shovel is Verify that the Snow Shovel is plugged
does not start. unplugged. into an electrical outlet.
The lock-out button or trigger Press and hold the lock-out button, and
switch were not used properly. then lift and hold the trigger switch (see
the section entitled Starting the Snow
Shovel).
The motor is on, but The belt is damaged. Replace the belt (see the section entitled
The rotor does not Inspecting/Replacing the Drive Belt).
turn.
The snow shovel The scraper is worn. Replace the scraper (see the section
leaves a thin layer entitled Replacing the Scraper).

English (Original instructions)
9

10

11

12

English (Original instructions)
13

English (Original instructions)
14

English (Original instructions)
15

EN EC DECLARATION OF CONFORMITY
Name: Changzhou Globe Co., Ltd.
Address: No. 65 Xinggang Rd., Zhonglou Zone, Changzhou, Jiangsu, China
Name and address of the person authorised to compile the technical
Name: Dennis Jacobson (Director of Outdoor Power Equipment)
Adress: Greenworks Tools Europe GmbH,
Schillingsrotterstr. 38
50996 Cologne
Germany
Herewith we declare that the product
Category ....................................................................................................... SNOW THROWER
Model .................................................................................................................................26027
Serial number .........................................................................................See product rating label
Year of Construction ...............................................................................See product rating label
n is in conformit y with the releva nt provisions of the Machinery Directive (2006/42/EC)
n is in conformit y with the provis ions of the following other EC-Directives
EMC Directive (2004/108/EC),
Noise Emission Directive (2000/14/EC amended by 2005/88/EC)
And furthermore, we declare that
Measured sound power level 96.7 dB (A)
Guaranteed sound power level 99 dB (A)
Conformity assessment method to Annex V / Directive 2000/14/EC
Place, date: Changzhou, 30/03/2012 Signature: Gary Gao Naixin (BEng, CEng, MIET)
Vice president of Engineering
EN 60335-1
ISO/DIS 8437
EN 62233; EN55014-1; EN55014-2
EN61000-3-2; EN61000-3-3; EN ISO 3744; ISO 11904

English (Original instructions)
RU
Shillingsrotterstr. 38
50996 Cologne
Germany
EN 60335-1
ISO/DIS 8437
EN 62233; EN55014-1; EN55014-2
EN61000-3-2; EN61000-3-3; EN ISO 3744; ISO 11904

EN LIMITED WARRANTY
Globe Tools warrants this outdoor product to be free of defects in material and workmanship for 24 months
from the date of purchase by the original purchaser, subject to the limitations below. Please keep your
invoice as proof of date of purchase.
This warranty is only applicable where the product is used for personal and non-commercial purposes. This
warranty does not cover damage or liability caused by / due to misuse, abuse, accidental or intentional acts
by user, improper handling, unreasonable use, negligence, failure by end user to follow operating
procedures outlined in the user’s manual, attempted repair by non-qualified professional, unauthorized
repair, modification, or use of accessories and/or attachments not specifically recommended by authorized
party. Please see your local dealer for list of authorized service centers in your area.
This warranty does not cover belts, brushes, bags, bulbs or any part which ordinary wear and tear results in
required replacement during warranty period. This warranty does not cover transportation cost or
consumable items such as fuses and batteries.
This limited warranty is void if the product’s original identification (trade mark, serial number, etc.) markings
have been defaced, altered or removed or if product is not purchased from an authorized reseller or if
product is sold AS IS and / or WITH ALL FAULTS.
Where permitted, the provisions of this limited warranty are in lieu of any other written warranty, whether
express or implied, written or oral, including any warranty of MERCHANTABILITY OR FITNESS FOR A
PARTICULAR PURPOSE. IN NO EVENT SHALL WE BE LIABLE FOR SPECIAL, INCIDENTAL,
CONSEQUENTIAL OR INCIDENTAL DAMAGES. OUR MAXIMUM LIABILITY SHALL NOT EXCEED THE
ACTUAL PURCHASE PRICE PAID BY YOU FOR THE PRODUCT.
This warranty is valid only in the European Union, Australia and New Zealand. Outside these areas, please
contact your authorized Greenworks tools ealer to determine if another warranty applies.

RU
Table of contents
Other GreenWorks Tools Snow Blower manuals