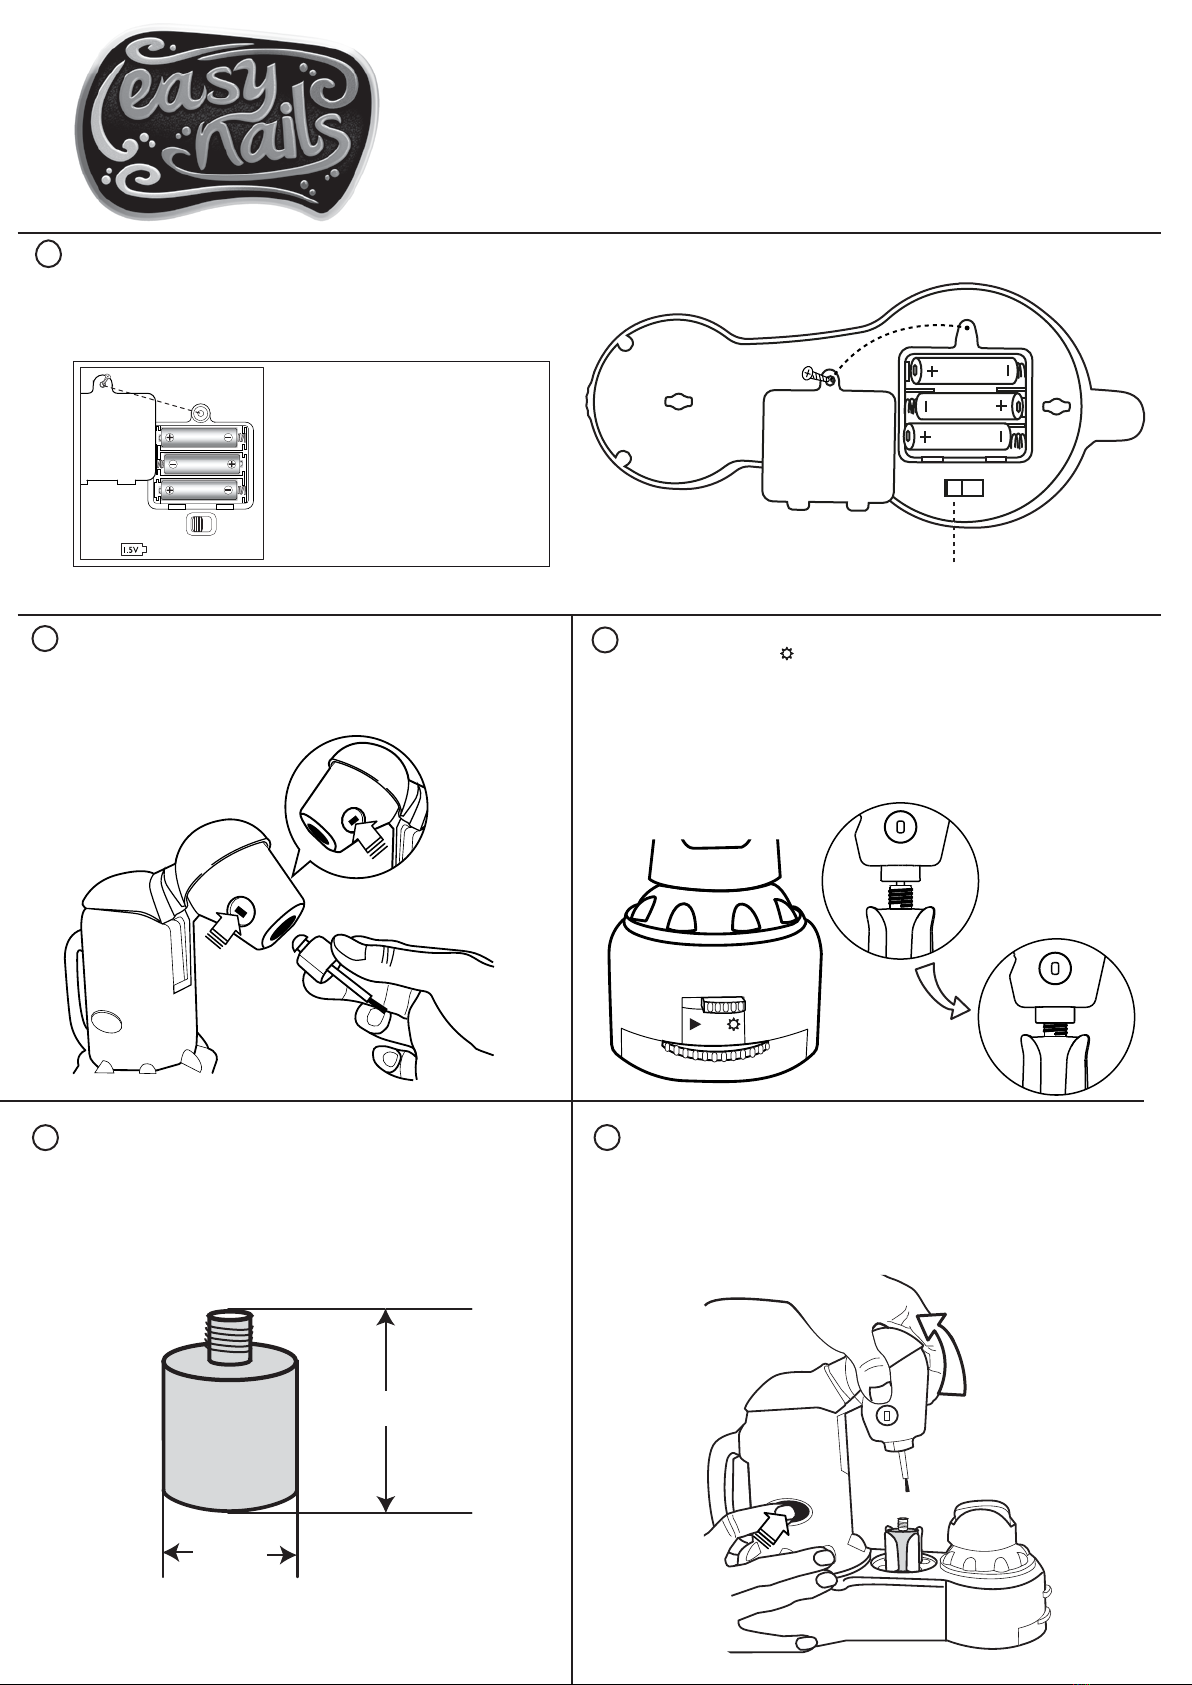
HOW TO INSTALL AND REPLACE BATTERIES
Unscrew the battery cover on the base using a small Phillips head
screwdriver. Install 3 AA batteries observing the correct polarity
(+/-). Replace the battery cover and tighten the screw. Switch the
Easy Nails to ON mode, using the switch next to the battery
compartment.
Play Instructions
TO CHANGE THE BRUSH
Press the buttons on the side of the robot arm and pull the brush out.
Push a new clean brush into the arm until you hear a click.
Put dirty brushes in a bowl of warm water and wipe clean with a warm damp cloth.
SETUP
1. Switch the switch to Setup mode.
2. Lower the bottle holder by rotating the dial clockwise (to the left).
3.Take the lid off one bottle of polish and put the bottle into the holder by pushing it in the centre
of the holder. Place the lid upright on the table on a sheet of waster paper or tissue.The nail
polish clasp will auto adjust to hold the bottle tight. (The adjustment option allows you to use
your own polish too).
4. Press the PINK button to move the arm into the dip position.
5. Ensure the bottle is aligned and raise the bottle holder up by rotating the dial anti-clockwise (to
the right) until the brush dips into the polish.
6. Switch the switch into PLAY ▶mode.
7. Easy Nails is now setup.
OTHER VARNISH BOTTLES
Your own nail polish can be used once the polish supplied has run out but the bottle
must be bigger than 18mm and smaller than 30mm diameter and between 42mm and
51mm high.
If the bottle is not round or the top not in the middle of the bottle then it might not
be possible to use it with Easy Nails Nail Spa.
TROUBLESHOOTING
If the robot arm gets stuck on the bottle it can be released using the button on the side
of the Easy Nail unit.
1. Press this button in to release the arms and manually raise it up as far as it will go then
release the button.
2. Switch the unit off and on again and repeat the setup procedure starting by lowering
the bottle holder.
BEFORE USING YOUR EASY NAILS NAIL SPA:
1. Prepare the following:
• Setup Easy Nails Nail Spa
• Spare Polish
• Glitter
• Gemstones
• Spare Brushes
• Damp Cloth
2.Wash hands especially nails thoroughly in warm soapy water and dry thoroughly to help a good finish.
3. Place the Easy Nail at a suitable height to play easily. Sitting on a chair at a table works best.
ADDING DECORATION:
Glitter
This can get messy. Always do this over a clean table or sheet of newspaper so any glitter that falls off can be swept back into the tube.
You can detail your nails with glitter by painting an area of your nail with some polish. Sprinkle on the glitter from the tube (be careful) while the polish is still wet.
Gemstones
Gemstones can be applied in the same way. Dab a blob of polish (using the polish brush from the bottle) onto the nail and then put a gemstone on before it dries. For a more
permanent fix a nail adhesive should be used (not supplied).
REMOVING THE VARNISH:
All the polish supplied is water based. It can be easily removed by peeling it off or scratching it gently with a fingernail. Alternatively soaking hands in warm water for 2 minutes
and rubbing with a cloth or flannel will remove it.
CARE:
Brushes should be kept clean and dry to prevent polish going hard and crusty. Crusty brushes should be soaked in warm water but they might not recover.
Polish pots should be stored with lids on, polish will dry out if left open.
Contents:
Easy Nail Spa
20 Gemstones
1 Tube of glitter
1 Pink polish
1 Purple polish
2 Spare Brushes
1 Instruction Sheet
Manufactured by:
Item: Easy Nails Nail Spa
Item Number: 05776
Age Grade: 5 years plus
Not suitable for children under 36 months. Choking hazard (small
parts).
Please remove all packaging attachments before giving this product to
a child.
Please use discretion if making purchases for children younger than
the age recommended on this package.
At the end of the useful life of this product do not dispose in normal
household waste. Check with your local authority or responsible
disposal centre and submit to the collection point for the recovery
and recycling of electrical and electronic equipment.
Product specifications, colour and contents may vary from those
illustrated.
IMPORTANT: Please retain packaging/instructions and purchase
details for future reference as they contain important information.
WARNING! CHOKING HAZARD.
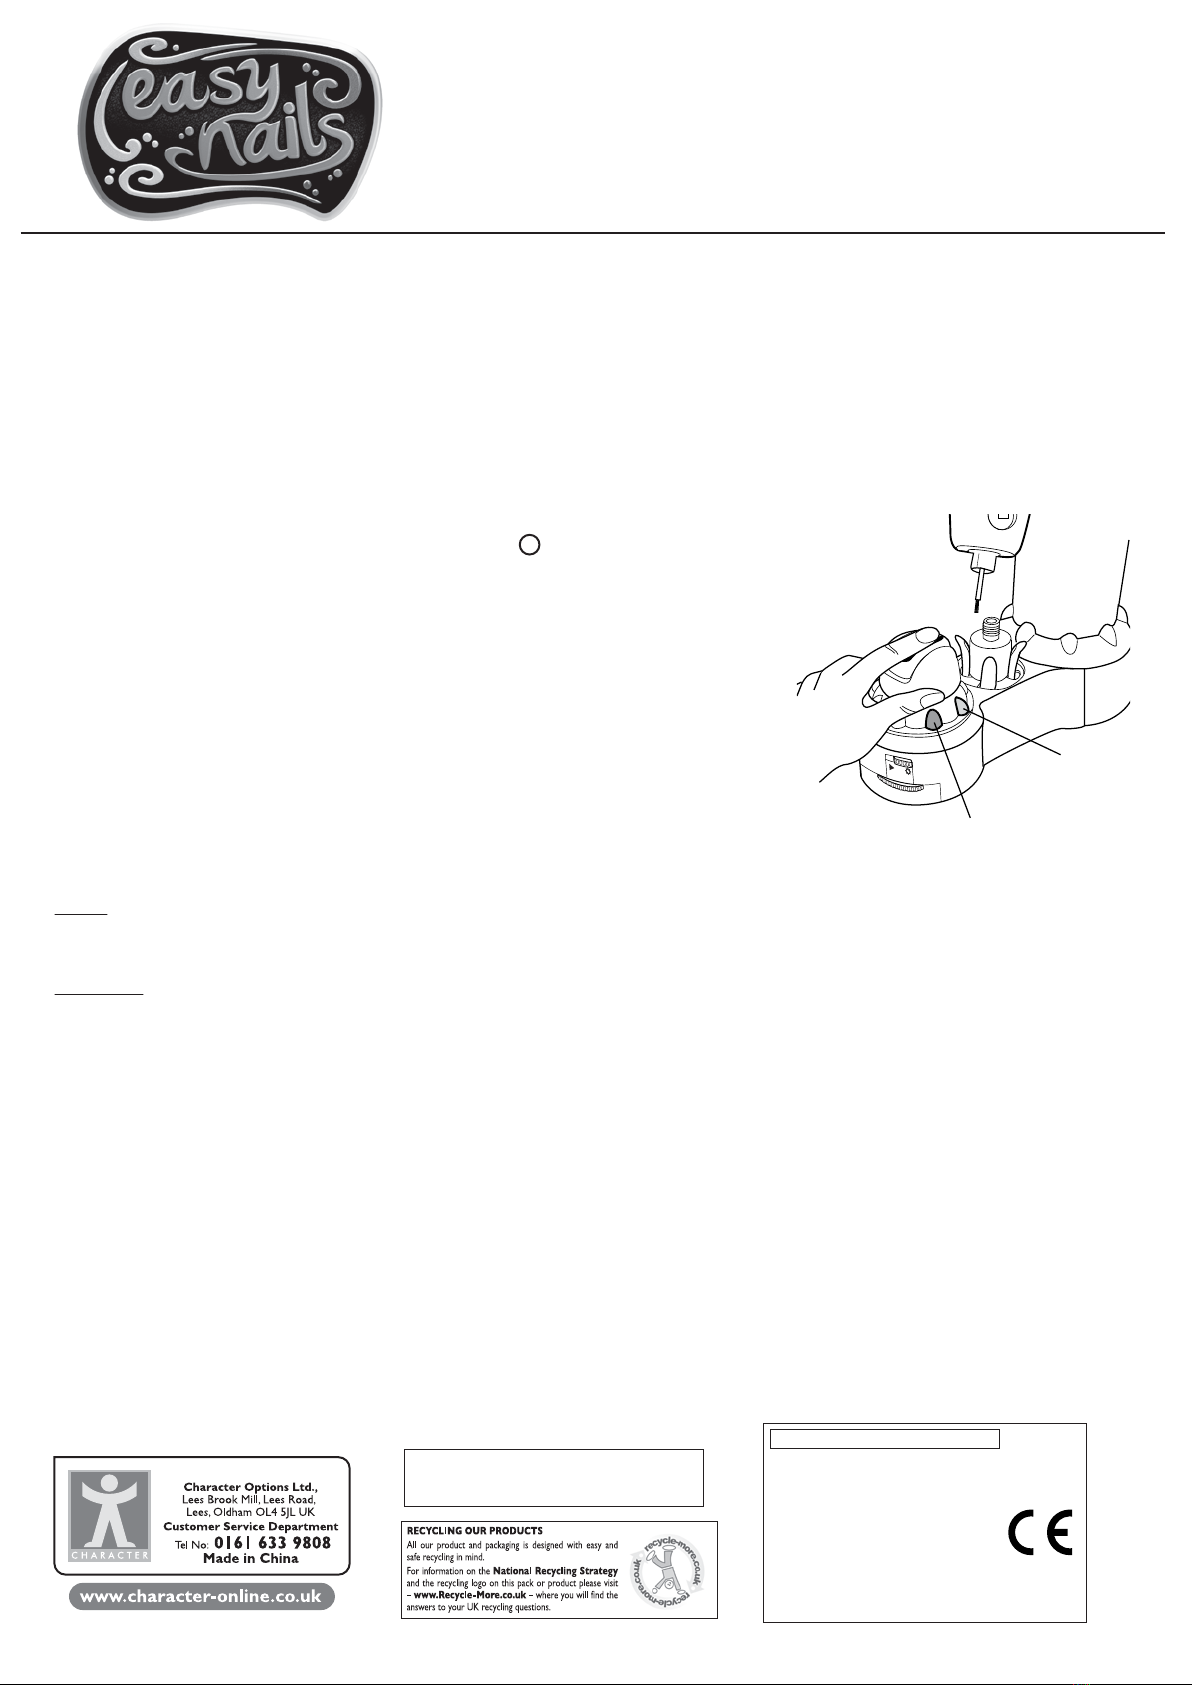
1. Make sure your unit is setup correctly, is in PLAY mode and switched on (SEE ).
2. Start with the first finger on your writing hand. Rest this on the nail rest.
3. Press the dip button (PINK) to load the brush with polish. NOTE:The buttons on both sides of the unit do the same
thing DIP and PAINT but are there to help paint the opposite hand.
4. Press the PAINT button (PURPLE) to start the paint cycle. The brush will come down and wait above your nail.
5.Adjust the position of your finger to be underneath the brush.This takes some practice. Keep painting until your nail is
covered.
6. Press the paint button again to apply the polish to the nail. Repeat this until you need more polish on the brush adjusting
the position of your finger each time.
7. Press the dip button when you need more polish or when you want to start your next nail.
8.Any polish on your skin can be easily wiped off with a damp cloth or scratched gently with a fingernail to remove it.
TO USE YOUR EASY NAIL PERFECT PAINT SPA:
5+
EASY NAILS NAIL SPA
Dip (Pink)
Paint (Purple)
Nail Polish:Apply only to nail; do not apply to skin.
Do not eat. Remove excess from skin and clothing.
Glitter:Avoid contact with eyes. In case of contact,
rinse clear with clean cold water.
3.