Easy Touch ET-604 User manual

Built-in Dolby Digital decoding for maximum home entertainment
Unique laser-head over-current protection system doubles service life
Special DVD deck features fully dustproof and anti shock design as well as augmented error
correction and better stability
Fully functional DVD operating system offers many favorite functions and user-friendly
operation
Integrated DVD and built-in 2-channel Hi-Fi amplifier
MINI COMBO SYSTEM
ET-604

A lightning bolt with an arrowhead symbol within
an equilateral triangle is intended to alert the
user to the presence of uninsulated "dangerous
voltage" within the product's enclosure that may
be of sufficient magnitude to constitute a risk of
electric shock to persons.
The exclamation point within an equilateral
triangle is intended to alert the user to the
presence of important operating and main-
tenance (servicing) instructions in the literature
accompanying the appliance.
WARNING: TO AVOID THE DANGER OF FIRE
OR ELECTRIC SHOCK, DO NOT EXPOSE THIS
APPLIANCE TO WATER OR MOISTURE. NEVER
OPEN THE CABINET, AS DANGEROUS HIGH
VOLTAGE IS CONTAINED INSIDE. ONLY
A QUALIFIED SERVICE TECHNICIAN SHOULD
ATTEMPT TO OPEN THE CABINET.
CAUTION: TO PREVENT ELECTRIC SHOCK,
MATCH WIDE BLADE OF PLUG TO WIDE
SLOT, AND FULLY INSERT INTO ELECTRICAL
SOCKET.
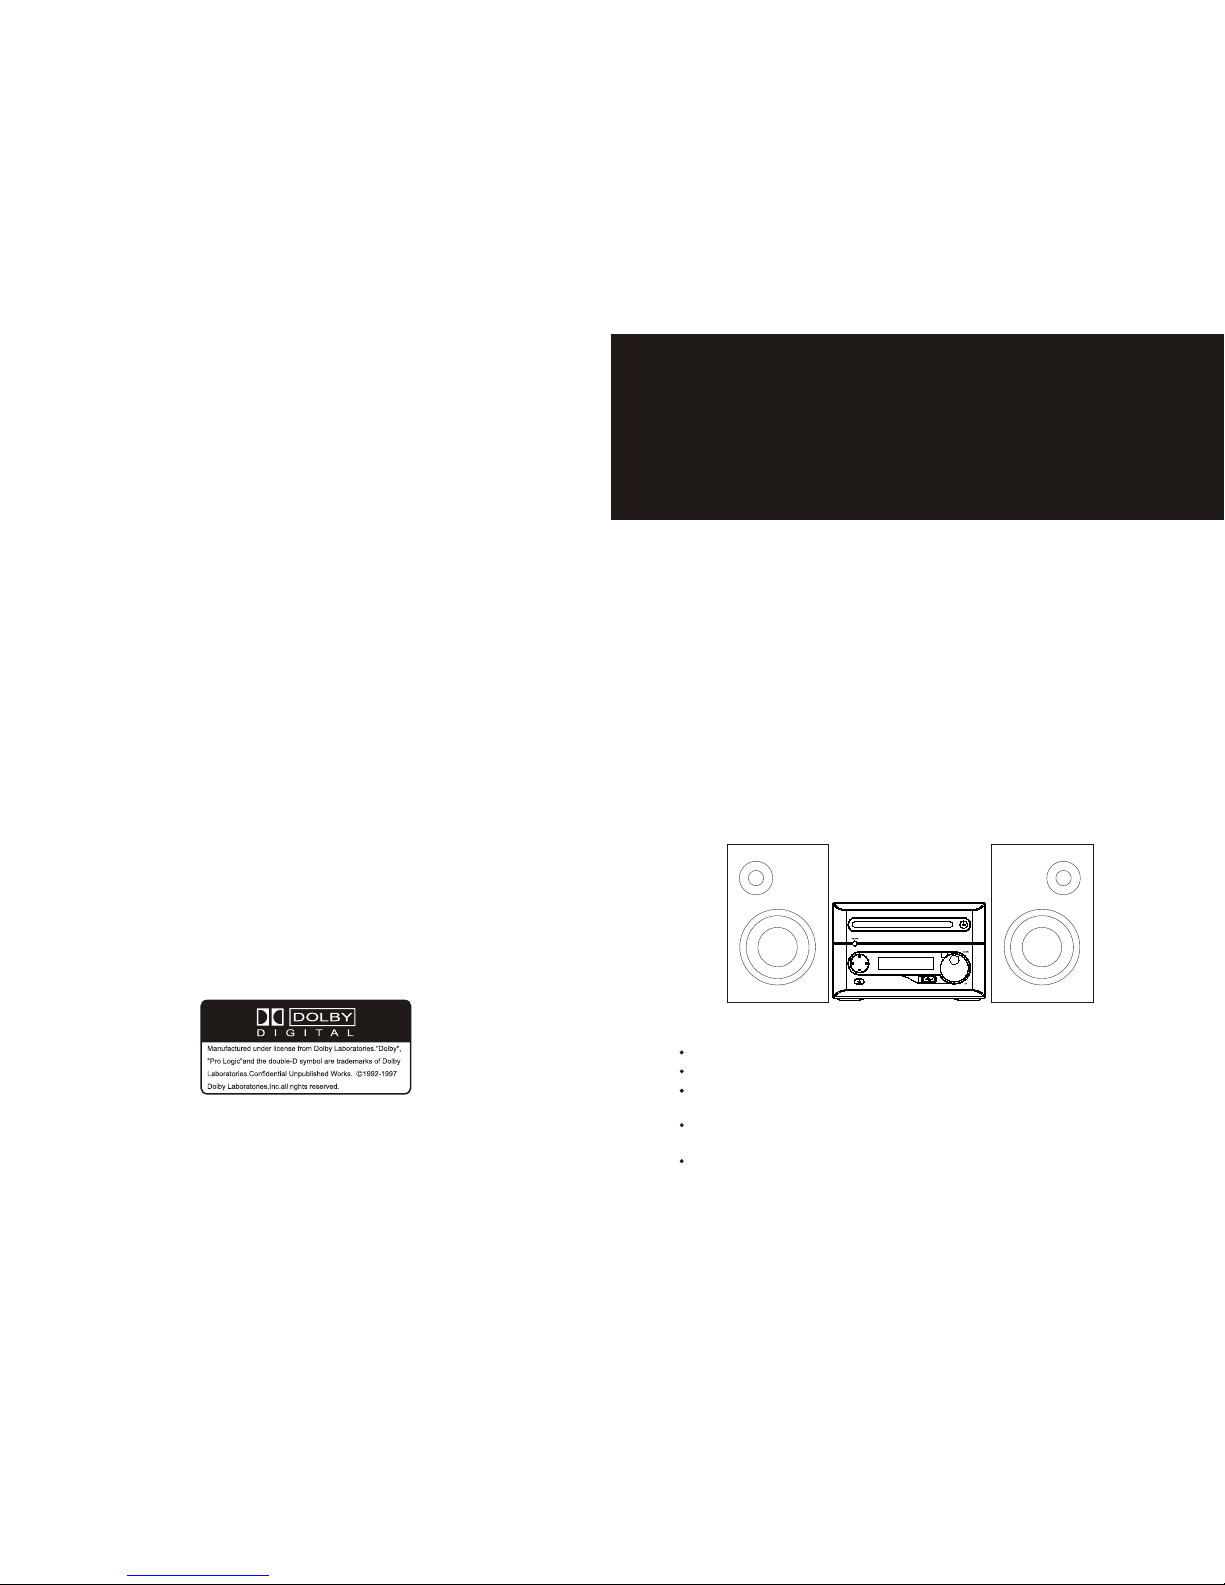
CAUTION: This DVD receiver unit employs
a laser system. To prevent direct exposure to
the laser beam, do not open the enclosure.
Visible laser radiation is present when enclo-
sure is open. DO NOT STARE INTO BEAM.
Additionally, the use of controls or adjustments
or performance of procedures other than those
specified herein may result in hazardous radia-
tion exposure.
To ensure proper use of this product, please
read this owner's manual carefully and retain
for future reference. Should the unit require
maintenance, contact an authorized service
centre.
PROTECT YOURSELF!
Record the model and serial numbers for this
unit while it is easy to see them. These numbers
are located on the back of the unit's cabinet.
Retain this information for future reference.
Model Number
Serial No. _________________________
Retain this information for future reference.
CAUTION
RISK OF ELECTRIC SHOCK DO NOT OPEN
CAUTION: TO REDUCE THE RISK OF
ELECTRIC SHOCK, DO NOT REMOVE COVER
(OR BACK). THERE IS NOS ERVICE
ABLE PART INSIDE. REFER SERVICING TO
QUALIFIED SERVICE PERSONNEL.
RISK OF ELECTRIC SHOCK
DO NOT OPEN
WARNING
PRECAUTIONS
-1-
CAUTION: Is it important that you read and follow all
of the instructions in this booklet and any marked on
the unit itself. Retain this booklet for future reference.
Accessories--- Never place this product on an un-
stable platform, stand, cart, wall mount, shelf, or
table. The product may fall, causing serious personal
injury to persons and pets, as well as seriously
damaging the product.
Any mounting of the product should follow the
manufacturer's instructions, and use a mounting
accessory recommended by the manufacturer.
This unit while positioned on some type of cart must
be moved with care. Quick stops, excessive force,
and uneven surfaces may cause the product and
cart combination to overturn.
Attachments---Use only approved attachment as
they may cause hazards.
Cleaning--- Always unplug this unit from the wall
electrical outlet before cleaning. Do not use liquid or
aerosol cleaners; use a damp cloth for cleaning.
Lightning--- For added product protection during
a lightning storm or when it is left unattended and
unused for long periods of time, unplug it from the
wall outlet and/or disconnect the antenna or cable
system. This will prevent damage to the product due
to lightning and power-line surges.
Object and Liquid Entry--- Never push objects of
any kind into this product through openings as they
may touch dangerous voltage points or short-out
parts that could result in a fire or electric shock.
Never spill liquid of any kind on or into the product.
Outdoor Antenna Grounding--- If an outside
antenna or cable system is connected to the product,
be sure the antenna or cable system is grounded so
as to provide protection against voltage surges and
built-up static charges.
Overloading---Do not overload wall outlets, exten-
sion cords, or integral convenience receptacles, as
this may result in a fire or electric shock.
Power - Cord Protection - Power - supply cords
should be routed so that they are not likely to be
walked on or pinched by items placed upon or against
them, paying particular attention to cords at plugs,
convenience receptacles, and the point where they
exit from the product.
Power Lines---An outside antenna system should
not be located in the vicinity of overhead power lines
or other electric light or power circuits, or where it
can fall into such power lines or circuits. When
installing an outside antenna system, extreme care
should be taken to keep from touching such power
lines or circuits as contact with them might be fatal.
Power Sources---This product should be operated
only from the type of power source indicated on the
marking label. If you are not sure of the type of power
supply to your home, consult your product dealer or
local power company. For products intended to
operate from battery power or other sources, refer to
the operating instructions. This DVD home theater
operates on AC 230V/50Hz. Do not turn off unit
immediately after turning on; wait at least 10 seconds.
Replacement Parts--- If replacement parts are
required, be sure the service technician has used
approved replacement parts or have the same
characteristics as the original part. Unauthorized
substitutions may result in fire, electric shock, or
other hazards.
Safety Check---Upon completion of any service
or repairs to this product, ask the service technician
to perform safety checks to determine that the
product is in proper operating condition.
Servicing--- Do not attempt to service this product
yourself as opening or removing covers may expose
you to dangerous voltage or other hazards. Refer all
servicing to qualified service personnel.
TV System---This unit is compatible with television
sets featuring either the NTSC or PAL color system.
Ventilation---Slots and openings in the cabinet
are provided for ventilation and to ensure reliable
operation and protection from overheating. These
openings should never be blocked by placing the
product on a bed, sofa, rug, or other similar surface.
This product should not be placed in a built-in install-
ation such as a bookcase or rack unless proper
ventilation is provided. Never place this product near
a heat source, such as heat registers, stoves,
radiators, or any other product that produces heat.
Water and Moisture---Do not use this product near
sources of water and moisture, such as bath tub, wash
bowl, kitchen sink, or wash machine; in a wet, damp
basement; or near a swimming pool or similar
locations. If moisture condensation occurs, remove
any disc, connect the unit's power cord to a wall outlet,
turn the unit on, and leave it on for two to three hours.
By then, the unit will warm up and moisturew ould
evaporate
IMPORTANT--
SAFETY INFORMATION

The following will help you get the most enjoyment from your DVD receiver system.
BEST LOCATION
The unit should be placed on a firm, flat surface, away from VCRs, stereos, radios, or large
speakers, as the magnetic flux from these devices may cause distortion in the sound and a poor
picture. If placed in a cabinet, be sure there is at least 1 o f f ree space completely around the unit
for proper ventilation.
TO OBTAIN A CLEAR PICTURE
A DVD receiver is a precision device. If the optical pick-up lens and disc drive parts become dirty
or worn down, picture quality will become poor. Store DVD player in a clean dust free environment.
PLAYABLE DISCS
This DVD receiver system will play the following types of discs: DVD, MP3, CD, CD-R,and
CD-RW with super-error correction ability. It is also capable of displaying picture CDs and digital
photo albums. It supports eight languages, up to 32 subtitles, and multi-angle viewing. It features
easy setup and operation with on-screen menus. It has full function CPU upgrading able capability.
DIGITAL AUDIO OUTPUT
The unit's coaxial output capability enables you to connect an external six-channel AV amplifier
and processor with built-in Dolby Digital code with just one cord. This enables you to conveniently
enjoy different DVD, CD, and Mp3 discs.
ANALOG AUDIO OUTPUT
Speaker system plug-and-play convenience through the built-in downmix 2-channel power
amplifier eliminates the use of an external power amplifier.
LASER-HEAD OVER-CURRENT
PROTECTION SYSTEM
To extend the service life of the laser head, the unit includes a unique laser-head over-current
protection system, ensuring a constant laser current.
""
ABOUT YOUR
DVD PLAYER
This page contains valuable information regarding the handling, cleaning, and storage of discs
played in this unit.
Handling
Do not touch the playback side of the disc.
Do not attach paper or tape to discs.
Do not stick or write anything on the surface. Protect against fingerprints.
Always hold a disc by the center and edge portions.
Cleaning
Fingerprints and dirt on the disc may cause picture and/or sound deterioration. Wipe the disc from
the center outward with a soft cloth. Always keep the disc clean.
If you cannot wipe the dirt off, lightly use a slightly moistened soft cloth and finish with a dry cloth.
Do not use any type of solvent such as: Paint thinner, benzene, commercially available cleaners or
anti-static spray for vinyl LPs.
Storing
Do not store discs in places subject to direct sunlight or near heat sources.
Do not store discs in places subject to moisture and dust.
Store discs vertically in a case. Stacking or placing objects on discs outside of their case may
cause warping.
NOTE: This DVD is not responsible for damage that may occur to any disc that is operated
in this unit or not handled, cleaned, or stored as suggested above.
USE OF DISCS
TABLE OF CONTENTS
Precaution ................................................ 1
Table of Contents .......................................2
About Your DVD Player ............................ 3
Best Location..........................................................3
To Obtain a Clear Picture......................................... 3
Playable Discs........................................................3
Digital Audio Output ................................................3
Laser-Head Over-Current Protection System ............3
Use of Disc ...............................................3
Handling.................................................................3
Cleaning.................................................................3
Storing...................................................................3
Front and Back panels .. .............................4
Front Panel.............................................................4
Back Panel.............................................................5
Remote Control..........................................6
Operating the remote control.......................7
Connecting Devices................................... 8
Speakers.................................................. 9
Arrangement of speakers........................... 9
Connecting speakers.................................10
Connecting antenna..................................11
Connecting power supply...........................12
Basic DVD operation .......................13 14 15
Playing the radio......................................16
PLAYING WMA MP3 AND JPEG.................17
System Setup......................18 19 20 21 22 23
LANGUAGE Setup .............................. 24 25
AUDIO SETUP... .................................. 26
VIDEO SETUP .................................... 27 28
SPEAKER Setup ................................. 29
DIGITAL Setup ...................................... .30
Trouble shooting...................................... 31
Technical specifications ........................... 32
-3-
-2-

FRONT AND
BACK PANELS
Back Panel Functions
10. ANTENNA
Use to connect the provided indoor FM and
AM loop antennas.
1. AUX INPUT
Use to connect input for both auxiliary 1 and 2
music sources.
2. AUDIO OUT
Use to connect both the right and left channel
line outputs as well as subwoofer output.
3. VIDEO INPUT VIDEO 1
7. S-VIDEO OUTPUT
9. FRONT/MAIN
Use to connect the four terminals of the left
and right front or main speakers.
11. 100V-240V~ 50/60HZ
This unit comes with an AC power cord. Be
sure its prongs are dry before plugging it into an
electrical outlet. Take caution not to overextend
the cord or walk on it.
4. VIDEO INPUT VIDEO 2
5. COAXIAL DIGITAL AUDIO OUTPUT
6. VIDEO OUTPUT
8. SCART IN/OUT
SCART TV IN/OUT
RCOAXIAL S-VIDEO
VIDEO
VIDEO 2
VIDEO 1
AM ANTENNA FM
AUX AUDIO INPUT AUDIO
OUTPUT AUX VIDEO INPUT VIDEO
OUTPUT
SW
L
SPEAKERS IMPEDANCE
234567 8
910 11
1
Front Panel Functions
6. NEXT
While in the DVD status, you may press this
button for next track. .
2. VOLUME
Use this button to control the unit's volume. It
controls all six channels simultaneously.
3. OPEN/CLOSE
Use this button to open and close the disc tray
while in DVD mode.
5. PREV
While in the DVD status, you may press this
button for previous track.
1.PHONE
outlet, check to make sure all of the connections
have been properly completed. When they have
to power the unit.
of electricity may cause interference with other
Before plugging the power cord into the AC
been, carefully plug power cord into outlet.
Press the POWER button on the front panel
When the unit is initially powered, a brief surge
electronic equipment on the same circuit. If this
occurs, connect the unit to an outlet on a
different circuit.
7. INPUT SIGNAL SOURCE
Use this button to select the proper input signal
source. (Note: The selected input will correspond to
the selected input terminal on the rear panel.)
9. USB CONNECT
Use only USB Flash Ram.
8. POWER
123
4
5
6
8
7
9
FRONT AND
BACK PANELS
PLAY /
Use this button to begin play function while in
DVD mode.
Use this button to pause play function while in
DVD mode.
PAUSE
4.
-5-
-4-

0
1 2 3
4 5 6
7 8 9
TUNER SCART AUX1/2
SETUP
FM MODE PRE/TUN
MEMO
ENTER
AUTO
STOP
VOL
+10
PAUSE/STEP PLAY
+
CH
ZOOM PROG SLOW
REPEAT
GOTO TITLE MENU DISPLAY
N/P
SUBTITLE LANGUAGE ANGLE
PS/IS
A-B
CH.SET
MUTE
RETURN
+
R/L
DVD
VIDEO
REMOTE
CONTROLLER
38
37
36
24
27
25
26
28
29
32
31
30
33
35
34
39
42
40
41
23
2
4
5
6
22
7
13
19
14
15
12
10
11
9
21
20
8
1
17
18
16
3
MUTE
AUX1/AUX2
SCART
0-9 NUMBER KEYS
SETUP
PRE/TUN
SCROLL UP
SCROLL RIGHT
SCROLL DOWN
SCROLL LEFT
AUTO
STOP
PLAY
CH CH+
FWD
REV BUTTON
A-B
SLOW
DISPLAY
MENU
ANGLE
LANGUAGE
CH.SET
R/L
VIDEO
OPEN/CLOSE
DVD
TUNER
FM MODE
ENTER
MEMO
PAUSE/STEP
VOLVOL
PREV BUTTON
NEXT BUTTON
ZOOM
PROG
GOTO
TITLE
SUBTITLE
N/P
PS/IS
REPEAT
RETURN
-6-
Notes:
Do not direct the remote sensor toward
any light source, such as direct sunlight or
a strong fluorescent light, as it may cause
the unit to not operate correctly.
When other remote controls are used
nearby or when the remote is used near
equipment using infrared rays, interference
may occur.
Placing an object on the remote control
may cause it to inadvertently depress a
button, changing a function and shortening
battery life.
Do not glaze the front of the DVD receiver
with colored glass, as it may cause
interference with normal operation of the
controller.
Make sure there is no barrier between the
remote control and remote sensor, as it
could prevent the unit from receiving the
signal.
Do not spill water or put wet items on the
remote control.
Never disassemble remote control.
BATTERIES
INCORRECT USE OF BATTERIES MAY
CAUSE THEM TO LEAK, CORRODE O R E XPLODE.
Battery Installation
1. Push down and out on the battery Compart-
ment cover to remove it.
2. Insert the two AAA b atteries into the battery
compartment of the remote control, making
sure the + and - signs on the batteries and
inside the batteries compartment match up.
3. Replace the battery compartment cover.
Notes:
Do not mix batteries from different manu-
facturers, nor old ones with new.
If the remote control will not be used for an
extended period of time, remove the
batteries to prevent damage-causing
corrosion.
Remove dead batteries immediately to
prevent damage-causing corrosion.
If battery leakage occurs, wipe the battery
liquid from the battery compartment, then
replace both batteries.
Always replace both batteries at the same
time, using new, fully charged batteries.
Life expectancy of batteries may vary
depending on amount of use.
Using the Remote Control
Point the remote control at the remote sensor
on the DVD receiver. When the signal is
received from the remote, the unit will function
accordingly. The remote will operate to
approximately 16' from the remote sensor at an
angle of around 30 each direction.
""
OPERATING THE
REMOTE CONTROL
-7-

SCART TV IN/OUT
RCOAXIAL S-VIDEO
VIDEO
VIDEO 2
VIDEO 1
AM ANTENNA FM
AUX AUDIO INPUT AUDIO
OUTPUT AUX VIDEO INPUT VIDEO
OUTPUT
SW
L
SPEAKERS IMPEDANCE
RECORDER
CD/DVD AUX PLAYER 1
Connection terminals for this DVD receiver
are found on the rear panel. Read carefully
and follow the manufacturers' instructions
of any video and audio device being
connected to this unit.
Do not connect the power until all connections
have been properly completed.
Red terminal (marked R) is for connecting the
right channel. The white terminal (marked L)
is for connecting the left channel. The yellow
terminal is for video connection. Make sure
all connections are securely made. Improper
connections may cause noise, poor perfor-
mance, or cause damage to the equipment.
Do not tie the AV cord with any other cords,
such as the power cord or speaker wires, as
it may result in poor picture and/or sound
quality.
CONNECTING
DEVICES
ACTIVE
SUBWOOFER (OPTIONAL)
CD/DVD AUX PLAYER 2
-8-
1
2
3
4
5
The configuration and arrangement of a
surround sound system's speakers is critical.
For maximum listening enjoyment, refer to the
arrangement of Speakers section in this manual
prior to connecting speakers.
Front or main right and left speakers;
These two speakers provide extensive
sound imaging and augment the dynamic effect
of the audio. A movie's principal dialogue comes
through these speakers.
Subwoofer speaker
Provides rich and powerful bass, adding a
powerful dimension of realism.
Hints:
Front or main speakers should be placed at
the same level and in a way that sound is
oriented toward the listener's ears.
Subwoofer speaker may be placed anywhere
within the room, as its location produces little
effect on a listener's sensation to sound. To
obtain the optimum bass effect, a subwoofer is
recommended in home theater systems.
1.TV set or screen
2. Front or main left speaker
3.Subwoofer
4.Front or main right speaker
5.Viewer's location
SPEAKERS ARRANGEMENT
OF SPEAKERS
-9-

1 2
3 4
5
This well-designed DVD receiver provides
optimum sound quality when the speakers used
are within the range of their rated impedance.
Important
The minimum impedance of the two speaker
terminals is 4 ohm; for the subwoofer, it is
8 ohm.
If you want to use only one speaker or listen
to monophonic music, do not parallel connect
individual speakers to the left and right
channel terminals. See the figure on the left
below.
Connecting Speaker Cables
1.Peel off approximately 1/ 2 of cable
insulation
2.Tighten the wire end (#2 below)
3.Open cable terminal by pressing back on
tab
4.Insert wire end into terminal
5.Release tab; make sure wire is in terminal
securely
Note: To prevent damage to the circuit, care
should be taken to prevent short circuiting from
occurring at the positive and negative poles of
the speaker cord.
"
CONNECTING
SPEAKERS
-10-
AM
FM
FM
Outdoor AM antenna
Coaxial cable(75 ohm)
Coaxial cable (75 ohm)
Outdoor FM antenna
Radio signals may be difficult to receive in
some buildings and under certain conditions.
The provided antenna will help in their reception.
They are intended for indoor use only.
AM Loop Antenna
The placement of the AM loop antenna should
be in a direction that provides the clearest
reception. Keep as far as possible from DVD
receiver, TV set, and speaker and power cords.
If reception remains poor, an outdoor antenna
may be necessary.
To connect the AM loop antenna:
1.Hold down handle
2.Insert wire end into hole
3.Release handle
Position for best reception
FM Indoor Antenna
The FM antenna should be fully extended
and in a direction that provides the clearest
signal. Secure the antenna ends in a location
where distortion is a minimum. If reception
remains poor, an outdoor antenna may be
necessary.
To connect the FM antenna:
1.Open cable terminal by pressing back on tab
2.Insert wire end
3.Release tab; make sure wire is in terminal
securely
2
3
1
CONNECTING
ANTENNA
-11-
SCART TV IN/OUT
RCOAXIAL S-VIDEO
VIDEO
VIDEO 2
VIDEO 1
AM ANTENNA FM
AUX AUDIO INPUT AUDIO
OUTPUT AUX VIDEO INPUT VIDEO
OUTPUT
SW
L
SPEAKERS IMPEDANCE
Main speaker Main speaker

POWER
Before plugging the power cord into the AC outlet, check to make sure all of the connections
have been properly completed. When they have been, carefully plug power cord into outlet.
Press the POWER button on the front panel to power the unit. The display panel will light.
When the unit is initially powered, a brief surge of electricity may cause interference with other
electronic equipment on the same circuit. If this occurs, connect the unit to an outlet on a different
circuit.
CONNECTING
POWER SUPPLY
-12-
BASIC DVD
OPERATION
-13-

BASIC DVD
OPERATION
-14-
Selecting Sound Source
1. Press any function button (Tuner Scart,
AUX1, AUX2) to select the desired sound source.
The appropriate symbol will appear in the display.
2. When the AM/FM tuner button is pressed,
the last station listened to will play.
Note: The desired program source will not play
unless it and the selected signal button coincide
with the active program source signal input.
Volume Control
The volume may be adjusted by either turning
the large volume knob on the front panel or
using the appropriate volume button on the
remote control.
Mute
Pressing the MUTE button temporarily mutes
every speaker. To resume audio, press MUTE
button again.
-15-
BASIC DVD
OPERATION

0
1 2 3
4 5 6
7 8 9
TUNER SCART AUX1/2
SETUP
FMMODE PRE/TUN
MEMO
ENTER
AUTO
STOP
VOL
+10
PAUSE/STEP PLAY
+
CH
ZOOM PROG SLOW
REPEAT
GOTO TITLE MENU DISPLAY
N/P
SUBTITLE LANGUAGE ANGLE
PS/IS
A-B
CH.SET
MUTE
RETURN
+
R/L
DVD
VIDEO
PLAYING THE RADIO
-16-
PLAYING WMA MP3 AND JPEG
-17-
Current MP3/JPEG file
name. If a JPEG file
playing, the name should be
*.jpg.
The playing file is
a JPEG picture.
The playing file is
a MP3 music.
File Switch Region: Displays the
file type of the playing and the
switching.
17
Basic operations
1.Press TUNER button to select desired wave
band (AM or FM).
2.Press CH+ or CH- button to find a station.
The frequency will change with each press.
When a station's signal is received, it will
appear in the display.
3.To lock onto a station quickly, hold the CH+
or CH- button for two seconds. The unit
will start automatic tuning. When a station
is found, automatic tuning stops.
1.Press the AUTO/SCAN button. the
automatic tuning mode is activated.
2.Stations will be stored in ascending order
until 50 stations of that particular wave band
have been saved. When a station is stored, the
memory storage number, as well as the station's
frequency, will flash for four seconds in the
display.
3.When the total number of stations reaches
50, in a particular wave's (AM or FM) memory,
no further station in that wave band will be saved.
1.To play preset stations
2.Press the PRESET/TUN button.
3.Press any of the numbered buttons to
select the desired station's memory number.
For example, to play the station at memory
#5, simply press the 5 button; for memory
#17, press the 1 button followed by the 7
button.
4.Stations in the memory function may also
be accessed by pressing the CH- or CH+
button.
Automatic Tuning
This unit will store up to 50 individual AM or
FM radio stations in its memory.
5.To add a station to memory, press the MEMO
button. The memory storage number will
blink for four seconds in the display. Press
MEMO again to store the station.
Memory number
Wave band Station frequency
4. To listen a frequency-known station, you can
input the station frequency directly by pressing
the number keys one by one in tune state.
FM MHZ
Press the TUNER button to select the desired wave band.
6 . To reduce noise when an FM-stereo program
has been received, press the FM mode button.The
word STEREO will disappear from the display.
The program is now heard in monographic
form, reducing the noise. To resume stereo
play, press the FM mode button again.

SYSTEM SETUP
SYSTEM SETUPSYSTEM SETUP
TV SYSTEM
SOURCE
VIDEO
TV TYPE
PASSWORD
RATING
DEFAULT
EXIT SETUP
-18-
SYSTEM SETUP
VIDEO SETUPVIDEO SETUP
BRIGHTNESS
CONTRAST
HUE
SATURATION
EXIT SETUP
VIDEO SETUPVIDEO SETUP
BRIGHTNESS
CONTRAST
HUE
SATURATION
EXIT SETUP
-19-
SCREEN SAVER
SCREEN SAVER

SYSTEM SETUP
SYSTEM SETUPSYSTEM SETUP
TV SYSTEM
VIDEO
TV TYPE
PASSWORD
RATING
DEFAULT
EXIT SETUP
AUTO
PAL
NTSC
-20-
SYSTEM SETUPSYSTEM SETUP
TV SYSTEM
VIDEO
TV TYPE
PASSWORD
RATING
DEFAULT
EXIT SETUP
DISC
USB
SOURCE
SOURCE
SYSTEM SETUP
-21-
SYSTEM SETUPSYSTEM SETUP
TV SYSTEM
VIDEO
TV TYPE
PASSWORD
RATING
DEFAULT
EXIT SETUP
S-VIDEOS-VIDEO
TV-RGBTV-RGB
SYSTEM SETUPSYSTEM SETUP
TV SYSTEM
VIDEO
TV TYPE
PASSWORD
RATING
DEFAULT
EXIT SETUP
SOURCE
SOURCE
4£º3PS
4£º3LB
16£º9
4£º3PS
4£º3LB
16£º9

SYSTEM SETUPSYSTEM SETUP
--------
SYSTEM SETUPSYSTEM SETUP
TV SYSTEM
VIDEO
TV TYPE
PASSWORD
RATING
DEFAULT
EXIT SETUP
-22-
SOURCE
SYSTEM SETUP
11 KIDKID SAFESAFE
22 GG
33 PGPG
44 PG13PG13
55 PG-RPG-R
66 RR
77 NC-17NC-17
88 ADULTADULT
SYSTEM SETUPSYSTEM SETUP
TV SYSTEM
VIDEO
TV TYPE
PASSWORD
RATING
DEFAULT
EXIT SETUP
RESTORERESTORE
SYSTEM SETUPSYSTEM SETUP
TV SYSTEM
VIDEO
TV TYPE
PASSWORD
RATING
DEFAULT
EXIT SETUP
-23-
SOURCE
SOURCE

LANGUAGE SETUP
-24-
LANGUAGE SETUPLANGUAGE SETUP
OSD LANGUAGE
AUDIO LANG
SUBTITLE LANG
MENU LANG
EXIT SETUP
LANGUAGE SETUPLANGUAGE SETUP
OSD LANGUAGE
AUDIO LANG
SUBTITLE LANG
MENU LANG
EXIT SETUP
LANGUAGE SETUPLANGUAGE SETUP
OSD LANGUAGE
AUDIO LANG
SUBTITLE LANG
MENU LANG
EXIT SETUP
ENGLISHENGLISH
FRENCH
RUSSIAN
FRENCH
RUSSIAN
SPANTISHSPANTISH
GERMANGERMAN
-25-
LANGUAGE SETUPLANGUAGE SETUP
OSD LANGUAGE
AUDIO LANG
SUBTITLE LANG
MENU LANG
EXIT SETUP
LANGUAGE SETUP
Russian,Czech,Roumanian,Polish,Hungarian,Yugoslarian.
DIVX SUBTITLE
DIVX SUBTITLE
DIVX SUBTITLE
DIVX SUBTITLE
LANGUAGE SETUPLANGUAGE SETUP
OSD LANGUAGE
AUDIO LANG
SUBTITLE LANG
MENU LANG
EXIT SETUP
WESTERN EUROPE
CENTRAL EUROPE
OHERS
WESTERN EUROPE
CENTRAL EUROPE
OHERS
DIVX SUBTITLE
3

SPDIP/OFF
SPDIF/RAW
SPDIF/PCM
SPDIP/OFF
SPDIF/RAW
SPDIF/PCM
AUDIO OUTAUDIO OUT
AUDIO OUT
LPCM OUT
EXIT SETUP
AUDIO SETUP
-26-
48K
96K
192K
48K
96K
192K
AUDIO SETUPAUDIO SETUP
AUDIO OUT
DOWN SAMPLE
EXIT SETUP
DOWN SAMPLE
To avoid disturbing neighbours at night,use this function to lower the volume without
changing the original tone.
-27-
VIDEO SETUPVIDEO SETUP
BRIGHTNESS
CONTRAST
HUE
SATURATION
EXIT SETUP
ON
OFF
ON
OFF
SCREEN SAVER
VIDEO SETUPVIDEO SETUP
BRIGHTNESS
CONTRAST
HUE
SATURATION
EXIT SETUP
SCREEN SAVER
VIDEO SETUP

-29-
SPEAKER SETUP
VIDEO SETUPVIDEO SETUP
BRIGHTNESS
CONTRAST
HUE
SATURATION
EXIT SETUP
SCREEN SAVER
VIDEO SETUPVIDEO SETUP
BRIGHTNESS
CONTRAST
HUE
SATURATION
EXIT SETUP
SCREEN SAVER
-28-
VIDEO SETUP
VIDEO SETUPVIDEO SETUP
BRIGHTNESS
CONTRAST
HUE
SATURATION
EXIT SETUP
SCREEN SAVER
SPEAKER SETUPSPEAKER SETUP
DOWNMIX
EXIT SETUP
LT/RT
STEREO

TROUBLE SHOOTING
This handy trouble-shooting guide is
provided to save you time in case you experience
any inconvenience with this DVD player. If the
problem is not listed or if the provided solution
does not correct the problem, please return to
point of sales within 12 months of purchase.
Problem Possible Solution
No power
1. Check to ensure that the power plug is
securely in the wall outlet.
No sound
1. Check the connection between the DVD
player and the TV set, amplifier, or any
other unit it is connected to.
2.Check to ensure the TV and amplifier are
in the correct mode.
No picture
1. Check the connection between the DVD
player and the TV set or any other unit it
is connected to.
2.Check to make sure TV is turned on.
Disc does not play
1.Check to make sure the disc is loaded
correctly label side facing up on disc tray.
2.Check that disc is clean from dirt, dust,
fingerprints, and smudges.
3.Check to ensure disc is with in the guides
on the tray.
4.Check if parental lock function is on.
5.Make sure disc is for use in region
Remote does not work.
1. Check batteries; possibly replace.
2. Check to ensure there isn't any obstacles
between the remote sensor on the unit's
front panel and the remote control.
3.Be sure the remote is aimed at the remote
sensor.
Divided picture
1.Check that disc is clean and has no
scratches.
2.The unit is controlled by a micro computer,
which may need to be reset. Turn off the
unit's power, wait several seconds, then
turn back on.
No color picture
1.Check to see if the connector is damag-
ed (bent pin).
MP3 discs don't play
1. Use another software edition to re burn
disc, as the edition used may not be com-
patible with the player.
2. Use new editions of software such as Audio
station 4, asy CD Creator , To ast"E "
Titanium, etc.
3. Make sure MP3 file is not encoded with a
variable bit rate, such as provided by Real
Networks.
-31-
DIGITAL SETUPDIGITAL SETUP
OP MODE
DIGITAL SETUPDIGITAL SETUP
OP MODE
DUAL MONO
EXIT SETUP
STEREO
MONO L
MONO R
MIX MONO
-30-
SYSTEM SETUP
LINE OUT
F REMODR
LINE OUT:Choose this setting to line out the input signal,it will be
more suitable forplaying in the night time,for the output volume is low.
RF REMOD:It will be more suitableto choose this setting for playing
in the daytime as theoutput volume is high.
6)DIGITALSETUP
DUAL MONO
EXIT SETUP

FrequencyR esponse: 200Hz-20kHz+ /-3 dB
S/N Ratio > 76dB
Input Sensitivity 350mv, 47k
Channel Resolution > 30dB (Normal)
Remote Control
Transmitter Infrared Ray
Signal Range Approximately 15'
Power Source 2 AAA Bat teries
General
Power Supply 100V~240V~ 50/60HZ
Consumed Power 80W
This product is subject to continuous
improvement, We reserve the right to modify
product design and/or specifications without
notice and without incurring any obligations.
""
TECHNICAL
SPECIFICATIONS
DVD Player
TV System NTSC/PAL
Compatible Discs DVD, CD, MP3,
CD-R, CD-RW
Resolution Ratio Greater Than 500 lines
Video S/N Ratio 65dB
Frequency Response fs (96KHz/24bit)
4Hz - 44KHz:+/-2dB
Audio S/N Ratio 95dB
Degree of Distortion <0.01%
D/A Converter 192KHz/24bit
Video Out 1Vp-p
S-Video Out Y: 1Vp-p(75 )
C: 0.3Vp-p(75 );
Audio Out 2.0V+0/-1V
2.1 Channel,
Digital Audio Output Coaxial
Connections Scart,USB,CVBS
S-Video, 2 Channel
Output
FM Tuner
Tuning Range 87.5-108MHz
S/N Ratio >46dB
Monophonic >46dB
Stereo >50dB (DIN)
Selectance 50dB
THD
Monophonic 2%
Stereo 3%
Frequency Response 30Hz-10kHz +/- 1dB
Stereo Resolution 35dB (1kHz)
30dB (100Hz-10kHz)
AM Tuner
Tuning Range 522-1620KHz
S/N Ratio 35dB
THD 3%
Amplifier
Output Power:
30W+30W (8 )
-32-
Table of contents