manuals.online logo
Brands
  1. Home
  2. •
  3. Brands
  4. •
  5. EasyAS
  6. •
  7. Indoor Furnishing
  8. •
  9. EasyAS 0022387 User manual

EasyAS 0022387 User manual

Frame
Screw
70mm
Hinge
Locking Screw
11mm
Check out the install video at easyas-shutters.com
I
N
T
E
R
N
A
T
I
O
N
A
L
P
R
O
T
E
C
T
E
D
PATENT
INSTALL
GUIDE
Hinge
Pin
80mm
PACK CONTENTSPACK CONTENTS
• Adjustable outer frame
• 4 x frame corner covers
• Multi Tool (Allen Key / Phillips Head Screwdriver)
• Screws (Phillips Head ) - see below
• Plantation Shutter Panels
• Hinge Pins
• White Stickers
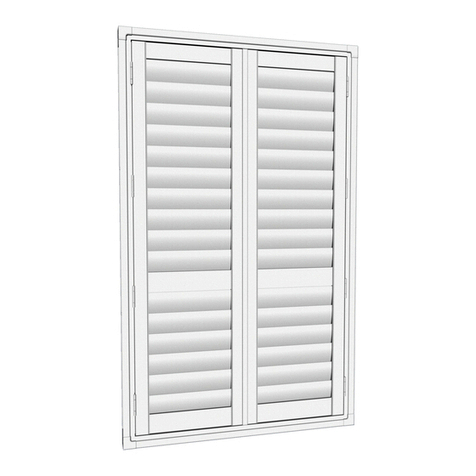
DOUBLE PANEL
APPLIES TO MODELSAPPLIES TO MODELS
FI/N: 0022387
GI/N: 0022388
HI/N: 0022389
KI/N: 0022393
LI/N: 0022394
MI/N: 0022395
PI/N: 0022398
QI/N: 0022399
RI/N: 0022400
+ Custom Configuration: P2-M0
• On a soft surface, lay out the adjustable frame, on the floor, in front of the window with hinges
pointing toward you
• Using the labels on each frame, lay out the adjustable frame in the following sequence, as
shown in figure 1(A):
T – Top, L – Left, B – Bottom, R – Right
• Assemble the adjustable frame corners by sliding the locking key into
position at the back of the frame, as shown in figure 2(A)
• Clip the corner covers onto the adjustable frame, as shown in figure 2(B)
NOTE: Hinge pin ‘holes’ need to be in an upward position.
1(A)
L
T
B
R
NOTE: These images are showing the back face of the shutter.
STEP 1
STEP 2
BACK VIEW OF FRAME
Locking
Key
Make sure
edges are flush
2(A)
BACK VIEW OF FRAME
2(B)
BACK VIEW OF FRAME
• Insert the adjustable frame into the window reveal as shown in figure 3(A).
• Using the Allen key, adjust the frame evenly by turning each adjuster 2 full turns at a time in an
anticlockwise direction to expand frame into the opening. Adjust each side adjuster evenly until a
tight, square fit, is achieved as shown in figure 3(B)
• Using the screws provided, secure the frame in place by inserting one screw into each side of the
frame. Each screw should be inserted through the hole in the centre of each adjuster, as shown in
figure 3(C)
NOTE: At this stage only use 1 screw on each side & insert
through the adjusters closest to the centre of each side.
NOTE: Hinges must be facing toward you when mounting.
3(B)3(A)
3(C)
USE ALLEN KEY
Frame Screw
70mm
NOTE: Take care while placing hinge pins to avoid damage and
scratches.
4(B)4(A)
Hinge Pin
NOTE: The two(2) panels will be numbered
Left & Right (1, 2)
STEP 4
STEP 3
• Insert the LEFT shutter panel first onto the hinges and secure with the hinge pins, as shown in
figure 4 (A)
• Repeat this step for the right shutter panel
• Open and close the shutter panels to check fit as shown in figure 4(B)
• Using the Allen key, make small adjustments to the adjustable frame, to align the doors if required
Check out the install video at easyas-shutters.com
STEP 5
• Using the screws provided, secure the adjustable frame, (Top, Bottom, Left and Right) by fixing the
remaining screws permanently into the window jamb, as shown in figure 5(A)
• Once complete, place white stickers (supplied) over adjusters/screws as shown in figure 5(B)
• Screw in the remaining ‘Hinge locking’ screws in place 5(C)
5(A) 5(B) 5(C)
Hinge locking screwWhite stickersSecure frame with remaining screws
Check out the install video at
easy-as.com.au or easy-as.co.nz

This manual suits for next models

17

Other EasyAS Indoor Furnishing manuals

EasyAS 0022381 User manual

EasyAS

EasyAS 0022381 User manual

EasyAS 0022385 User manual

EasyAS

EasyAS 0022385 User manual

EasyAS INTERNAL SLIDING SHUTTER User manual

EasyAS

EasyAS INTERNAL SLIDING SHUTTER User manual

EasyAS 0022390 User manual

EasyAS

EasyAS 0022390 User manual

Popular Indoor Furnishing manuals by other brands

PAIDI STEN 127 5599 instructions

PAIDI

PAIDI STEN 127 5599 instructions

Furniture of America CM4644WH-C Assembly instructions

Furniture of America

Furniture of America CM4644WH-C Assembly instructions

HON Ignition KD installation instructions

HON

HON Ignition KD installation instructions

Next CAILIN 499981 Assembly instructions

Next

Next CAILIN 499981 Assembly instructions

Kesseböhmer TM Q70/3-OH Assembly instructions

Kesseböhmer

Kesseböhmer TM Q70/3-OH Assembly instructions

AHB Home Furniture Series Assembly instructions

AHB

AHB Home Furniture Series Assembly instructions

Bouclair 9398316 Assembly instructions

Bouclair

Bouclair 9398316 Assembly instructions

RiverRidge Ellsworth 06-135 Assembly instructions

RiverRidge

RiverRidge Ellsworth 06-135 Assembly instructions

Furniture of America YNJ-1463 Assembly instructions

Furniture of America

Furniture of America YNJ-1463 Assembly instructions

Techni Mobili RTA-1854 Assembly instructions

Techni Mobili

Techni Mobili RTA-1854 Assembly instructions

Schildmeyer Diona 647250 Assembly instructions

Schildmeyer

Schildmeyer Diona 647250 Assembly instructions

Rousseau W36-MA20B Assembly guide

Rousseau

Rousseau W36-MA20B Assembly guide

Amart Furniture TANGIER 65931 Assembly instructions

Amart Furniture

Amart Furniture TANGIER 65931 Assembly instructions

atmosphera 140354 instruction sheet

atmosphera

atmosphera 140354 instruction sheet

Ovente MFW701 10 Series manual

Ovente

Ovente MFW701 10 Series manual

URBAN OUTFITTERS RYAN VANITY Assembly instructions

URBAN OUTFITTERS

URBAN OUTFITTERS RYAN VANITY Assembly instructions

Simpli Home WyndenHall brooklyn+max 3AXCNTT-03 manual

Simpli Home

Simpli Home WyndenHall brooklyn+max 3AXCNTT-03 manual

agatameble KING II K-08 Assembly instructions

agatameble

agatameble KING II K-08 Assembly instructions

manuals.online logo
manuals.online logoBrands
  • About & Mission
  • Contact us
  • Privacy Policy
  • Terms and Conditions

Copyright 2025 Manuals.Online. All Rights Reserved.