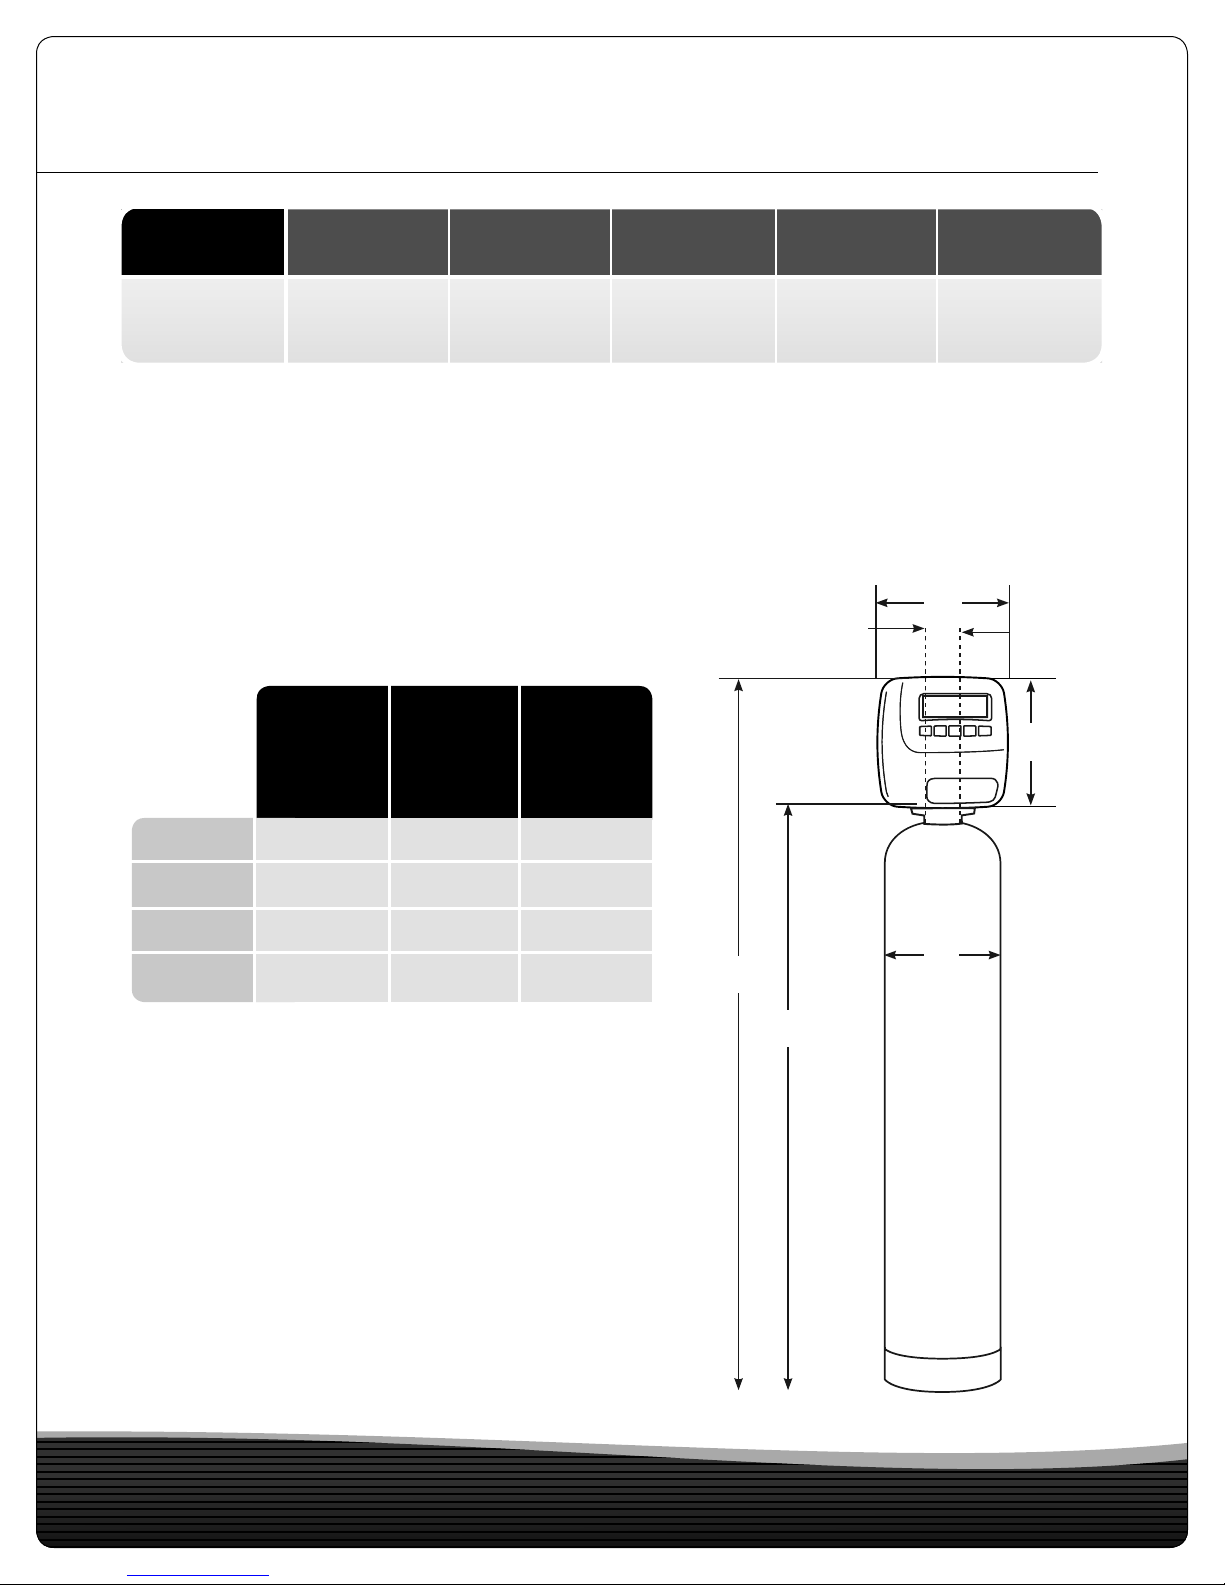
4Toxin Shield+ |Installation & Service Manual
Before Starting Installation
WHERE TO INSTALL THE FILTER
»Place the lter as close to the incoming water line as possible. On municipal applications, this
would be as close to the water meter as possible. If you desire to bypass outdoor faucets,
install or plumb as necessary (this will also conserve water and lter capacity).
»Connect the lter to the main water line before (ahead of) the water heater. Do not run hot water
through the lter. Temperature of water passing through the lter must be less than 120°F.
»Place the lter as close as possible to a oor drain, or other acceptable drain point.
»Place the lter in an area where water damage is least likely to occur if a leak develops. The
manufacturer will not repair or pay for water damage.
»Do not install the lter in an area where it could freeze. Freeze damage is not covered by the
warranty.
»A 120 volt electric outlet is required to plug in the lter controller. The lter comes with a 24 volt
transformer with a 10 foot power cord. This connection must meet local electrical codes.
»Keep the lter out of direct sunlight, as excessive sun and heat can distort any not-metallic
parts.
TOOLS, PIPE, FITTINGS & OTHER MATERIALS NEEDED
»A minimum pipe size of ¾” should be used to connect to the lter valve. Pipe size of 1” or larger
can be connected to the valve.
»Use copper, brass, CPVC or Pex plastic pipe ttings. Always follow local plumbing codes.
»A bypass valve is already installed on the lter. The bypass valve allows you turn off water to the
lter for maintenance, while still allowing water to ow into the house.
»A 1” bypass valve and a 1” drain are provided. The drain must have an air gap. The end of the
drain must be secured in place.
»If a solid drain line is needed to comply with local plumbing codes, you can purchase locally the
parts needed to connect to drain.