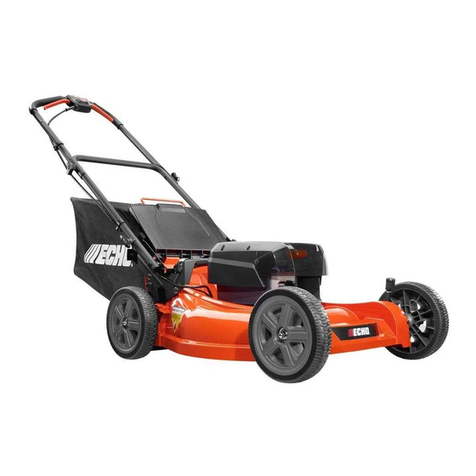
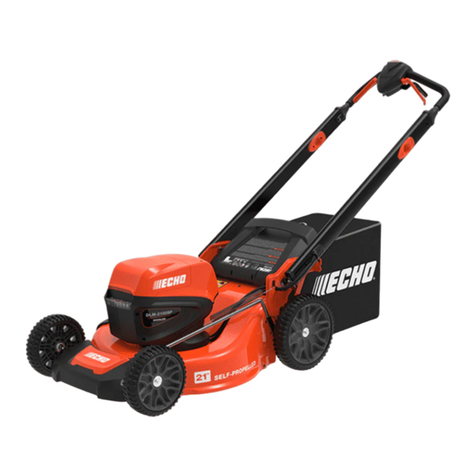
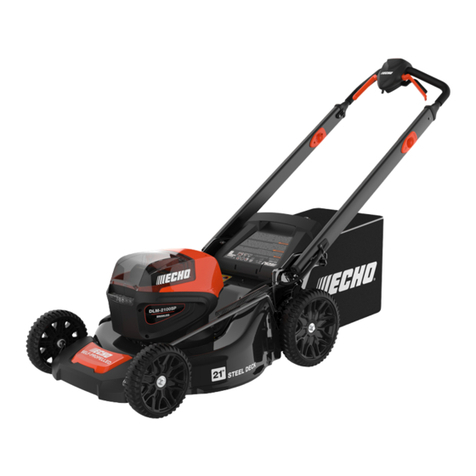
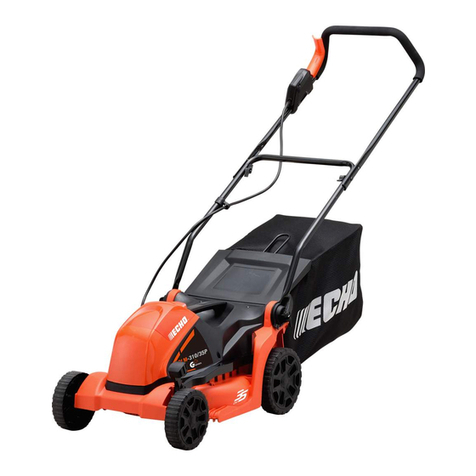
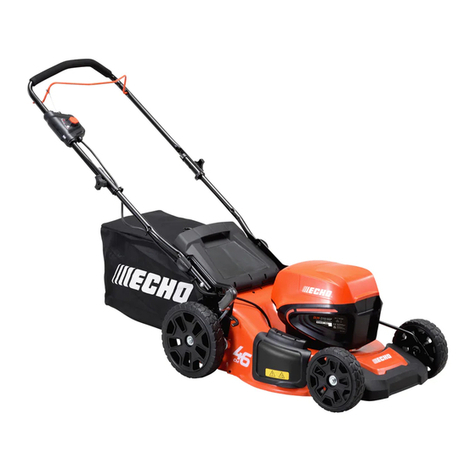
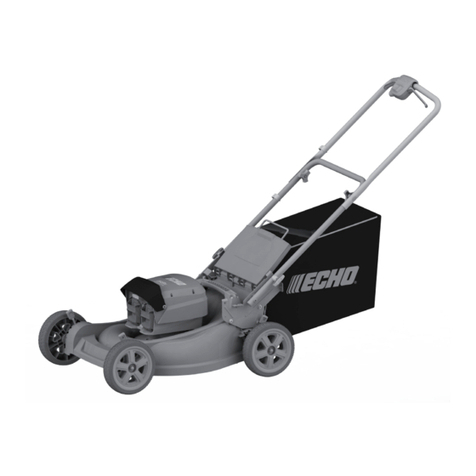
Echo DLM-310/35P User manual

DLM-310/35P
EN OPERATOR MANUALLAWN MOWER
FR MANUEL OPÉRATEURTONDEUSE À GAZON
FI KÄYTTÖOPASRUOHONLEIKKURI
CS NÁVOD K OBSLUZE
SK NÁVOD NA OBSLUHU
HR KOSILICA
HU
ET MURUNIIDUK
LV
LT
SR KOSILICA
SL VRTNA KOSILNICA
BS TRIMER ZA TRAVUKOSILICA
MK
ES MANUAL DEL OPERARIOCORTACÉSPED
IT MANUALE DI ISTRUZIONITOSAERBA
PT MANUAL DO OPERADORMÁQUINA DE CORTAR RELVA
PL KOSIARKA DO TRAWY
NO BRUKERHÅNDBOKGRESSKLIPPER
DA GRÆSSLÅMASKINE
SV ANVÄNDARHANDBOKGRÄSKLIPPARE
RO
DE BEDIENUNGSHANDBUCHRASENMÄHER
EL
SQ MANUALI I PËRDORIMITKOSITËS LËNDINE
MT
BG
NL GEBRUIKERSHANDLEIDINGGRASMAAIER
IS SLÁTTUVÉL
X750829-1002


1. 2. 3.
4. 5. 6. 7.
8. 9.
DLM-310/35P
1
2
4
5
55
6
6
15mm
16
7
7
8
9
3
9
13
14
1
2
17
18 19
4
10
11 12
15


1 Description...................................2
1.1 Purpose...................................................... 2
1.2 Overview.................................................... 2
1.3 Packing list................................................. 2
2 General safety rules.................... 2
2.1 Training.......................................................2
2.2 Preparation.................................................2
2.3 Operation....................................................3
2.4 Maintenance...............................................4
3 The recommended ambient
temperature range:......................5
4 Symbol......................................... 5
5 Risk levels....................................5
6 Recycle.........................................5
7 Installation................................... 6
7.1 Unpack the machine...................................6
7.2 Unfold and adjust the lower handle............ 6
7.3 Install the upper handle ............................. 6
7.4 Install the grass catcher............................. 6
7.5 Install the mulch plug..................................6
7.6 Set the blade height................................... 6
7.7 Install the battery pack............................... 6
7.8 Remove the battery pack........................... 7
8 Mower functions..........................7
9 Operation..................................... 7
9.1 Start the machine....................................... 7
9.2 Stop the machine....................................... 7
9.3 Empty the grass catcher.............................7
9.4 Operate on slopes...................................... 8
9.5 Operation tips............................................. 8
10 Maintenance.................................8
10.1 General maintenance................................. 8
10.2 Replace the blade...................................... 8
10.3 Store the machine...................................... 8
11 Troubleshooting.......................... 9
12 Technical data..............................9
13 EC Declaration of conformity.....9
1
English EN
14 UK Declaration of conformity...10

1 DESCRIPTION
1.1 PURPOSE
This machine is used for domestic lawn mowing. The
cutting blade must be approximately parallel to the
ground. All four wheels must touch the ground while you
mow.
1.2 OVERVIEW
Figure 1-9.
1Handle switch
2Start button
3Upper handle
4Lower handle
5Rear discharge door
6Battery compartment flap
7Height adjustment lever
8Grass catcher
9Mulch plug
10 Quick-release lever (lower handle)
11 Knob (upper handle)
12 Bolt (upper handle)
13 Slot
14 Grass catcher frame rod
15 Battery pack
16 Safety key
17 Blade nut
18 Spacer
19 Blade
1.3 PACKING LIST
1Lawn mower
2Grass catcher
3Manual
2 GENERAL SAFETY RULES
WARNING
Read carefully before use. Save this manual for future
reference.
2.1 TRAINING
• Read the instructions
carefully. Be familiar with
the controls and the correct
use of the machine.
• Never allow children,
persons with reduced
physical, sensory or mental
capabilities or lack of
experience and knowledge
or people unfamiliar with
these instructions to use the
machine. Local regulations
can restrict the age of the
operator.
• Keep in mind that the
operator or user is
responsible for accidents or
hazards occurring to other
people or their property.
• Never operate the machine
while people, especially
children, or pets are nearby.
2.2 PREPARATION
• While operating the
machine always wear
substantial footwear and
long trousers. Do not
operate the machine when
barefoot or wearing open
sandals. Avoid wearing
clothing that is loose fitting
or that has hanging cords or
ties.
• Thoroughly inspect the area
where the machine is to be
4
English
EN

used and remove all objects
which can be thrown by the
machine.
• Before using, always
visually inspect to see
that the blade, blade bolt
and the blade assembly
are not worn or damaged.
Replace worn or damaged
components in sets to
preserve balance. Replace
damaged or unreadable
labels.
2.3 OPERATION
• Use the machine only in
daylight or good artificial
light.
• Avoid operating the
machine in wet grass.
• Always be sure of your
footing on slopes.
• Walk, never run.
• Work across the face of
slopes, never up and down.
• Exercise extreme caution
when changing direction on
slopes.
• Do not work excessively
steep slopes.
• Use extreme caution when
reversing or pulling the
machine towards you.
• Stop the blade(s) if the
machine has to be tilted
for transportation when
crossing surfaces other
than grass, and when
transporting the machine to
and from the area to be
used.
• Never operate the machine
with damaged guards or
shields or without guards or
shields in place.
• Switch on the motor
carefully according to
instructions and with feet
well away from the blade(s).
• Do not tilt the machine
when switching on the
motor, except if the machine
has to be tilted for starting.
In this case, do not tilt
it more than absolutely
necessary and lift only the
part, which is away from the
operator.
• Do not start the machine
when standing in front of
the discharge opening.
5
English EN

• Do not put hands or feet
near or under rotating parts.
Keep clear of the discharge
opening at all times.
• Do not transport the
machine while the power
source is running.
• Stop the machine, remove
the disabling device and
battery pack. Make sure
that all moving parts have
come to a complete stop
• whenever you leave the
machine;
• before clearing blockages
or unclogging chute;
• before checking, cleaning
or working on the
machine;
• after striking a foreign
object. Inspect the
machine for damage
and make repairs before
restarting and operating
the machine;
• if the machine starts to
vibrate abnormally (check
immediately);
• inspect for damage;
• replace or repair any
damaged parts;
• check for and tighten any
loose parts.
2.4 MAINTENANCE
• Keep all nuts, bolts and
screws tight to be sure the
machine is in safe working
condition.
• Check the grass collector
frequently for wear or
deterioration.
• Be careful during
adjustment of the machine
to prevent entrapment of
the fingers between moving
blades and fixed parts of
the machine.
• Always allow the machine
to cool down before storing.
• When servicing the blades
be aware that, even
though the power source is
switched off, the blades can
still be moved.
• Replace worn or damaged
parts for safety. Use only
genuine replacement parts
and accessories.
6
English
EN

3 THE RECOMMENDED
AMBIENT TEMPERATURE
RANGE:
Item Temperature
Appliance storage temper-
ature range
0 ˚C ~ 45 ˚C
Appliance operation tem-
perature range
0 ˚C ~ 45 ˚C
Battery charging tempera-
ture range
4 °C ~ 40 ˚C
Charger operation temper-
ature range
4 °C ~ 40 ˚C
Battery storage tempera-
ture range
0 ˚C ~ 45 ˚C
Battery discharging tem-
perature range
0 °C ~ 45 °C
4 SYMBOL
Some of the following symbols may be used on this
product. Please study them and learn their meaning.
Proper interpretation of these symbols will allow you to
operate the product better and safer.
Symbol Explanation
Read operator's manual.
Keep bystanders away.
Do not expose machine to rain or
wet conditions.
Beware of sharp blades. Blades
continue to rotate after the motor
is switched off. Remove disabling
device before maintenance.
Do not operate on inclines greater
than 15º. Mow across the face of
slopes, never up and down.
Remove the battery pack before
the maintenance operatons.
Symbol Explanation
Li-ion battery
Guaranteed sound power level
5 RISK LEVELS
The following signal words and meanings are intended
to explain the levels of risk associated with this product.
SYM-
BOL
SIGNAL MEANING
DANGER Indicates an imminently
hazardous situation, which,
if not avoided, will result in
death or serious injury.
WARNING Indicates a potentially haz-
ardous situation, which, if
not avoided, could result in
death or serious injury.
IMPORTANT Indicates a potentially haz-
ardous situation, which, if
not avoided, may result in
minor or moderate injury.
NOTE Added to give more infor-
mation.
6 RECYCLE
Separate collection. You must not dis-
card with usual household waste. If it is
necessary to replace the machine, or if it
is no more use to you, do not discard it
with household waste.
Separate collection of used machine
and packaging let you recycle materi-
als and use them again. Use of the re-
cycled materials helps prevent environ-
mental pollution and decreases the re-
quirements for raw materials.
At the end of their useful life, discard
batteries with a precaution for our envi-
ronment. The battery contains material
that is dangerous to you and the envi-
ronment. You must remove and discard
these materials separately at a location
that accepts lithium-ion batteries.
7
English EN

7 INSTALLATION
WARNING
Do not use accessories that are not recommended by
the manufacturer.
WARNING
Do not put in the safety key or the battery pack until
you finalised the assembly of all the parts.
7.1 UNPACK THE MACHINE
WARNING
Read the operator's manual carefully to ensure that
you assemble the product correctly. Using a product
that has been incorrectly assembled could lead to an
accident or serious injury.
WARNING
• If parts of the machine are damaged, do not use
the machine.
• If you do not have all the parts, do not operate the
machine.
• If parts are damaged or missing, contact your
dealer.
1. Open the package.
2. Read the documentation provided in the box.
3. Remove all the unassembled parts from the box.
4. Remove the machine from the box.
5. Discard the box and packing material in compliance
with local regulations.
7.2 UNFOLD AND ADJUST THE
LOWER HANDLE
Figure 2.
1. Pull up and back the lower handle to lift the handle
into operation position. Make sure that the handles
click into position correctly.
2. Tighten the lower handle with the quick-release
levers on the two sides.
NOTE
Make sure that the two handles are in the same
position.
WARNING
Do not damage the cables when you fold or unfold the
handle.
7.3 INSTALL THE UPPER HANDLE
Figure 3.
1. Align the holes in the upper handle and the lower
handle.
2. Put the bolts through the holes.
3. Tighten the knobs onto the bolts.
4. Do the same operation on the other side.
7.4 INSTALL THE GRASS CATCHER
Figure 4.
1. Remove the mulch plug.
2. Open the rear discharge door and hold it.
3. Hold the the grass catcher by its handle and put the
hooks over the slots.
4. Close the rear discharge door.
7.5 INSTALL THE MULCH PLUG
Figure 5.
1. Remove the grass catcher.
2. Open the rear discharge door and hold it.
3. Hold the mulch plug by its handle and fit it in the
discharge chute.
4. Close the rear discharge door.
7.6 SET THE BLADE HEIGHT
The machine can be set to different blade heights.
Figure 6.
1. Pull the height adjustment lever rearward to
increase the blade height.
2. Pull the height adjustment lever forward to decrease
the blade height.
7.7 INSTALL THE BATTERY PACK
Figure 7.
WARNING
• If the battery pack or charger is damaged, replace
the battery pack or the charger.
• Stop the machine and wait until the motor stops
before you install or remove the battery pack.
• Read, know, and follow the instructions in the
battery and charger manual.
1. Open the battery door.
2. Align the lift ribs on the battery pack with the
grooves in the battery compartment.
3. Push the battery pack into the battery compartment
until the battery pack locks into place.
4. When you hear a click, the battery pack is installed.
8
English
EN

5. Close the battery door.
NOTE
The motor starts only when you put in the safety key.
7.8 REMOVE THE BATTERY PACK
Figure 7.
1. Open the battery door.
2. Remove the safety key.
3. Push and hold the battery release button.
4. Remove the battery pack from the machine.
8 MOWER FUNCTIONS
NOTE
This lawn mower is featured with 2 functions (rear
bagging/ mulching). These functions can be converted
by changing accessory setting. Please see the
following table for detail setting.
Please be noted that functions below vary with the
mower models.
TO CONVERT MOWER MULCH
PLUG
GRASS
BAG
For rear bagging × √
For mulching √ ×
"√" : installed
"×" : removed
9 OPERATION
WARNING
Do not handle battery pack, switch, or machine with
wet hands. Do not expose to rain or allow liquid to
enter the motor compartment.
Wear eye protection during operation.
9.1 START THE MACHINE
Figure 8.
1. Put in the safety key.
2. Push and hold the start button.
3. While you hold the start button, pull the handle
switch in the direction of the handle bar.
4. Now you can release the start button.
NOTE
If the machine does not start,
1. open the battery compartment flap and check the
safety key.
2. remove the battery pack and examine the mower
deck to make sure that no grass catches on the
blade and the blade can turn freely by hand.
Soft-Start
This Li-ion machine has a “soft-start” feature. When
you start the machine, it goes to full speed after
approximately 3 seconds.
9.2 STOP THE MACHINE
Figure 8.
1. Release the handle switch to stop the machine.
WARNING
If the blade does not stop when the handle switch
is released, remove the safety key or battery to stop
the power supply to product. Have your dealer repair
product before using product again.
WARNING
Wait until the blade fully stops before you start the
machine again. Do not quickly turn the machine off
and on or it will damage the machine.
WARNING
Always remove the safety key and battery pack after
you complete the work.
9.3 EMPTY THE GRASS CATCHER
1. Stop the machine.
2. Remove the safety key.
3. Remove the battery pack.
4. Open the rear discharge door and hold it.
5. Hold the grass catcher by its handle and unhook it
from the slots.
6. Close the rear discharge door.
7. Empty the grass catcher.
9.4 OPERATE ON SLOPES
WARNING
Do not mow on the slopes with incline more than 15°.
If you are not comfortable, do not mow on a slope.
• Do not go up and down on a slope, mow across the
face of the slope. Be careful when you change the
direction on a slope.
9
English EN

• Monitor the holes, ruts, rocks, and other hidden
objects that can cause you to fall. Remove all
obstacles such as rocks and tree limbs.
• Make sure that your footing is stable. If you are out
of balance, release the handle switch immediately.
• Do not mow near drop-offs, ditches, or
embankments.
9.5 OPERATION TIPS
• Do not try to override the operation of the start
button or handle switch.
• Do not tilt the machine when you start it.
• Do not put hands or feet near or below the turning
parts.
• Keep the discharge chute clean.
• Do not cut wet grass.
• Higher blade height is necessary for new or thick
grass.
• Clean the bottom of the mower deck after each
use. Remove grass clippings, leaves, dirt, and other
debris.
10 MAINTENANCE
CAUTION
Do not let brake fluids, gasoline, petroleum-based
materials touch the plastic parts. Chemicals can
cause damage to the plastic, and make the plastic
unserviceable.
CAUTION
Do not use strong solvents or detergents on the plastic
housing or components.
WARNING
Remove the battery pack from the machine before
maintenance.
10.1 GENERAL MAINTENANCE
• Before each use, examine the machine for
damaged, missing, or loose parts such as screws,
nuts, bolts and caps.
• Tighten correctly all the fasteners and caps.
• Clean the machine with a dry cloth. Do not use
water.
10.2 REPLACE THE BLADE
Figure 9.
WARNING
Use only approved replacement blades.
WARNING
Wear heavy gloves when you touch the blade.
1. Stop the machine.
2. Make sure that the blade fully stops.
3. Remove the safety key and battery pack.
4. Turn the machine to its side.
5. Wedge a piece of wood into the deck to prevent the
movement of the blade.
6. Remove the mounting nut and spacers with a
wrench or socket.
7. Remove the blade.
8. Install the new blade. Make sure that the raised
points engage the hole in the blade.
9. Put in the mounting nut and spacers and tighten
them. Recommended tightening torque: 33-37 NM.
WARNING
Otherwise, obstacle or blade may fly and hit the
user or a person nearby, who may be injured, or
may hit and damage something.
10.3 STORE THE MACHINE
• Remove the safety key.
• Remove the battery pack(s).
• Clean the machine before storage.
• Make sure the motor is not hot when you store the
machine.
• Make sure that the machine does not have loose
or damaged parts. If it is necessary, follow these
instructions:
• Replace the damaged parts.
• Tighten the bolts.
• Speak to your dealer.
• Store the machine in a dry area.
• Make sure that children cannot come near the
machine.
11 TROUBLESHOOTING
Problem Possible cause Solution
The handle is
not in position.
The bolts are not
engaged correct-
ly.
Adjust the height
of the handle
and make sure
that the knobs
and bolts are
aligned correctly.
10
English
EN

Problem Possible cause Solution
The machine
does not start.
The battery ca-
pacity is low.
Charge the bat-
tery pack.
The handle
switch is defec-
tive.
Replace the han-
dle switch.
The safety key is
not put in.
Put in the safety
key.
The machine
cuts grass un-
evenly.
The lawn is
rough.
Examine the
mowing area.
The blade height
is not set cor-
rectly.
Adjust the blade/
cutting height to
a higher position.
The machine
does not mulch
correctly.
Wet grass clip-
pings attach to
the deck.
Wait until the
grass dries be-
fore mowing.
The mulch plug
is missing.
Install the mulch
plug.
The machine is
hard to push.
The grass is too
tall, or the blade
height is too low.
Increase the
blade/cutting
height.
The grass catch-
er and the blade
drags in thick
grass.
Empty the grass
clippings from
the grass catch-
er.
There is a high
vibration in the
machine.
The blade is un-
balanced and
worn.
Replace the
blade.
The motor shaft
is bent.
1. Stop the mo-
tor.
2. Remove the
safety key
and battery
pack.
3. Inspect for
damage.
4. Contact your
dealer to re-
pair it.
Problem Possible cause Solution
The machine
stops during
mowing.
The blade height
is too low.
Increase the
blade/cutting
height.
The battery pack
is out of power.
Charge the bat-
tery pack.
The grass clip-
pings attach to
the deck or the
blade.
Remove the bat-
tery pack and
check the deck.
Operation tem-
perature of the
machine is too
high.
Cool the ma-
chine.
* If you cannot find the solution to these problems,
contact your dealer.
12 TECHNICAL DATA
Rated voltage 36 V DC, 40 V max
No load speed 3600 min-1
Cut width 350 mm
Cut height 20 - 70 mm
Grass catcher
capacity
40 L
Weight (without
battery pack)
14.2 kg
Measured sound
pressure level
LPA= 82 dB(A), K= 3 dB(A)
Guaranteed
sound power lev-
el
LWA.d= 96 dB(A)
Battery model LBP-36-80/ LBP-36-150
Charger model LC-3604
Vibration ≤2.5 m/s², K=1.5 m/s²
IPX IPX1
13 EC DECLARATION OF
CONFORMITY
Manufacturer: YAMABIKO CORPORATION
Address: 1-7-2 Suehirocho, Ohme, Tokyo
198-8760 JAPAN
Authorized
representa-
tive:
CERTIFICATION EXPERTS B.V.
Mr. Richard Glaser
11
English EN

Address: Amerlandseweg 7, 3621 ZC Breukelen,
The Netherlands
We, YAMABIKO Corporation, declare under our sole
responsibility that the hereunder specified product
conforms to the following directives.
Product
Name:
Lawn Mower
Brand: ECHO
Sales Model: DLM-310/35P
Serial Num-
ber:
U60935001001 to U60935100000
Directives Harmonized Standards/Procedure
2006/42/EC EN 60335-1:2012 +A2:2019, EN
60335-2-77:2010, EN 62233:2008
2014/30/EU EN 55014-1:2017+A11:2020, EN
55014-2:2015
2011/65/EU EN IEC 63000:2018
2000/14/EC,
2005/88/EC
Annex VI
Sound Power
Level:
Measured:89 dB(A) / Guaranteed: 96
dB(A)
TÜV SÜD Industrie Service GmbH (Notified Body 0036)
Westendstraße 199 80686 Munich Germany
Tokyo, July 1st 2022
_____________________________________
Hisashi Kobayashi / General Manager
Quality Assurance Department
YAMABIKO CORPORATION
10
English
EN
14 UK DECLARATION OF
CONFORMITY
Manufacturer: YAMABIKO CORPORATION
Address: 1-7-2 Suehirocho, Ohme, Tokyo 198-8760
JAPAN
Authorized
representative:
UKCA Experts Ltd.
Mr. Richard Glaser
Address: Dept 302, 43 Owston Road, Carcroft, Don-
caster, DN6 8DA, The United Kingdom
We,YAMABIKO Corporation, declare under our sole
responsibility that the hereunder specified product conforms
to the following regulations.
Product Name: Lawn Mower
Brand: ECHO
Sales Model: DLM-310/35P
Serial Number: U60935001001 to U60935100000
Regulations Designated standards
Supply of Machinery
(Safety) Regulations 2008
EN 60335-1:2012+A2:2019,
62233:2008
Electromagnetic Compati-
bility Regulations 2016
EN 55014-1:2017+A11:2020,
EN 55014-2:2015
The Restriction of the Use
of Certain Hazardous Sub-
stances in Electrical and
Electronic Equipment
Regulations 2012
EN IEC 63000:2018
Noise Emission in the En-
vironment by Equipment
for use Outdoors Regula-
tions 2001 Schedule 9 Sound Power Level:
Measured:89 dB(A)
Guaranteed: 96 dB(A)
Tokyo, July1st 2022
_____________________________________
Hisashi Kobayashi / General Manager
Quality Assurance Department
YAMABIKO CORPORATION
AnP Certification Limited (Notified Body 8500)
2 Parkfield Street Manchester M14 4PN United Kingdom
EN 60335-2-77:2010,EN

1 Description.................................14
1.1 Objet.........................................................14
1.2 Aperçu......................................................14
1.3 Liste de conditionnement......................... 14
2 Règles de sécurité générales...14
2.1 Formation................................................. 14
2.2 Préparation...............................................14
2.3 Fonctionnement........................................15
2.4 Maintenance.............................................17
3 Plage de température
ambiante recommandée :......... 17
4 Symbole..................................... 17
5 Niveaux de risque......................18
6 Recyclage...................................18
7 Installation................................. 18
7.1 Déballage de la machine..........................18
7.2 Dépliez et réglez la poignée inférieure.....18
7.3 Installation de poignée supérieure .......... 19
7.4 Installation de collecteur d'herbe..............19
7.5 Installation de l'insert mulching.................19
7.6 Réglage de hauteur de lame....................19
7.7 Installation de la batterie.......................... 19
7.8 Retrait de pack-batterie............................19
8 Fonctions de tondeuse............. 19
9 Fonctionnement........................ 20
9.1 Démarrage de la machine........................20
9.2 Arrêt de la machine.................................. 20
9.3 Vidage du collecteur d'herbe....................20
9.4 Travail en pente........................................20
9.5 Conseils d'utilisation.................................20
10 Maintenance...............................21
10.1 Maintenance générale..............................21
10.2 Remplacement de lame........................... 21
10.3 Stockage de la machine...........................21
11 Dépannage................................. 21
12 Données techniques................. 22
13 Déclaration de conformité CE.. 22
13
Français
FR

1 DESCRIPTION
1.1 OBJET
Cette machine est destinée à la tonte du
gazon domestique. La lame de coupe doit être
approximativement parallèle au sol. Les quatre roues
doivent toutes toucher le sol pendant la tonte.
1.2 APERÇU
Figure 1-9.
1Interrupteur de poignée
2Bouton de démarrage
3Poignée supérieure
4Poignée inférieure
5Trappe de décharge arrière
6Volet de compartiment de batterie
7Levier d'ajustement de hauteur
8Collecteur d'herbe
9Insert mulching
10 Levier de libération rapide (poignée inférieure)
11 Molette (poignée supérieure)
12 Boulon (poignée supérieure)
13 Fente
14 Tige de cadre de collecteur d'herbe
15 Pack-batterie
16 Clé de sécurité
17 Écrou de lame
18 Espaceur
19 Lame
1.3 LISTE DE CONDITIONNEMENT
1Tondeuse à gazon
2Collecteur d'herbe
3Manuel
2 RÈGLES DE SÉCURITÉ
GÉNÉRALES
AVERTISSEMENT
Lisez attentivement avant usage. Conservez ce
manuel pour référence ultérieure.
2.1 FORMATION
• Lisez attentivement les
instructions. Familiarisez-
vous avec les commandes
et l'usage correct de la
machine.
• Ne laissez jamais des
enfants, des personnes
dont les capacités
physiques, sensorielles ou
mentales sont réduites ou
des personnes dénuées
d’expérience, voire de
connaissance, voire peu
familières avec ces
instructions, utiliser la
machine. La réglementation
locale peut limiter l'âge de
l'opérateur.
• N'oubliez pas que
l'opérateur ou l'utilisateur
assume la responsabilité
des accidents et dangers
pour les autres personnes
et les biens.
• N'utilisez jamais la
machine si des personnes,
spécialement les enfants,
ou des animaux de
compagnie sont à proximité.
2.2 PRÉPARATION
• Pendant l'utilisation de
la machine, portez
systématiquement des
pantalons longs et des
14
Français
FR

chaussures résistantes.
N'utilisez pas la machine
pieds nus ou avec des
sandales ouvertes. Évitez
de porter des vêtements
amples ou comportant des
cordons ou des ficelles.
• Inspectez soigneusement la
zone d'usage de la machine
et retirez tous les objets
pouvant être projetés par la
machine.
• Avant l'usage, effectuez
systématiquement une
inspection visuelle pour
vous assurer que la
lame, le boulon de lame
et l'assemblage de lame
ne sont ni usés, ni
endommagés. Remplacez
les composants usés ou
endommagés ensemble
pour préserver l'équilibre.
Remplacez les étiquettes
endommagées ou illisibles.
2.3 FONCTIONNEMENT
• Utilisez la machine
uniquement à la lumière du
jour ou avec une bonne
lumière artificielle.
• Évitez d'utiliser la machine
sur de l'herbe mouillée.
• Assurez-vous
systématiquement de vous
tenir bien campé en pente.
• Marchez sans jamais courir.
• Travaillez transversalement
sur les pentes, jamais en
descente et en montée.
• Faites preuve d'une
précaution extrême pour
changer de direction en
pente.
• Ne travaillez pas sur
des pentes excessivement
prononcées.
• Faites preuve d'une
précaution extrême pour
changer de sens ou faire
venir la machine à vous.
• Arrêtez la ou les lames
si la machine doit être
inclinée pour le transport
en traversant des surfaces
autres que l'herbe et pour
transporter la machine
depuis et vers la zone
d'usage.
• N'utilisez jamais la machine
avec une protection ou
un bouclier endommagé,
15
Français
FR

voire si l'un d'eux vient à
manquer.
• Démarrez le moteur
prudemment selon les
instructions et en
maintenant les pieds bien
écartés de la ou des lames.
• N'inclinez pas la machine
pour enclencher le moteur
sauf si elle doit être
inclinée afin de démarrer.
En l'espèce, ne l'inclinez
pas au-delà du nécessaire
absolu et levez uniquement
la partie éloignée de
l'opérateur.
• Ne démarrez pas la
machine en vous tenant
devant l'ouverture de
décharge.
• Ne placez pas les mains
ou les pieds à proximité
ou sous les pièces en
rotation. Ne vous tenez
jamais devant l'ouverture de
décharge.
• Ne transportez pas la
machine si la source
d'alimentation est active.
• Arrêtez la machine et retirez
le dispositif de désactivation
ainsi que la pack-batterie.
Assurez-vous que toutes
les pièces mobiles sont à
l'arrêt complet
• dès lors que vous laissez
la machine ;
• avant d'éliminer un
blocage ou de déboucher
une goulotte ;
• avant de vérifier, nettoyer
ou travailler sur la
machine ;
• après un choc avec un
corps étranger. Inspectez
la machine pour repérer
les dommages et
effectuer les réparations
avant de la redémarrer et
de l'utiliser ;
• si la machine commence
à vibrer anormalement
(vérifiez immédiatement) ;
• pour rechercher les
dommages ;
• pour remplacer ou
réparer toute pièce
endommagée ;
• pour vérifier et serrer
toutes les pièces
desserrées.
16
Français
FR

2.4 MAINTENANCE
• Assurez-vous du serrage de
tous les écrous, boulons et
vis pour être certain que la
machine est en bon état de
marche en toute sécurité.
• Vérifiez le collecteur d'herbe
fréquemment pour repérer
usure et détérioration.
• En ajustant la machine,
assurez-vous d'éviter de
piéger les doigts entre les
lames mobiles et les pièces
fixes de la machine.
• Laissez systématiquement
la machine refroidir avant
son stockage.
• Pendant l'entretien des
lames, soyez conscient
du fait que même si
la source d'alimentation
est désactivée, les lames
restent mobiles.
• Par mesure de sécurité,
remplacez les pièces
usées ou endommagées.
Utilisez uniquement des
pièces de remplacement et
accessoires d'origine.
3 PLAGE DE TEMPÉRATURE
AMBIANTE RECOMMANDÉE :
Article Température
Plage de température de
stockage de l'appareil
0 ˚C ~ 45 ˚C
Plage de température de
fonctionnement de l'appar-
eil
0 ˚C ~ 45 ˚C
Plage de température de
charge de la batterie
4 °C ~ 40 ˚C
Plage de température de
fonctionnement du char-
geur
4 °C ~ 40 ˚C
Plage de température de
stockage de la batterie
0 ˚C ~ 45 ˚C
Plage de température de
décharge de la batterie
0 °C ~ 45 °C
4 SYMBOLE
Certains des symboles suivants peuvent être utilisés sur
ce produit. Étudiez-les et apprenez leur signification.
Une interprétation appropriée de ces symboles vous
aide à utiliser le produit de manière plus optimale et
sûre.
Symbole Explication
Lisez le manuel opérateur.
Maintenez les passants à l'écart.
N'exposez pas la machine à la
pluie ou à l'humidité.
Attention aux lames affûtées. Les
lames poursuivent leur rotation
après l'arrêt du moteur. Retirez le
dispositif de désactivation avant la
maintenance.
N'utilisez pas sur des pentes su-
périeures à 15º. Tondez transver-
salement sur les pentes, jamais
en descente et en montée.
17
Français
FR

Symbole Explication
Retirez le pack-batterie avant les
opérations de maintenance.
Batterie Li-ion
Niveau de puissance acoustique
garanti
5 NIVEAUX DE RISQUE
Les mots de signalisation et significations suivants sont
destinés à expliquer les niveaux de risque associés à ce
produit.
SYM-
BOLE
SIGNAL SIGNIFICATION
DANGER Indique une situation dan-
gereuse imminente qui, si
elle n'est pas évitée, va
entraîner des blessures
graves, voire mortelles.
AVERTISSE-
MENT
Indique une situation dan-
gereuse potentielle qui, si
elle n'est pas évitée, pour-
rait entraîner des blessures
graves, voire mortelles.
IMPORTANT Indique une situation dan-
gereuse potentielle qui, si
elle n'est pas évitée, pour-
rait entraîner des blessures
mineures, voire modérées.
NOTE Ajout pour complément
d'informations.
6 RECYCLAGE
Collecte à part. Vous ne devez pas met-
tre au rebut avec les déchets ménag-
ers habituels. S'il est nécessaire de re-
mplacer la machine ou si elle est de-
venue inutile pour vous, ne la mettez
pas au rebut avec les déchets ménagers
normaux.
Grâce à la collecte séparée de la ma-
chine usagée et de l'emballage, vous
assurez le recyclage des matériaux et
leur réutilisation. L'usage des matériaux
recyclés contribue à lutter contre la pol-
lution environnementale et réduit la de-
mande de matières premières.
Piles
Li-ion
À la fin de leur cycle de vie utile, mettez
les batteries /piles au rebut avec précau-
tion pour notre environnement. Une batt-
erie /pile contient des substances dan-
gereuses pour vous et l'environnement.
Vous devez retirer et mettre au rebut
ces substances à part sur un site ac-
ceptant les batteries /piles lithium-ion
7 INSTALLATION
AVERTISSEMENT
N'utilisez pas des accessoires non recommandés par
le fabricant.
AVERTISSEMENT
Ne mettez pas la clé de sécurité ou le pack-batterie
avant d'avoir finalisé l'assemblage de toutes les
pièces.
7.1 DÉBALLAGE DE LA MACHINE
AVERTISSEMENT
Lisez attentivement le manuel de l'opérateur pour
vous assurer d'assembler le produit correctement.
L'usage d'un produit incorrectement assemblé peut
entraîner une accident ou des blessures graves.
AVERTISSEMENT
• Si des pièces de la machine sont endommagées,
n'utilisez pas la machine.
• Si des pièces manquent, n'utilisez pas la machine.
• Si des pièces sont endommagées ou manquantes,
contactez votre revendeur.
1. Ouvrez l'emballage.
2. Lisez la documentation fournie dans la boîte.
3. Retirez toutes les pièces non-assemblées de la
boîte.
4. Retirez la machine de la boîte.
5. Mettez la boîte et le matériau d'emballage au rebut
dans le respect de la réglementation locale.
7.2 DÉPLIEZ ET RÉGLEZ LA
POIGNÉE INFÉRIEURE
Schéma 2
1. Tirez vers le haut et vers l'arrière la poignée
inférieure pour la mettre en position de
fonctionnement. Assurez-vous que les poignées
s'enclenchent correctement en position.
2. Serrez la poignée inférieure à l'aide des leviers à
dégagement rapide situés sur les deux côtés.
18
Français
FR
Other manuals for DLM-310/35P
2
This manual suits for next models
1
Table of contents
Languages:
Other Echo Lawn Mower manuals

Echo
Echo DLM-2100 User manual

Echo
Echo DLM-310/46P User manual

Echo
Echo DLM-310/35P User manual

Echo
Echo DLM-2100SP User manual

Echo
Echo Pro Attachment PAS-225 User manual

Echo
Echo DLM-310/35P User manual

Echo
Echo CLM-58V User manual

Echo
Echo DLM-310/46SP User manual

Echo
Echo PE-280 User manual

Echo
Echo TM-2000 User manual