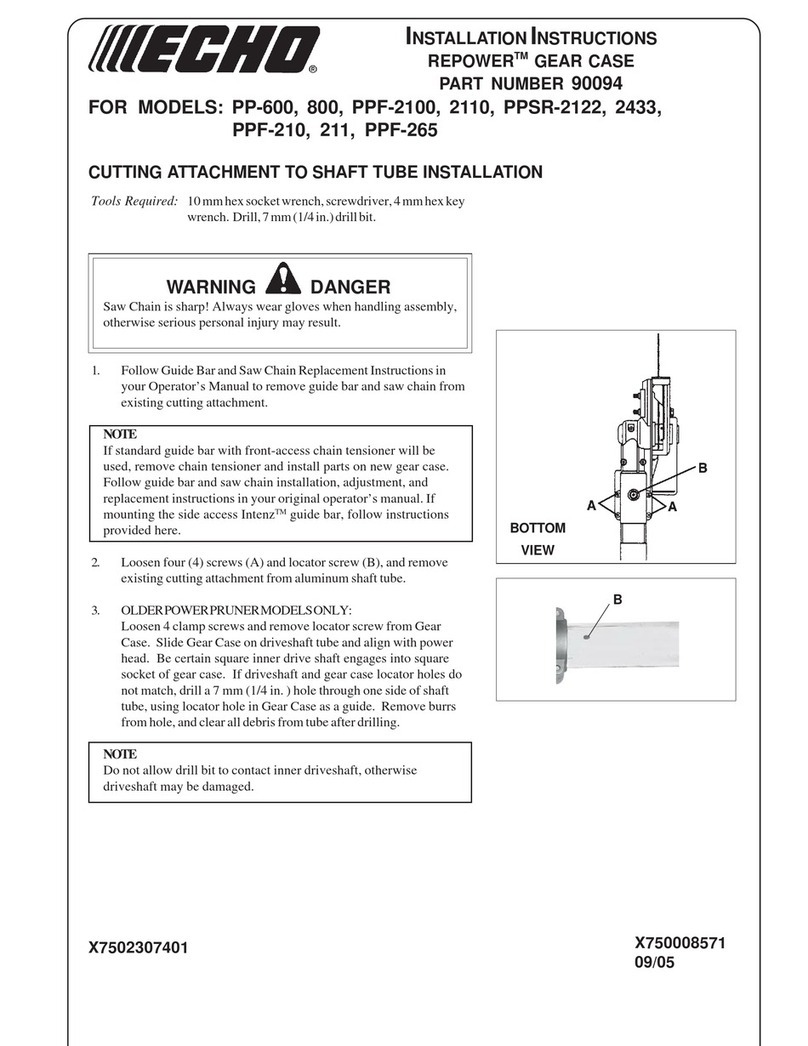
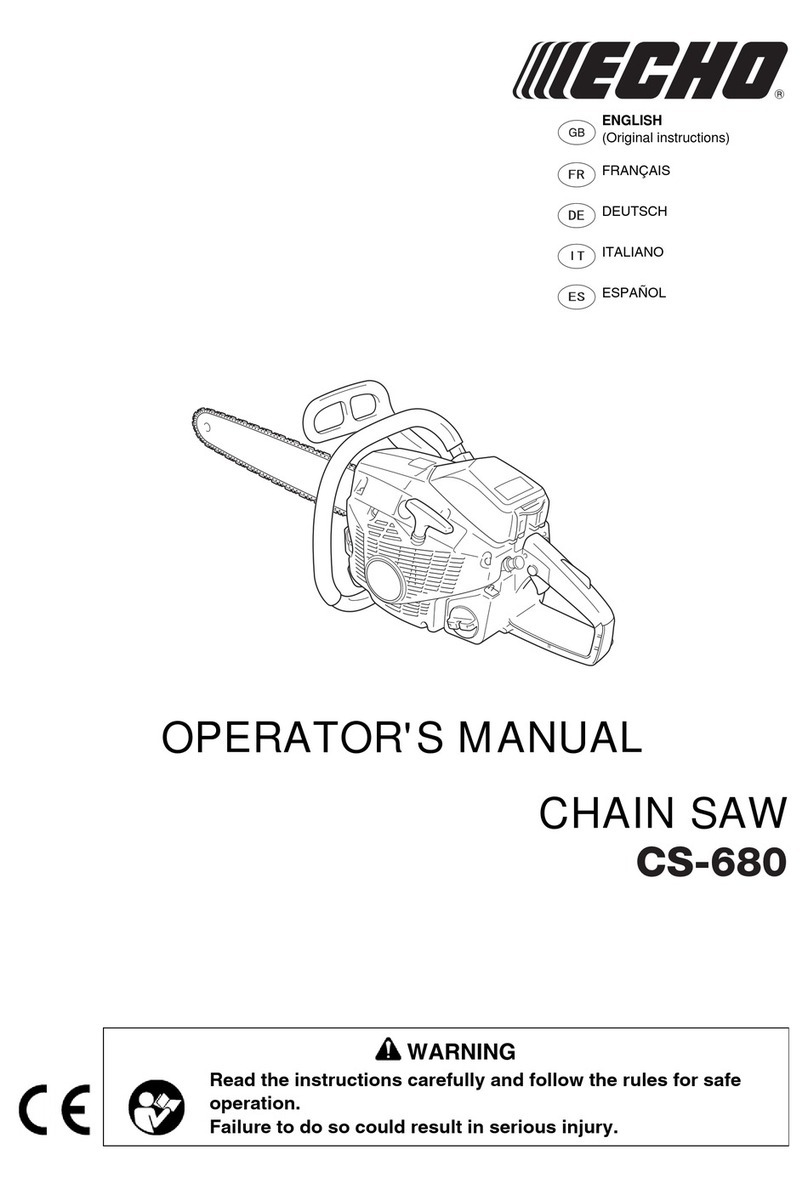
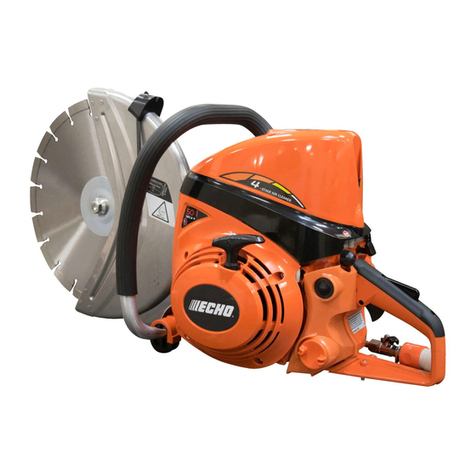
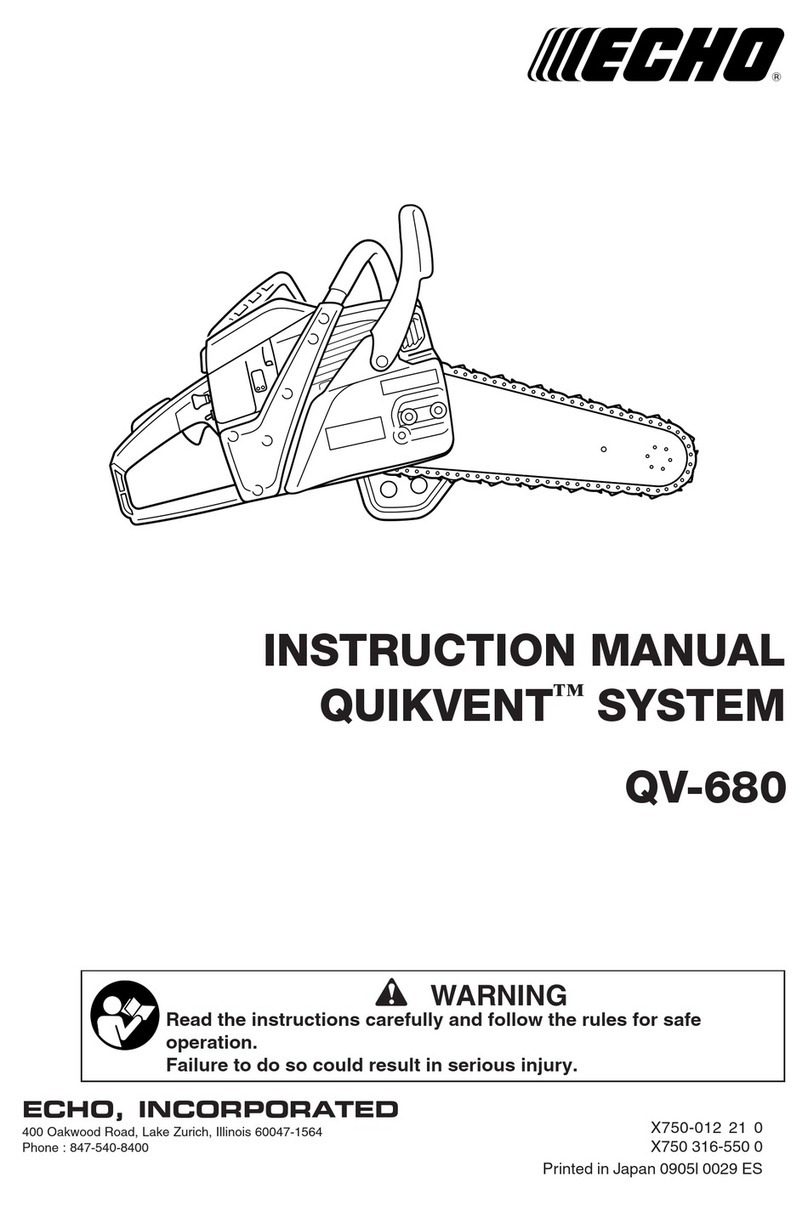
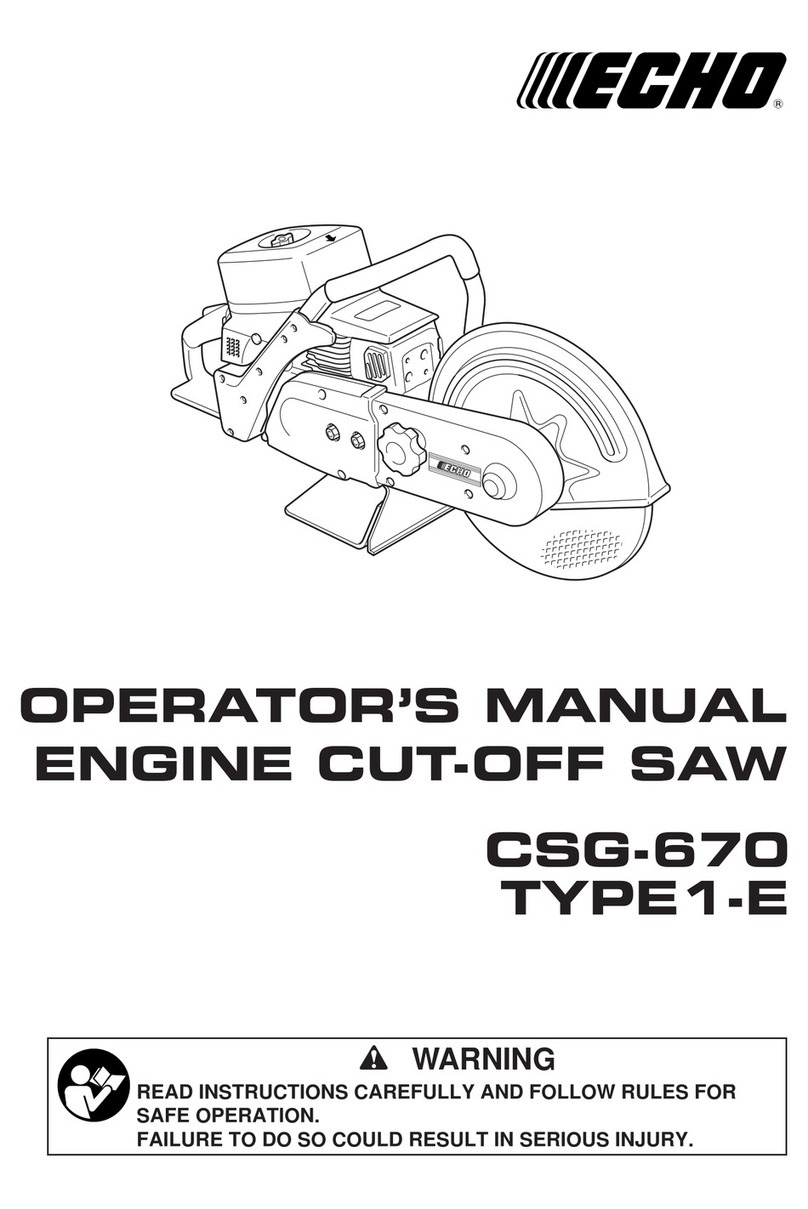
Echo Power Blend CSG-680 User manual

WARNING
Read the instructions carefully and follow the rules for safe
operation.
Failure to do so could result in serious injury.
WARNUNG
Lesen Sie die Bedienungsanleitung sorgfältig durch und befolgen
Sie die Sicherheitsbestimmungen, weil sonst das Risiko schwerer
Verletzungen besteht.
AVVERTENZA
Leggere e seguire attentamente le istruzioni per usare il
mototroncatore in modo sicuro.
La mancata osservanza di quest’avvertenza potrebbe causare
gravi lesioni.
DE
IT
GB
BEDIENUNGSANLEITUNG
TRENNSCHNEIDER
ENGLISH
DEUTSCH
ITALIANO
GB
DE
IT
MANUALE PER L’OPERATORE
DEL MOTOTRONCATORE
OPERATOR’S MANUAL
ENGINE CUT-OFF SAW
CSG-680

2
CSG-680
Specifications, descriptions and illustrations in this
manual were accurate at the time of publication,
and are subject to change without notice.
Illustrations may include optional equipment and
accessories, and may not include all standard
equipment.
WARNING
Improper use or care of this unit, or failure to
wear proper protection can result in serious
injury.
Read the rules for safe operation and
instructions in this manual.
Wear eye and hearing protection and a dust
mask when operating.
Breathing in asbestos fibres can pose a
serious health risk and may cause severe or
fatal respiratory diseases such as lung
cancer. Do not use your cut-off saw to cut,
damage, or disturb asbestos or products
using asbestos in any form. If you believe
you might be cutting asbestos, contact your
employer immediately.
Introduction
The ECHO model CSG-680 Cut-off Saw is a high-
performance petrol-powered tool designed for use
with a recommended 355 x 4 x 20 mm abrasive
wheel.A water-flush attachment is available for
dust control.
Use only ECHO’s wheels or other wheels having a
minimum spindle speed rating of 4400 r/min or
higher.
Never let children operate the cut-off saw.
This manual provides the information necessary for
assembly, operation and maintenance of the cut-off
saw as well as the wheels available for it.It is
important that you follow this information carefully.
If this operator’s manual has become illegible
through impairment or is lost, please purchase a
new one from your ECHO dealer.
When renting a machine together with this
operator’s manual provides explanation and
instruction, please rend out the machine together
with this operator’s manual to a person who
operates the borrowed machine.
When transferring a product, please deliver it
attaching the operator’s manual.
Contents
Introduction ................................................. 2
Symbols and Signs ..................................... 3
Decals..................................................... 3
Description .................................................. 4
Definition of Terms...................................... 5
Operator Safety Precautions....................... 6
Preparing for Use........................................ 8
Protective Equipment ............................. 8
Protecting Others ................................... 8
Physical Condition.................................. 9
Abrasive Wheel Types and Uses................10
ECHO Reinforced Wheels......................10
Wheel Speed Rrting ...............................10
Maximum Allowable Wheel Speed.........10
Engine Speed and Wheel Speed ...........10
Wheel Blotters and Mounting Flanges ...11
Emergency Applications.........................11
Ring Testing Wheels ............................11
Facts About Abrasive Wheel ..................12
Handling and Storage of Wheels............ 12
How to Install the Wheel......................... 13
Operation ....................................................14
2-Stroke Fuel..........................................14
Starting and Stopping.............................14
Sequence after Starting Engine .............15
Cutting Asphalt,
Tar and Reinforced Materials ............. 15
Cutting Technique ..................................16
Troubleshooting Cutting Problems..............17
Troubleshooting Engine Problems..............17
Maintenance and Adjustment .....................18
Rib Ace-belt Change and Adjustment ....18
Remounting Arm for Flush Cutting .........18
Air Filter ..................................................19
Spark Plug..............................................20
Replace Fuel Filter .................................20
Carburettor Adjustment ..........................21
Clean Muffler and Cooling System.........22
Clutch and Maximum Speed Checks .....22
Storage after Use........................................23
Disposal procedure .....................................23
Specifications .............................................. 24
Declaration of Conformity ...........................25

3CSG-680
Symbols and signs
Decals
FRONT
Carefully read the operator’s manual.
Wear eyes, ears, respiration and head protection.
Locate this safety decal on your unit.The complete
unit illustration found in the “Description” section
will help you locate them.
Make sure the decal is legible and that you
understand and follow the instructions on it.If a
decal cannot be read, a new one can be ordered
from your ECHO dealer.
Maximum wheel speed is indicated.
Wheel rotation direction is shown by arrow.
Direction for mounting air cleaner cover is shown.
NOTE
If it is mounted with its front and back reversed,
dust tends to enter easily.
Guaranteed sound power level.
P/N X503-005551
CAUTION
“CAUTION” indicates a potentially hazardous
situation which, if not avoided, may result in
minor or moderate injury.
DANGER
This symbol accompanied by the word
“DANGER” calls attentions to an act or a
condition which will lead to serious personal
injury or death of operators and bystanders.
WARNING
This symbol accompanied by the word
“WARNING” calls attentions to an act or a
condition which can lead to serious personal
injury or death of operators and bystanders.
Circle and slash symbol means
whatever is shown is prohibited.
NOTE
This enclosed message provides tips for use,
care and maintenance of the unit.

4
CSG-680
Description
Wheel Shield
Wheel
Wheel
Mounting Bolt
Outer Flange
Wheel Blotter
Rubber Spark / Dust ShieldFuel Tank Cap Ignition Switch Throttle Trigger
Throttle Latch
Metal Foot
Choke
Starter Grip
Air Cleaner Cover Nut
Front Handle
Air Cleaner Cover
Throttle Lockout
Rear Handle
Idle Speed Adjusting Knob
Rear Arm Cover
Arm Mounting Nuts
Wheel Shield
Locking Knob
Front Arm Cover
Muffler
Tool Kit
P/N X503-005551

5CSG-680
Definition ofTerms
ANSI – American National Standards Institute.
Arbor – A spindle or axle.
Arbor Hole – The mounting hole in the abrasive
wheel.
Autmatic Belt Tensioner – This feature, a spring-
loaded device in the wheel arm, maintains belt
tension.
Blotters – Discs of soft material placed between
wheel and mounting flanges to equalize
pressure against the wheel, and to avoid wear
on the flanges if slipping occurs.
Chaps – Protective covers for the legs.
Choke Control – The device used to enrich the
fuel / air mixture when starting the engine.
Cold Start – Starting sequence required whenever
engine is not warm enough from previous
operation to be started without choking.
Drop-Start – An improper variation of starting while
holding saw in the air. Do not start saw in the
air.
Dust Mask – A device worn to prevent breathing in
dust.
Engine Speed – The speed of the engine output
shaft.
Face Shield – A device worn in front of the eyes,
and all or part of the face, to supplement the
protection afforded by a primary protective
device.
Gasohol – Petrol containing methyl alcohol
(methanol) or more than 10 % of ethyl alcohol
(ethanol) that is harmful to internal engine parts.
Goggles – A device, with impact-resistant lenses,
intended to protect the eyes from the front, top
and sides. The goggles are stamped Z 87 for
qualification.
Governor – A device which limits the speed of the
engine.
Idle Speed – An engine speed which is slow
enough that the clutch does not engage.
Ignition Switch – The device which allows the
operator to run or stop the engine.
Kickback – A dangerous reaction and movement
off the saw, in an upward arc towards the
operator, caused by contact with an object at
the front segment of the wheel.
No Load Speed – The speed of the engine when
no load is applied.
Reduction Ratio – The ratio between the engine
speed and the spindle speed.
Reinforced Wheel – Abrasive wheels bonded on
both sides with layers of a fiber mesh material.
Spindle – An axle or arbor.
Spindle Speed – The speed at which the spindle
or wheel axle rotates.
Throttle Latch – A device used to latch the throttle
trigger in a position for starting the engine.
Throttle Trigger Lockout Lever – A lever on the
rear handle grip which the operator must hold
depressed for control of the throttle trigger, and
when released will lock the throttle control in the
idle position.
Throttle Trigger – The device in the rear handle
used to control the speed of the engine.
Tmo-Stroke Fuel – Fuel containing the lubricant
for two-stroke engines. It is made by mixing 2-
stroke engine oil with petrol.
Water-Flush – Constantly spraying the stone or
masonry surface during cutting, in order to
reduce exposure to dust, and also cool the
wheel.
Wheel Guard – A wheel shield which is intended to
protect the operator from wheel contact, and
also direct debris away from the operator.
Wheel Speed – The speed (r/min) of the shaft
(spindle, arbor) on which the cutting wheel is
mounted.
Wheel Speed Rating – The speed printed on the
label of the wheel by the manufacturer is the
maximum allowable wheel speed.
Wheel Thrust – The force of the wheel against the
work, felt by the operator as a pull of the saw.

6
CSG-680
Read this cut-off saw operator’s manual carefully. Be sure you understand
how to operate this saw properly before you use it.
Establish a training program for cut-off saw operators.
Use safety footwear, snug-fitting clothing and protective gloves.
Wear eye, hearing and head protection devices.Use ballistics chaps or pants
when necessary.Clothing of fire-resistant and unmeltable material should be
worn by emergency crews exposed to flames or high heat conditions.
Use caution when handling fuel.Put the fuel tank caps back tightly on both
the fuel container and the saw tank, move at least 3 m from the fuelling point,
and be sure there is no leakage of fuel from the fuel tank cap or the fuel
system before starting the engine.Avoid ignition from sparks.
DANGER
After refuelling, tighten fuel cap firmly and check for leakage. In case
of fuel leakage repair before starting operation since there is a
danger of fire.
WARNING
Do not run the engine indoors, or where there is poor ventilation.
Engine fumes contain deadly poisonous carbon monoxide.
IMPORTANT
zCheck before every use.
zAfter refuelling, make sure fuel does not leak or exude from around fuel
pipe, fuel grommet or fuel tank cap.
zIn case of fuel leakage or exudation there is a danger of fire. Stop using
the machine immediately and request your dealer to inspect or replace.
zIt is not permitted to fill fuel above the shoulder level of fuel tank.
Operate this petrol engine saw only in well-ventilated areas.
Do not store the unit with fuel in its tank, because a fuel leak could start a
fire.
Do not cause sparks in any area where there are flammable materials.
Start the saw on the ground with the cutting wheel completely in the clear.Do
not drop-start the saw, or start it if the wheel is obstructed by the ground or
any other object.
Do not allow other persons to be nearer than 9 m when you are starting or
cutting with the saw. Be aware that bystanders should wear hearing and eye
protection.Do not start cutting unless you have good footing and the work
area is clear.
Do not let someone hold the work you are cutting.
Adjust the wheel shield to a position where the sparks and debris from the
wheel will be thrown away from you.The wheel shield can be adjusted by
loosening the locking knob.After the position of the wheel shield is decided,
fix the wheel shield by tightening the locking knob firmly.Do not operate if the
wheel shield is damaged, missing from the unit, improperly positioned, or
cannot be locked in proper position.
Operator Safety Precautions
3 m
AdjustWheel Shield
Locking knob

7CSG-680
Keep a firm grip on the saw with both hands, the right hand on the rear
handle, and the left hand on the front handle when the engine is running.Use
a firm grip with thumbs and fingers encircling the saw handles.A firm grip will
help you to keep control if the saw kickback toward you, or the thrust of the
rotating wheel pulls it away from you.Never operate the saw with only one
hand.
Keep to the left of the saw so that no part of your body is in line with the
cutting wheel.Keep all parts of your body away from the cutting wheel when
the engine is running.
Do all cutting at full throttle speed. Cutting at less than full speed can damage
the clutch by allowing it to slip. Accelerating from slow to full speed while the
wheel is in cutting contact may cause a violent push or pull reaction resulting
in loss of control.
It will take time for the wheel to coast to a stop after the throttle trigger is
released.Be sure to wait for rotation to stop before releasing your grip on the
saw handles.Always shut off the engine before setting down the saw.
Always carry the saw with the engine stopped and the hot muffler away from
your body. Do not touch a hot muffler or cylinder.
Remove the wheel from the saw prior to transport or storage.Store wheels
properly to avoid damage from uneven pressure, moisture and extreme
temperatures.
Do not grind on the side of an abrasive cut-off saw wheel, or put any side
pressure on the wheel during cutting. Avoid letting the saw tilt or wobble off
line.
Use new, properly qualified wheels of correct diameter, thickness and
mounting hole size.The wheel blotters and the mounting flanges should be in
good condition, and the mounting bolt should be tightened to the proper
torque.
Inspect the wheel carefully for cracks, edge damage and warping before use.
Do not use any wheel that has been dropped.
All items of adjustment and maintenance given in this operator’s manual
should be performed as necessary, and may be done by the saw owner.AII
required items of service or adjustment not listed in this manual should be
performed only by a qualified ECHO servicing dealer.
Over speeding of the engine, or wrong size pulleys in the belt transmission
can result in dangerously high wheel speeds.Install only the proper diameter
pulleys in the belt transmission.The engine no load maximum speed is
controlled by a vibration-sensitive governor.Check speed with a tachometer,
or contact your ECHO dealer if you suspect the governor is not working
properly.
Keep to Left of
Cutting Line
Put no Side
Pressure on
theWheel
Check forWheel
Damage

8
CSG-680
Spectators children and fellow workers must be
warned to come no nearer than 9 m while the saw
is in use.Shut off the saw immediately if some one
moves closer to you than 9 m.Persons working in
the area near you should wear the same protective
equipment as the saw operator if endangered by
risky flying debris.
Preparing for Use
Protective Equipment
WARNING
Cut-off saw users risk injury if the saw is
used improperly, and / or safety precautions
are not followed. Protective clothing and
safety gear must be worn when operating a
cut-off saw.
zYou must wear eye protection goggles qualified
to the CE mark or the latest ANSI Standard Z 87.
(Z 87 is stamped on the goggles).These goggles
also must be worn under a face screen if one is
used.A face screen should be worn when there
is a risk from flying debris.
zHearing protection should be worn.(See
“DANGER,” page 15)
zWear a respirator or dust mask when cutting
concrete, stone, brick or other materials where
fine dust is produced while cutting.Use water
flush to keep down the dust.
zClothing should be made from fabric containing
natural fibers that resist catching fire and do not
melt.The clothing should cover as much skin
area as possible.Clothing should offer freedom
of movement, but should not be too loose or
baggy. Do not wear ties or jewelry.
zWear heavy duty boots with non-slip soles.The
boots should be high enough for shin protection,
or you should wear chaps for shin protection.
zWear non-slip, heavy duty work gloves to
improve your grip on the saw handles.The
gloves also help to reduce the transmission of
machine vibrations to your hands.
Hard Hat
No Bystanders!
Hearing Protection
Goggles (Z 87)
Dust Mask or Respirator
Trim-Fitting
Protective Clothing
Heavy Duty non-Slip Gloves
Chaps or High Boots
for Spark Protection
Heavy Duty Boots
with non-Slip Soles
Protecting Others

9CSG-680
Physical Condition Your judgment and / or dexterity may be impaired if
you are ill or have taken alcohol or other
substances known to affect the way you would
function normally.Operate only when sound in mind
and body.
WARNING
Precautions Againt Vibration and Cold
It is believed that a condition called
Raynaud’s Phenomenon which affects the
fingers of certain individuals is brought
about by exposure to cold and vibration.
Accordingly, your ECHO Cut-off Saw has
shock mounts designed to reduce the
intensity of vibration received through the
saw handles. Exposure to cold and vibration
may cause tingling and burning, followed by
loss of color and numbness, in a person’s
fingers. We strongly recommend your taking
the following precautions because the
minimum exposure which might trigger the
ailment is unknown.
zz
zz
zKeep your body warm – especially head,
neck, feet and ankles, and hands and
wrists.
zz
zz
zMaintain good blood circulation by
performing vigorous arm exercises during
frequent work breaks, and also by not
smoking.
zz
zz
zLimit the number of hours of cut-off saw
operation. Try to fill a part of each work
day with jobs where operating this saw or
other hand-held power tools are not
required.
zz
zz
zIf you experience discomfort, redness and
swelling of the fingers, followed by
whitening and loss of feeling, consult your
physician before exposing yourself further
to cold and vibration.

10
CSG-680
Prim Use
General purpose mild and
stainless steel: re-bar, pipe
and structural steel
Ductile or cast Iron and
concrete lined pipe
Heat treated, wear hardened
and alloyed steel
All masonry, concrete and
stone products and asphalt
Rock, block, stone, tile
Engine Drive Pully
9500 r/min ± 500 r/min
= between 3930 and
4370 r/min
Wheel Speed
Abrasive WheelTypes and Uses
ECHO Reinforced Wheels
ECHOWheels are labeled for the type of materials they are designed to cut.
The types of wheels identified below, and other types, may be available from ECHO dealer.
Labeled Application
Metal
Ductile
Rail Track
Masonry
Diamond Wheel
Other Uses
Aluminum and soft
brass. Does not cut
non-metals very well
AII except very hard
metals
Not for non-metals
Not for metals
Not for metal or
reinforced concrete
Dry or Water Flush
Dry
Dry. Does not cut
well when wet
Dry
Constant Water Flush
or Dry
Dry
Wheel Speed Rrting
The speed rating printed on these reinforced wheels could range from 4000
to 4400 r/min.This is the minimum acceptable wheel speed rating for this unit.
Wheels rated less than 4400 r/min must not be used on this saw.
Read Label onThe
Wheel
Maximum Allowable Wheel Speed
The wheel rotates at the same speed as the spindle (arbor) on which it is
mounted.The wheel must never be allowed to rotate faster than 4400 r/min if
the wheel speed is rated at 4400 r/min.(See “Engine Speed and Wheel
Speed”, below.)
Engine Speed and Wheel Speed
Since the reduction ratio of the engine drive pulley to the large driven pulley is
about 2.3 to 1.
The unit has a governor system designed to govern the engine high speed, at
no load, to within 500 r/min of 9500 r/min, at which the wheel speed should
range between 3930 and 4370 r/min.– safety inside the 4400 r/min limit.If the
engine exceeds this speed limit, take it to your nearest ECHO servicing
dealer for service.

11 CSG-680
Refer to Chart
Wheel Dimensions
AbrasiveWheel:
DiamondWheel:
Wheel Diameter
355 mm
355 mm
Mounting Hole Diameter
20 mm
(22 mm with Adapter)
20 mm
(22 mm with Adapter)
Wheel Blotters and Mounting Flanges
Wheel blotters attached to both sides of reinforced
wheels are cushions needed to equalize the
pressure of the mounting flanges from wear if
slippage between the wheel and the flanges occurs.
The blotters are 108 mm diameter.Take care that
the blotters do not become gouged or deeply
scratched and that there is no foreign material on
them when mounting the wheel.
Emergency Applications The cut-off saw has applications in fire fighting and
rescue work. An ECHO QUIK-VENT roof venting
saw is also available.Both of these units, however,
can cause sparks and should not be used in an
explosive atmosphere or where they could start a
fire.
WARNING
zDo not grind with a cut-off wheel or put
pressure on the sides.
zDo not mount wheel if blotters are
damaged. Do not destroy cushioning
effect by making mounting bolts too tight.
Never fasten while applying your weight.
Otherwise the thread could be broken.
Proper torque is 20 N•m (200 kgf•cm).
zExamine wheel carefully before use. Do
not use if wheel is warped, damp, cracked,
chipped or cutting area shows heat
discoloration.
zA wheel once dropped cannot be trusted.
Discard a wheel if you drop it.
Ring Testing Wheels
Cracks or defects in a wheel may not be visible.To help in verifying that a
wheel is ok to use, a“ring test”must be made immediately before mounting
all new or used wheels.
Put your finger through the mounting hole to support the wheel. Use a non-
metallic handle of any small tool or a small piece of wood to lightly tap (do not
hit) the wheel in the locations shown in the illustration.Do not tap wheel on
the edge.Uncracked wheels will make a ringing sound, wheels with cracks or
concealed cracks will make a dull “clunk”.
IMPORTANT
If a wheel being “ring tested” is dirty or damp or
is tapped at the vertical center line, the resulting
sound will be muffled and not reliable.
“Tap”Here
Center Line
45°
45°
45°
Blotter 108 mm
20 mm
(22 mm)
355 mm
Thickness
4 mm
3 mm
45°

12
CSG-680
Facts About Abrasive Wheel
ECHO wheels are made by laying a strong fiber mesh material into a form,
pouring a mixture of resin and the abrasive grit particles over the mesh, and
adding a second layer of mesh over the mixture.Then the resin and
reinforcing mesh are bonded together and cured.
The wheel’s ability to cut certain materials are due to the type abrasive, size
of the grit and it’s spacing.The reinforcement on both sides adds strength
and rigidity.
Always read the label on the wheel.If the wheel does not cut well, it may be
the wrong type for the material.Forcing it to cut may result in shattering of the
wheel and serious injury to the operator.
WARNING
Do not grind with a cut-off wheel or put pressure on the sides.
Use only ECHO reinforced wheels, or wheels approved for this saw
by ECHO. Wheels that are too thick or fit the arbor improperly may
shatter, causing serious personal injury. So may wheels of low speed
rating or those that are cracked, wrapped, out-of-round or edge-
damaged.
A wheel can stand a lot of cutting pressure as long as the pressure is straight
on and not from the side of the wheel. This is why you always must make
only straight line cuts, by avoiding saw tilt or wobbling off line during a cut.
Saws intended for forcible entry should be equipped with new wheels for
each use. If the used wheels can pass the ring test (page 11) and close
inspection, they may be use in training emergency crews.
Put no Side
Pressure on
theWheel
Check every wheel for warping, cracks and broken edges before mounting on
thesaw.
Warped wheels do not cut properly and may be stressed to the point of
breaking.Always store your wheels sown flat on a smooth, flat and dry
surface.When stacking many wheels, place cardboard or paper spacers
between them as a cushion.
Moisture and heat both can cause wheel damage.Do not let wheels lie in the
sun or expose them to high heat.Keep wheels dry at all times, and store in
an area of low humidity and moderate temperature.Protection from moisture
damage applies during water-flush cutting.To keep water from penetrating
the wheel, bring wheel up to cutting speed before turning on water, and
maintain wheel rotation for 10 seconds after shutting off water.
Handling and Storage of Wheels

13 CSG-680
How to Install the Wheel
Insert the bar tool.
Rotate the drive shaft until the hole in the large pulley and the bar tool
aligned.
Unscrew wheel mounting bolt with the 17 mm end of the box wrench or your
fingers.
Remove wheel bolt, washers and outer flange, leaving inner flange in place.
Mount wheel on arbor between the two flanges.
Install flat washer, lock washer and wheel bolt.
Tighten bolt securely.
WARNING
zBefore tightening, check that flanges are properly seated and not
cocked on the mount or bolt threads. Do not make bolt so tight as
to destroy the cushion supplied by the wheel blotters. Never fasten
while applying your weight. Otherwise the thread could be broken.
Do not tighten more than 20 N•m (200 kgf•cm).
zInner and outer flanges are not interchangeable. Reversing
positions may cause wheel damage and lock the wheel.
NOTE
Arm may be removed and remounted with wheel on the outboard side of
the arm as required for certain procedures. See page 18 for details.
Remove Wheel Bolt,
Washers and Outer
Flange
BarTool
Wheel Bolt
Hole the Large Pulley
Wheel with Blotters
Lock Washer
Flat Washer
Arm Outer Flange
Inner Flange
22 mm Adapter
Cutting Wheel
BoxWrench 17×19 mm
Tighten

14
CSG-680
Set saw down on level ground with wheel or saw blade in the clear. Grasp
front handle with left hand, and hold down rear handle with toe of your boot.
Never “drop-start” the saw.
WARNING
Wheel will rotate when engine is started at latched throttle setting.
Keep cutting wheel in the clear.
IMPORTANT
zCheck unit for loose nuts, bolts and screws before starting.
zAlways clear work area of debris before starting operation.
zAlways hold the unit firmly.
zWhen pulling starting rope, use short pulls, 1/2 to 2/3 of rope length.
zDo not allow the starter grip to snap back against the housing.
Operation
2-Stroke Fuel
zFuel is a mixture of regular grade petrol and an air-cooled 2-stroke engine
oil of reputable brand name.Minimum 89 Octane unleaded petrol is
recommended.Do not use fuel containing methyl alcohol or more than 10
% of ethyl alcohol.
zRecommended mixture ratio;50 : 1 (2 %) for ISO-L-EGD Standard (ISO/
CD 13738), JASO FC, FD grade and ECHO Premium 50 :1 oil.
- Do not mix directly in engine fuel tank.
- Avoid spilling petrol or oil.Spilled fuel should always be wiped up.
- Handle petrol with care, it is highly inflammable.
- Always store fuel in approved container.
1. Pour 1/2 of the petrol into a safe container.
2. Add oil to the petrol and mix them.
3. Add remaining petrol and mix again.
4. Install fuel cap and wipe spilled fuel from saw, container and the area.
IMPORTANT
Do not mix fuel in engine fuel tank.
Starting and Stopping
Safe Starting Techniques
Starting Cold Engine 1. Pull out choke all the way.
2. Move ignition switch to“RUN”position.
3. Depress and hold throttle trigger and lockout
while pushing in latch button to latch throttle for
starting.
4. Crank engine. Pull starter grip briskly, but only
1/2 to 2/3 its full length. Pulling rope to the end
may damage the starter.
5. Push in the choke the first time engine fires, and
crank until engine starts and runs. In cold
weather you should keep the choke out just a
little until the engine gets very warm. But, do not
operate with the choke out.
6. Squeeze and release trigger when engine runs.
You now have trigger control of the throttle
speed.
3
Depress and Hold Both
Throttle Trigger and
Lockout Lever, and
Push in Latch Button,
then Release Trigger
1
Pull out Choke
2
Move Switch to “RUN”
6
To De-latch Throttle, Squeeze
and Release the Trigger
4
Pull Starter Grip

15 CSG-680
1. Squeeze and release trigger to unlatch it and take control of the throttle.
2. Let engine warm to operating temperature before doing any cutting.
3. Take cutting stance on left side of saw. Never get any part of your body
behind the saw.Hold the saw firmly with both hands.Throttle up to cutting
speed and make gentle wheel contact with the work.
Stopping Engine Move ignition switch down to “STOP” position. Keep wheel in the clear until
all movement stops.
If engine does not stop, pull choke control knob out fully to stop engine. The
choked engine will slow to a stop. Be sure to keep the wheel in the clear until
all movement stops.
WARNING
With trigger latched, wheel will rotate as soon as engine starts. Keep
wheel in the clear.
Wheel will rotate for some time after the trigger is released. Keep
wheel in the clear until all movement stops.
Restarting Warm Engine When engine is warm from previous running, move ignition switch to “RUN”
position.And push choke control knob all the way in.Try cranking at idle
throttle without latching it.If this does not work, try again with throttle latched.
Choking may be needed if the engine has cooled.But, to avoid the possibility
of over-choking and flooding, always first try to start a warm engine without
choking it.
Sequence after Starting Engine
Cutting Asphalt,Tar and Reinforced Materials
Old, cold and hardened asphalt paving can be cut with a masonry wheel with
good results and little trouble with tarring of the wheel.Fresh asphalt and
tarred surfaces can gum up the wheel and slow its cutting action.Some tar or
resin-impregnated materials also may present problems of this sort.
Masonry containing metal reinforcement is best cut with a masonry wheel
which can cut through the reinforcing steel better than a wheel designed for
metal can cut the masonry.Expect faster than normal wheel wear.
DANGER
zDo not raise saw above chest height, because the saw is hard to
control when held up high, and dust or sparks will fall on you.
zWear hearing protection. Without it you risk hearing loss,
especially where bounce-back of sound waves off nearby surfaces
increases the noise.
zDo not take awkward or risky operating positions. Find solid
footing for both feet, and always hold the saw firmly with both
hands. Never make one-handed cuts.
zWhen the wheel engages the work, the thrust will exert a forward
pull which you must be ready to control. Keep bystanders out of
the way.
Wheel Thrust

16
CSG-680
Cutting Technique The main objectives are to avoid overheating the
wheel, and to prevent it from being pinched or
trapped or stressed in any way.
zAdjust position of wheel guard to direct the
discharge away from you.
zPrepare to make straight cuts only.Use a snap-
line to mark long cuts, and follow the marked line
carefully.
zTake a balanced, comfortable stance on the left
side of the saw.Hold saw firmly with both hands.
zAlways throttle up to cutting speed before letting
the wheel make contact.The saw may be jerked
forward, causing loss of control, if wheel is in
contact during throttling up.Carefully let cutting
edge of wheel make light contact with the work.
Do not push or bounce the wheel onto the work.
Hold saw steady.Do not let it tilt or wobble.
zDo not let the wheel stop in one place, but keep
it moving - in one direction, or back and forth,
along the line of cut. Cutting in one spot causes
heat build-up which can damage or glaze the
wheel.Too much cutting pressure also causes
overheating.
zCut as shallow and straight a groove as you can.
If you cut a curve, the wheel will start to bind as
the cut deepens.
zGo over and over the groove you have started
until the cut is completed.
zOn cuts of long duration, remove saw from cut
often to let the wheel cool.
zNever put any side pressure on a cut-off saw
wheel, grind on the side of it or use it to flick
away debris.
zWhen cutting large diameter pipe, cut 360
degrees around and try not to cut through. If a
large segment of the wheel breaks through, the
wheel may catch and kick out at lightning-fast
speed.
zBefore cutting materials which are not supported
along their entire length, provide support to
prevent binding.Also be aware that the top
section will settle on the wheel if a column is cut
in two.
NOTE
Always cut at full throttle. Cutting at less than full
throttle may harm the clutch as it will overheat
during slippage.
DANGER
Do not cut with the portion of the wheel
running from just below horizontal to just
past top dead center. This is the zone of
contact where the saw is likely to be kicked
upward and backward towards you.
Kickback
Danger Zone
Follow Snap Line
Keep Wheel
Moving
Cut in a
Straight Line
Saw will Bind
in Crocked Cut
Roll Pipe to Cut 360° Around
Try not to Let Wheel Break
Through in One Place

17 CSG-680
Troubleshooting Cutting Problems
Troubleshooting Engine Problems
Trouble
Wheel stops when cutting pressure
is applied
Belt slips and cannot be tensioned
properly
Poor cutting – wheel discoloured at
outer area
Trouble
Engine will not start
Engine hard to start
Engine misses
Engine overheats and / or stalls
under cutting load
Probable Cause
1. Bearing down too hard.
2. Binding in crooked cut.
3. Binding in closing cut.
4. Loose Rib Ace-belt.
Belt worn beyond the limit.
Heat damage.
Remedy
1. Ease up cutting pressure.
2. Lay out and follow a straight line.
3. Support material so cut will open.
4. Increase belt tension.
Replace Rib Ace-belt.
Replace wheel.
Do not cut long in one spot.
Water flush when recommended.
Probable Cause
1. Out of fuel.
2. Switch not on.
3. Engineflooded.
4. Fuel filter clogged.
5. Air filter blocked.
6. Spark plug fouled or
cracked.
7. Ignition magneto or
spark plug wire faulty.
1. See reasons under “will
not start”.
2. Water in fuel or fuel has
gone stale or sour.
3. Engine not getting the
proper fuel/air mixture.
4. Carburettor out of
adjustment.
1. Dirt in carburettor or
fuel line.
2. Carburettor out of
adjustment.
3. Weak or intermittent
spark.
1. Not enough oil.
2. Air passages around
cylinder clogged.
3. Carburettor main
adjustment is set too
“Lean”.
Remedy
1. Fill fuel tank.
2. Move switch to “RUN” position.
3. Remove spark plug. Turn switch
off and crank engine to expel the
fuel. Install clean, dry, properly
gapped spark plug.
4. Install clean fuel filter. Check that
fuel pick-up line is not leaking or
clogged. Clean fuel tank.
5. Clean or replace air filter
element.
6. Replace plug.
7. Contact nearest authorized
ECHO servicing dealer.
1. See remedies above.
2. Fill tank with clean, fresh fuel
mixture.
3. If over-choked and flooded,
remove plug and crank engine
before installing clean, dry plug.
If not choked enough, set
controls properly for starting.
4. See “Carburettor Adjustment” or
seek authorized dealer for
adjustment.
1. Contact nearest authorized
servicing dealer.
2. Adjust, or seek dealer service.
3. Contact nearest authorized
servicing dealer.
1. Use proper amount of oil in fuel
mixture.
2. Clean air intake grid on starter
side, flywheel, cylinder fins and
surrounding area.
3. See “Carburettor Adjustment” or
seek authorized dealer for
adjustment.

18
CSG-680
Maintenance and Adjustment
Rib Ace-belt Change and Adjustment
1. Move ignition switch down“STOP”position.
2. Remove belt tension (with 13 mm end of the box
wrench) by turning the cam anticlockwise.
3. Remove rear arm cover and front arm cover.
(Save the seven screws.)
4. Use the 13 mm end of the box wrench to loosen
arm mounting nuts just a little.
5. Push arm towards small pulley. Pull belt off
pulley at point (B) and slip new belt onto small
pulley. At point (A), start belt over the rim and
onto the large pulley.
6. Reinstall the covers.Turn the tension adjusting
cam clockwise until the edge of the arrow in the
peep window reachs the line.(See drawing.)
7. Lightly swing the tip of the arm up and down
several times.This sets the tension automatically.
8. Tighten the arm mounting nuts fully.
Remounting Arm for Flush Cutting
When necessary to cut up close to a barrier, invert and remount the arm so
the wheel is on the outboard side.
1. Refer to“Rib Ace-belt Change and Adjustment” to remove the belt.This
time, remove the arm mounting nuts, the long plate.
2. Use the parts removed in step one to remount the arm – this time in the
inverted position.(This time, direction of wheel rotation is opposite to the
arrow.)
3. Push the wheel shield and arm through loop of the Rib Ace-belt.Follow
instructions to mount and tension the Rib Ace-belt.
4. Reinstall all parts previously removed, and tension the belt.
Rear Arm Cover Front Arm Cover
Arm Mounting Nuts
Cam
Small
Pulley (A)
Large Pulley (B)
Small
Pulley (A)
Large Pulley (B)
Rib Ace-belt
BANDO 6PJ887
13 mm End of the Box Wrench Anticlockwise
Peep Window
Peep Window
Line
Arrow
Arm Mounting Nuts
Long Plate

19 CSG-680
Pleated Main Filter
Nylon Mesh Third Filter
Foam First Filter
Air Cleaner Base Plate
Air Filter
Air Cleaner Cover
Dust from cutting must be prevented from entering
the engine.The three (3) filters in the Air Cleaner
System can do this if they are properly maintained
and correctly installed.The foam, first filter when
used dry should be removed and cleaned each
time the fuel tank is refilled.If the foam filter is oiled
[recommended to prolong main (paper) filter life],
cleaning may be required more frequently if a
noticeable drop in power due to a clogged air filter
is noted.
IMPORTANT
Excess oil will contaminate the paper (main)
filter, shortening its life.
Bolts
Wing Nut
1. Close the choke (pull out knob) before removing the air cleaner cover to
prevent debris from entering the carburettor.
2. Loosen the wing nut and remove air cleaner cover.
3. Before removing the filters, clean the accumulated dust from the filters and
air cleaner base plate with a soft brush or by gently blowing (Do not use
compressed air).
4. The third (nylon mesh) filter should be removed only when cleaning is
necessary.When re-installing, be sure filter base is properly installed in the
rubber connector.
5. Clean the foam (first) filter and nylon (third) filter in water/detergent
solution.Wrap the foam filter in a clean cloth and squeeze (Do not wring)
dry.
6. If foam (first) filter is to be oiled, soak it in clean 20W or 30W engine oil.
Again wrap the filter in a clean dry cloth and squeeze (Do not wring) until
the filter appears dry.
7. Clean the main filter by gently tapping filter flat against a flat surface.Do
not brush or wetten the paper, harsh cleaning methods will damage the
filter.Fasten firmly the main filter mounting bolts.
8. Examine all three filters for cracks or tears.Replace any filter that is, or
appears, clogged or damaged after cleaning.

20
CSG-680
(Check Periodically)
1. Do not allow dust to enter fuel tank.
2. Clogged filter will cause difficulty in starting
engine or abnormalities in engine performance.
3. Pull the fuel filter out through fuel inlet port with a
piece of steel wire or the like.
4. When the filter is dirty, replace it.
5. When the inside of the fuel tank is dirty, rinsing
the tank out with petrol can clean it.
WARNING
Check condition of fuel cap and gasket. Be
sure the cap fits tightly and there is no fuel
leak.
Fuel Filter
Fuel Tank Cap
Replace Fuel Filter
Spark Plug
NGK BPMR7A
Spark Plug
1. Clean the outside of the saw.Then follow
instructions to disassemble the air cleaner.
2. Remove five screws and lift off the air cleaner
base plate to expose the spark plug. Pull off the
cap and remove the plug.
3. The proper spark plug for this engine is NGK
BPMR7A.The firing gap between the electrodes
should be adjusted to 0.6 mm - 0.7 mm before
use.
4. Install the spark plug.Proper tightness with a
cold engine is 15 to 17 N•m (150 to 170 kgf•cm).
5. Many failed plugs can be restored by filing or
scraping the electrodes down to bare metal,
cleaning all deposits off the porcelain insulation
around the center electrode, then re-gapping.
WARNING
Fuel vapors are extremely flammable and
may cause fire and/or explosion. Never test
for ignition spark by grounding spark plug
near cylinder plug hole, otherwise serious
personal injury may result.
0.6 mm - 0.7 mm
This manual suits for next models
1
Table of contents
Other Echo Saw manuals

Echo
Echo CS-3000 TYPE 1E Mounting instructions

Echo
Echo QV-680 User manual

Echo
Echo REPOWER 90094 User manual

Echo
Echo CS-271T User manual

Echo
Echo QV-670 Instruction Manual

Echo
Echo Power Blend CSG-670 User manual

Echo
Echo CS-550 Mounting instructions

Echo
Echo CSG-7410 User manual

Echo
Echo CLS-5800 User manual

Echo
Echo CS-680 User manual