Echomaster MRC-HDDVR User manual
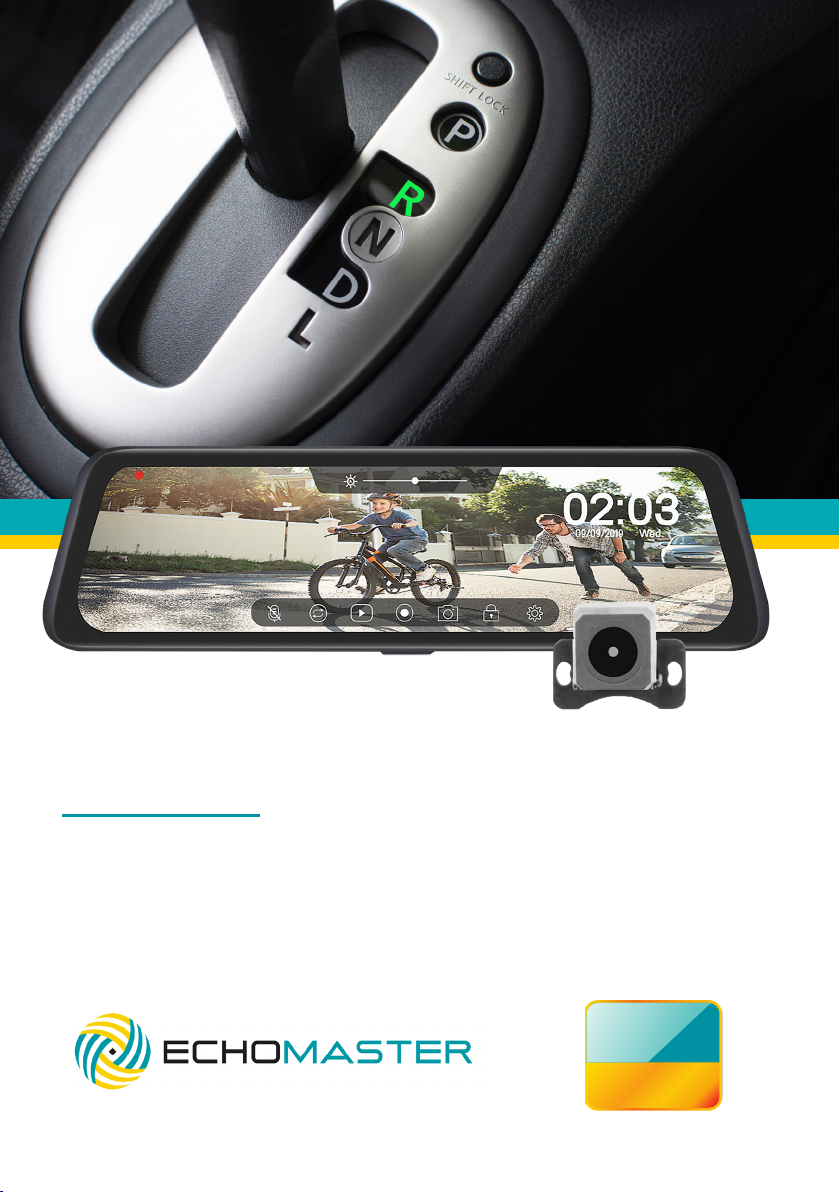
FULL SCREEN REAR VIEW MIRROR REPLACEMENT
MONITOR WITH DVR AND BACKUP CAMERA KIT
USER MANUAL
MRC-HDDVR
FHD
1080p
2 3
tel - 866-931-8021
tel - 866-931-8021
Mirror Dash Camera Rear CameraC ar Rear Window Bracket License Plate Bracket
Wrench
4X Vehicle-Specific
Monitoer Mounting
Adapters 1X Universal
Adapter
Micro Fuse Tap Adapter x2
GPS Antenna
Video Cable
Power Cable
4 5
tel - 866-931-8021
tel - 866-931-8021
Full Screen Rear View Mirror Replacement Monitor with DVR and Backup Camera Kit
INSTALLATION GUIDE
MIRROR INSTALLATION
STEP 2:
MRC-HDDVR
GETTING STARTED
STEP 1:
Installing the Memory Card
NOTE: Before removing the memory card, make sure the device is turned off.
1. Insert the memory card into the slot
2. Press the memory card until it clicks.
Removing the Memory Card
NOTE: Removing the memory card while the device is turned on can result in
a loss of data or damage to the device.
1. Turn off the device.
2. Press the card in until it clicks.
3. Release the card. The card ejects from the slot.
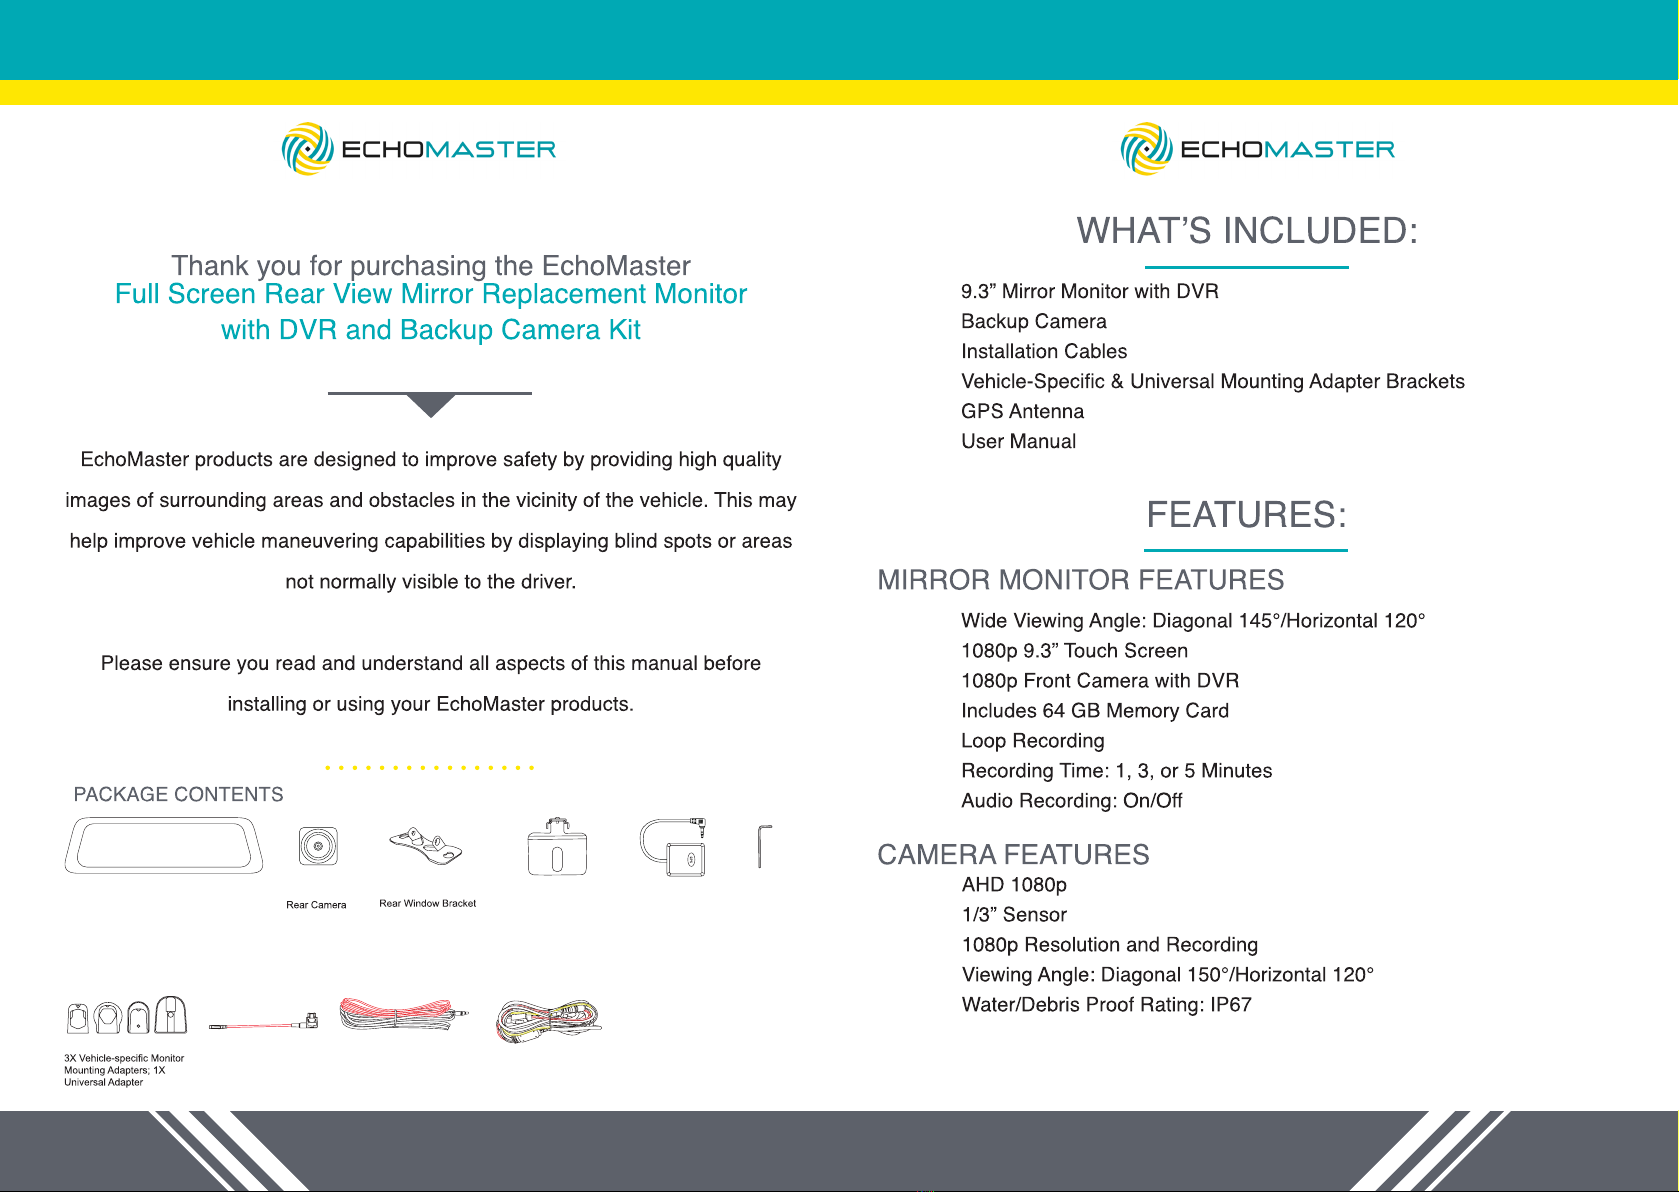
Monitor Overview
REMOVE THE ORIGINAL MIRROR
Hold the base of
the bracket
Pull out away from
the windshield to
slide bracket off
Remove rear view mirror
INSTALL YOUR NEW MIRROR
NOTE: Different cars require different brackets. DO NOT force the mirror off the
bracket. Your vehicle may require an included adapter for installation. Refer to
the bracket instructions to nd the correct bracket and adapter if applicable for
your vehicle.
Hold the base of
the bracket of your
new mirror, and nd
the correct position
Slide the bracket in,
moving towards the
windshield
Once in position,
secure with a screw
and screwdriver
Most cars like Toyota,Toyota Crown, Toyota Prado, Honda MPV, Honda CRV, Nissan,
Mazda3/5/6, Hyundai SUV, KIA SUV, Ford, New Mitsubishis and Chevrolets don't need
an adapter when installing the mirror. Please refer to the next pages to see if your vehicle
requires an adapter.
21 3

6 7
tel - 866-931-8021
tel - 866-931-8021
MIRROR ADAPTERS (IF APPLICABLE)
STEP 3:
VOLKSWAGEN / AUDI (ADAPTER 1)
(not needed with mirrors that have a protective case)
DODGE, CHRYSLER, JEEP, VOLVO (COMPACT), BMW (COMPACT)
(ADAPTER 2)
(not needed with mirrors that have a protective case)
HONDA / SUBARU (ADAPTER 3)
ADAPTER 4
In some vehicles, the EchoMaster mirror will not t in the standard bracket
in the vehicle, and none of the adapters t. In this case, glue Adapter 4 onto
the windshield using UV glue.

8 9
tel - 866-931-8021
tel - 866-931-8021
CAMERA INSTALLATION
STEP 4:
There are two locations you can install your EchoMaster backup camera. We
recommend that it is installed on your license plate, but it can also be installed
on your back windshield if needed.
1. Remove
license plate
MOUNTING THE CAMERA ON YOUR LICENSE PLATE
2. Mount the camera to the
top or bottom of your license
plate
2. Re-mount the license plate
MOUNTING THE CAMERA ON YOUR REAR WINDSHIELD
1. Remove bolts
from camera
mounting
bracket
2. Replace the
license plate
bracket with
the windshield
mount bracket
3. Clean the
window with
water or alcohol
and a lint-free
cloth
4. Remove protective lm
from the back of the mount
and press rmly to the
windshield for 30 seconds
If mounting on the bottom of your license plate, rotate the mounting bracket as
shown here:
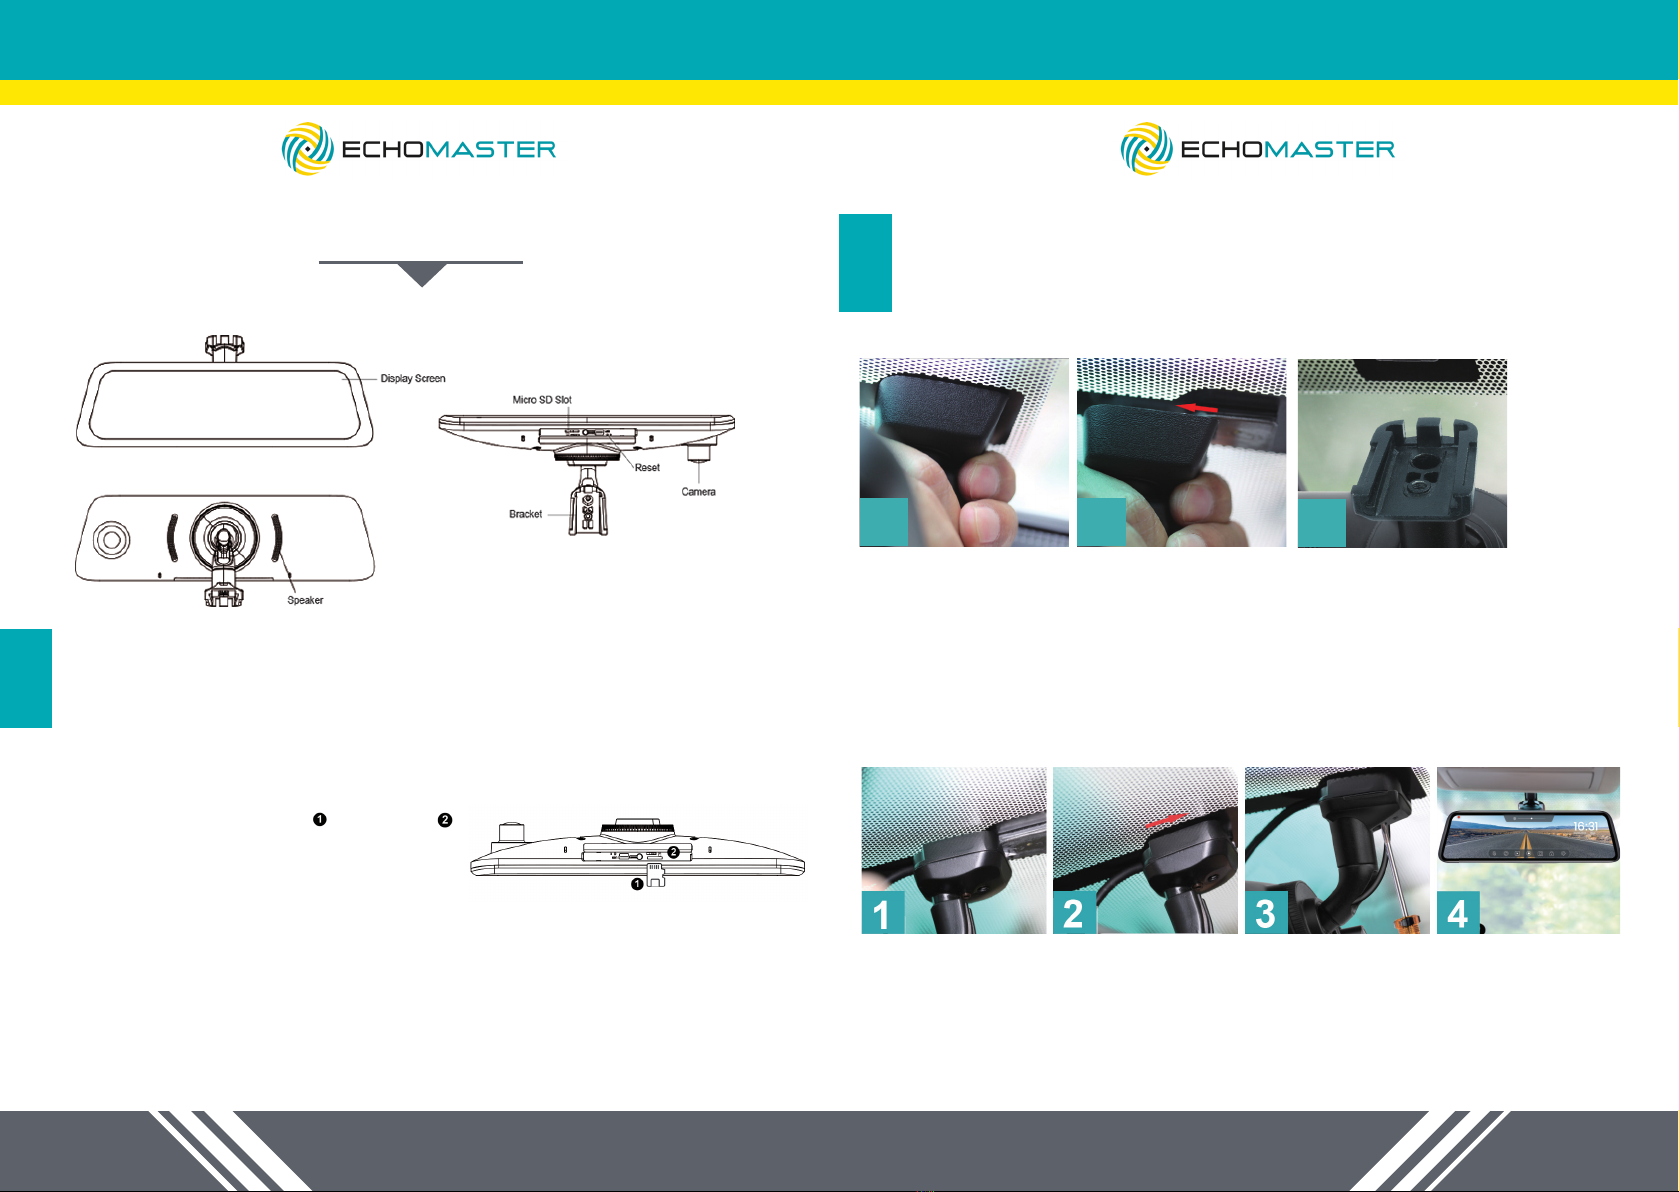
INSTALLATION WIRING
STEP 5:
NOTE:
The GPS module is mounted on the dashboard, with the front side facing
up. (The front side is the side with the word “GPS”)
1. The 9-pin connector at the mirror is connected to the 9-pin interface of
the power cable.
2. Locate the yellow wire (B+), the red wire (ACC), and the black wire
(GND) connectors in the car’s fuse box.
NOTE:
Before you start wiring in the fuse box, connect the two small fuse tap
adapters to the red line (ACC) and the yellow line (B+) respectively.
1. Open the transparent
plastic sleeve on the
fuse tap adapter
2. Insert (following the
direction of the arrow),
until the red box marks
coincide.
3. Put the long end of
the rubber sleeve into the
short side and make sure
the sleeve is tight.
10 11
tel - 866-931-8021
tel - 866-931-8021
NOTE:
The Micro add-a-circuit fuse tap adapter is included in the package.
A: Connect the yellow wire (B+) to the fuse box (Please be sure the fuse tap
adapter is connected to the other end)
This wire needs to be connected to the fuse which is a constant power
source.
How to nd it:
Using a test light, check the fuses if you can get power or not when the car is
in OFF state.
If the bulb of the car test light is on, then you have found the correct one.
B: Connect the red wire (ACC) to the fuse box. (Please be sure the fuse tap
adapter is connected to the other end )
This wire needs to be connected to the fuse which can get power when the car
in the ACC state.
Switching the key to the ACC state, then using the test light, check which
fuses get the power.
If the bulb of the test light is on, switch the car to the OFF state. If the bulb
turns off, you have found the correct one.
C: Black Wire (GND / GROUND) This wire needs to be connected to the met-
al part of the car (ground). Most cars have at least one obvious ground point
near the fuse box, please connect the ground lug to the ground point (as seen
in the photo).
3. Connect the 4 pin connector of the power cable to the video cable after
installing the rear camera. And connect the video cable of the monitor to the
camera wire.
Finally, connect the red wire to the reverse light.
MONITOR SETTINGS
STEP 6:
Turn ON/OFF the Monitor
1.Turn ON
The monitor will automatically turn on when the vehicle turns on. It is not
necessary to press the power button.
2.Turn OFF
The monitor will turn off when the engine shuts off .
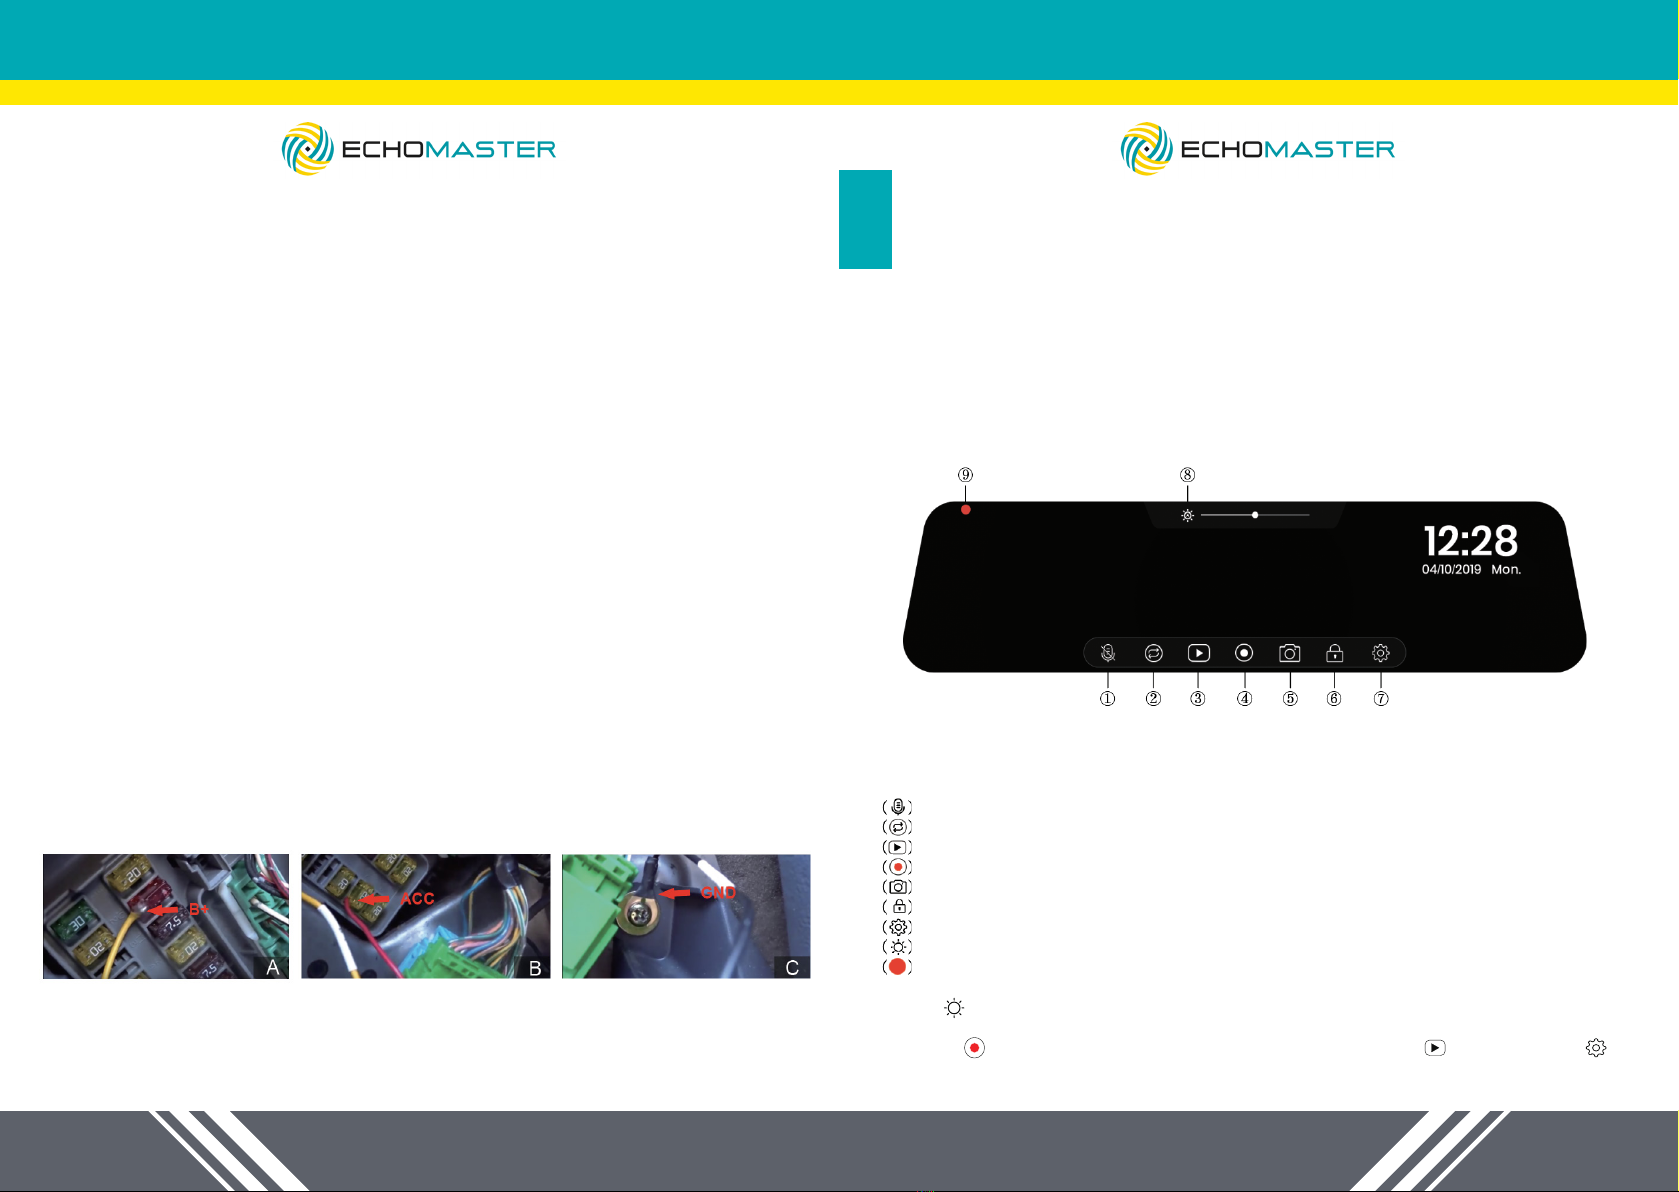
To operate the mirror dash cam, simply touch the screen with your ngertips, using the
icons below to access the functions and settings.
1. Mute: Mute or unmute the current recording
2. Switch Views: Switch between display views (Front or Rear; Front & Rear)
3. Playback: Playback videos and photos
4. Start/Pause: Start or pause recording manually
5. Shutter: Take pictures
6. Emergency Record: Start emergency recording manually
7. Settings: Open system settings
8. Screen Dimmer: Manually or automatically dim or increase the screen brightness
9. Recording Indicator: Red/yellow indicates loop recording or emergency recording
1. Tap ( ) to be able to adjust screen light manually or automatically. Slide the dot on
the lightness bar to dim or brighten the screen.
2. Pause ( ) current recording to enter into “Playback mode ( )” or “Settings ( )”.

12 13
tel - 866-931-8021
tel - 866-931-8021
Beep
Volume
Turn on or off the keytone
Turn off speaker or set a desired volume for speaker
On / Off
Off / High / Middle / Low
Clock Settings Set date and time Time; Date & Year ;
Date Format Set a desired date format
YYYY MM DD
/
MM DD YYYY
/
DD MM YYYY
Time Format Set a desired time format 12 hours / 24 hours
Protect Level Set the desired sensitivity level for detection of a collision Off / High / Middle / Low
Language Set the on-screen display menu language Multilanguage, English(default)
Speed Unit Set the desired speed unit km / h; mph
LCD Power Save Set the desired duration for backlight, always "Off" or
shutdown within a specific time Off / 1 Minute / 3 Minutes
Automatic Rear View On / Off
Once this mode is activated, the device will automatically
switch over to rear view within 30 sec.
GPS Time Sync Receive actual time from the satellite and then automatically
adjust the time on the device On / Off
Menu Options Description Available Options
------Time Zone Select an appropriate time zone manually
------FW Version Firmware Version
Yes / No
Format SD-Card Format a memory card(All data will be erased)
Restore all settings to the factory default values Yes / No
Reset Setup
14 15
tel - 866-931-8021
tel - 866-931-8021
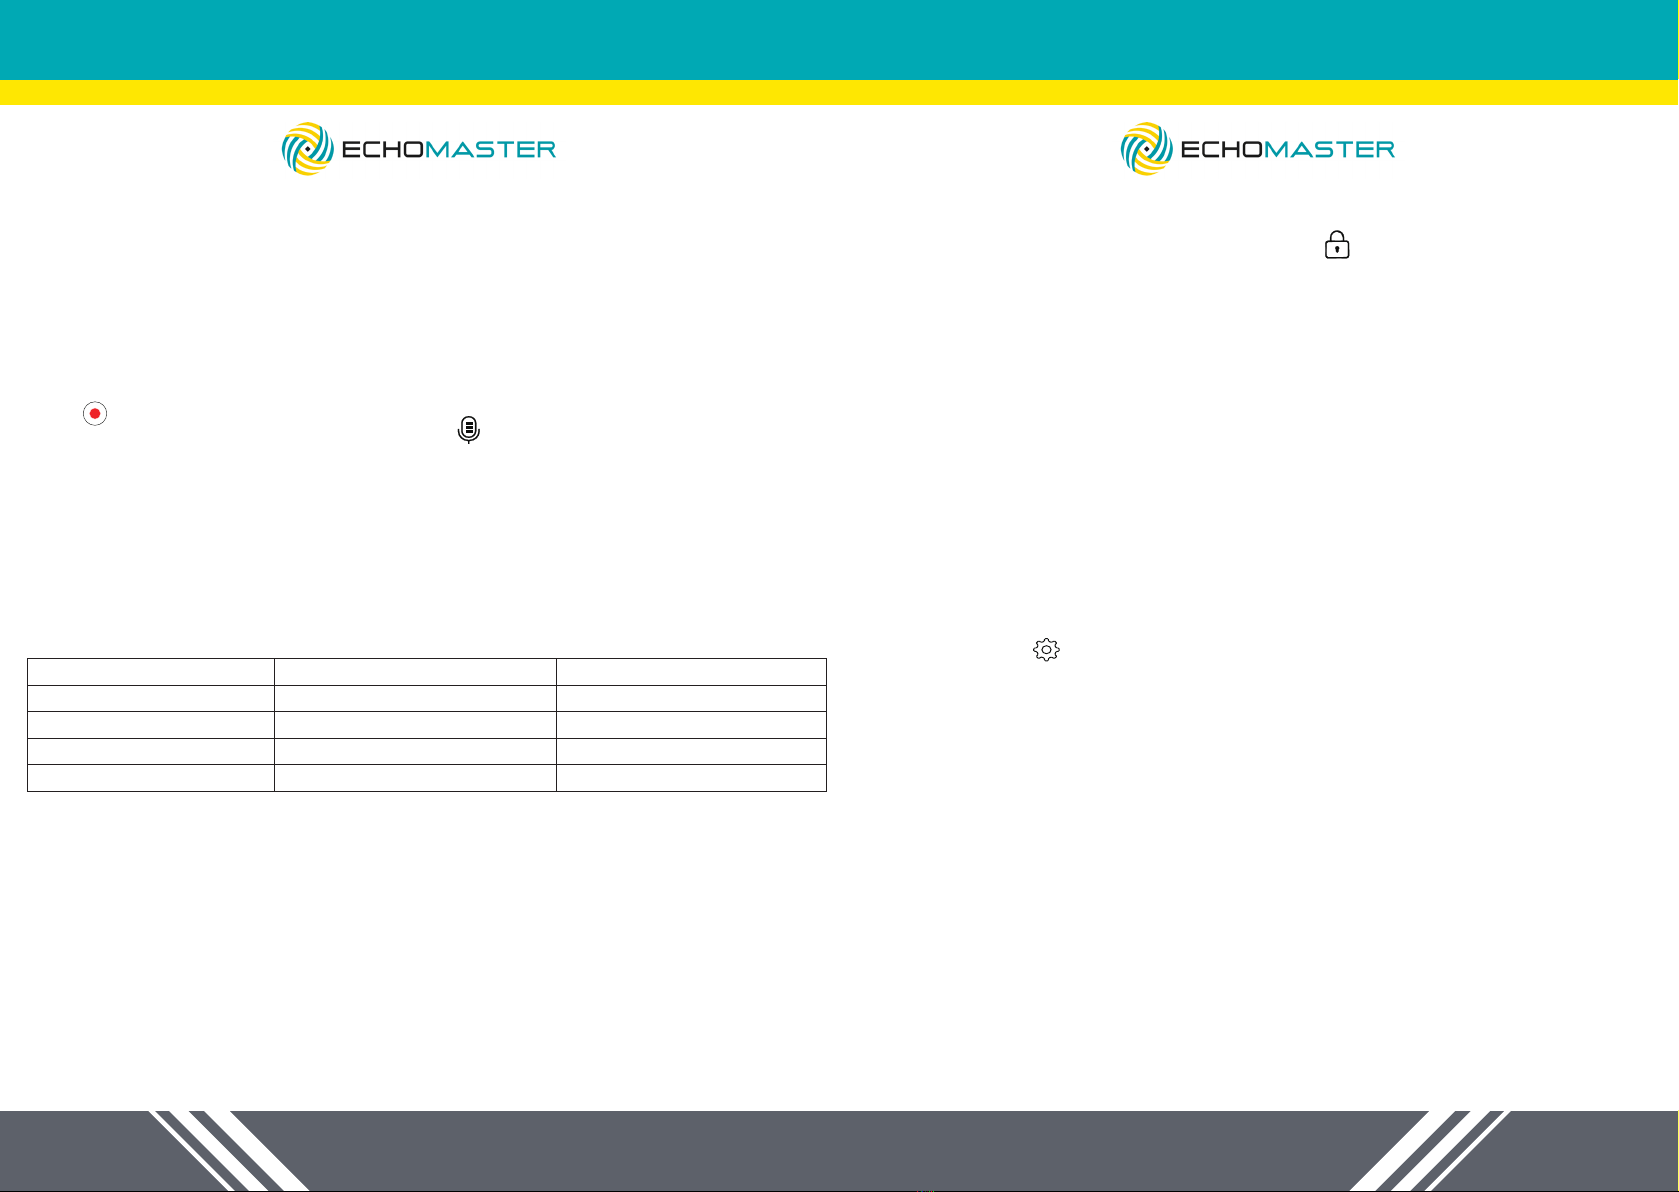
Manual Emergency Recording
To activate manual emergency recording, tap ( ), the current recording will be
locked as emergency recording and cannot be overwritten by loop recording.
NOTE:
• The collision sensing function can be adjusted in the “Protect Level” option
under the settings.
• Emergency recording video les are saved in memory card: \Event\F\R
folder.
• Emergency recording video les have the same time frame as loop video
les.
Parking Monitoring
This feature is meant to provide video proof for a collision that occurs when your
vehicle is parked and unattended. When an impact is detected, the mirror dash
cam turns on automatically and records a 30-second video (Front and Rear
cameras start recording simultaneously). These videos will remain protected on
the memory card and will not be overwritten by new recordings.
Parking monitoring function is disabled by default. You can enable the function
by selecting ( ) Movie Mode > Parking Monitoring
When parking monitoring detection is enabled, the system will enter parking
monitoring once the vehicle engine is stopped.
NOTE:
1. Parking recording les are saved in memory card: \Event\F\R folder.
2. This function requires constant power supply, and the monitor has been
connected to constant power supply so you don’t need to hardwire it.
3. In Parking Monitor Mode, the power cord is equipped with low power
protection. When the battery voltage is lower than 11.8v, the power supply
will stop automatically.
GPS Tracking System
GPS tracking system will automatically capture the speed, location and
coordinates of your car when the car starts.
Loop Recording
Insert a memory card into the card slot, and automatic loop recording will begin
after the vehicle turns on. The loop recording will be divided into several video
clips; the recording will not stop between video clips.
When there is insufcient space on the memory card, loop recording will
automatically overwrite the old les one by one.
When loop recording is in progress, you can manually stop recording by tapping
( )
To enable/disable the audio recording, tap ( )
Time frame for each video le can be 1/3/5 minutes.
NOTE: Loop Recording les are saved in memory card: \Normal\F\R folder.
Approximate recording time
This dash cam requires microSD™ or microSDHC memory card with the FAT32
system le type and requires a card speed rating of 10 or higher.
Approximate recording time (Dual-channel Front+Rear)
12
Memory Card Size
8GB
16GB
32GB
64GB
1.5H
3H
7H
14H
1H
2H
4H
9H
720P 30fps+1080P 25fps 1080P 30fps+1080P 25fps
Default setting 1080P/30fps(front) + 1080P/25fps (rear)
NOTE: If the dash cam cannot recognize your memory card, it may be caused by
an unrecognizable system le type, therefore please format the memory card rst.
Automatic Emergency Recording
During an accident, the internal G-sensor will detect the crash and activate
emergency recording. The current recording will be locked automatically to avoid
being overwritten by loop recording.
16 17
tel - 866-931-8021
tel - 866-931-8021
Automatic Date and Time
1. Tap ( )> ( ) > General Settings > Time Zone
2. Select the appropriate time zone, then press “Yes” to conrm or press “No” to
cancel the current selection
3. Go back to>General Settings>GPS Time Sync, click the button on the GPS
Time Sync bar to active auto time adjustment
NOTE: Install the GPS antenna correctly on the dashboard according to the
instructions and connect it to the dash cam for proper functionality
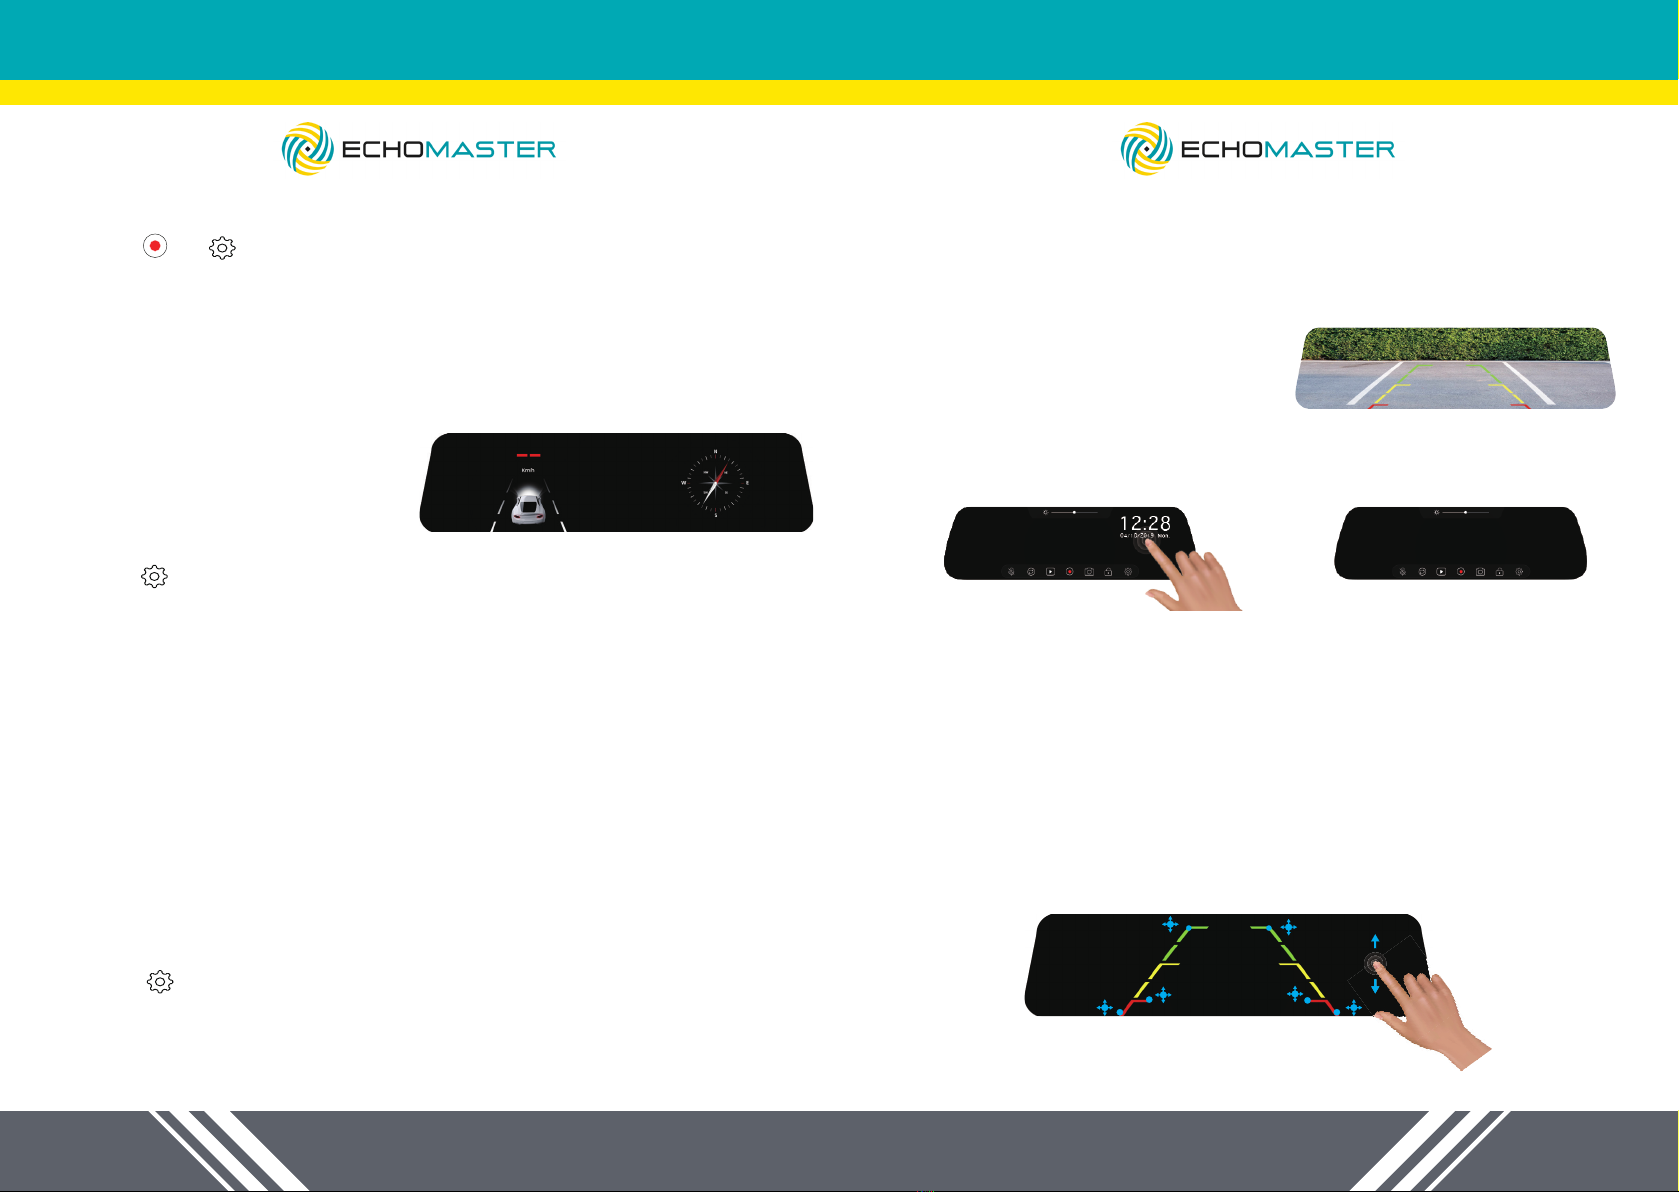
Driving Mode
In driving mode, you can view your
current speed and direction
1. Tap ( )> Movie Mode > Driving Mode
2. Activate or deactivate driving mode
Driving mode will automatically appear on the screen within 30 seconds after
the dash cam starts.
To display driving mode, press the screen and hold for 2 seconds while
recording is in progress.
Reversing Mode
Parking Assist Grid Lines Show up Automatically
Make sure that you have the trigger line (red thin wire) on the video cable
connected with the positive (+) of reverse light. When you place the vehicle
in reverse, those parking assist lines are displayed on the monitor to help you
estimate your distance from obstacles.
To turn off park assist lines:
1. Tap ( )> Movie Mode > Grid Lines Switch
2. Turn on or off parking assist grid lines
Manually Display Park Assist Grid Lines
The park assist grid lines can be shown on the screen manually. Just slide your
nger on the screen to the right before putting your vehicle in reverse. It will
display the rear view with park assist lines over the image. This allows you to
view the park assist lines without connecting the rear camera to your reverse
light.
Please refer to the following diagrams:
1. Slide the screen to the right.
2. Rear view with grid lines shown on the screen.
3. Slide the screen to the right again to end the reversing mode.
NOTE: Please slide your nger below the Brightness Adjustment Section on the
screen.
Parking Grid Lines Adjustment
1. Tap point 1/3 and hold it, move the grid lines to desired position.
2. Tap point 2 and hold it, move it right or left to extend or shorten the grid lines
length horizontally. Move it up or down to adjust the distance between red,
yellow, and green colors.
NOTE:
Move up or down in non-grid lines area to adjust reversing view angle.
11
11
3333
2222
18 19
tel - 866-931-8021
tel - 866-931-8021
Taking a Photo
1. Tap ( )> ( ) > General Settings > Time Zone
2. Select the desired type: Normal (Loop recording) /Emergency video
(Emergency recording) /Photo.
3. Tap the desired le to playback.
4. During playback, you can:
(1) While playing videos, tap to play the previous/next video; tap
to play/pause the video; hold on a point along the track bar to move
directly to a different location for the playback.
(2) While viewing photos, tap to display the previous/next photo.
(3) Tap ( ) / ( ) to lock/unlock the current le.
Installing the Playback Software
For Windows users, you can nd the download link for the playback software
“EchoMaster GPS Player” on the memory card.
1. Insert your memory card into the initiated mirror dash cam.
2. Take the memory card out after completing the “Memory Card Initialization”.
3. Find the download link called “autoplayerlitev1.1” in your memory card and
open it.
4. Follow the on-screen prompts to install the playback software on your
computer.
For Mac users, please nd the software “EchoMaster GPS Player” in the App
Store on your Mac OS computer. Download and follow the on-screen prompts
to install it on your computer.
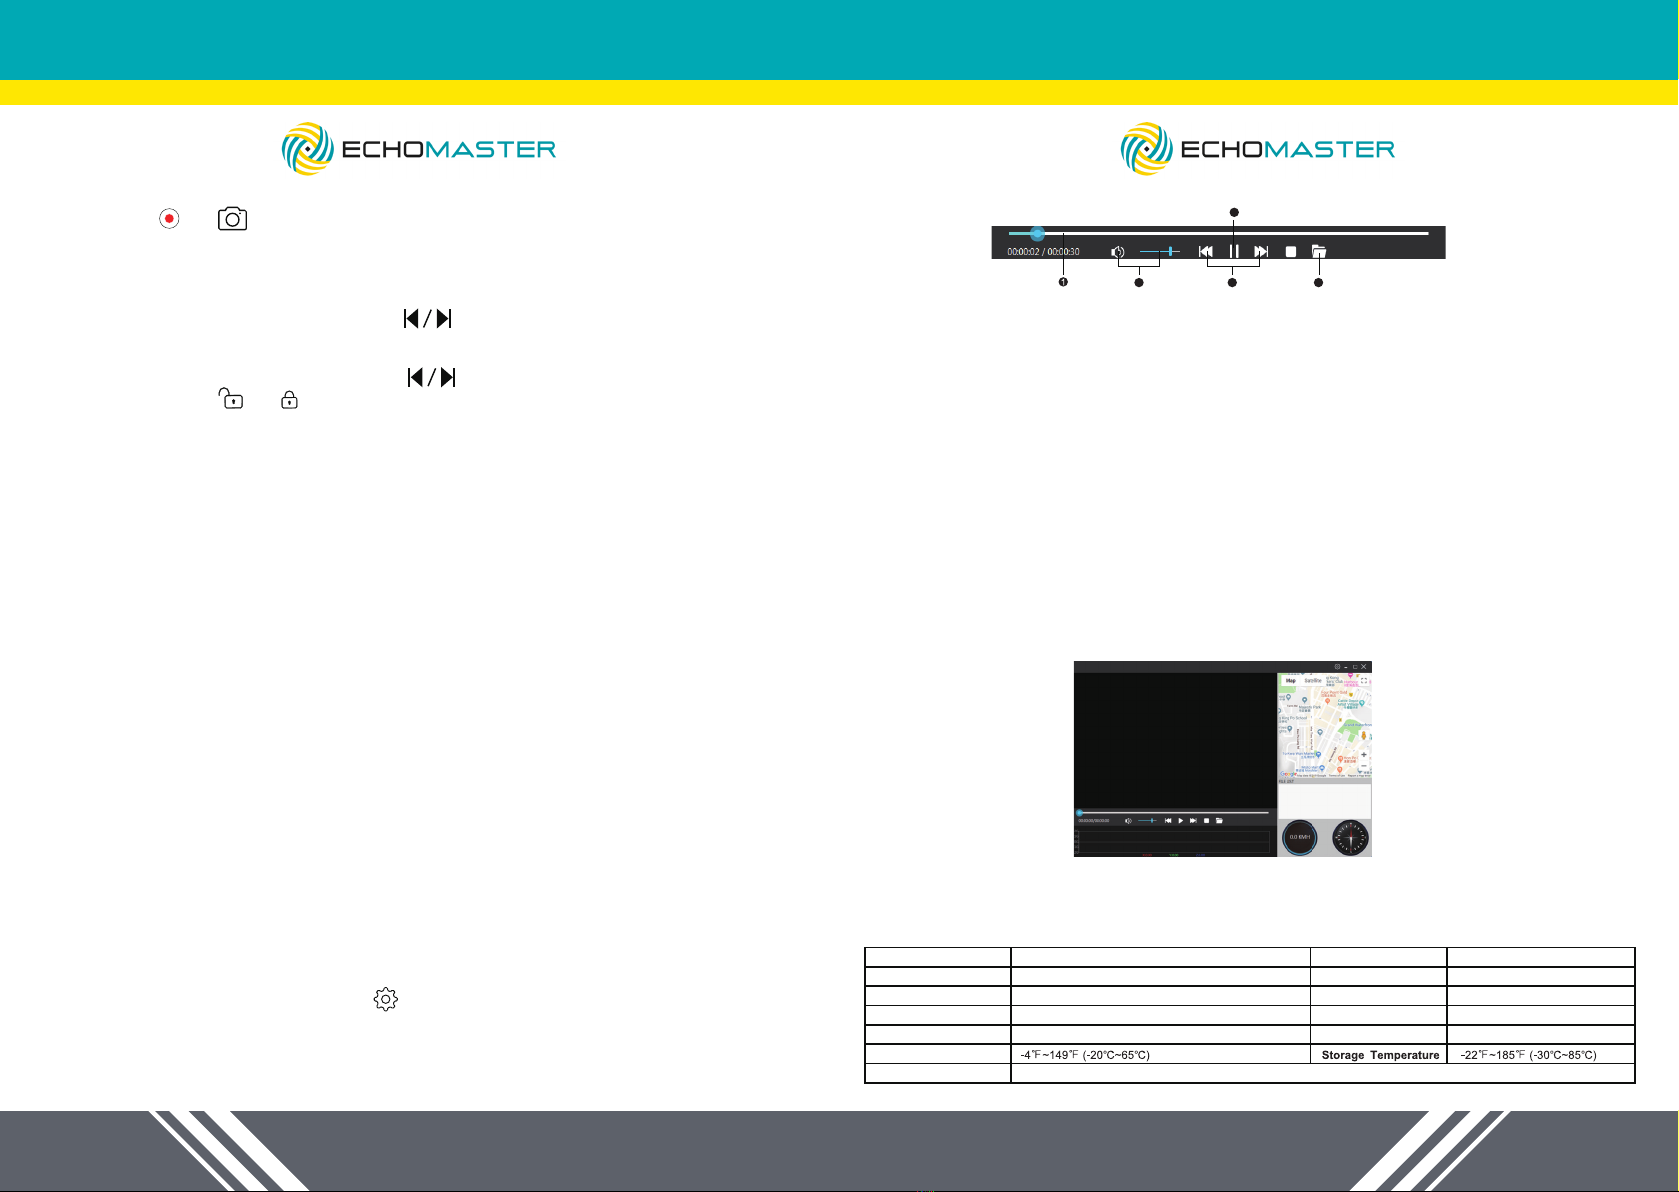
Playing the Recording Files
1. Remove the memory card from the dash cam and access the card on the
computer via a card reader.
2. By default, EchoMaster GPS Player shows the Map and the FILE LIST on
the right, meanwhile you can check the speed and direction at the bottom right.
3. Find the download link called “autoplayerlitev1.1” in your memory card and
open it.
4. Follow the on-screen prompts to install the playback software on your
computer.
5. During playback, you can view more driving information from the dashboard
panel and G-sensor chart that are displayed below the video playback screen.
On the dashboard panel, click ( ) to display the Settings Menu.
The G-sensor chart displays data in 3-axis waveform about the car’s shift
forward/backward (X), to the right/left (Y) and up/down (Z).
NOTE: The map screen may not display when the computer is not connected to
the internet or when your dash cam does not support the GPS function.
2 3 5
4
Playback Controls
Camera Field of View
Front Camera
Display Screen
Car Charger
G-Sensor
Storage
Working Temperature
Rear Camera
Sound Video
Image
GPS
Front: FOV 145°(diagonal), Rear: FOV 145°(diagonal)
1080P 30fps/720P 30fps
Built-in microphone/speaker
Input: 12-24V; Output: 5V
Built-in three-axis accelerometer
8-64GB MicroSD (FAT 32) card Class 10 and above required
AHD (1080P) 25fps
9.35 inch, resolution 1280*320
H.264 encoding (MOV)
JPEG
Support
Specs
The playback controls are as follows:
1. Display the playback progress
You can click on a point along the track bar to move directly to a different
location for the playback
2. Mute or unmute the volume
3. Skip to the previous/next le on the list
4. Start or pause the playback
5. Select the folder that stores the recording les
The Settings Menu:
1. Change Language: Set the display language
2. Speed Unit: Set speed unit
3. Maps: Set a map
4. Information: Display the version and copyright information

20 21
tel - 866-931-8021
tel - 866-931-8021
• Please format memory card regularly.
• Replace with a new memory card (class 10 or higher).
• If the solutions mentioned above do not help, please reset the dash cam.
TROUBLE SHOOTING
Crash Issue
Blank Screen
• Reset or restore default settings.
Unable to turn on/off automatically
• Reset or restore default settings.
GPS date / time are incorrect
• Choose the correct time zone manually when using it in the rst time.
Video recording / photography unavailable
• Check if memory card inserted or not.
• Low memory card class, please insert a larger / higher quality memory card
(class10, etc.).
• If the solutions mentioned above do not help, the memory card may be broken, please
replace a new one.
Card full or card error
• Format the memory card regularly.
• Broken card/low card class/incompatible memory card. We suggest you
replace the memory card.
• Reset or restore the dash cam.
Phone – 866-931-8021
EchoMaster is a Power Brand of AAMP Global
EchoMaster.com

Phone – 866-931-8021
EchoMaster is a Power Brand of AAMP Global
EchoMaster.com
Table of contents
Other Echomaster Automobile Accessories manuals

Echomaster
Echomaster FCTP-GM1903 User manual

Echomaster
Echomaster MM-70-UNI User manual

Echomaster
Echomaster PMM-7333-PL User manual

Echomaster
Echomaster TD-AUDIQ73G User manual

Echomaster
Echomaster PMON-43 User manual

Echomaster
Echomaster FC-TOYO User manual

Echomaster
Echomaster CL-FTC User manual

Echomaster
Echomaster MM-4320-BT User manual

Echomaster
Echomaster MRC-LP01CP User manual


