Ecomatik DD-S2 User manual

Dendrometer
Muenchner Str. 23
D-85221 Dachau/Germany
Tel.: +49 8131 260 738
Fax: +49 8131 260 736
website: www.ecomatik.de
Diameter Dendrometer
Type DD-S2
For measuring changes in diameter of plants
User Manual
Version 2019

Diameter Dendrometer Small - Type DD-S2
1
1. Introduction
Thank you for purchasing an Ecomatik Dendrometer type DD-S2. This is a highly precise
sensor for continuous measurements of diameter changes of small plants under both in-
door and outdoor conditions. The DD-S2 is designed for a fast and toolless installation.
This manual is written to help you install and operate your DD-S2 dendrometer with least
difficulty and for desirable results. Please read it carefully before installing the sensor, and
refer to it if you should have any difficulty with the sensor in the future.
The dendrometer is the sensor part of a measuring system. This means that the den-
drometer should be connected to a data logger for continuous data recording. The den-
drometer is compatible with the most data logger types. At Ecomatik a low-cost, special
for dendrometers developed DL18 logger is available
2. Product Description
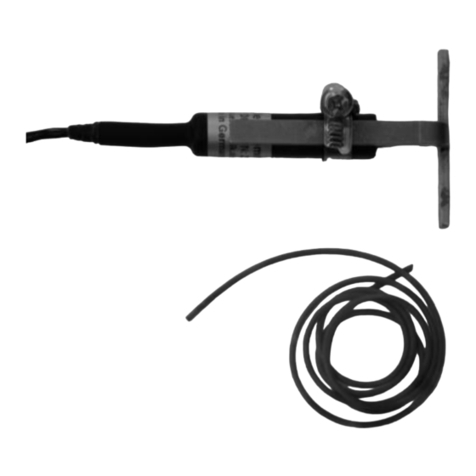
As shown below, the DD-S2 dendrometer consists of:
1x Sensor body with two knurled-head nuts to lock quick-mount frames, standard sensor
cable length 5 m (extendable to 100 m)
2x Quick-mount frame for two different diameter ranges, 0 to 2.2 cm or 1.8 to 5 cm
2x Pieces UV-resistant perforated rubber belt to fix dendrometer at the stem/branch
4x Pieces UV-resistant rubber band (3x 20 cm, 1x 50cm, reusable) to fix the sensor cable
at the branch/stem for strain relief.
DD-S2 Dendrometer
Please contact us should you miss anything of these items.
The standard cable length is 5 m. if you ordered cable extension, the cable length is the
ordered extension + 5 m.
To meet the requirements of different loggers, there are 2 different types of cables: cable
with plug and cable without plug. Cable with plug can only be connected to Dendrome-
ter Logger DL18. Cable without plug can be connected to other loggers.

Diameter Dendrometer Small - Type DD-S2
2
3. Safety Information
The sensor is protected from rain water, but it is not waterproof. Please do not immerse
the sensor in water, or install the sensor below a longer lasting snow cover.
Avoid any tension between the cable and sensor during handling and operation.
Pay attention to connections to data logger. Wrong connections will provide wrong read-
ings.
4. Installation
4.1 Cable Extension
The standard version is delivered with 5 m cable. It can be extended up to 100 m. Cable
type 4×0.25 mm2with shield is recommended for extensions.
4.2 Required tools for installation and for operation
- none -
4.3 Mounting
4.3.1 Select the adequate quick-mount frame size, 0 to 2.2 cm or 1.8 to 5 cm, according to
the stem/branch diameter.
4.3.2 Attach one end of each of the two perforated rubber belts to the fixation bolts at the
back-side bar of the quick-mount frame.
4.3.3 Firmly fix the frame at the stem/branch, by tightly wrapping the rubber belts around
the stem/branch and locking them again by slipping the desired hole of each belt on
the corresponding bolt at the back-side bar.
4.3.4 Unscrew and remove the two knurled-head nuts from the dendrometer body, then
insert the screws into the slide rail of the frame and loosely screw on the knurled-
head nuts again.
4.3.5 Move the dendrometer body along the sliding rail, so that the sensor rod is pushed
in by about 2-3 mm, then lock the dendrometer at the desired position by firmly
tightening the two knurled-head nuts. When the installation is taking place shortly
before frost period, the sensor rod should be pushed in by 5 mm. At frosts the stem
diameter can shrink considerably.
4.3.6 !! IMPORTANT !! Fix the cable onto the tree stem/branch so that the sensor is pro-
tected from any accidental pull/ drag of the entire cable length. This can be done us-
ing a rope or cable straps. In addition, there should be no tension between the sen-
sor and cable.
Ensure that no rain water can run along the cable, or the sensor rod and enter the
sensor casing. Rod entrance, as well as wire outlet should hence always be inclined
downwards.

Diameter Dendrometer Small - Type DD-S2
3
5. Wiring and Logger Configuration
The dendrometer is compatible with most data loggers. In the following we exemplify the
connection with Dendrometer Logger (DL18) and Campbell Logger (CR1000). Please
contact us if your logger is not described here, or if you should need further assistance.
Dendrometer Data Logger (DL18)
The DL18 is a battery powered, waterproof logger for connecting 4 dendrometers. It is a
very effective data logger for dendrometer measurement under outdoor conditions. For
details please see the user manual of the DL18.
Campbell Data Logger (CR1000)
The dendrometer can be measured both in single-ended voltage as well as differential
voltage mode. Differential voltage mode provides better accuracy. But single-ended mode
requires half as many channels as differential mode. One CR1000 can include 16 den-
drometers in single-ended mode, but only 8 dendrometers in differential mode.
Single-ended Voltage Mode ( 2 dendrometers)
Connection
Cable Color
Input Port
1st dendrometer
Yellow
1H
Green
Ground
Brown
Vx1
White
Ground
2nd dendrometer
Yellow
1L
Green
Ground
Brown
Vx1
White
Ground
Program Syntax
ExciteV (Vx1,2500,0)
VoltSe(SEVolt(),2,mV2500,1,True,0,_50Hz,Mult(),Offs())
If Multiplier=4.4, Offset=0, the results are measured in microns.
Differential Voltage Mode ( 2 dendrometers)
Connection
Cable Color
Input Port
1st dendrometer
Yellow
1H
Green
1L
Brown
Vx1
White
Ground
2nd dendrometer
Yellow
2H
Green
2L
Brown
Vx1
White
Ground
Program Syntax
ExciteV (Vx1,2500,0)
VoltDiff(DiffVolt(),2,mV2500,1,True,0,_50Hz,Mult(),Offs())
If Multiplier=4.4, Offset=0, the results are measured in microns.
An interval 0.5-hour for data collection can reveal the diurnal course of diameter changes
very well.

Diameter Dendrometer Small - Type DD-S2
4
6. Adjustment and maintenance
Ensure that no falling branches, fruits or snow land on the sensor. The sensor is protected
against water droplets but is not waterproof.
When the sensor is correctly installed, it will function under outdoor conditions without the
need for further maintenance.
Depending on the growth rate of the plant, the sensor should be reset after some months
or years of measurements. When the output approaches 11 mm, the sensor needs to be
reset.
To do so, relax the knurled-head screws and move the sensor body slowly along the slide
rail, until the sensor rod is pushed out completely. Then slowly move the dendrometer
body along the sliding rail in the opposite direction, until the sensor rod is pushed in again
by about 2-3 mm and lock the dendrometer at the desired position by firmly tightening the
two knurled-head nuts. When the installation is taking place shortly before frost period, the
sensor rod should be pushed in by 5 mm. At frosts the stem diameter can shrink consid-
erably.
7. Technical Specifications
Name of the Sensor
Diameter dendrometer small
Type DD-S2, fast mounting frame for toolless installation
Use area
For measuring diameter growth of plants
Suitable for plant
size
Diameter 0-5 cm (>5 cm on request)
Suitable for small plants such as trees, wheat, corn.
Range of the senor
11 mm
Resolution
The resolution of the sensor itself is infinite. The resolution of
readings is determined by connected data logger, e.g.:
CR1000 (differential w/i): 1.5 µm
Dendrometer logger DL18: 0.2 µm
Accuracy
Dendrometer dependent:
Max. ±4.5% of reading (stable offset)
Logger dependent, e.g.:
CR1000: ± (0.04% of reading +4.4 µm)
Dendrometer logger DL18: ±0.1%
Temperature coeffi-
cient of the sensor
<0.2 µm / °C in the whole range
Linearity
<1%
Environment
Outdoor condition: -25 to 70C air temperature, 0 to 100%
relative air humidity
Weight of the sensor
15 g without cable
Power supply
Stabilized Vex of 0.5 –10 VDC, power consumption practi-
cally zero
Material
Stainless steel and Aluminium
Cable length
5 m, extendable up to 100 m
Table of contents
Other Ecomatik Measuring Instrument manuals
Popular Measuring Instrument manuals by other brands
AquaLab
AquaLab Pawkit quick start guide

Dream Catcher
Dream Catcher ME3100 quick start guide

Electronics International Inc
Electronics International Inc M-1 Operating and installation instructions
FARM SCAN
FARM SCAN Jackal v2 manual
KEPCO
KEPCO BATCHtrol II Installing & operating manual
Prostat
Prostat PAR-809C user manual
