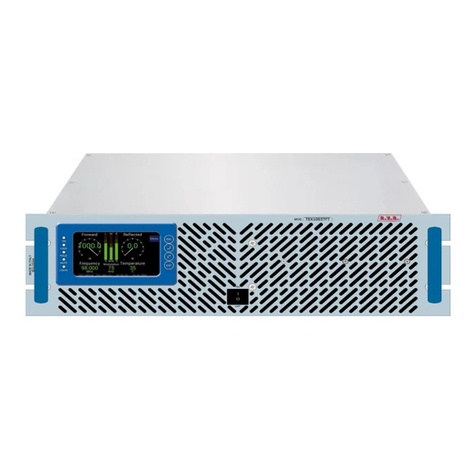
Eddystone S7605 Owner's manual

Print Date 12/05/15 Page 1 of 32 S7600-00MA-08
Eddystone Broadcast
----
S7600 Series
S76005 – S7601 – S7602
500W – 1kW – 2kW
Low Power
FM Transmitters
----
Installation
and
Operation
----
Issue 8
S7600-00MA-08
May 2015
----
Eddystone Broadcast Ltd.
26, Arden Rd.
Arden Forest Industrial Estate
Alcester, Warwickshire
B49 6EP, England
Tel. 44 (0)1789 762278
Fax. 44 (0)1789 766033
www.eddystone-broadcast.com

Print Date 12/05/15 Page 2 of 32 S7600-00MA-08
Intentional blank page

Print Date 12/05/15 Page 3 of 32 S7600-00MA-08
Index
SECTION ONE : INTRODUCTION
1.1 : GENERAL DESCRIPTION………………………………………………………………… Page 5
1.1.1 E2021 300W Amplifier Module……………….……………………………………………
Page 5
1.1.2 E2088/E2322 Power Supply Module…………………………………………………..…. Page 6
1.1.3 E2023 Transmitter Controller Unit……………………………..…………………………. Page 6
1.1.4 E2024 Splitter/Drive Changeover Unit………………...……………………..……………Page 7
1.1.5 E2025 Combiner Unit………………………………………………………………...…….. Page 7
1.2 : VARIANTS AND OPTIONS…………………………………………………………………Page 8
1.3 : TECHNICAL SPECIFICATIONS…………………………………………………………… Page 9
SECTION TWO : INSTALLATION
2.1 : PHYSICAL DIMENSIONS AND FITTING………………………………………………… Page 11
2.1.1 Installation Items …………………………………………………………………………….Page 11
2.1.2 Rack Mounting………………………………………………………………………………. Page 12
2.2 : EXTERNAL CONECTIONS……………………………………………………………….. Page 13
2.2.1 Mains Supply Connectors………………………………………………………………….. Page 13
2.2.2 RF Output Antenna Connector……………………………………………………………..Page 14
2.2.3 RF Input Exciter/Drive(s) Connectors…………………………………………………….. Page 14
2.2.4 Safety Interlock Connector………………………………………………………………….Page 14
2.2.5 RF Output Monitor Connector……………………………………………………………... Page 14
2.2.6 Drive A/B Monitor and Control Connectors ………………..……………………………. Page 14
2.2.7 Parallel (standard) or RS232 Serial Remote Control DTE Connector………………... Page 15
2.2.8 Second Transmitter Remote Control Connector………………………………...…...…. Page 16
2.2.9 Mains Supply Output Connectors…………………………………………………………. Page 16
2.2.10 RS232 Serial Control and Monitor (COM) Connector ………..………….…………….Page 17
2.2.11 TCP/IP Control and Monitor Connector (/T option only)……………………...………..Page 17
2.2.12 FWD/REV Output (Analogue Monitor) Connectors……………………………………. Page 17
2.3 : SETTING UP PROCEDURES…………………………………………………………….. Page 18
2.3.1 Fuses…………………………………………………………………………………………. Page 18
2.3.2 Output Power Level and Frequency Adjustment………………………………………… Page 19
2.3.3 Reverse Power Trip Level Adjustment…………………………………………………….Page 20
2.3.4 Serial Remote Control Baud Rate Setting ……………………………….……………….Page 21
2.4 : SERIAL REMOTE CONTROL AND MONITORING…………………….………………..Page 22
2.4.1 Introduction……………………………………………………………………….…………. Page 22
2.4.2 Control Commands and Status Monitor Requests……………………………………… Page 22
2.4.3 Reverted Status Monitor Information………………………………………………………Page 24
SECTION THREE : OPERATION
3.1 : CONTROLS AND DISPLAYS…………………..…………………………………..……… Page 27
3.1.1 E2021 Amplifier Module……………………………………………………………………. Page 27
3.1.2 E2088 Power Supply Module………….…………………..…………………………….. Page 27
3.1.3 E2322 Power Supply Module………………………………………………………….. Page 27
3.1.4 E2023 Transmitter Controller Unit……………………………………………….……….. Page 28
3.1.5 E2024 Splitter/Drive Changeover Unit…………………...………..………………………Page 29
3.1.6 E2025 Combiner Unit………………………………………………………………...…….. Page 29
3.1.7 Supply Disconnector…………………..…………………………………………………….Page 29

Print Date 12/05/15 Page 4 of 32 S7600-00MA-08
3.2 : MANUAL CONTROL……………………………………………………………………….. Page 30
3.3 : MANUAL MONITORING…………………………………………………………………... Page 30
3.4 : AUTOMATIC CONTROL………………………………………………………………….. Page 31
3.4.1 Exciter/Drive Control and Monitoring…………………………………………………….. Page 31
3.4.2 Muting and Reduced Power Operation…………………………………………………… Page 31
Bound at Rear
S76005-01 500W Front and Rear Panel Views………………………..……….……. S7600-04GA
S76005-02 500W Front and Rear Panel Views………………………..……….……. S7600-03GA
S7601 1kW Front and Rear Panel Views…………………………………………..…. S7600-01GA
S7602 2kW Front and Rear Panel Views…………………………………………..…. S7600-02GA
Block Diagram……………………………………………………………………………. S7600-00BK
Interconnections Circuit Diagram…………………………………………………….… S7600-00CT

Print Date 12/05/15 Page 5 of 32 S7600-00MA-08
SECTION ONE : INTRODUCTION
! CAUTION !
These Transmitters operate at high RF power levels, internal supply energy levels and mains
supply current levels. They also incorporate devices containing toxic BeO. Installation, operation
and maintenance of this unit must therefore, only be carried out by suitably qualified personnel,
familiar with and fully utilising the safety procedures such equipment demands.
NO attempt at installation should be made without full reference to and compliance with SECTION
TWO : INSTALLATION.
NO attempt at internal maintenance should be made without full reference to and compliance with the
appropriate sections (apart from fuse changing which is detailed in INSTALLATION).
1.1 : GENERAL DESCRIPTION
The S7600 Series of Low Power FM Transmitters provide output powers of up to and including 2kW
(used singly) or 4kW (using combined pairs) in the standard Band ll frequency range of 87.5-108MHz.
They are normally supplied with either one or two Exciters, capable of generating a standard mono or
stereo FM signal from a variety of analogue or digital audio or data sources (including left/right audio,
MPX, RDS, SCA, DARC etc.). It is important to note that the Exciter(s) supplied will depend on the
user’s actual requirements in this regard which, therefore, must be clearly specified at time of ordering.
The Transmitters are totally self-contained (including forced air-cooling) and can be mounted as a
complete unit (less Exciters) within a standard 19 inch rack with at least 600mm depth and 12U height
(up to 1kW) or 14U (up to 2kW). Pairs (including drives) can be accommodated in racks of 42U height.
All that is required is a connection to a mains supply, to an antenna and to the Exciter/Drive(s). When
used in pairs, to generate up to 4kW, an additional two-way splitter, combiner and approximately 1kW
balance load is also required. In this situation, additional manual ‘patching’ or manual/automatic
switching can be provided, as an option, to direct all of one Transmitter’s power to the antenna.
The key feature of The S7600 series is its ability to remain ‘on-air’. The use of multiple Amplifier and
Power Supplies Modules and dual power supply and control circuitry means that if failures do occur, it
normally only results in a reduction of output power. Furthermore, the lightweight, hot-pluggable
Amplifier and Power Supply Modules can be easily replaced, in seconds, without having to go ‘off-air’.
Provision for dual Exciter/Drive automatic changeover and for connection to a second active/passive
reserve S76XX or S79XX (i.e. 500W to 10kW) Transmitter is also made, further enhancing the ability
to remain ‘on-air’.
Each Transmitter consists of a number of modules described as follows (1.1.1 – 5 inc.). Front and rear
views, block and circuit diagrams, showing these modules are bound at the rear of this manual
(S7600-01GA S7600-02GA, S7600-03GA, S7600-04GA, S7600-00BK and S7600-00CT).
Workshop editions of this manual contain extra information, also bound at the rear, which gives
detailed test procedures, circuit diagrams, assembly diagrams, layouts and parts lists.
1.1.1 : E2021 300W Amplifier Module
Two (on S76005 500W) four (on S7601 1kW) or eight (on S7602 2kW) of these are provided, each
with their own independent control and monitoring circuitry. This circuitry includes reverse power,
supply current and temperature monitoring to shut down and protect individual modules. Failures in a
single Amplifier Module only tend to give a reduction in power, with the Transmitter still operating with
several modules having failed (in the S7601 and S7602).
Each Amplifier Module can be removed or replaced whilst the Transmitter is operating (‘hot-
pluggable’). This feature means that if failures do occur, modules can be replaced within seconds,
without having to go ‘off-air’. Red/green fault displays on the front of each module help indicate the
faulty module to be replaced, this normally restoring the Transmitter’s full output without any further
immediate technical investigation being required. The relatively low weight and small size of each
module assist their actual transport to site.

Print Date 12/05/15 Page 6 of 32 S7600-00MA-08
Each Amplifier also has its own front panel ‘mute’ switch, which is mechanically interlocked so that it
has to be operated before the module can be removed. All other signal, 50V dc supply and control
connectors are at the rear of the unit. The control connectors go to one of two independent internal
Transmitter control buses.
Each control bus has its own RS485 data bus, which is used to carry the monitored serial information
from the amplifier to the E2023 Controller. Each bus also has its own power level control line, derived
from the E2025 Combiner Unit, to set the power level of each amplifier module and thus the final
transmitter output power.
Various versions of the 300W Amplifier Module may be supplied. These versions have slightly
different internal circuitry. They are however interchangeable, but to maximise output power, all
modules should ideally be of the same version.
1.1.2 : E2088/E2322 Power Supply Module
Any given Transmitter can only accept either E2088 or E2322 modules, not both
Two of these are provided on the S76005 and S7601, with four on the S7602 (two more on the /P
options). The modules are equally grouped into two supplies ’A’ and ‘B’, with independent mains
supply connectors to enable operation from dual mains supplies. The 500W S76005 may optionally be
supplied with just one module/connector. The E2088/E2322 modules in each group are current OR’d
together. Thus, on the /P option, where the extra module is fitted, the current lost when any single
module in the group fails, can still be supplied by the remaining module(s) in the group.
The ‘A’ supply provides a supply bus to the one, two or four E2021 Amplifier Modules on the right
hand ‘A’ side of the transmitter. The ‘B’ supply provides a separate bus to the one, two or four
Amplifier Modules on the left hand ‘B’ side. Single units requiring power (E2023, E2024 and E2025)
and both cooling fans are supplied from both supply buses.
All supplies are switched via a single front panel safety switch. The switch can be padlocked in the ‘off’
position to ensure that the transmitter remains off whilst work is being carried out at the antenna etc.
Each E2088/E2322 Power Supply Module has its own forced air cooling, output control and monitoring
circuitry and generates a regulated 50V to 53V dc supply. Apart from on the single module 500W
variant, failure of a single Power Supply Module leaves the Transmitter still operating but with a 6dB
reduction in output power. As with the Amplifier Modules, each E2088/E2322 Power Supply module
can be removed or replaced, within seconds, whilst the Transmitter is operating. Red/green fault
displays, relatively low weight and small size again feature.
50-53Vdc outputs for each Amplifier, for all the low power single units and mains supplies for each
Exciter are provided via separate fuses at the rear of the Transmitter. The Power Supply monitor
connectors go to one of two independent internal Transmitter control buses and hence to the E2023
Controller.
1.1.3 : E2023 Transmitter Controller Unit
This single unit provides comprehensive monitoring of the forward power, current and temperature of
each E2021 Amplifier Module and of the final output forward power, reverse power and temperature
via the E2025 Combiner Unit. It also monitors the E2088/E2322 Power Supply Modules. In the
situation where dual drive automatic changeover or automatic power level control is used, this unit
provides the necessary control. Remote control and monitoring of the Transmitter can also be
provided via this unit using parallel or serial data.
The Control Unit is microprocessor based with a back illuminated, high contrast 4 line by 20 character
display and separate red/green ‘System Normal’ indicator. A robust, sealed membrane keypad is
provided with a sounder to indicate correct key entry. The rear of the unit has separate connectors for
the two independent internal Transmitter control buses, connectors to monitor and control one or two
Exciters, a connector for power level control and a connector for parallel monitoring. An RS232
monitor/control port is provided on the front panel (E2023-01/02) with an additional TCP/IP
monitor/control port on the rear (E2023-02 only). An RS232 monitor/control port is provided on the

Print Date 12/05/15 Page 7 of 32 S7600-00MA-08
rear panel (E2023-03/04) with an additional TCP/IP monitor/control port on the rear (E2023-04 only).
When the RS232 port is provided on the rear panel, no parallel monitoring is available.
If a fault should occur within the E2023, manually operated switches on the E2024 Splitter/Drive
Changeover Unit can be used for basic control of the Transmitter. This enables it to be kept ‘on-air’
whilst the E2023 is replaced.
1.1.4 : E2024 Splitter /Drive Changeover Unit
This single unit interfaces between the Exciter(s) and the multiple E2021 Amplifier Module inputs. The
splitter section within the unit is either two way (S76005) four way (S7601) or eight way (S7602) and
consists of the appropriate number of cascaded two way Wilkinson 3dB power splitters. These all use
standard 75Ωcoaxial cable, with 100Ωbalance loads and are thus easily repaired if any become
damaged. All outputs are brought to SMC connectors at the rear of the unit. Phase length matched,
50Ωcoax leads then connect these outputs to the E2021 inputs.
A front panel lockable toggle switch is provided to manually mute or start (i.e. demute) the Transmitter
or can be set to enable the E2023 Control Unit to select high/low power or to mute/demute the
Transmitter as part of an automatic control sequence. An interlock switch connector is also provided
on the rear to enable the open-circuiting of external switches placed at safety points (e.g. at Antenna
access gates) to automatically mute the Transmitter. The state of this circuit is displayed on a front
panel indicator.
As with the E2023, the rear of the E2024 has separate connectors for the two independent internal
Transmitter control buses
The E2024 can also provide manual or automatic dual drive changeover in conjunction with the E2023
Control Unit. A second front panel lockable toggle switch is provided on the E2024 to manually select
which Exciter (i.e. ‘Drive’) is to be used, or to enable the E2023 to automatically select the second
Exciter should the first one fail. Switching is performed by two coaxial RF relays within the E2024.
These direct one of two Exciter’s outputs to the internal splitter and the other to a dumping load. This
dumping load has to be provided (externally to the E2024) whenever two Exciters are supplied and the
Exciter not in use is required to remain ‘active’ or be tested. Three TNC connectors are provided at the
rear of the unit to connect to the Exciter(s) and the dumping load. Front panel indicators show which
Drive is selected.
1.1.5 : E2025 Combiner Unit
This single unit interfaces between the multiple E2021 Amplifier Module outputs and the antenna.
Phase length matched, 50Ωcoax leads connect the E2021 outputs to the TNC connectors at the rear
of this unit. The combiner section within the unit is either two way (S76005) four way (S7601) or eight
way (S7602) and consists of the appropriate number of cascaded four or two way Wilkinson power
combiners utilising standard handformable and flexible coaxial cable.
The combiner section is followed by an integral low pass filter, this removing harmonics of the wanted
frequency. An output directional coupler is then provided with a 7-16 output socket for connection to
the antenna. This coupler is used to monitor the output forward and reverse power. A sample of the
forward power is also directed to a front panel BNC connector for easy connection to test equipment.
The E2025 also contains circuitry to measure the Transmitter’s final output forward and reverse
powers via the output coupler, the temperature of the Combiner’s integral dumping load heatsink and
the currents in the Transmitter’s dual cooling fans. Front panel red/green displays indicate any fault
condition. Two multi-turn preset potentiometers are accessible via the front panel to enable
independent setting of two Transmitter output powers. They are selected using various forms of local,
external or remote control or via a link on the Combiner/Fan connector Board (see section 3.4.2).
The single E2025 control connector goes to the two independent internal Transmitter control buses via
the Combiner/Fan connector Board, where it monitors the dual fans’ currents. As previously detailed,
each control bus has its own RS485 data bus, one of which is used to carry the monitored serial
information from the E2025 to the E2023 Control Unit. For these two buses, the E2025 also provides
two equal but independent power level control voltages (derived from either the front panel High or

Print Date 12/05/15 Page 8 of 32 S7600-00MA-08
Low Power potentiometers) to set the power level of the E2021 Amplifier Modules and thus the final
Transmitter output power. One control voltage is used for the Amplifier Modules on the right hand A
side of the Transmitter and the other for the Amplifier Modules on the left hand B side.
Rear panel connectors give analogue dc output levels indicating the forward and reverse powers
generated.
1.2 : VARIANTS AND OPTIONS
The main variants and their constituent modules and units are as follows :-
Amplifier
Modules
Power
Supplies
Transmitter
Auto. Cont.
Splitter and
Drive C/O
Combiner
Unit
S76005-01
500W Max.
2 off
E2021-XX
1 off
E2088-01
or E2322-01
Single
E2023-XX
Single
E2024-03
Single
E2025-03
S76005-02
500W Max.
2 off
E2021-XX
2 off
E2088-01
or E2322-01
Single
E2023-XX
Single
E2024-03
Single
E2025-03
S7601-01
1kW Max.
4 off
E2021-XX
2 off
E2088-01
or E2322-01
Single
E2023-XX
Single
E2024-01
Single
E2025-01
S7602-01
2kW Max.
8 off
E2021-XX
4 off
E2088-01
or E2322-01
Single
E2023-XX
Single
E2024-02
Single
E2025-02
The options (defined by a letter suffix) are as follows :-
/P
Fitted with two additional E2088/E2322 Power Supply Modules
(or one only additional on S76005-01).
/T
Fitted with TCP/IP Remote Control (E2023-02 or E2023-04
Controller)
Examples are as follows :-
S76005-01 Standard 500W (with single E2088/E2322)
S76005-02/P 500W with two additional PSUs (four total)
S7601-01 Standard 1kW
S7602-01/P 2kW with two additional PSUs (six total)

Print Date 12/05/15 Page 9 of 32 S7600-00MA-08
1.3 TECHNICAL SPECIFICATIONS
The S7600 range of FM Transmitters is designed to meet or exceed ETSI Standards:-
EN 301 489-01 : ERM/EMC for Radio Equipment, Part 1, Common Technical Requirements.
EN 301 489-11 : ERM/EMC for Radio Equipment, Part 11, Specific Conditions for FM Transmitters.
EN 302 018-02 : ERM (Spectral Occupancy) for the FM Radio Broadcast Services.
EN 60215:1989 : Safety Requirements for Radio Transmitting Equipment
Note that the following figures do not include any which principally depend on the Exciter/Drive being
used (e.g. frequency stability). The figures given below may also be affected by the Exciter/Drive’s
performance. In both cases the Exciter/Drive’s own manual should be consulted.
RF Interface Ports 50Ωnominal
Input Drive Power RF Input from Exciter/Drive supplied :-
8-10W for S76005 (13W absolute maximum)
17-20W for S7601 (25W absolute maximum)
35-40W for S7602 (50W absolute maximum)
Output Power Level With any load with a return loss ≥14dB (1.5:1 VSWR) any angle.
(though see note below in ‘Output Power shutdown’ section)
Note two independent settings available for selection.
Adjustable at least 200W to 500W for S76005 (Power Low setting)
Adjustable at least 300W to 500W for S76005 (Power High setting)
Adjustable at least 400W to 1kW for S7601 (Power Low setting)
Adjustable at least 600W to 1kW for S7601 (Power High setting)
Adjustable at least 800W to 2kW for S7602 (Power Low setting)
Adjustable at least 1.2kW to 2kW for S7602 (Power High setting)
Output Power
Variation
Not more than ±1dB under all specified operating conditions.
Output Power
Shutdown
Output power is automatically reduced or shutdown to ensure that any load
with return loss <10dB including open and short circuits, does not cause any
damage to the transmitter.
The return loss level at which shutdown starts can be increased by an
internal adjustment (see section 2.3.3). This level is normally set at the
factory to be 16dB, the level at which excess reverse power first produces a
warning indication.
Output Reverse
Intermodulation
Reverse intermodulation products will be better than or equal to –10dB,
relative to the interfering incident signal, this being offset over the range
±300kHz to ±20MHz (but remaining within 87.5MHz to 108MHz).
Frequency Range 87.5 -108MHz
Spurious Emissions In the range 9kHz to 1000MHz : -
Better than or equal to –75dBc (S76005)
Better than or equal to –76dBc (S7601)
Better than or equal to –79dBc (S7602)
Out of Band
(Adjacent Channel)
Emissions
Better than or equal to –110dBc/Hz, at ±200kHz offsets, and 145dBc/Hz at
±2MHz. When measured in a 1kHz bandwidth, the limit figures become –
80dBc at ±200kHz offsets and –115dBc at ±2MHz.

Print Date 12/05/15 Page 10 of 32 S7600-00MA-08
Incidental
Amplitude
Modulation
Synchronous (AM due to FM) :-
Not greater than 2% with a peak deviation of ±40kHz at a modulation
frequency of 500Hz.
Asynchronous (residual AM due to hum and noise with no FM modulation) :-
Not greater than 1% when measured unweighted in a 20Hz to 20kHz
bandwidth.
Status Indications Output forward and reverse power and combiner temperature.
Output forward power, temperature and current of any selected Amplifier
module.
Power Supplies, Cooling fans and (when connected) Drives’ status.
Red/green pass/fail led indicators on all modules.
Dimensions Height :- 12U (S76005 and S7601) , 14U (S7602)
Width :- to fit standard 19in rack.
Depth :- to fit standard 600mm deep rack.
Environmental Ambient Temperature (operating) : -5 to +50 deg.C
Ambient Temperature (storage) : -20 to +70 deg.C
Relative Humidity (operating) : Less than or equal to 90%, non condensing
with the transmitter at a higher temperature than the ambient.
Altitude (operating) : Up to 3000 metres a.s.l.
Power Supply Two independent single phase inputs.
176 to 264V AC, 47- 63Hz.
Apparent power factor 98%.
Efficiency 88% (Power Supply units only)
Supply current, at each input, at 230V AC typically :-
4A (S76005-01 with 500W RF output)
2A (S76005-02 with 500W RF output)
4A (S7601 with 1kW RF output)
8A (S7602 with 2kW RF output)
Typical overall efficiency 55% at above power levels (AC in to RF out)

Print Date 12/05/15 Page 11 of 32 S7600-00MA-08
SECTION TWO : INSTALLATION
! CAUTION !
These Transmitters operate at high RF power levels, internal supply energy levels and mains
supply current levels. They also incorporate devices containing toxic BeO. Before commencing
installation, it is recommended that the complete INSTALLATION section is read and understood. The
instructions should then be strictly followed, by suitably qualified personnel, otherwise sub-
standard or even dangerous operation may result.
It is also strongly recommended that a mechanical check is made of the Transmitter, before it is
installed and switched on. This is to ensure that no loosening of connectors or damage has occurred,
during transit, which may lead to further damage being caused at switch-on. The principal items to
check are : -
No obvious physical damage has occurred to the Transmitter frame, modules or internal wiring.
All removable, internal RF coaxial connectors (SMA/B/C, BNC, TNC, N etc) are in place and tight.
All internal multi-way connectors (Ribbon, D Type, Molex etc) are in place and secure.
Each E2021 Amplifier Module is pushed fully into the Transmitter with its lock switch fully pushed
down – do not try to force these modules home – if they appear difficult to insert fully, check that
the locating ‘harpoons’ at the rear of each module (either side of its D connector) are not bent.
Each E2088/E2322 Power Supply Module is pushed fully into the Transmitter with its locking lever
engaged – do not try to force these modules home – if they appear difficult to insert fully, check the
connectors at the rear of the module.
2.1 : PHYSICAL DIMENSIONS AND FITTING
2.1.1 Installation Items
Various installation items are required. A list of these (including spare fuses) is given below. Actual
requirements depend on the configuration of the equipment supplied (e.g. with or without
Exciter/Drive(s), separate to or already fitted into a 19 inch rack, whether or not leads are supplied
ready made etc.). Note that extra, unlisted parts may be required for connections to any
Exciter/Drive(s) that are supplied (see manuals supplied with them).
Typical
Quantity
Description Function
2 6 Way, 16A/440V, free sockets with
top entry hoods
(e.g. ‘Contact Connectors’ H-BE
part numbers 10-1910 for insert
and 10.0110+12.9543 for hood)
For connection to leads from mains supply
distribution point.
(Note only one required on S76005-01)
2
Length
as req’d
3 core, 2.5mm
2
per core, type SY,
flexible steel armoured cable.
Mains supply leads.
(Note only one required on S76005-01)
2 16A ‘C’ rated 2 pole miniature circuit
breakers (MCBs).
Fitted at mains supply distribution point to
protect supply leads and mains input
components in the Transmitter.
(Note only one required on S76005-01)
1 7-16 RF coaxial free plug. For connection to lead from Antenna or RF
output load.
Length
as req’d
Low loss 50ΩRF coaxial cable, rated
in excess of Transmitter output
power at maximum ambient
temperature.
RF output lead.
1 - 3 TNC 50ΩRF coaxial free plug(s). For connection to leads from Exciter/Drive(s)
and their dummy load.

Print Date 12/05/15 Page 12 of 32 S7600-00MA-08
Typical
Quantity
Description Function
Length
as req’d
Low loss 50ΩRF coaxial cable, rated
in excess of Exciter/Drive output
power at maximum ambient
temperature.
RF input and dummy load leads.
1 Coaxial, 87.5 – 108MHz, 50Ωload
with suitable free connector, rated in
excess of Exciter/Drive output power
at maximum ambient temperature.
Exciter/Drives’ dummy load.
1 2 Way, 10A, 5.08mm pitch screw
terminal block (c/w wire shorting link).
(e.g. Weidmuller BL5.08/2)
External safety interlock connector (wire shorting
link is removed when connector is wired to
external safety circuits).
1 - 2 9 Way D plugs c/w covers. For connection to leads from control/monitor
inputs of Exciter/Drive(s).
1 - 2 9 Way D sockets c/w covers. For connection to parallel and serial RS232
remote control/monitor links.
1 15 Way D plug c/w cover. For connection to additional control/monitor
input links.
Length
as req’d
Multi-core screened cable (number of
cores as required).
Control/monitor leads.
Length
as req’d
Heavy gauge grounding wire/strap. For safety earth lead.
1-2 IEC 6A free plug to free socket mains
leads (1 metre, 3 core each
0.75mm
2
, EPR insulated, HOFR
sheathed for high temperatures).
For fused and switched mains supply
connections to Exciter/Drive(s).
8 Screws c/w plastic cup washers and
rack caged nuts.
For fixing S76005, S7601 or S7602 into 19 inch
rack.
2 Side support ‘L’ brackets c/w fixing
screws and washers.
For extra support to carry the Transmitter’s
weight in the rack.
3-9 500mA (F) Fuses (for smd holders,
‘Littelfuse’ R451.500)
For protection of control circuits within E2021
Amplifiers and E2025 Combiner Unit.
2-8 16A (T) HBC 5x32mm (¼ x1¼ in)
Fuses
For protection of internal dc supply leads to and
high current circuitry within E2021 Amplifiers.
4 6.3A (T) HBC 5x20mm Fuses For protection of internal low current dc supply
leads and of mains supply leads and circuitry
intended for connection to Exciter/Drives(s).
2.1.2 Rack Mounting
If the Transmitter is not supplied ready mounted in a 19 inch rack, this will be required to be done at
time of installation.
! CAUTION !
The S76005, S7601 and S7602 (i.e. the assembly carrying the Amplifiers, Power Supplies, Controller,
Splitter/Drive Changeover and Combiner) are heavy. Before installation in a rack, the Amplifier
Modules and Power Supplies should be removed to reduce the overall weight and ease the process.
These units are removed from the front of the Transmitter, taking care to release the mechanical
securing locks first. The Fan Assembly may also be opened, unplugged and then removed from the
rear of the Transmitter.
The 19 inch rack should be of standard 600mm depth and at least 12U height (for the S76005 or
S7601) or 14U (for the S7602). Additional height will be required if Exciter/Drive(s) are to be fitted into
the same rack (recommended). These should be fitted below the actual Transmitter section for ease of
inter-wiring. Additional bottom support ‘L’ brackets are also be required at each side, below the
Transmitter, to help carry its weight. The Transmitter is then fixed to the front of the racking using eight
screws, plastic cup washers and caged nuts. The Amplifier modules, Power Supplies and Fan
Assembly can then be refitted and external connections made.

Print Date 12/05/15 Page 13 of 32 S7600-00MA-08
2.2 EXTERNAL CONECTIONS
2.2.1 Mains Supply Connectors
These are two independent 6 Way plugs at the rear of the Supply Disconnector section, CON02 and
CON03. Having two enables use of independent ‘A/B’ power sources with the same or different
phases. Each supply must be single phase, 176V to 264V AC, 47 - 63Hz.
The maximum current drawn from each supply (at 230V AC) is in the order of 2A (for the S76005-02),
4A (for the S76005-01 or S7601) or 8A (for the S7602).
! CAUTION !
The S76005, S7601 and S7602 MUST NOT be operated at voltages significantly below 176V, as
the supply current may exceed the rating of the two 2x16A mains supply connectors and
associated wiring and components. Fitting of the specified MCB (see next paragraph) will ensure
this cannot occur
! CAUTION !
The mains supply leads (two total except for the 500W single input S76005-01, where only one is
used) to the Transmitter must each consist of three core (P+N+protective earth) insulated cable. Each
core must be at least 2.5mm
2
and the overall cable armoured (type SY flexible steel armoured cable
preferred) and not mounted in a conduit with other supply cables. Two double pole, 16A (C
rated) MCBs must be provided at the supply distribution board(s) to protect both leads and
Transmitter supply input circuitry. Also, since the supply input circuitry contains filters, which pass
current to the Transmitter chassis, the Transmitter chassis must be connected to a safety ground.
Also ensure whilst making any connections to the mains supply, that the Transmitter’s front
panel Supply Disconnector is switched to ‘off’ (i.e. at O) and is preferably padlocked in that
position to prevent inadvertent operation of the Transmitter.
Each lead terminates in a separate 6 Way 16A/440V free socket at the Transmitter end, which are
wired as follows :-
Pin 1 Line
Pin 2 Neutral
Pin 3 Prot. Earth
Earthing Pin Prot. Earth
The two leads must go via separate MCBs.
The armouring of the cable should also be taken to ground at the supply distribution board.
The free connectors should be fitted with top entry hoods.
An earthing bolt is provided adjacent to the mains supply input connector to allow the Transmitter
chassis to be permanently bonded to nearby safety ground directly or via rack metalwork.

Print Date 12/05/15 Page 14 of 32 S7600-00MA-08
2.2.2 RF Output Antenna Connector
! CAUTION !
When operating, high RF Voltages are present on this connector. Always ensure when making
connections here, or working on any load connected, that the Transmitter’s front panel Supply
Disconnector is switched to ‘off’ (i.e. at O) and is preferably padlocked in that position.
This is a 50Ω7-16 coaxial socket on the E2025 Combiner Unit’s output directional coupler (at the top
rear of the Transmitter). Care must be taken to use adequately rated (at maximum ambient
temperature) low loss cable for the lead to the antenna or load
2.2.3 RF Input Exciter/Drive(s) Connectors
! CAUTION !
When operating, high RF Voltages may be present on these connectors. Always ensure when
making connections here, or working on any load connected, that the drive source(s) to the
Transmitter are switched off or safely muted.
These are three 50ΩTNC coaxial sockets at the centre rear of the E2024 Splitter/Drive Changeover
Unit. Socket SK08 (Drive A) is for connection a single Exciter/Drive’s RF Output. When dual drive
changeover is supplied, socket SK06 (Drive B) is used for connection to the second Exciter/Drive’s RF
Output. In this case, socket SK07 (Load) is used for connection a 50ΩExciter/Drive dummy load,
normally situated in the section of the rack where the Exciter/Drives are fitted.
2.2.4 Safety Interlock Connector
This is a removable, 2 Way, 5.08mm screw terminal block PL13 at the rear of the E2024 Splitter/Drive
Changeover Unit. A shorting link has to be made between the terminals to de-mute the Transmitter
(the front panel INTERLOCK EXT. MUTE display goes from red to green when the terminals are
linked). If there are no external safety interlock switches, a short direct link is made, this being the
state in which the connector is normally supplied. If connections need to be made to external safety
switches, this link is removed and the switches are wired in a series loop to the connector so that if
any switch opens, the link is broken.
! CAUTION !
For the safety interlocks to work correctly, the external switches and link wiring must ‘float’
(i.e. must not be grounded at any point). The total loop resistance should not exceed approximately
100Ω. The external wiring may also be ferrite loaded for emc requirements. No external voltages
should be applied to this connector.
2.2.5 RF Output Monitor Connector
This is a 50ΩBNC coaxial socket SK01 on the left-hand side of the E2025 Combiner Unit front panel.
This provides an harmonically filtered sample of the Transmitter’s forward output power at a level, into
50Ω, approximately 64dB below the power being delivered into the load (e.g. approximately 0.4mW for
1kW being delivered). This connector is for test purpose only with the test equipment and lead being
disconnected when not in use. NOTE that the levels of any harmonics present are not necessarily
equal to those at the antenna.
2.2.6 Drive A/B Monitor and Control Connectors
These are two identical 9 Way D sockets SK03 and SK06 at the rear of the E2023 Controller unit.
These are used to enable one or two Exciter/Drive(s) to be monitored and controlled by the E2023
(with two Exciter/Drives this enables automatic dual Exciter/Drive changeover). Multi-core screened
cable, not exceeding 3 metres in length, should be used for the interconnecting leads.

Print Date 12/05/15 Page 15 of 32 S7600-00MA-08
Each lead terminates in a separate 9 Way free D plug at the E2023 end which is wired as follows :-
Pin 1 RS232 Data from Drive (not enabled)
Pin 2 Ground
Pin 3 Prefer Drive from Rem. Control
Momentary low > approx. 1sec
Pin 4 Slow Status Monitor from Drive
Continuous low >2secs registers ‘good’
Continuous high >10secs registers ‘fail’
Pin 5 Fast Status Monitor from Drive
Continuous low >2secs registers ‘good’
Continuous high >2secs registers ‘fail’
Pin 6 RS232 Data to Drive (not enabled)
Pin 7 Ground
Pin 8 Ground
Pin 9 Mute/demute to Drive
Continuous low to mute
Each input (pins 3, 4, 5) is internally ‘pulled up’ to +5V through 12kΩand must be fed from a voltage
free source of less than 1kΩto ground for a low state (open-circuit for a high state). These inputs are
protected against constant application of up to ±12V dc directly applied.
The mute/demute output (pin 9) is an ‘open collector’ NPN, silicon low saturation switching transistor
suitable for driving loads from +5V to +24V dc with maximum currents of 10mA. The low state output
impedance is approximately 10Ω.
These connections are wired in accordance with the monitor and control requirements of the type of
Exciter/Drive(s) supplied and normally, not all the pins will need to be connected. Pin 3, if used, is for
connection to a remote control and monitoring system. This enables selection of a particular drive to
be preferred (forced) remotely by momentarily pulling this line to ground.
If automatic dual Exciter/Drive changeover only requires one of the two status monitor inputs for
operation, the other must be connected to ground.
2.2.7 Parallel (standard) or RS232 Serial Remote Control DTE Connector
This is a 9 Way D plug PL04 at the rear of the E2023 Controller unit. It is used to enable various forms
of remote control and monitoring, possibly requiring additional external units. Multi-core screened
cable, not exceeding 3 metres in length, should be used for the interconnecting lead.
The lead terminates in a 9 Way free D socket at the E2023 end which is wired as follows :-
Parallel (standard) Serial RS232
Pin 1 Power Output Low (app.–2dB rel. set output) Not connected
Pin 2 Power Output Fail (app. –12dB rel. max o/p) Received Data (to E2023)
Pin 3 Reverse Power High (app. 13, 25 or 50W) Transmit Data (from E2023)
Pin 4 Combiner Temp. High (app. +100deg.C) Not Connected
Pin 5 Ground Ground
Pin 6 Fan/Cooling System Fail Not Connected
Pin 7 System Normal Not Connected
Pin 8 Drive A/B Selected Not Connected
Pin 9 Drive Changeover on Auto Not Connected
The parallel outputs are ‘open collector’ NPN, silicon low saturation switching transistors suitable for
driving loads from +5V to +24V dc with maximum currents of 10mA. The low state output impedance
is approximately 100Ω. Each output is protected against constant application of up to ±5V dc directly
applied. A normal (non-faulty) condition is indicated by the output pin being pulled to ground (i.e. low
state) by the switching transistor. Drive A selected and Drive C/O on Auto are similarly indicated. Note
that the serial option requires an additional internal link lead, which re-directs the serial remote control
from the front panel COM port to the rear panel DTE connector (pins 2, 3, 5 only).

Print Date 12/05/15 Page 16 of 32 S7600-00MA-08
2.2.8 Second Transmitter Remote Control Connector
This is a 15 Way D socket SK05 at the rear of the E2023 Control Unit. It is used to enable externally
derived automatic control of Transmitter muting and high/low power level setting. Multi-core screened
cable, not exceeding 3 metres in length, should be used for the interconnecting lead.
The lead terminates in a 15 Way free D plug at the E2023 end which is wired as follows :-
Pin 1 Select Low Power Input (continuous low to select)
Pin 2 Mute Transmitter Input (continuous low to mute)
Pin 3 Output Status A (continuous low state – not used)
Pin 4 Output Status B (continuous low state – not used)
Pin 5 RS485 Data (+) In (not used)
Pin 6 RS485 Data (-) In (not used)
Pin 7 RS485 Data (+) Out (not used)
Pin 8 RS485 Data (-) Out (not used)
Pin 9 Not Connected
Pin 10 Ground
Pin 11 Ground
Pin 12 Ground
Pin 13 Ground
Pin 14 Not Connected
Pin 15 Not Connected
Each input (pins 1, 2) is internally ‘pulled up’ to +5V through 12kΩand must be fed from a voltage free
source of less than 1kΩto ground for a low state (open-circuit for a high state). These inputs are
protected against constant application of up to ±12V dc directly applied. Note that they are only active
when the associated E2024 Auto-Mute-Start switch is in the Auto position and have delays in the
order of 200mS. Thus, they should not be used as part of a safety interlock system (see 2.2.4).
Each output (pins 3, 4) is a relay contact to ground for a low state (open-circuit for a high state). The
contacts are rated at 1mA (minimum at 5V dc) to 1A maximum switching current. The maximum
voltage (including switching surges) must be limited to ±24V dc. These outputs (and pins 5-8 inc.) are
not used and thus should not be externally connected.
2.2.9 Mains Supply Output Connectors
These are two standard IEC three pin (L+N+PE) sockets CON01 and CON04 either side of the mains
supply input connectors. Each one is only connected, via the front panel SUPPLY DISCONNECTOR
switch to the mains supply input which is adjacent to it Thus equipment connected to these supplies
can be arranged in two independent groups, both groups being switched off when the Transmitter
itself is switched off using the front panel switch.
The continuous total load on output each should not exceed approximately three amps. Each output is
protected by a 6.3A (T) HBC fuse, FS11 and FS12, to allow for current surges at ‘switch-on’

Print Date 12/05/15 Page 17 of 32 S7600-00MA-08
2.2.10 RS232 Serial Control and Monitor (COM) Connector
This is a 9 Way D plug PL01 on the right hand side of the E2023 Control Unit front panel. It is used to
enable down loading of status and to enable simple control using a personal computer (PC) directly
connected to this front panel COM port. Multi-core screened cable, not exceeding 30 metres in length,
should be used for the interconnecting lead. The lead terminates in a 9 Way free D socket at the
E2023 end which is wired as follows :-
Pin 1 Not connected
Pin 2 Received Data (to E2023)
Pin 3 Transmit Data (from E2023)
Pin 4 Not Connected
Pin 5 Ground
Pin 6 Not Connected
Pin 7 Not Connected
Pin 8 Not Connected
Pin 9 Not Connected
Note that the assigned pin numbers and their functions are for a standard 9 pin plug on ‘Data Terminal
Equipment’ (DTE) such as computers. Standard crossover or ‘null modem’ leads may thus be used for
connection to a personal computer or PC. The length of the interconnecting lead may be extended by
use of compatible RS422/485 or fibre-optic line drivers.
Note that the internal connections to this connector may be re-directed to the rear panel DTE
connector PL04 by the use of an optional internal link lead (see section 2.2.7).
Full details of serial remote control procedures via this connector are given in Section 2.4.
2.2.11 TCP/IP Control and Monitor Connector (/T option only)
This is a standard RJ45 connector SK08 mounted in an additional screened box fitted to the rear of
the E2023-02 or E2023-04 Control Unit. This enables all the control and monitoring detailed in Section
2.4 to be performed using TCP/IP (Transmission Control/Internet Protocol)
This arrangement requires the unit to be assigned a unique Internet Protocol address. When first
connected to the network via its RJ-45 connector, the E2023’s TCP/IP adapter will attempt to acquire
an IP address automatically (it’s quite common to have networks configured to use ‘DHCP’, which
provides these addresses on demand). The address to which a device has been assigned can then be
determined and, if required, be overridden with a desired fixed value, using Eddystone supplied
software.
Note that internal linking leads determine if control and monitoring is via this connector or the front
panel RS232 COM port connector (both cannot be used together).
2.2.12 FWD/REV Output (Analogue Monitor) Connectors
These are two 50ΩSMC coaxial sockets PL13/14 at the left rear of the E2025 Combiner Unit. They
provide DC analogue output voltages corresponding to the Transmitter output forward and reverse
powers. Coaxial screened cable, not exceeding 3 metres in length, should be used for the
interconnecting leads.
PL13 provides the forward power indication at a level of approximately 1.5V at 250W, 2V at 500W,
2.8V at 1kW and 4V at 2kW (limited by maximum transmitter output power).
PL14 provides the reverse power indication at a level of approximately 1.4V at maximum rated output
power with a 15dB return loss load.
Both outputs are from impedances of approximately 5kΩ.

Print Date 12/05/15 Page 18 of 32 S7600-00MA-08
2.3 SETTING UP PROCEDURES
2.3.1 Fuses
If any problems occur after the Transmitter has been installed and switched on, fuses may need to be
checked and possibly replaced. However, a blown or open-circuit resettable fuse would generally
indicate the presence of a fault, which would need correcting.
The type, function and access to fuses is as follows :
Type Function Access
500mA (F) Fuses
(for smd holders,
‘Littelfuse’
R451.500)
One per E2021.
For protection of control circuits
within E2021 Amplifier modules.
If fuse blows, all front panel
displays on just the affected E2021
go out and its power level falls.
Remove Amplifier module from front,
taking care to release the mechanical
securing locks first. Smd fuseholder is at
rear of unit under the screen cover.
500mA (F) Fuse
(for smd holders,
‘Littelfuse’
R451.500)
One only.
For protection of control circuits
within E2025 Combiner Unit
If fuse blows, all front panel
displays on just the E2025 go out
and the overall output power level
falls to zero.
Note, if a spare fuse is not
available, one may be transferred
from one of the E2021 modules to
enable operation at lower power.
Slide Combiner Unit forwards after
removing front and single rear fixing
screws, taking care not to strain any
leads connected to its rear. Remove
front screen cover section.
Smd fuseholder is accessible
underneath the screen cover on the
front printed circuit board, right hand
side.
! CAUTION ! Ensure that the front
panel Supply Disconnector is
switched to ‘off’ (i.e. at O) and is
preferably padlocked in that position.
16A (T) HBC
5x32mm
(¼ x1¼ in) Fuses
One per E2021.
For protection of internal dc supply
leads to and high current circuitry
within E2021 Amplifier modules.
If fuse blows, all front panel
displays on just the affected E2021
go out and its power level falls to
zero.
At the bottom rear of the Transmitter,
the larger fuse-holders grouped in ones,
twos or fours on the left/right hand sides.
Note FS number and position mirrors
amplifier number and position.
! CAUTION ! these are high energy
circuits and thus care must be taken
if replacing the fuse with power on.
6.3A (T) HBC
5x20mm Fuses
Two only.
For protection of internal low
current dc supply leads.
Internal low current supplies are
dual redundant, thus the loss of one
fuse produces no failure (only
E2023 display warning). If both
blow, E2023, E2024 and E2025
front panel displays all go out and
the overall output power level falls.
At the bottom rear of the Transmitter,
the single smaller fuseholders on the left
and right hand sides, FS9/10.
! CAUTION ! these are high energy
circuits and thus care must be taken
if replacing the fuse with power on.
6.3A (T) HBC
5x20mm Fuses
Two only
For protection of mains supply
leads and circuitry intended for
connection to Exciter/Drive(s).
At the bottom rear of the Transmitter,
the single smaller fuseholders adjacent
to the associated mains output sockets.
FS11/12
! CAUTION ! these are high energy
circuits and thus care must be taken
if replacing the fuse with power on.

Print Date 12/05/15 Page 19 of 32 S7600-00MA-08
0.75A Hold
RXE 60V
Resettable Fuses
Two
For protection of the dual fan
cooling unit.
If the fuse goes high impedance,
the fan, which it supplies, will not
operate and the FANS display on
the front of the E2025 Combiner
Unit will go from green to red.
On Fan Connector board inside top rear
of Transmitter.
Note this fuse will automatically reset if
the front panel Disconnector switch is
temporarily set to ‘off’ (i.e. to ‘O’) or if the
Fan Unit is temporarily disconnected
from the Fan Connector board.
3A Hold
RUE 30V
Resettable Fuse
One only.
For internal protection of E2023
Controller unit.
If the fuse goes high impedance,
the E2023 front panel displays will
all go out and any automatic control
will cease.
Inside E2023, on rear Interface Board.
Note this fuse will automatically reset if
the front panel Disconnector switch is
temporarily set to ‘off’ (i.e. to ‘O’) or if the
E2023 is temporarily disconnected from
the Control Bus Boards at both sides of
the rear of the Transmitter.
2.3.2 Output Power Level and Frequency Adjustment
If the Transmitter is not supplied with preset output power levels and frequency, its front panel HIGH
POWER and LOW POWER controls and the Exciter/Drive(s)’ power output and frequency will need to
be set. The manuals for the type of Exciter/Drive(s) supplied or in use must be consulted for
information on how the settings required of them are actually made.
The procedure is as follows :
1) Ensure the Transmitter has been installed as detailed in sections 2.1 and 2.2. and that the
E2024 Splitter/Drive Changeover front panel switches are set to MUTE and either SELECT A
or SELECT B (i.e. not AUTO).
2) Disconnect all E2021 Amplifier modules by releasing their front mechanical locks and pulling
them slightly forward.
3) Apply power to the Transmitter (i.e. ensure supply distribution 16A MCBs are on and the front
panel Disconnector switch is at ‘on’ (i.e. at ‘I’).
4) Ensure all displays are on red, green or amber (except disconnected E2021s) else follow fuse
checking procedure as detailed in section 2.3.1 (fault finding may be required if this occurs).
Check Exciter/Drive(s) are operating.
5) Check the E2024 INTERLOCK/EXT MUTE display is green (if red ensure the safety interlock
link at the rear of this unit is made).
6) Set the Exciter/Drive(s) power output to minimum, which must be less than 13W (S76005)
25W (S7601) or 50W (S7602) and frequency to that required.
7) Reconnect all E2021 Amplifier modules ensuring their mechanical locks are remade and
ensuring all their displays come on at red, green or amber – if not, again check fuses.
8) Set the E2024 Splitter/Drive Changeover front panel switches to START and SELECT A or
SELECT B to connect an Exciter/Drive to the Transmitter itself.
9) Set the E2025 Combiner Unit’s front panel HIGH POWER and LOW POWER twenty turn
controls to fully clockwise (i.e. maximum power setting). Ensure that the HIGH POWER
control display is on. If the LOW POWER display is on, check that the link LK1 FORCE LOW
POWER on the Fan Connector Board is removed (this board is inside the Transmitter at the
top rear).

Print Date 12/05/15 Page 20 of 32 S7600-00MA-08
10) Slowly increase the selected Exciter/Drive(s) output power until 500W (on S76005) 1kW (on
S7601) or 2kW (on S7602) is just obtained. To ensure complete accuracy, an external
calibrated power meter should be used to measure this output power. Increase the input level
by a further 1dB (approximately 20%). In no case however must the input power exceed 13W
(on the S76005) 25W (on the S7601) or 50W (on the S7602). The output power should rise
above 500W, 1kW or 2kW.
11) If a second Exciter/Drive is fitted, repeat step (10) with the E2024 front panel switch set at
SELECT A or SELECT B to connect it to the Transmitter itself.
12) With the Exciter/Drive power set as described, turn the HIGH POWER control anti-clockwise
until the measured output power falls back to 500W, 1kW or 2kW (or less if required). Check
the same power is obtained by selecting the other Exciter/Drive if fitted (using the E2024 front
panel switch).
13) Link LK1 FORCE LO POWER on the Combiner/Fan Connector Board The LOW POWER
display on the E2025 should come on in place of the HIGH POWER display.
14) With the Exciter/Drive power still set as described, turn the LOW POWER control anti-
clockwise until the output power falls back to the level required, typically down to
approximately half of the Transmitter’s maximum rated output. Check the same lower power is
obtained by selecting the other Exciter/Drive if fitted (again using the E2024 front panel
switch).
15) Unless required to stay in low power operation, remove enable LK1 FORCE LO POWER.
16) Check that the output power displayed on the E2023 Control Unit also reads the set output
power. This reading will not be as accurate as the external calibrated power meter but should
be within about ±0.25dB (approx. 25W at 500W, 50W at 1kW or 100W at 2kW).
17) If the reading is not within this range it may be adjusted by a preset control inside the E2025
Combiner Unit. To access this control, slide the E2025 forwards after removing its front fixing
screws and single rear fixing screw, taking care not to strain any leads connected to its rear.
Remove front screen cover section The preset control (marked ‘CAL FWD’) is at the rear left
hand side of the printed circuit board. Care must be taken that none of the other four preset
controls on the board are altered. Adjust the control clockwise to increase reading or anti-
clockwise to decrease reading.
The Transmitter will now be ready for operation with audio and or data sources applied to the
Exciter/Drive(s). The manuals for the type of Exciter/Drive(s) supplied or in use must be again
consulted for information on how such sources are applied and controlled.
The RF Monitor connector at the left-hand front of the E2025 Combiner Unit may be used to check the
close-in spectrum of the Transmitter output signal. Note that any harmonic levels shown will not
necessarily indicate those present at the Transmitter output. Any test equipment should not however
normally be left connected.
2.3.3 Reverse Power Trip Level Adjustment
If the REV led on the E2025 Combiner Unit is intermittently or permanently red, this indicates that the
level of reverse power is greater than about 13W (on S76005), 25W (on S7601) or 50W (on S7602).
This shows that the antenna system connected to the Transmitter is relatively poor. If the Transmitter’s
reverse power trip point is set too low, this may cause a reduction in the available output power. As
long as the E2021 Amplifier’s REV leds are not also red, the trip point setting can be increased to help
maintain full output power (although the REV warning may still be displayed).
The reverse power trip point may be adjusted by a preset control inside the E2025 Combiner Unit. To
access this control, slide the E2025 forwards after removing its front fixing screws and single rear
fixing screw, taking care not to strain any leads connected to its rear. Remove front screen cover
section.
This manual suits for next models
2
Table of contents
Other Eddystone Transmitter manuals

