manuals.online logo
Brands
  1. Home
  2. •
  3. Brands
  4. •
  5. Eden
  6. •
  7. Amplifier
  8. •
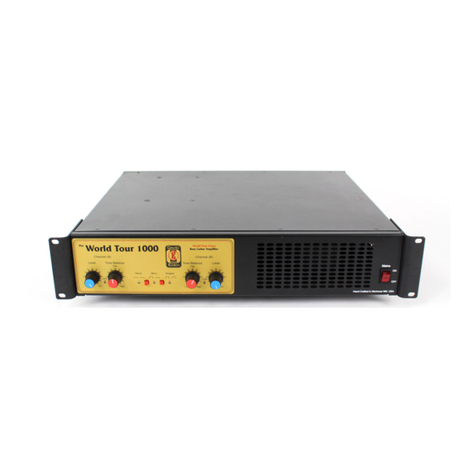
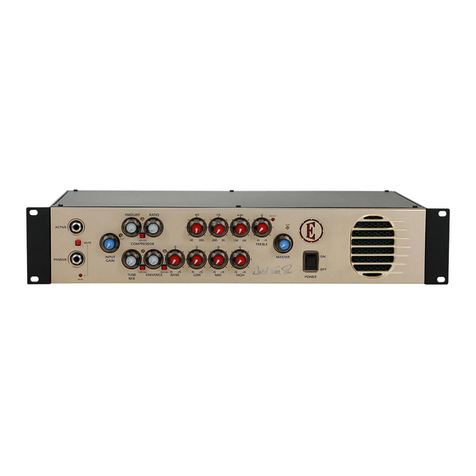
  9. Eden WTB1000 User manual

Eden WTB1000 User manual

This manual suits for next models

1

Other Eden Amplifier manuals

Eden EC8 User manual

Eden

Eden EC8 User manual

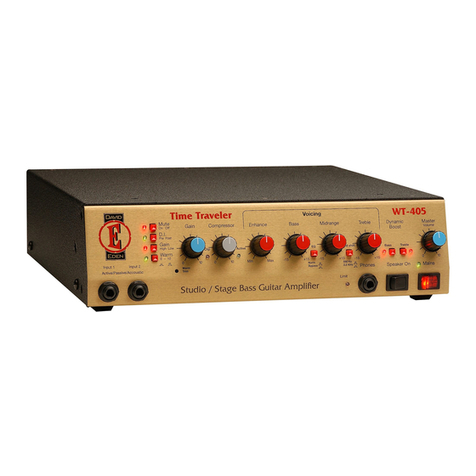
Eden Never Compromise WT405 User manual

Eden

Eden Never Compromise WT405 User manual

Eden EM275 METROMIX SERIES User manual

Eden

Eden EM275 METROMIX SERIES User manual

Eden WT-330 Time Traveler User manual

Eden

Eden WT-330 Time Traveler User manual

Eden Valvetech VT-300A User manual

Eden

Eden Valvetech VT-300A User manual

Eden WTX-264 User manual

Eden

Eden WTX-264 User manual

Eden WTX-264 User manual

Eden

Eden WTX-264 User manual

Eden Navigator WP-100 User manual

Eden

Eden Navigator WP-100 User manual

Eden ENX-260 User manual

Eden

Eden ENX-260 User manual

Eden World Tour 1205 User manual

Eden

Eden World Tour 1205 User manual

Eden World Tour WTX1000N Powered Navigator User manual

Eden

Eden World Tour WTX1000N Powered Navigator User manual

Eden EM15 METROMIX SERIES User manual

Eden

Eden EM15 METROMIX SERIES User manual

Eden Valve Tech VT-300B User manual

Eden

Eden Valve Tech VT-300B User manual

Eden World Tour WT800C User manual

Eden

Eden World Tour WT800C User manual

Eden Nemesis RS Series Combos User manual

Eden

Eden Nemesis RS Series Combos User manual

Eden Terra Nova TN226 User manual

Eden

Eden Terra Nova TN226 User manual

Eden Navigator WP-100 User manual

Eden

Eden Navigator WP-100 User manual

Eden David line Valve-Tech series User manual

Eden

Eden David line Valve-Tech series User manual

Eden WT800 User manual

Eden

Eden WT800 User manual

Eden Nemesis Silver Series NA120 User manual

Eden

Eden Nemesis Silver Series NA120 User manual

Eden E300 NEVER COMPROMISE User manual

Eden

Eden E300 NEVER COMPROMISE User manual

Eden Terra Nova Module User manual

Eden

Eden Terra Nova Module User manual

Eden WT-300 Traveler User manual

Eden

Eden WT-300 Traveler User manual

Eden E-300T User manual

Eden

Eden E-300T User manual

Popular Amplifier manuals by other brands

Magnat Audio EDITION FOUR Owner's manual/warranty document

Magnat Audio

Magnat Audio EDITION FOUR Owner's manual/warranty document

Inter-m PA-2000A Operation manual

Inter-m

Inter-m PA-2000A Operation manual

Yamaha TX6n owner's manual

Yamaha

Yamaha TX6n owner's manual

Peavey TNT 150 user guide

Peavey

Peavey TNT 150 user guide

Bosch LBB 1903/10 Installation and user instructions

Bosch

Bosch LBB 1903/10 Installation and user instructions

Avocent Emerge DA1200D Installer/user guide

Avocent

Avocent Emerge DA1200D Installer/user guide

Redgum RGi35 operating instructions

Redgum

Redgum RGi35 operating instructions

Cambridge Audio AXA25 user manual

Cambridge Audio

Cambridge Audio AXA25 user manual

Alpine MRP-M200 owner's manual

Alpine

Alpine MRP-M200 owner's manual

Technical Pro H1502UrBT user manual

Technical Pro

Technical Pro H1502UrBT user manual

FMS EMGZ307 operating manual

FMS

FMS EMGZ307 operating manual

Racal Instruments 5601 user manual

Racal Instruments

Racal Instruments 5601 user manual

Valcom V-1094A Technical specifications

Valcom

Valcom V-1094A Technical specifications

Cambridge Audio 851D user manual

Cambridge Audio

Cambridge Audio 851D user manual

QSC 3800 Specifications

QSC

QSC 3800 Specifications

NAD C300 owner's manual

NAD

NAD C300 owner's manual

Rotel RMB-1077 owner's manual

Rotel

Rotel RMB-1077 owner's manual

Peavey Monitor 300 Series operating guide

Peavey

Peavey Monitor 300 Series operating guide

manuals.online logo
manuals.online logoBrands
  • About & Mission
  • Contact us
  • Privacy Policy
  • Terms and Conditions

Copyright 2025 Manuals.Online. All Rights Reserved.

THE LEADER IN BASS AMPLIFICATION.
World Tour Black 1000
Bass Guitar Amplifier
Operation Manual
Never Compromise
©04-30-2009 by U.S. Music Corp.
2
Bass Guitar Amplifier
WTB1000
OPERATION MANUAL
Publishing Date 04-30-2009
FORWARD
Congratulations on the purchase of your new Eden World Tour Integrated
Amplifier System. All of us at Eden are totally committed to providing you
with the very best bass guitar systems in their class. Our goals are to offer
you the outstanding performance quality of a top-notch, professional bass
amplification system at a reasonable price point, and to make World Tour
amplifiers the most musical and reliable Bass amplifiers available.
This manual will cover all domestic and international versions of the
WTB1000 integrated amplifier.
The WTB1000 delivers 325 watts RMS output @ 8 Ohms,500 watts @ 4
Ohms and 600 watts @ 2 Ohms with both channels driven. In Bridge Mode,
it delivers 1000 Watts RMS @ 8 Ohms, and 1200 watts @ 4 Ohms. Both
modes of operation have +3dB of headroom. This amplifier offers two
independent power amps and features a thermostatically-controlled, active
cooling system with built-in thermal safeties.
You have purchased what we feel is one of the finest bass amplifiers
in the world. The new pre-amplifier section, with its familiar Eden Enhance
control and powerful new tone control system are coupled to a studio quality
compressor. The new automatic Dynamic Booster for low and high
frequencies, along with Graphic EQ and a gentle auto-compression
circuit, allow you to achieve a wide array of sounds. This compact,
rack mountable package houses modular circuits made with superior
components and designed for years of trouble-free service.
3
The Eden World Tour products group is the result of our quest for ultimate
bass tone and maximum reliability. Your new World Tour Amplifier was
designed, engineered and manufactured equivalent to aircraft vibration
standards and housed in a one-piece aluminum case with steel top to ensure
maximum reliability. The modular design allows quick repair in the field
should such a need arise.
The Eden line of World Tour amplifiers is the result of our research and
development in combining high performance and compact size. Just as a
skilled craftsman needs good quality tools that won't let him down on the
job, so does a good musician. We hope you enjoy the tool weve created for
you. Have fun; play low!
Please read this manual in its entirety before operating your new amplifier.
Failure to do so could result in misuse or damage. Weve taken the time to
write it, which was a lot longer than the time it will take for you to read it.
Help us help you by taking a few moments to learn how to properly use your
new amp. Youll be glad you did!
CAUTION!
Your ears are your most important piece of equipment.
Unfortunately, they cannot be replaced as easily as your other
gear. Please take the following warning seriously.
This product, when used in combination with loudspeakers
and/or additional amplification may be capable of producing
sound levels that could cause permanent hearing loss. DO NOT
operate at high volume levels or at a level that is uncomfortable.
If you experience any discomfort or ringing in the ears or suspect
hearing loss, you should consult an audiologist.
Thank you for your purchase of an Eden bass guitar product.
This unit has been designed and constructed to give you years of
trouble-free service.
Please take the time to review this manual
and to send in your warranty registration card.
4
FRONT PANEL FEATURES
Input Jack  Designed to accept a standard ¼ inch mono phone plug. For
best results use a high quality shielded cable to connect your instrument to
the amplifier. The input is buffered and will handle standard passive,
high level active, and piezo input signals.
Mute switch  Mutes all the outputs except the Tuner Out, allowing for
silent tuning. Lead singers and guitarists love this feature! The indicator
lights up when Mute is ON.
Gain Control  Regulate the first gain stage of the preamplifier and
controls the amount of signal available to the system.
Input Pad  Pull gently on the Input Gain control to engage a -12dB pad.
This feature is very useful for basses that have a very hot signal level.
Compressor Control - This adjusts the threshold level of the compressor.
The ratio is fixed at an optimum point for bass reproduction.
Compressor Indicator - Lights to indicate that the signal has crossed the
threshold of the compression circuit and that compression is taking place.
Tube Control - This adjust the amount of Tube Distortion in the preamp.
5
Enhance Controls  Called the Magic Knob by some, this complex
control simultaneously boosts the very low bass, upper middle, and high
frequencies while putting a dip in the lower middle frequencies. It is flat
when set to its minimum level (fully counterclockwise).
Bass  This traditional shelving tone control provides 15dB of boost or cut at
Midrange Control  This covers the center portion of the sound envelope
and can be critical to getting your sound right. The body of the bass guitar
sound is in the Midrange. It boost or cuts the seleted Mid frequency 15dB.
Midrange Freq. Control  This controls the center frequency of the Midrange
from 250Hz to 2.5KHz.
Treble  This traditional shelving tone control provides 15dB of boost or cut
We recommend you engage these switches at low volumes so that your
sound remains consistent at any volume. At higher volume levels they arent
needed but you may want to use them as a matter of taste. Because we
strongly support Freedom of Choice, weve incorporated these two switches
into our design. (Youre welcome.) Indicator lights to the outsides of the
switches let you know when the boost circuits are engaged.
Master Level Control  Adjusts overall system output and stage loudness.
approximately 30Hz. The control is flat in the 12:00 position.
at approximately 11KHz. The control is flat in the 12:00 position.
Tone Control Section
Dynamic Boost  Immediately to the right of the Treble control you will find
two switchs labeled Bass and Treble. These engage the Dynamic Boost. This
feature allows the extreme lows and highs to be adjusted to the ears relative
loudness curve (Fletcher-Munson Curve). This ensures the bass will sound full
and solid, even at very low playing levels.
6
Bridge Mono Select  The WTB1000 has two separate amplifiers. They can
be used in Dual Mono or Stereo Mode, or can be bridged together to create
one, high-power amp. To engage Bridge Mono operation, depress this
switch. The indicator light will come on when in this mode.
NOTE: Choose the mode of operation while the amplifier is OFF.
Mains On/Off Switch  This switch turns the system power ON or OFF.
The switch illuminates to indicate the presence of AC power present in the
chassis. This switch is prior to the fuse. The switch light can be on even if
the fuse is blown. The light in the switch may flicker depending on local
voltage conditions. This is normal and nothing to be concerned about.
DC Power On Indicator  Lights to indicate that there is power throughout
the entire amplifier.
Output Limit Indicators  Light to indicate activity of the power amplifier
limiting circuits, which protect the speaker system(s) from severe distortion.
These LEDs indicate that the amplifiers have reached their maximum output
level.
Headphone Output/Slave Output  You can use this output for silent
practicing  your neighbors will really appreciate this feature  or to power
another amplifier. This output is controlled by the Master Volume so that
you can control the entire rig with a single volume control.
Graphic EQ Section  This section contains a traditional 9-band Graphic EQ.
Each of the 9-bands boost or cut the signal 12dB. The center frequencies are
31Hz, 63Hz, 125Hz, 250Hz, 500Hz, 1KHz, 2KHz, 4KHz, 8KHz. The selector
switch to the right of the 8KHz slider enables or disables the circuit. The LED
turns on when the switch is pushed in to indicate the circuit is active.
7
REAR PANEL FEATURES
Amplifier Power Rating:
In Dual Mono or Stereo Mode, with both channels driven:
325 watts RMS @ 8 Ohms
500 watts RMS @ 4 Ohms
600 watts RMS @ 2 Ohms
In Mono Bridge Mode:
1000 Watts RMS @ 8 Ohms
1200 Watts RMS @ 4 Ohms
All modes of operation have +3dB of headroom. This means that the
maximum output is twice the RMS rating.
Note: Our new D610XLT is rated at 6 Ohms and is rated at 1050 Watts
RMS. When connecting this cabinet to the WTB1000 in Bridge Mode, it will
receive approximately 1100 Watts RMS, which is a near-perfect match.
Combination Power Cord Jack and Fuse Holder  The removable power
cord is attached here. To access the fuse holder, pull the holder out of the top
of the power receptacle. Your unit was shipped with a spare fuse inserted in
the fuse carrier. USE ONLY THE SAME SIZE AND TYPE FOR
REPLACMENT. Using a fuse with a different rating than specified can
cause damage to your amplifier.
8
All models come with a holder marked (FUSE) and are factory configured
for 100/120/ 230/240 only and must be adapted by a service technician for
any voltage change.
Fuse Requirements:
USA @ 120 Volts /60 HZ  10 Amps, 5 x 20 mm GMC/T/slow blow
Europe @ 240 Volts/50 Hz - 5 Amps, 5 x 20 mm GMC/T/slow blow
Japan @ 100 Volts/60 Hz - 12 Amps, 5 x 20 mm GMC/T/slow blow
IMPORTANT NOTE: Always use slow blow or time delay type fuses.
Do not use fast blow fuses.
IMPORTANT NOTE: In order to operate properly anywhere other
than North America, the voltage configuration may be easily changed
by moving one or two jumpers inside the amplifier, following the
instructions located on the inside of the top panel. These modifications
should be made by a QUALIFIED technician. Contact your local
distributor for further information.
Speaker Outputs  These consist of two ¼ inch jacks and an NL-4
connector (sometimes called a Speakon) for each amplifier. The jacks are
wired in parallel. The total speaker load impedance should not go below 2
ohms. On NL-4 connectors, we use +1, -1 connections.
Bridge Mono Output  The WTB1000 can also be used in Bridge Mono
mode. There is a separate NL-4 connector for this mode of operation.
IMPORTANT NOTE: Use ONLY the Bridge Mono Output when
operating your amplifier in Mono Bridge mode. Using the individual
amplifier outputs when in Mono Bridge mode may cause significant
damage to your amplifier.
9
Footswitch Jack  Connect the Footswitch here. When connected, the
footswitch overrides the corresponding front panel controls.
Tuner Out Jack  This standard ¼ inch jack is designed to provide a pre-
gain signal for connection to a tuner. It can also be used to provide pre-tone
signal to other devices such as a direct box or console. The signal is hot
enough to provide adequate signal to virtually every tuner on the market.
Stereo Aux. Inputs - These standard ¼ inch input jacks are designed to
accept the signal from an external source such as a CD or cassette player,
drum machine, synth. module, etc. The signal is summed post EQ prior
to the Master Volume control. These jacks can also be used to return a
studio cue signal, allowing the WTB1000 to provide you with your
own headphone mix in the studio.
Recording Out  This fully balanced XLR output allows you to send a
post-EQ signal to a recording or sound reinforcement mixing console. We
use Pin 2 hot configuration. Adjusting the Master Volume control will not
affect this send. This output is designed to use with phantom powered
systems. However, it never hurts to turn off the phantom power at the board,
if possible.
Ground Lift Switch  This switch lifts the ground within the balanced
output system to allow you to eliminate excessive noise/ground loops when
connected to external systems.
Mono Pre EQ Effects Send/Return  These standard 1/4 inch jacks allow
you to send and receive your signal to and from external devices. This
effects loop is positioned post (behind) the compressor and before the
Enhance control and the tone section. This loop is at line level; do not use
instrument level effects in this loop as they tend to be overloaded by the
higher signal level which can cause distortion.
Stereo Post EQ Effects Send/Return  These standard 1/4 inch jacks allow
you to send and receive your signal to and from external devices. This
effects loop is positioned post (behind) the tone section. This loop is at line
level; do not use instrument level effects in this loop as they tend to be
overloaded by the higher signal level which can cause distortion.
10
Cooling System  Your amplifier features a thermostatically controlled fan,
which will switch on when the internal temperature reaches 130 degrees F.
In low volume situations (into 8 Ohm loads) the fan may not come on at all.
The cooling system also features a high temperature thermal safety system,
which will activate a standby switch if the operating temperature goes above
190 degrees F. This circuit will automatically shut down the output of the
system in the event of overheating. It will automatically reset itself to normal
operation as soon as the unit cools down to a safe operating temperature.
NOTE: the D.I. will continue to operate normally even when the amplifier is
in thermal safety mode. Only the stage sound will be lost.
IMPORTANT NOTE: Excessive heat is a very bad thing and can
result in severe damage to your amplifier. DO NOT bypass or
disconnect any part of your thermal safety system. Doing so will
immediately void your warranty!
FOOTSWITCH FEATURES
The footswitch is connected via the rear panel of the amp using the supplied
7-pin DIN cable. When connected, the footswitch overrides the
corresponding switches on the front panel. From left to right, the buttons on
the footswitch are:
Mute  Engage this button to mute all outputs except the Tuner out. This
allows silent tuning, a feature that your guitarist will very much appreciate.
Unfortunately, it will not mute your guitar player, no matter how much you
wish it did.
Enhance Bypass  Disengages the Enhance circuits, allowing you to
instantly change tone. One neat way to use this feature is to create a tone via
the tone controls only, then dial in some Enhance for a second tone. Using
the switch, you can flip between the two tones youve created. This control
is also global, meaning that it affects both channels simultaneously.
Tube Bypass  Engage this button to bypass the effect of the Tube control.