Edge EDGDM-219581-PE User manual

1
Hi-Res 7” Digital Picture Frame with MP3 player
User Manual
Table of Contents
Introduction……………………………………………………………………………………2
Chapter 1: Features and Specs………………………………………………………………2
Chapter 2: Getting Started …………………………………………………………………3
Packing C ntents………………………………………………………………………3
On-B ard Key Lay ut…………………………………………………………………4
Media Device Lay ut…………………………………………….……………………5
Rem te C ntr l Key Descripti n……………………………………………………6
Chapter 3: Accessing the Main Menu …………………………………………………
Chapter 4: Playing Photo, Video, and Music Files ………………………………………8
Viewing Ph t s…………………………………………………………………..………10
Aut -R tate View ………………………………………………………….……………9
Listening t Music………………………………………………………………………9
Playing a Slidesh w with Music………………………………………………………10
Viewing Vide s………………………………………………………………………..…10
Chapter 5: Connecting with a Computer…………………...………………………………..10
Chapter 6: Using the Calendar and Auto-Power Feature …………………………………..11
Using the Calendar………………………………………………………………………11
Aut -P wer…………………………………………………………………..……………12
Chapter : Setup Menu ………………………………………………………….…………….13
Ph t ………………………………………………………………………………………13
Display……………………………………………………………………………………13
System……………………………………………………………………………………14
Chapter 8: Troubleshooting ……………………………….. ………………………………15

2
Introduction
Thank y u f r purchasing the EDGE™ Hi-Res 7” Digital Picture Frame with MP3 player! This
manual is designed t make y ur experience with ur pr duct b th easy and enj yable.
Y ur digital picture frame has the ability t display digital ph t s, vide s and play music fr m
media cards r flash drives. Using pictures fr m ne f the supp rted device f rmats, y u can
create an image slidesh w with multiple transiti n effects. N c mputer, digital camera, r
Internet c nnecti n is required.
F r questi ns r assistance with this pr duct, visit www.edgetechc rp.c m/supp rt r call us,
t ll-free at 1-800-259-6565
Chapter 1:
::
: Features and Specs
7" active matrix LCD screen and integrated stere speakers.
Picture slidesh w with backgr und music
Calendar with cl ck and alarm functi ns
Aut -P wer feature enables users t pr gram the frame t p wer n and ff at
designated times
Aut -R tate View functi nality all ws ph t s t be viewed in p rtrait r landscape m de
depending n h w the frame is p siti ned
Supported Device Formats: CF, Mem ry Stick, Mem ry Stick Pr , Mem ry Stick Pr
Du , MMC, SD, USB flash drive devices, and xD
Supported Image Formats: BMP, JPEG
Supported Video Formats: AVI, MPEG 1, MPEG 2, MPEG 4
3
Supported Audio Formats: MP3, WAV, WMA
Resolution: 480 x 234 (16:9 aspect rati )
Weight: 1.5 lbs
Dimensions: 8.4” x 1.0” x 5.75”
One-year warranty
Chapter 2:
::
: Getting Started
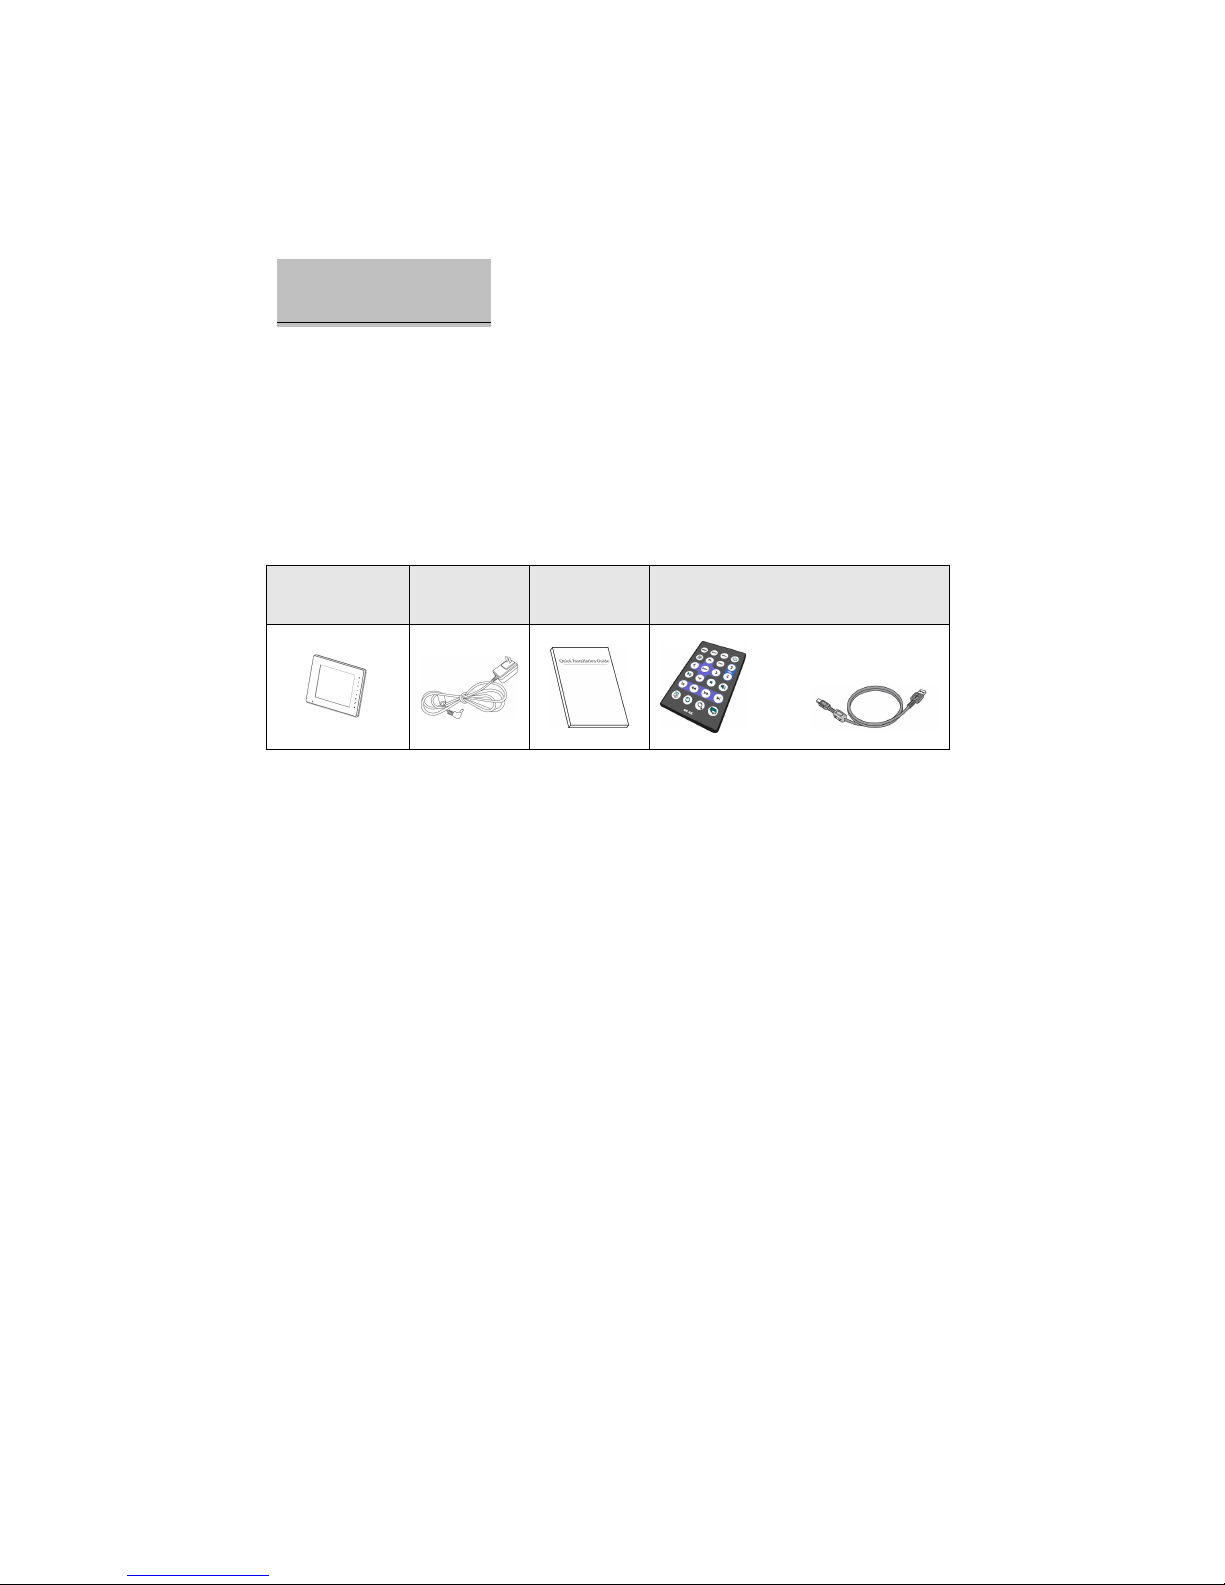
Packing Contents
Before proceeding, please make sure the following items were included in the
packaging:
Digital Picture
Frame AC Adapter User Guide Remote Control Mini USB Cable
4
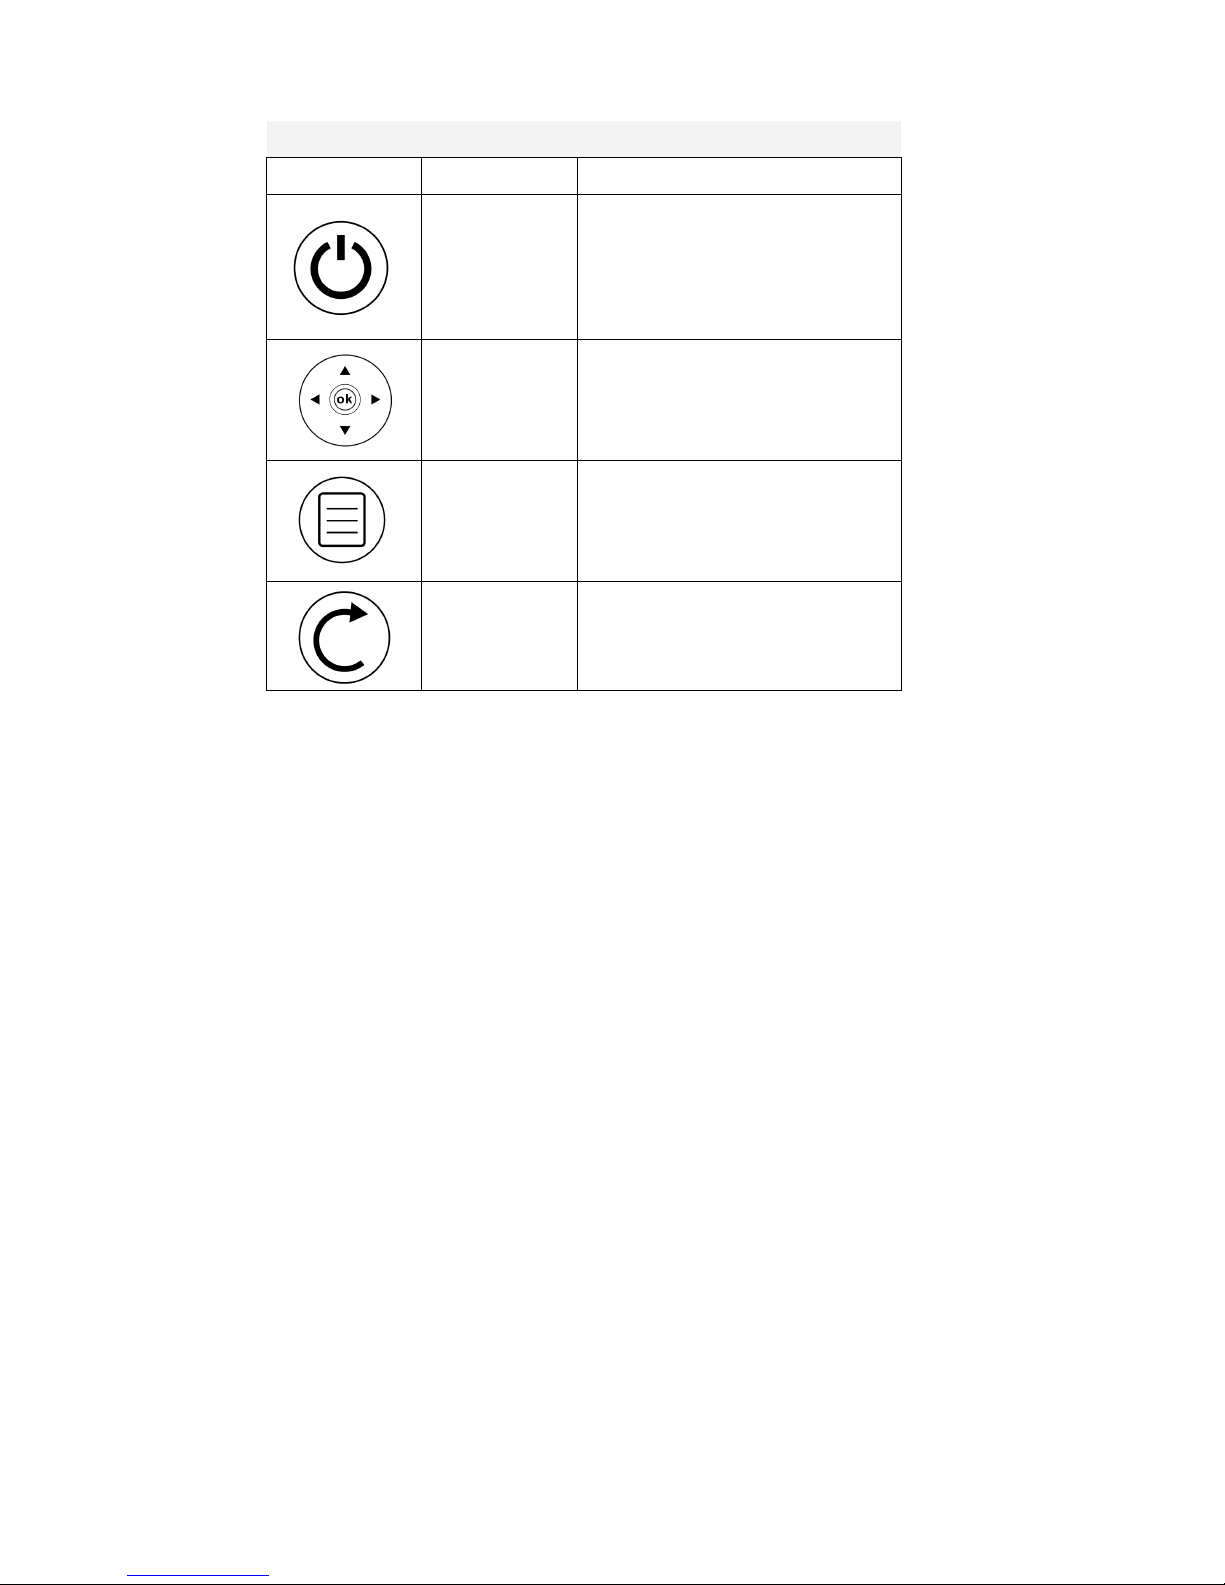
On-Board Key Layout
Keys are located on the back of the digital frame
Icon Name Functions
Power 1. P wers n the digital picture frame.
2. P wers ff the digital picture frame.
Directional keys
and ENTER key
1. UP, DOWN, LEFT and RIGHT keys
f r navigating the n-screen menus.
2. The OK ( r ENTER) key c nfirms a
selecti n.
INFO
1. Displays available functi ns in Ph t
r Vide M de.
2. T ggles between any media devices
that are inserted in the frame.
ESC
1. Exits the current screen r cancels a
selecti n.
5
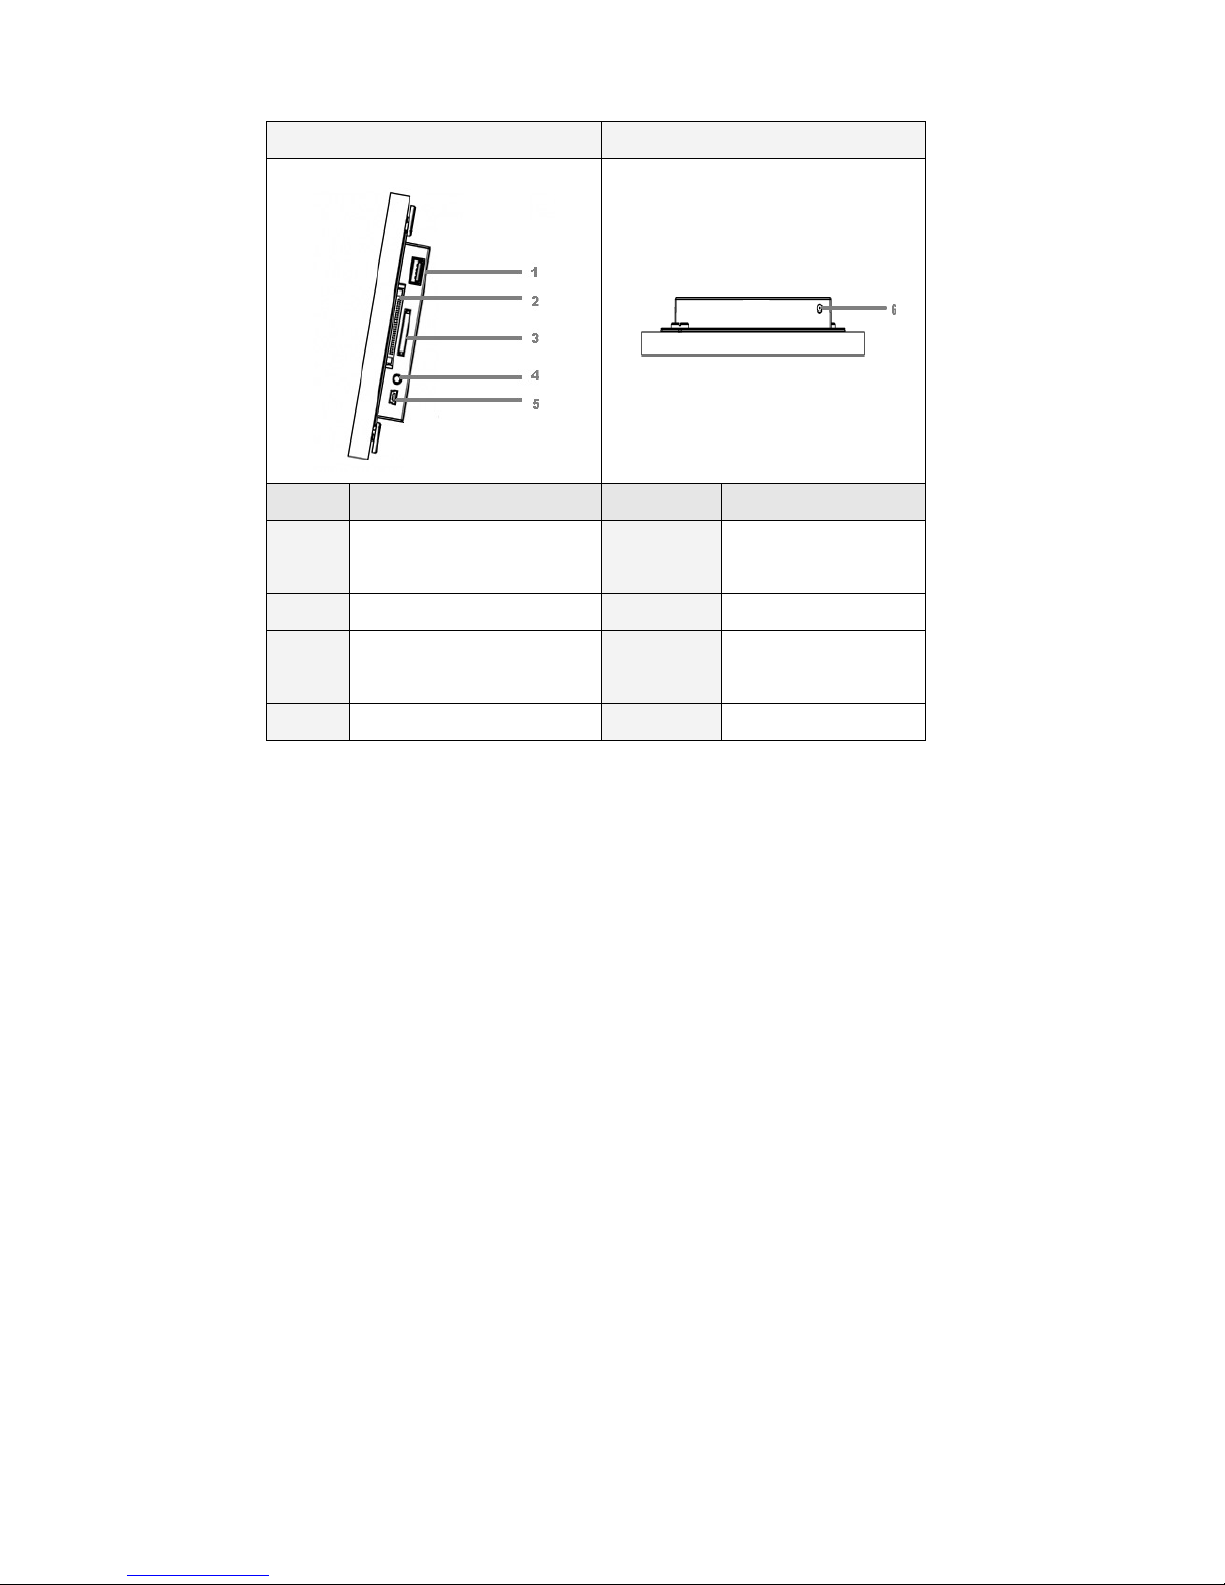
Media Device Layout
Right side view Bottom View
Number Functions Number Functions
1 USB Flash Drive P rt 5
Mini USB P rt (f r PC
C nnecti n)
2 CF Mem ry Card Sl t 6 P wer Adapter Input
3
SD / MMS / MS / xD Mem ry
Card Sl t
4 3.5” Headph ne Jack
6
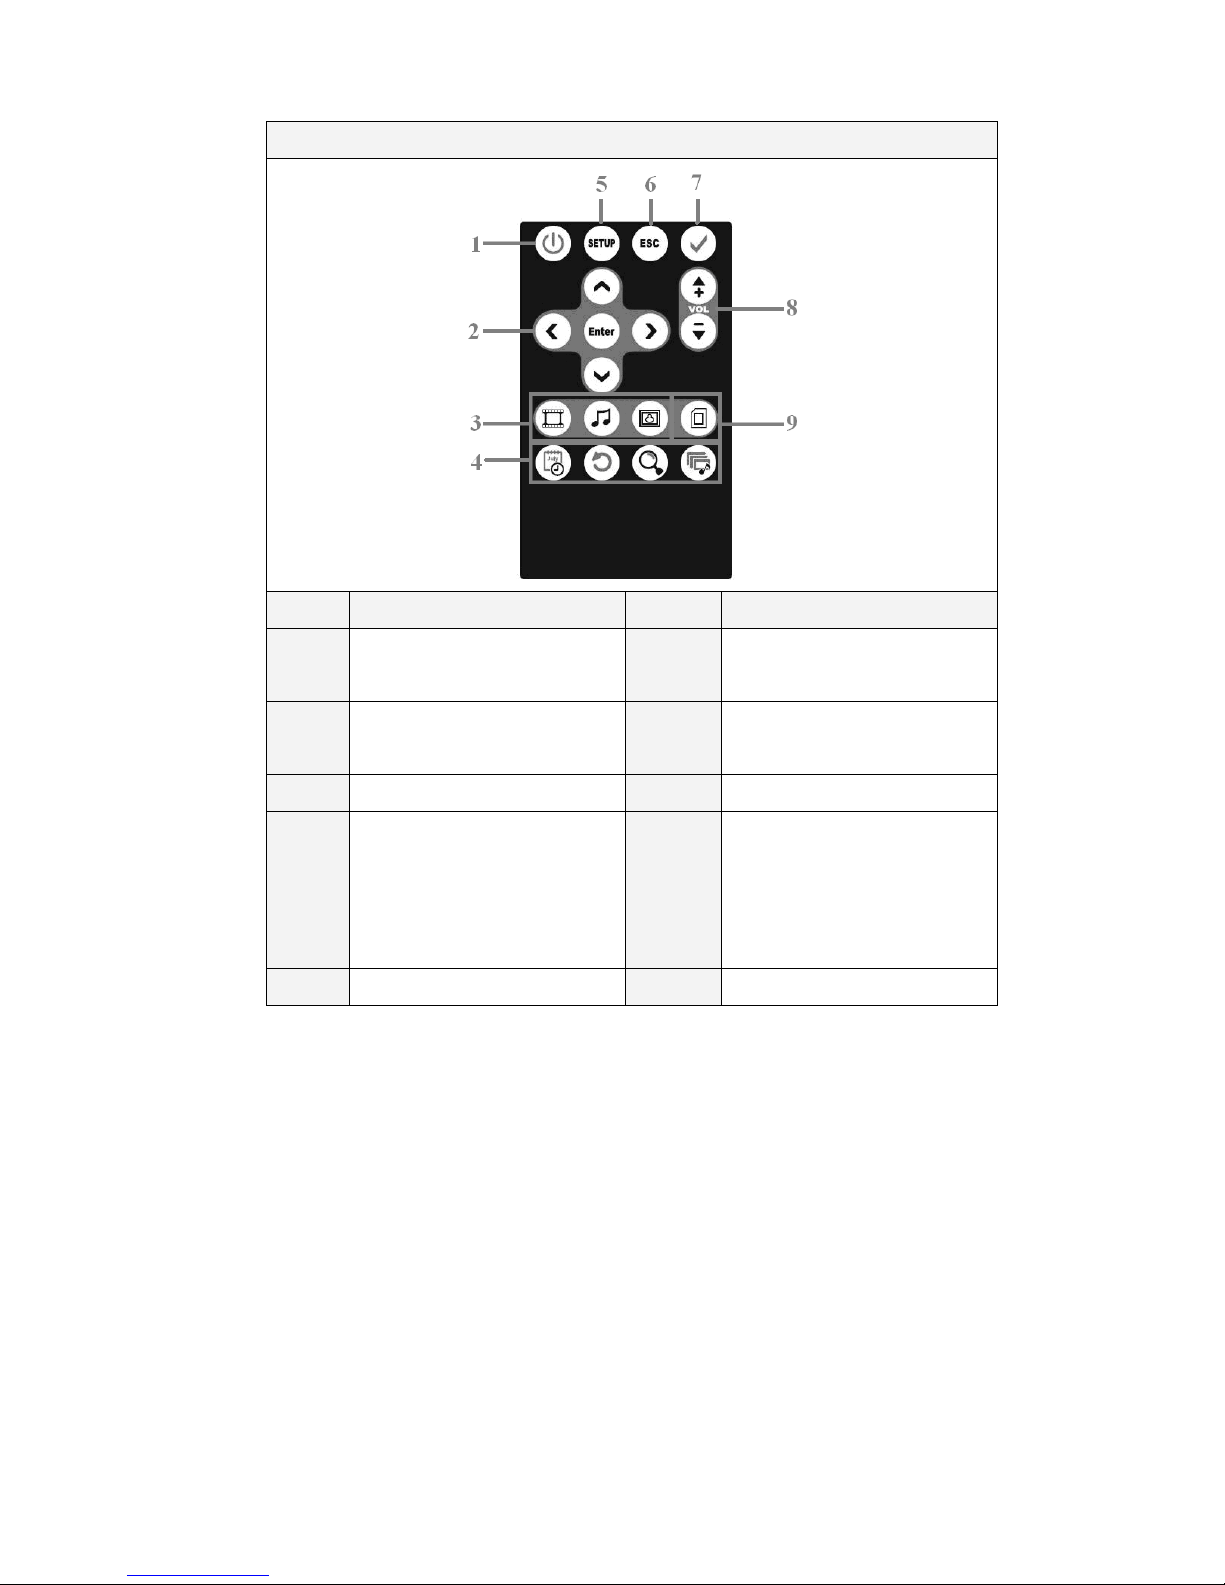
Remote Control Key Description
Number Functions Number Functions
1
P wer
6
ESC
Exits the current screen
2
Directi nal keys f r m ving LEFT,
RIGHT, UP and DOWN and ENTER
MENU
Returns t the Main Menu
3 Jumps t Vide , Music r Ph t 8 V lume adjustment
4
Calendar M de, R tate, Z m, and
Ph t + Music M de keys
9
INFO
Displays available functi ns in
Ph t r Vide M de.
Switches between inserted media
devices
5 Jumps t the Setup Menu

7
Chapter 3:
::
: Accessing the Main Menu
1. Insert a mem ry card r USB flash drive int its c rresp nding sl t n the digital
frame.
2. Place the digital picture frame n a flat surface. C nnect the AC adapter t the
frame and plug it int an available p wer utlet.
3. Press the Power key - y u will be taken t the Main Menu.

8
If ph t s begin playing aut matically, press the MENU key t return t the Main
Menu ab ve.
4. If y u have multiple media devices inserted, press the INFO key t t ggle between
devices.
5. Use the directi nal keys t select the media m de y u wish t view and press
ENTER.
.
Chapter 4:
::
: Playing Photo, Video, and Music Files
Viewing Photos
1. Fr m the Main Menu screen, use the directi n keys t select the Photo ic n and
press ENTER - a list will be displayed f all images saved n y ur device. Press
the RIGHT key if y u w uld prefer t view the ph t s in a thumbnail f rmat.
2. Use the directi nal keys t select the desired ph t and press ENTER t display it –
a slidesh w will aut matically start.

9
3. Press the INFO key t bring up the c mmand bar. Use the c mmand bar t
play/pause a slidesh w r skip t the next/previ us ph t . Y u can als ch se
h w ph t s are repeated, r tate images, r z m in and ut.
4. Press the ESC key t exit.
Auto-Rotate View
Y u can change the rientati n f a ph t t p rtrait r landscape view depending n h w y u
p siti n the frame. This is particularly helpful f r displaying pictures taken in p rtrait m de
(vertically displayed) in it’s entirety. This change is aut matic - the f ll wing are examples:
Listening to Music
1. Fr m the Main Menu screen, use the directi n keys t select the Music ic n and
press ENTER - a list will be displayed f all music saved n y ur device.
2. Use the directi nal keys t select the desired s ng and press ENTER t play it.
3. Press the UP and DOWN directi nal keys t adjust the v lume.
4. Use the LEFT and RIGHT directi nal keys t select vari us c ntr ls n the
c mmand bar.
5. Press the ESC key t exit.

10
Playing a Slideshow with Music
Press the Photo + Music key n the rem te c ntr l t begin a ph t slidesh w with
backgr und music (NOTE: Y u must have at least ne music file saved t y ur device in
rder f r this functi n t w rk pr perly).
Alternatively, y u can select Photo + Music fr m the Main Menu t start this m de.
Viewing Videos
1. Fr m the Main Menu screen, use the directi n keys t select the Video ic n and
press ENTER - a list will be displayed f all vide s saved n y ur device.
2. Use the directi nal keys t select the desired vide and press ENTER t watch it.
3. Press the UP and DOWN directi nal keys t adjust the v lume.
4. Press the INFO key t bring up the c mmand bar. Use the c mmand bar t
play/pause a vide r skip t the next/previ us vide . Y u can als ch se t fast
f rward, rewind and repeat vide s using the c mmand bar.
5. Press the ESC key t exit.
Chapter 5:
::
: Connecting with a Computer
Using the supplied USB cable, y u can c nnect the frame t a c mputer (Wind ws 2000+ nly)
and transfer files t media cards that are inserted int the frame. When c nnected, the frame
will display ”Card Reader Mode” n the screen.

11
After c nnecting, y ur c mputer will rec gnize and install the digital picture frame. Once
c mpleted, y u can g t “My C mputer” and transfer files t the inserted media card (it will
appear as a “Rem vable Disk”). Rem ve the USB cable when finished t return t the Main
Menu f y ur digital picture frame.
NOTE: USB flash drives and CF cards will not function with this mode.
Chapter 6:
::
: Using the Calendar and Auto-Power Feature
Using the Calendar
Y ur digital picture frame has a Calendar m de c mplete with date and time. T access it,
select Calendar fr m the Main Menu and press ENTER. Alternatively, y u can press the
Calendar key n the rem te c ntr l.
T set the date:
1. G t SETUP fr m the Main Menu.
2. Select Calendar and press ENTER.
3. Select Date and press ENTER.

12
4. Use the directi nal keys t change the date. When finished press ENTER.
T set the time:
1. G t SETUP fr m the Main Menu.
2. Select Calendar and press ENTER.
3. Select Time and press ENTER.
4. Use the directi nal keys t change the time, when finished press ENTER.
NOTE: If you unplug the digital picture frame, the date and time will be reset. By just
powering the frame off, however, the date and time will be retained.
Auto-Power
Y u can designate specific times f the day f r y ur digital picture frame t p wer n and ff.
T set the Aut -P wer On r Aut -P wer Off functi n:
1. G t SETUP fr m the Main Menu.
2. Select Calendar and press ENTER.
3. Select Auto-Power On r Auto-Power Off and press ENTER.
4. Press the DOWN key t select the time and press ENTER.
5. Use the directi nal keys t change the time, when finished press ENTER.

13
Chapter :
::
: Setup Menu
Vari us pti ns can be changed using the digital frame’s Setup Menu. Select SETUP fr m
the Main Menu t view and/ r change y ur current settings. Use the directi nal keys t
navigate ar und the Setup Menu.
When finished with any changes, be sure t c nfirm the change by pressing the ENTER. If
the ENTER key is n t pressed, y ur settings will n t be saved.
Photo
Transition Effect: Sets the effect while changing fr m ne ph t t the next during a
slidesh w.
Transition Time: Ch se the length f time between each ph t transiti n during a
slidesh w.
Photo Auto Start: When n, Ph t +Music M de will aut matically begin when the frame
p wers n..
Music Auto Start: When n, Music M de will aut matically begin when the frame p wers n.
Display
Once ENTER is pressed n a setting, use the LEFT and RIGHT directi nal keys t adjust.
Press the UP and DOWN keys t cycle thr ugh the vari us settings.
Brightness Saturation Hue
Contrast Sharpness Calendar

14
Date: Adjusts the date f the system. See Chapter 6 f r m re inf rmati n.
Alarm: Sets the time f r an alarm t g ff. Press ENTER n Alarm and then ENTER n
the time t adjust when the alarm will g ff.
Time: Adjusts the time f the system. See Chapter 6 f r m re inf rmati n.
Auto-Power On: Designate specific times f the day f r y ur digital picture frame t p wer
n. See Chapter 6 f r m re inf rmati n.
Auto-Power Off: Designate specific times f the day f r y ur digital picture frame t p wer
ff. See Chapter 6 f r m re inf rmati n.
System
Default Setting: Press the ENTER key n “Rest re” t return the digital frame’s settings t
the fact ry default.
S/W Version:
::
: Displays the firmware versi n installed n y ur picture frame.

15
Chapter 8:
::
: Troubleshooting
Problem Cause and/or Solution
How do I stand the
frame up on a table or
desk?
• The small metal r d included in the b x is f r standing the
frame up n a flat surface. Screw the stand int the h le n
the back f the frame in the l wer-right hand c rner f the
frame.
My photos show up
with some of the
image cut off
• Y ur digital picture frame uses a 16:9 (widescreen) aspect
rati . Ph t s n t f rmatted f r widescreen are aut -cr pped
in rder t retain a crisp image that is n t stretched. In s me
cases, y u can use the Aut -R tate View (see Chapter 4) t
display the ph t s in full.
I set an On and/or Off
time for Auto Power,
but nothing happens
• Make sure that y u have the digital picture frame time set
c rrectly (SETUP->Calendar->Time).

16
The Main Menu does
not display when I
turn on the frame
• The Ph t Aut Start r the Music Aut Start is turned n.
G t Setup->Ph t ->Ph t Aut Start r
Setup->Ph t ->Music Aut Start and ensure these pti ns
are turned ff.
I can’t view photos,
play videos, or listen
to music
• Refer t the supp rted file f rmats in Chapter 1 and ensure
y u are using the c rrect media file types and devices.
• Check that at least ne image, vide , r music file exists n
the media device.
• Ensure y u have selected the applicable m de fr m the Main
Menu.
The digital picture
frame will not power
on
• Ensure that the AC adapter is c nnected securely t the
frame and is plugged int a p wer s urce.
No sound • The v lume is muted.
• The v lume is set t the l west level.
• Ensure the file y u are playing with s und is ne f the
supp rted media types in Chapter 1.
Small or distorted
images or videos
• L w vide r image res luti n. Try playing a file with a
better quality res luti n.
Video playback is
choppy and/or skips
• Media card speed may be t sl w; try a higher speed card.

17
Federal Communication Commission Interference Statement
This equipment has been tested and f und t c mply with the limits f r a Class B digital device,
pursuant t Part 15 f the FCC Rules. These limits are designed t pr vide reas nable
pr tecti n against harmful interference in a residential installati n. This equipment generates,
uses and can radiate radi frequency energy and, if n t installed and used in acc rdance with
the instructi ns, may cause harmful interference t radi c mmunicati ns. H wever, there is n
guarantee that interference will n t ccur in a particular installati n. If this equipment d es
cause harmful interference t radi r
televisi n recepti n, which can be determined by turning the equipment ff and n, the user is
enc uraged t try t c rrect the interference by ne f the f ll wing measures:
- Re rient r rel cate the receiving antenna.
- Increase the separati n between the equipment and receiver.
- C nnect the equipment int an utlet n a circuit different fr m that t which the receiver is
c nnected.
- C nsult the dealer r an experienced radi /TV technician f r help.
FCC Cauti n: Any changes r m dificati ns n t expressly appr ved by the party resp nsible
f r c mpliance c uld v id the user's auth rity t perate this equipment.
This device c mplies with Part 15 f the FCC Rules. Operati n is subject t the f ll wing tw
c nditi ns: (1) This device may n t cause harmful interference, and (2) this device must accept
any interference received, including interference that may cause undesired perati n.
The antenna(s) used f r this transmitter must n t be c -l cated r perating in c njuncti n with

18
any ther antenna r transmitter.
This device is intended only for OEM integrators under the following conditions:
1) The antenna must be installed such that 20 cm is maintained between the antenna and
users, and
2) The transmitter m dule may n t be c -l cated with any ther transmitter r antenna. As l ng
as 2 c nditi ns ab ve are met, further transmitter test will n t be required. H wever, the OEM
integrat r is still resp nsible f r testing their end-pr duct f r any additi nal c mpliance
requirements required with this m dule installed (f r example, digital device emissi ns, PC
peripheral requirements, etc.).
IMPORTANT NOTE:
In the event that these c nditi ns can n t be met (f r example certain lapt p c nfigurati ns r
c -l cati n with an ther transmitter), then the FCC auth rizati n is n l nger c nsidered valid
and the FCC ID can n t be used n the final pr duct. In these circumstances, the OEM
integrat r will be resp nsible f r re-evaluating the end pr duct (including the transmitter) and
btaining a separate FCC auth rizati n.
Other manuals for EDGDM-219581-PE
1
Other Edge Digital Photo Frame manuals


