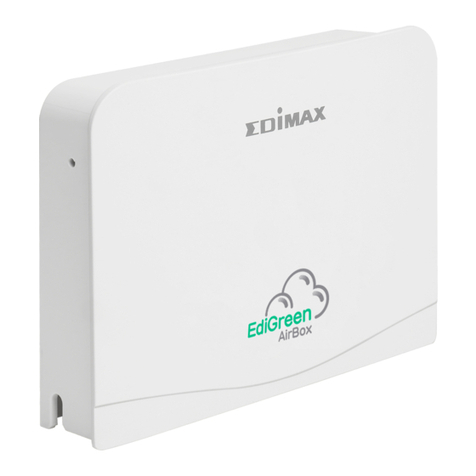
Edimax AI-2003W User manual

AI-2003W & AI-2004W
Quick Installation Guide
09-2019 / v1.0

2
Contents
I. Safety Information ...............................................3
II. Product Information.............................................4
II-1. Package Content..............................................................................4
II-2. LED Indicator ...................................................................................5
II-3. Hardware Introduction....................................................................7
II-4. System Requirement .......................................................................8
II-5. Total Air Quality Solution Structure.................................................9
III. Installation........................................................ 10
III-1. Hardware Installation ....................................................................10
III-2. Smart App Installation...................................................................11
III-3. Android OS ....................................................................................12
III-4. iOS .................................................................................................15
III-5. Deploying the Unit.........................................................................19
IV.Reset to Factory Default Settings .................... 22
V. Cleaning the Unit............................................... 23
V-1. Air Pump Cleaner...........................................................................23
V-2. Dust-off Canned Compressed Air ..................................................24

3
I. Safety Information
For effective sensing and retrieval of environmental data, please install the
unit with the safety restrictions outlined below:
1. Must be in locations with good air circulation.
2. Must be positioned for proper air intake to achieve cross ventilation.
3. The air inlet must be kept clear and should be rechecked regularly.
4. Must be in locations close to a power supply and has good Wi-Fi internet
signal capable of connecting to the Internet 24 hours a day, 7 days a week.
5. Must not be installed in locations that are subject to extremes of humidity
or temperature such as near fire or other heat sources.
6. Must not be installed in locations directly exposed to sunlight or reflected
light source.
7. Must not be installed in corrosive environments such as in environments
with salty, acidic or basic air, or places with storage of corrosive liquids.
8. Do not inject gas, contaminants, or smoke directly into the unit, or install
the unit in a location prone to the aforementioned actions.
Unable to follow the above-mentioned guideline may reduce
machine lifetime.
You can find all supporting documents from the link below or via QR Code:
https://www.edimax.com/download
(Once you’ve visited the Edimax official website, please enter model no.
“AI-2003W or AI-2004W” into the search box to search for your product.)

4
II. Product Information
The AI-2003W (7-in-1) & AI-2004W (8-in-1) Multi-Sensor Indoor Air Quality
Detector is your best air quality solution – with visible figures/display that
intuitively simplifies data reading to aid the improvement of indoor air quality
for homes, schools, healthcare institutes, smart buildings and smart city
projects.
II-1. Package Content
Air Quality Detector
(AI-2003W or AI-2004W)
Device Stand Quick Installation Guide
Power Adapter (12V/1A)

5
II-2. LED Indicator
1. LED Status
LED
Color
LED Status
Description
System Status
Red
Flash
Waiting to be wirelessly paired
On
Device is booting up
Green
Flash
Wi-Fi is operational but not connected
On
Wi-Fi setup successful
Blue
On
Device connected to the Internet

6
2. LED Ring
Air quality LED and consolidated air quality LED can be turned on or off.
By default, the LED is turned on.
To turn on / off the LED, press and hold the center button for 5 seconds.
LED
Color
LED Status
Description
Consolidated
Air Quality &
AirBox Status
Green
On
Consolidated air quality: Good
Blue
AirBox in default
Red
Consolidated air quality: Unhealthy
System Status LED will always be on (flashing or stayed on) when the unit
is powered.
3. OLED Display
OLED Display shows the following info:
-CO2
-Temp.
-Humi.
-HCHO
- CO
-TVOC
-PM2.5
-PM10

7
II-3. Hardware Introduction
1. Hardware Interface
Center Button
OLED Display For Sensors Results
Power Jack

8
Connector:
1. NO1 and NO2 pin for Air Circulator
2. A+ and B- pin for Signal Board
3. VCC pin (Voice Controlled Carrier)
* VCC (5V) controls NO1 and NO2.
* Only support 2 ports Air Circulator.
Built-in Sensor
Model
Sensors
PM2.5
PM10
CO
2
(NDIR)
CO TVOC HCHO Humidity Temperature
AI-2003W
v v v v v v v
AI-2004W
v v v v v v v v
II-4. System Requirement
-Internet with Wi-Fi Connection (802.11n)
-Computer or mobile device with web browser
-EdiGreen Plus account: Please contact your distributor or SI, where you
purchased the device, to claim the EdiGreen Plus account “Email and
Password”.
○
1
○
2
○
3

9
II-5. Total Air Quality Solution Structure
*AI-2003W and AI-2004W only support Wi-Fi connection.
*3rd party air circulator support is for specific project only.

10
III.Installation
This section will guide you through the steps to connect your air quality
detector to the Internet.
III-1. Hardware Installation
1. Please connect the power adapter to the unit (demonstrated on the left)
and a power socket.
2. Please wait a moment for the device to boot up. Proceed to the Internet
connection procedure when the System Status LED starts flashing in Red.

11
III-2. Smart App Installation
Search and download "EdiGreen Plus" in Apple App Store or Google Play
Store. Launch the "EdiGreen Plus" in your smart mobile device.
For Internet connection procedure, please follow the instructions
below according to your mobile device
Please make sure…
˙"Access to my location" is turned on.
Android OS iOS
˙Your mobile device is able to connect to your home's Wi-Fi network or
whichever network you anticipated the detector to connect to. Please
make sure this network has internet connectivity.
˙If you have trouble setting up AI-2003W & AI-2004W via Wi-Fi, please turn
off your mobile device 4G connection.

12
Please follow the steps below to set up EdiGreen Plus on your phone:
˙Before starting the EdiGreen Plus, please contact your distributor or SI,
where you purchased the device, to claim the EdiGreen Plus account
“Email and Password”.
˙Go to your mobile device’s Wi-Fi settings, and connect to the Wi-Fi. Please
make sure this network has internet connectivity.
III-3. Android OS
i. Open the EdiGreen Plus, and enter your “Email and password” to log in.
ii. Tap “Setup”.

13
iii. The app will start searching for available device. Tap the desired Wi-Fi
network.
iv. Enter the Wi-Fi password and tap to continue.

14
v. Please wait a moment for the setup process.
vi. Setup Complete! Now you are able to monitor the air quality near your
unit with your mobile device anywhere (as long as you have access to
the Internet).

15
iOS
i. Open the EdiGreen Plus, and enter your “Email and password”to
log in.
ii. Tap “Setup Device”.

16
iii. Enter the last two digits of your AirBox.
Please find the unique SSID of your detector on the product label.
The final 2 digits ** of the SSID "AirBox_Setup_**" is the final two
digits of the detector's “Setup WiFi SSID”.

17
iv. Press Join
v. The app will start searching for available Wi-Fi network for the detector.
Tap the desired Wi-Fi network and enter the Wi-Fi password and press
OK to continue.

18
vi. Please wait a moment for the setup process.
vii. Congratulations! Your AirBox and Edigreen Plus is up and running!
Note: The system status LED of AirBox should be turned on in blue.

19
III-4. Deploying the Unit
After connecting to the Internet (and your mobile device's EdiGreen Plus app),
you can choose how to place your air quality detector.
1. Rubber Legs
The rubber legs (shown below) act as shock prevention and anti-slide support.
i. Simply place the unit with the center button facing upwards on a
bench or flat surface.
Robber Legs
Robber Legs

20
2. Using Device Stand
Use the Device Stand to hold the device on a surface.
i. Locate the anchors on the Device Stand and the anchor holes on the
device. Insert the anchors into the device.
ii. Push the anchors towards the smaller ends of the anchor holes to fix
the Device Stand.
Smaller end of
anchor hole
This manual suits for next models
1
Table of contents
Other Edimax Security Sensor manuals
Popular Security Sensor manuals by other brands

Selcom Security
Selcom Security CAYMAN operating manual

Bosch
Bosch FCA-350-B4 Installation and maintenance instructions

AJAX
AJAX MotionProtect quick start guide

Lightning Protection International
Lightning Protection International GUARDIAN PLUS installation manual

B.E.G.
B.E.G. LUXOMAT Indoor 180-SC Operating and mounting instructions

CiA
CiA XR Series manual