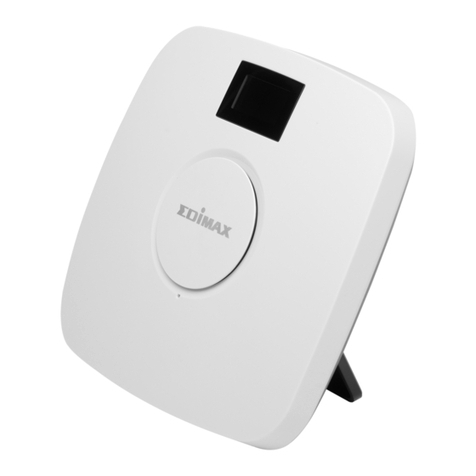
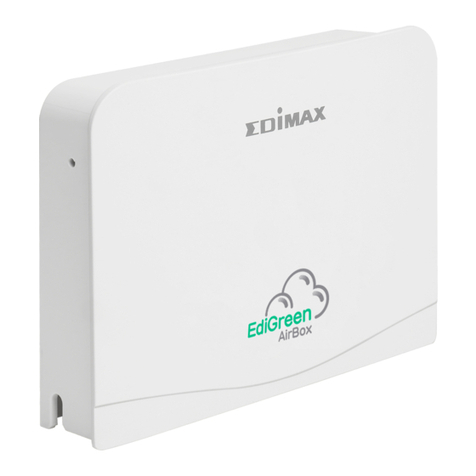
Edimax AI-2002W User manual

AI-2002W
Indoor Air Quality Detector
User Manual
07-2018 / v2.0

2
Content
ISafety Information ................................................................................ 4
II Product Information .............................................................................. 5
II-1 Package Content............................................................................................ 5
II-2 LED Indicator ................................................................................................. 5
III Installation............................................................................................ 7
III-1 Android OS ....................................................................................................8
III-2 iOS ............................................................................................................... 12
III-3 Deploying the Unit ...................................................................................... 16
IV Home Screen Information and Functions...............................................19
IV-1 Menu ........................................................................................................... 20
IV-1-1 Device Management............................................................................. 20
IV-1-1-1 Device Configuration............................................................... 21
IV-1-1-2 Remove Device........................................................................ 22
IV-1-1-3 Add Device Option .................................................................. 22
IV-1-2 Show Nearby Air Quality ...................................................................... 23
IV-1-3 HELP...................................................................................................... 24
IV-1-4 Information........................................................................................... 24
IV-2 Device Name ............................................................................................... 26
IV-3 Collective Air Quality Information Chart..................................................... 26
IV-4 Current Air Quality Information.................................................................. 27
IV-4-1 Change Device Name............................................................................ 28
IV-4-2 Choosing Air Quality Timeline .............................................................. 28
IV-4-3 Air Quality VS Time............................................................................... 28
IV-4-4 Air Quality Information Chart............................................................... 29
VReset to Factory Default Settings..........................................................30
VI Advance Feature ..................................................................................31
VI-1 Adding Already-Connected Devices ............................................................ 31
VI-1-1 Scan QR Code........................................................................................ 31
VI-1-2 Add Via Local Network ......................................................................... 32
VII Cleaning the Unit .................................................................................34
VII-1 Air Pump Cleaner......................................................................................... 34

4
ISafety Information
For effective sensing and retrieval of environmental data, please install the
unit with the safety restrictions outlined below:
-Must be in locations with good air circulation.
-Must be positioned for proper air intake to achieve cross ventilation.
-The air inlet must be kept clear and should be rechecked regularly.
-Must be in locations close to a power supply and has good Wi-Fi internet
signal capable of connecting to the Internet 24 hours a day, 7 days a week.
-Must not be installed in locations that are subject to extremes of humidity
or temperature such as near fire or other heat sources.
-Must not be installed in locations directly exposed to sunlight or reflected
light source.
-Must not be installed in corrosive environments such as in environments
with salty, acidic or basic air, or places with storage of corrosive liquids.
-Do not inject gas, contaminants, or smoke directly into the unit, or install
the unit in a location prone to the aforementioned actions.
Unable to follow the above-mentioned guideline may reduce machine
lifetime.

5
II Product Information
II-1 Package Content
Air Quality Detector
Device Stand
Quick Installation Guide
Power Adapter (12V/1A)
CD with User Manual
II-2 LED Indicator
LED
Color
LED Status
Description
System Status
Red
Flash
Waiting to be wirelessly paired
On
Device is booting up
Green
Flash
Wi-Fi is operational but not connected
On
Wi-Fi setup successful
Blue
On
Device connected to the Internet
PM2.5
HCHO
TVOC
CO2
Green
On
Air quality: Good
Yellow
Air quality: Moderate
Orange
Air quality: Unhealthy for Sensitive Groups
Red
Air quality: Unhealthy
Purple
Air quality: Hazardous
Consolidated
Air Quality
Green
On
Consolidated air quality: Good
Red
Consolidated air quality: Unhealthy

6
Turning LED On / Off
Air quality LEDs and consolidated air quality LED can be turned on or off. By
default, the LEDs are turned on.
To turn on / off the LEDs, press and hold the center button for 5 seconds.
System Status LED will always be on (flashing or stayed on) when the unit
is powered.

7
III Installation
This section will guide you through the steps to connect your air quality
detector to the Internet.
1. Search and download "EdiGreen
Home" in Apple App Store or Google
Play.
iOS
Android
Alternatively, scan the QR code on the
left (choose your device's OS
correctly).
2. Please connect the power adapter to
the unit (demonstrated on the left)
and a power socket.
3. Please wait a moment for the device to
boot up. Proceed to the Internet
connection procedure when the
System Status LED starts flashing in
Red.
For Internet connection procedure, please follow the instructions below
according to your mobile device (III-1 Android OS or III-2 iOS).

8
III-1 Android OS
Please make sure…
A. "Access to my location" is turned on.
B. Your mobile device is able to connect to your
home's Wi-Fi network (such as the "test_5" network
shown on the right) or whichever network you
anticipated the detector to connect to. Please make
sure this network has internet connectivity.
1. Before starting the EdiGreen Home App, go to
your mobile device’s Wi-Fi settings and connect to
the Wi-Fi SSID of your detector (AirBox.Setup.**).
Please find the unique SSID of your detector on the
product label. The final 2 digits ** of the SSID
"Airbox.Setup.**" is the final two digits of the detector's
MAC address.

9
2. Open the EdiGreen Home App.
3. Tap "Setup".
4. The app will start searching for available Wi-Fi
network for the detector.
If you cannot find the desired Wi-Fi network SSID, tap
to refresh network list. Alternatively, tap "Connect
to a hidden network" to manually connect to the desired
Wi-Fi network.
5. Tap the desired Wi-Fi network.
6. Enter the Wi-Fi network password and tap to
continue.

10
Please wait a moment for the setup process.
7. Enter a device name, password, and confirm the
password.
8. Tap "Yes" to continue.
Setup Complete! Please wait a moment for the app to
take you back to its home screen.

11
Congratulations! Your air quality
detector is up and running!
The home screen is as shown on the
left.
The system status LED should be turned
on in blue.
Now you are able to monitor the air
quality near your unit with your mobile
device anywhere (as long as you have
access to the Internet).
CO2and TVOC sensors require up to 72 hours to self-calibrate after the
installation.

12
III-2 iOS
Please make sure…
A. "Access to my location" is turned on.
B. Your mobile device is able to connect to your
home's Wi-Fi network (such as the "test" network
shown on the right) or whichever network you
anticipated the detector to connect to. Please make
sure this network has internet connectivity.
1. Before starting the EdiGreen Home App, go to
your mobile device’s Wi-Fi settings and connect
to the Wi-Fi SSID of your detector
(AirBox.Setup.**).
Please find the unique SSID of your detector on
the product label. The final 2 digits ** of the SSID
"Airbox.Setup.**" is the final two digits of the
detector's MAC address.

13
2. Open the EdiGreen Home App.
3. Tap "Setup Device".
4. The app will start searching for available Wi-Fi
network for the detector.
If you cannot find the desired Wi-Fi network SSID,
tap to refresh network list. Alternatively, tap
"Connect to a hidden network" to manually connect
to the desired Wi-Fi network.
5. Tap the desired Wi-Fi network.
6. Enter the Wi-Fi network password and tap “OK”
to continue.

14
Please wait a moment for the setup process.
7. Enter a device name, password, and confirm the
password.
8. Tap "OK" to continue.
Setup Complete! Please wait a moment for the app to
take you back to its home screen.

15
Congratulations! Your air quality
detector is up and running!
The home screen is as shown on the
left.
The system status LED should be turned
on in blue.
Now you are able to monitor the air
quality near your unit with your mobile
device anywhere (as long as you have
access to the Internet).
CO2and TVOC sensors require up to 72 hours to self-calibrate after the
installation.

16
III-3 Deploying the Unit
After connecting to the Internet (and your mobile device's EdiGreen Home
app), you can choose how to place your air quality detector.
Rubber Legs
Simply place the unit with the center button facing upwards on a bench or flat
surface.
The rubber legs (shown below) act as shock prevention and anti-slide support.
Rubber Legs
Detector sitting on a bench or flat surface

17
Using Device Stand
Use the Device Stand to hold the device on a surface.
1. Locate the anchors on the Device Stand and the anchor holes on the
device. Insert the anchors into the device.
2. Push the anchors towards the smaller ends of the anchor holes to fix the
Device Stand.
anchor holes
anchors
smaller end of anchor hole

18
3. Place the unit at your desired location in the position shown below:
The bottom of the stand has rubber to act as anti-slide support.
anti-slide rubber

19
IV Home Screen Information and Functions
Home screen of the app features a few simple functions and real-time data for
users to quickly understand current air quality near the device.
Different mobile operating systems will have slightly different display
cosmetic-wise.
The following sections will explain the featured functions and information.
錯誤! 找
不到參照
來源。
0
IV-3
錯誤!
找不到
參照來
源。

20
IV-1 Menu
Tap to enter Menu as shown below:
IV-1-1 Device Management
This submenu displays the device(s) added to the app.
Users can go into one single device for further configurations or add more
Devices to this app.
1
2
Table of contents
Other Edimax Security Sensor manuals