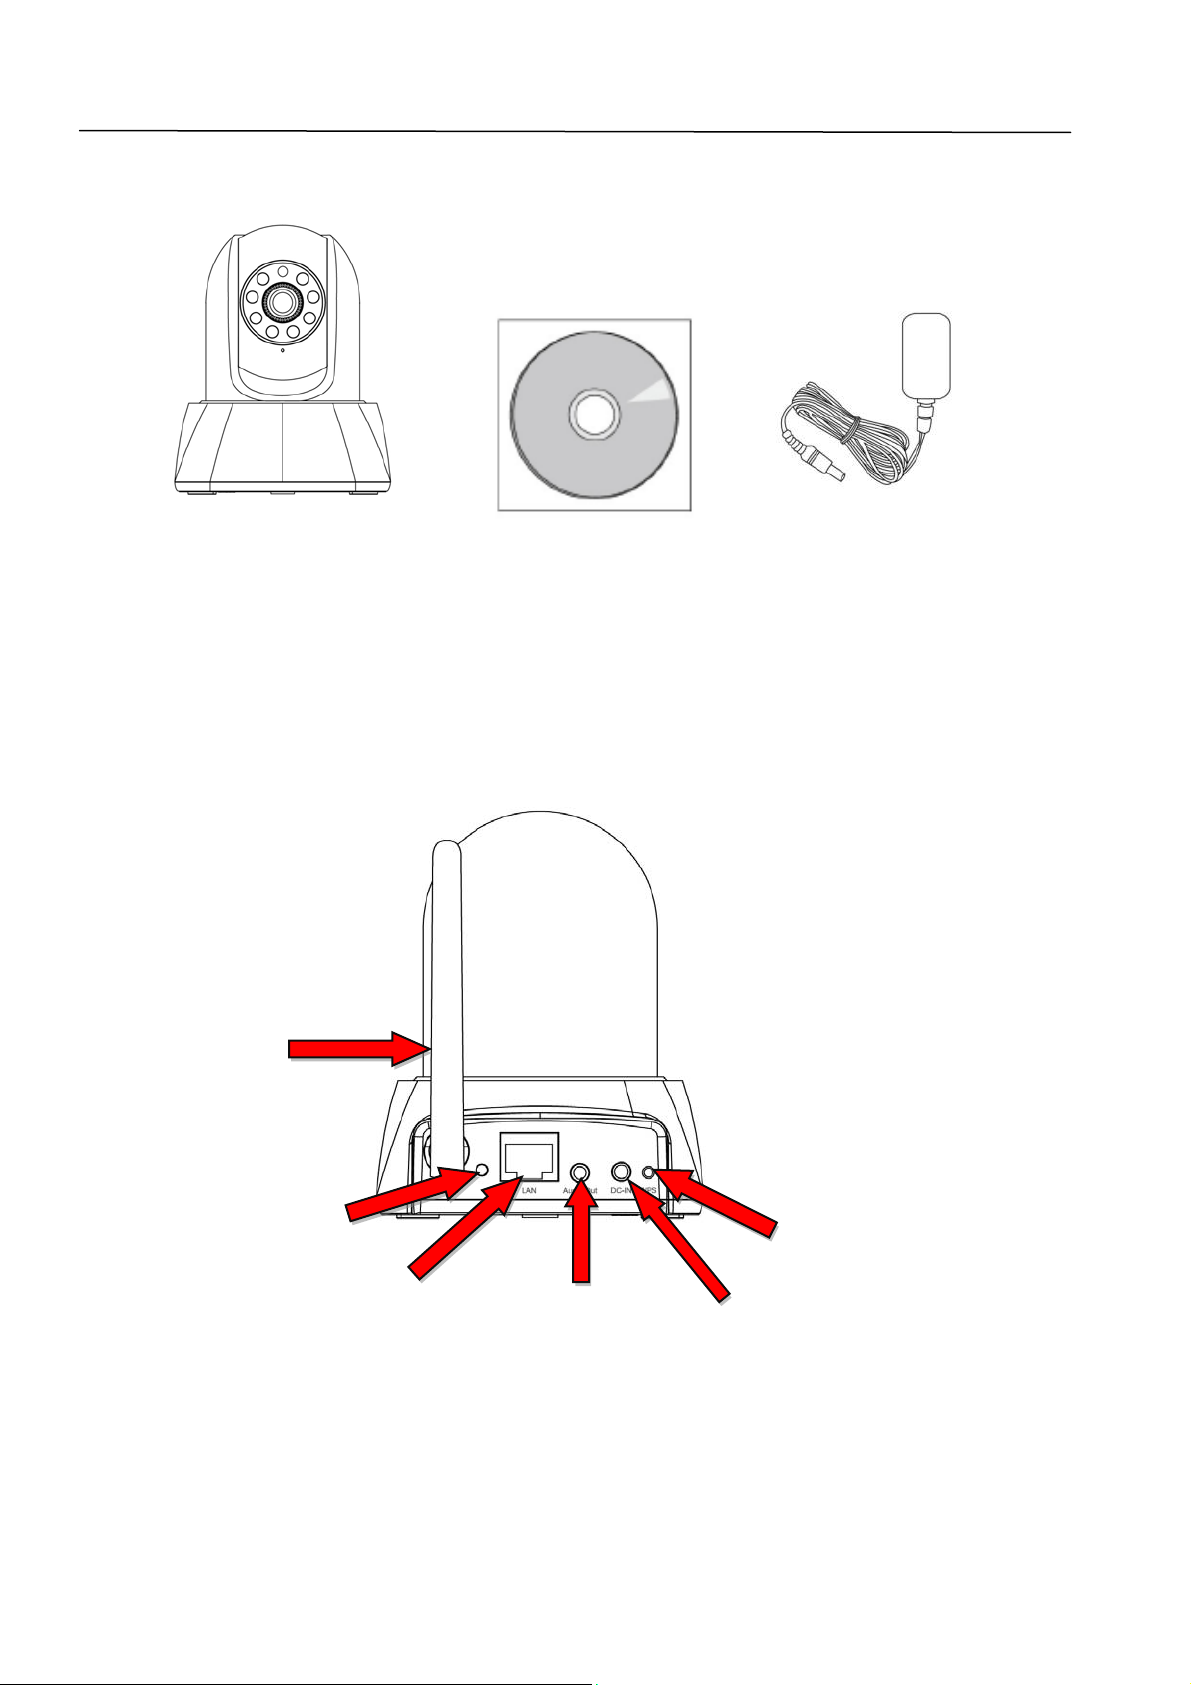
Edimax IC-5006IWW User manual

Pan‐TiltInternetCamera
UserManual
Version:1.0
(October,2013)

1
I.ProductInformation..........................................................................2
I‐1.PackageContents.............................................................................................................2
I‐2.BackPanel........................................................................................................................2
I‐3.LEDStatus........................................................................................................................3
I‐5.Reset................................................................................................................................4
II.HardwareInstallation........................................................................5
III.CameraSetup....................................................................................6
III‐1.Installing&UsingEdiViewFinder....................................................................................6
III‐2.WPS(Wi‐FiProtectedSetup).........................................................................................11
III‐3.Web‐BasedManagementInterface..............................................................................12

2
I. ProductInformation
I‐1.PackageContents
IC‐5006IWW CD‐ROM PowerAdapter
I‐2. BackPanel
WPS/ResetButton
A
ntenna
LED
LANPortPowerPort
A
udioOutpu
t

3
I‐3. LEDStatus
LEDColorLEDStatusDescription
Orange
QuickFlashingNetworkcameraisstarting
up/restarting.
SlowFlashing
(1xpersecond) WPSisactive.
Green
OnConnectedtonetworkandcloud.
SlowFlashing
(1xpersecond) Connectedtonetworkbutnotcloud.
Off‐‐ Noconnection.

4
I‐5. Reset
Ifyouexperienceproblemswithyournetworkcamera,youcanresetthe
camerabacktoitsfactorydefaultsettings.Thisresetsallsettingsbackto
default.
1.PressandholdtheWPSbuttonfoundonthe
backpanelforatleast10seconds
2.ReleasethebuttonwhentheorangeLEDis
flashingquickly.
3.Waitforthenetworkcameratorestart.The
cameraisreadywhenthegreenLEDisonor
flashing.
Afterreset,theLEDwilldisplayoffIfthereisnoEthernet
connectiontothenetworkcamerafromarouter/access
point/switch.

5
II. HardwareInstallation
Followtheinstructionsbelowtoensureyourcameraisproperlyconnected
andreadyforsetup.
1. UseanEthernetcabletoconnectthe
networkcamera’sLANporttoa
router/switch/accesspoint’sLANport,
asshownbelow.
2. Connectthepoweradaptertothe
networkcamera’spowerportandtoa
powersupply,asshownbelow.
3. Waitamomentforthecameratopoweron.Thecameraisreadywhen
thegreenLEDonthebackofthecameradisplaysonorflashing.Please
refertoIII.CameraSetuptosetupyournetworkcamera.

6
III. CameraSetup
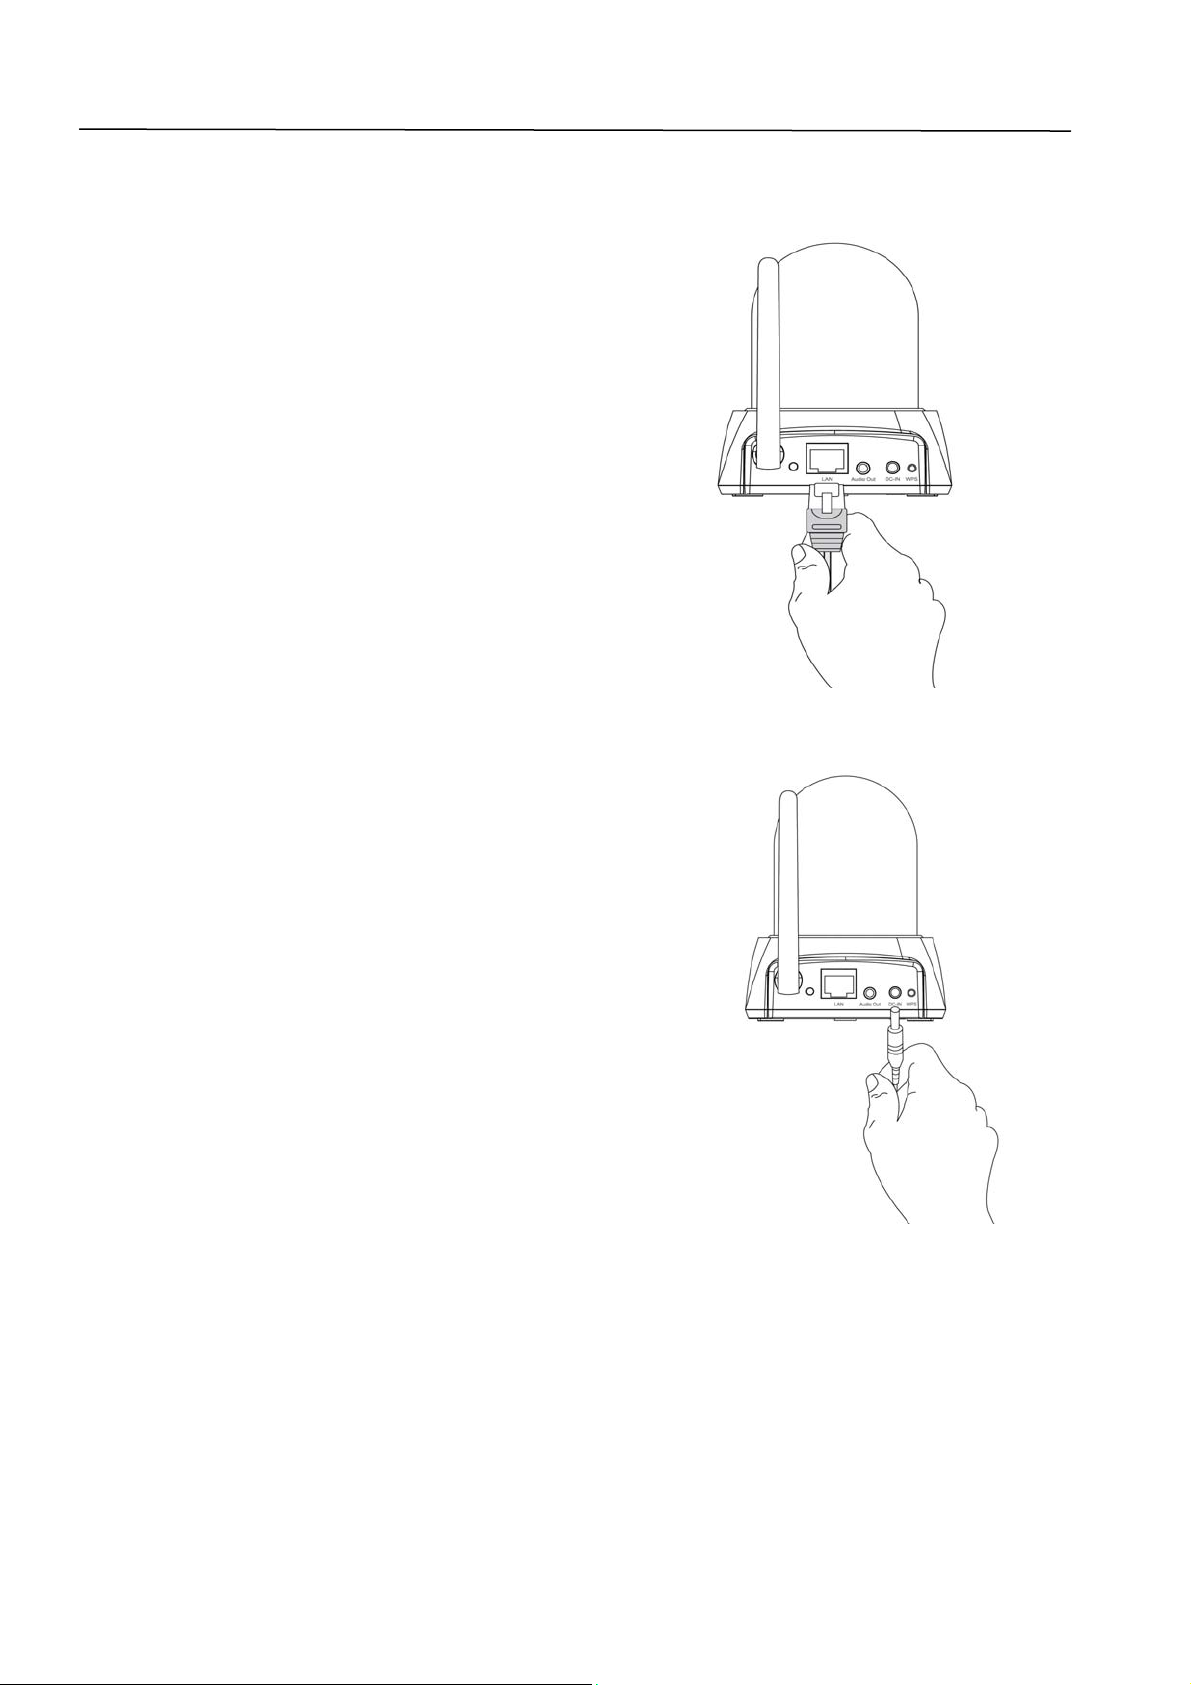
Yournetworkcameracanbeupandrunninginjustafewminutes.First,
pleasefollowtheinstructionsbelowinIII‐1.Installing&UsingEdiViewFinder
toinstalltheincludedEdiViewfindersoftwareandconnectyourcamerato
yourwirelessnetwork.
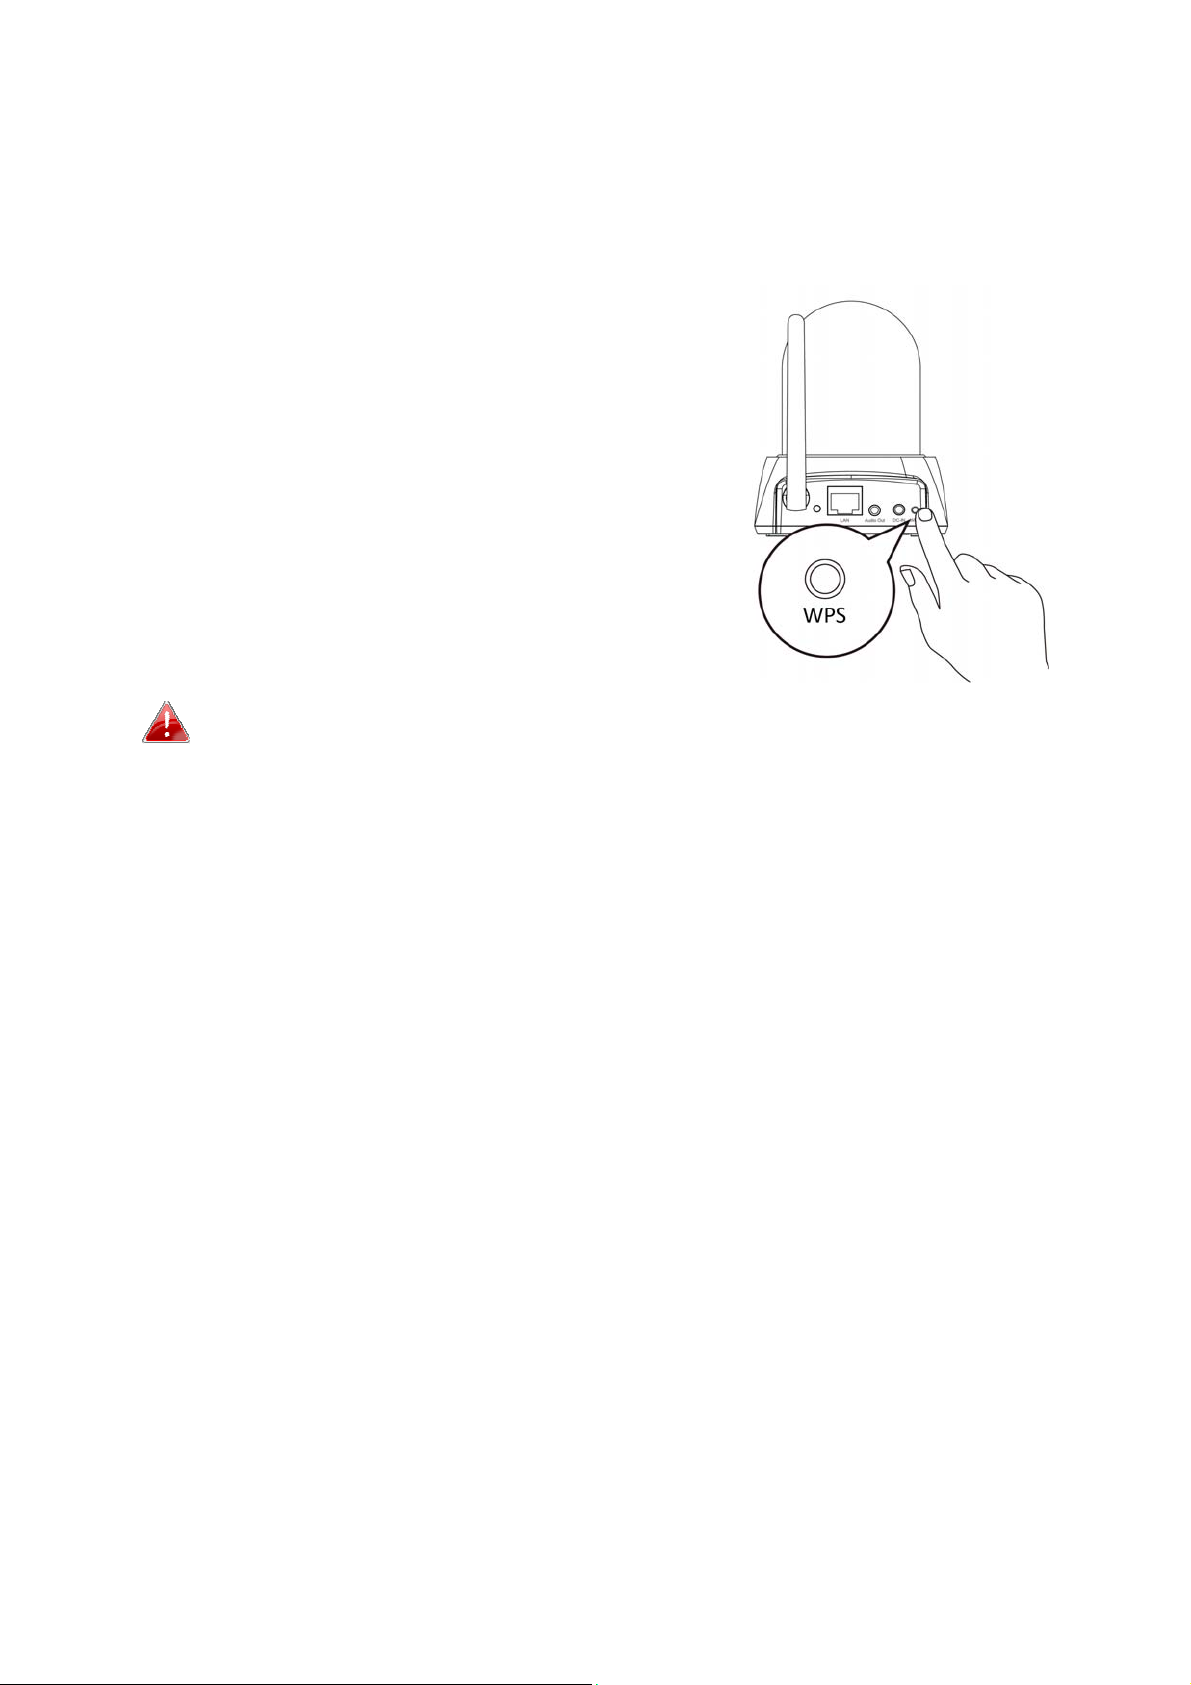
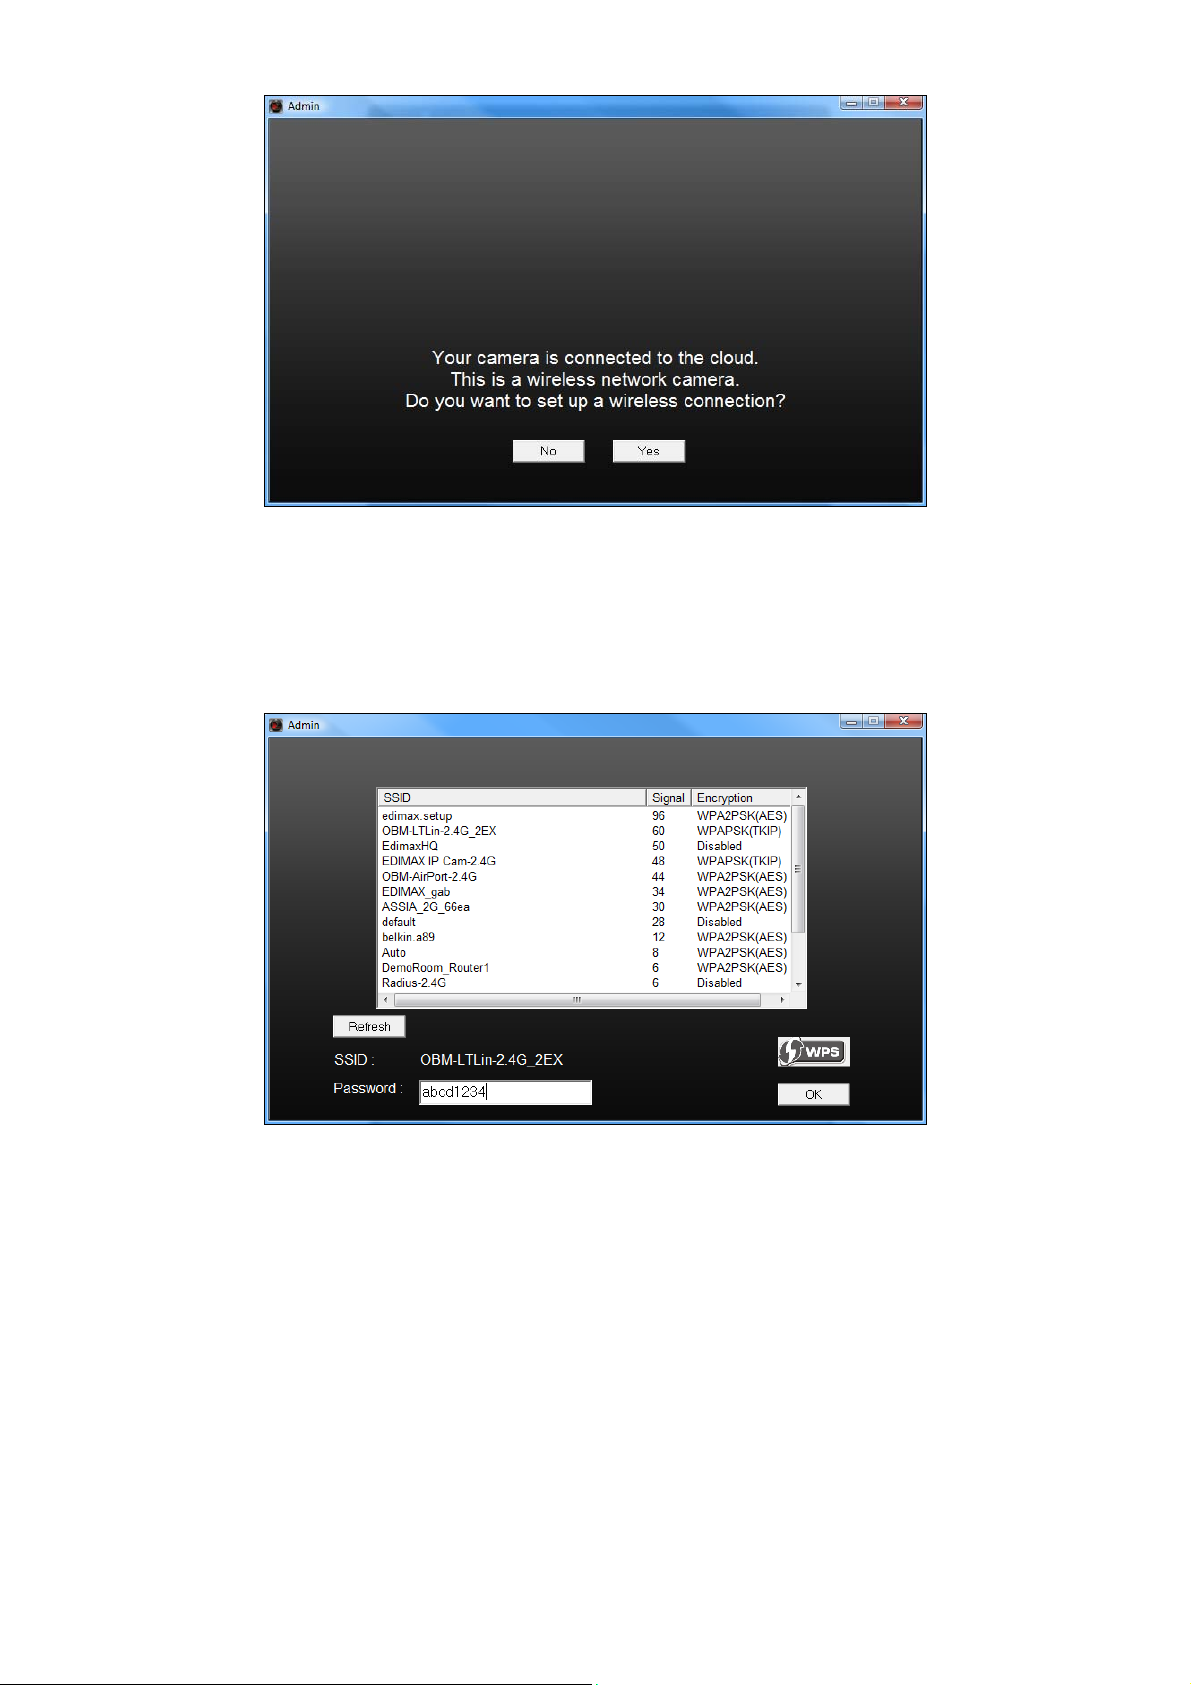
OryoucanfollowIII‐2.WPSasanalternativemethodtoconnectyour
networkcameratoyourwirelessnetwork.
Then,youcanusethewebbasedmanagementinterfacetowatchalive
streamandfurtherconfigurethecameraifyouneed(seeIII‐3.).
Additionaly,youcanviewthecamerasliveimageusingeitherthecloudID
(seeIII‐4.)ortheEdiViewsmartphoneapp(seeIII‐5).
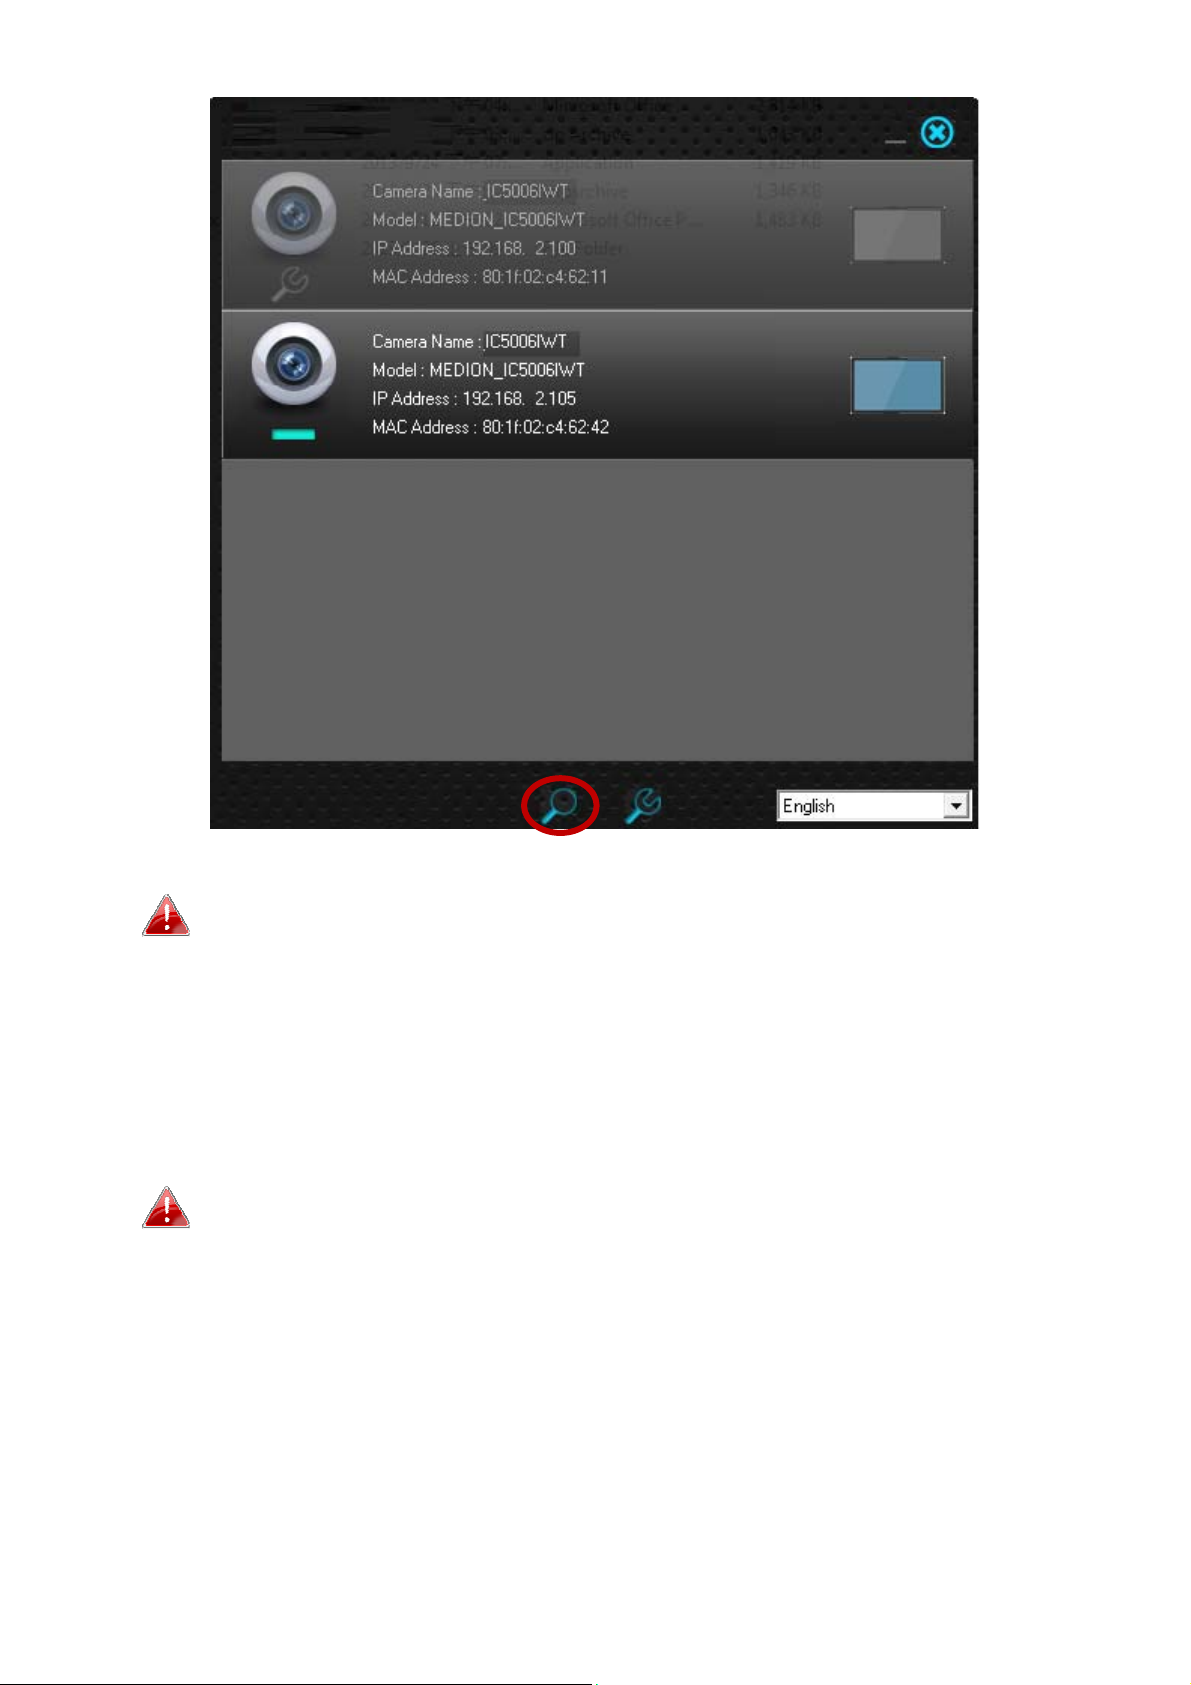
III‐1. Installing&UsingEdiViewFinder
Ensureyourcomputerisconnectedtothesamerouterasthe
networkcamera.ItisrecommendedtouseadynamicIPaddress
foryourcomputer.StaticIPuserspleaserefertotheusermanual
ifyouencounterdifficulties.
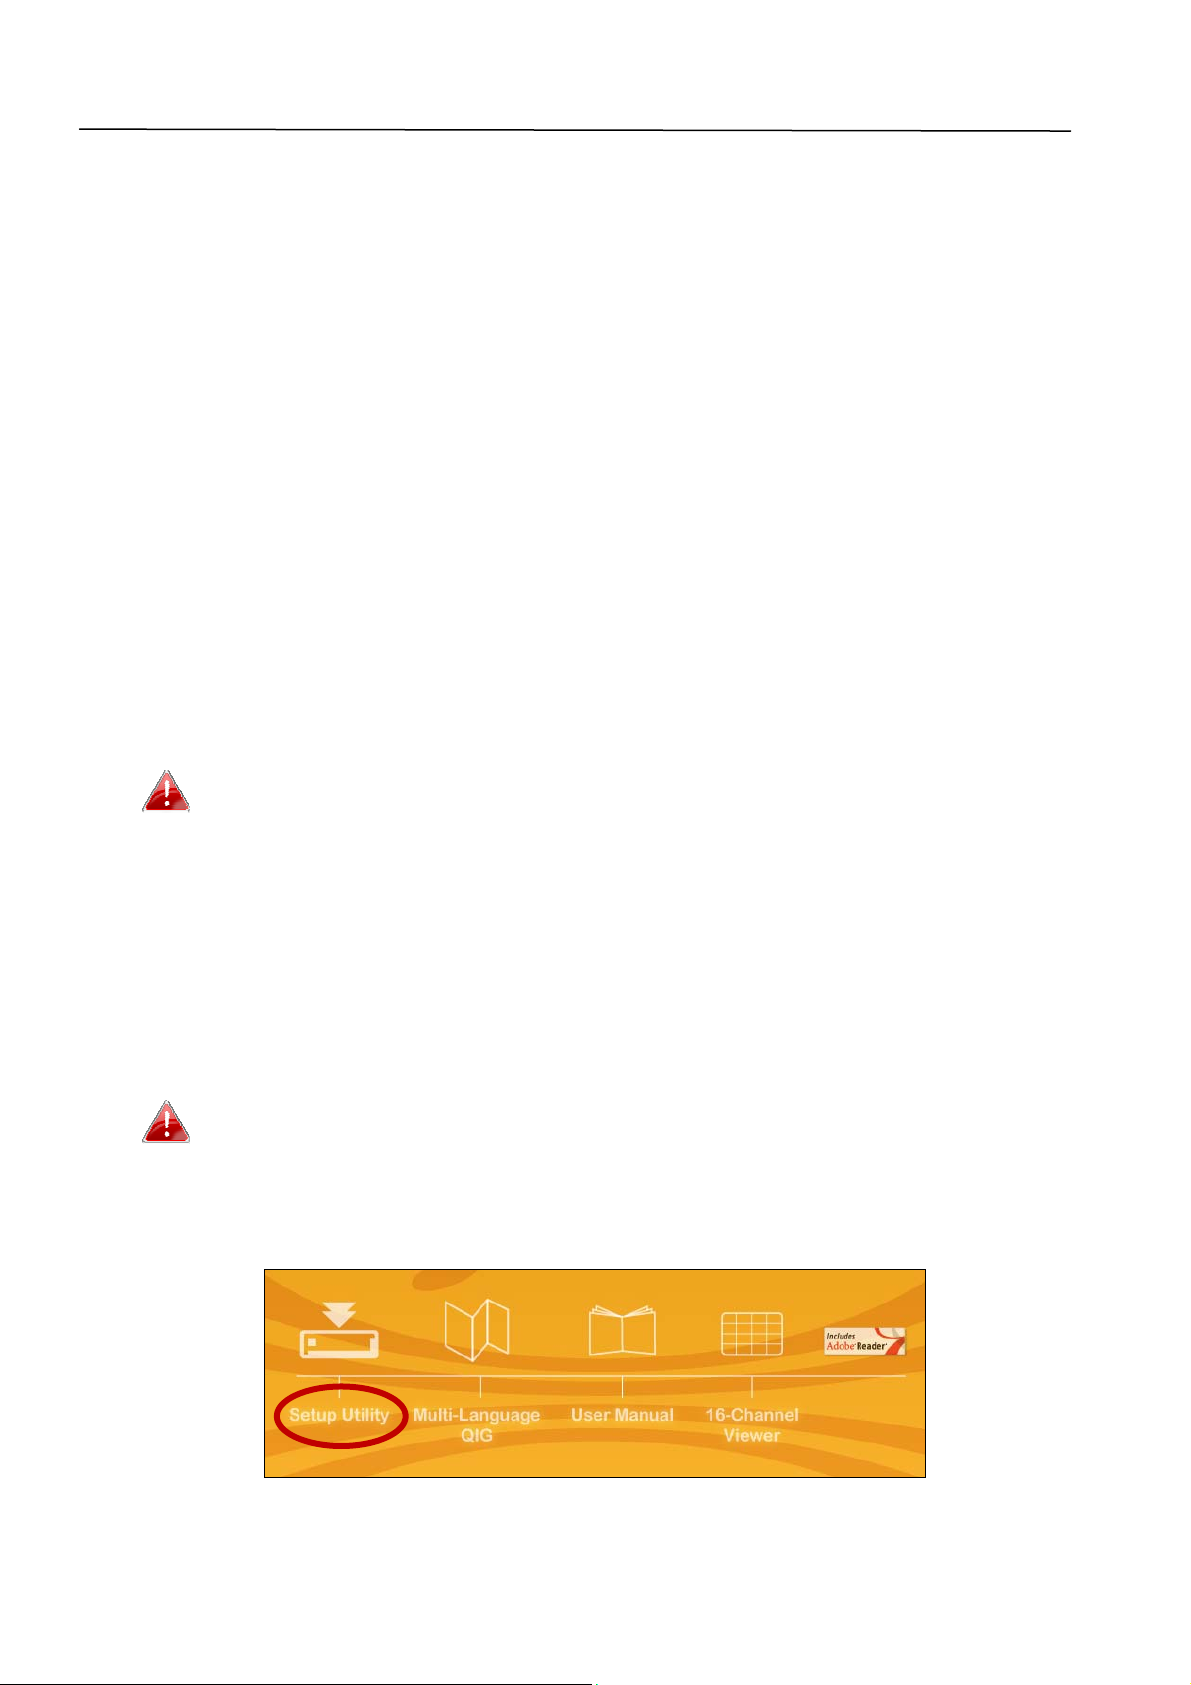
1.InserttheincludedCDintoyourCD‐ROMdriveandifthesetuputilitydoes
notautomaticallyopen,pleaselocateandopenthe“Autorun.exe”filein
the“Autorun”folder.
MacOSutilityisincludedontheCD‐ROM.Macusersplease
locatethesetuputilityusingFinder.
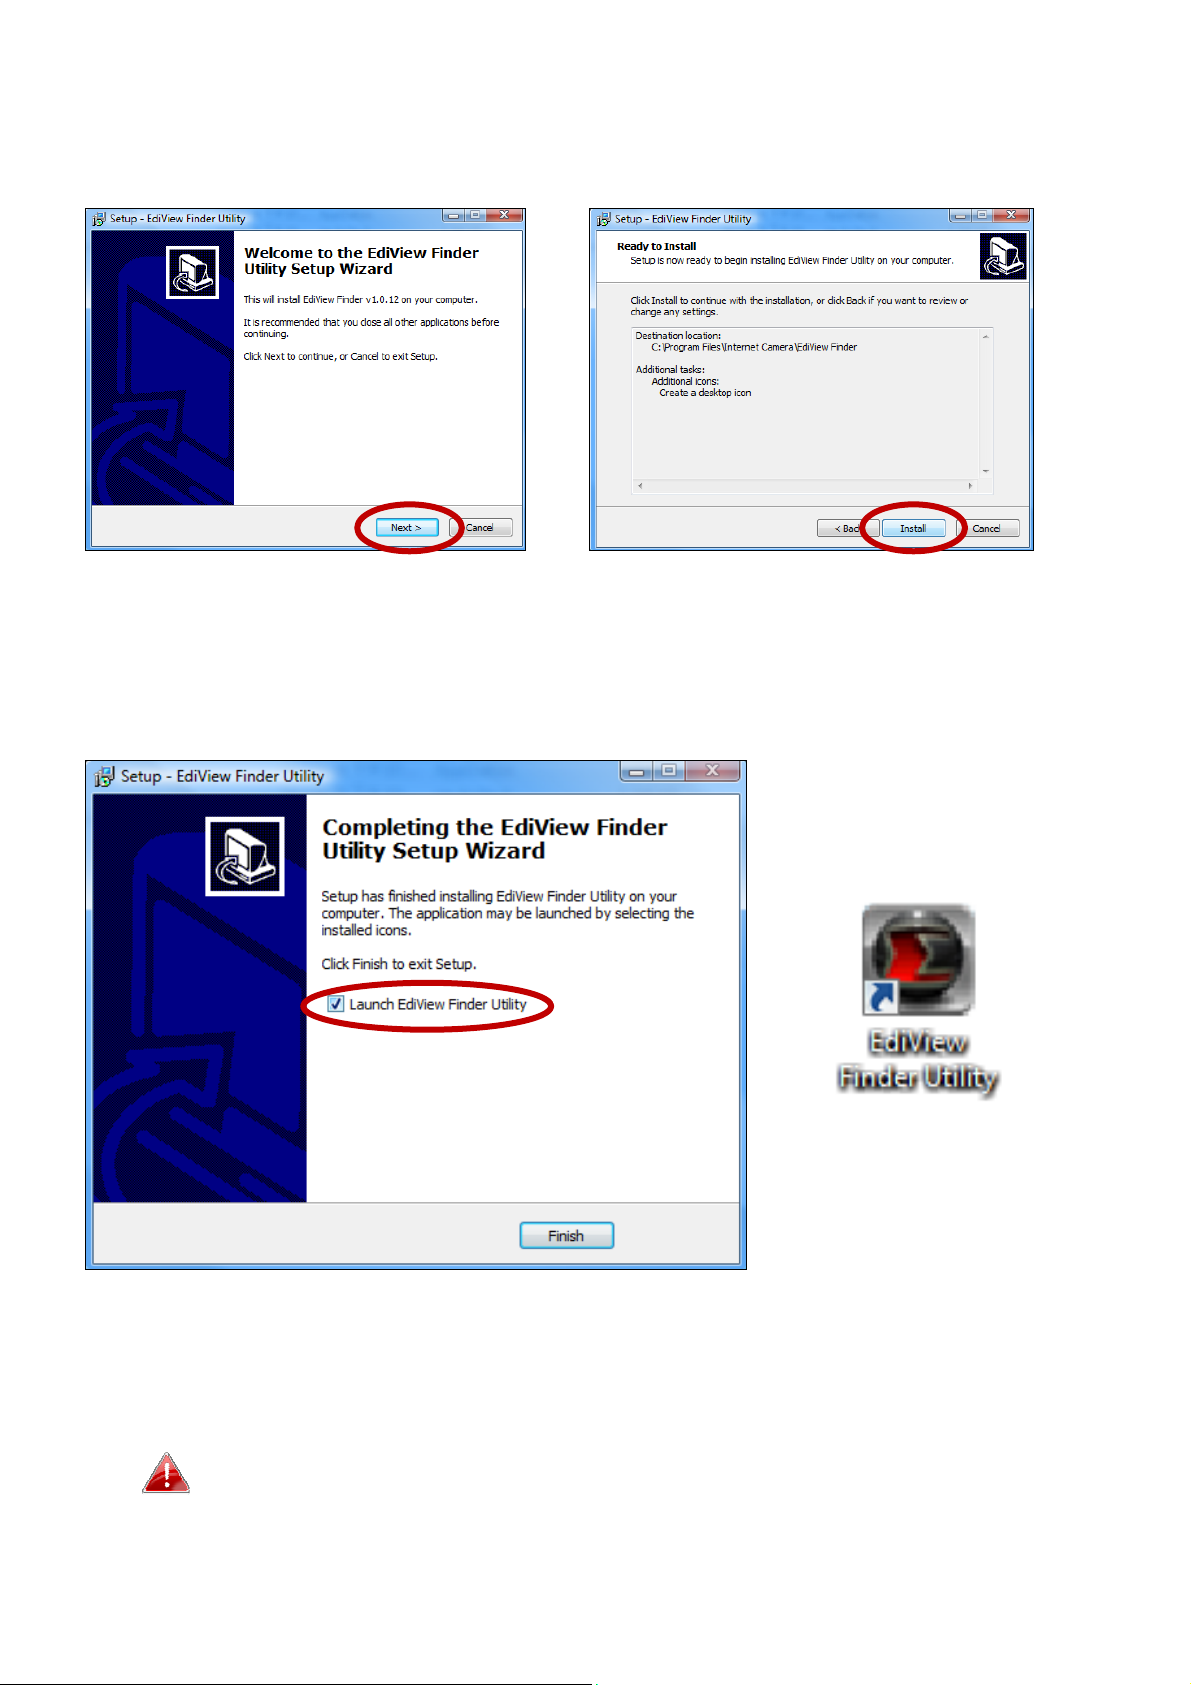
2.Click“SetupUtility”toinstalltheEdiViewFindersoftwareutility.

7
3.Click“Next”andfollowtheon‐screeninstructionstoinstalltheEdiView
Findersoftwareutility.
4.Wheninstallationiscomplete,select“LaunchEdiViewFinderUtility”
beforeclicking“Finish”.Ordoubleclickthe”EdiViewFinderUtility”iconon
yourdesktoptolaunchEdiViewFinder.
5.EdiViewFinderwilllistallcamerasonyourlocalnetwork,alongwitheach
camera’sname,model,IPaddressandMACaddress.
Clickthesearchicontorefreshthelistifyourcameraisnot
displayed.

8
Thenetworkcamera’sIPaddressisdisplayedonthisscreen.After
setup,youcanenterthisIPaddressintotheURLbarofaweb
browseronthesamelocalnetworktoaccessyournetwork
camera’sweb‐basedconfigurationinterface.
6.Doubleclickyourcameraandthenchoose“Yes”or“No”ifyouwishtoset
upawirelessconnection.Ifyouchoose“No”pleasegotostep10.
TheIC‐5006IWTisawirelesscamera,pleasechoose“Yes”toset
upyourwirelessconnection.

9
7.Selectyourwirelessnetworkfromthelistandenterthecorrectpassword
inthe“Password”field,beforeclicking“OK”.Thisisthewirelessnetwork
whichyourcamerawillconnectto.
8.UnplugtheEthernetcablefromyournetworkcameraandclick“Next”.
Pleasewaitamomentforthecameratodetecttheconnection.

10
9.Whentheconnectionisdetectedasshownbelow,pleaseclick“Next”.
10. Enteranameandpasswordforyourcamera..Click“OK”tocontinue.

11
III‐2. WPS(Wi‐FiProtectedSetup)
TheWPSbuttonisaquickandeasymethodtoestablishasecurewireless
connectionbetweenyournetworkcameraandyourwirelessrouter/access
point.
1.PressandholdtheWPSbuttononyourwirelessrouter/accesspointfor
thecorrectlengthoftimetoactivateitsWPS.
Pleasechecktheinstructionsforyour
wirelessrouter/accesspointforhowlong
youneedtoholddownitsWPSbuttonto
activateWPS.
2.Withintwominutes,presstheWPS/Resetbuttononthenetworkcamera
for2–5secondstoactivateWPS.TheorangeLEDwillflashslowlyto
indicatethatWPSisactive.
TakecarenottoholdtheWPSbutton
toolongandresetyournetwork
camera(seeI‐5.)
3.Thedeviceswillestablishaconnection.ThegreenLEDwilldisplayonor
flashingtoindicateasuccessfulconnection.

12
III‐3. Web‐BasedManagementInterface
Whenyouareusingthesamelocalnetworkasyourcamera,youcanusethe
web‐basedmanagementinterfacetovieworconfigurethecamera.
Ifyouarenotonthesamelocalnetworkasyournetworkcamera
(e.g.ifyouareawayfromyourhome),pleaserefertochaptersIII‐
4.orIII‐5.instead.
Toaccesstheweb‐basedmanagementinterface,pleasefollowthe
instructionsbelow.
1.Enterthenetworkcamera’sIPaddressintotheURLbarofawebbrowser.
Thecamera’sIPaddresscanbefoundbyopeningEdiViewfinder,as
displayedbelow:
InternetExplorerisrecommended.

13
2.YoumaybepromptedtoallowaJavaadd‐ontorun.Pleaseclickthe
messagewhereitsays“clickhere”andthenclick“RunAdd‐on”.
Ifanyothersecuritywarnings/promptsappear,pleaseselect
“Run”or“Allow”orsimilar,dependingonyourbrowser.
3.Entertheusernameandpasswordforyournetworkcamera(default
username:admindefaultpassword:1234).Thenetworkcamera’sweb‐
basedmanagementinterfacewillthenbedisplayedinyourbrowser.Please
refertotheusermanualformoreguidance.

14

Federal Communication Commission Interference Statement
This equipment has been tested and found to comply with the limits for a Class B digital device,
pursuant to Part 15 of the FCC Rules. These limits are designed to provide reasonable
protection against harmful interference in a residential installation. This equipment generates,
uses and can radiate radio frequency energy and, if not installed and used in accordance with
the instructions, may cause harmful interference to radio communications. However, there is
no guarantee that interference will not occur in a particular installation. If this equipment does
cause harmful interference to radio or television reception, which can be determined by turning
the equipment off and on, the user is encouraged to try to correct the interference by one or
more of the following measures:
Reorient or relocate the receiving antenna.
Increase the separation between the equipment and receiver.
Connect the equipment into an outlet on a circuit different from that to which the receiver
is connected.
Consult the dealer or an experienced radio/TV technician for help.
FCC Caution: Any changes or modifications not expressly approved by the party responsible
for compliance could void the user's authority to operate this equipment.
This device complies with Part 15 of the FCC Rules. Operation is subject to the following two
conditions: (1) This device may not cause harmful interference, and (2) this device must
accept any interference received, including interference that may cause undesired operation.
This device and its antenna(s) must not be co-located or operating in conjunction with any
other antenna or transmitter.
For product available in the USA/Canada market, only channel 1~11 can be operated.
Selection of other channels is not possible.
FCC Radiation Exposure Statement:
This equipment complies with FCC radiation exposure limits set forth for an uncontrolled
environment. This equipment should be installed and operated with minimum distance 20cm
between the radiator & your body.
Table of contents
Other Edimax Webcam manuals
Popular Webcam manuals by other brands

Conceptronic
Conceptronic CLLCHATCAM v2.0 Quick installation guide

Logitech
Logitech 961362-0403 - Quickcam Communicate Web... installation guide

Genius
Genius FaceCam 322 manual

LIGHTBOARD DEPOT
LIGHTBOARD DEPOT LBD4832-SS-A-1 DOCUMENTATION & INSTRUCTIONS

Micro Innovations
Micro Innovations IC710C Quick installation guide

Creative
Creative Live Cam Sync HD manual