EDISON Professional Party System Drum User manual

Home Entertainment Bluetooth and Drum System
MODEL NO.: PARTY SYSTEM DRUM
INSTRUCTION MANUAL
* The picture is only provided for reference. Please refer to the actual unit!
FCC ID: RSBPARTYSYSTEMDRU

Instructions for use
Please read all instructions carefully
Getting started
Remove the unit from the box
Remove any packaging from the product
Place the packaging inside the box and store for safekeeping
In the box
PARTY SYSTEM DRUM
Power Cord
Drum sticks
Audio Cable
Instruction Manual
Features
- 7 drum pads
- DJ sound effects
- Bluetooth wireless connection functionality
- Speaker lights
- With USB and SD card support
- 5 bands equalizer control
- Built in FM radio
- 3.5MM aux in jack
- Microphone input
- Guitar input

Product Diagram
TOP:
1
MIC.IN
Microphone input
2
GT.IN
Guitar input
3
LED ON/OFF
Speaker LED lights ON/OFF
4
VOL-
Reduce volume of drum effects
5
Drum pad
Drum pad (Closed Hi-hat)
6
Drum pad
Drum pad (Ride)
7
Drum pad
Drum pad (TOM2)
8
Drum pad
Drum pad (TOM1)
9
Drum pad
Drum pad (Crash cymbal)
10
Drum pad
Drum pad (Snare drum)
11
Drum pad
Drum pad (Bass drum)
12
VOL+
Increase volume of drum effects
13
SD card port
SD card port
14
USB port
USB port
15
Aux input
Aux input (3.5mm)
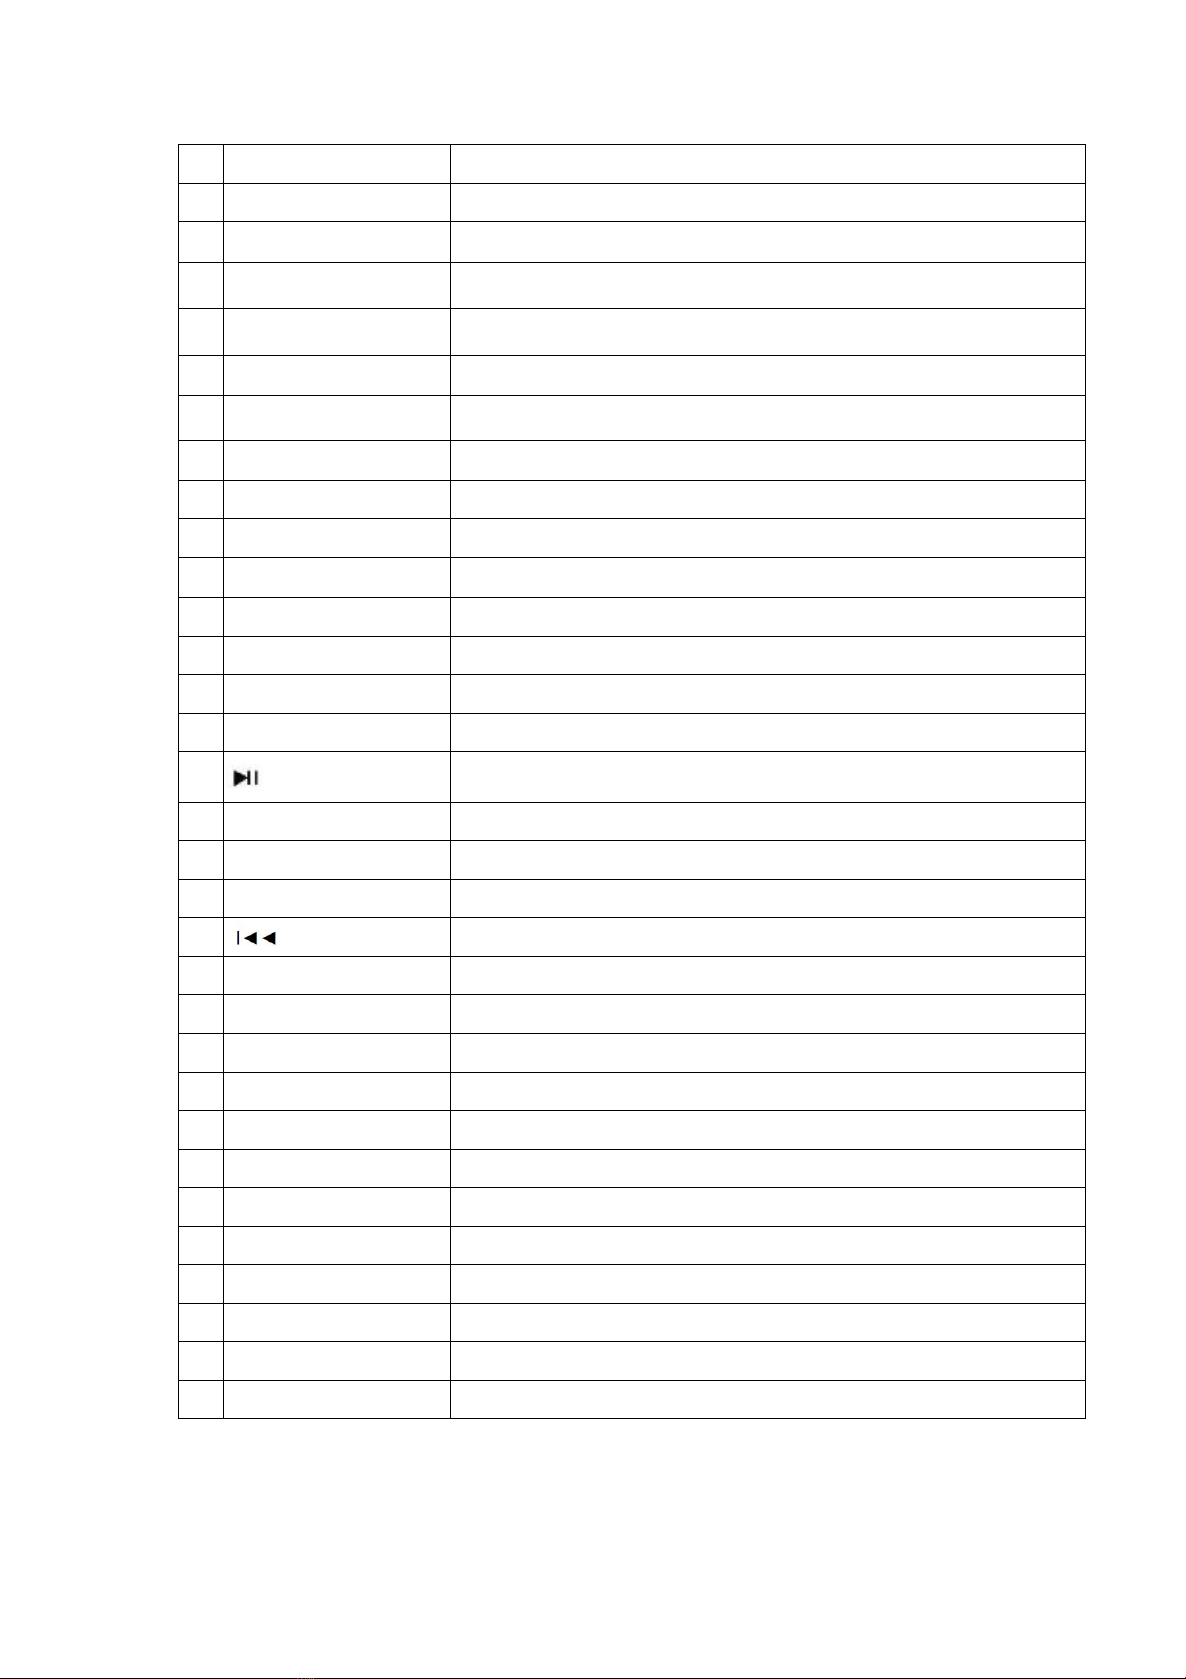
16
Start/stop playback
17
MODE
Select mode playback made (AUX/Bluetooth/USB/SD/FM)
18
►►I
Play next track/channel
19
Vol +-
Master volume controller
20
Play previous track/channel
21
Echo +-
Microphone echo effect controller
22
MIC/GT +-
Microphone/Guitar volume controller
23
STOP
Stop demo songs playback
24
Demo
Play pre-installed demo songs
25
REC
Drum effects record (Up to 800 notes)
26
DJ effects
DJ sound effect knob
27
LED display
LED display
28
Record light
REC light up red during recording
29
Play
Play record drum effects
30
DJ MODE
DJ sound effects mode select (11 modes)
31
DRUM STYLE
Modify drum effect pitch
32
GRAPHIC EQUALIZER
Make equalizer settings

Rear:
1
Power switch
Switch device of/off
2
Power supply
100V-240V 50/60Hz input
3-4
Line Out
Audio outputs L/R
5-6
Aux in
Audio inputs L/R
7
FM antenna
FM antenna

INSTRUCTION FOR USE
Connecting the power
Plug the power cord into the power socket of the unit.
Turning on/off the speaker
Switch the POWER switch on the rear of the speaker to the ON position to switch the
device on.
Drum effects
There are seven drum effect pressure pads on the top of the speaker that you can use
to generate various drum effects.
-Press one or more of the seven drum effect pressure pads to generate various
Drum effects.
-Press the DRUM STYLE button to select various sound effects for the drum effect
pressure pads.
-Press the VOL+ button to increase the volume of the drum effects and the VOL-
button to decrease the volume of the drum effects.
Record drum effects
You can record the drum effects that you create or a drum effect sequence to play it
back later from the speaker. Press the REC button to start recording. The REC LED
lights up red. Generate the desired drum effects that you want to record. The
recording is stored in the party speaker’s internal memory (up to 800 notes).
Press the PLAY button to play your recording. The REC LED goes out.
Demo songs play/stop
You can play the pre-installed demo songs.
Press the DEMO button to play demo songs, press again to switch songs. Press the
STOP button to stop demo songs.
DJ sound effect
You can play DJ sound effects.
Turn the DJ sound effects knob to have DJ sound effects.
Press the DJ MODE button to change DJ sound effects style.

Connect Bluetooth audio output device
To connect a Bluetooth audio output device (e.g. smart phone or tablet PC), proceed
as follows:
-Switch the speaker on.
-Press the MODE button once or repeatedly until the screen shows ‘bt’ to switch to the
Bluetooth mode. The speaker is now in pairing mode. During this time, ‘bt’ flashes on
the display.
The party speaker attempts to automatically connect itself to the last audio output
device connected via Bluetooth. If this is not possible, the speaker sends its device
identification via Bluetooth and bt flashes on the screen.
-Switch on the Bluetooth function on your audio output device and enable search
mode. On your audio output device select your speaker Party System Drum from the
list of available devices and link the devices. You may find more information about the
Bluetooth function of your playback device in its operating instructions.
-If you are prompted to enter a password, enter 0000. After successful Bluetooth
paired, a beep sounds will come up and the ‘bt’ on the screen will be solid.
You can control how tracks are played and the volume on your external device and on
the party speaker. The functions available when using an audio playback device on the
party speaker depend on your external device and the software used.
Connecting an external playback device VIA AUX IN
You can use the AUX IN connection to connect an external playback device (for
example a CD player or MP3 player).
-Switch the party speaker ON.
-Switch on your external device. Plug the end of a 3.5 mm cinch cord (not supplied
with the device) into the AUX IN plug on the top of the speaker.
-Connect the other end of the cord to your external device. Switch on your external
device.
-Press the MODE button several times until you see AUX in the display. The audio
signal from your external device will now be played back.
The track playback is controlled via the external device. The volume can be controlled
both on your external device and the speaker.

Inserting USB memory sticks
-Insert the USB drive into the USB slot on the top of the party speaker.
-It will enter to USB mode, the USB will appear on the display. And it will play the songs
from the USB immediately.
-Due to the numerous different file systems and file formats, compatibility with the
connected memory media cannot be guaranteed.
-Depending on the size of the data medium, it may take some time for the system to
be detected.
-The supported file format is MP3/WMA.
-USB sticks up to 32 GB are supported.
-External hard disks are not supported.
Inserting SD memory card
Insert the SD memory card into the slot on the top of the party speaker. The card’s
contacts show towards the front of the device. Sd will appear in the display.
Please note the following when connecting an SD memory card:
-Due to the numerous different memory cards on the market, compatibility with the
connected memory media cannot be guaranteed.
-Depending on the size of the data medium, it may take some time for the system to
be detected.
-The MP3/WMA file format is supported.
-SD memory cards up to 32 GB are supported.
FM function
-Press the MODE button once or several times to select the operating mode you
require. The frequency will appear on the display.
-Press and hold the button to search channels automatically. It will store all stations
after stop searching.
-Press the or button to next or previous channel.
Connect guitar
The guitar can be used in any operating mode. To connect the guitar, proceed as
follows:
-Insert the connection cord (6.3 mm cinch) for the guitar into the guitar plug GT in.
-Connect the guitar with the connection cord. Use the MIC/GT volume knob to select
the desired guitar volume

Connecting a microphone
-Insert the cord of the microphone supplied into the MIC plug on the top of the
speaker.
-Use the MIC/GT volume knob to select the desired microphone volume.
-Use the MIC ECHO knob to set any desired echo sound effect for the microphone.
Line in
Separately from the AUX connection on the top (3.5 mm cinch), the AUX IN connection
(cinch) on the back of the device offers another option for connecting an external
audio playback device to the party speaker.
-Insert the cinch connection cord to the AUX IN connections on the back of the
device. Please note the colour markings and the L (left) and R (right) labels.
-Press the MODE button several times until you see AUX in the display. The audio
signal from your external device will now be played back.
The track playback and volume settings are controlled via the external device.
Line out NL
You can connect an external amplifier (television, recording device, sound bar, active
speaker etc.) to the party speaker via the LINE OUT connection.
-Insert the cinch connection cord to the LINE OUT connections on the back of
the device. Please note the colour markings and the L (left) and R (right) labels.
DO’S and Don’ts
Read the following recommendations before using the speaker. Following these you
will be able to enjoy the product for many years.
. Don’t use abrasive cleaning solvents to clean the speaker.
. Do not expose the speaker to extremely high or low temperature as this will shorten
the life of electronic devices, distort certain plastic parts.
. Don’t attempt to disassemble the speaker as it may get damaged if you are not
professional.
. Do not expose the speaker to heat or fire. Avoid storage in direct sunlight.
. Do not subject the speaker to mechanical shock.
. Do not add any fluids or solids to your speaker.
. Do not use the speaker if it has been damaged in any way,

Note: This equipment has been tested and found to comply with the limits for a class
B digital device, pursuant to part 15 of the FCC Rules. These limits are designed to
provide reasonable protection against harmful interference in a residential
installation.
This equipment generate uses and can radiate radio frequency energy and, if, not
installed and used in accordance with the instructions, may cause harmful
interference to radio communications.
However, there is no guarantee that the interference will not occur in particular
installation. If this equipment does cause harmful interference to radio or television
reception, which can be determined by turning the equipment off and on, the user is
encouraged to try to correct the interference by one or more of the following
measures:
- Reorient or relocate the receiving antenna.
-Increase the separation between the equipment and receiver.
-Connect the equipment into an outlet on a circuit different from that to which the
receiver is connected.
-Consult dealer or an experienced radio/TV technician for help changes or
modifications not expressly approved by the party responsible for compliance could
void the user’s authority to operate the equipment.
This device complies with Part 15 of the FCC Rules. Operation is subject to the
following two conditions:
(1) this device may not cause harmful interference, and
(2) this device must accept any interference received, including the interference
that may cause undesired operation.
Table of contents


