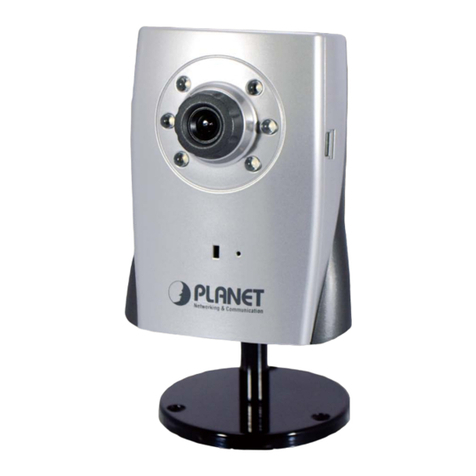
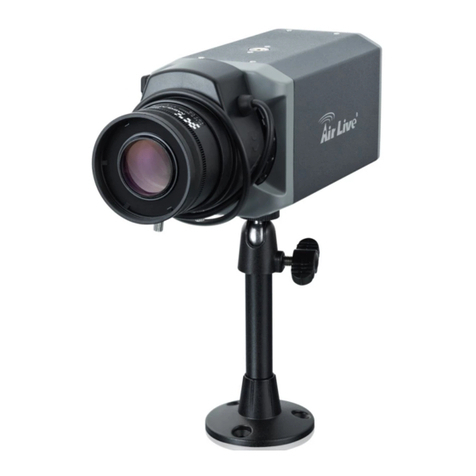
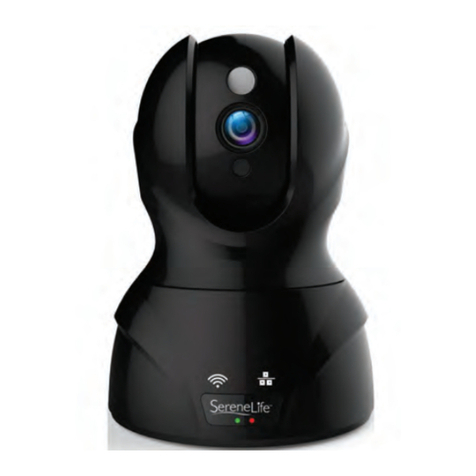
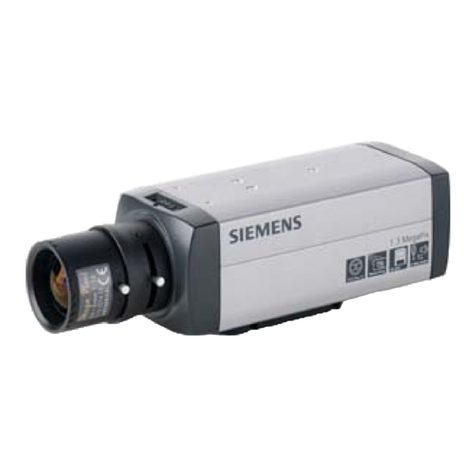
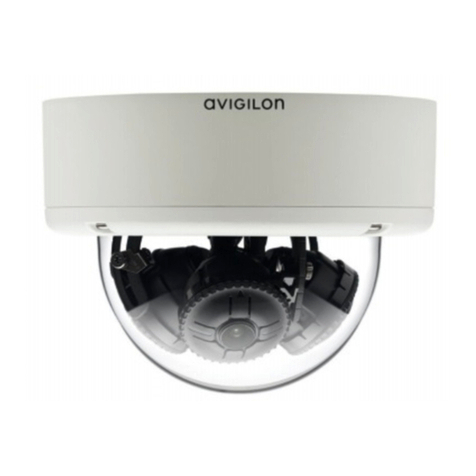
Ednet CUBE User manual

User Guide
CUBE/MOVE | cordless IP camera | Indoor

A
SSMANN Electronic GmbH I Auf dem Schüffel 3 I 58513 Lüdenscheid I Germany
PAGE 2 USER GUIDE
FOREWORD
1. Foreword
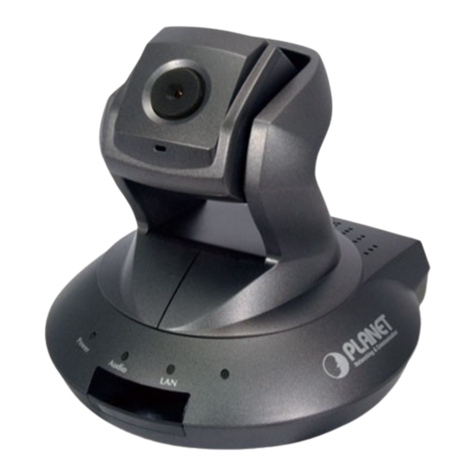
1.1 MOVE | Cordless IP camera | Indoor
Would you like to know that your home, children's room or even
office is protected, and are you looking for an economical means of
surveillance, even readily when on the go? The cordless and
controllable ednet MOVE IP camera enables you to cast an eye on
your house and home, even when you are on the go. Simply open
the App with your mobile phone or tablet and see what is happening
live at home at any time. Alternatively you can also access the live
pictures over the ednet IP camera portal. With the help of the
integrated swivel and tilt slope function, you can flexibly expand the
field of vision of your surveillance camera and even steer it, whether
the camera should record further to the right, to the left, up or down.
The camera is compact and inconspicuous at the same time, so
that you can place it perfectly on your sideboard, for example. From
there, you can cast an eye on your pets, your entrance area or even
open living areas. Get cracking now: The only thing you need is an
internet enabled mobile phone, an internet connection, and
obviously power for your ednet IP camera.
1.2 Security becomes simple - with the ednet
MOVE IP camera
• Access live images on the go via the App
• Revolving and swiveling camera, controllable over different
network devices
• WLAN LAN in accordance with the latest 11n standard for fluid transmissions
• Image sensor: 1/5" CMOS color sensor
• High video resolution (VGA 640x480)
• image refresh rate: up to 30 fps
• High video resolution (VGA 640x480)
• High light sensitivity 0.68 Lux
• Conforms to 802.11b/g/n standard
• Supports movement recognition
• Supports the control of brightness, contrast, shade, saturation and focus
• image refresh rate: up to 30 fps
• Integrated LEDs for surveillance in the dark
• LAN-speed: 10/100Base-TX Ethernet
• Remotely controllable, motorized swivel and tilt function
• Electricity consumption: 4.0 W
• Operating temperature -5 °C to 55 °C
• Dimensions (L x W x H): 105 mm x 85 mm x 112 mm

A
SSMANN Electronic GmbH I Auf dem Schüffel 3 I 58513 Lüdenscheid I Germany
PAGE 3 USER GUIDE
FOREWORD
1.3 CUBE | Cordless IP camera | Indoor
Would you like to know that your home, children's room or even
office is protected, and are you looking for an economical means of
surveillance, even readily when on the go? The cordless ednet
CUBE IP camera enables you to cast an eye on your house and
home, even on the go. Simply open the app with your mobile phone
or tablet and see what is happening live at home at any time.
Alternatively you can also access the live pictures over the ednet IP
camera portal. The camera is at the same time compact and
inconspicuous, so that you can place it perfectly on a wall shelf, for
example. From there, you can cast an eye on your sleeping children
or your terrace door, for example. Get cracking now: The only thing
you need is an internet enabled mobile phone, an internet
connection and obviously power for your ednet IP camera.
1.4 Security becomes simple - with the ednet
CUBE IP camera
• Access live images on the go via the App
• WLAN LAN in accordance with the latest 11n standard for fluid
transmissions
• Image sensor: 1/6" CMOS color sensor
• image refresh rate: up to 30 fps
• High video resolution (VGA 640x480)
• High light sensitivity 0.68 Lux
• Conforms to 802.11b/g/n standard
• Supports movement recognition
• Supports the control of brightness, contrast, shade, saturation and focus
• Integrated LEDs for surveillance in the dark
• LAN-speed: 10/100Base-TX Ethernet
• Electricity consumption: 3.0 W
• Operating temperature -5 °C to 55 °C
• Dimensions (L x W x H): 60 mm x 40 mm x 92 mm

A
SSMANN Electronic GmbH I Auf dem Schüffel 3 I 58513 Lüdenscheid I Germany
PAGE 4 USER GUIDE
CONTENTS
2. Contents
1. Foreword 2
1.1 MOVE | Cordless IP camera | Indoor 2
1.2 Security becomes simple - with the ednet MOVE IP camera 2
1.3 CUBE | Cordless IP camera | Indoor 3
1.4 Security becomes simple - with the ednet CUBE IP camera 3
2. Contents 4
3. Symbols & highlighting 8
4. Packaging contents & connection 9
4.1 Connectors 9
5. Important notes to start 10
5.1 Safety and guarantee 10
5.2 Disposal 10
6. Installation 11
6.1 Necessary parts 11
6.2 Installation of the ceiling/wall mounting 11
7. Preparation 12
7.1 Connect power supply 12
7.2 Connect camera to router 12
8. Software installation 13
9. Set up the user account 16
9.1 Create a user account with your Smarthpone/tablet 16
9.2 Create a new "ednet" account 16
9.3 Create user account with your PC 17

A
SSMANN Electronic GmbH I Auf dem Schüffel 3 I 58513 Lüdenscheid I Germany
PAGE 5 USER GUIDE
CONTENTS
10. Add camera 18
10.1 With your smartphone/tablet 18
10.2 Adding the camera by scanning the QR-Codes 18
10.3 Add the camera with manual input of the camera ID & access password 18
10.4 Add the camera to the PC via the software browser 19
11. Wireless Lan set up 20
11.1 Set up Wireless Lan via the App 20
11.2 Set up wireless LAN via the software 21
12. Symbols 22
12.1 Operating controls upper menu 22
12.2 Operating controls lower menu 22
13. Functions & settings 23
13.1 System settings 23
13.2 Recording settings 24
13.3 Local alarm messages 25
13.4 Network 26
13.5 Device settings 27
13.6 Search 28
13.7 Change registration password 29
13.8 Log 29
13.9 Help 30
13.10 Camera notifications 30
14. Operating controls 31
14.1 Movement control area 31

A
SSMANN Electronic GmbH I Auf dem Schüffel 3 I 58513 Lüdenscheid I Germany
PAGE 6 USER GUIDE
CONTENTS
14.2 Screenshot 31
14.3 Record video 32
14.4 Listen 32
14.5 Talking 33
14.6 Level movement 33
14.7 Move around vertically 34
14.8 Go to position 34
14.9 Set position 35
14.10 PTZ rate 35
14.11 Vertical flip 36
14.12 Reflecting 36
14.13 Wireless Setup 37
14.14 Alarm Log 37
14.15 Parameters 38
15. Glossary 39
16. Index 41

A
SSMANN Electronic GmbH I Auf dem Schüffel 3 I 58513 Lüdenscheid I Germany
PAGE 7 USER GUIDE
CONTENTS
Notes

A
SSMANN Electronic GmbH I Auf dem Schüffel 3 I 58513 Lüdenscheid I Germany
PAGE 8 USER GUIDE
SYMBOLS & HIGHLIGHTING
3. Symbols & highlighting
In this handbook, symbols and highlighting are used to flag certain
information.
This symbol denotes advice and tips that are useful in operation and use.
This symbol denotes important advice that you should follow by all means, in
order to avoid malfunctions.
Highlighting Function Examples
Inverted commas Keys
Controls
Menus
Paths
Folder and file names
"F1" key
"Help"
"Parameters"
"C:\My Documents"
"Documentation"
Red & underlined Address to enter in the
internet browser
www.assmann.com
Red Links and references within
this handbook
Supplied with
Bold Emphasis Do not click on this button.

A
SSMANN Electronic GmbH I Auf dem Schüffel 3 I 58513 Lüdenscheid I Germany
PAGE 9 USER GUIDE
PACKAGING CONTENTS & CONNECTION
4. Packaging contents & connection
1. 1x ednet IP camera
2. 1x network cable
3. 1x power adapter with connection cable (5V/2A)
4. 1x ceiling/wall mounting
5. 1x assembly kit
6. 1x quick installation manual
4.1 Connectors
Micro SD card slot
Threaded mounting for ceiling/wall mounting
A
ntenna
Loudspeaker
5V/2A power adapter
I/O input/output (not functional)
Operating lights
RJ 45 network connection
3.5 audio jack, audio output
Microphone
Lens unit LEDs

A
SSMANN Electronic GmbH I Auf dem Schüffel 3 I 58513 Lüdenscheid I Germany
PAGE 10 USER GUIDE
IMPORTANT NOTES TO START
5. Important notes to start
5.1 Safety and guarantee
This instruction manual serves to familiarize you with the the mode of operation of this product.
Therefore keep these instructions safe at all times, so that you can access them at any time.
With the purchase of this product, you receive a two-year guarantee against defects when used
properly. Please also note the general business conditions!
Please only use the product in its intended manner.
Any other use may lead to possible damage to the product or the product's surroundings.
Reconstructing or changing the product will impair the safety of the product. Attention danger of
injury!
Never open the product independently. Never carry out repairs yourself!
Handle the product with care. It can be damaged by knocks or falls from even a low height.
Keep the product away from moisture and extreme heat.
Never immerse the product in water or other liquids.
Only use the product indoors.
Only use a type CAT5, RJ45 network cable.
Never insert the network cable into the audio jack.
ATTENTION
No liability will be accepted for consequential damage.
Subject to technical changes and errors excepted!
5.2 Disposal
This electrical appliance does NOT belong in household
waste.
For correct disposal, please refer to the public collection points in your community.
Please obtain details about the location of such a collection point and about appropriate
available quantity restrictions per day/month/year as well as about contingent costs of
collection from the respective municipality.

A
SSMANN Electronic GmbH I Auf dem Schüffel 3 I 58513 Lüdenscheid I Germany
PAGE 11 USER GUIDE
INSTALLATION
6. Installation
6.1 Necessary parts
First of all, please check the complete product contents of the camera in the original packaging
(see "4 Packaging contents & connection" on page 9)
Furthermore, for installation you will require
Drill for the plug hole
Pencil for marking the drilling holes
Screwdriver
6.2 Installation of the ceiling/wall mounting
• First of all mark the drilling holes by means of the predetermined holes of the ceiling/wall
mounting with a pencil.
Placement of the plugs can be dispensed with if the base is made of
wood. To attach the holder, the supplied screws are subsequently
screwed directly into the base. In order to facilitate the screwing into
wood, the positions should initially be drilled with a 2 mm bit for
example (drilling depth scarcely under screw length).
• Now drill the holes at the marked points and push in the plugs.
• Place the wall holder over the drilled holes and press against the wall, then introduce both
screws and tighten with a screwdriver. To ensure the plastic holder is not damaged, tighten
the screws sufficiently.
• Screw the female thread on the underside of the camera underside to the thread screw of the
mounting and adjust the mounting to the desired angle by means of the lateral locking
screws.

A
SSMANN Electronic GmbH I Auf dem Schüffel 3 I 58513 Lüdenscheid I Germany
PAGE 12 USER GUIDE
PREPARATION
7. Preparation
Before you can use your IP camera, some preparations must be made!
7.1 Connect power supply
Connect the connector plug of the enclosed power adapter with the power adapter connection
on the camera.
7.2 Connect camera to router
Connect one end of the included network cable to the LAN-connection on the camera. Connect
the other end of the network cable to one of the connectors marked with “LAN” on the back of
your router. Many routers have only one LAN-connection, others have several connections.
Your router must have a working Internet connection.
Switch/Router
LAN/www
Power adapte
r
RJ45
PC/notebook

A
SSMANN Electronic GmbH I Auf dem Schüffel 3 I 58513 Lüdenscheid I Germany
PAGE 13 USER GUIDE
SOFTWARE INSTALLATION
8. Software installation
Install the supplied software or run the downloaded setup.exe.
Click on "Next" to move to the next step.
Select a folder where the software should be installed and click on "Next".

A
SSMANN Electronic GmbH I Auf dem Schüffel 3 I 58513 Lüdenscheid I Germany
PAGE 14 USER GUIDE
SOFTWARE INSTALLATION
Select "Create a desktop icon", to access the software later directly from your desktop
Then click on "Install" to begin the installation.

A
SSMANN Electronic GmbH I Auf dem Schüffel 3 I 58513 Lüdenscheid I Germany
PAGE 15 USER GUIDE
SOFTWARE INSTALLATION
Then confirm the firewall message with "allow access".

A
SSMANN Electronic GmbH I Auf dem Schüffel 3 I 58513 Lüdenscheid I Germany
PAGE 16 USER GUIDE
SET UP THE USER ACCOUNT
9. Set up the user account
In order to use your ednet camera and to have a video image anytime
and anywhere, you need to register your camera in a user account. The
setup and control can both be done from your Smartphone/tablet as
well as from a PC.
9.1 Create a user account with your smartphone/tablet
If you have an Apple iOS device, you will find our "ednet IP camera" app in the Apple App Store.
For Smartphones and Tablets with Google Android OS, you will find the "ednet IP cameras"
app in the Google™ Play Store.
Input "ednet" or "ednet IP cameras" into the search field of the respective App store.
In the search results, the "ednet IP camera" app is denoted with this symbol. Then
install the App on your mobile device. Start the App on your tablet or on your
smartphone.
9.2 Create a new "ednet" account
Create a new "ednet" account with an individual user name and password.
Click on "register". Please choose a user name, a password and confirm the selected
password. Then enter your e-mail address. Confirm your input with "OK".
Then log into the App with "Login" using your user name and password. Now you can add your
camera to the account (see "10 Add camera" on page 18").

A
SSMANN Electronic GmbH I Auf dem Schüffel 3 I 58513 Lüdenscheid I Germany
PAGE 17 USER GUIDE
SET UP THE USER ACCOUNT
9.3 Create user account with your PC
Please visit the website http://www.ip-cam.biz/.
Under "Software Download" you will find the software for Windows and Apple.
After the software has been installed on your computer, open it and select "account".
Create a new "ednet" account
Click on "account". Please choose a user name, a password and confirm the selected
password. Then enter your e-mail address.
After that, confirm your input.

A
SSMANN Electronic GmbH I Auf dem Schüffel 3 I 58513 Lüdenscheid I Germany
PAGE 18 USER GUIDE
A
DD CAMERA
10. Add camera
10.1 With your smartphone/tablet
Click on the "ednet IP camera" app under "WAN" on the "+" symbol in order to add your
camera.
This is easily done by scanning the QR-code with your smartphone/tablet or through manual
entry of the activation data.
The following devices are suitable for scanning the QR-code:
Apple iPhone™, Apple iPad™, Android Smartphone, Android
Tablet (with integrated back camera).
The camera ID and the access password as well as the QR code can be found on the enclosed
camera registration card.
10.2 Adding the camera by scanning the QR-Codes
Android devices show a grid on the display. Move the camera forward or backward until the
QR-code fits into the grid.
Apple iOS™ devices do not show any grid. To scan a QR-Code with an Apple iOS™ device,
you may need to move the device backward and forward a couple of times, until it recognizes
the code.
10.3 Add the camera with manual input of the camera ID & access
password
The camera ID and the access password are on the enclosed
camera registration card. Under "camera alias" please enter a name
for the camera, and after that, please enter the "camera ID" from the
card into the "camera ID" field. Please enter the "login password"
from the card into the "access password" field.
After adding the camera, please check in the camera list in App
whether your camera is listed under WAN.

A
SSMANN Electronic GmbH I Auf dem Schüffel 3 I 58513 Lüdenscheid I Germany
PAGE 19 USER GUIDE
A
DD CAMERA
10.4 Add the camera to the PC via the software browser
In order to add a camera to the PC, go to "WAN" and
press the right mouse key. There you click on "add
camera".
A
new window opens, in which you enter a name for the
camera under "camera alias". After that, please enter the
"camera ID" into the field "camera identification" field and the
"login password" into the "camera password" field. The
camera ID and the access password are on the enclosed
camera registration card.
A
fter successfully adding the camera, please check in the
camera list whether your camera is displayed under "WAN".
If you wish to use your ednet IP camera further with a network cable,
the installation is finalized here.
If, however, you intend to use the wireless variant in the WLAN for the
greatest possible flexibility in the choice of location, please continue
reading.

A
SSMANN Electronic GmbH I Auf dem Schüffel 3 I 58513 Lüdenscheid I Germany
PAGE 20 USER GUIDE
WIRELESS LAN SET UP
11. Wireless Lan set up
11.1 Set up Wireless Lan via the App
The set up of the wireless (WLAN) connection between the IP camera and
WLAN-router/access point takes place via a PC or smartphone/tablet.
For this, go to the "LAN" area of the App and/or the software.
In order to connect the camera with the App via the WLAN go
into the camera settings. To do this, press on the blue arrow.
Select the menu choice WLAN-network settings, there you
can configure the camera's WLAN settings.
A
ctivate the camera's WLAN-function, while clicking on "WIFI
on" and then look for available wireless networks.
Select the network with which you want to connect and enter
the network key.
Please confirm the input with "OK".
Now the network cable can be removed from the camera, and the camera can be operated
over your wireless LAN.
This manual suits for next models
1
Table of contents
