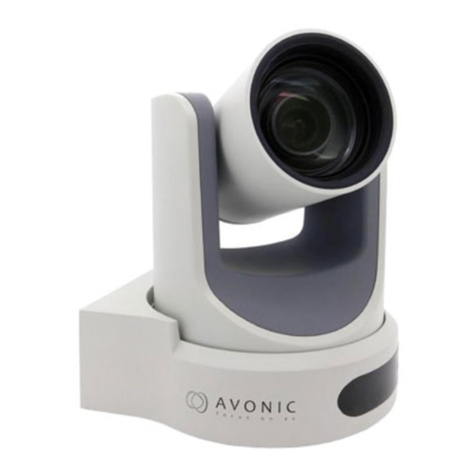
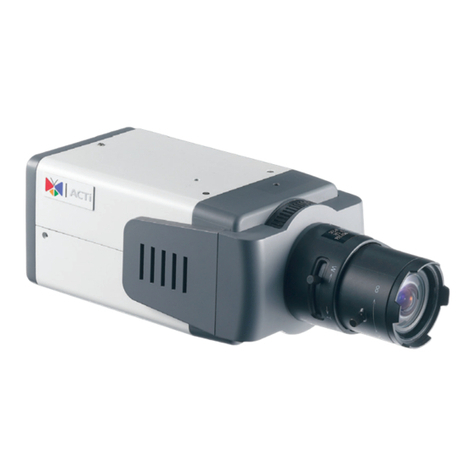
Avonic CM60-IP-BOX User manual

www.avonic.eu
1
CM60-IP-BOX
Integration HD Color Box Camera
User Manual v2.1

www.avonic.eu
2
Safety Notes
Before installing the device, please read this manual carefully and follow
instructions indicated to ensure proper operation. Please keep this manual for
future reference.
When powering on the device, please check the input power voltage carefully,
the camera accepts DC12V, otherwise, it may cause damage to the camera.
Polarity of the power supply plug drawing as follows.
Please put power, video and control cables at safe place in order not to cause
malfunction to the device.
Please put the device into use at required working temperature and humidity,
working condition of the device is 0°C ~ +40°C,humidity at < 90%. Please
avoid unrelated objects getting into the device like corrosive liquid that may
cause damage / danger.
Please avoid shock, vibration, soaking the device when transporting and
installing, otherwise, it may cause damage to the camera.
Please only refer to authorized personnel to repair the device, do not
disassemble the camera by yourself.
Only use shielded control and video cables, and the cables should be
connected separately in order to ensure proper use. Do not aim the camera
lens at sunlight or strong lights that may cause damage to the imaging system
of the device.
Please use a soft cloth to clean the device, do not use strong or abrasive
detergent to clean that will damage the device’s housing / lens.

www.avonic.eu
3
Contents
Safety Notes..............................................................................2
Contents ....................................................................................3
Product Overview.....................................................................4
Features ......................................................................................................................................................4
Packing List.................................................................................................................................................4
Main Parts and Control Interfaces..............................................................................................................4
Box Camera Description.........................................................................................................................4
Installation.................................................................................6
System Requirements ................................................................................................................................6
Internet Connecting.....................................................................................................................................6
IP camera control........................................................................................................................................6
Setup IP address.....................................................................................................................................6
VLC stream media player monitoring.....................................................................................................6
IP Camera parameter setup ...................................................................................................................7
Homepage introduction...........................................................................................................................7
Media.......................................................................................................................................................7
System Setting ........................................................................................................................................8
Network Setting.......................................................................................................................................8
Information...............................................................................................................................................9
OSD Menu Operation ...............................................................9
Key Description...........................................................................................................................................9
MENU(Main Menu).....................................................................................................................................9
EXPOSURE ................................................................................................................................................9
COLOR......................................................................................................................................................10
IMAGE.......................................................................................................................................................10
FOCUS......................................................................................................................................................10
NOISE REDUCTION ................................................................................................................................11
SETTING...................................................................................................................................................11
INFORMATION .........................................................................................................................................11
RESTORE FACTORY SETTINGS...........................................................................................................11
Serial port control...................................................................12
Annex 1 Technical Specifications.........................................13
Annex 2 Size and Dimension ................................................14
Troubleshooting .....................................................................15

www.avonic.eu
4
Product Overview
Features
20x Optical Zoom. TAMRON high quality
super telephoto lens.
H.264 and H.265 Support, enabling full
HD 1080p/60fps video stream by ultra-
low bandwidth, lag-time within 200ms.
1080P Full HD, Panasonic's 1/2.7 inch,
2.07 million effective pixels high quality
HD CMOS sensor.
Double Interface, 3G-SDI interface and
IP streaming at the same time.
Ultra-high Frame Rate up to 60fps in
1080P or even up to 120fps output in
720P over IP only.
AAC Audio Encoding, better sound
quality and smaller bandwidth.
Low-light, high SNR of CMOS sensor
combined with 2D and 3D noise
reduction algorithm, effectively reduce
the noise, even under low illumination
conditions.
PoE Support (802.3af), effectively
reduce the cost of installation and signal
routing.
ICR Infrared Filter with auto switch, keep
watch over day and night.
Packing List
When you open the package, please make sure
below items are included. If any items is missing,
please contact your supplier.
Box Camera x 1
Power Adapter x 1
Manual(1)
Main Parts and Control
Interfaces
Box Camera Description
Bottom Part
1 Camera Back Cover
2 Installation Positioning Track
3 Camera Front Cover
4 Lens Cap

www.avonic.eu
5
Rear Part
1. 3G-SDI interface
2. RJ45 interface
3. Audio Line in interface
4. DC 12V power interface
5. Power light
6. Audio Line out interface
7. Right key
8. MENU key
9. Down key
10. Left key
11. Up key
12. RS485 interface
Operating tips
Press "MENU" button, then plug in the power
supply and keep holding down the "MENU"
button for 8 seconds, the camera will restore
factory Settings.

www.avonic.eu
6
Installation
System Requirements
Operating System:
Windows 2000/2003/XP/vista/7/8/10
Network Protocol: TCP/IP
Client PC: P4/128MRAM/40GHD/ support
scaled graphics card,support
DirectX8.0 or more advanced version.
Internet Connecting
IP camera control
Setup IP address
IP camera default IP address is
192.168.100.99,
user "admin",
password "admin"
After modified, IP Camera be restarted
Unknow camera IP, view as below:
Method 1: connect camera to TV, press [menu]
of the behind camera, select "Information", the
camera IP will be show on screen.
Change IP address,2 methods as below:
Method 1: On web control page, find "Network"--
->Change IP---->Click "Apply"
----> Restart camera
VLC stream media player monitoring
Visit VLC media server procedure
Open VLC media player, click "Media"->"Open
Network Steam ",or click "Ctrl+N"; as below:
Input URL address:
rtsp://ip: port number/1 (First stream);

www.avonic.eu
7
rtsp://ip: port number/2 (Second stream).
NOTE!
RTSP port number default value is 554.
IP Camera parameter setup
Homepage introduction
Menu
All pages include 2 menu bars:
1. Real time monitoring: displaying video
image
2. Parameter setup: with function buttons
Video viewing window
Video viewing window must be same as video
resolution, the bigger the resolution is, the bigger
the playing area is. Double click viewing window,
will show full-screen, double click again, will
return to initialized size.
1) Video playback pause button: control real-time
video pause, stop the last picture, click
recoverable video again.
2) Audio control buttons: can set silent mode.
3) Full screen switch button.
Language selection
Chinese/English/Russian
Media
1. Video format Support 50HZ and 60HZ
and OSD three formats.
2. Encode Protocol
Support H.264 and H.265 and MJPEG
three formats.
3. Encode Level Support baseline, main
profile, high profile.
4. Resolution
First stream support
1920x1080,1280x720,
1024x576,960x540,640x480,640x360,
Second stream support
50Hz:1280x720,1024x576,720x576,
720x408,640x360,480x270,320x240,60
Hz:1280x720,1024x576,720x480,720x
408,640x360,480x270,320x240,
the bigger resolution is, the clearer the
image will be, more network bandwidth
will be taken.
5. Bit Rate
User can assign bit flow/stream,
normally speaking, the bigger bit flow
is, the clearer the image will be. The bit
allocation must combine with network
bandwidth, when the network
bandwidth is too narrow and the
allocated bit flow is too big, will cause
video signal flow not to be transmitted
normally, the video effect will be worse.

www.avonic.eu
8
6. Frame rate
User can specify the size of the frame
rate, generally, the frame rate greater,
the image more smooth; Frame rate is
smaller, the more you’ll have the sense
of a stuttering image.
7. I key frame interval:
Set interval between 2 I frame, the
bigger interval is, the response will be
lower from viewing window.
8. Bit Rate control
Code stream control way:
Constant bit rate: video coder will be
coding according to preset speed
Variable bit rate: video coder will adjust
the speed based on preset speed to
gain the best image quality.
9. Fluctuate level
Restrain the fluctuation magnitude of
variable rate, grade 1 ~ 6
System Setting
1. Work Mode
Work Mode RTSP
2. Reboot
Click the "Reboot" button, system
restart.
3. User and password
The user can modify the password
(letters and Numbers only)
4. Apply / Cancel
Modify password and click the "apply"
button to the login page, press "cancel"
button to cancel password change.
Network Setting
1. Lan Settings
Default the IP address is
192.168.100.99, The MAC address can
be modified.
2. Port Settings
a. HTTP Port IP address identifies the
network device, the device can run
multiple web applications, each
network program using network port
to transmit data, so data transmission
to be carried out between the port and
port. Port setting is to set up WEB
SERVER program using which port to
transmit. When port mapping, need to
be consistent with the port
number(default port: 80)
b. RTSP Port Network camera support
RTSP protocol, use the VLC tools
broadcast.
c. PTZ Port Support PTZ protocol,
default port: 5678.
3. Control Protocol Setting
Setting camera control communication
protocol, include Visca address, Pelco-
D address, Pelco-P address.
4. RTMP Setting
Setting the camera stream, can set up
two stream, in the two stream selection
control code stream of "On", "Off",
"Video", "Audio", etc.
5. RTSP Setting
Setting network camera RTSP protocol
of "On", "Off".
6. ONVIF Setting
Setting the ONVIF protocol and ONVIF
authorization "On", "Off".
7. Multicast Setting
Setting multicast "On", "Off", and
multicast address(default address

www.avonic.eu
9
224.1.2.3) and port(default 6688)
8. Apply / Cancel
Modify network parameters then press
"Apply" button to modify network
parameters, press "Cancel" button to
cancel network parameters.
Information
Show the current device information, as shown
to the right.
OSD Menu Operation
Key Description
The camera USES five buttons, respectively, to
determine key [MENU], select key 【 】 up and
down, left and right sides choose key "【 】;
Under normal image press "MENU" key, the
screen displays the main menu, press 【 】,
from top to bottom cycle options menu item and
press 【 】 select menu options, use a scroll
arrow or highlight the selected item, press menu
button "MENU" to highlight the menu item; Each
menu page has a "Return" option, to Return to
the previous menu or exit the menu.
MENU(Main Menu)
Directly press "MENU" button to enter the main
menu.
Use the select key up and down【 】Choose a
menu item, press【MENU】 to enter submenu.
choose[Exit]press【MENU】 to exit menu.
EXPOSURE
Mode: Set the camera exposure mode, Optional
items: Auto, Bright, Iris Priority, Shutter Priority,
Manual, WDR.
Shutter: Set the Shutter values, only when the
Mode for the Shutter Priority Mode and Manual
Mode effective, Optional items:
1/10000s,1/6000s,1/4000s,1/3000s,1/2000s,1/1
500s,1/1000s,1/725s,1/500s,1/350s,1/250s,1/20
0s,1/125s,1/100s,1/90s,1/60s,1/30s.
Iris: Set the Iris values, only when the Mode for
the Iris Priority and Manual Mode effective,
Optional
items:F1.8,F2.0,F2.4,F2.8,F3.4,F4.0,F4.8,F5.6,
F6.8,F8.0,F9.6,F11.0,Close
GainLimit: Set the Gain value, Optional items: 0
~ 15.
Bright: Set the brightness values, only when the
effective Mode for Bright Mode, Optional items:
0 ~ 17.
ExpCompMode: Set the exposure
compensation mode, can be installed: On,Off.
ExpComp: Set the exposure compensation
value, only when ExpCompMode item to On
effective, Optional items: -7 ~ 7.
MENU
Exposure
Color
Image
Focus
Noise Reduction
Setting
Information
Restore Factory Settings
Exit
EXPOSURE
Mode Auto
ExpCompMod On
ExpComp -1
GainLimit 3
Backlight Off
DRC Strength 3
Anti Flicker 50Hz
Return

www.avonic.eu
10
Backlight: Set the backlight compensation,
Optional items: On,Off.
DRC Strength: Set up digital wide dynamic
strength, can set up different levels of wide
dynamic effect, Optional items: 0 ~ 8.
Anti Flicker: Set the flashing function, Optional
items: 50Hz, 60Hz, Off.
DCRStrength: Set the DRC strength values,
Optional items: 0 ~ 6.
Return: get back
COLOR
WB Mode: Set the camera white balance mode,
Optional items: Auto, 3000K/Indoor, 4000K,
5000K/Outdoor, 6500K-1, 6500K-2, 6500K-
3,One Push, Manual.
RGTuning: Adjust the camera white balance
mode of red tuning, are effective only when the
white balance mode to Auto, Optional items: -10
~ 10.
BGTuning: Adjust the camera white balance
mode of bluetuning, are effective only when the
white balance mode to Auto, Optional items: -10
~ 10.
R Gain: Adjust the camera white balance mode
of red gain, are effective only when the white
balance mode to Manual, Optional items: 0 ~
255.
B Gain: Adjust the camera white balance mode
of blue gain, are effective only when the white
balance mode to Manual, Optional items: 0 ~
255.
Saturation: Color saturation adjustment,
Optional items: 60% ~ 200%.
Hue: Chroma adjustment, Optional items:0 ~
14.
IR Filter: Choose IR Filter, Optional items: 1~ 3.
AWB sens: The white balance sensitivity,
Optional items: Low, Middle, High.
Return: get back.
IMAGE
Luminance: Brightness adjustment, Optional
items: 0~14.
Contrast: Contrast adjustment, Optional items:
0~14.
Sharpness: Sharpness adjustment, Optional
items:Auto,0~15.
Flip-H: Image flipped horizontally. Optional
items: On,Off.
Flip-V: Image Flip Vertical. Optional items:
On,Off.
Gamma: Optional items: default, 0.45, 0.5, 0.56,
0.63.
Style: Optional items: Norm, Clarity, Bright,
Soft,5S.
Return: get back.
FOCUS
Z-Doom Limit: Digital zoom camera settings,
Optional items:x1.
AF Sensitivity: Focus camera sensitivity,
Optional items: Low,Middle,High.
Auto Focus: Autofocus camera settings,
Optional items: On,Off.
COLOR
WB Mode Auto
AWB Sens Low
RG Tuning 2
BG Tuning -1
Saturation 100%
Hue 7
Return
IMAGE
Luminance 7
Contrast 7
Sharpness 2
Flip-H Off
Flip-V Off
Gamma Default
Style Clarity
Return
FOCUS
D-Zoom Limit x1
AF Sensitivity High
Auto Focus On
Return

www.avonic.eu
11
Return: get back.
NOISE REDUCTION
2D NR:2D noise reduction, Optional items:1 ~
5,Close,Auto.
3D NR:3D noise reduction, Optional items:1 ~
8,Close.
Return: get back.
SETTING
Language: Language Settings, Optional items:
English, Chinese.
Protocol: Communication protocol Settings,
Optional items: VISCA,PELCO-D,PELCO-P.
VISCA Address: Address of the Visca Settings,
Optional items:0 ~ 7.
P-D Address:P-D address settings, valid in
PELCO-D mode, Optional items: 0 ~ 254.
P-P Address:P-P address settings, valid in
PELCO-P model, Optional items: 0 ~ 31.
Baudrate: Camera baud rate settings, Optional
items: 38400, 19200, 9600, 4800, 2400.
Video Format: Camera video format settings,
Optional items: 1080P60, 1080P50, 1080I60,
1080I50, 1080P30, 1080P25, 720P60, 720P50.
Lens: Set lens type, Optional items: Type1,
Type2.
Return: get back.
INFORMATION
RESTORE FACTORY
SETTINGS
Yes: verify, press【MENU】to restore factory
Settings.
No: cancel, press【MENU】to back to menu.
Return: get back.
NOISE REDUCTION
2D NR 3
3D NR 3
Return
SETTING
Language English
Protocol VISCA
VISCA Address 1
Baudrate 9600
Video Format 1080P30
Lens Type2
Return
Information
Version 7.2.01
Data 2016-08-10
AF Version 1.1.7
IP 192.168.100.99
Gateway 192.168.100.1
Netmask 255.255.255.0
Return
RESTORE FACTORY SETTINGS
Yes
No
Return

www.avonic.eu
12
Serial port control
The camera provides the following commands to control menu over RS-485:
function
command packet
Notes
UP
8x 01 06 01 08 08 03 01 FF
Equivalent to the back four direction keys.
DOWN
8x 01 06 01 08 08 03 02 FF
LEFT
8x 01 06 01 08 08 01 03 FF
RIGHT
8x 01 06 01 08 08 02 03 FF
OK
8x 01 04 0B 02 FF
or
8x 01 04 0B 03 FF
Equivalent to the back【MENU】key.
x:Camera address number.

www.avonic.eu
13
Annex 1 Technical Specifications
Specifications
CM60-IP-BOX
Video System
1080p/60, 1080p/50, 1080i/60, 1080i/50, 1080p/30, 1080p/25, 720p/120 (supported
by network only), 720p/60, 720p/50, 720p/30, 720p/25, 640x480p/240 (supported by
network only, optional)
Sensor
1/2.7'', CMOS, Effective Pixel: 2.07M
Scanning Mode
Progressive
Lens
20x, f4.42mm ~ 88.5mm, F1.8 ~ F2.8
Digital Zoom
32x (optional)
Horizontal Angle of View
60.7° ~ 3.36°
Vertical Angle of View
34.1° ~ 1.89°
Minimal Illumination
0.05 Lux @ (F1.8, AGC ON)
Shutter
1/30s ~ 1/10000s
White Balance
Auto, 3000K/Indoor, 4000K, 5000K/Outdoor, 6500K_1, 6500K_2, 6500K_3, One Push,
Manual
Day-night Mode
IR cut filter with auto switch
Digital Noise Reduction
2D,3D digital noise reduction
Backlight Compensation
Support
Image Freeze
Support
PoE
Support
Ceiling Installation
Support
IP Features
Video Compression
H.265/H.264/MJEPG
Video Stream
Main Stream, Sub Stream
Main Stream Resolution
1920x1080, 1280x720, 1024x576
Sub Stream Resolution
720x576, 720x480, 320x240
Video Bit Rate
128Kbps ~ 8192Kbps
Bit Rate Type
Variable Rate, Fixed Rate
Frame Rate
50Hz: 1fps ~ 50fps, 60Hz: 1fps ~ 60fps, 720p120: 120fps, 640x480p240: 240fps
Audio Compression
AAC
Audio Bit Rate
96Kbps, 128Kbps, 256Kbps
Support protocols
TCP/IP, HTTP, RTSP, RTMP, Onvif, DHCP, Multicast, etc.
Input/Output Interface
HD Output
1x3G-SDI: BNC type, 800mVp-p, 75Ω, Along to SMPTE 424M standard
Network Interface
1xRJ45:10M/100M adaptive Ethernet ports
Audio Interface
1-ch: 3.5mm Audio Interface, Line In
1-ch: 3.5mm Audio Interface, Line Out
Communication interface
1xRS485:Max Distance: 1200m, Protocol: VISCA/Pelco-D/Pelco-P
Power Connector
JEITA(DC IN 12V)
Reset Button
Support
General specification
Input Voltage
DC 12V / PoE (802.3af)
Current Consumption
0.5A (Max)
Operating Temperature
-10°C ~ 40°C (14°F ~ 104°F)
Storage Temperature
-40°C ~ 60°C (-40°F ~ 140°F)
Power Consumption
6W (Max)
Size
138.5mm x 76.8mm x 60.3mm
Net Weight
650Kg (1.4lb)

www.avonic.eu
14
Annex 2 Size and Dimension
Front
Rear
Top
Side
Bottom

www.avonic.eu
15
Troubleshooting
Problem
Solution
Display shows no image
Check whether the camera power
supply is connected and the voltage is
normal, whether the power light shine
Check whether video platform, TV
cable connection is normal
Check for manual lens aperture and
open the aperture
Sometimes there is no image
Check whether video platform, TV
cable connection is normal.
Check whether the camera installation
safety, if there is a strong shock
Image blurring
Check whether the lens focusing
accurately.
Check whether the lens surface is
clean.
Can not control with serial port
The camera control parameters is set
up correctly.
Check whether control line connection
is good

www.avonic.eu
16
CM60-IP-BOX-MAN2.1
Avonic © 2017
Other manuals for CM60-IP-BOX
1
Table of contents
Other Avonic IP Camera manuals

Avonic
Avonic AV-CM44-VCUC User manual

Avonic
Avonic CM44-VCUC-B User manual

Avonic
Avonic AV-CM22-VCU User manual

Avonic
Avonic CM60-IP User manual

Avonic
Avonic CM50-IP User manual

Avonic
Avonic AV-CM22-VCU User manual

Avonic
Avonic CM63-IP User manual

Avonic
Avonic AV-CM44-VCUC-B User manual

Avonic
Avonic AV-CM22-VCU User manual