EDY EDTK6002 User manual

Koelkast –Refrigerator
Kühlschrank –Refrigerateur
Gebruiksaanwijzing
User Manual
Gebrauchsanleitung
Mode dé Emploi
EDTK6002

2

Huishoudelijke apparaten horen niet in de
vuilnisbak. Breng ze naar de betreende
afvalverwerkingsafdeling van uw gemeente.
Omschrijving van het apparaat pagina 4
1. Veiligheidsvoorschriften pagina 4
2. Ingebruikname pagina 5
3. Het koelgedeelte gebruiken pagina 5
4. Het vriesvak gebruiken pagina 5
5. Tips pagina 6
6. Ontdooien pagina 6
7. Reiniging & onderhoud pagina 6
8. Storingen zelf oplossen pagina 7
9. Draairichting deur wijzigen pagina 7
10. Bovenblad verwijderen pagina 9
Garantie pagina 10
N E D E R L A N D S
3
Omschrijving van het apparaat
• Lees eerst de gebruiksaanwijzing aandachtig en
geheel door voordat u het apparaat gaat gebruiken en
bewaar deze zorgvuldig voor latere raadpleging.
• Gebruik dit apparaat uitsluitend voor de in de
gebruiksaanwijzing beschreven doeleinden. Het apparaat
is geschikt voor het bewaren van levensmiddelen. In het
vriesvak kunt u ook verse levensmiddelen invriezen.
• Sluit het apparaat alleen aan op wisselstroom, op een
randgeaarde wandcontactdoos, met een netspanning
overeenkomstig met de informatie aangegeven op het
typeplaatje van het apparaat.
• Maak geen gebruik van enkele/meerdere adapters of
verlengsnoeren.
• Gebruik het apparaat niet wanneer de stekker, het snoer
of het apparaat beschadigd is, of wanneer het apparaat
niet meer naar behoren functioneert of wanneer
het gevallen of op een andere manier beschadigd is.
Raadpleeg dan de winkelier of onze technische dienst. In
geen geval de stekker of het snoer zelf vervangen.
• Het apparaat moet worden verplaatst en geïnstalleerd
door twee of meer personen.
• Wees voorzichtig met het verplaatsen van het apparaat
om te voorkomen dat de vloer beschadigd raakt.
• Let op dat tijdens de installatie de voedingskabel niet
beschadigd raakt.
• Controleer of het apparaat niet te dicht bij een
warmtebron geplaatst wordt.
• Om een goede ventilatie te garanderen, moet er een
ruimte van 10 cm rondom het apparaat vrij gehouden
worden.
• De ventilatieopeningen nooit afdekken.
• Zorg dat de koelleidingen niet beschadigd raken.
• Installeer het apparaat op een stevige, vlakke en stabiele
ondergrond.
• Installeer het apparaat in een droge en goed
geventileerde ruimte. Het apparaat is bedoeld voor
gebruik in een ruimte waar de omgevingstemperatuur
valt binnen de volgende klasse, afhankelijk de
klimaatklasse die u op het typeplaatje vindt aan de
achterzijde van het apparaat.
Klimaatklasse Omgevingstemperatuur
SN Van 10°C tot 32°C
N Van 16°C tot 32°C
ST Van 18°C tot 38°C
T Van 18°C tot 43°C
• Bewaar geen explosieve of licht ontvlambare stoen in
het apparaat. De dampen kunnen brandgevaar of een
explosie veroorzaken.
• Bewaar geen glazen flessen of potten in de vriezer met
vloeistoen, want deze kunnen kapot vriezen.
• Gebruik geen mechanische, elektrische of chemische
middelen om het ontdooiproces te versnellen.
• Zorg ervoor dat kinde ren niet met het apparaat kunnen
spelen, zoals zich er in verstoppen. Dit is gevaarlijk.
• Het apparaat is niet bedoeld voor installatie door
hulpbehoevenden, kleine kinderen en/of personen
met gebrek aan ervaring en kennis, tenzij zij goede
begeleiding krijgen of geïnstrueerd zijn in het veilig
gebruiken van het apparaat door een persoon die
verantwoordelijk is voor hun veiligheid.
• Reparaties aan elektrische apparaten dienen uitsluitend
door vakmensen uitge voerd te worden. Het is gevaarlijk
om een reparatie uit te voeren waarbij de behuizing van
het apparaat geopend moet worden.
1 | VEILIGHEIDSVOORSCHRIFTEN
1
3 + 4
6
11
10
9
8
7
5
2
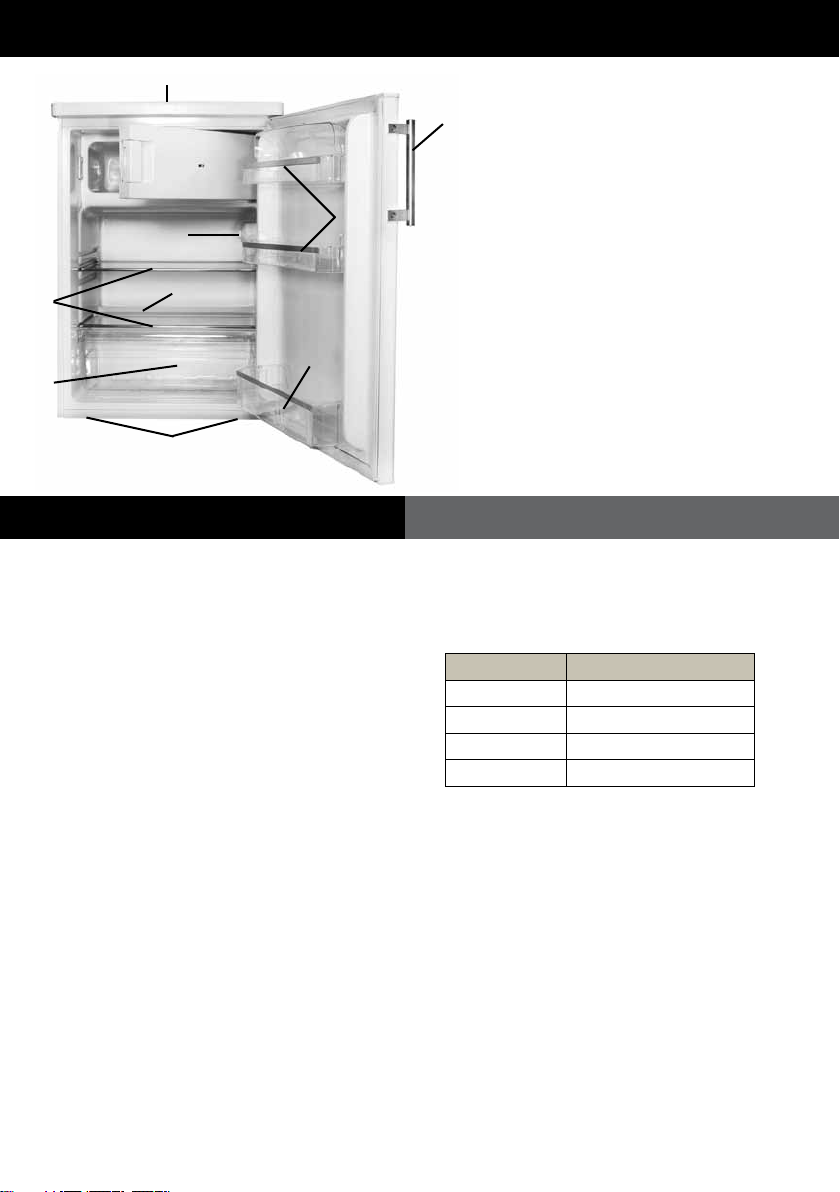
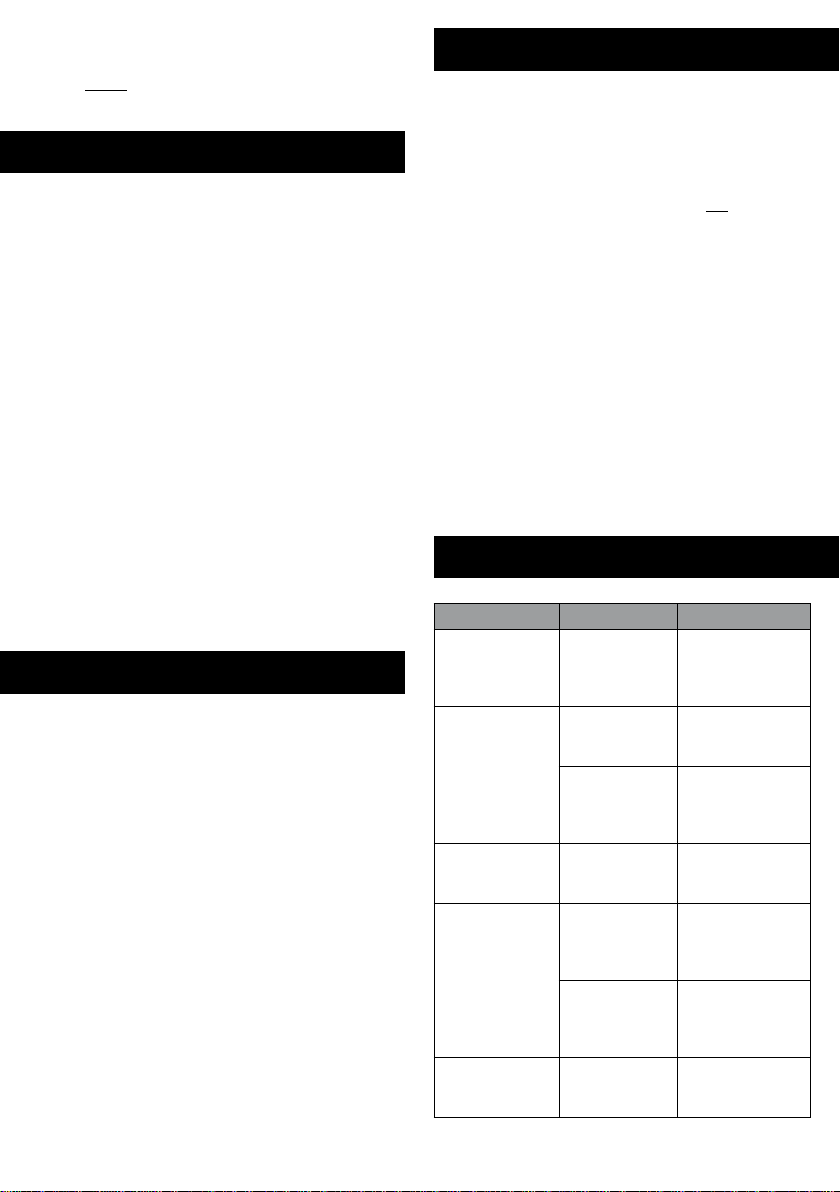
1. Bovenblad
2. Vriesvak
3. Binnenverlichting
4. Thermostaat knop
5. Glazen schappen
6. Ontdooiwaterafvoer
7. Groentelade
8. Stelvoeten
9. Flessenrek
10. Deurvakken
11. Handgreep
4
• Het apparaat uitsluitend binnenshuis gebruiken en
opbergen.
• Het netsnoer nooit scherp buigen of over hete delen
laten lopen.
• Verwijder de stekker altijd uit het stopcontact als het
apparaat gereinigd of gerepareerd wordt.
• Het apparaat nooit gebruiken met onderdelen die niet
door de fabrikant zijn aanbevolen of geleverd.
• Niet aan het snoer c.q. het apparaat trekken om de
stekker uit de wandcontactdoos te halen. De stekker
nooit met natte of vochtige handen aanraken.
• Als u besluit het apparaat, vanwege een defect, niet
langer te gebruiken, adviseren wij u, nadat u de stekker
uit de wandcontactdoos heeft verwijderd, het snoer
af te knippen. Breng het apparaat naar de betreende
afvalverwerkingafdeling van uw gemeente.
• Let op met ijsklontjes en ijsjes. Als deze direct uit de
vriezer geconsumeerd worden dan bestaat de kans op
vrieswonden.
• Dompel het apparaat, het snoer of de stekker nooit
onder in water.
• Dit apparaat is uitsluitend geschikt voor huishoudelijk
gebruik. Wanneer het apparaat oneigenlijk gebruikt
wordt, kan er bij eventuele defecten geen aanspraak op
schadevergoeding worden gemaakt en vervalt het recht
op garantie.
Voordat u het apparaat voor de eerste maal in gebruik
neemt, dient u als volgt te werk te gaan: pak de koelkast
voorzichtig uit en verwijder al het verpakkingsmateriaal.
De verpakking (plastic zakken, piepschuim en karton)
buiten het bereik van kinderen houden. Controleer na het
uitpakken het apparaat zorgvuldig op uiterlijke schade,
mogelijk ontstaan tijdens transport. Plaats het apparaat op
een stevige, vlakke ondergrond en let op dat er genoeg
ruimte omheen is voor voldoende ventilatie.
Er is minimaal 10 cm rondom nodig tussen de koelkast en
de muren. Op deze wijze kan de koelkast de warmte goed
kwijt, goed koelen en energiezuinig functioneren. Met de
stelvoetjes kunt u het apparaat waterpas zetten.
Plaats de koelkast niet in de buurt van warmtebronnen
zoals verwarming of fornuis.
Monteer de bijgeleverde handgreep aan de gewenste kant
van de deur met de bijgeleverde schroeven en plaats de
bijgeleverde witte afdekdopjes aan de andere kant van de
deur waar u de handgreep niet wilt hebben. Let op: de
koelkast nooit aan de handgreep optillen.
Laat het apparaat nadat het geplaatst is, minimaal 3 uur
staan voordat u de stekker in het stopcontact steekt.
Reinig eerst de binnenkant van
de koelkast. Gebruik hiervoor een
warm sopje met bijvoorbeeld
afwasmiddel, allesreiniger of soda. Neem de binnenkant
van de koelkast na het schoonmaken af met schoon water
en droog alles goed na. Laat het apparaat 1 à 2 uur drogen.
De bediening van de koelkast bevindt zich aan de
binnenkant. Stel de thermostaat in op stand 3.
Controleer of de spanning overeenkomt met die vermeld
is op het typeplaatje en steek de stekker in het stopcontact.
4 | HET VRIESVAK GEBRUIKEN
2 | INGEBRUIKNAME
3
3 | HET KOELGEDEELTE GEBRUIKEN
Het vriesgedeelte biedt u de mogelijkheid om
diepgevroren producten te bewaren, verse levensmiddelen
in te vriezen en ijsblokjes te maken.
Vries niet teveel tegelijk in. Hoe sneller het invriezen,
hoe langer de kwaliteit van het voedsel behouden blijft.
Om het invriezen te versnellen kunt u de thermostaat op
stand 7 zetten en weer terug zetten zodra het voedsel
ingevroren is.
Zorg er voor dat de levensmiddelen goed verpakt zijn,
zodat ze hun smaak behouden en geen geur afgeven aan
andere levensmiddelen.
Leg de diepvriesproducten zo snel mogelijk na aankoop
in het vriesvak. Zorg ervoor dat ze tijdens het vervoer niet
ontdooien.
Het bewaren van vers ingevroren en diepvriesproducten is
afhankelijk van het type voedsel.
Stand 1 = warm, kleinste capaciteit
Stand 7 = koud, grootste capaciteit
Bij apparaten met een vriesvak is het advies om de
thermostaat tussen stand 4 en 7 te zetten om de
temperatuur van het vriesvak te waarborgen.
De lamp binnen in de koelkast zal, elke keer als u de deur
opent, aan gaan.
Attentie:
De omgevingstemperatuur, de frequentie van het openen
van de deur en de positie van het apparaat hebben invloed
op de temperatuur in de koelkast. Houd hier rekening mee
met het instellen van de thermostaat.
• Plaats geen heet voedsel in de koelkast.
• Plaats nooit gevaarlijke, licht ontvlambare of explosieve
stoen zoals alcohol, aceton of benzine in de koelkast
omdat er een kans op explosiegevaar is.
• Pak vlees en vis goed in om nare geuren te voorkomen.
• Laat voldoende ruimte tussen de verschillende
levensmiddelen om de lucht goed te kunnen laten
circuleren.
• Plaats geen voedsel tegen de achterwand van de
koelkast. De schappen hebben een stop om dit te
vermijden.
• Laat de deur niet langer open dan noodzakelijk.
Het apparaat zal nu continue koelen tot de ingestelde
temperatuur is bereikt. Laat het apparaat op temperatuur
komen zonder levensmiddelen in de koelkast. Dit duurt
meestal 2 tot 3 uur. Daarna kunt u de thermostaat op
de gewenste stand zetten en de koelkast vullen met
levensmiddelen.
5

Zet voordat u de koelkast wilt reinigen het apparaat uit,
verwijder de stekker uit de wandcontactdoos.
Reinig de binnenkant van de koelkast. Gebruik hiervoor
een warm sopje met bijvoorbeeld afwasmiddel,
allesreiniger of soda om vieze geuren te voorkomen.
Neem de binnenkant van de koelkast na het schoonmaken
af met schoon water en droog alles goed na. Laat het
apparaat 1 à 2 uur drogen. De schappen, de lade en de
deurrekjes kunt u eenvoudig uit de koelkast nemen en
met de hand afwassen. Deze onderdelen mogen niet in de
vaatwasmachine gereinigd worden.
Reinig de buitenkant van de koelkast en de deurrubbers
met een zachte vochtige doek.
Reinig de achterzijde van de koelkast minstens één keer
per jaar met een stofzuiger zodat de condensator en de
ventilatieopeningen schoon blijven en de koelkast zo
optimaal kan functioneren.
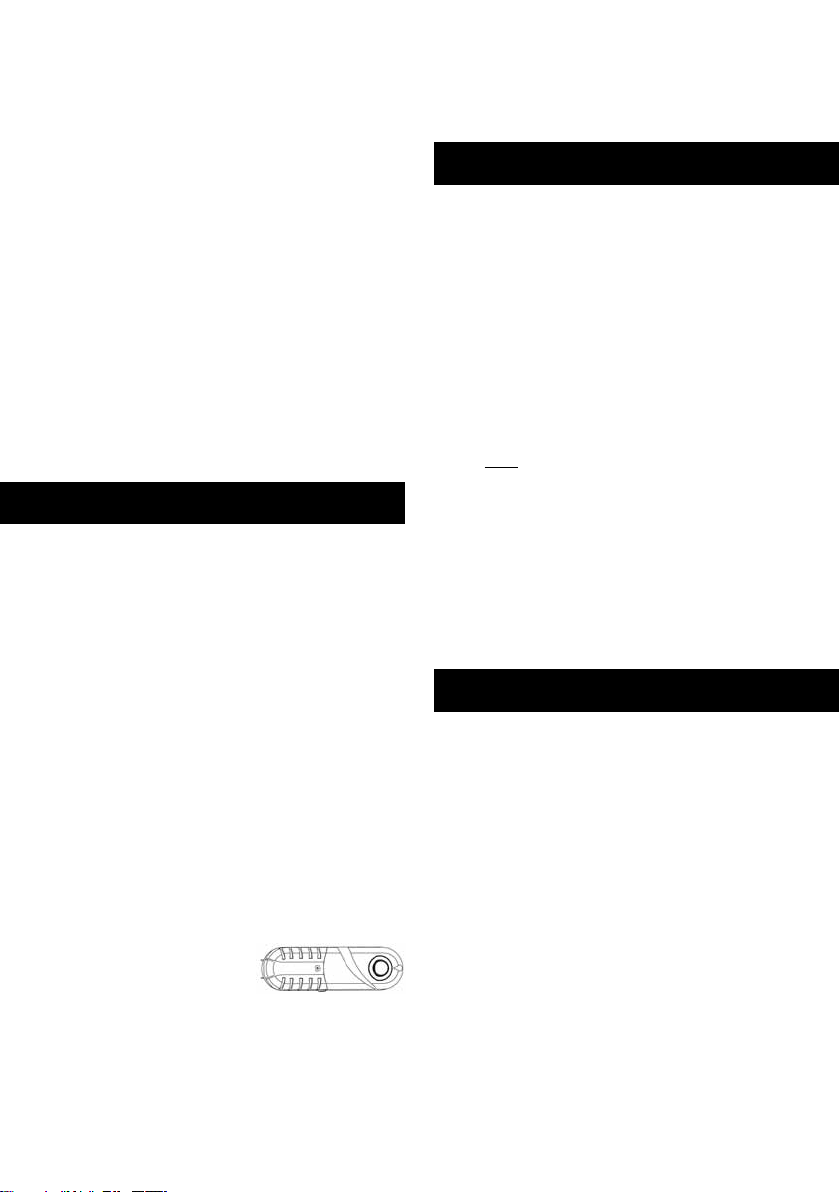
HET VERVANGEN VAN DE LAMP
Wanneer de lamp in de koelkast kapot is, kunt u deze zelf
vervangen. Volg deze stappen:
• Verwijder de stekker uit het stopcontact.
• Verwijder het afdekkapje van de verlichting door het
schroee los te draaien en trek het kapje dan naar u toe.
• Controleer eerst of het lampje goed is aangedraaid.
• Als het lampje defect is, vervang het dan door hetzelfde
type: kleine buislamp, maximaal 10 Watt, fitting E14. Een
dergelijk lampje is algemeen verkrijgbaar.
• Plaats het afdekkapje en het schroee weer terug.
• Steek de stekker in het stopcontact.
7 | REINIGING & ONDERHOUD
In de onderstaande tabel kunt u zien hoeveel maanden u
ingevroren producten kunt bewaren.
Voedsel Maanden Voedsel
Plaats geen glazen flessen of blikken in het vriesvak.
Deze kunnen kapot gaan als de inhoud bevriest.
Koolzuurhoudende dranken kunnen zelfs exploderen.
Bewaar daarom nooit limonade, bier, wijn, champagne,
etc. in het vriesvak.
5 | TIPS
• Een hoge omgevingstemperatuur beïnvloedt het
energieverbruik nadelig. Ook direct zonlicht en andere
warmtebronnen in de buurt van de koelkast hebben een
ongunstige invloed.
• Houd de ventilatieopeningen vrij. Afgedekte
en vervuilde openingen veroorzaken een hoge
energieverbruik. Zorg voor voldoende ruimte rondom
de koelkast zodat een goede ventilatie en luchtstroming
rondom de koelkast mogelijk is.
• Open de deur van de koelkast niet vaker dan nodig is en
laat de deur zo kort mogelijk open.
• De afstand tussen de schappen en de achterwand
zorgt voor een vrije luchtcirculatie. Plaats dus geen
levensmiddelen tegen de achterwand.
• Zet de thermostaat op een lagere stand als de
omstandigheden dat toelaten.
• Laat gekookt voedsel wat u in de koelkast wilt bewaren
eerst afkoelen tot kamertemperatuur voordat u het in de
koelkast legt.
• Rijp of ijs zorgen ervoor dat het stroomverbruik
toeneemt. Verwijder deze daarom regelmatig zodra ze 3
tot 5 mm dik zijn.
• Een deurrubber die niet goed sluit kan het
stroomverbruik verhogen. Laat het daarom op tijd en
door een vakman vervangen.
• De condensor aan de achterkant van de koelkast moet
altijd schoon en stofvrij gehouden worden.
• Als de instructies niet worden nageleefd dan kan dat
leiden tot een hoger stroomverbruik.
6 | ONTDOOIEN
Het ontdooien van de koelruimte gebeurt volledig
automatisch. De aanwezigheid van waterdruppels op de
achterwand aan de binnenkant van de koelkast geeft aan
dat het koelgedeelte aan het ontdooien is. Het dooiwater
loopt via het afvoergootje naar een opvangbakje waarin
het verdampt.
Het ontdooien van het vriesvak
Ontdooi het vriesvak wanneer de ijslaag een dikte van 3
tot 5 mm heeft bereikt. Verwijder alle producten uit het
vriesvak. Bewaar de bevroren producten op een koele
plaats ingepakt in kranten en dekens.
Schakel de thermostaat uit. Ontdooi het vriesvak. Het
ontdooien kunt u versnellen door een schaal met heet
water in het vriesvak te plaatsen.
Maak het vriesvak schoon en droog. Zet de thermostaat
weer op de gewenste stand. Plaats de bevroren producten
pas in het vriesvak als deze weer op temperatuur is.
Waarschuwing: Verwijder ijsaanslag nooit met scherpe
voorwerpen, ontdooisprays, een föhn, een straalkacheltje
of iets dergelijks. Dit kan leiden tot onveilige situaties en
onherstelbare schade veroorzaken aan het apparaat.
6

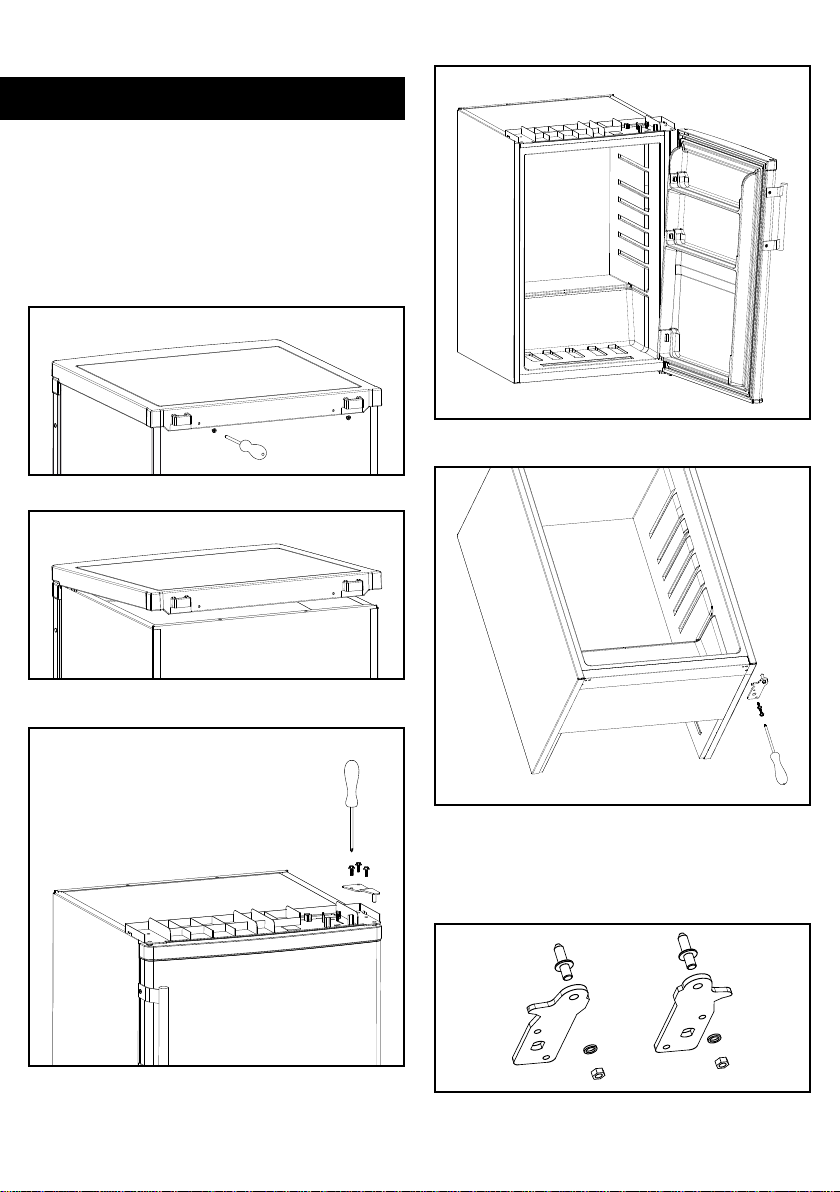
• Verwijder de drie schroeven waarmee het deurscharnier
bevestigt is, terwijl u het scharnier (rechterkant) tegen
het frame houdt. Verwijder het bovenste scharnier.
• Til de deur op van de pen van het onderste scharnier en
leg de deur op bijvoorbeeld een deken zodat er geen
krassen op de deur komen.
9 | DRAAIRICHTING DEUR WIJZIGEN
Storing Oorzaak Oplossing
Apparaat doet
niets; lampje
brandt niet
Stekker niet in
het stopcontact
Steek de stekker
in het stopcontact
Temperatuur in
de koelkast te
hoog of te laag
Thermostaat
verkeerd
ingesteld
Zet de
thermostaat op
de juiste stand
Ventilatie-
openingen zijn
geblokkeerd
Reinig de venti-
latieopeningen
Water loopt uit
de koelkast
Dooiwater-
afvoer is
verstopt
Maak de dooi-
waterafvoer vrij
door deze met
een satéprikker
door te prikken.
Apparaat maakt
lawaai
Is het apparaat
goed geïnstal-
leerd?
Controleer de
installatie
Raakt de
achterkant van
de koelkast
iets?
Controleer dit en
plaats de koelkast
verder naar voren
Verlichting
brandt niet
Lamp is defect Vervang de
lamp volgens de
instructies
Opmerking: het borrelen en het maken van
expansiegeluiden in het koelcircuit is normaal.
8 | STORINGEN ZELF OPLOSSEN
De deur van de koelkast kan aan de rechter- of linkerkant
worden geopend. Het apparaat wordt standaard geleverd
met de opening aan de linkerkant. Om de draairichting van
de deur te wijzigen volgt u de onderstaande instructies.
Attentie: Verwijder eerst de stekker uit het stopcontact
voordat u de draairichting van de koelkastdeur wijzigt.
• Verwijder de schroeven aan de achterzijde van de
koelkast terwijl u het bovenblad tegen het apparaat blijft
houden.
• Til het bovenblad aan de achterkant op en verwijder
hem uit de voorste bevestigingspunten en leg deze
apart.
7

• Plaats het stelvoetje terug.
• Zet de koelkast rustig recht neer.
• Verwijder de handgreep, als deze al gemonteerd
is. Verwijder voorzichtig de afdekdopjes en schroef de
handgreep aan de gewenste zijde vast. Plaats de
afdekdopjes aan de andere kant van de deur.
• Plaats de deur op het onderste scharnier en houd
deze goed vast.
• Monteer, terwijl de deur gesloten is, het bovenste
scharnier aan de linkerkant met behulp van de drie
schroeven. Draai de schroeven pas vast als de deur
waterpas is ten opzichte van de ondergrond van het
apparaat.
• Om het scharnier aan de onderkant te kunnen
verwijderen, laat u de koelkast achter over hellen (max.
45°).
• Verwijder het stelpootje links door deze helemaal los te
draaien.
• Verwijder de twee schroeven terwijl u het onderste
scharnier ondersteunt. Verwijder het onderste scharnier.
• Voordat u het onderste scharnier weer plaatst, moet
de pen van het scharnier worden verwijderd en moet de
richting van het scharnier worden omgekeerd.
Monteer het onderste scharnier op de linkerkant, met
behulp van de twee schroeven.
• Monteer de scharnierpen in het onderste scharnier.
8

• Plaats het metalen scharnier terug met de drie
schroeven.
• Zet de koelkast op de juiste plek en wacht 2 à 3 uur
voordat u de stekker in het stopcontact steekt.
• Monteer het bovenblad met de schroeven.
• Laat de koelkast 2 à 3 uur rusten voordat u de stekker
in het stopcontact doet.
Om de koelkast makkelijk onder bijvoorbeeld een werkblad
te plaatsen, kan het bovenblad verwijderd worden. Volg de
onderstaande instructies.
Attentie: Verwijder eerst de stekker uit het stopcontact.
• Verwijder de schroeven aan de achterzijde van de
koelkast terwijl u het bovenblad tegen het apparaat blijft
houden.
• Til het bovenblad aan de achterkant op en verwijder hem
uit de voorste bevestigingspunten.
• Verwijder de schroeven op het kunststof frame en het
metalen scharnier van de deur.
• Verwijder het scharnier en het kunststof frame.
10 | BOVENBLAD VERWIJDEREN
9

U heeft 2 jaar garantie op technische defecten na aankoop datum.
Wat niet onder garantie valt :
Het gebruik; voor niet normaal huishoudelijk gebruik (het apparaat is bedoeld voor
normaal huishoudelijk gebruik)
Een oorzaak die aan het apparaat vreemd is, zoals;
Schade die opgelopen werd bij het transport of ingevolge een verkeerde
behandeling zoals deuken, krassen, afgebroken onderdelen.
Installatie fouten bijv. (verkeerde spanning).
Storingen ten gevolge van o.a. ondeskundig gebruik, stof/pluisvorming in/aan het
apparaat w.o. verstoppingen van o.a.(indien van toepassing) luchtcirculatie, filters,
als mede breuk in kunststof, rubber, glas, wat anders dan bij normaal gebruik
defect is geraakt; zulks ter beoordeling van service monteur of importeur.
U heeft twee jaar garantie op het apparaat na aankoop datum, de garantie is alleen
dan geldig indien een geldig aankoop bewijs kan worden getoond.
Garantie rechten op het apparaat zijn niet overdraagbaar.
Indien apparaten ter reparatie worden aangeboden dienen deze schoon te zijn,
anders kan behandeling voor reparatie worden geweigerd.
Servicenummer voor Nederland: 0900-0404040
Servicenummer voor België: 0032-(0)38080919
GARANTIEVOORWAARDEN
10

E N G L I S H
Legislation requires that all electrical and
electronic equipment must be collected for
reuse and recycling. Electrical and electronic
equipment marked with the symbol indicating
separate collection of such equipment must be
returned to a municipal waste collection point.
Description of the appliance page 12
1. Safety instructions page 12
2. Before first use page 13
3. Using the cool compartment page 13
4. Using the freezer compartment page 13
5. Tips page 14
6. Defrosting page 14
7. Cleaning & maintenance page 14
8. Troubleshooting page 14
9. Reversing the door opening page 16
10. Removing the top panel page 17
Guarantee page 18
11
Description of the appliance
1 | SAFETY INSTRUCTIONS
• Please read these instructions before operating the
appliance and retain for future use.
• The appliance is intended solely for domestic use within
the home. The appliance is suitable for keeping food. You
can also freeze fresh food in the freezer compartment.
• Before plugging into a socket, check that the voltage in
your home corresponds with the voltage printed on the
bottom of the appliance.
• Do not use single/multiple adapters or extension cables.
• Always carry out regular checks of the appliance and
the power cord to ensure no damage is evident. Should
there be any signs that the appliance or the power cord
is damaged in the slightest degree, the entire appliance
should be returned to the Customer Service Department.
For your own safety, only use the accessories and spare
parts from the manufacturer which are suitable for the
appliance.
• The appliance must be handled and installed by two or
more persons.
• Be careful not to damage the floor when you move the
appliance.
• During installation, make sure the appliance does not
damage the power cable.
• Check the appliance is not positioned near a heat source.
• Make sure that there is sucient ventilation, leave a
space of 10 cm around the appliance.
• Keep the vent outlets of the appliance free.
• Do not damage the refrigerant circuit pipes of the
appliance.
• Install the appliance on a firm and stable surface.
• Install the appliance in a dry and well ventilated area.
The appliance is intended for operation in environments
where ambient temperatures fall within the following
ranges, depending on the climatic class indicated on the
rating label at the back of the appliance. The appliance
may not work properly if it is left for a long time at a
temperature outside the specified range.
Climatic class Ambient temperature
SN From 10°C to 32°C
N From 16°C to 32°C
ST From 18°C to 38°C
T From 18°C to 43°C
• Do not store or use petrol, flammable liquids or gas in the
vicinity of this or other electrical appliances. The fumes
can create a fire hazard or explosion.
• Do not keep any bottles containing fluids which will
freeze in the freezer. The freezing may cause the bottles
to break.
• Do not use mechanical, electric or chemical means to
speed up the defrost process.
• Do not allow children to play or hide inside the appliance
- there is a risk of becoming trapped and suocating.
• This appliance is not intended for installation by persons
(including children) with reduced physical, sensory or
mental capabilities, or lack of experience and knowledge,
unless they have been given supervision or instruction
concerning use of the appliance by a person responsible
for their safety.
• It is hazardous for anyone other than a competent
person to carry out any service or repairs that involve the
removal of the housing.
• Only use and place the appliance indoors.
• Do not let the cord hang over the edge of the table or
counter and keep it away from the heated surface.
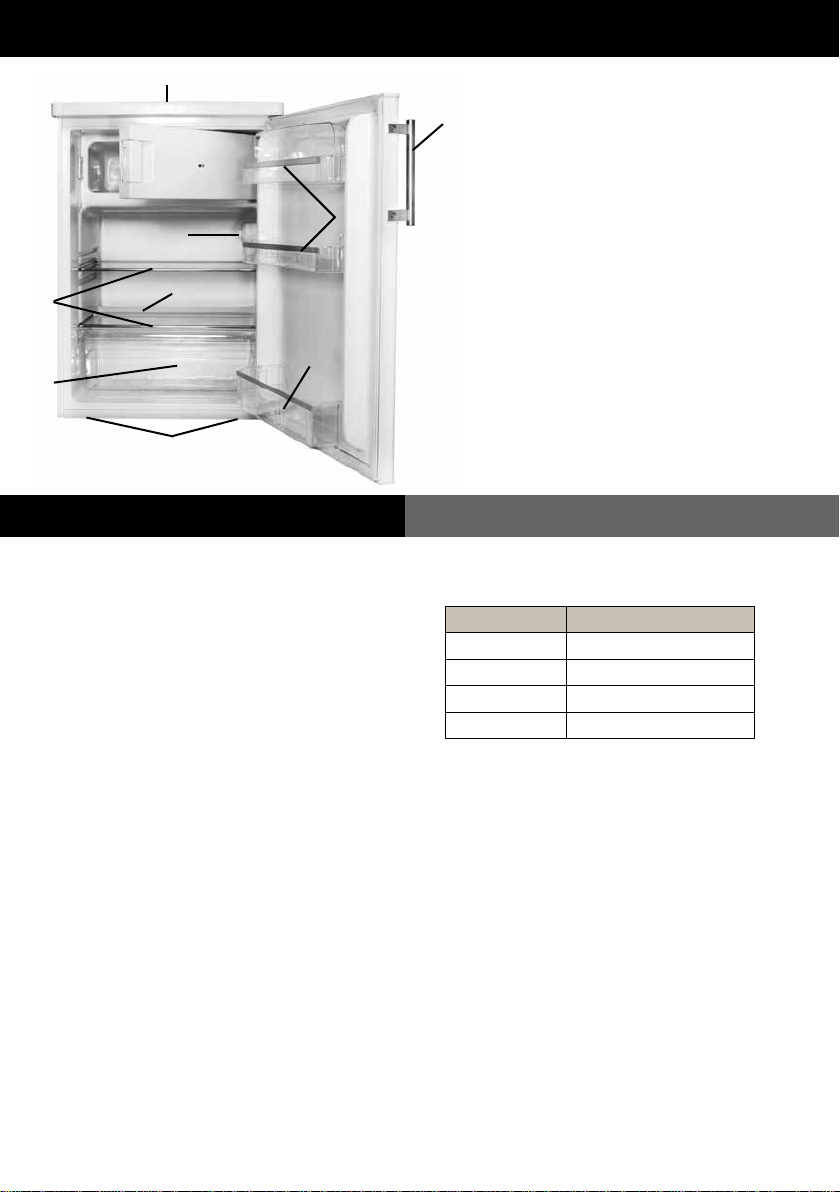
1. Top panel
2. Freezer compartment
3. Interior lighting
4. Thermostat
5. Glass shelves
6. Drain outlet
7. Vegetable drawer
8. Adjustable feet
9. Bottle rack
10. Door compartments
11. Handle
1
3 + 4
6
11
10
9
8
7
5
2
12
Before you use the appliance for the first time, please do as
follows: Carefully unpack the appliance and remove all the
packaging material. Keep the material (plastic, polystyrene
and cardboard) out of reach of children. Check the
appliance after unpacking for any damage, possible from
transportation. Place the appliance on a flat and stable
surface. Make sure there is enough open space around the
appliance for the intake and/or outlet vents. A minimum
clearance of 10 cm is required between the appliance and
any adjacent walls. The refrigerator needs good ventilation
for easy dissipation of heat, high eciency of refrigeration
and low power consumption.
You can level the appliance using the adjustable feet.
Do not place the appliance near a heat source such as a
heater or furnace.
Mount the enclosed handle on the desired side of the door
with the enclosed screws and place the enclosed caps on
the other side for a nice finish. Attention: never lift the
refrigerator by the handle.
Leave the appliance to stand for at least 3 hours before
you insert the plug into the socket.
First clean the interior of the appliance. Use warm water
and a neutral detergent. After cleaning, rinse the interior
with clean water and rub dry. Leave the appliance to dry
for 1 to 2 hours.
The appliance features internal
controls. Set the thermostat on
setting 3. Check that the voltage in
your home corresponds with the
voltage printed on the back of the appliance and plug it in
a socket. The appliance now cools continuously until the
set temperature has been reached. Do not place anything
in the refrigerator until the set temperature is reached. This
4 | USING THE FREEZER COMPARTMENT
2 | BEFORE FIRST USE
3
3 | USING THE COOL COMPARTMENT
The freezer compartment enables you to preserve frozen
food, freeze fresh produce and to produce ice cubes.
Do not freeze too large an amount of food at one time;
the faster the food is frozen, the longer is preserves its
qualities. To speed the freeze process up you can set the
thermostat to the highest setting and return the setting to
the normal position when the food is frozen.
Place frozen food in the freezer compartment as soon as
possible after purchase. Make sure that it doesn’t defrost
during transport.
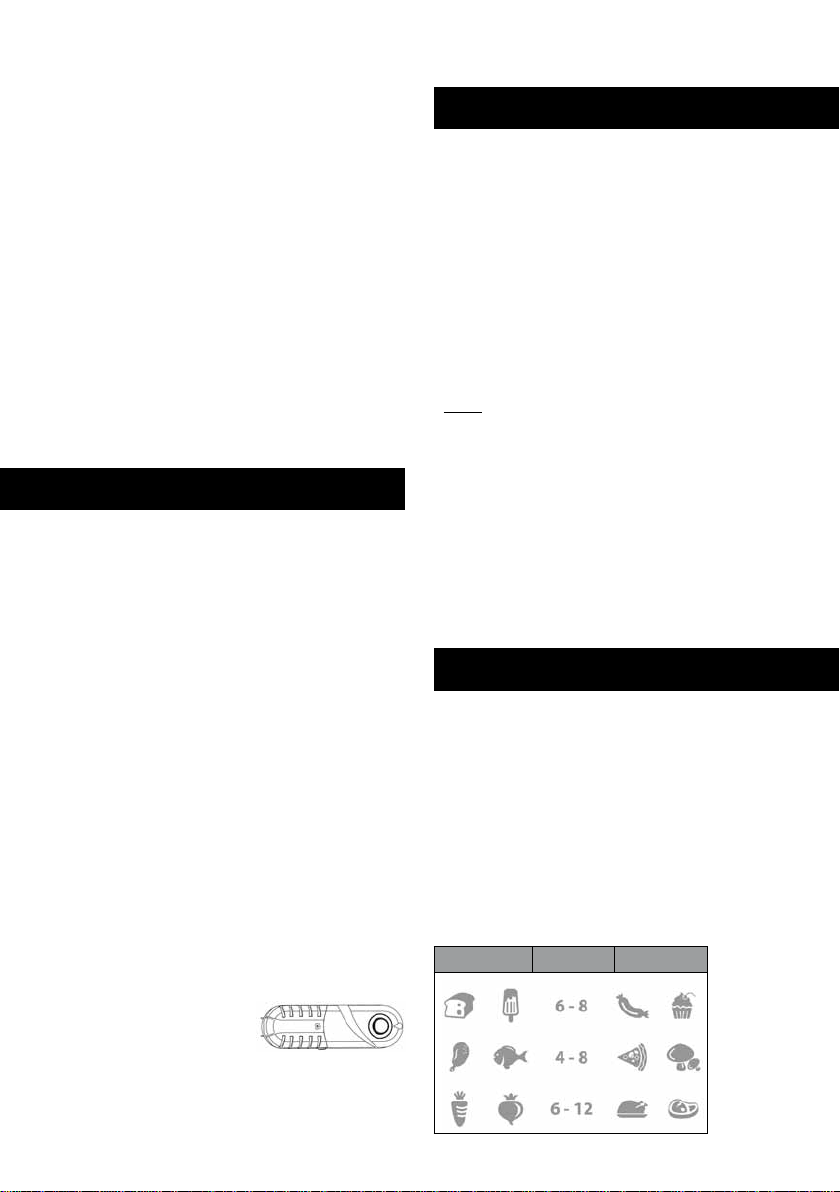
The length of time you can keep food depends very much
on the quality of the food.
The table below gives the recommended storage times for
frozen fresh foods.
Food Months Food
• Before moving or cleaning the appliance, make sure it is
switched of and unplugged.
• For your own safety, only use the accessories and spare
parts from the manufacturer which are suitable for the
appliance.
• Never unplug it from the socket by pulling on the cable.
Always ensure that your hands are dry before handling
the plug or power cord.
• Should you decide not to use the appliance anymore,
make it inoperative by cutting the power cord after
removing the plug from the socket. We also recommend
making all potentially dangerous parts of the appliance
harmless, particularly for children who might be tempted
to play with it.
• Do not eat ice cubes or ice lollies immediately after
taking them out of the freezer since they may cause cold
burns.
• Never immerse any part of the main body, lid, power
cord and plug in water or any other liquid to protect
against electrical hazards.
• If the appliance is used for other purposes than intended,
or is it not handled in accordance with the instruction
manual, the full responsibility for any consequences will
rest with the user. Any damages to the product or other
things are not covered by the warranty.
Setting 1 = lowest cooling setting (highest temperature)
Setting 7 = higest cooling setting (lowest temperature)
For appliances with a freezer compartment a setting
between 4 and 7 is advised when frozen products are
stored for a longer period.
The light on the inside will now light up every time you
open the door.
Note:
The ambient air temperature, how often the door is
opened and the position of the appliance can aect the
internal temperature. These factors must be taken into
account when setting the thermostat.
• Do not put hot food into the refrigerator.
• Never introduce volatile, inflammable or explosive fluids
such as alcohol, acetone or petrol because of the risk of
explosion.
• It is advisable to wrap meat and fish to avoid odours.
• Leave sucient space between the food to enable air to
circulate correctly between them. Similarly, when storing
them, avoid puttin food items in contact with eacht
other.
• Do not place food items in contact with the cold wall
at the back of the refrigerator. The shelves have a stop to
avoid this.
• The door should not be left open any longer than
necessary.
usually takes 2 or 3 hours. Then set the thermostat at the
desired setting and place food into the refrigerator.
13
Before cleaning the refrigerator always unplug the
appliance. Clean the interior of the appliance. Use warm
water and a neutral detergent to prevent any bad smells
occurring. After cleaning, rinse the interior with clean
water and rub dry. Leave the appliance to dry for 1 to
2 hours. Simply remove the shelves, drawer and door
compartments to clean them by hand. Do not clean the
interior accessories in the dishwasher.
Clean the outside of the refrigerator and the gasket with a
soft moist cloth.
We recommend that you dus the back of the appliance
with a cloth or vacuum cleaner once a year in order to
maintain a good output and low energy consumption.
REPLACING THE BULB
When replacing the bulb, proceed as follows:
• Unplug the appliance from the mains.
• Remove the lamp cover by unscrewing the screw and
pull the lamp cover towards you.
• First check if the bulb is fully screwed in.
• If the bulb is defective, replace it with a bulb of the same
type: maximum 10 Watt, socket E14. This kind is widely
available.
• Replace the cover and the screw.
• Plug the appliance back into the mains.
7 | CLEANING & MAINTENANCE
5 | TIPS
• High ambient temperatures have a negative eect on
energy use. Keep the refrigerator in a position away from
direct sunlight or other sources of heat.
• Keep ventilation openings free. Clogged openings lead to
higher use of energy.
• Try not to open the door too often, especially when the
weather is wet and hot. Once you open the door, mind
to close it as soon as possible.
• The space between the shelves and the rear wall of the
refrigerator compartment must be unobstructed to allow
the cool air to circulate. Therefore don’t place any food
items against the back.
• Turn the thermostat to a lower setting when the
circumstances allow it.
• Before storing fresh cooked food, make sure the food has
cooled at least to room temperature.
• Ice and frost layer increase energy consumption, so
clean the appliance as soon as the layer is 3 to 5 mm
thick.
• If the gasket is damaged or if it turns out that the sealing
is poor, the energy consumption is substantially higher.
To restore eciency, replace the gasket.
• Keep the condensor on the rear wall always clean, free of
dust or any impurities.
• Always consider the instructions, otherwise the
energyconsumption is substantially higher.
6 | DEFROSTING
Defrosting of the refrigerator compartment is
completely automatic. Droplets of water on the rear wall
of the refrigerator compartment indicate that the periodic
automatic defrost cycle is in progress. The defrost water is
automatically routed to a drain outlet and into a container
from which it evaporates.
Defrosting the freezer compartment
Defrost the freezer compartment when the layer of ice
reaches a thickness of 3 to 5 mm. Keep the contents of
the freezer in a cool place and wrapped in blankets or
newspapers.
Switch the thermostat o. Defrost the freezer
compartment. You can speed up the defrosting process by
placing a bowl of hot water in the freezer.
Clean and dry the freezer. Switch the thermostat on to the
right setting. When the freezer compartment reaches its
correct temperature, replace the food items.
Warning: Never remove the ice with the aid of sharp
objects, defrost sprays, a hair-drier, a heater, or similar
items. This may lead to unsafe situations and may cause
irreparable damage to the appliance.
8 | TROUBLESHOOTING
Problem Cause Solution
Appliance is not
functioning;
light does not
work
Aplliance is not
plugged in
Plug the
appliance in the
socket
Temperature
inside the
refrigerator is
too high or too
low
Thermostat has
been set
incorrectly
Set the
thermostat
correctly
Air
circulation
vents are
blocked
Clean the
ventilation
openings
Water is running
out of the
refrigerator
Drain outlet is
blocked
Clear the drain
outlet with a
skewer
Appliance is
excessively noisy
Has the
appliance been
installed
correctly?
Check the
installation
Are the pipes
at the back
touching or
vibrating?
Check it and
move the
appliance
forwards
The inside light
is not working
Lamp is
defective
Replace the bulb
following the
instructions
Do not store glass bottles or containers with liquids in
the freezer which will freeze. The freezing may cause
the bottles to break. Highly carbonated drinks can even
explode. Never keep lemonade, fruit juice, beer, wine,
champagne, etc. in the freezer.
14
• Lift the door from the bottom hinge pin and place it on a
non-scratching surface.
• To easily remove the bottom hinge tilt the appliance at
max. 45°.
• Remove the front leg on the left by unscrewing it.
• Remove the two screws holding the bottom hinge.
Remove the bottom hinge.
• Before replacing the bottom hinge, remove the hinge pin
and reverse the direction of the hinge. Reassemble the
bottom hinge on the left hand side using the two screws.
9 | REVERSING THE DOOR OPENING
It is possible to change the door opening from either the
left or the right side. The appliance is delivered with the
door opening from the left side. To change the opening
direction, please follow these instructions.
Note: Before reversing the door swing, unplug the
appliance from the mains.
• Remove the screws at the back, holding the top panel
to the appliance.
• Lift the top panel at the backside and remove it.
• Remove the three screws holding the top hinge (right
side) to the frame. Remove the top hinge.
Note: gurgling and hissing noises due to expansion in the
refrigerant circuit are normal.
15

• While holding the door in the closed position, reassemble
the top hinge on the left hand side using the three
screws. Do not tighten the screws until the top of the
door is level with the counter top.
• Refit the top panel using the screws.
• Leave the appliance to stand for at least 3 hours before
you insert the plug into the socket.
• Replace the hinge pin into the bottom hinge.
• Replace the front leg.
• Set the refrigerator carefully upright.
• Remove the handle, if it is already fitted, and place it on
the other side of the door. Don’t forget to also refit the
white screw caps.
• Lower the door onto the bottom hinge pin and hold it.
10 | REMOVING THE TOP PANEL
To install the refrigerator beneath a counter top for
example, you can easily remove the top panel.
Note: unplug the appliance.
• Remove the screws at the back, holding the top panel to
the appliance.
• Lift the top panel at the backside and remove it.
16

• Remove the screws on both the frame and the metal
hinge.
• Remove the hinge and the frame.
• Reassemble the metal hinge using the three screws.
• Leave the appliance to stand for at least 3 hours before
you insert the plug into the socket.
17

You have 2 years warranty on technical defects after purchase
Not included in warranty :
Other than normal domestic use (this appliance is for normal domestic use only).
Causes not being related directly to the appliance such as;
Damage occurring during transport or because of wrong usage such as dents,
scratches, broken parts.
Installation errors (such as wrong voltage).
Malfunctioning because of improper usage, dust/fluff in and on the appliance,
amongst others blocking of air circulation, as well as breaking of plastics, rubber, glass
which other than by normal use has gone defect, such to be judged by the service man
and or importer.
You have 2 year warranty on technical defects on the appliance after date of purchase,
warranty is only valid if a valid notice of purchase/invoice can be shown.
Warranty rights are not transferable.
If appliance is offered for servicing it needs to be clean, otherwise service can be refused.
Servicenumber for the Netherlands: 0900-0404040
Servicenumber for Belgium: 0032-(0)38080919
WARRANTY CONDITIONS
18

La législation exige que tous les appareils électriques et
électroniques soient collectés pour être réutilisés et recyclés. Les
appareils électriques et électroniques marqués du symbole
indiquant des collectes distinctes pour de tels appareils doivent
être ramenés à la déchetterie.
Description de l’appareil page 20
1. Consignes de sécurité page 20
2. Avant la première utilisation page 21
3. Utiliser le compartiment de
réfrigération
page 21
4. Utiliser le compartiment de
congélation
page 21
5. Conseils page 21
6. Dégivrage page 22
7. Nettoyage et entretien page 22
8. Dépannage page 22
9. Inverser le sens d'ouverture de la
porte
page 23
10.Retirer le panneau supérieur page 24
Garantie page 25
FRANÇAIS
19

Description de l’appareil
1. Panneau supérieur
2. Compartiment de congélation
3. Éclairage intérieur
4. Thermostat
5. Clayettes en verre
6. Sortie de vidange
7. Bac à légumes
8. Pieds réglables
9. Compartiment à bouteilles
10. Compartiments de la porte
11. Poignée
1 | CONSIGNES DE SÉCURITÉ
•Veuillez lire ces instructions avant de mettre l'appareil en
marche et conservez-les en vue d'une utilisation future.
•L'appareil est uniquement destiné à un usage domestique
à l'intérieur du domicile. L'appareil convient à la
conservation des aliments. Vous pouvez également congeler
des aliments frais dans le compartiment de congélation.
•Avant de brancher le congélateur, assurez-vous que la
tension de votre domicile correspond à la tension imprimée
sur le fond de l'appareil.
•N'utilisez pas d'adaptateurs à entrée unique/multiples ou
de rallonges.
•Veillez à vérifier régulièrement l'absence de dommages
sur l'appareil et le câble d'alimentation Au moindre signe de
dommages sur l'appareil ou sur le câble d'alimentation,
l'ensemble de l'appareil doit être retourné au Service Après-
Vente. Pour votre sécurité, utilisez uniquement les
accessoires et pièces détachées du constructeur, adaptés à
l'appareil.
•L'appareil doit être déplacé et installé par deux personnes
ou plus.
•Attention à ne pas endommager le revêtement de sol ou le
sol même lorsque vous déplacez l'appareil.
•Au cours de l'installation, assurez-vous que l'appareil
n'endommage pas le câble d'alimentation.
•Vérifiez que l'appareil n'est pas placé à côté d'une source
de chaleur..
•Assurez-vous que l'aération soit suffisante, conservez un
espace libre de 10 cm de tous les côtés de l'appareil.
•Assurez-vous que les sorties d'aération de l'appareil ne
sont pas obstruées.
•Veillez à ne pas endommager les tuyaux du circuit de
refroidissement de l'appareil.
•Installez l'appareil sur une surface stable et solide.
•Installez l'appareil dans un endroit sec et bien aéré..
L'appareil est destiné à un usage dans des environnements
où la température ambiante est comprise dans les
fourchettes suivantes, selon la classe climatique indiquée sur
la plaque signalétique située à l'arrière de l'appareil.
L'appareil risque de ne pas fonctionner correctement s'il
reste trop longtemps dans un environnement où la
température ambiante n'est pas comprise dans la fourchette
spécifiée.
Classe climatique
Température ambiante
SN
De 10°C à 32°C
N
De 16°C à 32°C
ST
De 18°C à 38°C
T
De 18°C à 43°C
•N'utilisez ou ne stockez pas d'essence, de liquides
inflammables ou de gaz à proximité de cet appareil ou
d'autres appareils électriques. Les vapeurs peuvent être la
source d'un risque d'incendie ou d'explosion.
•Ne conservez pas de bouteilles contenant des liquides qui
pourraient congeler au congélateur. La congélation risque de
briser les bouteilles.
•N'utilisez aucun outil mécanique, électrique ou chimique
pour accélérer le processus de dégivrage.
•N'autorisez pas des enfants à jouer ou à se cacher dans
l'appareil - il existe un risque que l'enfant reste coincé dans
l'appareil et suffoque.
•Cet appareil n'est pas destiné à être installé ou utilisé par
des personnes (y compris des enfants) dont les capacités
physiques, sensorielles ou mentales sont diminuées,
manquant d'expérience ou de connaissances, excepté si
elles sont supervisées ou ont été renseignées sur l'usage de
l'appareil par une personne responsable de leur sécurité.
•Il est impératif qu'une personne compétente réalise les
travaux d'entretien ou de réparation impliquant de retirer
les panneaux de protection.
•L'appareil ne doit être placé et utilisé qu'en intérieur.
•Ne laissez pas le cordon pendre sur le rebord de la table
ou du plan de travail et veillez à l'éloigner de toute surface
chauffante.
•Avant de déplacer ou de nettoyer l'appareil, assurez-vous
qu'il est mis hors tension et débranché.
•Pour votre sécurité, utilisez uniquement les accessoires et
pièces détachées du constructeur, adaptés à l'appareil.
•Ne débranchez jamais l'appareil de la prise en tirant sur le
câble. Assurez-vous toujours d'avoir les mains sèches avant
de toucher à la fiche ou au câble d'alimentation.
•Si vous décidez de ne plus utiliser l'appareil, mettez-le hors
service en coupant le câble d'alimentation après avoir retiré
la fiche de la prise. Nous vous recommandons également de
faire en sorte que toutes les pièces potentiellement
dangereuses ne présentent plus aucun risque, notamment
pour les enfants qui pourraient être tentés de jouer avec.
20
Table of contents
Languages:
Other EDY Refrigerator manuals


