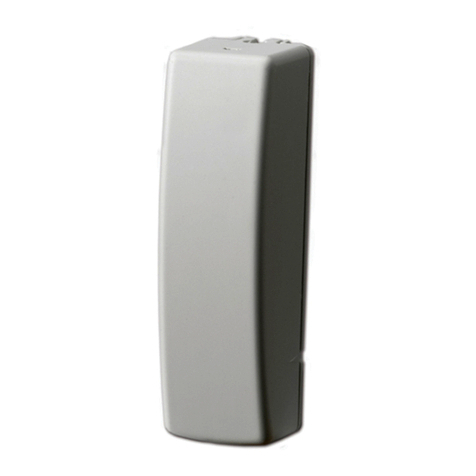
Eelectron PD00E11KNX User manual

USER MANUAL
Translation of the original instructions
Version: 1.0
Date: 24/03/2023
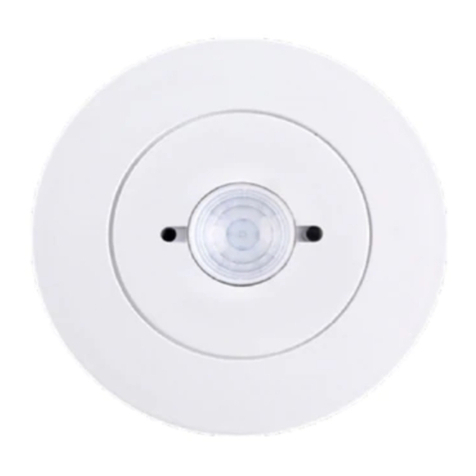
PD00E11KNX KNX Presence detector Standard BLE - E-lock interface, lighting control
PD00E13KNX KNX Space BLE - E-lock interface - lighting control, temperature, humidity,
sound sensor, occupancy and utilization reporting

PD00E1xKNX
2PD00E1xKNXFI00020100_UM_EN_1.0
MEMBER
Index
1. Introduction to the user manual ................................................................................................................................................4
Meaning of the symbols used ................................................................................................................................................. 4
2. Product overview ......................................................................................................................................................................4
3. Installation instructions ..............................................................................................................................................................5
.............................................................................................................................................5
5. General parameters ..................................................................................................................................................................5
6. Beacon BLE ..............................................................................................................................................................................6
7. Test Mode .................................................................................................................................................................................6
8. Presence ..................................................................................................................................................................................7
Follow up time......................................................................................................................................................................... 7
9. Illuminance ...............................................................................................................................................................................7
Adjustment of the illuminance sensor ..................................................................................................................................... 7
Manual adjustment ................................................................................................................................................................. 8
1 point adjustment .................................................................................................................................................................. 8
2 Points Adjustment ................................................................................................................................................................ 8
Advanced................................................................................................................................................................................ 8
10. Remote presence ......................................................................................................................................................................9
11. Use of remote presence ...........................................................................................................................................................9
12. Remote illuminance ..................................................................................................................................................................9
Use of remote illuminance .................................................................................................................................................... 10
13. Sound sensor .......................................................................................................................................................................... 11
........................................................................................................................................................... 11
Follow-up time ...................................................................................................................................................................... 12
Light status object................................................................................................................................................................. 12
Objects A,B,C - presence/absence....................................................................................................................................... 12
Stand-by function (corridor function)..................................................................................................................................... 12
Lock function......................................................................................................................................................................... 13
Stop function......................................................................................................................................................................... 13
Utilization function................................................................................................................................................................. 14
OFF hysteresis .................................................................................................................................................................... 14
Occupancy function .............................................................................................................................................................. 14
Simple presence ................................................................................................................................................................... 14
Automatic presence, illuminance depending ........................................................................................................................ 15
Semi-automatic presence ..................................................................................................................................................... 15
Semi-automatic presence illuminance depending ................................................................................................................ 15
Constant illuminance ............................................................................................................................................................ 15
Constant illuminance presence depending........................................................................................................................... 16
Constant illuminance presence depending, semi-automatic ................................................................................................ 16
15. Inputs ......................................................................................................................................................................................16
16. CO2 and VOC sensor .............................................................................................................................................................16
17. Virtual Holder ..........................................................................................................................................................................16
18. E-Lock .....................................................................................................................................................................................16
19. Circadian Rhythm ...................................................................................................................................................................16
20. Thermostat ..............................................................................................................................................................................17
21. Logics ......................................................................................................................................................................................17
VERSION DATE CHANGES
1.0 24/03/2023 -

PD00E1xKNX
3PD00E1xKNXFI00020100_UM_EN_1.0
MEMBER
Any information inside this manual can be changed without ad-
vice.
This handbook can be download freely from the website:
www.eelectron.com
Exclusion of liability:
Despite checking that the contents of this document match the
hardware and software, deviations cannot be completely exclud-
ed. We therefore cannot accept any liability for this.
Any necessary corrections will be incorporated into newer ver-
sions of this manual.
Eelectron S.p.A.
Via Claudio Monteverdi 6, I-20025 Legnano (MI), Italia

PD00E1xKNX
4PD00E1xKNXFI00020100_UM_EN_1.0
MEMBER
ing / closing data and the management of an automated room
KNX. The plug-in can manage up to 8 doors and allows the wir-
ing of the three rear inputs which remain available even if the
plug-in is connected to the rear connector.
The devices integrate an antenna with BEACON BLE (Blue-
tooth Low Energy) function. Data format compatible with iBea-
con® and Eddystone®The devices allow you to set the transmis-
sion frequency and signal strength.
BLE technology allows the sending of messages to mobile devic-
es. These devices must have an app that allows them to retrieve
information from BLE beacons.
The humidity sensor (SPACE BLE version) manages the
measurement of the ambient relative humidity and allows the
-
Presence detection, based on a passive infrared sensor, has 5
can be activated: presence with or without brightness control and
with automatic or semi-automatic detection; constant brightness
independent or presence dependent with automatic or semi-au-
tomatic activation.
Moreover, 12 logic blocks are available to implement simple
expressions with logical or threshold operator or complex ex-
pressions with algebraic and conditional operators; It’s possible
-
ature and humidity or dew point calculation.
The device also integrates the “Virtual Holder Logic”
of application is the hotel room: through a magnetic sensor in-
stalled on the door and connected to a digital input (also to the
sensor itself), accurate presence information is managed. The
presence detection solution can deduce the presence of people
in the room using one or more dedicated sensors. It also detects
-
haviors.
The device manages the ambient lighting based on the meas-
ured illuminance; it is also possible to enable the logic called
“Circadian Rhythm” with which brightness and color temper-
basis of the real position of the sun during the day with respect
to a terrestrial coordinate. This function allows you to recreate
lighting comfort in an environment as close as possible to reality.
The measurement of lighting in the environment is carried out
indirectly and it is therefore necessary to carry out a calibration.
The sensor is installed on the ceiling and the detected brightness
ETS software it is possible to set correction parameters for the
device basing on a local measurement using the lux meter.
The SPACE BLE version integrates the “Utilization function”
which enables functionalities for mapping space status and re-
lated usage/availability (eg occupancy index and % of utilization
rates) and the “Occupancy function” that detects useful data for
1. Introduction to the user manual
This manual is intended for use by KNX installers and describes
functions and parameters of the KNX BLE presence sensors and
how the settings and congurations can be changed using the
ETS software tool.
For the technical data of the device and the compatible accesso-
ries, please refer to the datasheet of the device itself.
Meaning of the symbols used
WARNING - The operation or phase described must be
carried out in compliance with the instructions provided
and with the safety standards.
IMPORTANT NOTE - Details and specications to be re-
spected for the correct functioning of the device.
2. Product overview
The range of Eelectron presence sensors BLE with E-lock inter-
face is suitable for mounting up to 4 m height.
The STANDARD BLE, and SPACE BLE versions include a
brightness sensor for environmental lighting control. The SPACE
version includes humidity and temperature sensors with the rel-
ative control algorithms and a sound sensor that can be used in
rooms with parts not totally visible to the infrared sensor.
All versions have a rear connector with 3 digital inputs that can
be connected to buttons or switches free of potential and used
for on / o commands, dimming, shutters or blinds / scenarios,
sequences, step commands, etc.
One of the 3 inputs can be congured as analogue for the con-
nection of NTC temperature probes (see eelectron probes code
TS00A01ACC / TS00B01ACC / TS00D01ACC not included) with
which to send the temperature measurement on the bus or man-
age a complete thermostat module. The thermostat manages 2
stages with an integrated PI controller for controlling heating and
cooling equipment, valves, 2 and 4-pipe fan coils, etc.
CODE TYPE MAIN FUNCTIONS
PD00E11KNX STANDARD BLE
presence detection
e-lock interface
lighting control
temperature control [1]
PD00E13KNX SPACE BLE
presence detection
e-lock interface
lighting control
temperature control [2]
humidity sensor
sound sensor
occupation and use reporting
[1]: Only with external temperature sensor/analog probe.
[2]: Also with embedded temperature sensor.
The devices allow integration with the Plug-in wireless door lock
system interface (IC01H10DLS)for the detection of door open-

PD00E1xKNX
5PD00E1xKNXFI00020100_UM_EN_1.0
MEMBER
the processing of information related to the intensity of the ac-
tivity of the occupants within the monitored areas (to generate a
‘heat map’ of the building areas).
read the following notes for device installation and sensitivity set-
tings parameters.
and temperature of moving objects and people; the lower this
be.
3. Installation instructions
The device can be used for permanent indoor installations in dry
locations and is intended for ceiling mounting.
WARNING
• Device must be installed keeping a minimum distance of 4
mm between electrical power line (not SELV, for example:
mains) and input cables or red / black bus cable.
• The device must be mounted and commissioned by an au-
thorized installer.
• The applicable safety and accident prevention regulations
must be observed.
• The device must not be opened. Any faulty devices should
be returned to manufacturer.
• For planning and construction of electric installations, the
relevant guidelines, regulations and standards of the re-
spective country are to be considered.
• KNX bus allows you to remotely send commands to the
system actuators. Always make sure that the execution of
remote commands do not lead to hazardous situations, and
that the user always has a warning about which commands
can be activated remotely.
Illuminance measurement
Ambient illuminance measurement is performed indirectly, and
calibration is therefore necessary.
The sensor is installed on the ceiling and the detected illumi-
the SW ETS it is possible to set correction parameters for the de-
vice on the basis of an on-site measurement using a lux-meter.
-
sor.
Presence and movement detection
care the following notes for correct installation of the device and
setting of the sensitivity parameters.
• -
perature and the temperature of moving objects and people;
sensor will be.
• For a correct coverage of the sensor surveillance area, avoid
that walls (including glass) or furniture are an obstacle; if this
is not possible, increase the number of sensors in the area
for complete coverage.
• Always mount the sensor on a stable site, not subject to vi-
brations or oscillations that can simulate movement.
•
area can cause false detections, avoid this type of interfer-
ence as much as possible.
• Avoid placing heat-producing appliances such as fan coils,
printers, lamps, etc. in the coverage area. or objects that
move due to wind or air currents.
For more information visit: www.eelectron.com
4. Conguration and commissioning
the device parameters the corresponding application program or
the whole eelectron® product database must be loaded in the
ETS® program.
The commissioning of the device requires the following steps:
• connect the bus KNX (1)
• turn on the bus power supply
• press the programming button (2); the red programming
LED (visible through the device lens) turns ON
• download into the device the physical address and the con-
5. General parameters
KNX PARAMETER SETTINGS
Delay to send telegrams on
power up [s] 5 ÷ 15
Through this parameter is possible to set the delay of transmission of
telegrams after a power on by selecting the time by which the device
is allowed to send telegrams.
In large systems after a power failure or shutdown this delay avoids
a transmission block.
-
gestion during the initialization phase.
The input detection and the values of objects are updated at the end of
the transmission delay time
At the end of ETS programming the device behaves like after a power
on.
Sound sensor disabled / enabled
Enabling the function shows the dedicated page
21

PD00E1xKNX
6PD00E1xKNXFI00020100_UM_EN_1.0
MEMBER
Use Led for sound event no / yes
Humidity sensor disabled / enabled
Enabling the function shows the dedicated page.
This function is not available on the PD00E11KNX sensor
Temperature function
Temperature function disabled
Temperature sensor
Thermostat
Temperature sensor: 2-point temperature control module with hyster-
esis, selection of the control band variable from the bus, enabling and
disabling the module from the bus.
Thermostat: complete temperature control module, PI algorithm, ded-
- 6-way; fan coil, etc.
Day/night Object disabled / enabled
Using this object, it is possible to change the sensitivity of the sensor
during the day and decreasing it at night.
Use virtual Holder disabled / enabled
By setting this parameter, it is possible to enable a “virtual holder”, that
is a logical function that automatically recognizes the presence of a
person in a room. This function can be used in hotels or similar instal-
lations and requires connection to other devices (see “Virtual Holder”).
Temperature alarm object disabled / enabled
The “temperature alarm” object is used to report alarms relating to
the sensor connected to input 3 (if enabled), to the smart sensor (if
present), or if surveillance timeout occurs when KNX-Probe (via bus
is enabled).
Use led for presence event no / yes
-
tection
Enable test mode disabled / enabled
By enabling this parameter will be visible a communication object to
enter test mode (see Test Mode)
KNX PARAMETER SETTINGS
Use E- Lock no / yes
It allows interfacing the sensor with the plug-in code IC01H10DLS for
detecting door opening/closing data and managing a KNX automated
room.
It is recommended to connect the plug-in to the sensor
and then turn on the sensor.
The E-Lock device has a 15 second “warm up” time on
startup.
E- Lock input 3 type digital / analog
Only if the E-lock function is enabled, input 3 of the plug-in can be
NTC probes).
Logic 5-8 function
logic
e-lock
circadian rhythm
With this parameter it is possible to enable the following functions:
logic
Enable logic functions 5 to 8
e-lock
Enable e-lock channels 1 to 4
circadian rhythm
Enable circadian rhythm module
Logic 9-10 function
logic
e-lock
COsensor
With this parameter it is possible to enable the following functions:
logic
Enable logic functions 9 to 10
e-lock
Enable e-lock channels 5 to 6
CO2 sensor
Enables the CO2 sensor module (CO2 measured value must be sent
from a KNX sensor).
Logic 11-12 function
logic
e-lock
VOC sensor
With this parameter it is possible to enable the following functions:
logic
Enable logic functions 11 to 12
e-lock
Enable e-lock channels 7 to 8
VOC sensor
Enable the VOC sensor module (the VOC measured value must be
sent from a KNX sensor).
KNX PARAMETER SETTINGS
Input 3
digital
analog
CO2 sensor
VOC + CO2 sensor
/ analog (for NTC probe interfacing).
Only in the PD00E13KNX sensor is it possible to cong-
ure input 3 for the CO2 sensor (for interfacing the CO2
sensor code SM03E01ACC) or VOC + CO2 sensor (for
interfacing the VOC + CO2 sensor code SM03E02ACC).
Use CO2 sensor no / yes
Enable the CO2 module (see “CO2/VOC Sensor”); the CO2 measured
value must be sent by a KNX sensor.
Use circadian rhythm disabled / enabled
Enable the circadian rhythm module (see “Circadian Rhythm”)
Use VOC sensor (KNX sensor) no / yes
Enable the VOC module (see “CO2/VOC sensor”); the VOC meas-
ured value must be sent by a KNX sensor.
6. Beacon BLE
Please refer to the “Beacon” user manual.
7. Test Mode
Communication objects involved:
“<General> Test Mode” 1 Bit CW
Enables test mode when receiving a “1” telegram. The test mode is
deactivated upon receipt of a “0” telegram or after a time that can be
set in minutes using the “Test time” parameter visible on the “General
Parameters” page.
“<Presence> Output” 1 Bit CRT
During installation it is recommended to put the sensor in test
mode to check the actual coverage area. With the test it is possi-

PD00E1xKNX
7PD00E1xKNXFI00020100_UM_EN_1.0
MEMBER
ble to check whether the area controlled by the sensors includes,
for example, the PC workstations rather than the expected entry
points; similarly, it will be possible to verify that the monitored
areas do not include unwanted passage areas such as corridors
appliances without the need for them. In both cases it is recom-
mended to change the position of the sensor and repeat the test.
Duringthe test, the front LED is always enabled, and its lighting indi-
cates that a movement has been detected. During the test, the 1-bit
telegramassociatedwith thefollowing objectisalsosenton thebus:
+
+
[A] PRESENCE TELEGRAMM
[B] FOLLOW UP TIME RESTARTS
[C] ABSENCE TELEGRAM
[D] FOLLOW UP TIME
REFLECTING LIGHT
DIRECT LIGHT
11 bbiitt oonn//ooffff
44 bbiitt ddiimmmmiinngg
11 bbyyttee %%
11 bbyyttee %%
11 bbiitt oonn//ooffff
44 bbiitt ddiimmmmiinngg
11 bbyyttee %%
11 bbiitt oonn//ooffff
44 bbiitt ddiimmmmiinngg
11 bbyyttee %%
B
C
A
9 <Remote presence> Input
10 < Remote presence > Input
6 <Presence> Output
6 <Presence> Output
If it is necessary for the sensor to detect “small” movements such
as a person working on a desk, it is recommended to check the
detection also in relation to the sensitivity value set. The high-
er the sensitivity set, the greater the sensor’s ability to detect
“small” movements. High sensitivity values can lead to false de-
tections caused by “thermal noise”: carefully read the warnings
to reduce the possibility of false detections.
(see “Presence and movement detection”).
8. Presence
The presence module provides a parameter for setting the sen-
for channels 1 to 5 that use presence; the remaining parameters
are connected only to this module.
KNX PARAMETER SETTINGS
Sensor sensitivity
Very high sensitivity
high sensitivity
normal sensitivity
low sensitivity
very low sensitivity
Use low sensitivity values when the sensor is placed in “thermally
noisy” environments, for example in the presence of sources of hot
or cold air emissions (see installation suggestions); high sensitivity
values can be used when the sensor must detect “small” movements
such as those of a person working at a desk.
Sensor sensitivity day If the day-night switching object is en-
abled (general parameter), it will be
possible to diversify the sensitivity at
Sensor sensitivity night
Presence sensor
send absence only
send presence only
send both absence/presence
-
gram.
Presence telegram OFF is presence
ON is presence
-
ue will be used for absence.
Follow up time
Hours
Minutes
Seconds
0..24
0..59
0..59
Sets the follow up time
Output cyclic send time No cyclic sending
15 s … 12 h
Set the period of cyclical sending.
Follow up time
The presence telegram is sent in the presence module when the
sensor detects presence [A]; the device waits for the follow up
time to elapse before sending the absence telegram [C]; if a new
movement [B] is detected during the monitoring time, the follow
up time restarts. The absence telegram is sent only when the
follow up time ends without any movement being detected [D]
9. Illuminance
In this module the parameters relating to the brightness sensor
Adjustment of the illuminance sensor
It is very important to carry out a correct and precise calibration
of the illuminance sensor; in fact, the sensor must measure the
-
furniture and the distance from the windows.
+
+
[A] PRESENCE TELEGRAMM
[B] FOLLOW UP TIME RESTARTS
[C] ABSENCE TELEGRAM
[D] FOLLOW UP TIME
REFLECTING LIGHT
DIRECT LIGHT
11 bbiitt oonn//ooffff
44 bbiitt ddiimmmmiinngg
11 bbyyttee %%
11 bbyyttee %%
11 bbiitt oonn//ooffff
44 bbiitt ddiimmmmiinngg
11 bbyyttee %%
11 bbiitt oonn//ooffff
44 bbiitt ddiimmmmiinngg
11 bbyyttee %%
B
C
A
9 <Remote presence> Input
10 < Remote presence > Input
6 <Presence> Output
6 <Presence> Output
as possible to direct light.
There are 3 calibration methods available.
• MANUAL
• 1 POINT
• 2 POINTS

PD00E1xKNX
8PD00E1xKNXFI00020100_UM_EN_1.0
MEMBER
• ADVANCED
Manual adjustment
Manual calibration is done by setting two ETS parameters:
PARAMETRO KNX IMPOSTAZIONI
Coeciente di correzione
[*0.01] 1 … 1023
Imposta il fattore da moltiplicare per il valore misurato espresso in cen-
tesimi, il valore 100 equivale ad non applicare alcun valore di correzi-
one; valori superiori a 100 fanno si che il valore di luminosità misurata
aumenti (200 = il doppio, 250 = 2.5 volte; 300 = il triplo); valori inferiori
a 100 fanno si che il valore di luminosità misurata diminuisca ( 50 = la
metà, 25 = un quarto, 10 = un decimo).
Oset di correzione [*10 Lux] -128 … +127
-
postato è in decine di lux pertanto impostando il parametro al valore
+10 darà come risultato quello di sommare 100 Lux (10*10=100) al
valore misurato, al contrario impostando il parametro al valore -8 darà
come risultato quello di sottrarre 80 Lux (-8*10=-80) al valore misura-
1 point adjustment
-
lated directly by the sensor; requires setting of 2 ETS parame-
ters:
KNX PARAMETER SETTINGS
Measured value ceiling [*10 Lux] 0 .. 255
Measured value desk [*10 Lux] 0 .. 255
To set the correct values of the parameters, use a lux meter to
detect the brightness and follow the procedure described below;
if possible, carry out the procedure in the dark hours or with the
shutters down, in any case avoid situations in which the exter-
nal light enters the room directly because in this case the result
could be distorted.
STEP DESCRIPTION
1Place the lux-meter on the work surface for which you want
to have accurate brightness control,
2
Change the intensity of the lamps until the desired lighting
value is obtained: if, for example, the desired value is 500
Lux, adjust the lighting until this measurement is obtained
on the lux-meter located on the desk.
3Read the brightness value measured by the sensor and
available on object 8 <Illuminance> Output
4
Set in ETS the parameter “ Measured value ceiling “ with the
value sent by the sensor (divided by 10) and the parameter
“ Measured value desk “ with the value measured by the lux
meter (divided by 10)
2 Points Adjustment
-
sor; requires setting of 4 ETS parameters:
KNX PARAMETER SETTINGS
Measured value ceiling
PT1 [*10 Lux] 0 .. 255
Measured value desk
PT1 [*10 Lux] 0 .. 255
Measured value ceiling
PT2 [*10 Lux] 0 .. 255
Measured value desk
PT2 [*10 Lux] 0 .. 255
To set the correct values of the parameters, use a lux meter to
detect the brightness and follow the procedure described below;
if possible, carry out the procedure in the dark hours or with the
shutters down, in any case avoid situations in which the exter-
nal light enters the room directly because in this case the result
could be distorted.
STEP DESCRIPTION
1Place the lux-meter on the work surface for which you want
to have accurate brightness control,
2
Change the brightness of the lamps until you get the lighting
value lower than the desired one: if for example the desired
value is 500 Lux, modulate the lighting up to read 100/200
Lux on the lux-meter placed on the desk.
3Read the brightness value measured by the sensor and
available on object 8 <Illuminance> Output
4
Set in ETS the parameter “Value measured on the ceiling
PT1” with the value sent by the sensor (divided by 10) and
the parameter “Value measured on the desk PT1” with the
value measured by the lux-meter (divided by 10)
5
Change the brightness of the lamps until obtaining the light-
ing value higher than the desired one: considering a desired
value of 500 Lux, modulate the lighting up to read 700/900
Lux on the lux meter placed on the work surface.
6Read the brightness value measured by the sensor and
available on object 8 <Illuminance> Output
7
Set in ETS the parameter “Value measured on the ceiling
PT2” with the value sent by the sensor (divided by 10) and
the parameter “Value measured on the desk PT2” with the
value measured by the lux-meter (divided by 10)
Advanced
Communication objects involved:
“<Illuminance> Calibration Setpoint” 1 bytes CRT
“<Illuminance> Calibration Action” 1 byte CRWT
“<Illuminance> Command/Status Lamp” 1 byte CRWT
The advanced calibration is managed by the specic
external software “eSensorCalibration” propriety of
Eelectron S.p.A, and it’s suitable for areas with high
contribute of natural light.

PD00E1xKNX
9PD00E1xKNXFI00020100_UM_EN_1.0
MEMBER
KNX PARAMETER SETTINGS
Avarage lux algorithm
Very fast
fast
normal
slow
very slow
[A] TELEGRAMMA PRESENZA
[B] RI-ATTIVAZIONE TEMPO DI SORVEGLIANZA
[C] TELEGRAMMA ASSENZA
[D] TEMPO DI FOLLOW UP
LUCE RIFLESSA
LUCE DIRETTA
A
B
C
2 1 3
5 4
t
t
lux
out %
When there is a sudden change
in illuminance (in the example
the lux is reduced) the system
reacts by increasing the control
value%, the red slope corre-
sponds to the “very fast” algo-
rithm, the purple one (softer)
corresponds the “very slow” al-
gorithm.
Minimum output value [*10 Lux] 0 … 255
Maximum output value [*100 Lux] 5 … 255
Values below the minimum value will be forced to the minimum value,
values greater than the maximum value will be forced to the maximum
value.
Send on variation [Lux] Do not send, 5 .. 75
-
ous value which triggers the immediate sending of the value
Cyclic send time No cyclic sending, 15 s .. 12 h
Period of cyclical sending of the illuminance measurement
When there is a sudden change in illuminance (in the example
the lux is reduced) the system reacts by increasing the control
value%, the red slope corresponds to the “very fast” algorithm,
the purple one (softer) corresponds the “very slow” algorithm.
10.Remote presence
Communication objects involved:
“<Remote precence x> Input” 1 Bit CW
The sensor can also receive presence information from other
sensors (remote sensors) which therefore act as “slaves” of the
main sensor acting as “master”. The “slave” sensors are used to
increase the detection area. When a sensor acts as a “slave” it
can still also act as a “master” for the area it covers.
The settings relating to the management of the slaves can be set
in the “Remote Presence” section. The device can receive up to
-
tected with telegram “0” or “1”.
As will be seen later, in the section relating to the sensor chan-
For example: in an area covered by 5 sensors the “master”, to
which 4 “slaves” are connected, is able to regulate a group of
lights which must be turned on when at least one slave detects
the presence while other 5 groups of lights can be each associ-
ated with a single sensor.
[A] TELEGRAMMA PRESENZA
[B] RI-ATTIVAZIONE TEMPO DI SORVEGLIANZA
[C] TELEGRAMMA ASSENZA
[D] TEMPO DI FOLLOW UP
LUCE RIFLESSA
LUCE DIRETTA
A B C
2 1 3
5 4
respectively. A second channel of sensor A regulates lamps 4
and 5, which must both remain on as long as presence is detect-
ed by one of the 3 sensors (A or B or C). The second channel of
sensor A considers the telegrams of remote sensors B and C.
+
+
[A] PRESENCE TELEGRAMM
[B] FOLLOW UP TIME RESTARTS
[C] ABSENCE TELEGRAM
[D] FOLLOW UP TIME
REFLECTING LIGHT
DIRECT LIGHT
1 bit on/off
4 bit dimming
1 byte %
1 byte %
1 bit on/off
4 bit dimming
1 byte %
1 bit on/off
4 bit dimming
1 byte %
B
C
A
15 <Remote presence> Input
16 < Remote presence > Input
7 <Presence> Output
7 <Presence> Output
11.Use of remote presence
To use the presence information from remote sensors, the fol-
of each channel; it is necessary to have enabled and connected
the communication objects as described in the previous chapter.
KNX PARAMETER SETTINGS
Use remote presence no/yes
Choose yes to consider data from other sensors for this channel
Presence do not use/use
Choose “use” to use the information of the presence channel of the
device itself.
Remote presence 1 (2.4) do not use/use
Choose “use” to consider the presence data coming from the remote
sensor 1 (2,3,4)
12.Remote illuminance
Communication objects involved:
“<Remote illuminance x> Input” 2 Byte CW
The sensor can receive the illuminance value from other sensors
and use it to obtain a weighted average. Each sensor channel
has its own parameters to select which external lighting values
to consider and with what weight.
It is possible to activate up to 4 remote brightness channels, for
each channel the following parameters are available.
Fig. 1

PD00E1xKNX
10PD00E1xKNXFI00020100_UM_EN_1.0
MEMBER
KNX PARAMETER SETTINGS
Remote illuminance sensor unused / used
Activates the remote brightness channel, makes a communication ob-
ject visible and also the following parameters.
Illuminance after download
[*10 Lux] 0 .. 255
-
loading, ie before valid data is received from the remote sensor.
Correction coecient [*0.1] 1 .. 255
Set the factor to be multiplied, expressed in hundredths, by the meas-
ured value, the value 10 is equivalent to not applying any correction
value; values greater than 100 cause the received brightness value to
increase (20 = double, 25 = 2.5 times; 30 = triple); values less than
100 cause the measured brightness value to decrease (5 = half, 1 =
one tenth).
Correction oset [*10 Lux] -128 … +127
of lux therefore setting the parameter to the value +10 will result in
adding 100 Lux (10 * 10 = 100) to the measured value, on the contrary
setting the parameter to the value -8 will result in that to subtract 80
Lux (-8 * 10 = -80) from the measured value. The value 0 is equivalent
Correction output limits
Minimum [*10 Lux] 0 .. 255
With this parameter you set the minimum value that the external com-
(the set value is multiplied by 10 Lux).
Maximum [*100 Lux] 0 .. 255
This parameter sets the maximum value that the external component
value is multiplied by 100 Lux).
Use of remote illuminance
To use the illuminance information from remote sensors, the fol-
each channel; it is necessary to enable and connect the commu-
nication objects as described in the previous chapter (function
not available on the BASIC model).
KNX PARAMETER SETTINGS
Usa remote illuminance no / yes
Choose yes to use brightness values from other sensors for this chan-
nel.
Weight illuminance da 1 a 15
Weight remote illuminance 1
Do not use, da 1a 15
Weight remote illuminance 2
Weight remote illuminance 3
Weight remote illuminance 4
Choose “use” only if the communication object is connected, otherwise
choose “do not use”.
importance to the value read by one sensor than another.
Example 1:
consider the contribution of a second sensor.
To give the same weight to the value of each sensor
set the parameters as:
Weight illuminance 1
Weight remote illuminance 1 1
The total weight is 2 (1+1) and each sensor
weighs in equal parts: 1/2 of the total, i.e. 50%
To give one sensor twice the weight of the other, set the param-
eters as:
Weight illuminance 2
Weight remote illuminance 1 1
The total weight is 3 (2+1) the internal sensor
weighs 2/3 of the total (66%), the external one
1/3 (33%)
Example 2:
consider the contribution of 2 other sensors.
To give the same weight to the value of each sensor
set the parameters as:
Weight illuminance 1
Weight remote illuminance 1 1
Weight remote illuminance 2 1
Il peso totale è 3 (1+1+1) e ciascun sensore
pesa in parti uguali: 1/3 del totale cioè pesa al
33%
Example 3:
consider the contribution of 2 other sensors.
To give a sensor twice the weight of each of the other two, set
the parameters as:
Weight illuminance 2
Weight remote illuminance 1 1
Weight remote illuminance 2 1
The total weight is 4 (2+1+1) the internal sensor
weighs 2/4 of the total (50%), the remote sen-
sors 1 and 2 weigh 1/4 each (25%)

PD00E1xKNX
11PD00E1xKNXFI00020100_UM_EN_1.0
MEMBER
13.Sound sensor
Communication objects involved:
“<Sound Sensor> Output” 1 Bit CRT
“<Sound Sensor> Enable” 1 Bit CRT
The PD00E13KNX model is equipped with a sensor capable of
detecting sounds and measuring their intensity. Using this sen-
sor it is possible to send the value in decibels relative to the
sound level of the room via bus: this measurement, together with
those of brightness, relative humidity and temperature, is used
®, Breeam
The sound sensor is also used in environments where there are
parts not visible to the infrared sensor, such as bathrooms.
Using ETS parameters and communication objects it is possible
the device has detected movement through the passive infrared
sensor, it is possible to prolong the switching on of the lights also
on the basis of the detected sounds.
At the end of the follow-up time, after the light has been automat-
that the light can be reactivated by the sounds even after turned
(from very high to very low); it is important to select the appropri-
ate value based on the intended use of this sensor.
The sound sensor detects sounds or noises whose inten-
which it is located; in other words, the sensor uses an adaptation
algorithm to avoid false detections if the background noise
changes slowly.
The sound sensor can be enabled or disabled from the
bus via a 1-bit communication object, it is therefore possi-
ble to keep it enabled at the times when you want to obtain the
maximum performance of the device in terms of sensitivity and
disable it when it is not necessary (for example in work environ-
ments may be active during working hours and not active in oth-
er hours).
KNX PARAMETER SETTINGS
State after download disabled / enabled
the end of the download, the function can also be enabled or disabled
from the bus.
Enable telegram telegram“0”/telegram“1”
Select the value of the 1 bit telegram to enable / disable
Sensitivity
Very high
high
normal
low
very low
Select the sensitivity of the sound sensor
Sensitivity – day
As in the previous parameter: if the
day-night switching object is ena-
bled, it will be possible to diversify
the day
Sensitivity - night
Output type
decibel
intensity [w/m2]
The sound sensor can be used to manage ON / OFF commands or
to communicate to the supervisory systems the sound intensity value
detected in dB or in W / m2
Telegram when sound event
detected
[if output type = o/on]
the telegram to be sent when sound is detected (start event).
Send only detection event no/yes
Choose “no” to send the telegram of opposite value to that of detection
(end of event), at the end of the follow-up time
Detection retention time 1 s. .. 2 hours
If no sound is detected the telegram related to the end of the event is
sent at the end of this time.
Correction oset
[if output type = decibel] -7 .. +7
Sending interval never, 1 minute … 2 hours
Periodical sending time
Send on variation
[if output type = decibel] never, 2 dB … 14 dB
Value of deviation from the previous value that generates the sending
of the data.
Send on variation
[if output type = Intensity] never, 2*10-9 .. 8.19 * 10-6
Value of deviation from the previous value that generates the sending
of the data.
14.Channels conguration
we see the possible settings and functions, they are the same
for each channel.
The possible types of functions are as follows; not all functions
are possible for all models, the BASIC model does not provide
any function related to brightness:
The PD00E11KNX model does not include any func-
tion related to brightness.
• No action
• Simple presence
• Automatic presence, illuminance depending
• semi-automatic presence
• semi-automatic presence, illuminance depending
• Constant illuminance
• Constant illuminance, presence depending
• Constant illuminance, presence depending, semi-automatic
Some settings are recurring and may appear on more than one
function, these settings will be described below.

PD00E1xKNX
12PD00E1xKNXFI00020100_UM_EN_1.0
MEMBER
Follow-up time
Communication object involved:
“<Channel x> Follow-up Time” 2 bytes CW
-
tion of a presence, must consider the PRESENCE status valid
even if it has not detected other movements. If a new movement
is detected during the follow-up time, it is restarted. At the end of
this time, the device goes into the ABSENCE state.
KNX PARAMETER SETTINGS
Follow-up time
Hours 0 .. 24
Minutes 0 .. 59
Seconds 0 .. 59
KNX PARAMETER SETTINGS
Follow-up time object disabled / enabled
By enabling the object “<Channel x> Follow-up Time” it is possible to
modify the time with a BUS command.
It is possible to use the information of the sound sensor to extend
the follow-up time (in this case the sound is considered as a new
of the follow-up within which the detection of a sound reactivates
the follow-up time even if this has expired..
KNX PARAMETER SETTINGS
Use sound sensor event dur-
ing follow-up time no/yes
If you select yes the sound sensor will be considered for the whole
follow-up time.
Sound sensor reaction time
on absence 0 .. 255 s. [0=no reaction]
At the end of the follow-up time the sensor goes into the ABSENCE
-
ENCE and reactivate the follow-up time upon detection of a sound
where it is.
Light status object
KNX PARAMETER SETTINGS
Light status object disabled / enabled
It enables the communication object “<Channel x> Light Status” wich
Dead time [s] 0 ... 255
When a command of OFF is sent on the object “<Channel x> Light
Status” it is enabled the Dead Time, which is the interval time during
which the sensor doesn’t detect any precence.
Objects A,B,C - presence/absence
The channels in which the behavior of the device is linked to the
presence always have 3 communication objects associated with
it.
page <Channel x> Outputs
Objects A and B are 1-bit objects; for each of them it can be de-
-
er the presence, absence or both telegrams must be sent.
KNX PARAMETER SETTINGS
Output A (same parameters for Output B)
Execute presence action no/yes
Execute absence action no/yes
Presence telegramma telegram “0” / ”1”
a dedicated page for each channel.
bytes; in this way it is possible to use each channel to send sce-
nario, percentage, HVAC, temperature, brightness, etc. setpoint
values on the presence, absence or both events.
KNX PARAMETER SETTINGS
Output C
Output C - type
none
1 byte signed
1 byte unsigned
2 byte signed
2 byte unsigned
Delay Output C 0, 100 ms, 200ms, 500 ms,
1 s, 2 s, 5 s, 10 s
Delay for sending object C respect to objects A and B.
Stand-by function (corridor function)
The stand-by function is connected to presence detection; by ac-
tivating this function the device, at the end of the follow-up time,
lower brightness level to save energy but avoiding that the area
remains completely in the dark.
A typical application concerns the lighting of corridors. If there
corridor lighting without installing a dedicated sensor. A channel
-
remain empty the corridor can go into stand-by remaining with
the light on at a reduced brightness level to facilitate the passage
of people who have to walk through it. If the light is controlled
light on during standby time and activate (optionally) a warning
on of the light.

PD00E1xKNX
13PD00E1xKNXFI00020100_UM_EN_1.0
MEMBER
KNX PARAMETER SETTINGS
Stand-by function disabled / enabled
a dedicated page for each channel.
Stand-by time
Hours 0 .. 24
Minutes 0 .. 59
Seconds 0 .. 59
Output A (same parameters for Output B)
Execute warning action no/yes
Activates the warning function for channels with 1-bit output, i.e. those
presence.
Execute Stand-by Only for output C
Stand-by value
with “constant illuminace”
-
itate orientation, typically in the corridors.
Use sound sensor event during
stand-by time no/yes
If you select yes, the sound sensor will be considered for the whole
average value of the environment in which it is located) sensor exits
the stand-by state to return to presence.
Lock function
The function allows to block (disable) a device channel; each
channel has a communication object to activate / deactivate the
block via bus. The selection of the block function enables in ETS
a page dedicated to its parameters: <Channel x> Block.
KNX PARAMETER SETTINGS
Telegram for lock activation telegram “0” / “1”
Lock state after download unlocked / locked
Assigns the status of the lock function after the ETS download is com-
plete
Lock state at power-on unlocked / locked / state before pow-
Assigns the status of the block function at the end of the power-on
sequence
Automatic unlocking time 0 .. 255
[0=no automatic unlock]
It is possible to set a time after which the block function is automati-
cally disabled
Output behaviour when
locked
Disable sensor and don’t send tele-
gram
Disable sensor and send telegram
Output A (B)
Output C nothing / value
Value
Only for output C enabled: value en-
chosen for object C.
If the “disable sensor and send telegrams” behavior is selected, it will
block so that the ligths controlled by the sensor can remain in the cho-
sen state for as long as the channel is disabled.
Stop function
The stop function is used to temporarily deactivate the sensor by
changing the brightness of the environment with a manual com-
mand, for example with a KNX button or by using a sensor input.
The KNX button will be connected directly to the light actuator
and the group addresses must also be connected to the sensor
so that it can receive the commands that are imposed by the
user on the lights.
Sensor objects to be connected to the manual control:
“<Channel x> Stop 1 Bit” 1 bit CW
“<Channel x> Stop 4 Bit” 4 bit CW
“<Channel x> Stop 1 Byte” 1 Byte CW
Example of connection between button, sensor and actuator: the
objects that connect the button to the actuator are also connect-
ed to the sensor to give information that the command has been
manually forced.
+
+
[A] PRESENCE TELEGRAMM
[B] FOLLOW UP TIME RESTARTS
[C] ABSENCE TELEGRAM
[D] FOLLOW UP TIME
REFLECTING LIGHT
DIRECT LIGHT
1
1
b
b
i
i
t
t
o
o
n
n
/
/
o
o
f
f
f
f
4
4
b
b
i
i
t
t
d
d
i
i
m
m
m
m
i
i
n
n
g
g
1
1
b
b
y
y
t
t
e
e
%
%
1
1
b
b
y
y
t
t
e
e
%
%
1
1
b
b
i
i
t
t
o
o
n
n
/
/
o
o
f
f
f
f
4
4
b
b
i
i
t
t
d
d
i
i
m
m
m
m
i
i
n
n
g
g
1
1
b
b
y
y
t
t
e
e
%
%
1
1
b
b
i
i
t
t
o
o
n
n
/
/
o
o
f
f
f
f
4
4
b
b
i
i
t
t
d
d
i
i
m
m
m
m
i
i
n
n
g
g
1
1
b
b
y
y
t
t
e
e
%
%
B
C
A
9 <Remote presence> Input
10 < Remote presence > Input
6 <Presence> Output
6 <Presence> Output
A typical application of the stop function is to force the lights to
on in an environment where the detected brightness is greater
than the set threshold.
For as long as the device detects the presence of people, the
adjustment will be disabled considering the manual selection of
the user as a priority. The sensor will return to directly control the
lights only at the end of the follow-up time.
It is possible to set the parameter “Automatic restart time”; it de-
it expires the sensor resumes its automatic behavior.
These communication objects are also available:
“<Channel x> Restart” 1 bit CW
“<Channel x> Activated/Stopped” 1 bit CRT
or “1” telegram; the second sends the active / stop status on the
bus with telegram “0” or “1”.

PD00E1xKNX
14PD00E1xKNXFI00020100_UM_EN_1.0
MEMBER
KNX PARAMETER SETTINGS
Stop state after download activated / stopped
Stop state after power on activated / stopped / state before
OFF
Telegram for restart telegramma “0” / “1”
the manual forcing status (stop)
Telegram for activated telegramma “0” / “1”
channel is active again (not in stop), the opposite telegram will signal
the manual forcing status (stop)
Automatic restart time (0=un-
limited) [min] 0..255
channel exits the manual forcing (stop) and returns to automatic mode.
Utilization function
Function available only on product code PD00E13KNX
sensor.
The utilization function is associated with each channel which
includes the presence detection function, the function can be
enabled on the channel pages. Using the utilization function, it
is possible to calculate the percentage of time in which the pres-
ence of people in the area monitored by the sensor is detected.
from 1 minute to 4 hours; it is recommended to keep monitoring
time values from 5 to 60 minutes in order to make data collection
as granular as possible and leave it to the supervisor to process
it.
The usage data, expressed as a percentage, is sent at the end
of each surveillance period using a 1 byte object. Another 1-bit
object is used to force the sending of the percentage data as well
transmitted data can be compared. The ability to manage the
sending of data on request is also useful for collecting data with
variable frequencies throughout the day.
OFF hysteresis
KNX PARAMETER SETTINGS
OFF hysteresis (1% -> 0%) [Lux] 0 ... 255
than the set point value + the hysteresis value.
[A]
FOLLOW UP TIME
SETPOINT ILLUMINANCE
[B]
[C]
SETPOINT + HYSTERESIS
[D]
non-active non-active non-active
active
active
active time
sensor value
hysteresis value
setpoint value
non-attivo non-attivo non-attivo
attivo
attivo
attivo tempo
valore sensore
valore di isteresi
valore di setpoint
Occupancy function
Function available only on product code PD00E13KNX
sensor.
The occupancy function detects data to be used to process in-
formation related to the intensity of the activity of people within
the areas monitored by the sensor, this activity is proportional
to the number of people present and allows you to generate a
“heat map” of the areas of the buildings. The heat map, usually
buildings are used during the various hours of the day and with
what intensity by providing precise information to the building
manager. The analysis of the occupancy data of a building in
fact highlights any planning errors of energy resources as well
as possible optimizations of the use of individual and common
spaces.
KNX PARAMETER SETTINGS
Monitor function disabled / enabled
If enabled, the sensor activates the monitoring of presence events.
Monitor cyclic time [min] 0 .. 255 (0 = never)
counter is restarted from zero.
Simple presence
In this mode, the sensor acts as a simple presence detector with-
out taking into account the contribution of the brightness sensor.
There are 3 communication objects that can send data on the
bus when the presence or absence condition is detected, chan-
<Channel x> Output A 1 bit CRT
< Channel x> Output B 1 bit CRT

PD00E1xKNX
15PD00E1xKNXFI00020100_UM_EN_1.0
MEMBER
< Channel x> Output C
1 bit
CRT
1 byte signed
1 byte unsigned
2 byte signed
2 byte unsigned
For channels A, B, C it is possible to set the cyclical repetition of
the command; if activated the command is sent periodically, in
presence and absence for all 3 objects.
Automatic presence, illuminance depending
In this mode the sensor works taking into account the contribu-
tion of the brightness sensor.
The parameters, functions and communication objects are the
same seen in the settings of the simple presence mode plus
control of the light.
[A]
FOLLOW UP TIME
SETPOINT ILLUMINANCE
[B]
[C]
SETPOINT + HYSTERESIS
[D]
non-active non-active non-active
active
active
active time
sensor value
hysteresis value
setpoint value
non-attivo non-attivo non-attivo
attivo
attivo
attivo tempo
valore sensore
valore di isteresi
valore di setpoint
[A]
because the illuminance is lower than the setpoint (the light
is turned on)
[B]
The illuminance exceeds the setpoint value + the hysteresis
and the sensor goes into the absence state (the light is turned
[C] The illuminance becomes lower than the setpoint, the pres-
ence status is still active (the light is switched on).
[D]
The FOLLOW UP time expires without any new presence
detected, the sensor goes into the absence state (the light is
KNX PARAMETER SETTINGS
Average lux algorythm
Very fast
Fast
Normal
Slow
Very slow
faster the algorithm and the faster it reacts to a change in lux level.
of the light, the “very slow” selection can introduce delays in switching
Upper threshold illumi-
nance [*10 Lux] 0…255
-
ing on the light when presence is detected (for higher illuminance val-
ues the light is not switched on)
Ignore illuminance thresh-
old on presence event no / yes
-
ness above the threshold, the sensor must turn on the light before
starting the regulation (parameter = yes) or not turn on the light (pa-
rameter = no).
Illuminance hysteresis 50..500 Lux
with values that are too low the band will be narrow and the light could
Semi-automatic presence
In semiautomatic modes, presence is activated by a manual
command (button); the sensor receives this telegram and trig-
gers the command to switch on the lights. There is a 1-bit object
for telegram reception.
“<Channel x> Command for semiautomatic” 1 Bit CW
KNX PARAMETER SETTINGS
Manual command activation
telegram telegram “0” / “1”
This parameter selects which telegram activates the sensor.
Let’s assume that telegram “1” is selected as the manual activa-
tion telegram; when this telegram is received, the light switches
on.
• If the opposite telegram (“0”) is sent, the sensor:
• -
tion of telegram “1” and telegram “0” it has not detected any
presence or movement.
• ignores the telegram if in the time elapsed between the re-
ception of telegram “1” and telegram “0” has already detect-
ed a presence or movement.
• -
egram “0” has not been sent previously).
The functions and parameters of this mode are the same as in
the Simple Presence mode.
Semi-automatic presence illuminance depending
In this mode, the sensor is activated by a manual command, i.e.
a 1 bit telegram which is sent on the bus and received by the
sensor.
The functions and parameters of this mode are the same as
those for automatic presence Illuminance depending.
Constant illuminance
This channel is independent of presence detection and manages
the constant lighting of the environment in which it is installed.
The desired lux level is set with a setpoint value that can be
changed from the bus while the brightness is managed by ob-
jects with % format:
“<Channel x> Illuminance setpoint” 1 bytes CW
“<Channel x> Output brightnees Zone 1” 1 byte CRT

PD00E1xKNX
16PD00E1xKNXFI00020100_UM_EN_1.0
MEMBER
The environment in which the detector performs constant bright-
ness control can be divided into zones.
The sensor is typically placed in the center of the room and de-
tects the brightness at that point, the controlled environment
could have greater lighting in the areas near the windows and
less in the more distant areas.
Assuming that in the environment there are lights arranged in
parallel rows, it is possible to group the lights of the same row up
to a maximum number of 5 rows (zones).
where the sensor is located. For each other zone it is possible to
indicates the percentage to adjust the lighting level control. In the
hypothesis that the sensor is placed in the center of the room
contribution of external light will be greater than the central area,
the adjustment reaches the level set for the “master” zone; when
zones is increased anyway up to bringing all the zones to 100%.
W
W
I
I
N
N
D
D
O
O
W
W
S
S
ZZOONNEE 11
ZZOONNEE 22
ZZOONNEE 33
ZZOONNEE 55
ZZOONNEE 55
with a 1 bit communication object.
<Channel x> illuminance setpoint 1 Bit CW
KNX PARAMETER SETTINGS
Minimum output telegram delay 2s .. 20s
-
lation telegram and the next.
Number of controlled zones 1 .. 5
Zone x Oset -100% .. + 100%
[x] = from 2 to 5
-
eter is for zones 2 to 5).
Zone 1 minimum value 0% .. 50%
for zones 1 to 5)
Zone 1 maximum value 51% .. 10%
for zones 1 to 5)
Oset after download disabled / enabled
Oset at power on disabled / enabled / before pow-
Constant illuminance presence depending
makes the lighting level of the controlled environment constant.
Unlike the “Constant lighting” mode, the adjustment is made only
if there is a presence in the controlled area, when the sensor
goes in the absence state sets the brightness to a predetermined
value (typically 0%). For this mode, the parameters already de-
scribed relating to the follow-up time and the use of the sound
sensor can be set (if present).
KNX PARAMETER SETTINGS
Send initial brightness when
over setpoint no/yes
If the sensor detects presence, it can send the command to switch
on the lights even if the brightness is higher than the setpoint; the
adjustment algorithm will cause the lights to go out if they do not need
to be on.
Constant illuminance presence depending, semi-automatic
previous paragraph (Constant lighting presence depending).
The sensor is activated by a manual command, i.e. a 1 bit tele-
gram which is sent on the bus and received by the sensor.
15.Inputs
Please refer to the “Digital input” user manual.
16.CO2 and VOC sensor
Please refer to the “CO2 and VOC sensor” user manual.
17.Virtual Holder
Please refer to the “Virtual Holder” user manual.
18.E-Lock
Please refer to the “E-lock” user manual.
19.Circadian Rhythm
Please refer to the “Circadian Rhythm” user manual.
This manual suits for next models
1
Table of contents
Other Eelectron Security Sensor manuals
Popular Security Sensor manuals by other brands

schmersal
schmersal BNS 33S Series operating instructions
Theben
Theben thePassa P360-101 UP WH manual

EINHELL
EINHELL TC-MD 50 Original operating instructions

PCB Piezotronics
PCB Piezotronics 482C24-SU Installation and operating manual

Versahaul
Versahaul VH-SR quick start guide

ipf electronic
ipf electronic UT990895 manual

