manuals.online logo
Brands
  1. Home
  2. •
  3. Brands
  4. •
  5. Effydesk
  6. •
  7. Indoor Furnishing
  8. •
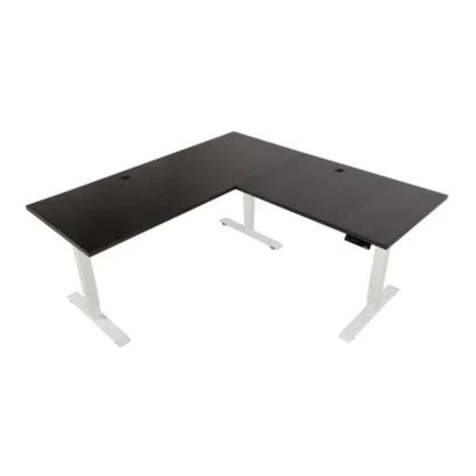
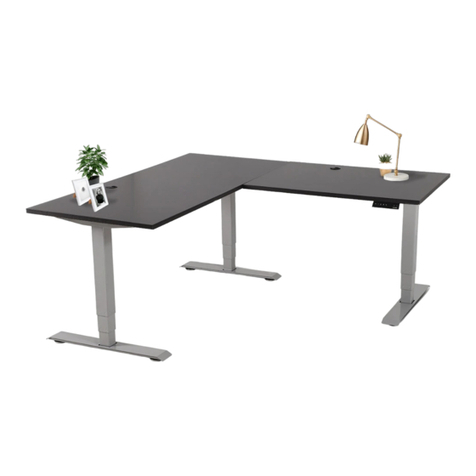
  9. Effydesk Home Office Standing Desk 715 CAD User manual

Effydesk Home Office Standing Desk 715 CAD User manual

7
8
6
Instruction Manual
M6X12 M6X8 or
M5X18 M6X16
Dx5
Zip Tie
Rubber Pad
M4X12
Gx8
M6X16
Crossbar
Control Box
Power Cable
Lifting Column
Foot
Extension Cord
Side Bracket
Keypad
4mm Allen Key
(included) Tape Measure
Ax16 Bx4 Cx12
Ex12 Fx2
Technical Data
Parts List
Tool Required
Accessory ListAccessory List
UL
710-1160mm
Segment Column 2
240 lbs
Height Range
Recommend Load <220 lbs
30mm/s
Screwdriver
If you have any issues with your product, please feel free to contact us via
team@effydesk.ca
Thank you for your order!
We will help you resolve the issue as soon as possible.
info@effydesk.ca
or
For more information, please visit
https://effydesk.ca/pages/how-to-assemble-your-height-adjustable-standing-desk
Jx1
Power Bar Holder
4
B
Separate the Crossbar ⑧ and you will find the Crossbar Rail inside.
Crossbar End
Crossbar Rail
Crossbar End
Insert one of the Crossbar Ends into the one of the Lifting Columns and secure with screws.
Attach the Side Bracket ⑥ to one of the Lifting Columns.
8
Allen Key
4mm
Repeat the same step for the other Lifting Column.
STEP 1
Repeat the same step for the other Lifting Column.
STEP 2
STEP 3
Allen Key
4mm
Insert one of the Crossbar Ends into the one of the Lifting Columns ③ and secure with screws.
12
Repeat the same step for the other Lifting Column.
STEP 2
Allen Key
4mm
Slide the two Crossbar Ends back into the Crossbar Rail.
Please make sure to fit the slots as shown below.
Attach both Feet ④ to the bottom of the Lifting Columns.
Allen Key
4mm
8
G
Note: Please make sure the circular holes are facing inwards as shown below.
Slider for Control box
STEP 4
STEP 5
Install the tabletop (Predrilled / Non-predrilled ).
C12
12
E
Non-predrilled
C
Predrilled
STEP 6
STEP 7
12
Connect all the cables to the Control Box ①.
5
D
D
Power Port
Lifting Column Ports
Note : Use Zip Ties (D) to secure cables under the table.
Keypad Port
7
STEP 8
STEP 9
F
2
Allen Key
4mm Screwdriver
8
A
F
A
attach the Keypad ⑦ with Screws (F) to the tabletop.
Firmly secure the Crossbar with Screws (A) and
●
●
●
●
●
●
●
●
●
●
●
●
●
●
●
●
●
●
●
●
●
●
●
●
●
●
●
●
●
●
●
●
●
●
●
●
●
●
●
●
●
●
●
●
●
●
●
●
●
●
●
●
●
●
●
●
●
●
●
●
●
●
●
●
●
●
●
●
●
●
●
●
●
●
●
●
●
●
●
●
●
●
●
●
●
●
●
●
●
●
●
●
●
●
●
●
●
●
●
●
●
●
●
●
●
●
●
●
●
●
●
●
●
●
●
●
●
●
●
●
●
●
●
●●●
●
●
●
●
●
●
●
●
●
●
●
●
●
●
●
●
●
●
●
●
●
●
●
●
●
●
●
●
●
●
●
●
●
●
●
●●
●●
●
●
●
●
●
●
●
●
●
●
●
●
●
●
●
●
●
●
●
●
●
●
●
●
●
●
●
●
●
●
●
●
●
●
●
●
●
●
●
●
●
●
●
●
●
●
●
●
●
●
●
●
●
●
●
●
●
●
●
●
●
●
●
●
●
●
●
●
●
●
●
●
●
●
●
●
●
●
●
●
●
●
●
●
●
●
●
●
●
●
●
●
●
●
●
●
●
●
●
●
●
●
●
●
●
●
●
●
●
●
●
●
●
●
●
●
●
●
●
●
●
●
●
●
●
●
●
●
●
●
●
●
●
●
●
●
●
●
●
●
●
●
●
●
●
●
●
●
●
●
a) Carefully peel the backing on one side of the double-sided adhesive and stick it to the back side of
either slider.
b) Peel the backing on the other side of the same adhesive and stick it to the back (non-outlet) side of
the power bar. Set the power bar aside.
c) Find the other double-sided adhesive and carefully peel the backing on one side and stick it to the
back side of the other slider.
d) Peel the backing on the other side of the same adhesive and stick the slider to any location on the
underside of the tabletop.
Note: The Control Box is equipped with a gyro sensor so the table and the Control Box
must be level in order to work properly or else it will not move up and down.
Power Port
Lifting Column Ports
Keypad Port
Plug the cable from the Keypad into the Control Box and flip the table onto its feet.
Slide the Power Bar into the Power Bar Holder as shown below.
STEP 10
STEP 11
Operation Guide
Before plugging in the table, make sure that
The Lifting Columns are level and set at their lowest position.
All the screws are tightened to avoid the desk becoming wobbly.
Calibrate the desk by following the steps below:
Please press the Down button and hold for 10-15 seconds until the table stutters and beeps.
Release the button. Your desk is ready to use!
Adjust the table to the desired height, then press M.
“S-“ will flash on the display.
Program Presets
Advanced Safety Feature: Lock and unlock the table
Press the Up and Down buttons at same time for 5
seconds, until “LOC” appears on the display.
All buttons will be inactivated and no change can be
made.
Press the Up and Down buttons together again to
unlock the Keypad and all of the table’s features.
Prepare for First-time Use
Memory Programmable Presets Desk Height Up and Down
Press M for 10 seconds, the Keypad will display “1-1”.
Press the Down button and it will change to “1-0”.
Press M for 10 seconds to lock the setting.
Raise the desk to the desired maximum height.
Press M and the Up button together for 5 seconds until
Lower the desk to the desired minimum height.
Set Maximum Height Limit
●
Set Minimum Height Limit
Changing from centimetres to inches
●
●
●
●
●
●
●
●
●
●
●
●
●
●
●
Press a number to set the desired height as a preset.
you hear a beep. This sets the maximum height limit.
until you hear a beep. This sets the minimum height limit.
Press M and the Down button together for 5 seconds until
Reset the table
When an error code or “RST” appears on the display, please reset the table.
Unplug the power cord from the Control Box.
Please unplug and replug and let it cool off for a couple of minutes before proceeding.
If“HOT” appears on the display
Unplug the cable that connects the Keypad to the Control Box.
Wait 30 minutes and plug all the cables back in again.
Press the Down button and hold for 10-15 seconds until the table stutters and beeps.
Press by holding
10-15 seconds
●
●
●
●
●
www.effydesk.ca
or info@effydesk.ca team@effydesk.ca
If you have any questions, please contact us at

Other Effydesk Indoor Furnishing manuals

Effydesk Executive User manual

Effydesk

Effydesk Executive User manual

Effydesk L Shaped Desk User manual

Effydesk

Effydesk L Shaped Desk User manual

Popular Indoor Furnishing manuals by other brands

Regency LWMS3015 Assembly instructions

Regency

Regency LWMS3015 Assembly instructions

Furniture of America CM7751C Assembly instructions

Furniture of America

Furniture of America CM7751C Assembly instructions

Safavieh Furniture Estella CNS5731 manual

Safavieh Furniture

Safavieh Furniture Estella CNS5731 manual

PLACES OF STYLE Ovalfuss Assembly instruction

PLACES OF STYLE

PLACES OF STYLE Ovalfuss Assembly instruction

Trasman 1138 Bo1 Assembly manual

Trasman

Trasman 1138 Bo1 Assembly manual

Costway JV10856 manual

Costway

Costway JV10856 manual

moss DESIGN Caisson Credenza Assembly instructions

moss DESIGN

moss DESIGN Caisson Credenza Assembly instructions

Aquaglide FULL DECK 15.0 owner's manual

Aquaglide

Aquaglide FULL DECK 15.0 owner's manual

AREBOS AR-HE-SW30 user manual

AREBOS

AREBOS AR-HE-SW30 user manual

Till-Hilft Fulda 87005.330 Assembly instructions

Till-Hilft

Till-Hilft Fulda 87005.330 Assembly instructions

Twoey Outside 2010 quick start guide

Twoey Outside

Twoey Outside 2010 quick start guide

Hettich Easys 200 operating instructions

Hettich

Hettich Easys 200 operating instructions

The bedboss RELAX 404 Series owner's manual

The bedboss

The bedboss RELAX 404 Series owner's manual

Oeseder Möbelindustrie Bern 991 720 Assembly instructions

Oeseder Möbelindustrie

Oeseder Möbelindustrie Bern 991 720 Assembly instructions

Costway HW68469 user manual

Costway

Costway HW68469 user manual

Next ALIX A27743 Assembly instructions

Next

Next ALIX A27743 Assembly instructions

BROSA Hans Assembly guide

BROSA

BROSA Hans Assembly guide

Prodigg MINIKA PBA015T-FUR installation manual

Prodigg

Prodigg MINIKA PBA015T-FUR installation manual

manuals.online logo
manuals.online logoBrands
  • About & Mission
  • Contact us
  • Privacy Policy
  • Terms and Conditions

Copyright 2025 Manuals.Online. All Rights Reserved.