EGi play&sound 41020 User manual

008490 11/2015
LN
+
R L
N L R L
+R
R +L L
L+ L R+ R
40425
1
2
1
2 2
1
GNDANT
41513
41020
115/230 V~
+-15%; 50/60 Hz
115/230 V~
+-15%; 50/60 Hz
IDIOMA
ESPAÑOL
ENGLISH
DEUTSCH
FRANÇAIS
ITALIANO
PORTUGUES
Technical specifications
41513 Wall Radio FM/RDS module (with optional bluetooth®, input & USB)
41020 Wall Radio FM/RDS Kit (with bluetooth®, line input IN,USB & headphones)
en instruction manual
Av. Almozara, 79 50003 ZARAGOZA - Spain T. +34 976 40 53 56 F. +34 976 40 53 54 e-mail: [email protected] www.egiaudio.com
Display LCD graphic
Supply voltage 115 / 230 V~; 50/60 Hz
Power consumption (max) 143 mA (115 V~) / 60 mA (230 V~)
Stand-by power (max) 0.2 W (0.6 W with 41518 module)
FM band 87.5 - 108.0 MHz
Speakers impedance 16 W(2+2 W audio power)
Housing ø60 mm box
Dimensions (mm) 45 x 45 x 52
Main MENU (to enter it, press MENU key )
NOTE: INPUT and BLUETOOTH functions are only available when a 41518 module is connected.
TIME
Internal clock can be adjusted automatically (by synchronizing it to a station with RDS time information) or manually.
If AUTO mode is selected, time information will be restored automatically after a power failure.
Automatic setting:
From TIME menu select AUTO.
Press FM FM key and choose a station that offers RDS time information (usually state stations).
Wait 1 or 2 minutes for the clock to synchronize and press OK. If current time is not displayed, switch to other station.
Manual setting:
From TIME menu select MANUAL.
Use and keys to modify hours value (HOURS is highlighted).
Then, press key to adjust minutes the same way as hours. When all is correct, press OK key.
Once the clock is set, OK key will be replaced by key in TIME menu.
If key is pressed, time will not be displayed anymore.
12-24 hours mode:
To change time display mode, press key to highlight 12/24H.
Then press 12/24H to choose the desired option. Press OK to validate.
RADIO 5
107,9 FM
MENU
RADIO
TIME
ALARM
SLEEP
BACKLIGHT
EQUALIZER
TIME
AUTO
MANUAL
12/24H
TIME TIME
HOURS
MINUTES
00:34
ALARM
NOTE: Take into account that present FM station and volume level will be stored for ALARM function.
To set the alarm, highlight ALARM from main menu by using and keys and press OK.
Use +and keys to modify hours value (HOURS is highlighted).
Then, press and keys to adjust minutes the same way as hours.
Press key (MORE) to select alarm type.
Alarm volume will be set at the same level that it was when configured.
By means of and keys, following options can be chosen: FM radio once , Buzzer once , FM radio every day or Buzzer
every day .
When all is correct, press OK key.
Activation time and alarm type will be shown on main screen.
When alarm is triggered, it can be turned off by pressing STOP (stop alarm) or SNOOZE (repeat every 9 minutes).
If not turned off, alarm will stop after 10 minutes.
To delete the alarm, select ALARM from the main menu and press key.
SLEEP (TIMER)
To set the timer, highlight SLEEP from main menu by using and keys and press OK.
Use or to select whether the timer will be activated once (NOW) or every time the module is turned on (ALWAYS).
Use +and keys to adjust turn off time.
Press OK to save the settings.
Select 0 minutes to deactivate SLEEP function.
LIGHTING CONTROL
Lighting when the module is on:
To adjust screen lighting level, highlight BACKLIGHT from main menu by using and keys and press OK.
Lighting level can be modified by using +and keys. Press (EXIT) to save the setting.
Lighting when the module is stand-by):
Lighting level can be modified by using +and keys.
When the module is off, the screen can be completely darkened.
EQUALIZER
To adjust bass and treble, highlight EQUALIZER from main menu by using and keys and press OK.
Use or to select bass or treble .
Once selected, press +or to increase or decrease bass or treble level.
When adjusted press OK to save and quit, or to quit without saving.
MANUAL FM
To tune manually a station, highlight MANUAL FM from main menu by using and keys and press OK.
Tuning frequency can be increased or decreased in 100 KHz steps by pressing or .
To perform an automatic search, press or to find the next higher/lower frequency station (signal level must be over a certain threshold).
When a station is found (both in auto and manual mode), after some seconds RDS*information will appear.
Sometimes this information is changing, press OK when it is displayed the information you want to associate with the station. The station
will be added to FM list (if there is any memory available).
It can be stored up to 36 stations (30 from autoscan + 6 from manual tuning).
(*) Not all the stations transmit RDS information, If RDS text does not appear, press OK.
AUTOSCAN
To activate automatic station search, highlight AUTOSCAN from main menu by using and keys and press OK.
A new FM station list will be created. Favourites list can be kept or deleted.
Autoscan process can take several minutes.
Press to quit without doing autoscan.
LANGUAGE
To select menu language, highlight LANGUAGE from main menu by using and keys and press OK.
Use or to select the desired language and press OK.
VERSION
To know device firmware version, highlight VERSION from main menu by using and keys and press OK.
It will appear: software version, serial number and other service information. (SW stands for software version and HW stands for
hardware version).
RESET
To reset the system configuration to factory settings, highlight RESET from main menu by using and keys and press OK. User will be
prompted to confirm action (press OK) or to quit without executing reset (press ).
IMPORTANT: Personal configurations, FM list and Favourites list will be erased by resetting.
SETTINGS
To change the settings, highlight SETTINGS from main menu by using and keys and press OK.
Use and keys on the right to select the item to be modified.
Use and keys on the left to activate/deactivate the option.
EXT. ANTENNA:
Use and keys on the right to select EXT. ANTEN.
Use and keys on the left to select external antenna (YES) or internal antenna (NO).
Internal antenna is recommended.
Use an external antenna in case of mains interferences (caused by ballasts or switching power supplies).
STEREO:
Use and keys on the right to select STEREO.
Use and keys on the left to select stereo mode (YES) or mono mode (NO). Use mono mode when FM reception is poor.
RDS LIVE:
This function allows real time RDS information display.
Use and keys on the right to select RDS LIVE.
Use and keys on the left to activate RDS LIVE (YES) or to show only the station name (NO).
ALARM
HOURS
MINUTES
00:00
ALARM TYPE
FM ONCE
00 : 00
SLEEP
NOW
ALWAYS
10
MINUTES
BACKLIGHT
EQUALIZER
TREBLE
BASS
0
MANUAL FM
RADIO 1
107.9
AUTOSCAN
NEW
FM LIST
KEEP
FAVOURITES?
YES NO
Operation
First connection
Press ON key .
Language selection menu appears.
Use or keys to select your language and press OK.
Or press to exit.
Autoscan
Once language is chosen, autoscan process begins. It performs an automatic search for the FM* stations with
best reception and obtains RDS data (this operation can take up to 2 minutes approximately).
(*) Up to 30 stations + 6 in manual mode.
Autoscan process can be done at any time by entering MENU and selecting AUTOSCAN.
AUTOSCAN
RNE 3
89.3
03/30
Wiring diagram
NOTE:
In this example, 40425 power amplifier is used. Nevertheless, 03001, E17G/D
and 40430 models can be connected.
In case E17G/D power amplifier is chosen, "45" should be used as GND.
Impedance
16 W
Impedance
16 W
Impedance
4 W
In this configuration, speakers or power
amplifiers can be used.
Impedance
4 W
L- Left
R- Right
L- LeftR- Right
Main screen
Turn on/off the device
Press key to turn on/off the device.
When the module is off, backlighting intensity can be adjusted by means of +and keys. It affects only to the backlighting when
the module is off.
It affects only to the backlighting when the module is off.
NOTE: In case of power failure, when the module is turned on again, RADIO mode will be selected.
Volume adjustment
When the module is on, volume level can be adjusted by means of +and keys.
A short press changes the volume step by step, whereas a long press changes it at an accelerated rate.
NOTE: This function is available when an audio source is activated and its main screen is displayed.
FM List
Press FM key to see all tuned stations.
Use and keys to select a station and press OK to listen to it. Normally, station name is displayed. If the station does not send RDS
information, station frequency is displayed instead.
Press key to add stations to FAVOURITES list.
Press key again to remove a station from FAVOURITES list.
To remove a station from FM LIST, select it and press (REMOVE). It will be erased permanently.
To recover an erased station, it must be tuned later by using MANUAL FM.
Press key (EXIT) to quit menu at any moment.
Favourites list
Up to 6 favourite stations can be selected.
Press at FM LIST to choose them. Selected station will be added to favourites list at the first free location. A station can be added at
FAVOURITES by using and keys to select a free location and then FM key. This way a list of available stations will appear, from
which the desired station can be added to FAVOURITES .
To remove a favourite station from the list, select it using and keys and press key (REMOVE).
FM LIST
RADIO 1
RADIO 2
RADIO 3
RADIO 4
RADIO 5
RADIO 6
FAVOURITES
NATIONAL RADIO
NEWS RADIO
TOP 40
EMPTY
EMPTY
EMPTY
RADIO 5
107,9 FM
IDIOMA
ESPAÑOL
ENGLISH
DEUTSCH
FRANÇAIS
ITALIANO
PORTUGUES
VERSION
SW:1.0 HW:1.0
RESET
RESET
TO FACTORY
SETTINGS
SETTINGS
INPUT
EXT. ANTEN.
STEREO
PIN
NAME
YES
Connection to 41518 module (USB, bluetooth®and line input + phones output)
Some menu elements can be shown or not depending on configuration and connected modules.
41518 module is controlled from 41513 module and when it is connected, some features are added to menu.
USB, Bluetooth®and line input sources can be activated from main menu (PHONES is activated when a jack is plugged in).
USB
An USB memory with audio files (MP3 or WAV) should be inserted in 41518 module inlet prior to use this function.
BEATLES-HELP
01-Help!
02-The night
03-You've got
USB
BEATLES-Help
U2-Achtung
U2-October
MENU
USB
INPUT
BLUETOOTH
RADIO
TIME
ALARM
USB
01:48
To select the USB source, select USB from main menu .
Once USB is selected, press USB to search the desired song in the folders and subfolders tree. Press to play it.
Coaxial external antenna.
OPTIONAL
Enter SETTINGS menu to select it.

1
2
1
2
21
1
2
1
1
2
1
2
1
BLUETOOTH iPHONE
SETTINGS
INPUT
EXT. ANTEN.
STEREO
PIN
NAME
USBUSB
INPUT
USB PLAYER
02-The night BEATLES
00:30
USB
01:48
Av. Almozara, 79 50003 ZARAGOZA - Spain T. +34 976 40 53 56 F. +34 976 40 53 54 e-mail: [email protected] www.egiaudio.com
EGi guarantees its electronic and electroacoustic products against any manufacturing defect that affects its operation for 36 months from the production date (indicated in every manufacture), taking
the commitment of repairing or replacing the faulty modules which failure, always to the discretion of EGi, is caused by a manufacturing defect, without any charge for spare parts.
This guarantee does not include charges for the shipping and handling of the modules, nor the labour charges for the replacement in the installation of the aforementioned electronic and electroacoustic modules.
The guarantee will not cover in any case the damages or breakings of the trimming pieces (lattices, trims, masks, frames...).
This guarantee refers only to the concept of replacement in factory of the modules produced by EGi, excluding any other cover or responsibility on the rest of the materials or the whole of the installation
that is put at the user disposal, but that is not supplied nor executed by EGi.
Therefore this guarantee does not cover:
a. The fitting up and the interconnection between the modules.
b. The results from the abuse or misuse of the product, including but not limited to:
b.1. Not using the product for usual purposes, or not following the instructions from EGi for the correct use and maintenance of the product.
b.2. The installation or use of the products in a way that is not concordant with the technical or security rules now in force.
c. The malfunctions caused by the wrong installation of the modules, or by an installation with inappropiate cables.
d. The malfunctions caused by the intervention of a person non-authorised by EGi.
e. The consequences of mixing with equipment from other sources, and also adaptations, modifications, adjustments and/or adjustment attempts, irrespectively of those that have been performed
in a technically correct way, provided that there is not an express authorisation by EGi.
f. The consequences of accidents, natural catastrophes or any cause beyond EGi control, including but not limited to lightning, water and public disturbances.
In all these cases that are excluded from the guarantee, and every time that the modules are not considered as faulty by EGi, the sender should take responsibility of the full amount of the repair, and
in the event of a visit from our technicians, the requesting person will bear the expenses originated without a cause justified in the guarantee.
ATTENTION: If you notice any problem in your EGi installation, our Customer Support Service will attend you from 9h to 13h (Central European Time).
Guarantee
ABOUT THIS MANUAL
We have taken all efforts to make the contents of this manual reliable and updated. However, EGi does
not guarantee the accuracy of the contents which are subject to change without previous notice.
TECHNICAL SUPPORT
If, while using the system, you encounter a problem that cannot be solved by consulting the
manual, please contact the installer. You can also consult the website www.egiaudio.com to
find the latest information and other resources to solve your problem.
COPYRIGHT INFORMATION
This manual in whole or in part, and any product or software described herein, may not be
reproduced, transmitted, saved in data recovery systems, or translated into any language in any
form or by any means, except all documents saved by the user to make security copies; without
the previous written consent of the manufacturer.
All products or corporate names herein may (or not) be registered trademarks or copyright of their
respective companies and are used for identification or explanatory reasons only, and in interest
of the owner without the intention of infringing any regulation or rule.
Copyright © 2010. All rights reserved.
SAFETY INSTRUCTIONS
This system has been designed and manufactured in compliance with the latest safety standards
for household electronic equipment. However, to ensure safe use of this product, it is important
to follow the instructions given in this documentation.
No EGi product should be covered with anything that impedes ventilation.
Do not place any sources of naked flame such as lighted candles or similar elements on top
of the device.
Do not expose the device to poured, splashed or sprayed water.
Disconnect the Mains supply before carrying out any work on the installation.
Do not expose the equipment to direct sunlight.
Do not use excessive force when handling the controls.
The user should abstain from carrying out any alterations or repairs on the product,
reserving these actions for qualified personnel.
Only use accessories supplied by EGi.
EGi will not be held liable for any damage arising from misuse of the product or usage other
than what is was designed for (See Guarantee section).
An exclamation mark inside a triangle indicates important operation and
maintenance instructions and the existence of components that may affect
safety if replaced.
Class II device.
IMPORTANT
Please read these "Safety instructions" carefully before using any EGi product.
The lightening-shaped arrow warns of the presence of dangerous voltage. To minimise
the risk of electric shock, do not remove the cover.
The lightening signs near the amplifier output terminals warn of the danger of electric
shock in normal usage conditions (Terminals dangerous to touch). Do not touch
these terminals while the device is in operation.
This symbol indicates that the product must not be treated as normal domestic
waste, but must be handed over to the corresponding collection point for electrical
and electronic equipment.
The smark means European Conformity and is a European mark for certain
groups of services or industrial products.
The mark must be displayed by a product if it is within the scope of the
approximately 20 "New Approach" Directives and can be sold and put into service
legally within the countries of the EU. If the product complies with the provisions
of applicable European Directives and the is displayed on the product, member
states cannot prohibit, restrict or impede the placement of the product or service
on the market. Thus, the mark can be considered as a passport for commercialising
a product in EU countries.
LIABILITY
Due to the wide variety of services and devices the system interacts with, the manufacturer cannot
be held liable for failure or faulty operation of devices not manufactured by EGi and connected or
used by any module in the PLAY & SOUND series.
DECLARATION OF CONFORMITY
Electroacústica General Ibérica, S. A. with registered address in Avda. Almozara, 79 - 50003
Zaragoza (Spain), declares under its sole responsibility that the equipment described in this
manual incorporates the functions specifies in each case and complies with current regulations:
Directive 2004 / 108 EC, regarding electromagnetic compatibility and Low Voltage Directive
2006 / 95 / EC, regarding safety in low voltage receivers.
información
Information
BT DEVICES
NOKIA
iPHONE
BT SEARCH
SEARCHING
BT SEARCH
NOKIA
iPHONE
PC
BLUETOOTH
When BLUETOOTH option is highlighted and set by pressing OK, the module activates Bluetooth®
function and it becomes visible to other Bluetooth®devices.
Device search can be done in two ways:
- From the device that is going to transmit audio (smartphone, laptop, tablet)
- From the 41513 module by entering Bluetooth folder BT .
Press BT key to display paired devices list.
Bluetooth®
MENU
RADIO
BLUETOOTH
MASTER ON
TIME
ALARM
SLEEP
NOTE:
In case of power failure or if Bluetooth®mode is quit and re-entered quickly, it could take
14 seconds for the BLUETOOTH function to be available, In the meantime symbol will
be displayed.
Press to find new devices. They will be displayed after around one minute.
Select the device to be paired with, and press .
The paired device will ask for a PIN code. If it has not been changed, the value to be entered is printed on the module labels.
BLUETOOTH
Troubleshooting
Problem
Module doesn't work. The screen is off.
The screen is on, but there is not any sound.
Band FM reception.
(41513 module uses mains cable as antenna. In case of interferences or weak
signal, please connect an external antenna and change antenna selection in
SETTINGS menu accordingly).
A bluetooth®device is not seen from the module.
Time is not recovered automatically after a power failure. It shows blinking
dashes instead of the time.
Time is not displayed on the screen.
Possible solution
Press any key to get a response.
Check mains connection.
Check that a valid audio source is selected and it is playing some music.
Check volume level is not at minimum.
Check that the speakers are properly connected to the connection block.
Connect an external FM antenna by using coaxial cable or check that it is properly
connected.
Check antenna settings to see if antenna selection is correct.
Ensure that the module is not close to electronic ballasts or similar equipment
(fluorescent lamps).
Check that the device has bluetooth®function enabled and it is configured as visible
to other devices.
Check that time is configured to AUTO mode and a valid FM station is selected (it
must transmit time information by using RDS).
Configure time settings to AUTO mode, so it can recover time information automatically
after a power failure.
Check that TIME is not disabled.
Set the clock in manual or auto mode.
Once the Bluetooth device is connected, user will be able to listen to the
music, to change volume or to control music playing. It can be done either
form the device or from the module.
When key is pressed, module enters remote player mode.
Press to jump to the next song.
Press to jump to the previous song.
Press to play/pause the music.
Bluetooth®connected.
Bluetooth®NOT connected.
To unpair a device (i.e. delete it form paired devices list), enter BT (BT DEVICES), select the device to unpair with and press key. The pairing can be also deleted from the device
(smartphone, PC, tablet, laptop).
Enter settings menu to change PIN.
Module Friendly Name is factory preset to "EGI 41518 _ _ _ _". "_ _ _ _" stands for a four digit unique identifier.
These codes are printed on a label on the back of the module and on another loose label.
Enter settings menu to change NAME.
IMPORTANT: It is recommended changing module Friendly Name and PIN prior to use Bluetooth®, in order to differentiate it from other nearby devices. Select SETTINGS from
main menu to do it
Once the desired song is being played, exit folders screen by pressing (EXIT). Press mp3 key to enter the player screen.
From this screen, audio tracks playing can be controlled.
A short press on or keys, jumps to the previous or next audio track.
If or keys are kept pressed, present audio track time is moved back or forward.
PLAY/REPEAT MODES (pressing key)
All the tracks in the present folder or directory are played indefinitely.
Present track is played indefinitely.
RND RANDOM o SHUFFLE - All the tracks in the USB memory (regardless their location in the folder tree) are played in a random order and indefinitely.
All the tracks in the USB memory (regardless their location in the folder tree) are played indefinitely.
NOTE: When the word SEARCHING appears, it means that the module is looking for a USB memory stick or that it is not inserted.
When the symbol appears, the module is searching for audio files "MP3" or "WAV".
BEATLES-HELP
02-The night BEATLES
Input
Prior to use this function, a device must be connected to 41518 module through the 3.5 mm jack input.
MENU
USB
INPUT
BLUETOOTH
RADIO
TIME
ALARM
INPUT
Phones
To enter headphones mode PHONES , it is necessary to connect a 3.5 mm stereo plug to PHONES jack.
Speaker outputs are automatically turned off. Volume level is switched to the last stored value at PHONES mode.
Press + / keys to control volume.
MENU
VERSION
RESET
SETTINGS
SETTINGS
To change these 41518 module special settings, highlight SETTINGS from main menu by
using and keys and press OK.
Settings (only available when a 41518 is connected)
PIN
1003
PIN
1000
SETTINGS
INPUT
EXT. ANTEN.
STEREO
PIN
NAME
PIN
This option allows changing BLUETOOTH®PIN. It is factory preset to the value printed on the labels, but it can be changed to any desired 4 digit code.
Highlight PIN from SETTINGS menu and press OK.
Use the 2 top keys on the left to select the digit.
Use the 2 top keys on the right to change the digit.
Press OK to validate the new PIN, or press to quit without modifying it.
PIN
0000
NAME
EGI 41518
XXXX
NAME
BAÑO 1
NAME
IMPORTANT: It is recommended to perform this operation prior to activate Bluetooth®.
This option allows changing BLUETOOTH®Friendly Name. It is factory preset to "EGI 41518_ _ _ _", but it can be changed to any desired name (up to 14 characters).
Highlight NAME from SETTINGS menu and press OK.
It will appear a list with suggested names that can be assigned to the module. The module current name is at the top of the list.
Any name is editable by selecting it and pressing OK.
Use the 2 top keys on the left to select the character.
Use the 2 top keys on the right to change the character.
Press OK to validate the new NAME, or press to quit without modifying it.
NOTE: It is recommended to change Friendly Name and PIN before pairing the module with any Bluetooth®device, so they are displayed correctly.
If module Friendly Name is not updated in a Bluetooth®device, please delete the module from the device Bluetooth list and re-pair it.
NOTE:
PHONES option can be activated from any audio source
(USB, Radio, Bluetooth®and Input).
Sample screen shows USB case.
PLAY & SOUND series products
References
41513 Wall radio 2+2 W stereo with FM RDS and mains voltage from 115 to 230 V~; 50/60 Hz.
41514 Remote control for the new PLAY & SOUND ref. 41517, 41018 and 41019 products.
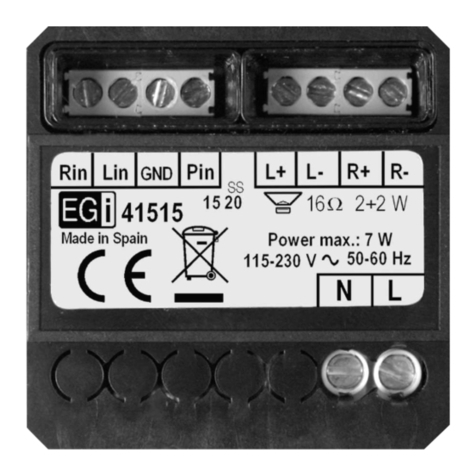
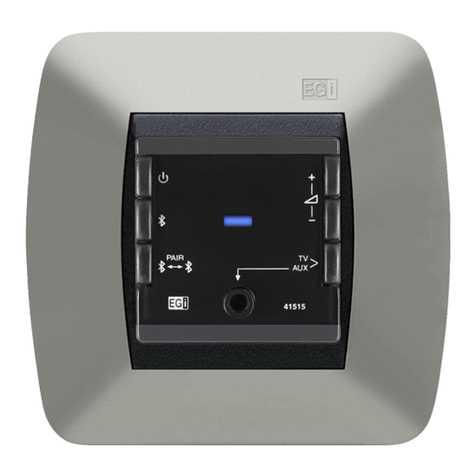
41515 Bluetooth®sound unit with AUX/TV and PIN inputs. 2+2 W, 115-230 V~.
41517 Master sound amplifier 6+6 W with bluetooth®, FM/RDS, multiroom, and AUX IN signals on ballast format.
41518 Auxiliary module for 41513 Wall Radio with line-in Input, USB memory player, headphones output and bluetooth®.
Note
In case more audio power is needed, we suggest using the following audio power amplifiers:
E17G/D (20 W mono at 4 Wor 10+10 W stereo at 2 W)
40425 (30 W mono at 8 Wor 15+15 W stereo at 4 W)
40430 (100 W mono at 2 Wor 50+50 W stereo at 4 Wor 25+25 W stereo at 4 Wat the same time that 50 W at 2 Wfor mono subwoofers).
To select the line input source, select INPUT from main menu .
Due to a policy of continuous improvement, EGi reserve the right to modify their products
at any time. Although every effort is made to present up to date documentation, the documents
and illustrations provided may not coincide with the product purchased.
You can access the latest versions of documentation in: www.egiaudio.com
EGi will not be held liable for any possible errors in the text or references.
All brands mentioned herein are registered with their owners.
This manual suits for next models
3
Other EGi Radio manuals
