EGi play & sound AIR RADIO 41514 User manual

HIGH QUALITY SOUND
41514
008489 09/2015
A
A
E
C
B G
G
H
F
F
D
VINCULOS
ELIMINAR
AÑADIR
EGI 0008
Introduciendo el código PIN:
Una vez seleccionado el idioma, pulse la tecla PIN.
Introduzca el código PIN (a través de las 4 teclas superiores) que aparece en la etiqueta inferior de la carcasa del módulo, o en una etiqueta suelta adhesiva que se encuentra en el embalaje
del módulo máster multiroom 41517 que desea vincular.
Una vez introducido el código PIN o password pulse la tecla OK. Aparecerá en la pantalla VINCULANDO... mientras los equipos intentan vincularse.
Ya vinculados, en la pantalla aparecerá VINCULADO A NUEVO RECEPTOR.
A partir de aquí el mando a distancia ya reconoce el módulo máster al que se ha vinculado y podrá manejar todas las funciones del mismo. Podrá vincular hasta 4 módulos máster adicionales
entrando en el menú VINCULOS.
En caso de fallo el mando a distancia volverá a la pantalla anterior para repetir la operación. Asegúrese de introducir correctamente el código PIN del módulo máster seleccionado.
Especificaciones técnicas
41514 Mando a distancia (bluetooth®, FM/RDS, input y multiroom)
es manual de instrucciones
Avda. Almozara, 79 50003 ZARAGOZA - España T. 976 40 53 53 F. 976 40 53 54 e-mail: [email protected] www.egiaudio.com
Vinculación y configuración de los módulos 41514 y 41517
Alimentación 3 pilas AAA de 1.5 V
Banda RF 2.4 GHz; Zigbee RF
Visualizador LCD gráfico
Peso (Kg.) 0.122
Dimensiones (mm.) 52 x 125 x 19
Acabado Aluminio
Antes de comenzar a utilizar el amplificador máster, recuerde que la alimentación de red debe estar correctamente conectada y activada entre 115 y 230 V~ 50/60Hz.
Un mando a distancia 41514 puede comunicarse por radio con un máximo de 5 módulos de techo 41517 mientras que un módulo 41517 puede llegar a ser controlado por 15 mandos a distancia
41514 distintos (además de poderse utilizar individualmente en modo bluetooth).
NOTA: Todas las modificaciones realizadas a través del mando a distancia 41514, se realizan realmente en el módulo máster 41517.
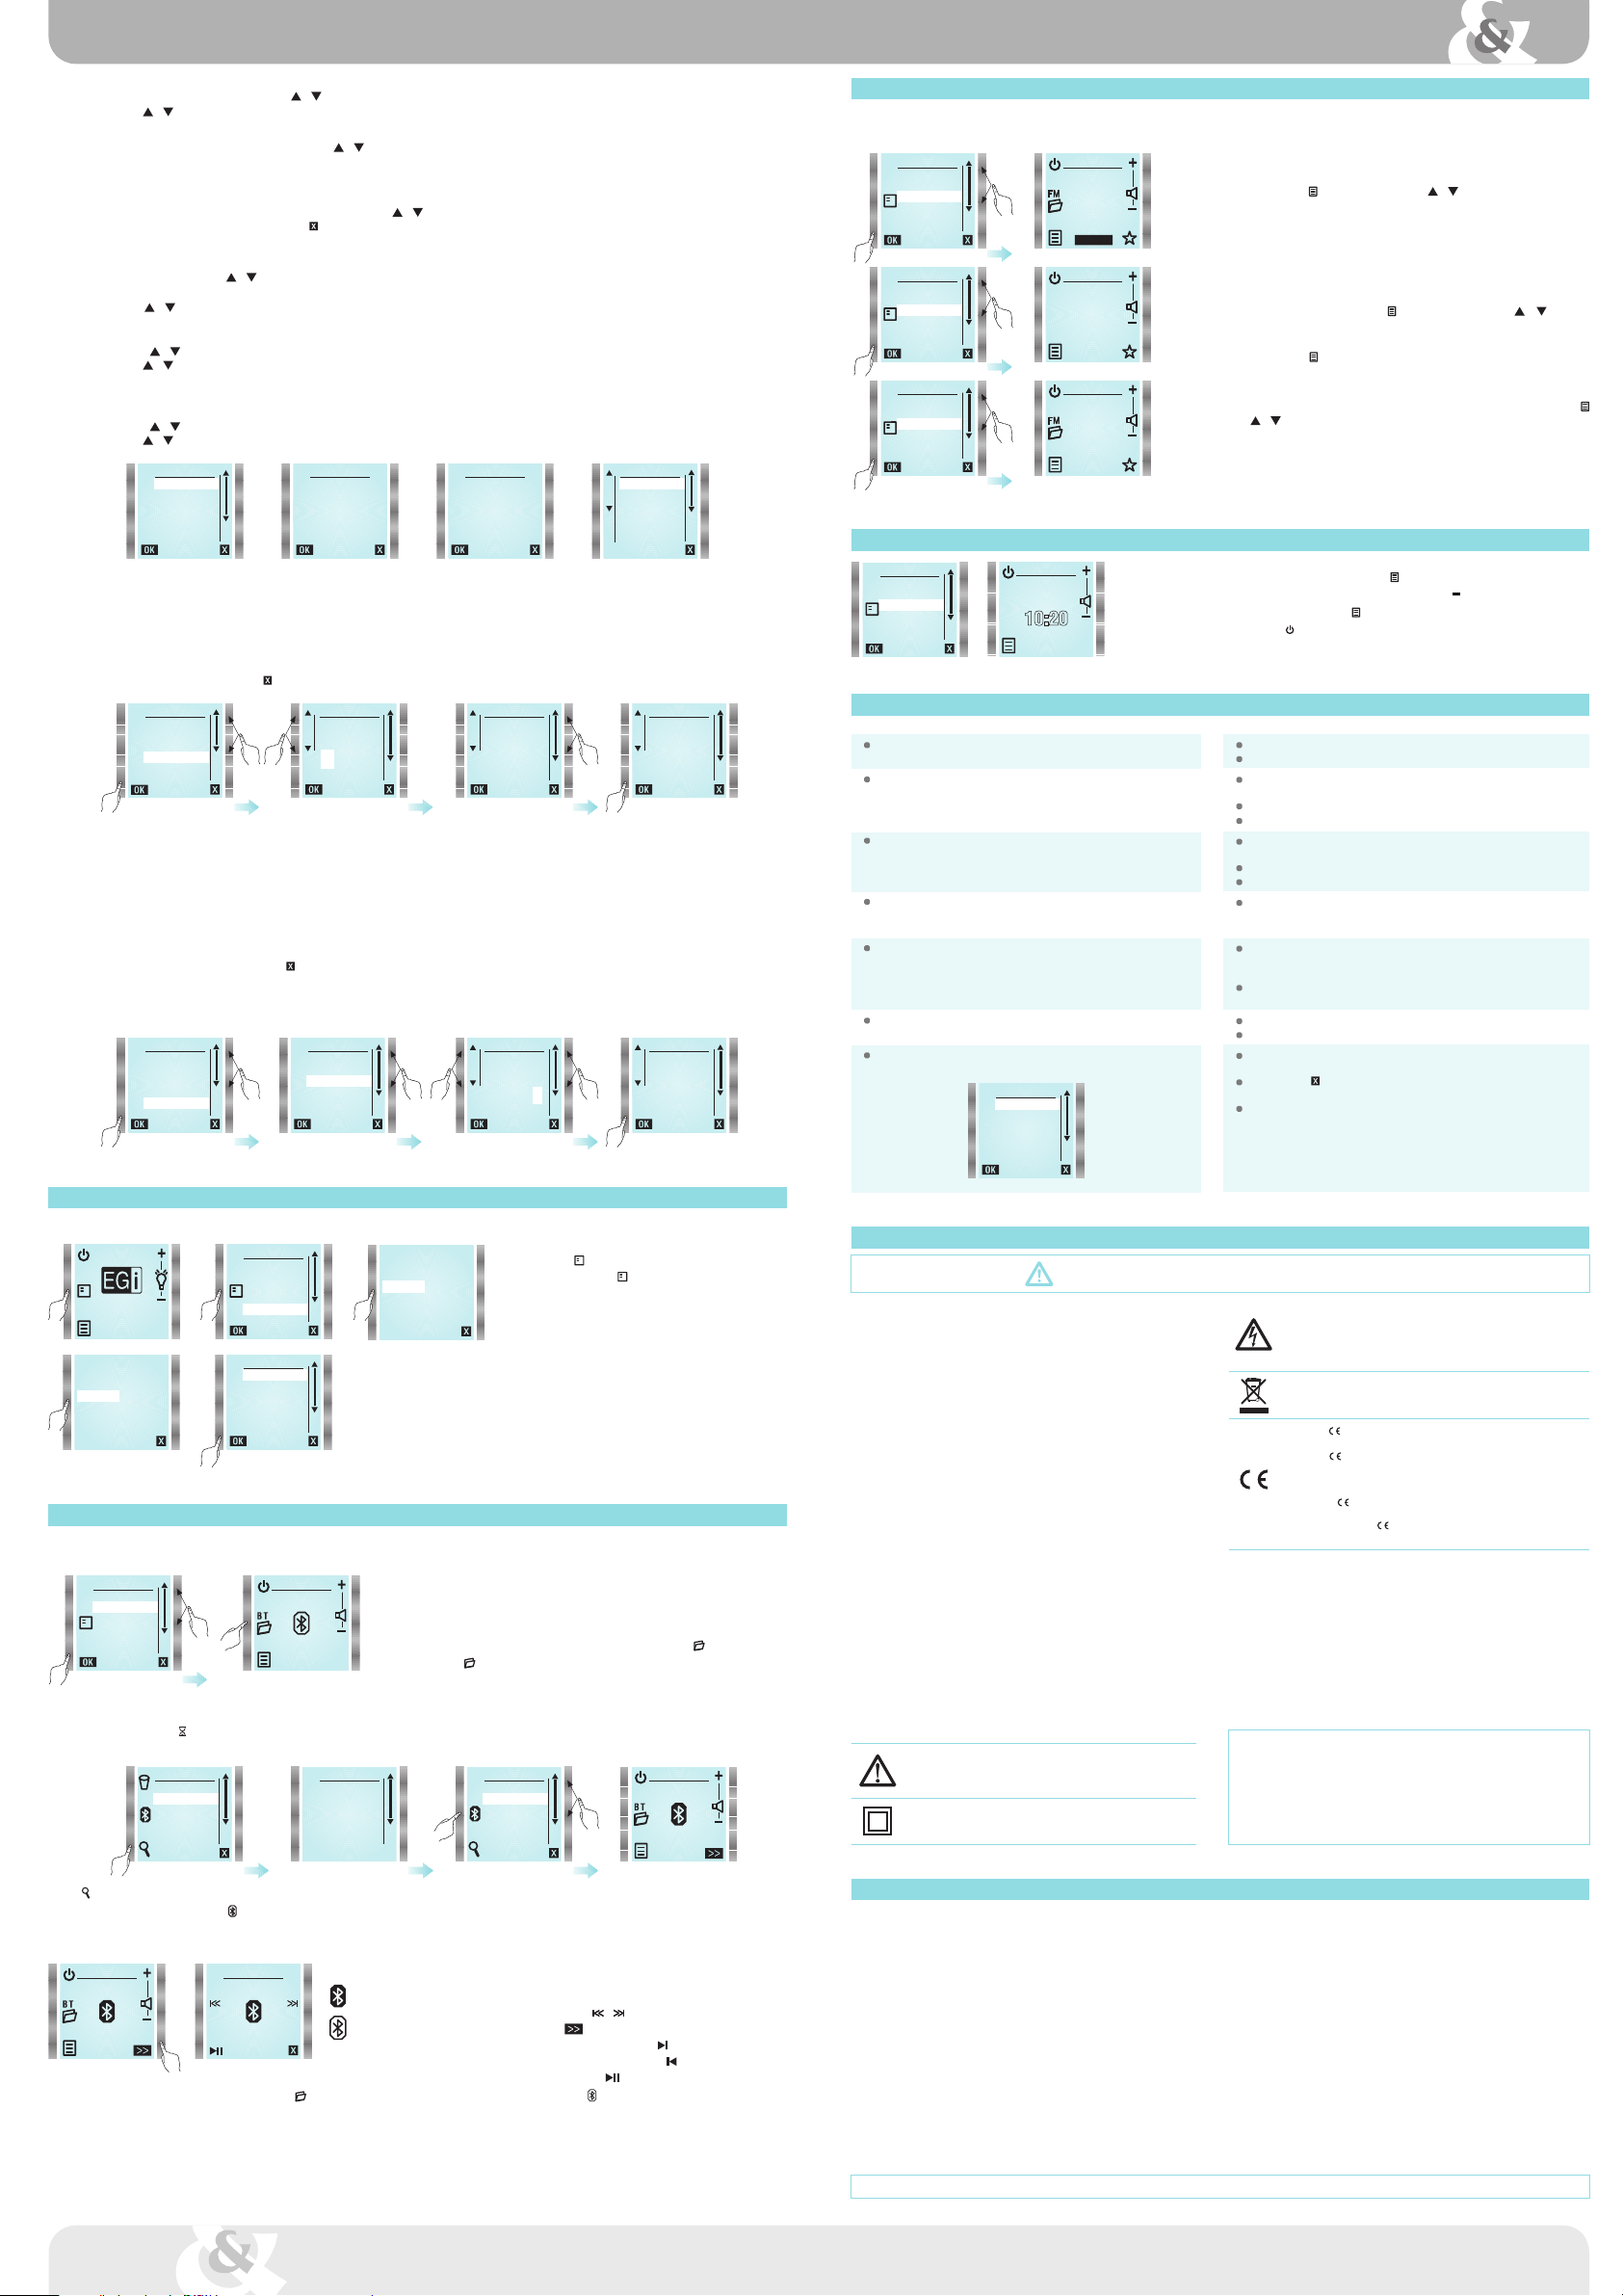
Ajustes de MENÚ (para entrar pulse la tecla MENÚ )
RELOJ
Puede ajustar el reloj de forma automática (sincronizándolo con una emisora que envíe la hora en la información RDS) o manual.
Siempre que el ajuste del reloj se haya realizado en modo automático, si el equipo pierde en un momento dado la tensión de red eléctrica, a la vuelta de ésta, el equipo buscará
la hora de forma autónoma, cuando el mando se encienda o quede en stand-by.
Ajuste automático:
Para realizar este ajuste la radio debe estar activada. En el menú RELOJ seleccione AUTO.
Pulse la tecla FM y elija la emisora que proporcione la señal de reloj por RDS (esta señal aparece en radios estatales).
Espere 1 ó 2 minutos a que el reloj se sincronice y pulse OK. Si no aparece la hora es que la emisora seleccionada no emite hora. Cambie a otra emisora.
Ajuste manual:
Para ajustar el reloj, use las teclas y para colocarse sobre la opción, y pulse OK.
Use las teclas +y para aumentar el valor de las horas (aparece HORAS seleccionado).
Cuando termine, pulse la tecla para ajustar los minutos de la misma forma que las horas. Cuando todo esté correcto, pulse la tecla OK.
Una vez que el reloj está configurado, si vuelve al menú RELOJ, la tecla OK es sustituida por .
Si pulsa la tecla desaparecerá la hora del display en modo reposo y eliminará la hora.
Modo 12-24 horas:
Para cambiar el modo de presentación de la hora, pulse la tecla hasta que aparezca resaltado 12H/24H.
Luego, pulse la tecla 12-24H para elegir la opción adecuada. Pulse OK para confirmar.
RADIO 5
107,9 FM
MENU
RADIO
BLUETOOTH
INPUT
MASTER ON
RELOJ
ALARMA
RELOJ
AUTO
MANUAL
12/24H
RELOJ RELOJ
HORAS
MINUTOS
00:34
ALARMA
Para ajustar la alarma, use las teclas y en el menú principal para posicionarse sobre la opción ALARMA, y pulse OK.
Use las teclas +y para modificar el valor de las horas (aparece HORAS seleccionado).
Cuando termine, pulse las teclas y para ajustar los minutos de la misma forma que las horas.
Pulse la tecla (MÁS) para seleccionar el tipo de alarma.
La alarma tendrá el mismo volumen que el utilizado durante su programación.
Mediante las teclas y puede elegir entre alarma mediante radio FM un día , alarma mediante buzzer un día , alarma mediante radio
FM todos los días o alarma mediante buzzer todos los días .
Cuando todo esté correcto, pulse la tecla OK.
En la pantalla principal aparecerá la hora de activación y el tipo de alarma.
Al sonar la alarma podrá apagarla de 2 maneras: STOP (parar alarma) o SNOOZE (repetición cada 9 minutos).
Si al transcurrir 10 minutos, la alarma no ha sido desactivada ésta se apagará definitivamente.
Para borrar la alarma memorizada entre en el menú ALARMA y pulse la tecla .
SLEEP (TEMPORIZADOR)
Para ajustar la función temporizador, use las teclas y en el menú principal para posicionarse sobre la opción SLEEP, y pulse OK.
Use o para seleccionar si desea activar el temporizador una sola vez (AHORA) o cada vez que encienda el equipo (SIEMPRE).
Pulse +y para ajustar el tiempo de desconexión.
Pulse OK para guardar la selección.
Para desactivar SLEEP seleccione 0 minutos.
CONTROL DE ILUMINACIÓN
Iluminación con el mando encendido:
Para ajustar la intensidad de la iluminación de la pantalla, use las teclas y en el menú principal para posicionarse sobre la opción
ILUMINACIÓN, y pulse OK.
Modifique la iluminación con las teclas +y . Una vez modificado pulse la tecla (SALIR).
Iluminación con el mando en reposo (Stand-by):
Use las teclas +y para aumentar o disminuir el nivel de iluminación del display.
Con el mando en reposo puede llegar a oscurecer totalmente el display.
ECUALIZAR
Para ajustar los graves y agudos, use las teclas y en el menú principal para posicionarse sobre la opción ECUALIZAR, y pulse OK.
Mediante este ajuste puede modificarse el nivel de graves y agudos.
Use o para seleccionar graves o agudos .
Una vez seleccionado, pulse +o para aumentar o disminuir el nivel de frecuencias graves o agudas.
Una vez modificado, pulse la tecla OK (ACEPTAR) o la tecla (SALIR).
FM MANUAL
Para seleccionar manualmente la frecuencia FM, use las teclas y en el menú principal para posicionarse sobre la opción FM MANUAL,
y pulse OK.
Mediante la pulsación de o se sube o baja la frecuencia en la banda FM en pasos de 100 kHz.
Si se desea una búsqueda automática, mediante la pulsación de o se sube o baja en la banda FM de forma automática hasta que se
encuentra una emisora FM de suficiente intensidad.
Cuando encuentre la emisora (tanto en modo manual como automático) si espera unos instantes, una vez sintonizada la emisora, aparecerá
la información RDS*.
Si esta información viene en varias partes, pulse la tecla OK cuando visualice el texto con el que desee identificar la emisora. Esta emisora
se añade a la lista FM si existe espacio en la memoria.
Pueden almacenarse un máximo de 36 emisoras (30 en autoscan + 6 manuales).
(*) No todas las emisoras transmiten información RDS, si no aparece el texto de RDS pulse OK.
AUTOSCAN
Para seleccionar el modo de búsqueda y registro automático de emisoras FM, use las teclas y en el menú principal para posicionarse
sobre la opción AUTOSCAN.
Al pulsar AUTOSCAN se vuelve a crear la lista de emisoras FM. Puede elegir entre mantener la lista de emisoras favoritas o eliminarla.
El proceso de autoscan puede tener una duración de varios minutos.
Para salir sin autoscan pulse la tecla ).
ALARMA
HORAS
MINUTOS
00:00
TIPO ALARMA
FM UN DIA
00 : 00
SLEEP
AHORA
SIEMPRE
10
MINUTOS
ILUMINACION
ECUALIZAR
AGUDOS
GRAVES
0
FM MANUAL
RADIO 1
107.9
AUTOSCAN
CREAR NUEVA
LISTA FM
¿MANTENER
FAVORITOS?
SI NO
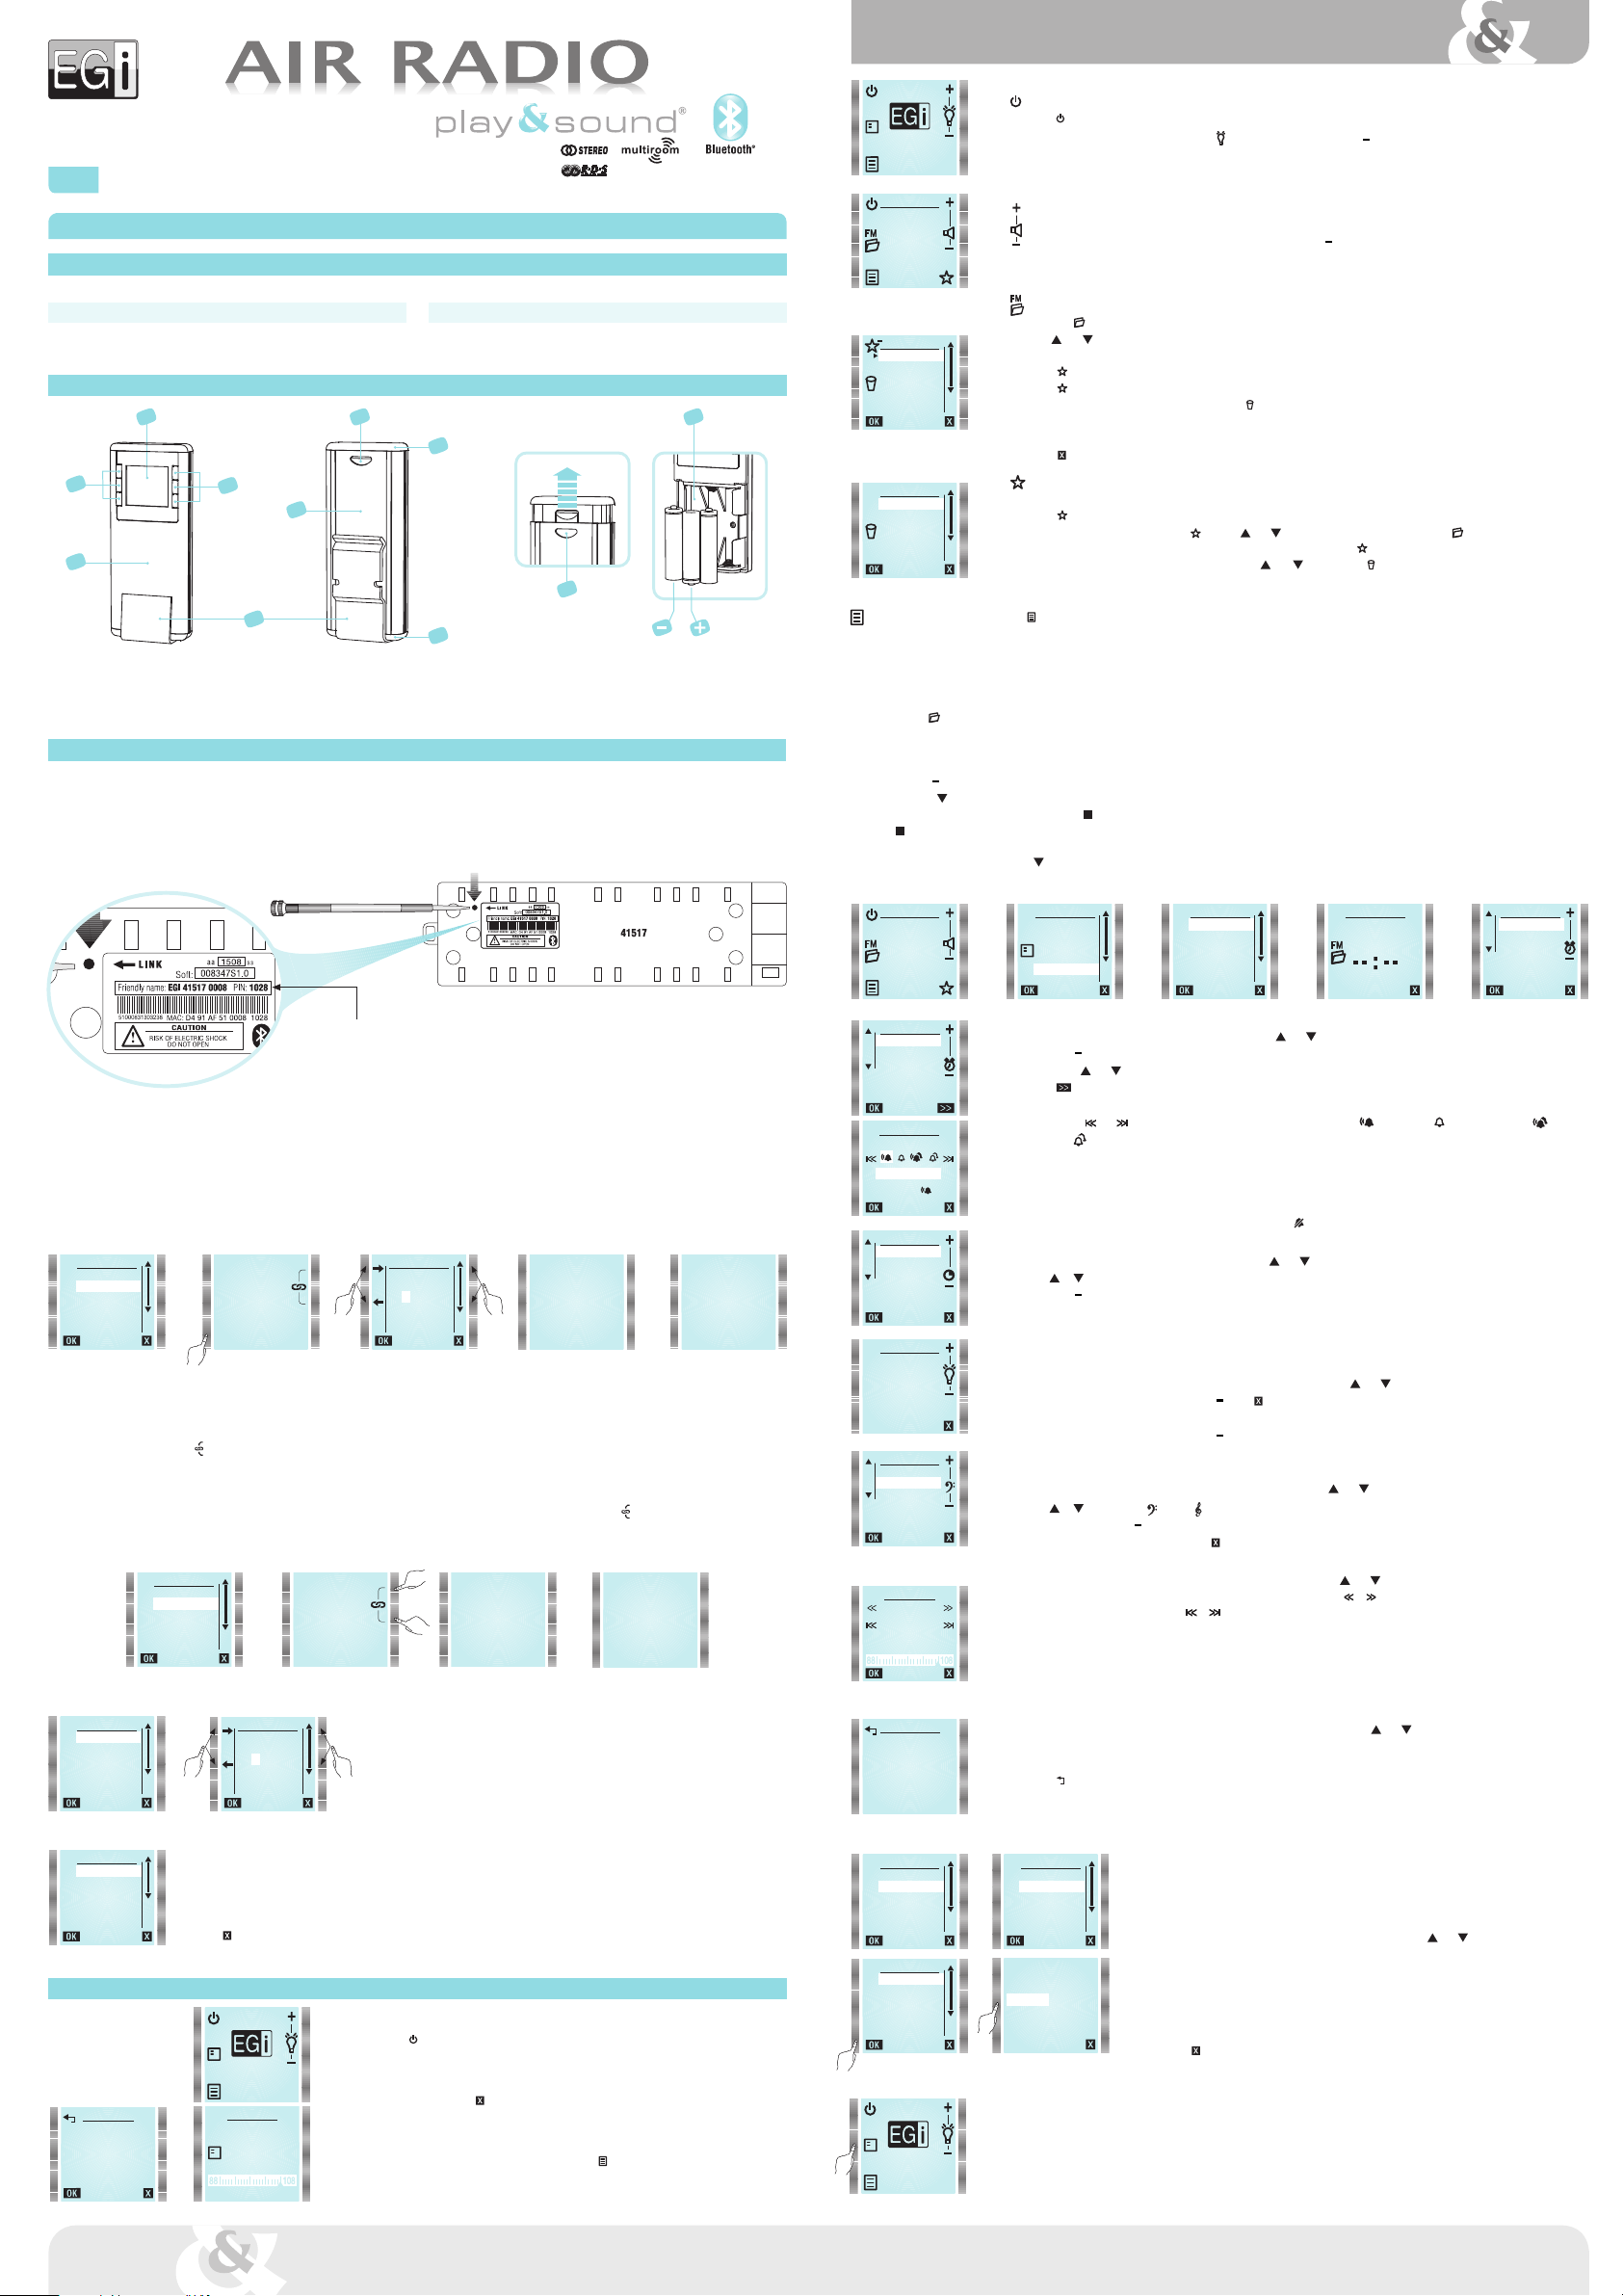
Componentes principales
ATeclas.
BVisor (dispaly).
CCarcasa frontal.
DSoporte de pared para el mando a distancia.
ECarcasa trasera.
FTapas embellecedoras (blanco/negro).
GPestaña deslizante.
HCompartimento de baterías.
Pantalla principal
Encender/apagar el equipo
Pulse la tecla para encender/apagar el equipo.
Con el mando apagado, las teclas +y aparecen en modo ajuste de retroiluminación .
Esto permite ajustar el nivel de iluminación del display con el mando en reposo.
NOTA: En caso de pérdida de red eléctrica, al encender de nuevo el equipo éste siempre accede a modo RADIO.
Regulación de volumen
Siempre que el módulo esté encendido podrá subir o bajar el volumen mediante las teclas +y .
Una pulsación corta modifica el volumen paso a paso y una pulsación mantenida permite el cambio acelerado.
NOTA: Esta función aparece en pantalla, siempre que esté activada cualquier fuente de sonido y se encuentre en la pantalla de reposo de la fuente
seleccionada.
Lista FM
Pulse la tecla FM para ver todas las emisoras sintonizadas.
Usar las teclas y para seleccionar la emisora. Se visualiza el nombre. Si la emisora no emite información RDS se visualiza la frecuencia.
Cuando vea seleccionada la emisora que desea escuchar, pulse la tecla OK.
Si decide no salir de LISTA FM y desea añadir emisoras a la lista de FAVORITOS pulse la tecla .
Para quitar una selección de la lista de FAVORITOS vuelva a pulsar la tecla FAVORITOS.
Si desea eliminar una emisora de la LISTA FM, selecciónela y pulse (ELIMINAR).
Si la emisora que desea eliminar pertenece a FAVORITOS entre en FAVORITOS y pulse la tecla (ELIMINAR).
Si elimina una emisora de la LISTA FM, desaparecerá permanentemente.
Si desea recuperarla deberá resintonizar posteriormente mediante FM MANUAL.
Puede abandonar el menú en cualquier momento pulsando la tecla (SALIR).
Lista de favoritos
Puede seleccionar hasta 6 emisoras preferidas.
Para elegirlas, pulse añadir a FAVORITOS desde la LISTA FM. La emisora seleccionada se añadirá a la lista de favoritos en la primera
posición libre.
También puede añadir una emisora desde FAVORITOS, usando las teclas y para seleccionar una posición vacía y a
continuación la tecla FM . De esta manera, aparecerá la lista de emisoras disponible, donde podrá seleccionar la emisora que
desea añadir a FAVORITOS.
Para borrar una emisora favorita selecciónela con las teclas y y pulse sobre la tecla (ELIMINAR).
LISTA FM
RADIO 1
RADIO 2
RADIO 3
RADIO 4
RADIO 5
RADIO 6
FAVORITOS
RNE 3
M80
40 PRINCIPALES
VACIO
VACIO
VACIO
RADIO 5
107,9 FM
EGI 0008
Pulsando el botón LINK:
Una vez seleccionado el idioma; a través de un micro destornillador o de un clip, pulse mediante una pulsación corta la tecla interna LINK del módulo máster 41517 que desee vincular.
Dispondrá de 1 minuto para pulsar durante 0.5 sg. las 2 teclas a la vez en el mando a distancia 41514. Aparecerá en la pantalla VINCULANDO... mientras los equipos intentan vincularse.
Ya vinculados, en la pantalla aparecerá VINCULADO A NUEVO RECEPTOR.
A partir de aquí el mando a distancia ya reconoce el módulo máster al que se ha vinculado y podrá manejar todas las funciones del mismo. Podrá vincular hasta 4 módulos máster adicionales
entrando en el menú VINCULOS.
En caso de fallo el mando a distancia volverá a la pantalla anterior para repetir la operación. Asegúrese de pulsar correctamente la tecla interna LINK del módulo máster seleccionado, y
seguidamente pulse de nuevo durante 0.5 sg. las 2 teclas a la vez en el mando a distancia 41514.
NOTA: En caso de que se intente vincular un mando ya vinculado a un módulo de techo al cual ya se hubiera vinculado previamente, el mando no lo admitirá y esto se verá como un
fallo en la vinculación. Para poder volver a vincular un mismo módulo de techo, éste deberá ser previamente borrado manualmente del mando a distancia 41514 desde la opción ELIMINAR
del menú VINCULOS.
Parte trasera del módulo máster 41517 para acceder a la tecla interna
LINK.
Código PIN
PULSAR
Vinculación
Seleccione el idioma en el que se desea ver los textos en el mando a distancia 41514.
Seguidamente aparecerá una pantalla en dónde podrá modificar el idioma o vincular el
mando a distancia con el módulo máster multiroom 41517.
La vinculación se puede realizar de 2 formas: introduciendo el código PIN del módulo
máster multiroom o pulsando el botón LINK del módulo máster multiroom.
IDIOMA
ESPAÑOL
ENGLISH
DEUTSCH
FRANÇAIS
ITALIANO
PORTUGUES
PIN
0 0 0 0
IDIOMA
VINCULAR
A NUEVO
RECEPTOR
PIN
VINCULANDO...
VINCULADO
A NUEVO
RECEPTOR
IDIOMA
VINCULAR
A NUEVO
RECEPTOR
PIN
VINCULANDO...
IDIOMA
ESPAÑOL
ENGLISH
DEUTSCH
FRANÇAIS
ITALIANO
PORTUGUES
VINCULADO
A NUEVO
RECEPTOR
NOMBRE
EGI 0008
COCINA
SALON
DORMITORIO
ASEO
Configuración
Una vez vinculados los equipos, aparecerá una serie de nombres que Ud. podrá asignar a cada módulo
máster vinculado.
El primer nombre que se ofrece en la lista, es el que tiene originalmente el módulo máster 41517 al salir
de fábrica (siempre y cuando no se haya modificado previamente por el usuario).
Todos ellos son configurables por lo que si se selecciona uno de ellos pulsando 0K, aparecerá otra
pantalla con ese nombre para que se le pueda añadir una numeración (por ejemplo EGI 0009) o
cambiar el nombre a su gusto.
Una vez modificado el nombre del módulo máster 41517, recuerde que este se modificará a su vez
en el Friendly Name Bluetooth®del mismo módulo.
AJUSTES
INPUT
ANTENA EXT.
ESTEREO
PIN
NOMBRE
SI
AUTOSCAN
CREAR
LISTA FM
Funcionamiento
Primera conexión
Pulse la tecla de encendido .
Autoscan
Aparece la opción de realizar el proceso de AUTOSCAN para memorizar todas las emisoras con un correcto
valor de emisión en la memoria del equipo.
Pulse la tecla OK para realizarlo o la tecla (SALIR) para continuar sin el proceso de autoscan.
El proceso de autoscan realiza una búsqueda automática de las emisoras FM*con mayor potencia y obtiene
los datos de RDS (esta operación puede durar 2 minutos aproximadamente).
(*) Hasta 30 emisoras + 6 en modo manual.
Para volver a realizar el proceso de autoscan, entre en MENÚ y seleccione la opción AUTOSCAN.
NOMBRE
EGI
0 0 0 8
Una vez cambiado y/o confirmado el nombre deseado, se mostrará la pantalla AJUSTES donde podrá especificar si el módulo tiene una fuente de
audio conectada a la entrada INPUT y seleccione SÍ o NO para ello.
El equipo, por defecto, dispone de antena a través del cable de red. En caso de existir poca señal de FM, en la opción ANTENA EXT. seleccione SÍ
para activar la antena exterior y mejorar la recepción de las emisoras mediante un cable de antena conectado en la regleta exterior.
Señal ESTÉREO le permite seleccionar el sonido del equipo en mono o estéreo. Pulse SÍ/NO para ello.
Una vez finalizados todos los ajustes, pulse la tecla (SALIR) para continuar con el funcionamiento del equipo.
AUTOSCAN
RNE 3
89.3
03/30
VÍNCULOS
El menú VÍNCULOS permite al mando a distancia 41514 vincularse a otros módulos máster 41517.
El número máximo de módulos máster que permite vincular es 5. De esta forma con un solo mando a distancia
podrá gestionar individualmente 5 habitaciones e incluso cambiarles el nombre. Sin embargo, el módulo máster
multiroom 41517 puede vincular hasta 15 mandos a distancia 41514.
Este menú permite concretamente eliminar o añadir módulos máster 41517 al mando a distancia 41514; para
ello siga estas instrucciones.
Para entrar en el menú VÍNCULOS use las teclas y en el menú principal para posicionarse sobre la
opción VÍNCULOS, y pulse OK.
Para añadir otro módulo máster pulse la opción AÑADIR y aparecerá una pantalla donde podrá vincular de
2 maneras diferentes, mediante la introducción del código PIN o mediante la tecla trasera LINK del módulo
máster 41517 (véase el apartado anterior "Vinculación").
Si desea cambiar el nombre de la zona, vaya al MENÚ general, entre en AJUSTES y modifique el nombre
en el apartado NOMBRE.
Para eliminar una vinculación en el mando a distancia pulse la opción ELIMINAR.
A continuación, aparecerá una pantalla donde verá las zonas vinculadas y Ud. podrá seleccionar directamente
la zona a eliminar. Una vez pulsada quedará eliminada de la memoria del mando a distancia 41514.
Si no desea eliminar ninguna zona, pulse la tecla (SALIR).
CÓMO SELECCIONAR EL MÓDULO MÁSTER O ZONA A CONTROLAR:
En caso de que se haya vinculado más de un módulo máster 41517 al mando a distancia 41514, si el mando no se puede comunicar con el módulo
que tenga seleccionado en un momento dado, se ofrecerá directamente la posibilidad de elegir otro equipo o el mismo, que se verá seleccionado
en blanco (si sólo hay un vínculo se mostrará igualmente esta pantalla).
Para más información lea el apartado "Cómo cambiar de zona".
MENU
VERSION
VINCULOS
INICIALIZAR
AJUSTES
EGI 0008
EGI 0030
SALON
ELIMINAR
VINCULOS
ELIMINAR
AÑADIR
EGI 0008
1
2
1
2
1
2
21
MASTER
1
2
1
2
1
2
NOMBRE
EGI 0008
COCINA
SALON
DORMITORIO
ASEO
NOMBRE
SALON1
Avda. Almozara, 79 50003 ZARAGOZA - España T. 976 40 53 53 F. 976 40 53 54 e-mail: [email protected] www.egiaudio.com
MENU
RADIO
BLUETOOTH
INPUT
MASTER ON
RELOJ
ALARMA
EGi garantiza sus fabricados electrónicos y electroacústicos contra cualquier defecto de fabricación que afecte a su funcionamiento durante 36 meses a partir de la fecha de su producción (indicada en cada fabricado),
comprometiéndose a reparar o reponer los módulos defectuosos cuyo fallo, siempre a juicio de EGi, se deba a defecto de fabricación, sin cargos de repuestos.
Esta garantía no incluye gastos de envío de módulos, ni mano de obra de sustitución en la instalación de los citados módulos electrónicos y electroacústicos. En ningún caso la garantía cubre los desperfectos o
roturas de piezas embellecedoras (rejillas, embellecedores, carátulas, marquillos...).
Esta garantía se refiere únicamente al concepto de sustitución en fábrica de los módulos producidos por EGi, excluyéndose cualquier otra cobertura o responsabilidad sobre el resto de materiales
o el conjunto de la instalación puesta a disposición del usuario, pero que EGi no suministra ni ejecuta.
Por lo tanto no quedan cubiertas por esta garantía:
a. La instalación e interconexionado entre sus módulos.
b. Las consecuencias de abuso o mal uso del producto, incluyendo pero no limitado a:
b.1. No usar el producto para fines normales, o no seguir las instrucciones de EGi, para el correcto uso y mantenimiento del mismo.
b.2. La instalación o utilización de los productos de forma no concordante con las normas técnicas o de seguridad vigentes.
c. Las averías producidas por la incorrecta instalación de los módulos, o con cable que no sea el adecuado.
d. Las averías generadas por intervención de persona no autorizada por EGi.
e. Las consecuencias de mezcla con equipos de otro origen, así como adaptaciones, modificaciones, ajustes y/o tentativas de ajustes, irrespectivamente de que ello haya sido efectuado de forma técnicamente correcta
en principio, siempre que no exista expresa autorización por EGi.
f. Las consecuencias de accidentes, catástrofes naturales o cualquier causa ajena al control de EGi, incluyendo pero no limitado al rayo, agua y disturbios públicos.
En todos estos casos excluidos de la garantía, y siempre que los módulos no sean juzgados como defectuosos por parte de EGi, su remitente deberá hacerse cargo del importe total de la reparación, y caso de
producirse visita de nuestros técnicos, su solicitante correrá con los gastos originados sin causa justificada de garantía.
ATENCIÓN: Si Vd. observa algún problema en su instalación EGi nuestro Servicio de Atención al cliente le atenderá de 9h. a 13h.
Garantía
SOBRE ESTE MANUAL
Todos los esfuerzos han sido realizados para asegurar que los contenidos de este manual sean
correctos y estén actualizados. Sin embargo, no es posible garantizar la fidelidad de los contenidos,
y el fabricante se reserva el derecho de efectuar cambios sin previo aviso.
SOPORTE TÉCNICO
Si durante el uso de su sistema se encuentra con un problema, y no puede solucionarlo consultando
el manual, por favor, contacte con su instalador. Puede también consultar la web www.egiaudio.com
donde encontrará información actualizada y otros recursos para dar solución a su problema.
INFORMACIÓN DE COPYRIGHT
Ninguna parte de este manual, incluyendo los productos o el software descrito en él, podrá ser
reproducido, transmitido, almacenado en sistemas de recuperación, o traducido a ningún idioma
en forma o medio alguno, exceptuando documentación almacenada por el comprador para realizar
copias de seguridad, sin expreso consentimiento previo y por escrito del fabricante.
Los productos y nombres corporativos que aparecen en este manual pueden ser marcas registradas
o copyright de sus respectivas compañías, y son utilizadas aquí sólo por motivos de identificación o
explicativos y en beneficio del dueño, sin intención de infringir dichas normas.
Copyright © 2010. Todos los derechos reservados.
INSTRUCCIONES DE SEGURIDAD
Este sistema ha sido diseñado y fabricado para cumplir con los últimos estándares de
seguridad para equipos electrónicos en el ámbito doméstico. Sin embargo, para asegurar
un uso seguro de este producto, es importante tener en cuenta las instrucciones indicadas
en esta documentación.
Ningún producto de EGi deberá cubrirse con cualquier elemento que dificulte su ventilación.
No deben situarse sobre el aparato fuentes de llama desnuda tales como velas encendidas o similares.
No verter agua, no exponer a goteo o proyecciones de agua.
Cortar el suministro de corriente antes de efectuar cualquier intervención en la instalación.
No exponga el producto a la acción directa del sol.
No presionar con fuerza las partes móviles de los mandos.
El usuario debe evitar cualquier intento de intervención o reparación del producto y dirigirse
únicamente a personal cualificado.
Utilice únicamente los accesorios suministrados por EGi.
EGi declina toda responsabilidad que derive del uso impropio del producto o de un uso distinto
de aquel para el que está destinado (ver el apartado Garantía).
El signo de exclamación dentro de un triángulo indica la existencia de importantes
instrucciones de operación y mantenimiento en la documentación que acompaña
al producto y la existencia de componentes internos cuyo reemplazo puede
afectar a la seguridad.
Aparato de Clase II.
IMPORTANTE
Lea detenidamente estas "Instrucciones de seguridad" antes de utilizar cualquier producto EGi.
El signo del rayo con la punta de flecha, alerta contra la presencia de voltajes
peligrosos. Para reducir el riesgo de choque eléctrico, no retire la cubierta.
Los signos del rayo cerca de los terminales de salida del amplificador alertan del riesgo de
choque eléctrico en condiciones normales de uso (terminales peligrosos al tacto). No toque
dichos terminales mientras el equipo esté encendido.
Este símbolo indica que el presente producto no puede ser tratado como residuo
doméstico normal, sino que debe entregarse en el correspondiente punto de
recogida de equipos eléctricos y electrónicos.
La marca significa Conformidad Europea y es una marca europea para ciertos
grupos de servicios o productos industriales.
La marca debe ser ostentada por un producto si éste se encuentra dentro del
alcance de las aproximadamente 20 llamadas Directivas "New Approach" y puede
venderse y ponerse en servicio legalmente dentro de los países que conforman
la UE. Si el producto cumple las provisiones de las Directivas Europeas aplicables
y la marca se ostenta en el producto, los estados miembros no pueden
prohibir, restringir o impedir la colocación en el mercado o puesta en servicio
del producto. La marca puede considerarse como el pasaporte para el comercio
del producto en los países de la Unión Europea.
RESPONSABILIDAD
Debido al amplio espectro de servicios y dispositivos con los que interactúa el sistema, el fabricante
no puede responsabilizarse de fallos o funcionamientos defectuosos o anómalos de dispositivos
o sistemas no fabricados por EGi conectados o usados por cualquier módulo de la serie PLAY
& SOUND.
DECLARACIÓN DE CONFORMIDAD
Electroacústica General Ibérica, S. A. con dirección en Avda. Almozara, 79 - 50003 Zaragoza (España),
declara bajo su única responsabilidad que los equipos descritos en este manual incorporan las
funciones especificadas en cada caso y son conformes con la normativa vigente:
Directiva 2004 / 108 CE, relativa a la compatibilidad electromagnética y Directiva de Baja Tensión
2006 / 95 / CE, relativa a la seguridad de los receptores de baja tensión.
Debido a la política de mejora constante, EGi se reserva el derecho a modificar en
cualquier momento sus productos. Si bien se trata de presentar la documentación
actualizada, puede que los documentos y la imagen proporcionada no coincidan con el
producto adquirido.
Puede consultar las últimas versiones de documentación en www.egiaudio.com
EGi no se responabiliza de posibles errores en el texto o referencias.
Todas las marcas citadas están registradas por sus propietarios.
información
Información
IDIOMA
ESPAÑOL
ENGLISH
DEUTSCH
FRANÇAIS
ITALIANO
PORTUGUES
VERSION
SW:1.0 HW:1.0
INICIALIZAR
EGI 0008
INICIALIZAR
AL ESTADO
DE FABRICA
AJUSTES
INPUT
ANTENA EXT.
ESTEREO
PIN
NOMBRE
SI
IDIOMA
Para seleccionar el idioma del menú, use las teclas y en el menú principal para posicionarse sobre la opción IDIOMA, y pulse OK.
Use las teclas y para elegir el idioma en el que se representan los menús. Una vez seleccionado, pulse OK.
VERSIÓN
Para conocer la versión de firmware del equipo, use las teclas y en el menú principal para posicionarse sobre la opción VERSIÓN, y pulse OK.
Al pulsar, aparecerá la versión de software instalada, el número de serie y otros datos que son exclusivos para el servicio técnico y el fabricante (SW es la versión de software
y HW es la versión de hardware).
INICIALIZAR
Para reiniciar el sistema a los valores predeterminados de fábrica, use las teclas y en el menú principal para posicionarse sobre la opción INICIALIZAR, y pulse OK. Una vez esté
en la pantalla INICIALIZAR pulse OK para reiniciar o pulse para salir sin inicializar el módulo máster 41517.
IMPORTANTE: Al volver el sistema al estado inicial de fábrica se perderán todas las configuraciones personalizadas, listas de FM y favoritos.
AJUSTES
Para realizar ajustes, use las teclas y en el menú principal para posicionarse sobre la opción AJUSTES, y pulse OK.
INPUT:
Use las teclas y de la izquierda para activar la entrada INPUT SI para poder verla y seleccionarla en el MENÚ general; o INPUT NO para no activarla y que no aparezca
en el MENÚ general.
ANTENA EXT:
Pulse las teclas y de la derecha hasta que ANTENA EXT. aparezca seleccionado.
Use las teclas y de la izquierda para seleccionar la antena exterior (SI) o la antena interior (NO).
El uso de la antena interna es el recomendado.
Use antena exterior en caso de interferencias en la red (causadas por balastos electrónicos o fuentes de alimentación conmutadas).
ESTÉREO:
Pulse las teclas y de la derecha hasta que ESTÉREO aparezca seleccionado.
Use las teclas y de la izquierda para seleccionar modo ESTÉREO (SI) o modo MONO (NO) para los casos en que la recepción FM es deficiente.
BT DEVICES
NOKIA
iPHONE
BT SEARCH
BUSCANDO
BT SEARCH
NOKIA
iPHONE
PC
BLUETOOTH
NOMBRE
SALON1
AJUSTES
INPUT
ANTENA EXT.
ESTEREO
PIN
NOMBRE
PIN
1003
PIN
1000
AJUSTES
INPUT
ANTENA EXT.
ESTEREO
PIN
NOMBRE
PIN
Con esta opción se puede cambiar el PIN BLUETOOTH®("xxxx"), que viene dado de fábrica y que está indicado en las etiquetas, por otro que Ud. desee de 4 dígitos.
Seleccione PIN en la pantalla de AJUSTES y pulse OK para validar.
Para seleccionar el dígito a cambiar pulse las 2 teclas superiores de la izquierda.
Para modificar el dígito a cambiar pulse las 2 teclas superiores de la derecha.
Para validar el nuevo PIN pulse OK.
Si no quiere cambiar el PIN, para salir pulse .
PIN
0000
NOMBRE
IMPORTANTE: Recomendamos realizar esta operación antes de activar bluetooth®o enlazarlo.
Con esta opción se puede cambiar el nombre del dispositivo BLUETOOTH®que viene dado por defecto de fábrica "EGI 41517_ _ _ _" por otro que Ud. desee (dispone de hasta 14 caracteres).
Seleccione NOMBRE en la pantalla de AJUSTES y pulse OK para validar.
La pantalla le ofrecerá varios nombres genéricos, seleccione uno y pulse OK para modificar el nombre o mantenerlo.
Para seleccionar el caracter a cambiar pulse las 2 teclas superiores de la izquierda.
Para modificar el caracter a cambiar pulse las 2 teclas superiores de la derecha.
Para validar el nuevo NOMBRE pulse OK .
Si no quiere cambiar el NOMBRE, para salir pulse .
NOTA: Se recomienda que antes de buscar estos dispositivos en otros equipos, cambie los nombres y pines para tener la visualización definitiva.
Antes de modificar estas opciones y para que los cambios se hagan efectivos, se recomienda omitir o borrar los anteriores nombres de sus dispositivos y volver a buscarlos
para ver los nombres y dispositivos actualizados.
Al seleccionar la opción BLUETOOTH y validarla mediante la tecla OK, el dispositivo bluetooth®
se activa para ser visto por otros dispositivos.
La búsqueda de dispositivos se puede hacer de 2 formas:
- desde el dispositivo del que se vaya a emitir audio (móvil, portátil, iPad, tablet...), o bien
- desde la carpeta de dispositivos bluetooth®que ve su módulo 41517 BT .
Pulse la tecla BT para visualizar la lista de los dispositivos que ve y ha guardado.
Bluetooth®
MENU
RADIO
BLUETOOTH
MASTER ON
RELOJ
ALARMA
SLEEP
NOTA:
En caso de pérdida de red eléctrica o apagado repentino del bluetooth®, la opción
BLUETOOTH puede tener un retardo de 14 segundos hasta su activación y visualización,
mientras tanto aparece el símbolo .
Pulse para buscar nuevos dispositivos que se visualizarán antes de un minuto.
Seleccione el dispositivo a enlazar y pulse .
El dispositivo al que se ha enlazado pedirá la clave de acceso. Si no se ha modificado, corresponderá al valor impreso en las etiquetas.
BLUETOOTH
RADIO 5
107,9 FM
MULTIROOM
RADIO 5
107,9 FM
Una vez elegido el módulo 41517 que queremos que distribuya la música a los demás (con su música
seleccionada), entre en MENÚ y seleccione con las teclas y MASTER ON.
Una vez seleccionada la opción MASTER ON y siempre que este equipo no se apague, distribuirá la
música al resto de los módulos 41517 conectados al BUS.
Para escuchar la música en el resto de los módulos 41517, simplemente al encenderlos éstos entrarán
automáticamente a reproducir la música MULTIROOM procedente del 41517 MASTER ON.
Si el equipo está ya encendido, entre en MENÚ y seleccione con las teclas y la opción
MULTIROOM. Inmediatamente el equipo empezará a reproducir la música que emite el módulo 41517
seleccionado como MASTER ON.
Para salir pulse la tecla MENÚ y seleccione otra fuente musical o apague el mando.
Para salir del modo MASTER ON en el 41517 que se haya elegido como MASTER, entre en MENÚ
y con las teclas y seleccione la opción MASTER OFF.
Automáticamente este equipo pasará a funcionar individualmente, y todos los equipos de la instalación
que estén en modo MULTIROOM se apagarán.
Multiroom
MENU
RADIO
BLUETOOTH
MASTER ON
RELOJ
ALARMA
SLEEP
MENU
RADIO
BLUETOOTH
MULTIROOM
RELOJ
ALARMA
SLEEP
MENU
RADIO
BLUETOOTH
MASTER OFF
RELOJ
ALARMA
SLEEP
NOTA: La opción MULTIROOM sólo funciona al conectar el BUS multiroom (regletas de conexión 4, 5 y 6) entre los diferentes módulos 41517 de la instalación.
Esta opción permite distribuir la música seleccionada en uno de los equipos (MASTER ON) al resto de los equipos de la instalación. Para ello, siga los siguientes pasos.
Input
Para acceder y escuchar la entrada de audio INPUT, ir a MENÚ y seleccionar la función INPUT.
Una vez seleccionado INPUT podrá regular el volumen mediante las teclas +y .
Para salir y hacer otra selección pulse la tecla MENÚ .
Para apagar el equipo, pulse la tecla .
Resolución de incidencias
Problema
El equipo no responde. La pantalla está apagada.
Pantalla encendida con visualización, pero no hay audio.
Recepción FM deficiente.
(El módulo máster multiroom 41517 dispone de antena automática a través del
cable de red eléctrico. En caso de existir interferencias o tener una señal débil,
conecte una antena exterior y cámbiela en el menú AJUSTES).
El equipo no ve el dispositivo bluetooth®con el que lo quiere enlazar.
Cuando se va la tensión eléctrica del equipo, éste no recupera la hora
automáticamente, de modo que queda constantemente parpadeando unas rayas
en las posiciones del reloj en pantalla.
El equipo no muestra la hora en pantalla.
El mando a distancia 41514 pierde la comunicación con el módulo máster
41517 y muestra la siguiente pantalla:
Posible solución
Pulse cualquier tecla para respuesta.
Revise el estado de las pilas.
Compruebe que está en una fuente de sonido con música, sintonizando una emisora
con programación o reproduciendo una canción.
Compruebe que el nivel de volumen no está al mínimo.
Compruebe la correcta conexión de los altavoces en la regleta.
Conecte en el módulo 41517 una antena FM externa utilizando cable coaxial apantallado
en los conectores habilitados o compruebe que ésta está correctamente conectada.
Compruebe el tipo de antena seleccionada en el menú de opciones.
Retire el equipo de balastos electrónicos u otros equipos (fluorescentes...).
Compruebe que el dispositivo bluetooth®que quiere enlazar no sólo tiene activada
la funcionalidad BLUETOOTH, sino que ésta está configurada como visible a otros
usuarios, de modo que no está en modo BLUETOOTH invisible.
Compruebe que la última vez que ajustó la hora en el equipo, esta operación se
realizó en el modo de ajuste automático del reloj, a través de una emisora FM con
RDS que emita la hora.
Ajuste el reloj en modo de ajuste automático, para que en una próxima caída de tensión,
el equipo pueda introducir la hora de forma autónoma a la vuelta de la tensión.
Compruebe que en ajuste manual de reloj no se haya eliminado la hora.
Ajuste el reloj en el modo automático o manual.
Asegúrese de que el equipo de amplificación 41517 (ubicado en el techo o falsa
pared) esté alimentado con red eléctrica 115 V~ / 230 V~ .
Pulsar la tecla (SALIR), para que el mando a distancia 41514 vuelva a intentar
la comunicación.
Pulse ELIMINAR para borrar módulos máster vinculados anteriormente, o pulse
AÑADIR para memorizar un nuevo módulo máster 41517.
Para ello, desde la pantalla principal o desde la pantalla de MENÚ,
pulse la tecla .
Una vez pulsada la tecla , en la pantalla aparecerán las zonas a
las que está vinculado el mando a distancia.
Pulse directamente sobre la zona que desea controlar. El mando
pasará directamente a manejar el módulo máster 41517 o zona
seleccionada.
Cómo cambiar de zona en el mando a distancia 41514
EGI 0008
VINCULOS
ELIMINAR
AÑADIR
EGI 0008
EGI 0030
SALON
ELIMINAR
A partir de aquí, el mando a distancia volverá a la pantalla principal, pero ya sobre la zona seleccionada.
En caso de no comunicarse con la zona selecciona (por exceso de distancia con el módulo máster o porque
este esté ocupado o sin alimentación) el mando a distancia le ofrecerá la selección zonas para seleccionar
otra zona con la que se pueda comunicar.
Si el mando a distancia no consigue comunicarse con ninguna otra zona, le ofrecerá la posibilidad de
ELIMINAR o AÑADIR otras zonas.
NOTA: Para más información lea el apartado "Vínculos".
MENU
RADIO
BLUETOOTH
INPUT
MASTER ON
RELOJ
ALARMA
BLUETOOTH
Cada vez que seleccione el dispositivo bluetooth®podrá escuchar música,
manejar el volumen y la reproducción de las canciones desde el propio
dispositivo (móvil, portátil, iPad, tablet...), o bien desde el propio módulo
41514 pulsando las teclas o .
Al pulsar la tecla el módulo entra en modo reproductor remoto.
Para avanzar de canción en canción, pulse .
Para retroceder de canción en canción, pulse .
Para reproducir o parar pulse .
iPHONE
Bluetooth®enlazado.
Bluetooth®NO enlazado.
Para desenlazarse del dispositivo bluetooth®, entre en BT (BT DEVICES) seleccione el dispositivo a desenlazar y pulse la tecla . También se puede desenlazar desde el propio
dispositivo bluetooth®(PC, Tablet, móvil...).
Para cambiar la clave entre en el menú AJUSTES .
El nombre de estos dispositivos es EGI 41517 y 4 números consecutivos ("EGI 41517 _ _ _ _") predefinidos de fábrica.
Estos códigos vienen en una etiqueta adhesiva en la parte trasera del mando y en otra etiqueta suelta para el usuario.
Para modificar este nombre entre en el menú AJUSTES y cambie el nombre en "NOMBRE".
INPUT
EGI 0008
EGI 0030
SALON
VINCULOS
ELIMINAR
AÑADIR
El mando a distancia 41514 permite tanto desde la pantalla principal en stand-by como desde la pantalla de MENÚ, seleccionar el manejo de otra zona u otro módulo máster 41517.
IMPORTANTE: Antes de seleccionar BLUETOOTH, se recomienda entrar en AJUSTES para cambiar el nombre del dispositivo "NOMBRE" y su clave de acceso "PIN" y así diferenciarlo de
otros posibles dispositivos bluetooth®del entorno.
HIGH QUALITY SOUND
41514
008489 09/2015
A
A
E
C
B G
G
H
F
F
D
LINKS
REMOVE
ADD
EGI 0008
Entering PIN code:
Press PIN key and enter PIN code by means of four upper keys.
Master module PIN code is printed on a label attached to the back housing. A loose label with PIN code is supplied as well for user convenience.
Once PIN code has been entered, press OK key. During the linking process, LINKING... will appear on the screen.
When linked, it will appear LINKED TO A NEW RECEIVER.
From that moment on, the remote control will be able to command the master module. The remote control can be linked to a maximum of four additional master modules by
entering LINKS menu.
In case of linking process fail, the remote control will show linking options again. Please check PIN code is entered correctly.
Technical specifications
41514 Remote control (bluetooth®, FM/RDS, input & multiroom)
en instruction manual
Av. Almozara, 79 50003 ZARAGOZA - Spain T. +34 976 40 53 56 F. +34 976 40 53 54 e-mail: [email protected] www.egiaudio.com
Linking and Configuring 41514 & 41517 modules
Power supply 3 AAA 1.5 V bateries
RF band 2.4 GHz; Zigbee RF
Display LCD Graphic
Weight (Kg.) 0.122
Dimensions (mm.) 52 x 125 x 19
Finish Aluminium
The sound unit must be connected to a mains voltage between 115 and 230V ~ 50 / 60Hz, prior to being used.
A 41514 remote control can be linked with up to five 41517 master modules. On the other hand, a 41517 master module can be controlled by up to fifteen 41514 remote controls (it can be
controlled directly in Bluetooth mode as well).
NOTE: Every command issued on the remote control 41514 is performed effectively on the 41517 master module.
Main MENU (to enter it, press MENU key)
TIME
Internal clock can be adjusted automatically (by synchronizing it to a station with RDS time information) or manually.
If AUTO mode is selected, time information will be restored automatically after a power failure.
Automatic setting:
From TIME menu select AUTO.
Press FM key and choose a station that offers RDS time information (usually state stations).
Wait 1 or 2 minutes for the clock to synchronize and press OK. If current time is not displayed, switch to other station.
Manual setting:
From TIME menu select MANUAL.
Use +and keys to modify hours value (HOURS is highlighted).
Then, press key to adjust minutes the same way as hours. When all is correct, press OK key.
Once the clock is set, OK key will be replaced by key in TIME menu.
If key is pressed, time will not be displayed anymore.
12-24 hours mode:
To change time display mode, press key to highlight 12/24H.
Then press 12/24H to choose the desired option. Press OK to validate.
RADIO 5
107,9 FM
MENU
RADIO
BLUETOOTH
INPUT
MASTER ON
TIME
ALARM
TIME
AUTO
MANUAL
12/24H
TIME TIME
HOURS
MINUTES
00:34
ALARM
To set the alarm, highlight ALARM from main menu by using and keys and press OK.
Use +and keys to modify hours value (HOURS is highlighted).
Then, press and key to adjust minutes the same way as hours.
Press key (MORE) to select alarm type.
Alarm volume will be set at the same level that it was when configured.
By means of and keys, following options can be chosen: FM radio once , Buzzer once , FM radio every day or Buzzer
every day .
When all is correct, press OK key.
Activation time and alarm type will be shown on main screen.
When alarm is triggered, it can be turned off by pressing STOP (stop alarm) or SNOOZE (repeat every 9 minutes).
If not turned off, alarm will stop after 10 minutes.
To delete the alarm, select ALARM from the main menu and press key.
SLEEP (TIMER)
To set the timer, highlight SLEEP from main menu by using and keys and press OK.
Use or to select whether the timer will be activated once (NOW) or every time the module is turned on (ALWAYS).
Use +and keys to adjust turn off time.
Press OK to save the settings.
Select 0 minutes to deactivate SLEEP function.
LIGHTING CONTROL
Lighting when the module is on:
To adjust screen lighting level, highlight BACKLIGHT from main menu by using and keys and press OK.
Lighting level can be modified by using +and . Press (EXIT) to save the setting.
Lighting when the module is stand-by:
Lighting level can be modified by using +and keys.
When the module is off, the screen can be completely darkene.
EQUALIZER
To adjust bass and treble, highlight EQUALIZER from main menu by using and keys and press OK.
Use or to select basss or treble .
Once selected, press +or to increase or decrease bass or treble level.
When adjusted press OK to save and quit, or to quit without saving.
MANUAL FM
To tune manually a station, highlight MANUAL FM from main menu by using and keys and press OK.
Tuning frequency can be increased or decreased in 100 KHz steps by pressing or .
To perform an automatic search, press or to find the next higher/lower frequency station (signal level must be over a certain threshold).
When a station is found (both in auto and manual mode), after some seconds RDS*information will appear.
Sometimes this information is changing, press OK when it is displayed the information you want to associate with the station. The station
will be added to FM list (if there is any memory available).
It can be stored up to 36 stations (30 from autoscan + 6 from manual tuning).
(*) Not all the stations transmit RDS information, If RDS text does not appear, press OK.
AUTOSCAN
To activate automatic station search, highlight AUTOSCAN from main menu by using and keys and press OK.
A new FM station list will be created. Favourites list can be kept or deleted.
Autoscan process can take several minutes.
Press to quit without doing autoscan.
ALARM
HOURS
MINUTES
00:00
ALARM TYPE
FM ONCE
00 : 00
SLEEP
NOW
ALWAYS
10
MINUTES
BACKLIGHT
EQUALIZER
TREBLE
BASS
0
MANUAL FM
RADIO 1
107.9
AUTOSCAN
NEW
FM LIST
KEEP
FAVOURITES?
YES NO
Main components
AKeys.
BDispaly.
CFront housing.
DRemote control holder (wall mounting).
EBack housing.
FTrim (white/black).
GSliding clip.
HBatteries compartment.
Main screen
Turn on/off the device
Press key to turn on/off the device.
When the module is off, backlighting intensity can be adjusted by means of +& keys.
It affects only to the backlighting when the module is off.
NOTE: In case of power failure, when the module is turned on again, RADIO mode will be selected.
Volume adjustment
When the module is on, volume level can be adjusted by means of +and keys.
A short press changes the volume step by step, whereas a long press changes it at an accelerated rate.
NOTE: This function is available when an audio source is activated and the remote control is at the idle screen.
FM List
Press FM key to see all tuned stations.
Use and keys to select a station and press OK to listen to it. Normally, station name is displayed. If the station does not send RDS
information, station frequency is displayed instead.
Press key to add stations to FAVOURITES list.
Press key again to remove a station from FAVOURITES list.
To remove a station from FM LIST, select it and press (REMOVE).
It will be erased permanently.
To recover an erased station, it must be tuned later by using MANUAL FM.
Press key (EXIT) to quit menu at any moment.
Favourites list
It can be selected up to 6 favourite stations.
Press at FM LIST to choose them. Selected station will be added to favourites list at the first free location.
A station can be added at FAVOURITES by using and keys to select a free location and then FM key. This way a list of available
stations will appear, from which the desired station can be added to FAVOURITES .
To remove a favourite station from the list, select it using and keys and press key (REMOVE).
FM LIST
RADIO 1
RADIO 2
RADIO 3
RADIO 4
RADIO 5
RADIO 6
FAVOURITES
NATIONAL RADIO
NEWS RADIO
TOP 40
EMPTY
EMPTY
EMPTY
RADIO 5
107,9 FM
EGI 0008
Pressing LINK key:
By using a small screwdriver or a clip, press shortly once on LINK internal key of the master module to be linked.
Press at the same time the two keys for 0.5 s on the remote control. You have a minute to do that. During the linking process, LINKING... will appear on the screen. When linked, it
will appear LINKED TO A NEW RECEIVER.
From that moment on, the remote control will be able to command the master module. The remote control can be linked to a maximum of four additional master modules by
entering LINKS menu.
In case of linking process fail, the remote control will show linking options again. Please check LINK key is pressed, and press again the two keys at the same time on the remote control.
NOTE: If a remote control is linked to a master module, further linking attempts will be unsuccessful. If necessary, a link can be deleted by entering LINKS menu and selecting REMOVE.
Access to LINK internal key on the back side of 41517.
PIN code
PRESS
Linking
Select preferred language for 41514 remote control. The screen will show options for
changing language and linking to a 41517 master module.
Linking process can be done in two ways: by entering master module PIN code or by
pressing LINK key on master module.
IDIOMA
ESPAÑOL
ENGLISH
DEUTSCH
FRANÇAIS
ITALIANO
PORTUGUES
PIN
0 0 0 0
LANGUAGE
LINK TO
NEW
RECEIVER
PIN
LINKING...
LINKED TO
A NEW
RECEIVER
LANGUAGE
LINK TO
NEW
RECEIVER
PIN
LINKING...
IDIOMA
ESPAÑOL
ENGLISH
DEUTSCH
FRANÇAIS
ITALIANO
PORTUGUES
LINKED TO
A NEW
RECEIVER
NAME
EGI 0008
LIVING ROOM
KITCHEN
BEDROOM
BATHROOM
Configuration
After linking, it will appear a list with suggested names that can be assigned to the master module.
The master module current name is at the top of the list.
Any name is editable by selecting it and pressing OK. A number can be added (i.e. BEDROOM2), or it
can be changed as desired.
The master module chosen name will become its Bluetooth®Friendly Name too.
SETTINGS
INPUT
EXT. ANTEN.
STEREO
PIN
NAME
YES
AUTOSCAN
NEW
FM LIST
Operation
First connection
Press ON key .
Autoscan
AUTOSCAN option will appear. This process searches and memorizes FM radio stations.
Press OK to do the process or key (EXIT) to continue without scanning.
Autoscan process performs an automatic search for the FM*stations with best reception and obtains RDS data
(this operation can take up to 2 minutes approximately).
(*) Up to 30 stations + 6 in manual mode.
Autoscan process can be done at any time by entering MENU and selecting AUTOSCAN.
NAME
EGI
0 0 0 8
After choosing the name, it will appear the SETTINGS menu. The first item asks if an audio source is connected to INPUT terminals, select
YES or NO accordingly.
The module takes the FM signal from the mains cable by default. In case of bad reception, enter EXT. ANTEN. choose YES and connect an external
antenna to the respective terminals.
Stereo or mono sound can be selected by STEREO setting.
Press key (EXIT) when all the settings are done.
AUTOSCAN
RNE 3
89.3
03/30
LINKS
LINKS menu allows 41514 remote control to be linked to other 41517 master modules.
Up to 5 master modules can be linked. A remote control can manage 5 rooms and even change its name.
However, a 41517 master module can be linked with up to 15 remote controls.
Concretely, this menu allows deleting or adding links to 41517 master modules.
To do that, follow these instructions.
To enter LINKS menu, highlight LINKS from main menu by using and keys and press OK.
To add a new master module press ADD option. It will appear a new screen with two methods of linking:
PIN entering or pressing LINK key on master module (see LINKING section).
To change master module name, go to main menu, select SETTINGS and then select NAME.
To remove a link to a master module, press REMOVE.
Then a list of linked modules will be displayed.
Select the module to be removed.
Press key (EXIT) to quit without removing any link.
HOW TO SELECT THE MASTER MODULE TO BE CONTROLLED:
If the remote control has been linked to more than one master module, it can be chosen which master module is commanded by the remote control.
See "How to change the master module to be controlled by 41514 remote control" below.
MENU
VERSION
LINKS
RESET
SETTINGS
EGI 0008
EGI 0030
LIVING ROOM
REMOVE
LINKS
REMOVE
ADD
EGI 0008

1
2
1
2
1
2
21
MASTER
1
2
1
2
1
2
NAME
EGI 0008
LIVING ROOM
KITCHEN
BEDROOM
BATHROOM
NAME
KITCHEN 1
Av. Almozara, 79 50003 ZARAGOZA - Spain T. +34 976 40 53 56 F. +34 976 40 53 54 e-mail: [email protected] www.egiaudio.com
MENU
RADIO
BLUETOOTH
INPUT
MASTER ON
TIME
ALARM
EGi guarantees its electronic and electroacoustic products against any manufacturing defect that affects its operation for 36 months from the production date (indicated in every manufacture), taking
the commitment of repairing or replacing the faulty modules which failure, always to the discretion of EGi, is caused by a manufacturing defect, without any charge for spare parts.
This guarantee does not include charges for the shipping and handling of the modules, nor the labour charges for the replacement in the installation of the aforementioned electronic and electroacoustic modules.
The guarantee will not cover in any case the damages or breakings of the trimming pieces (lattices, trims, masks, frames...).
This guarantee refers only to the concept of replacement in factory of the modules produced by EGi, excluding any other cover or responsibility on the rest of the materials or the whole of the installation
that is put at the user disposal, but that is not supplied nor executed by EGi.
Therefore this guarantee does not cover:
a. The fitting up and the interconnection between the modules.
b. The results from the abuse or misuse of the product, including but not limited to:
b.1. Not using the product for usual purposes, or not following the instructions from EGi for the correct use and maintenance of the product.
b.2. The installation or use of the products in a way that is not concordant with the technical or security rules now in force.
c. The malfunctions caused by the wrong installation of the modules, or by an installation with inappropiate cables.
d. The malfunctions caused by the intervention of a person non-authorised by EGi.
e. The consequences of mixing with equipment from other sources, and also adaptations, modifications, adjustments and/or adjustment attempts, irrespectively of those that have been performed
in a technically correct way, provided that there is not an express authorisation by EGi.
f. The consequences of accidents, natural catastrophes or any cause beyond EGi control, including but not limited to lightning, water and public disturbances.
In all these cases that are excluded from the guarantee, and every time that the modules are not considered as faulty by EGi, the sender should take responsibility of the full amount of the repair, and
in the event of a visit from our technicians, the requesting person will bear the expenses originated without a cause justified in the guarantee.
ATTENTION: If you notice any problem in your EGi installation, our Customer Support Service will attend you from 9h to 13h (Central European Time).
Guarantee
ABOUT THIS MANUAL
We have taken all efforts to make the contents of this manual reliable and updated. However, EGi does
not guarantee the accuracy of the contents which are subject to change without previous notice.
TECHNICAL SUPPORT
If, while using the system, you encounter a problem that cannot be solved by consulting the
manual, please contact the installer. You can also consult the website www.egiaudio.com to
find the latest information and other resources to solve your problem.
COPYRIGHT INFORMATION
This manual in whole or in part, and any product or software described herein, may not be
reproduced, transmitted, saved in data recovery systems, or translated into any language in any
form or by any means, except all documents saved by the user to make security copies; without
the previous written consent of the manufacturer.
All products or corporate names herein may (or not) be registered trademarks or copyright of their
respective companies and are used for identification or explanatory reasons only, and in interest
of the owner without the intention of infringing any regulation or rule.
Copyright © 2010. All rights reserved.
SAFETY INSTRUCTIONS
This system has been designed and manufactured in compliance with the latest safety standards
for household electronic equipment. However, to ensure safe use of this product, it is important
to follow the instructions given in this documentation.
No EGi product should be covered with anything that impedes ventilation.
Do not place any sources of naked flame such as lighted candles or similar elements on top
of the device.
Do not expose the device to poured, splashed or sprayed water.
Disconnect the Mains supply before carrying out any work on the installation.
Do not expose the equipment to direct sunlight.
Do not use excessive force when handling the controls.
The user should abstain from carrying out any alterations or repairs on the product,
reserving these actions for qualified personnel.
Only use accessories supplied by EGi.
EGi will not be held liable for any damage arising from misuse of the product or usage other
than what is was designed for (See Guarantee section).
An exclamation mark inside a triangle indicates important operation and
maintenance instructions and the existence of components that may affect
safety if replaced.
Class II device.
IMPORTANT
Please read these "Safety instructions" carefully before using any EGi product.
The lightening-shaped arrow warns of the presence of dangerous voltage. To minimise
the risk of electric shock, do not remove the cover.
The lightening signs near the amplifier output terminals warn of the danger of electric
shock in normal usage conditions (Terminals dangerous to touch). Do not touch
these terminals while the device is in operation.
This symbol indicates that the product must not be treated as normal domestic
waste, but must be handed over to the corresponding collection point for electrical
and electronic equipment.
The smark means European Conformity and is a European mark for certain
groups of services or industrial products.
The mark must be displayed by a product if it is within the scope of the
approximately 20 "New Approach" Directives and can be sold and put into service
legally within the countries of the EU. If the product complies with the provisions
of applicable European Directives and the is displayed on the product, member
states cannot prohibit, restrict or impede the placement of the product or service
on the market. Thus, the mark can be considered as a passport for commercialising
a product in EU countries.
LIABILITY
Due to the wide variety of services and devices the system interacts with, the manufacturer cannot
be held liable for failure or faulty operation of devices not manufactured by EGi and connected or
used by any module in the PLAY & SOUND series.
DECLARATION OF CONFORMITY
Electroacústica General Ibérica, S. A. with registered address in Avda. Almozara, 79 - 50003
Zaragoza (Spain), declares under its sole responsibility that the equipment described in this
manual incorporates the functions specifies in each case and complies with current regulations:
Directive 2004 / 108 EC, regarding electromagnetic compatibility and Low Voltage Directive
2006 / 95 / EC, regarding safety in low voltage receivers.
Due to a policy of continuous improvement, EGi reserve the right to modify their products
at any time. Although every effort is made to present up to date documentation, the documents
and illustrations provided may not coincide with the product purchased.
You can access the latest versions of documentation in: www.egiaudio.com
EGi will not be held liable for any possible errors in the text or references.
All brands mentioned herein are registered with their owners.
información
Information
IDIOMA
ESPAÑOL
ENGLISH
DEUTSCH
FRANÇAIS
ITALIANO
PORTUGUES
VERSION
SW:1.0 HW:1.0
RESET
EGI 0008
RESET
TO FACTORY
SETTINGS
SETTINGS
INPUT
EXT. ANTEN.
STEREO
PIN
NAME
YES
LANGUAGE
To select menu language, highlight LANGUAGE from main menu by using and keys and press OK.
Use and to select the desired language and press OK.
VERSION
To know device firmware version, highlight VERSION from main menu by using and keys and press OK.
It will appear: software version, serial number and other service information. (SW stands for software version and HW stands for hardware version).
RESET
To reset the master module configuration to factory settings, highlight RESET from main menu by using and keys and press OK. User will be prompted to confirm action
(press OK) or to quit without executing reset (press ).
IMPORTANT: Personal configurations, FM list and Favourites list will be erased by resetting.
SETTINGS
To change the settings, highlight SETTINGS from main menu by using and keys and press OK.
INPUT:
If an audio source is connected to INPUT terminals, select YES. Select NO otherwise (INPUT option will not appear in main menu in this case).
EXT. ANTENNA:
Press and keys on the right to select EXT. ANTEN.
Use and keys on the left to select external antenna (YES) or internal antenna (NO).
Internal antenna use (NO) is recommended.
In case of interferences from the mains (caused by other devices like electronic ballasts) or bad reception, use external antenna (YES).
STEREO:
Press and keys on the right to select STEREO.
Use and keys on the left to select stereo mode (YES) or mono mode (NO).
BT DEVICES
NOKIA
iPHONE
BT SEARCH
SEARCHING
BT SEARCH
NOKIA
iPHONE
PC
BLUETOOTH
NAME
KITCHEN 1
SETTINGS
INPUT
EXT. ANTEN.
STEREO
PIN
NAME
PIN
1003
PIN
1000
SETTINGS
INPUT
EXT. ANTEN.
STEREO
PIN
NAME
PIN
This option allows changing BLUETOOTH PIN. It is factory preset to the value printed on the labels, but it can be changed to any desired 4 digit code.
Highlight PIN from SETTINGS menu and press OK.
Use the 2 top keys on the left to select the digit.
Use the 2 top keys on the right to change the digit.
Press OK to validate the new PIN, or press to quit without modifying it.
PIN
0000
NAME
IMPORTANT: It is recommended to perform this operation prior to activate Bluetooth®.
This option allows changing BLUETOOTH Friendly Name. It is factory preset to "EGI 41517_ _ _ _" , but it can be changed to any desired 14 character name.
Highlight NAME from SETTINGS menu and press OK.
It will appear a list with suggested names that can be assigned to the master module. The master module current name is at the top of the list.
Any name is editable by selecting it and pressing OK.
Use the 2 top keys on the left to select the character.
Use the 2 top keys on the right to change the character.
Press OK to validate the new NAME, or press to quit without modifying it.
NOTE: It is recommended to change Friendly Names and PINs before pairing the module with any Bluetooth®device, so they are displayed correctly.
If module Friendly Name is not updated in a Bluetooth®device, please delete the module from the device Bluetooth list and re-pair it.
When BLUETOOTH option is highlighted and set by pressing OK, the module activates Bluetooth®
function and it becomes visible to other Bluetooth devices.
Device search can be done in two ways:
- From the device that is going to transmit audio (smartphone, laptop, tablet).
- From the 41517 module by entering Bluetooth®folder BT .
Press BT key to display paired devices list.
Bluetooth®
MENU
RADIO
BLUETOOTH
MASTER ON
TIME
ALARM
SLEEP
NOTE:
In case of power failure or if Bluetooth®mode is quit and re-entered quickly, it could take
14 seconds for the BLUETOOTH function to be available, In the meantime symbol will
be displayed.
Press to find new devices. They will be displayed after around one minute.
Select the device to be paired with, and press .
The paired device will ask for a PIN code. If it has not been changed, the value to be entered is printed on the module labels.
BLUETOOTH
RADIO 5
107,9 FM
MULTIROOM
RADIO 5
107,9 FM Select the module which will distribute the music to the others (and choose its desired audio
source).
Highlight MASTER ON from main menu by using and keys and press OK.
When a module is switched on, it automatically selects MULTIROOM audio source (i.e. the music from
MASTER module).
In case the module is turned on yet, go to main menu and select MULTIROOM source.
To exit MULTIROOM mode, choose another audio source form main menu or turn off the module.
To exit master mode, select MASTER OFF from main menu.
The module will no longer distribute music and all the modules in MULTIROOM mode in the installation
will turn off.
Multiroom
MENU
RADIO
BLUETOOTH
MASTER ON
TIME
ALARM
SLEEP
MENU
RADIO
BLUETOOTH
MULTIROOM
TIME
ALARM
SLEEP
MENU
RADIO
BLUETOOTH
MASTER OFF
TIME
ALARM
SLEEP
NOTE: It is necessary to wire multiroom BUS (connection blocks 4, 5 and 6) to all 41517 modules in the installation, in order to use MULTIROOM option.
This option allows the user to share the selected music on one module to the rest of the modules in the installation. To do that, follow the next steps:
Input
To select the audio INPUT source, select INPUT from main menu.
Once selected that source, its volume level can be controlled by +and keys.
Another audio source can be selected from main menu.
To turn off the module, press key.
Troubleshooting
Problem
Module doesn´t work. The screen is off.
The screen is on, but there is not any sound.
Bad FM reception.
(41517 master module uses mains cable as antenna. In case of interferences
or weak signal, please connect an external antenna and change antenna selection
in SETTINGS menu accordingly).
A bluetooth®device is not seen from the module.
Time is not recovered automatically after a power failure. It shows blinking
dashes instead of the time.
Time is not displayed on the screen.
41514 remote control losses communication with 41517 master module and
shows the following screen:
Possible solution
Press any key to get a response.
Check batteries status.
Check that a valid audio source is selected and it is playing some music.
Check volume level is not at minimum.
Check that the speakers are properly connected to the connection block.
Connect an external FM antenna by using coaxial cable or check that it is properly
connected.
Check antenna settings to see if antenna selection is correct.
Ensure that the module is not close to electronic ballasts or similar equipment
(fluorescent lamps).
Check that the device has bluetooth®function enabled and it is configured as visible
to other devices.
Check that time is configured to AUTO mode and a valid FM station is selected (it
must transmit time information by using RDS).
Configure time settings to AUTO mode, so it can recover time information automatically
after a power failure.
Check that TIME is not disabled.
Set the clock in manual or auto mode.
Verify that 41517 master module (placed on the ceiling) is properly powered
(115 V~ / 230 V~ ).
Press key (EXIT), so that the remote control can retry a communication.
Press REMOVE to delete previously linked master modules, or press ADD to memorize
a new master module.
Press key to show the name of the master modules the remote
control is linked to.
Press the key next to the name of the module to be controlled.
How to change the master module to be controlled by 41514 remote control
EGI 0008
LINKS
REMOVE
ADD
EGI 0008
EGI 0030
LIVING ROOM
REMOVE
From that moment on, the remote control will command the selected master module, and its main screen
will be shown.
If communication with the selected master module is not possible (either by loss of coverage or because
the module is busy or unpowered), the remote control will return to the list of linked modules.
If no communication is possible, the remote control will offer the possibility of removing or adding master
modules.
NOTE: See "LINKS" section for details.
MENU
RADIO
BLUETOOTH
INPUT
MASTER ON
TIME
ALARM
BLUETOOTH Once the Bluetooth device is connected, user will be able to listen to the
music, to change volume or to control music playing. It can be done either
form the device or from the remote control.
When key is pressed, module enters remote player mode.
Press to jump to the next song.
Press to jump to the previous song.
Press to play/pause the music.
iPHONE
Bluetooth®connected.
Bluetooth®NOT connected.
To unpair a device (i.e. delete it form paired devices list), enter BT (BT DEVICES), select the device to unpair with and press key. The pairing can be also deleted from the device
(smartphone, PC, tablet, laptop).
Enter SETTINGS menu to change PIN.
Module Friendly Name is factory preset to ("EGI 41517 _ _ _ _") stands for a four digit unique identifier.
These codes are printed on a label on the back of the module and on another loose label.
Enter SETTINGS menu to change NAME.
INPUT
EGI 0008
EGI 0030
LIVING ROOM
LINKS
REMOVE
ADD
41514 remote control can command several master modules. The master module to be controlled can be selected from both standby screen and main menu screen.
IMPORTANT: It is recommended changing module Friendly Name and PIN prior to use Bluetooth®, in order to differentiate it from other nearby devices. Select SETTINGS from
main menu to do it.
Table of contents
Languages:
Other EGi Remote Control manuals


