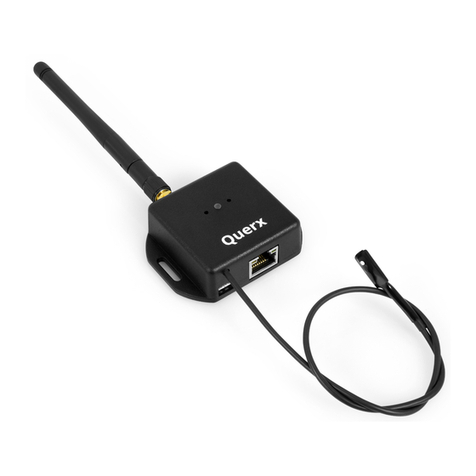
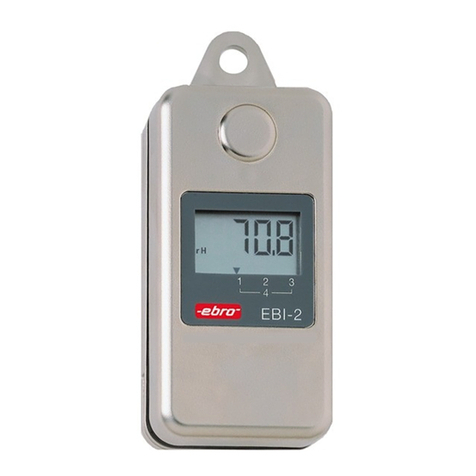
Egnite Querx TH User manual

Querx TH
Network thermometer and data logger
User Guide

Inhaltsverzeichnis
1 Introduction
1 1.1 Safety instructions
1. About Querx TH
3 Querx PT100 at a glance
3 Features
4 Possible fields of application
4 Included in delivery
Putting into operation
5 .1 Network connection
5 . Power supply
5 .3 Network configuration with DHCP
6 .4 Manual network configuration
6 Installation of Device Discoverer
6 ssign network configuration
6 .5 Basic configuration
3 Accessing the web interface
8 3.1 Host name
9 3. Homepage
9 3.3 Log in
9 3.4 Accessing the configuration interface
4 Configuration
10 4.1 Basic configuration
10 ssign system name
10 Configuration of the temperature unit
11 Configure a name server
11 Set date and time
12 Deactivating the discovery function
13 Reset internal memory
13 4. Network configuration
14 utomatic configuration over DHCP
14 Manual configuration
14 4.3 User Management
15 dd user
15 Edit user
16 Delete user
16 Deactivate anonymous access
17 utomatic log out
17 4.4 Configuration of alerts
17 Dead-band
18 Temperature alerts

19 Humidity alerts
20 Dew point alerts
5 Data access and configuration of interfaces
5.1 Web interface
22 Configuration of the web interface
22 Visualization of measured data
24 Export recorded data
24 Embed chart into other web sites
24 Last sensor events
5 5. E-Mail interface
25 Manage email accounts
26 Manage email recipients
27 Email templates
8 5.3 Cloud services
28 Data export to ThingSpeak
29 Data export to Xively
30 5.4 Modbus/TCP
30 ctivate Modbus/TCP
30 5.5 SNMP
31 General settings
31 ctivate SNMP gent
31 ctivate SNMP traps
32 Download MIB
3 5.6 Syslog
32 Configure syslog server
3 5.7 Android App Querx Discoverer
6 Maintenance, tips and troubleshooting
33 6.1 Restart Querx TH
33 Warm reboot
33 Cold reboot
33 6. Configuration backup and restore
34 Backup configuration
34 Restore configuration
34 6.3 Reset configuration
34 Configuration reset via web interface
35 Manual configuration reset
35 6.4 Firmware updates
36 Install firmware image
36 ctivate firmware image
37 ctivate alternative firmware image
37 6.5 Change the battery
40 6.6 Troubleshooting
41 6.7 Environment-friendly disposal

1 Introduction
Querx TH is a networking enabled measuring unit for
collecting temperature and humidity values.
This manual contains the basic information needed for
setting up, operating and maintaining Querx TH.
Up-to-date and in-depth information on Querx TH can be
found on the websites http://www.egnite.de and
http://sensors.egnite.de.
1.1 Safety instructions
Please read this manual carefully and obey the following
safety instructions to minimize risks of injury and damage.
Querx TH is used for stationary measurement and
processing of temperature and humidity data, as well as for
providing this data over several interfaces.
ll other use is regarded as not according to the intended
purpose. egnite can not be held responsible for
consequences from unintended use.
To avoid accidents caused by electrical current, please obey
the following instructions:
Only use device, cable and adapter in proper condition.
Disconnect power supply during maintenance.
Do not manipulate the device or its accessories.
Repairs are only to be done by trained staff.
Don't submerge the device in water or other liquids.
Introduction 1
Intended purpose
Querx TH online
Danger of death caused
by electrical shocks

In this manual the following symbols are used:
⚠Danger
Informs on possible danger for live and health.
⚠Attention
Informs on circumstances that can damage the device.
⚠Information
Emphasizes useful information and tips worth reading.
1. About Querx TH
Querx TH measures temperature, humidity and calculates
the dew point. The alert function sends out notifications over
email (TLS / StartTLS), SNMP trap and syslog, if critical
thresholds are exceeded.
The internal memory stores at least 51 days of data. n
interactive web interface provides a graphical representation
of the logged data and the possibility to export it in the CSV
and XML file formats.
Cloud interfaces connect Querx TH to the Internet of Things
and allow world wide data access via web and ndroid pp.
Through SNMP, you connect Querx TH to network
management systems, such as Nagios or Zabbix.
Modbus/TCP allows usage in industrial environments
(SC D ).
Introduction 2
Symbol explanation

1. .1 Querx PT100 at a glance
(1) Button for configuration reset
( ) Status LED
(3) Micro-USB jack for power supply
(4) Sensor cable with humidity and temperature sensors
(5) RJ-45 jack for Ethernet connection
(6) Link LED
1. . Features
Integrated high-quality sensors: oil-repellent, water- and
dust-proof
Measuring range temperature: -40°C – 85°C
Measuring range humidity: 0-95% rH
lerts via email, SNMP trap and syslog message
utomatic network configuration via DHCP, mDNS and
Bonjour
Ten alarm types:
Temperature too high / low
Temperature too low / low
Temperature rises /drops too fast
Humidity rises / drops too fast
Dew point too high / too low
Introduction 3

Secured email transmission with TLS / StartTLS
M2M-Communication: SNMP and Modbus/TCP
Cloud export: world wide data access and programming
interfaces
Interactive web interface with graphical depiction of
recorded data
ndroid pp available
Data logger with internal memory for at least 51 days
CSV and XML data export
1. .3 Possible fields of application
Server room monitoring
Estate monitoring
utomated climate profiling for buildings
Preventive conservation
Cause-determination for mold-remediation
1. .4 Included in delivery
Querx TH Set ( rticle EGN600114))
Querx TH with sensors for temperature and humidity
Ethernet cable
Micro-USB cable
USB wall plug adapter with clippings for UK, EU, US and
U
CD with software and documentation
Querx TH ( rticle EGN600214)
Querx TH without accessories
Introduction 4

Putting into operation
.1 Network connection
1. Connect Querx TH to your network, using the supplied
network cable. If no DHCP server is available in your
network, you can directly connect Querx TH to the
computer, which is used for configuration.
. Power supply
1. Prepare the wall plug adapter by gently pushing the
clipping for your country into the guide rails from above,
until it locks in place.
. Now connect the wall plug adapter to the device, using
the provided Micro-USB cable.
3. Put the adapter into the wall outlet. Querx TH's status LED
lights yellow.
⚠Danger
Never use the device with a broken adapter. There is a risk
for live caused by electrical current.
If you do not have a free wall outlet, you can directly connect
Querx TH to any free USB port at your computer.
.3 Network configuration with DHCP
Over DHCP, Querx TH can obtain an automatic network
configuration. If valid settings are received, the status LED
lights green.
Putting into operation 5

If a network error has occurred, Querx TH blinks yellow. In
this case, check whether the network cable is connected
properly. If the problems remain, ask your network
administrator for advice.
.4 Manual network configuration
If your network does not support DHCP and your computer
does not support mDNS, you have to manually carry out the
network configuration.
⚠Information
Most users won't need the following instructions. Please
continue with chapter 4, ' ccessing the web interface'.
.4.1 Installation of Device Discoverer
On the supplied CD-ROM you will find the application Device
Discoverer, which allows remote configuration of Querx TH.
1. Start the installation software for Device Discoverer.
. Follow the instructions within the installation wizard.
.4. Assign network configuration
1. Start the application Device Discoverer.
. Right-click on the device, which you want to configure and
choose Device configuration.
3. Enter an IP address and a network mask.
4. Click the OK button.
Querx TH will restart with the new configuration. The status
LED lights yellow. s soon as the device is available, the
status LED blinks green.
.5 Basic configuration
Now, Querx TH is configured for network access. Please
continue with chapter 3 ' ccessing the web interface' and
Putting into operation 6

afterward carry out the basic configuration as discussed in
chapter 4 'Configuration'.
Putting into operation 7

3 Accessing the web interface
3.1 Host name
With mDNS, you can directly access Querx TH over its
system name in the local network. This name can be
configured in the configuration interface.
1. Open a web browser and enter the following URL in the
address bar:
http://<systemname>.local/
Per default, this system name is querx00000, where you
have to replace the six 0s with the last six characters of
the device's M C address. This address can be found on
the sticker at the bottom side of the unit.
For the example image above, the address is:
http://querx .local/
From the Safari web browser, you can also access Querx TH
directly over the Bonjour menu.
⚠Information
If you cannot access the web interface, you need to
manually set a network configuration. How to do this is
discussed in chapter 2.5 'Manual network configuration'.
ccessing the web interface 8
Access via Bonjour
Access via host name

3. Homepage
On Querx TH's homepage you will find the recorded data
displayed in an interactive chart. In chapter 5 'Data access
and configuration of interfaces' you will learn how to use the
display and export functions.
In the upper part of the homepage, you find buttons to log
in at Querx TH and to open the configuration interface.
3.3 Log in
If you have configured users and assigned access rights to
them, you need to log in at Querx TH. Enter your user name
in the field User, your password in the field Password and
click Login afterward.
In Querx TH's default configuration, no users are configured.
You can learn more on user management in chapter 4.3
'User Management'.
3.4 Accessing the configuration interface
To access the configuration interface, click on the
Configuration button in the upper right corner of the
homepage.
ccessing the web interface 9

4 Configuration
4.1 Basic configuration
For proper operation, the following configuration steps need
to be carried out.
4.1.1 Assign system name
On the homepage of the configuration interface, which can
also be accessed via System / General, enter a system name
for the device. This name is used to identify the unit and for
addressing it in your network.
1. Enter the system name in System name.
. If you want to use SNMP, enter a responsible member of
staff in Contact person and the location of the device in
System location.
3. Click on Save to apply your changes.
4.1. Configuration of the temperature unit
1. In the configuration interface, click on Sensors /
Temperature.
. Choose the physical temperature unit for Querx TH to
work with from the field Unit.
3. Click on Save to apply your changes.
Configuration 10

4.1.3 Configure a name server
You need to provide a name server to enable services like
NTP, email and cloud connectivity.
1. In the configuration interface, click on System / Network.
a. If a name server is provided via DHCP, check Obtain
DNS server automatically.
b. To manually set a name server, select Set DNS server
manually and enter the IP address at Preferred DNS
server.
. Click on Save to apply your changes.
3. If you have changed DNS settings, restart the unit over
web interface, as discussed in chapter 6.1.
4.1.4 Set date and time
There are three ways to set date and time:
If there is an NTP server available in your local network or if
Querx TH has an internet connection, you should obtain
date and time automatically via SNTP.
Otherwise, you can synchronize the time with the computer
from which you are configuring Querx TH or set it manually.
1. Open the page System / Time in the configuration
interface.
. Select the appropriate time zone for your country from
Set time zone.
3. Set daylight saving time options:
a. If in your country daylight saving time is applied and
time changeover happens at the last Sundays in March
and October, check Auto DST.
b. If DST is applied in your country, but time changeover
does not happen at the last Sundays in March and
October, do not set Auto DST. Instead, set DST manually
when DST is in effect.
Configuration 11

4. Click on Save to apply your changes.
Querx TH can automatically obtain date and time over the
Net Time Protocol, if an NTP server is available.
1. Enter the IP address or the host name of an NTP server at
Set NTP, for example pool.ntp.org.
. Click Sync NTP to receive date and time over network.
⚠Information
s long as a valid NTP server is available, Querx TH will
automatically update date and time once an hour.
If you cannot receive date and time over network, you need
to manually provide these values.
1. In the section Set time enter the current date in the little
endian date format at the field Date. For the February 1st,
2014 this is 1. 2.2 14.
. Enter the current time in the field Time, with hours,
minutes and seconds separated by colons. For half past 1
pm, this is 13:3 : .
3. Click on Save to apply your changes.
You can also synchronize date and time with the computer
you use to configure Querx TH.
1. In the section Set time, click on Sync PC. The time and date
fields are updated.
. fter synchronization do not click on Save.
4.1.5 Deactivating the discovery function
To enable network configuration with Device Discoverer,
Querx TH has the discovery function enabled as default. To
increase security, it is recommended to deactivate this
function after your device is set up.
Configuration 12
Obtain date and time
over network
Set date and time
manually
Synchronize date and
time with your computer

1. In the configuration interface, open the page System /
Network.
. Next to Discovery, deactivate the check box Enable.
3. Click on Save to apply your changes.
4.1.6 Reset internal memory
Once Querx TH is powered up, the device starts recording
data. To restart the recording with the new settings, you
need to reset the internal memory.
1. In the configuration interface, open the page Maintenance
/ Reset.
. Click on the Delete sensor data button.
3. Confirm the reset by ticking the check box Are you sure.
4. Click on Yes.
This process can take several seconds. fterward Querx TH
restarts recording data with timestamps and temperature
units according to your configuration.
4. Network configuration
In most cases, Querx TH automatically gets a network
configuration over DHCP. It is nevertheless possible to
manually configure network settings.
⚠Information
Some changes to the network configuration require a
reboot of the system. See Section 6.1, 'Restart Querx TH'.
Configuration 13

4. .1 Automatic configuration over DHCP
1. In the configuration interface, open the page System /
Network.
. Choose Obtain IP address automatically.
a. If you want to obtain DNS settings automatically as
well, choose Obtain DNS server automatically.
b. If you want to configure your own DNS servers, choose
Set DNS Server manually and enter the IP addresses of
your first name server in Preferred DNS server and of
your second name server in Alternate DNS server.
3. Click on Save to apply your changes.
4. If you have changed your DNS setting, restart the device
as discussed in Chapter 6.1.
4. . Manual configuration
1. In the configuration interface, open the Page System /
Network.
. Click on Set IP address manually.
3. Enter the IP address for the device in the field Local IP
address.
4. Specify a Network mask.
5. Provide the IP address of the router, which connects
Querx TH to the Internet in Gateway IP address.
6. Provide a Preferred DNS server and an Alternate DNS server
for Internet name resolution in the appropriate fields.
7. Click on Save to apply your changes.
8. Restart the device as discussed in chapter 6.1.
4.3 User Management
You can configure up to three users with varying access
restrictions to the device. Per default, data access and
Configuration 14

configuration are allowed for any user from the local
network.
You can assign different right groups to system users:
Disabled: User has no access to the device.
Read data: User can read measured data.
Read data / read config: User can read measured data and
device configuration.
Read data / write config: User has unrestricted access to
measurement data and to the device configuration.
4.3.1 Add user
1. In the configuration interface, open the Page System /
User.
. In the section Users, click on the action Add next to a free
slot.
3. On the next page, provide a User name and a Password in
the according fields.
4. Choose the access rights that you want to assign to the
user from Group.
5. Click on Save to apply your changes.
4.3. Edit user
1. In the configuration interface, open the page System /
User.
. In the section Users click on Edit next to the user you want
to change.
3. On the following page, carry out your changes.
4. Click on Save to apply your changes.
Configuration 15

⚠Information
You can only withdraw configuration write access from a
user, as long as at least one other user with write access
exists.
4.3.3 Delete user
1. In the configuration interface, open the page System /
User.
. In the section Users, click on the action Del next to the
user that you want to remove.
3. On the following page, confirm the removal by clicking on
Yes.
⚠Information
user with write access on the configuration can only be
deleted, as long, as at least one other user with write
access exists.
4.3.4 Deactivate anonymous access
s soon as you have added users with write access on the
configuration, you can restrict the anonymous access.
1. In the configuration interface, open the page System /
User.
. In the section Users click on Edit next to the user
Anonymous.
3. To completely deactivate anonymous access, choose
Disabled from Group. To only restrict the access, choose
the appropriate Group.
4. Click on Save to apply your changes.
Configuration 16
Other manuals for Querx TH
1
Table of contents
Other Egnite Data Logger manuals

