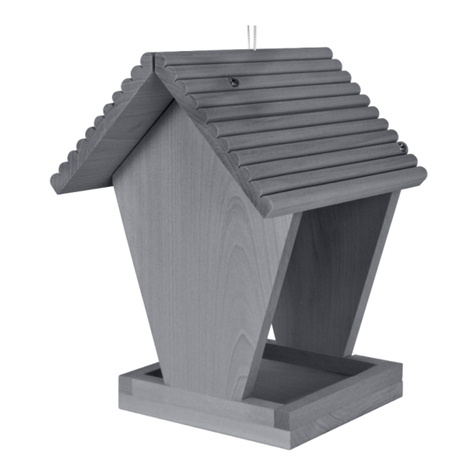
Eichhorn 100004581 Assembly instructions

D: Aufbauanleitung
GB: Instructions for assembly
F: Instructions de montage
I: Instruzioni di montaggio
NL: Montagehandleiding
D: ACHTUNG! Benutzung unter unmittelbarer Auf-
sicht von Erwachsenen. GB: WARNING!To be used
under the direct supervision of an adult.
F: ATTENTION! À utiliser sous la surveillance d’un
adulte. I: AVVERTENZA! Da usare sotto la diretta
sorveglianza di un adulto. NL: WAARSCHUWING!
Gebruiken onder direct toezicht van een volwassene.
100004581
Simba Toys GmbH & Co. KG · Werkstr. 1 · 90765 Fürth · Germany · www.simbatoys.de · Simba Toys España S.L., Edicio América II, C/ Proción, 7, Portal 2, Planta 2ª, Ocina E, 28023 Madrid • Simba Toys Italia S.p.A – Strada Statale 32
n. 9 – 28050 Pombia (NO) Italy • Simba Toys Polska Sp. z o.o., ul. Flisa 2, 02-247 Warszawa • Simba Toys Hungária Kft., Biatorbágy • Smoby Toys SAS., Le Bourg Dessus, 39170 Lavans-lès-Saint-Claude, France • Simba Toys CZ, spol. s r.o., Lidická
481, 273 51 Unhošť • Simba Toys Bulgaria , Симба Тойс България ЕООД , с. Кривина 1588 , общ. София, ул. Розова Градина 17, тел-+359 2 9625859 • Simba Toys Austria, Wien • Simba Oyuncak Paz.Ltd. Şti., İçerenköy Mahallesi, Huzur Hoca
Caddesi, Piramit Grup İş Merk. No.57 Kat 2, 34752 Ataşehir / İstanbul, TÜRKİYE • S.C. Simba Toys Romania SRL, Baneasa Business Center, Sos. Bucuresti-Ploiesti 19-21, Sector 1, 013694 - Bucuresti, Romania • Simba/Dickie (Switzerland) AG,
Überlandstrasse 18, 8953 Dietikon • Simba Toys Nordic As, Pindsleveien 1 C, 3221 Sandeord, Norway • N.V. Simba Toys Benelux S.A., Moeskroensesteenweg 383C, 8511 Aalbeke, Belgium • Simba Toys Middle East, Dubai, U.A.E. • Simba Toys
Rus,142072, Московская область, Домодедовский район, г. Домодедово, мкр. Востряково, владение „Триколор“, строение 7 • Simba Smoby Toys UK Ltd.,
Broomeld House, Bolling Road, Bradford BD4 7BG • Simba Dickie Finland Oy, Sinikalliontie 3 B, 02630 Espoo, Finland • Simba Toys Ukraine Ltd., Сімба Тойз Україна,
вул. Червоноткацька 42, м. Київ 02660 • Simba Toys Kazakhstan 050000, Republic of Kazakhstan, Almaty, Microdistrict of Almerek,1 • Simba Thailand 172 Moo 4, Soi
Wat Praifah Bangkok-Patumthani Rd. Bangdua, Muang, Pathumthani 12000 Thailand • Simba Smoby Toys Chile, Avendia Providencia 1760, Ocina 17 01, Santiago de
Chile, Chile • SISO TOYS SOUTH AFRICA (PTY) Ltd 264 Aberdare Drive, Phoenix Industrial Park Phoenix, Durban 4068, Kwa Zulu Natal South Africa • Simba India, flEck
VkWbZt~ bafM;k izk- fy- 808] Æao³Q®y] lgkj Iyk>k dkWEIysDl] ts- ch- uxj] va/ksjh ¼iw½] eqcabZ & 400 059] Hkkjr• Fabriqué en Chine / Hergestellt in China / Made in
China / Fabricado en China / Fabricado na China / Fabbricato in Cina 44440918

8x
1x
D: 2 Seitenteile ①②, 1 Vorderteil ③, 1 Rückteil ④, 2 Dachteile ⑤⑥, 1 Boden ⑦, 9 Schrauben ⑩, 1 Sitzstange ⑧, 1 Schnurstopper ⑨ , 1 Schnur
⑪, Farbtöpfe ⑫, 1 Pinsel ⑬
GB: 2 side sections ①②, 1 front section ③, 1 rear section ④, 2 roof sections ⑤⑥, 1 base ⑦, 9 screws ⑩, 1 perch ⑧, 1 cord stopper ⑨ , 1 cord ⑪,
paint pots ⑫, 1 brush ⑬
F: 2 parois latérales ①②, 1 paroi avant ③, 1 paroi arrière ④, 2 parties de toit ⑤⑥, 1 plancher ⑦, 9 vis ⑩, 1 perchoir ⑧, 1 arrêt de cordon ⑨,
1 cordon ⑪, des pots de peinture ⑫, 1 pinceau ⑬
I: 2 pannelli laterali ①②, 1 pannello frontale ③, 1 pannello posteriore ④, 2 spioventi del tetto ⑤⑥, 1 pavimento ⑦, 9 viti ⑩, 1 asticella ⑧,
1 stopper cordino ⑨ , 1 cordino ⑪, colori ⑫, 1 pennello ⑬
NL: 2 zijdelen ①②, 1 voorzijde ③, 1 achterzijde ④, 2 dakdelen ⑤⑥, 1 bodem ⑦, 9 schroeven ⑩, 1 zitstokje ⑧, 1 koordstopper ⑨ , 1 koord ⑪,
verfpotten ⑫, 1 kwast ⑬
D: Du brauchst zusätzlich 1 Schraubenzieher •GB: You also need 1 screwdriver •F: Tu as besoin
enplusd’un tournevis •I: Ti occorre inoltre 1 cacciavite •NL: Je hebt ook 1 schroevendraaier nodig
D: Inhalt • GB: Contents • F: Contenu • I: Contenuto • NL: Inhoud
D: Wichtiger Hinweis: Nach erstmaligem Önen der Töpfchen sind die Farben nur noch
begrenzt haltbar!
GB: Important note: Once the containers have been opened, the paint will only last for a
limited time!
F: Note importante: Une fois que les godets auront été ouverts, les peintures ne dureront
qu‘un temps limité!
I: Avvertenze: Dopo aver aperto i vasetti la prima volta i colori si conservano inalterati
soltanto per un periodo limitato!
NL: Belangrijke aanwijzing: Nadat de potjes de eerste keer werden geopend, is de verf
alleen nog beperkt houdbaar!
D: Eingedickte Farbe kann mit ein paar Tropfen Wasser wieder vermalbar gemacht
werden. Bei Malpausen die Töpfchen fest verschließen.
GB: Thickened paint can be made usable again by means of a few drops of water. When
taking a break, rmly close the.
F: La peinture épaissie redeviendra utilisable avec`quelques gouttes d‘eau. Pendant les
pauses de travail, fermer bien les godets.
I: Diluire i colori troppo densi con qualche goccia d’acqua. Chiudere bene i vasetti nelle
pause di lavoro.
NL: Ingedikte verf kan met een paar druppeltjes water weer schilderbaar worden
gemaakt. Sluit de potjes goed tijdens een schilderpauze.
4
3
2 6
7
512
11
10
14
13
8
9
1

10
D: Schraube das Seitenteil ① an dem Vorder- und Rückteil fest. Schiebe den Boden ⑦ mit der
Leiste nach unten in die Kerben.
GB: Screw the side section ① to the front and rear sections. Slide the base ⑦ into the notches
with the batten facing downwards.
F: Visse la paroi latérale ① aux parois avant et arrière. Insère dans les encoches le plancher ⑦
avec la barre vers le bas.
I: Avvita il pannello laterale ① al pannello frontale e a quello posteriore. Inla il pavimento
⑦ nelle scanalature con il listello rivolto verso il basso.
NL: Schroefhet zijdeel ① aan de voor- en achterzijde vast. Schuif de bodem ⑦met de rand
naar beneden in de inkepingen.
D: Montage • GB: Assembly • F: Montage • I: Montaggio • NL: Montage
3
10
10
D: Verbinde das Vorderteil ③, dasSeitenteil ② und das Rückteil ④ mit den Schrauben so, dass
die Kerben nach innen unten ausgerichtet sind.
GB: Connect the front section ③, the side section ② and the rear section ④with the screws
so that the notches are on the inside at the bottom.
F: Assemble la paroi avant ③, la paroi latérale ② et la paroi arrière ④ avec les vis de façon à
ce que les encoches soient situées en bas et vers l’intérieur.
I: Unisci il pannello frontale ③, il pannello laterale ②e il pannello posteriore ④con le viti in
modo che le scanalature si trovino all’interno e in basso.
NL: Verbind de voorzijde ③, het zijdeel ②en de achterzijde ④zodanig met de schroeven, dat
de inkepingen naar binnen onder zijn uitgelijnd.
2
24
3
7
4
D: Befestige die Sitzstange ⑧ mit der Schraube ⑩ am Vorderteil ③.
GB: Attach the perch ⑧ to the front section ③using the screw ⑩.
F: Fixe le perchoir ⑧ avec la vis ⑩sur la paroi avant ③.
I: Fissa l‘asticella ⑧ con la vite ⑩al pannello frontale ③.
NL: Bevestig het zitstokje ⑧ met de schroef⑩op de voorzijde ③.
1
8
3
1
10
10
6
14
3
10

59
11 6
D: Lege das Seil so in die Kerbe des Dachteils, dass der Schnurstopper im Inneren des Hauses
ist. Befestige das zweite Dachteil ⑤mit den beiden Schrauben ⑩ wie abgebildet.
GB: Place the cord in the notch of the roof section in such a way that the cord stopper is inside
the bird house. Attach the second roof section ⑤ with the two screws ⑩ as shown.
F: Place le cordon dans l’encoche de la partie de toit de façon à ce que l’arrêt de cordon soit
à l’intérieur du nichoir. Fixe la deuxième partie de toit ⑤ à l’aide des deux vis ⑩ comme
indiqué sur la gure.
I: Posiziona il cordino nell‘intaglio dello spiovente del tetto in modo che lo stopper si trovi
all‘interno della casetta. Fissa il secondo spiovente ⑤con le due viti ⑩ come indicato.
NL: Plaats het koord zodanig in de inkeping van het dak, dat de koordstopper zich in het huisje
bevindt. Bevestig het tweede dakdeel⑤met de twee schroeven ⑩ zoals afgebeeld.
5
10
10
7
D: Bemale das Vogelhaus. Versiegele es eventuell noch mit einem wasserfesten Lack (nicht
enthalten), bevor du es draußen aufhängst.
GB: Paint the bird house. If necessary, seal it with a waterproof varnish (not included) before
hanging it outside.
F: Peins le nichoir. Tu peux aussi sceller la couleur avec une peinture résistante à l’eau (non
incluse) avant de suspendre le nichoir à l‘extérieur.
I: Dipingi la casetta per gli uccelli. Se necessario, sigillala con una vernice impermeabile (non
in dotazione) prima di appenderla all‘esterno.
NL: Schilder het vogelhuisje. Verzegel het met een waterbestendige lak (niet meegeleverd)
voordat u het buiten ophangt.
12
13
Other Eichhorn Toy manuals
