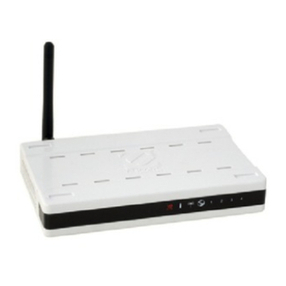
Eicon Networks Diva 2480 User manual

www.eicon.com
Your package should include the following:
Notes:
• Your package contains two Eicon Wireless PC Cards. One card
is used in the Diva 2480; the other is for your computer. The two
cards are identical.
• The Eicon Wireless PC Cards included in this package can be
used with computers equipped with a compatible PC Card slot,
running Windows 98, Windows Millenium Edition, Windows
2000, or Windows NT.
• The yellow Ethernet cable is a crossover cable and is used to
connect the Diva 2480 directly to a single computer via an Ether-
net port. To connect the Diva 2480 to a network hub, you must
use a straight-through Ethernet cable (sold separately). See
‘LAN Setup’ in the User’s Guide for more information.
This following steps summarize what is required to set up the
Diva 2480, depending on the scenario.
To use the Diva 2480 as a wireless access point
• Set up the Diva 2480 with the Eicon Wireless PC Card..............2
• Install an Eicon Wireless PC Card into your computer............3,4
• Configure Diva 2480 Internet account settings..........................6
• Configure Diva 2480 wireless encryption settings.....................7
To use the Diva 2480 with the USB cable
• Install the USB Cable ...............................................................10
• Configure your Internet account settings (if required)...............6
To use the Diva 2480 with the Ethernet cable
• Install the Ethernet Cable .........................................................10
• Configure your Internet account settings (if required)...............6
Optional Installation Procedures
• Install the Client Manager (for use with the wireless PC Card) ..8
• Install the Diva Assistant (for use with the Diva 2480) ..............9
If you are using Windows 2000, you should run the Windows 2000
driver update software before inserting the PC Card into your com-
puter. If you do not run the update, Windows 2000 will use its ex-
isting drivers automatically.
For more detailed information, see ‘Windows 2000 / Eicon Wireless
PC Card Installation’ on page 3.
1
11
1Package contents
Diva 2480 ADSL Wireless Router Eicon Wireless
PC Cards (2)
Ethernet Cable (Yellow) USB Cable ADSL Cable
Quickstart Power Adapter Diva CD-ROM
2
22
2Installation overview
Windows 2000 users please note
Diva 2480 ADSL
Wireless Router
Quickstart Guide

2
This section describes how to perform the initial setup of the Diva 2480 using the supplied Eicon Wireless PC Card. If you wish to use the
Ethernet or USB cables instead, see ‘Installing the Ethernet cable’or ‘Installing the USB cable’on page 10.
1. Connect the small round end of the power adapter to the power
connector (labelled ) on the back of the Diva 2480.
Connect the other end to a power outlet.
2. Connect the included ADSL phone cable to the ADSL port ( )
on the back of the Diva 2480.
Connect the other end of the cable to a telephone outlet.
1. Remove the Eicon Wireless PC Card from its protective case.
2. Gently slide the Eicon Wireless PC Card (label face up) into the
PC Card slot on the back of the Diva 2480.
When the card is inserted properly, the left indicator light on the
card will flash, and the right indicator light will stay solid.
Initial setup of the Diva 2480 is complete.
Note, however, that Internet access is not available until you con-
figure your Internet settings on the Diva 2480 via its web interface.
This web interface is accessed via a web browser.
For more information, see ‘What’s Next?’at the top right of this
page.
In order to access the Diva 2480’s web interface wirelessly, you
must first install the Eicon Wireless PC Card onto your computer, if
you do not already have a wireless adapter.
Depending on your operating system, see:
•Windows 2000 / Eicon Wireless PC Card Installation ................3
•Windows Me / Eicon Wireless PC Card Installation ...................4
•Windows 98 / Eicon Wireless PC Card Installation ....................4
Once installed, you can access the web interface and configure
your account settings via the web interface. See ‘Configuring
Diva 2480 Internet account settings’on page 6.
If you have a computer with a wireless LAN adapter
If you already have a computer equipped with a compatible wire-
less LAN adapter, you must configure the adapter to the default
settings of the Diva 2480. This is described below:
1. Configure your wireless LAN adapter to use the network name
eicon (all lowercase letters). This name is assigned to the
Diva 2480 by default.
Note: Network names are case-sensitive. You must use all lower case
letters when entering the name ‘eicon’.
Normally, a user can specify ‘ANY’as the network name in order
to access a wireless LAN within range, and the Diva 2480 sup-
ports this feature. However, by default , the Diva 2480 is config-
ured to ignore requests with ‘ANY’as the network name.
2. Disable encryption on your wireless LAN adapter. By default the
Diva 2480 does not use encryption.
3. Using your wireless LAN software, verify that the Diva 2480 is
responding. Your wireless LAN adapter should be assigned an
IP address of 192.168.1.x automatically.
Note: Your wireless LAN adapter must be set to acquire its IP address
dynamically, i.e., it must be set to act as a DHCP client. Most adapters
are configured this way by default.
4. Configure your account settings via the web interface.
See ‘Configuring Diva 2480 Internet account settings’
on page 6.
3
33
3Diva 2480 Setup
Step 1: Connect the Power and ADSL Cables
Step 2: Insert the Eicon Wireless PC Card
into the Diva 2480
Finished!
ADSL
cable
Power
adapter
PC Card
What’s Next?

3
This section describes how to install the Eicon Wireless PC Card onto your computer.
Instructions for Windows 2000 are shown below;for Windows Millennium Edition or Windows 98, see page 4.
Step 1: Update Windows 2000 PC Card Drivers
If you are using Windows 2000, it is strongly recommended that
you run the Windows 2000 PC Card Driver update before you in-
sert the Eicon Wireless PC Card into your computer.
Windows 2000 includes drivers for the Eicon Wireless PC Card.
When you insert the PC Card, Windows will install the drivers auto-
matically. However, these drivers may not be the latest versions.
Note: If you inserted the PC Card before updating the Windows 2000 driv-
ers, see ‘Uninstalling the Windows 2000 Drivers’on page 11.
1. If your computer is off, turn it on, enter your username and
password if prompted to do so, then wait until the Windows
desktop is visible.
2. Insert the Diva CD-ROM into your CD-ROM drive.
Note: The Diva CD-ROM is set to autoplay. If the setup program ap-
pears automatically, click ‘Exit’(lower left of the window).
3. Double-click ‘My Computer’.
4. Right-click on your CD-ROM drive and select ‘Open’.
Note: Do not double-click the CD-ROM drive. Doing so will re-launch
the autoplay program.
5. Browse to the folder wireless\drivers\win_2000.
7. Follow the on-screen instructions.
Note: It is recommended that you accept all default values presented by
the installer program. The installer will copy the new Windows 2000
driver files to the folder ‘c:\program files\orinoco\driver’.
Step 2: Insert the PC Card
4
44
4Installing the Eicon Wireless PC Card onto your computer
Windows 2000 / Eicon Wireless PC Card Installation
6. Double-click on the
file ‘Setup’. The install
program will start.
1. Remove the Eicon Wireless PC Card from its protective case.
2. With your computer on, gently insert the Eicon Wireless
PC Card (label face up) into the PC Card slot of your computer.
3. After a few moments, Win-
dows will display the ‘Found
New Hardware’window.
4. The ‘Found New Hardware
Wizard’will then appear.
Click ‘Next’.
5. Select ‘Search for a suitable
driver’, then click ‘Next’.
6. When asked for the location
of the driver files, select
‘Specify a location’, clear
all other options, then
click ‘Next’.
A new window opens
requesting that you
locate the files.
7. In the ‘Copy manufacturer’s
files from’field, enter:
C:\Program Files\
Orinoco\Driver
The Windows 2000 driver
updater installed the new
driver files to this location
by default.
Click ‘OK’when ready.
Note: You can also click ‘Browse’
to locate the driver folder.
8. Once Windows has found
the driver and is ready to
proceed, click ‘Next’.
9. During the install process,
you will be prompted to
configure your wireless
LAN settings.
To continue, see ‘Configur-
ing Wireless LAN Settings
(Windows 98/Me/2000)’
on page 5.

4
1. Leave your computer on during installation.
If your computer is off, turn it on, enter your username and
password if prompted to do so, then wait until the Windows
desktop is visible.
2. Remove the Eicon Wireless PC Card from its protective case.
Gently insert the Eicon Wireless PC Card (label face up) into the
PC Card slot of your computer.
Windows Me / Eicon Wireless PC Card Installation
3. After a few moments, Win-
dows will display the ‘New
Hardware Found’window.
The ‘Add New Hardware
Wizard’window will then
appear.
4. Insert the Diva CD-ROM into your CD-ROM drive.
Wait a moment for the CD-ROM to spin up.
5. From the ‘Hardware Wizard’window, select ‘Automatic search
for a better driver’, then click ‘Next’.
Windows automatically searches the CD-ROM for a compati-
ble driver. When found, the driver is installed automatically.
6. During the install process,
you will be prompted to con-
figure your wireless LAN set-
tings.
To continue, see ‘Configur-
ing Wireless LAN Settings
(Windows 98/Me/2000)’
on page 5.
Windows 98 / Eicon Wireless PC Card Installation
3. After a few moments, Win-
dows will display the ‘New
Hardware Found’window.
The hardware wizard will
then appear.
4. Insert the Diva CD-ROM into your CD-ROM drive.
5. From the ‘Hardware Wizard’window, click ‘Next’.
6. Select the option ‘Search for
the best driver’, then click
‘Next’.
7. When asked for the location
of the driver files, select
‘Specify a location’and clear
other options.
8. In the ‘Location’field, enter: E:\wireless\drivers\win_98
Replace ‘E’with the letter of your CD-ROM drive.
Note: You can also click ‘Browse’to locate this folder.
Click ‘Next’to continue.
9. Once Windows has found
the driver and is ready to
proceed, click ‘Next’.
Note: You may be asked to in-
sert your Windows install CD-
ROM during this process.
10.During the install process, you will be prompted to
configure your wireless LAN settings.
To continue, see ‘Configuring Wireless LAN Settings (Win-
dows 98/Me/2000)’on page 5.
4
44
4Installing the Eicon Wireless PC Card onto your computer (continued)

5
During installation of the PC Card drivers, the ‘Add/Edit Configura-
tion Profile’window will appear.
This window allows you to edit your wireless configuration.
Note: You can change these settings later on through the ‘Wireless Net-
work’control panel.
1. With the ‘Default’profile selected, click ‘Edit Profile’.
The ‘Edit Configuration’window is displayed. The ‘Network
Name’field should be blank.
2. Enter eicon as the network name. This is the default setting
for the Diva 2480.
Note: Network names are case-sensitive. You must use all lower case
letters when entering the name ‘eicon’.
3. From the ‘Edit Configuration’window, click ‘OK’, then click ‘OK’
again in the ‘Add/Edit Configuration Profile’window.
Note: Do not define any encryption settings for the moment. By default,
the Diva 2480 does not have encryption enabled. For more information,
see ‘Configuring Diva 2480 wireless encryption settings’on page 7.
4. You will then see a message stating that the Client Manager has
not yet been installed. Click ‘OK’.
Note: If you are using Windows 98, you may be asked to insert your
Windows install CD-ROM at this point.
5. The Hardware Wizard will confirm that the software has been
successfully installed. Click ‘Finish’.
6. If asked to restart your computer, do so.
Note: If you are using Windows 2000, you do not need to restart
your computer.
To continue, see ‘Configuring Diva 2480 Internet account
settings’on page 6.
Changing wireless LAN settings at a later time
After driver installation, the ‘Wireless Network’control panel allows
you to change your wireless LAN settings, if required. To access
this control panel:
1. Click ‘Start’, ‘Settings’, ‘Control Panel’.
2. Double-click ‘Wireless Network’.
Configuring Wireless LAN Settings (Windows 98/Me/2000)
‘Edit
Profile’
button
Network
name
Network
name
4
44
4Installing the Eicon Wireless PC Card onto your computer (continued)

6
To access the Internet through the ADSL network, you will need to
enter configuration information on the Diva 2480, such as user-
name and password. This information is supplied by your ADSL or
Internet provider.
The procedure for changing settings is the same for all access
methods (wireless, Ethernet, USB).
Note: Changes are performed using a web browser (Internet Explorer 4.0
or later, or Netscape Navigator 3.0 or later). An installer for Internet Ex-
plorer for Windows is in the ‘bonus’folder on the Diva CD-ROM.
1. Make sure you have restarted your computer.
2. Launch your web browser.
3. Click ‘File’, ‘Open’, enter 192.168.1.1 then click ‘OK’.
The Diva 2480 main configuration page should appear.
Note: If you do not see the ‘Configuration’page, see ‘Troubleshooting’
on page 11.
4. From the main menu, click ‘Internet Wizard’.
5. This first page of the Internet Wizard displays the detected
VPI/VCI settings for your ADSL connection.
If the settings match those supplied by your provider, click the
‘Next’button.
If the settings are incorrect, click the ‘Internet Wizard - Step 1
(Advanced)’link to edit the settings.
6. Next you are presented with encapsulation and connection type
settings. Normally, these settings are detected automatically,
and you should only have one option for each.
Verify that the settings match those supplied by your provider. If
not, select the proper settings.
Click ‘Next’to continue.
7. The third step in the wizard will differ depending on the connec-
tion type specified in Step 2.
•If you are using a connection-oriented type (‘PPP over Ether-
net’or ‘PPP over ATM’), you will be asked to enter your user-
name and password.
•If you are using an always-on connection type (‘IP over ATM’
or ‘Ethernet over ATM’), you will be asked for your IP and
DNS addresses.
These settings should have been supplied to you by your ADSL
provider.
8. Click the ‘Finish’button to complete the setup wizard.
To verify that the ADSL settings you entered were correct, check
the ‘status’field on the main page. If this field states ‘Ready’,
then you are now connected to the Internet!
You should now be able to access the Internet. Try visiting an ex-
ternal web site, such as www.eicon.com.
Wireless LAN Security Settings
To prevent unwanted usage of your wireless Internet access, see
‘Configuring Diva 2480 wireless encryption settings’on page 7.
5
55
5Configuring Diva 2480 Internet account settings
Configuring Account Settings
Internet
Wizard
Finished!

7
The Diva 2480 is assigned the network name ‘eicon’by default.
When you installed the drivers for your Eicon Wireless PC Card,
you set the network name to ‘eicon’to match this setting.
This enabled your computer to join the Diva 2480’s wireless net-
work. You then gained access to the web interface, changed your
account settings, and finally, you were able to access the Internet.
However, anyone with a computer and a compatible wireless LAN
adapter, who guesses that your network name is ‘eicon’, can ac-
cess the Internet connection you have set up.
To protect your Internet access against unauthorized use, you can
enable encryption settings on the Diva 2480. This feature is dis-
abled by default.
Note: Defining wireless security measures also prevents anyone from ac-
cessing the web interface wirelessly. However, this is not the same thing
as defining a log in password for the web interface.
1. Launch your web browser.
2. Click ‘File’, ‘Open’, enter 192.168.1.1 then click ‘OK’. The
Diva 2480 main configuration page should appear.
3. From the main menu, click ‘Advanced Configuration’, then click
‘Wireless LAN Settings’.
Note: Online help is available by clicking on the setting names.
4. In the ‘Network Name’field, enter a new name, if desired, for the
wireless LAN.
5. If you wish to encrypt your wireless transmissions, select the
‘Enable data encryption’checkbox.
6. Enter encryption key values in one or more of the four encryp-
tion key fields. Encryption keys must be either 5 or 13 charac-
ters in length. For more information on encryption keys,
consult the online help or see ‘About Encryption Keys’at right.
Note: It is strongly recommended that you write down the encryption
keys before typing them in. Key characters display as **** as they are
entered.
7. Next, select one of the keys using the drop-down menu.
The key you select will be used to encrypt outgoing data only.
Incoming data will be accepted and decrypted if it uses any of
the four keys in the key list.
Note: The 'Encrypt Data Transmission Using' setting on the Diva 2480
does not have to be the same as that on wireless stations. However, key
lists on your wireless access point and all wireless stations must be
identical in order for the wireless LAN to function properly.
8. Click ‘Save’.
If you changed the network name or the encryption settings, and
you are accessing the device via a wireless LAN card, you
should lose access to the Diva 2480. This is normal, as the set-
tings for your wireless LAN adapter no longer match those on
the Diva 2480.
To regain access, you must configure your wireless LAN adapter
so that its settings match those of the Diva 2480. This is demon-
strated in ‘Modifying WLAN settings on your computer’at right.
The wireless settings for each computer that is to have access to
your wireless LAN must match the Diva 2480’s wireless settings.
Specifically:
•The network name set for your wireless LAN adapter should
match that of the Diva 2480.
•All encryption keys defined on the Diva 2480 must also be de-
fined for your wireless LAN adapter.
The following procedure demonstrates how to do this with the
Eicon Wireless PC Card included with your Diva 2480 package.
1. Click ‘Start’, ‘Settings’, ‘Control Panel’.
2. Double-click ‘Wireless Network’.
3. Select the default profile and click ‘Edit’.
4. In the ‘Basic’tab, change the ‘Network Name’setting to match
the new network name you gave the Diva 2480.
5. If you enabled encryption on the Diva 2480, click the ‘Encryp-
tion’tab, then select ‘Enable Security’.
Enter all the encryption keys exactly as they were entered in the
for the Diva 2480 ‘s wireless LAN web page.
6. Select the key you wish to use for encrypting outgoing data from
the ‘Encrypt data transmission using’drop-down menu.
Note: This affects outgoing data only. The choice of key does not have
to match that of the Diva 2480.
7. Click ‘OK’then ‘OK’again.
The settings take effect immediately. Using your web browser, try
accessing the Internet (www.eicon.com for example) or the
Diva 2480’s web interface (192.168.1.1).
•Encryption keys must be either 5 or 13 characters in length.
Configure a 5-character key if the client wireless stations use the
standard WEP encryption (64-bit RC4). Configure a 13-charac-
ter key if the client wireless stations use the enhanced 128-bit
RC4 encryption.
Note: The Eicon Wireless PC Card uses 128-bit RC4 encryption.
•The Diva 2480 can currently only use ASCII characters (and not
hexadecimal) in its encryption keys. Some wireless PC Cards al-
low you to specify encryption keys in hexadecimal.
•In order to function properly, all access points and wireless sta-
tions on the same wireless network must be programmed with
identical key lists.
•If you define only one encryption key, it must be entered in the
first key field. If you configure one key only in fields 2, 3, or 4,
you may not be able to access your wireless network, even if
you have configured your wireless PC Card in the same manner.
6
66
6Configuring Diva 2480 wireless encryption settings
Modifying WLAN Settings on the Diva 2480
Modifying WLAN settings on your computer
About Encryption Keys

8
When the Eicon Wireless PC Card drivers were installed, a new
control panel named ‘Wireless Network’became available. This
control panel allows you to change basic wireless parameters and
allows you to select which group of settings to use.
Along with allowing you to modify wireless settings, the Client
Manager software can display the quality of your connection to the
wireless network. You can also switch between profiles more easily
through a system tray icon.
1. Insert the Diva CD-ROM into your CD-ROM drive.
2. Windows will automatically start the setup program on the Diva
CD-ROM and display the following menu.
Note: If the menu does not appear, double-click ‘My Computer’, double-
click your CD-ROM drive, then double-click the file CDSETUP.EXE.
3. Click ‘Installation’then click ‘Client Manager’.
The install program starts, as shown below.
4. Click ‘Next’and follow the onscreen instructions.
This software can be installed directly from the following location
on the Diva CD-ROM: wireless\software\pc_card\cl_mgr
The Client Manager launches automatically into the Windows sys-
tem tray (at the lower right of your screen) whenever you start your
computer. You should see the following icon:
Click this icon to bring up the Client Manager window.
Right-click on this icon to dislpay a list of menu options.
Note: If you do not see Client Manager icon, click ‘Start’, ‘Programs’,
‘Orinoco’, ‘Client Manager’.
Wireless Link Quality
The icon in the system tray reflects the link quality of your wireless
connection.
Viewing or editing PC Card settings
To view or edit PC Card settings:
1. Right-click on the Client Manager icon.
2. Select ‘Configuration Profile’.
3. Select ‘Add/Edit Profile’.
Switching to to another wireless profile
To use another wireless profile:
1. Right-click on the Client Manager icon.
2. Select ‘Configuration Profile’.
3. From the submenu, select the profile you wish to use.
Wireless Network Control Panel
You can also change settings or profiles through the Wireless Net-
work control panel. This control panel is installed along with your
PC Card drivers.
1. Click ‘Start’, ‘Settings’, ‘Control Panel’.
2. Double-clicking ‘Wireless Network’.
For more information
For more information on using the Client Manager, consult the on-
line help.
1. Right-click on the Client Manager icon.
2. Select ‘Help’.
3. From the submenu, select ‘Contents’.
7
77
7Installing the Client Manager (for use with the Eicon Wireless PC Card)
Installing the Client Manager
Using the Client Manager
ICON STATE MEANING
Green, all bars full Excellent connection
Green, some bars full Good connection
Yellow, some bars full Connection is weak. Move your computer
closer to the Diva 2480.
Red, first bar only Connection is poor. Save your files and move
your computer closer to the Diva 2480.
Red, jagged line
through icon
No connection. Either your computer is still
looking for an initial connection, or you have
moved out of range of the Diva 2480.
Blank Peer-to-peer connection (between computers).

9
The Diva Assistant software (compatible with Windows 95 or
later), allows you to:
•View the performance of the Diva 2480
•View log messages sent by the Diva 2480
•Access to the Diva 2480 web interface quickly
1. Insert the Diva CD-ROM into your CD-ROM drive.
2. Windows will automatically start the setup program on the Diva
CD-ROM and display the following menu.
Note: If the menu does not appear, double-click ‘My Computer’, double-
click your CD-ROM drive, then double-click the file CDSETUP.EXE.
3. Click ‘Installation’, then click ‘Diva Assistant’.
4. The install program starts, as shown below.
5. Click ‘Next’and follow the onscreen instructions.
6. When installation is complete and you click ‘Finish’, you will see
a message stating that you must restart your computer before
launching the software. Click ‘Yes’.
Note: You may encounter problems if you do not restart your computer
after installation.
Once you have returned to the Windows desktop, double-click the
Diva Assistant icon in the System Tray or on the Windows desktop
to launch the software.
System Tray icon:
Windows desktop icon:
The following window will appear:
•General Tab: Displays device information and current status of
the front indicator lights.
•Performance Tab: Displays performance and data transfer infor-
mation.
•Tools tab: Provides shortcuts to the Diva 2480 web-based con-
figuration interface. You can also backup and restore configura-
tion settings, and upgrade the device firmware.
•Diagnostic Log tab: Displays recent messages sent by the
Diva 2480.
For more information on using the Diva Assistant, right-click on the
Diva Assistant system tray icon and select ‘Help’.
8
88
8Installing the Diva Assistant (for use with the Diva 2480)
Installing the Diva Assistant
Using the Diva Assistant

10
This section describes how to set up your computer using the
Diva 2480’s Ethernet port.
Note: The Ethernet port can be used by any computer equipped with a
properly-installed Ethernet card.
If you have not yet configured your account settings, see ‘Configur-
ing Diva 2480 Internet account settings’on page 6.
If the account settings have already been configured, you should
be able to access the Internet. Try visiting an external web site,
such as www.eicon.com.
This section describes how to set up your computer using the
Diva 2480’s USB port.
Note: Use of the Diva 2480’s USB port requires Windows 98, Windows
Millennium Edition, Windows 2000, or Windows XP. The USB port cannot
be used with Windows 95, Windows NT, or Apple Macintosh computers.
The steps in the Windows hardware wizards differ depending on
the operating system used.
1. Insert the Diva CD-ROM into your CD-ROM drive.
2. From the hardware wizard window, click ‘Next’and follow the
onscreen instructions.
For step-by-step instructions on completing the hardware wiz-
ard, see ‘USB Windows Hardware Wizards’on page 12.
Driver files are located in the root of the Diva CD-ROM.
3. The Hardware Wizard will confirm that the software has been
successfully installed. Click ‘Finish’.
4. When asked to reboot your computer, do so.
If you have not yet configured your account settings, see ‘Configur-
ing Diva 2480 Internet account settings’on page 6.
If the account settings have already been configured, you should
be able to access the Internet. Try visiting an external web site,
such as www.eicon.com.
9
99
9Installing the Ethernet cable
Step 1: Connect the Cables
1. Leave your computer on during installation.
2. If you have not already done so, connect the ADSL cable and
power adapter, as described in the section ‘Connect the Power
and ADSL Cables’on page 2.
3. Connect one end of the yel-
low Ethernet cable to the
Ethernet port ( ) on the
back of the Diva 2480.
Connect the other end to the
Ethernet port on your com-
puter’s network adapter card.
When connected properly, the Ethernet indicator light ( on
the front of the device) will turn green when the Diva 2480 is
plugged in and the computer is on.
Step 2: Check TCP/IP Settings and Restart
1. Verify that your computer’s
Ethernet adapter is set to
acquire its IP address
automatically. Most adapters
are set this way by default.
Consult the terms ‘TCP/IP’or
‘DHCP’in the documentation
for your operating system for
instructions.
2. Restart your computer.
What’s Next?
10
1010
10 Installing the USB cable
Step 1: Connect the Cables
1. Leave your computer on during installation. If your computer
is off, turn it on and wait until Windows has booted and the
desktop is visible.
2. If you have not already done so, connect the ADSL cable and
power adapter, as described in the section ‘Connect the Power
and ADSL Cables’on page 2.
3. Connect the square end of
the included USB cable to the
port marked ‘USB’on the
back of the Diva 2480.
Connect the other end to an
available USB port on your
computer.
4. After a few moments, Win-
dows will display the ‘Hard-
ware Wizard’window,
followed by the Windows
hardware wizard.
Step 2: Complete the Hardware Wizard
What’s Next?

11
Cannot access the web interface (or the Internet) via
the wireless LAN adapter on my computer
•Check that you are within range of the Diva 2480. If you are un-
sure, move your computer closer to the Diva 2480.
•Check that the network name setting for your wireless LAN
adapter is set to the same name as the Diva 2480 (set to ‘eicon’
by default).
•Check that the encryption settings for your computer’s wireless
LAN adapter exactly match those of the Diva 2480.
•If you still cannot access the Diva 2480, use the USB or Ethernet
connection to temporarily access the device.
Internet is not accessible
When troubleshooting why you cannot access the Internet, exam-
ine the state of the ADSL light ( ) on the front panel of
the Diva 2480.
(1) If the ADSL light is glowing continuously (is not blinking),
a connection to the ADSL network has been established.
This means Internet access is possible. Try the following:
•Restart your computer and try accessing the Internet again.
•Verify that your setup information has been entered correctly as
described in ‘Configuring Diva 2480 Internet account settings’
on page 6.
•Verify that the wireless LAN settings on your computer, includ-
ing encryption settings, exactly match those of the Diva 2480. If
possible, use the USB or Ethernet cables.
•Verify that the TCP/IP settings are configured to acquire an IP
address dynamically from a DHCP server. Consult the documen-
tation included with your operating system for information on
verifying TCP/IP settings.
•Verify that your Web browser is configured to use the local LAN,
and is not configured to use a proxy server.
(2) If the ADSL light blinks continuously or stays off, Internet ac-
cess is not possible –the Diva 2480 is unable to establish a con-
nection with the ADSL network. Try the following:
•Check that your cables are connected properly.
•Disconnect the power cable from the Diva 2480, wait a few sec-
onds, then reconnect the cable.
If the ADSL light continues to blink or stays off, contact your ADSL
service provider.
Network name or encryption keys are unknown
If you forget the network name or encryption settings you specified
on the Diva 2480, you must connect directly via the Ethernet or
USB cable. From there you can see the network name. However,
encryption keys cannot be recovered and can only be changed.
Resetting to factory defaults
Resetting the Diva 2480 to factory defaults will change the network
name back to ‘eicon’and will disable encryption. However, all set-
tings, including username and password, are replaced with their
factory settings, so you will have to reconfigure the device for In-
ternet access.
To reset to factory defaults, hold down the Diva 2480’s reset button
(located underneath the device) for more than 15 seconds.
For technical support, visit our web site at:
http://www.eicon.com/support
For other contact information, visit:
http://www.eicon.com/support/contact.asp
For service, contact your Eicon Networks supplier.
If you accidentally inserted the Eicon Wireless PC Card before up-
dating the Windows 2000 drivers, or to update the current drivers,
follow these instructions.
Note: Windows 2000 offers the chance to update drivers instead of remov-
ing them. However, as it is not guaranteed that all driver files will be up-
dated properly, it is recommended that you first uninstall the drivers, as
described below.
1. With your Eicon Wireless PC Card inserted into your PC Card
slot, right-click ‘My Computer’and select ‘Properties’.
2. Click the ‘Hardware’tab, then click the ‘Device Manager’button.
3. Click the small plus sign (+) next to ‘Network Adapters’to ex-
pand the list of devices present.
4. Right-click ‘WaveLAN/IEEE PC Card’(or ‘Orinoco PC Card’) and
select ‘Uninstall’.
5. Click ‘OK’when the warning message is displayed.
6. Close the ‘Device Manager’window.
7. Click ‘OK’in the ‘System Properties’window.
8. Remove the Eicon Wireless PC Card from the PC Card slot.
9. Install the Windows 2000 update as described in ‘Update Win-
dows 2000 PC Card Drivers’on page 3. Continue following the
instructions as described. Do not insert the PC Card until the up-
date is installed.
An in-line filter is a small device designed to reduce interference
between ADSL signals and your regular telephone signals. Your
package may or may not include an in-line filter.
To install an in-line filter, plug your phone or other analog device
into the in-line filter, then plug the in-line filter into your telephone
outlet, as shown below. You must use one in-line filter per tele-
phone device in your location.
Note: As telephone cable standards differ from region to region, your in-
line filter and telephone outlet may not be exactly as illustrated.
11
1111
11 Troubleshooting 12
1212
12 Technical Support
13
1313
13 Uninstalling the Windows 2000 Drivers
14
1414
14 In-line filters
In-line filter

12
Windows 2000: USB Driver Install Windows Me: USB Driver Install
Windows 98: USB Driver Install
15
1515
15 USB Windows Hardware Wizards
1. Insert the Diva CD-ROM into your CD-ROM drive.
Note: The Diva CD-ROM uses the Windows autorun feature. When the
CD-ROM is inserted, a welcome program starts automatically. If this
occurs, click ‘Exit’in the bottom-left corner of the window.
2. From the ‘Hardware Wizard’
window, click ‘Next’.
3. Select ‘Search for a suitable
driver’, then click ‘Next’.
4. When asked for the location of
the driver files, select ‘CD-ROM
drives’, clear other options,
then click ‘Next’.
Windows automatically
searches the CD-ROM for a
compatible driver.
5. Once Windows has found the
driver, click ‘Next’.
Note: You may be asked to insert
your Windows install CD-ROM
during this process.
6. During installation, Windows will display the ‘Digital Signature
Not Found’message. Click ‘Yes’to continue.
7. When installation is complete, click ‘Finish’.
If required, see ‘Configuring Diva 2480 Internet account set-
tings’on page 6.
1. Insert the Diva CD-ROM into your CD-ROM drive.
2. From the ‘Hardware Wizard’
window, select ‘Automatic
search for a better driver’,
then click ‘Next’.
Windows automatically
searches the CD-ROM for a
compatible driver. When found,
the driver is installed with no
further prompting.
3. When installation is complete, click ‘Finish’.
Reboot your computer when asked to do so.
If required, see ‘Configuring Diva 2480 Internet account set-
tings’on page 6.
1. Insert the Diva CD-ROM into your CD-ROM drive.
2. From the ‘Hardware Wizard’
window, click ‘Next’.
3. Select the option ‘Search for
the best driver’, then click
‘Next’.
4. When asked for the location of
the driver files, select ‘CD-ROM
drive’, clear all other options,
then click ‘Next’.
5. Once Windows has found the
driver, click ‘Next’.
Note: You may be asked to insert
your Windows install CD-ROM
during this process.
6. When installation is complete, click ‘Finish’.
Reboot your computer when asked to do so.
If required, see ‘Configuring Diva 2480 Internet account set-
tings’on page 6.
Copyright © 1999-2001 Eicon Networks Corporation / 227-205-01 GCA
Table of contents
