Eighteeth NanoPix1 User manual
Intraoral Digital Imaging Sensor
USER MANUAL
Changzhou Sifary Medical Technology Co., Ltd

Version: S04
IFU-6935013/S04
Issued: 2020.12.19
Size: 130mmx180mm

Table of Contents
Page 3 / 66
Table of Contents
1. Scope of Sensor.....................................................................................................5
2. Symbols................................................................................................................ 6
3. Introduction...........................................................................................................8
3.1 Scope of Application.....................................................................................8
3.2 Contraindications...........................................................................................8
3.3 Safety Instructions.........................................................................................8
4. Product Installing................................................................................................10
4.1 Installation Environment Requirements......................................................10
4.2 Cybersecurity...............................................................................................10
4.3 Connecting the Sensor to the Computer Terminal...................................... 11
4.4 Software Installing...................................................................................... 13
4.5 Software Update.......................................................................................... 16
4.6 Sensor Mounting......................................................................................... 17
4.7 Sensor Protection.........................................................................................19
4.8 Use of Handheld Bracket............................................................................ 19
5. Software Introduction......................................................................................... 21
5.1 Login........................................................................................................... 21
5.2 Software Interface Introduction...................................................................22
5.3 The Menu of Tools......................................................................................23
5.4 Patient Medical Record Menu.....................................................................27
5.5 Oral X-ray Image Acquisition Menu...........................................................29
5.6 Oral X-ray Image View Menu.....................................................................32
5.7 Oral Diagnostic Report Menu..................................................................... 35
6. Operating Instructions.........................................................................................37
6.1 Acquiring Oral X-ray Image....................................................................... 37
6.2 Importing Existing Oral X-ray Images........................................................41
6.3 Image Quality Optimization........................................................................44
6.4 Report Generation....................................................................................... 44
7. Recommended X-ray Source Parameters and Exposure Time........................... 47
8. Maintenance........................................................................................................49
8.1 Foreword..................................................................................................... 49
8.2 General recommendations...........................................................................49
8.3 Disinfection components.............................................................................50
8.4 Autoclavable Components.......................................................................... 51
9. Troubleshooting.................................................................................................. 56
10. Technical Data.................................................................................................. 58
11. EMC Tables...................................................................................................... 59
12. Statement...........................................................................................................65

Table of Contents
Page 4 / 66
1 Scope of Sensor
Page 5 / 66
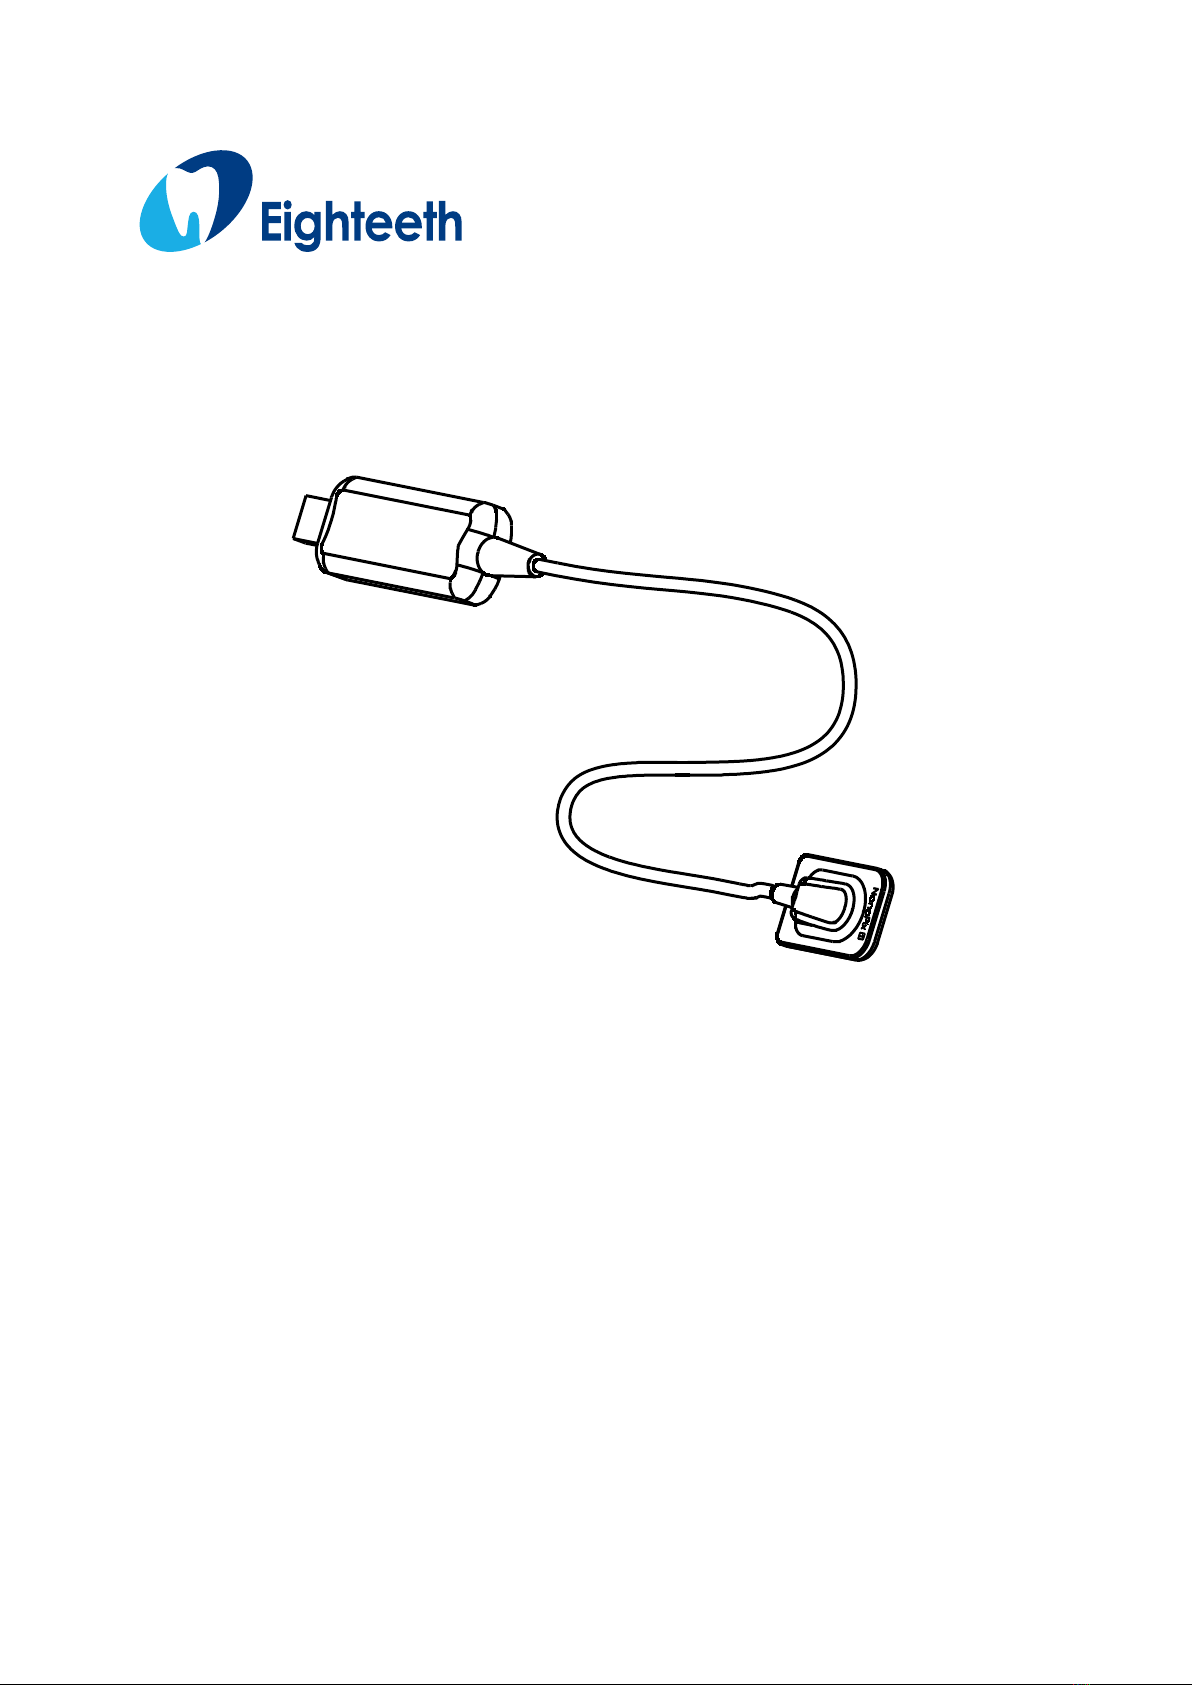
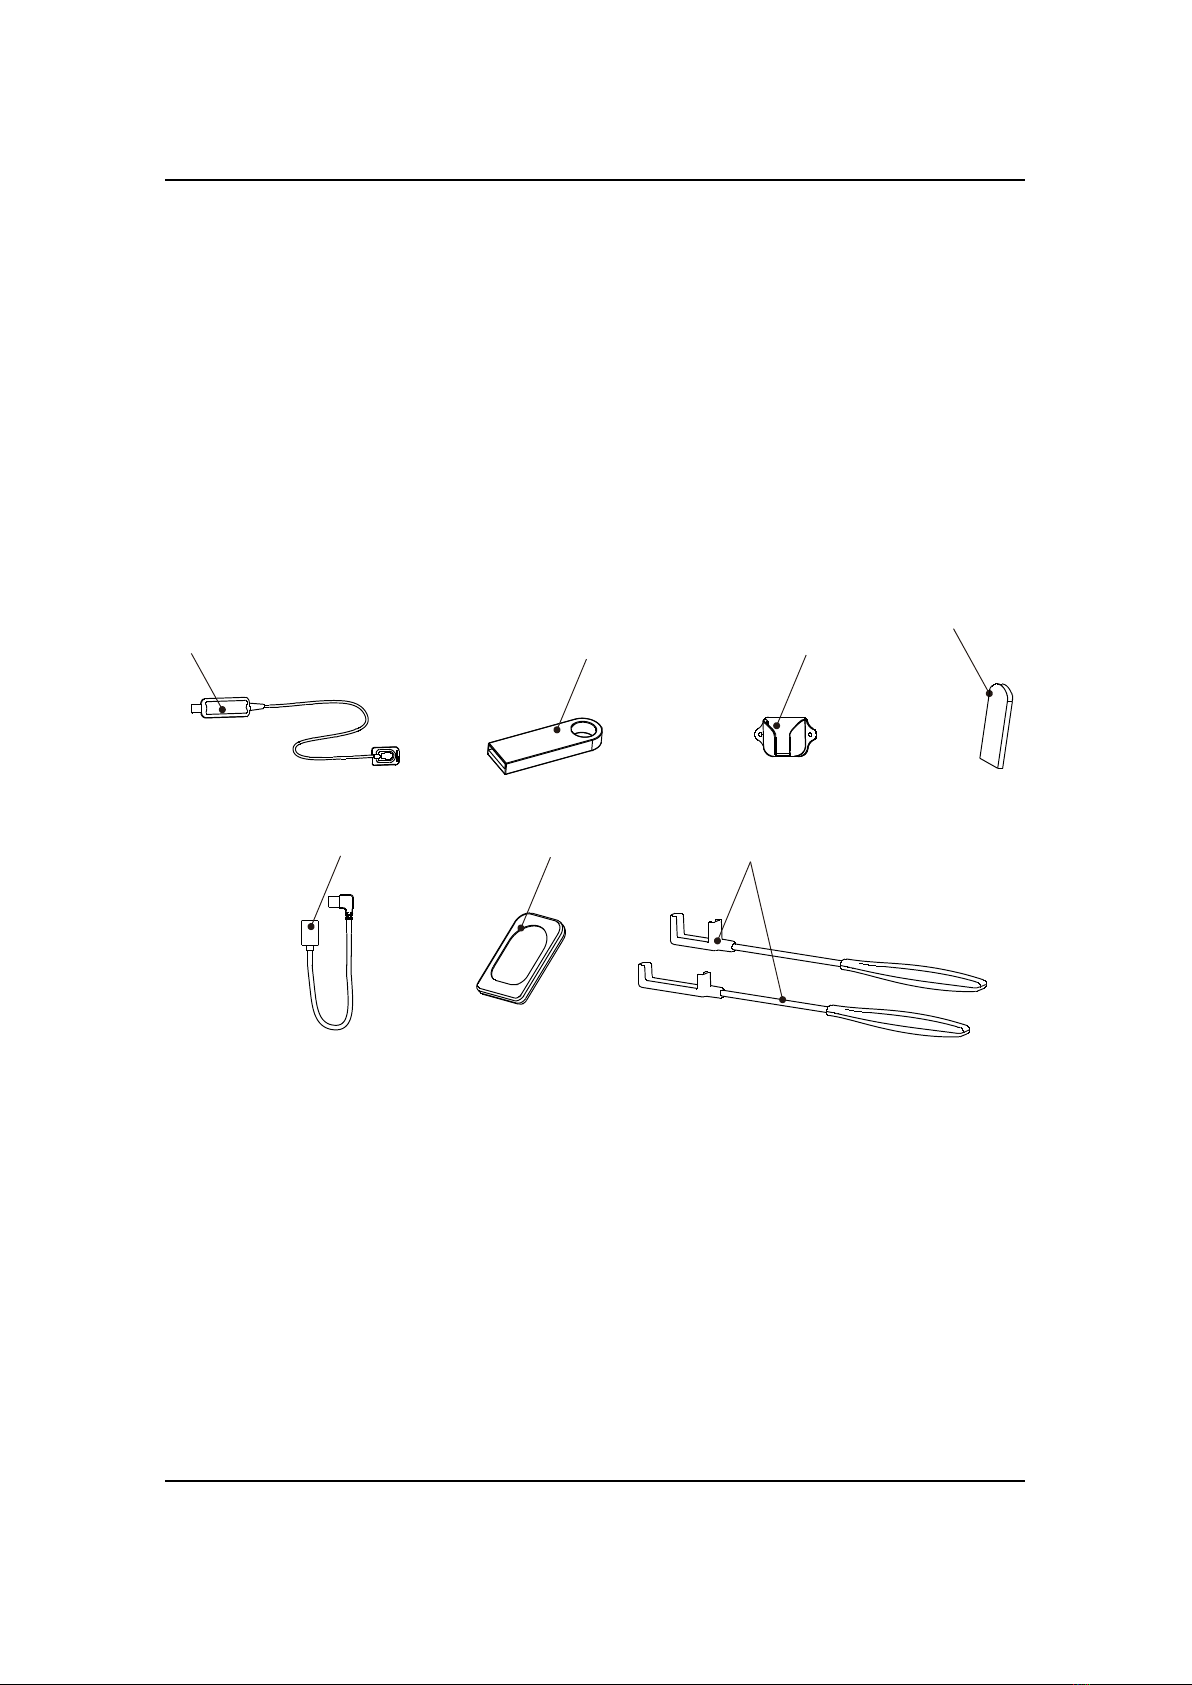
1. Scope of Sensor
1. Sensor
2. USB Flash Driver
3. Sensor Mounting Bracket
4. Disposable Sleeve
5. USB Extension Cable
6. Silicone Protective Cover
7. Handheld Bracket (Optional).
6 7
1234
5
2 Symbols
Page 6 / 66
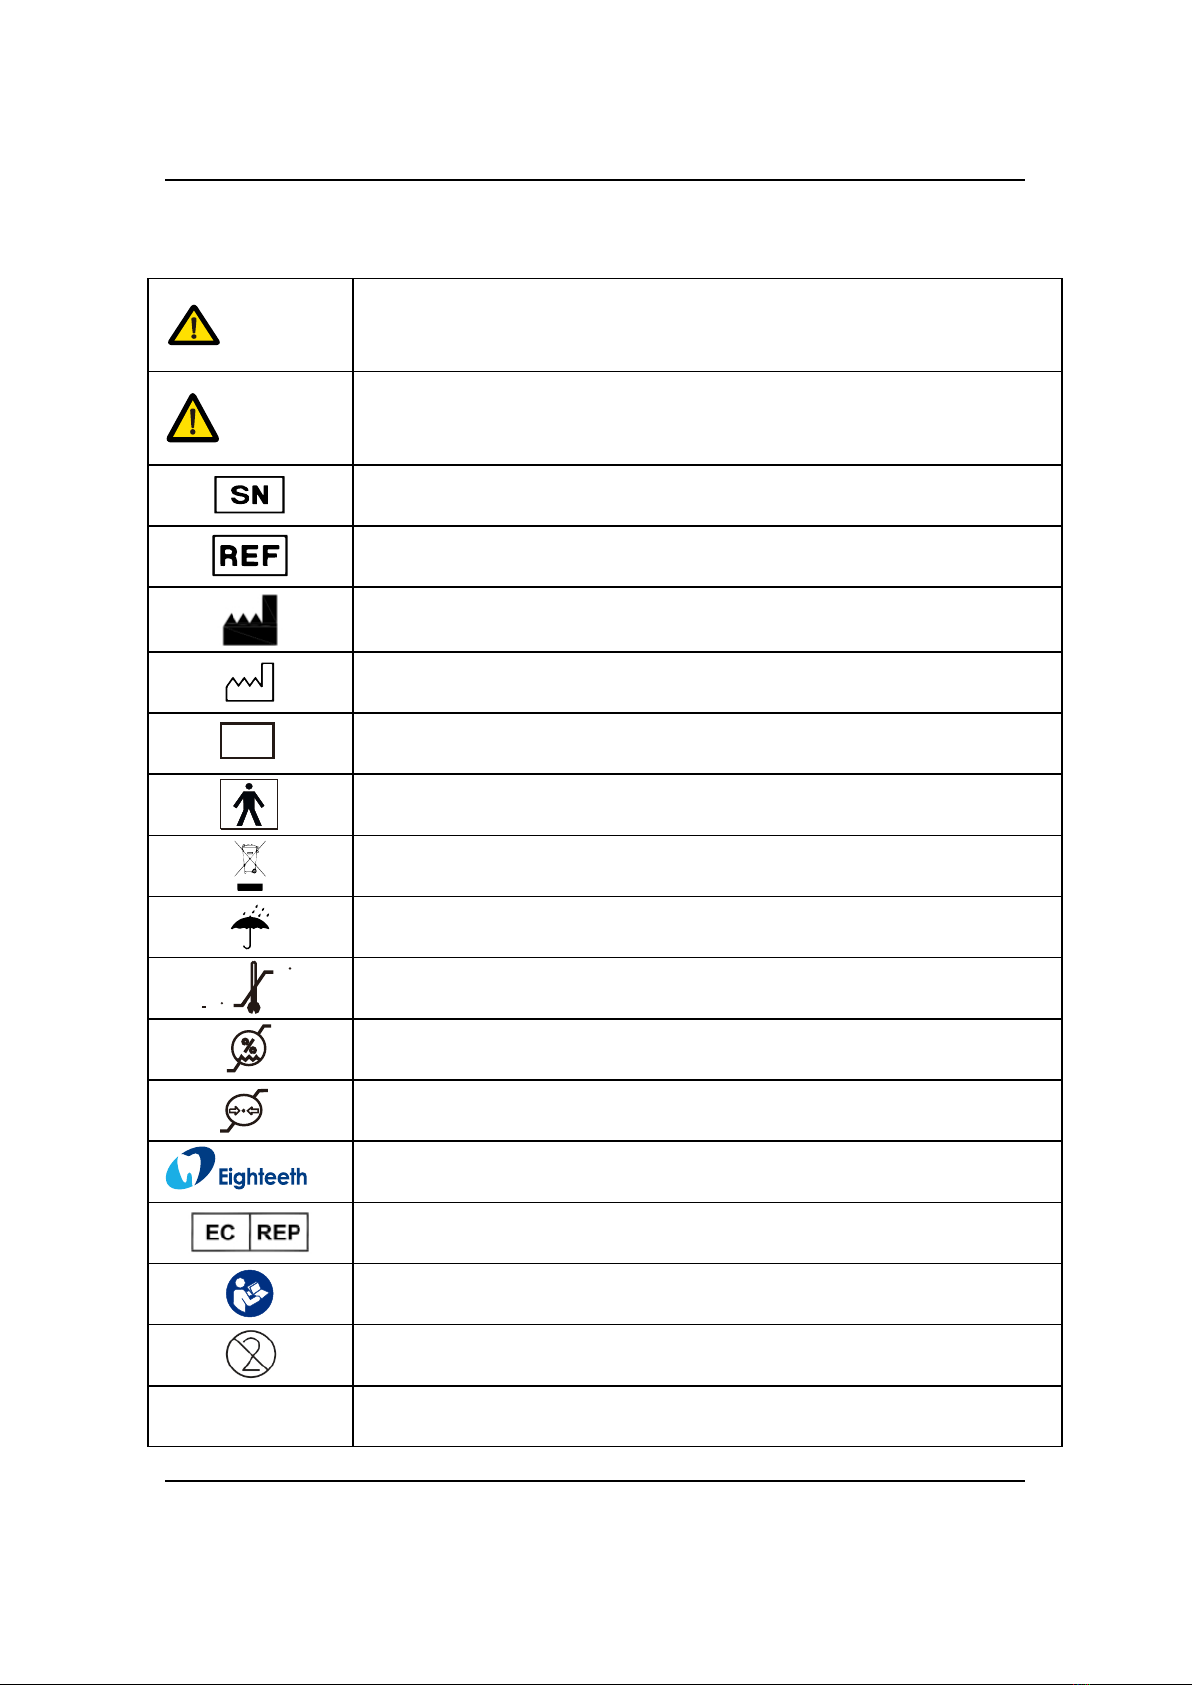
2. Symbols
WARNING
If the instructions are not followed properly, the operation may
lead to hazards for the product or the user/patient.
NOTE
Additional information, explanation of operation, and
performance.
Serial number
Catalogue number
Manufacturer
Date of manufacture
LOT
Lot of manufacture
Type BF applied part
Dispose of in accordance with the WEEE directive
Keep dry
55 C
20 C
Temperature limitation
80%
20%
Humidity limitation
106kPa
70kPa
Atmospheric pressure limitation
Manufacturer’s LOGO
Authorized Representative in the European Community
Follow instructions for use
Do not reuse
IP68
Protection against liquid and particular matter

2 Symbols
Page 7 / 66
IPX8
Protection against liquid

3 Introduction
Page 8 / 66
3. Introduction
3.1 Scope of Application
NanoPix1/NanoPix2 is intended to collect dental x-ray photons and convert
them into electronic impulses that may be stored, viewed, and manipulated for
diagnostic use by dentists.
This device must only be used in hospital environments, clinics or dental
offices by trained and qualified dental personnel, and not used in the oxygenrich
environment.
3.2 Contraindications
Patients and operators of cardiac pacemakers should use it with caution.
Pregnant women are prohibited from using it.
3.3 Safety Instructions
1. Please read this manual before use.
2. The safety regulations and guidelines of NanoPix1/NanoPix2 must be
installed and used following the purposes specified in the manual.
3. Do not use the device when the sensor is damaged.
4. Avoiding liquid entering the device, which could cause short circuit or
corrosion.
5. This device must be disconnected from the power supply before cleaning
or disinfection.
6. To avoid the cross-infection of patients, a disposable sleeve must be used
before placing the sensor in the mouth, and the sleeve must be discarded after use
on each patient.

3 Introduction
Page 9 / 66
WARNING
Please read the following warning carefully before using:
1. This device can only be used by people with relevant qualifications and
technical approval.
2. The device must not be placed in humid surroundings or anywhere where it can
come into contact with any type of liquids.
3. Do not expose the device to direct or indirect heat sources. The device must be
operated and stored in a safe environment.
4. The device requires special precautions concerning electromagnetic
compatibility (EMC) and must be installed and operated in strict compliance with
the EMC information. In particular, do not use the device in the vicinity of
fluorescent lamps, radio transmitters, remote controls and do not use this system
near the active HF Surgical Equipment in the hospital. Portable RF
communications equipment (including peripherals such as antenna cables and
external antennas) should be used no closer than 30 cm (12 inches) to any part of
the NanoPix1/NanoPix2, including cables specified by the manufacturer.
Otherwise, degradation of the performance of this equipment could result.
5. Do not operate or store at high temperatures.
6. If irregularities occur in the device during treatment, switch it off. contact the
agency.
7. Never open or repair the device yourself, otherwise, void the warranty.
8. Please use original accessories and install original software.

4. Product Installing
Page 10 / 66
4. Product Installing
4.1 Installation Environment Requirements
Since this product is not equipped with a computer, during the installation of
this product, customers need to provide an additional laptop or desktop computer.
The specific performance requirements of the computer are as follows:
1. Hardware requirements
CPU
≥1.0GHz
Memory
≥2GB
Hard Disk
≥64GB
Display Resolution
1024*768 or above
USB ports
USB2.0 ≥1
2. Operating system requirements
Microsoft Windows 7/8/10 32-bit/64-bit
4.2 Cybersecurity
1. Network: NanoPix only needs to connect to the network when there is a
new version update, and there is no need to connect to the network during use.
Make sure your Internet connection is stable when upgrading. The new software
installation package will be transferred to the nide computer via the tcp/ip protocol.
Particularly, please turn on anti-virus software when upgrading to prevent network
attacks.

4. Product Installing
Page 11 / 66
2. Security Software: NanoPix supports anti-virus software and/or use of
firewall for proper protection against viruses, malware, and intrusions. The
security software should be an effective version that can ensure the security of the
computer system.
3. Data Interface and Transfer Protocol: USB2.0
4. Data Format: JPEG、PNG、BMP、DICOM、JPG
5. User Access Control:
Account Setting: NanoPix software adopts account settings when starting,
and users can open the software only after entering the correct user name and
password.
Encryption and Binding: NanoPix is encrypted and bound with Intraoral
Digital Imaging Sensor. Only when the license file and sensor calibration file are
included, the user can use the software normally.
4.3 Connecting the Sensor to the Computer
Terminal.
Step
Graphic Example
Description
1
Connect the USB
extension cable and
the sensor, and then
insert the other end of
the USB extension
cable into USB
sockets on the
computer.

4. Product Installing
Page 12 / 66
2
Check and ensure the
connection between
the computer and the
sensor is reliable.
NOTE
All IT components electrically connected to the NanoPix1/NanoPix2 must confirm
to IEC 60950-1.

4. Product Installing
Page 13 / 66
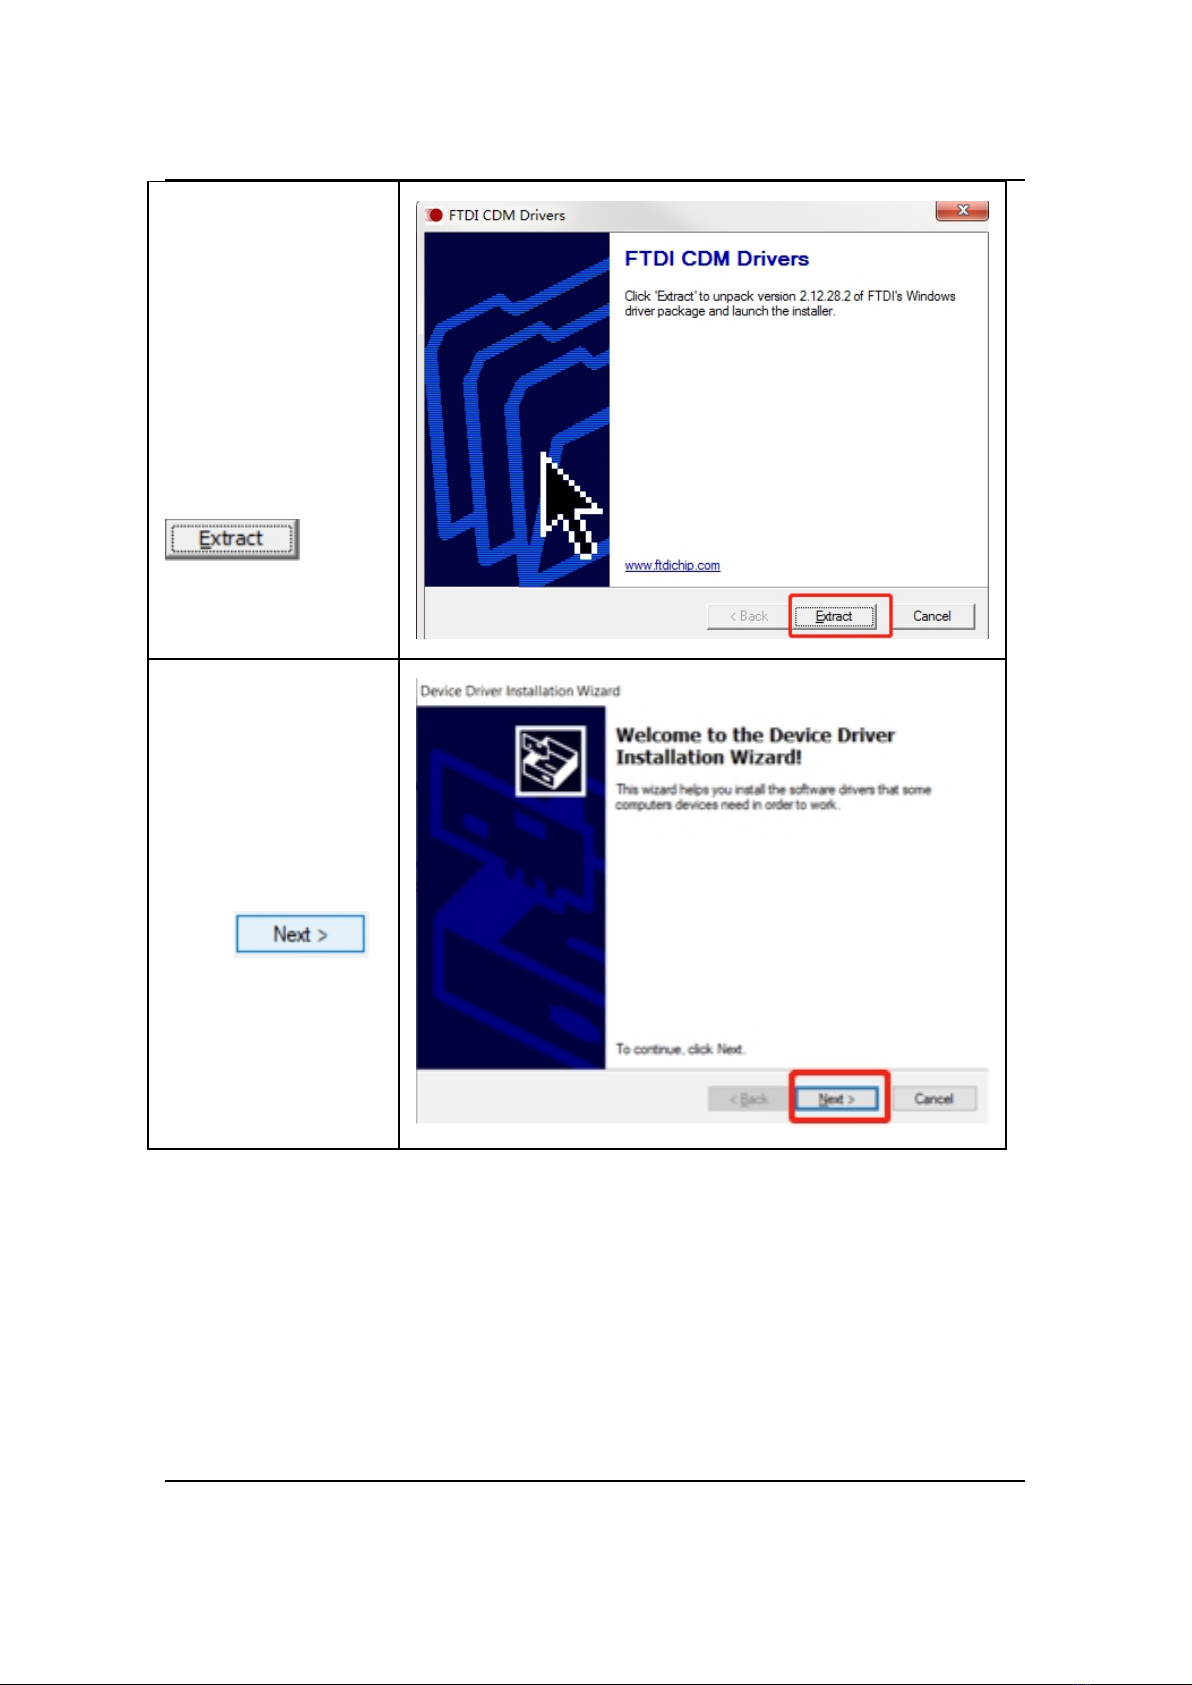
4.4 Software Installing
Make sure the sensor is connected to the computer terminal before installing
the software.
Step 1:
Connect the USB
flash driver to the
computer and open
it.
Step 2:
double click .exe
file, and then click
.
Step 3:
Enter the software
installation, wait for
the software to pop
up the driver
installation dialog
box.
4. Product Installing
Page 14 / 66
Step 4:
The software pops
up the driver
installation dialog
box, and click
.
Step 5:
Click
4. Product Installing
Page 15 / 66
Step 6:
Accept the
agreement to
continue to the next
step.
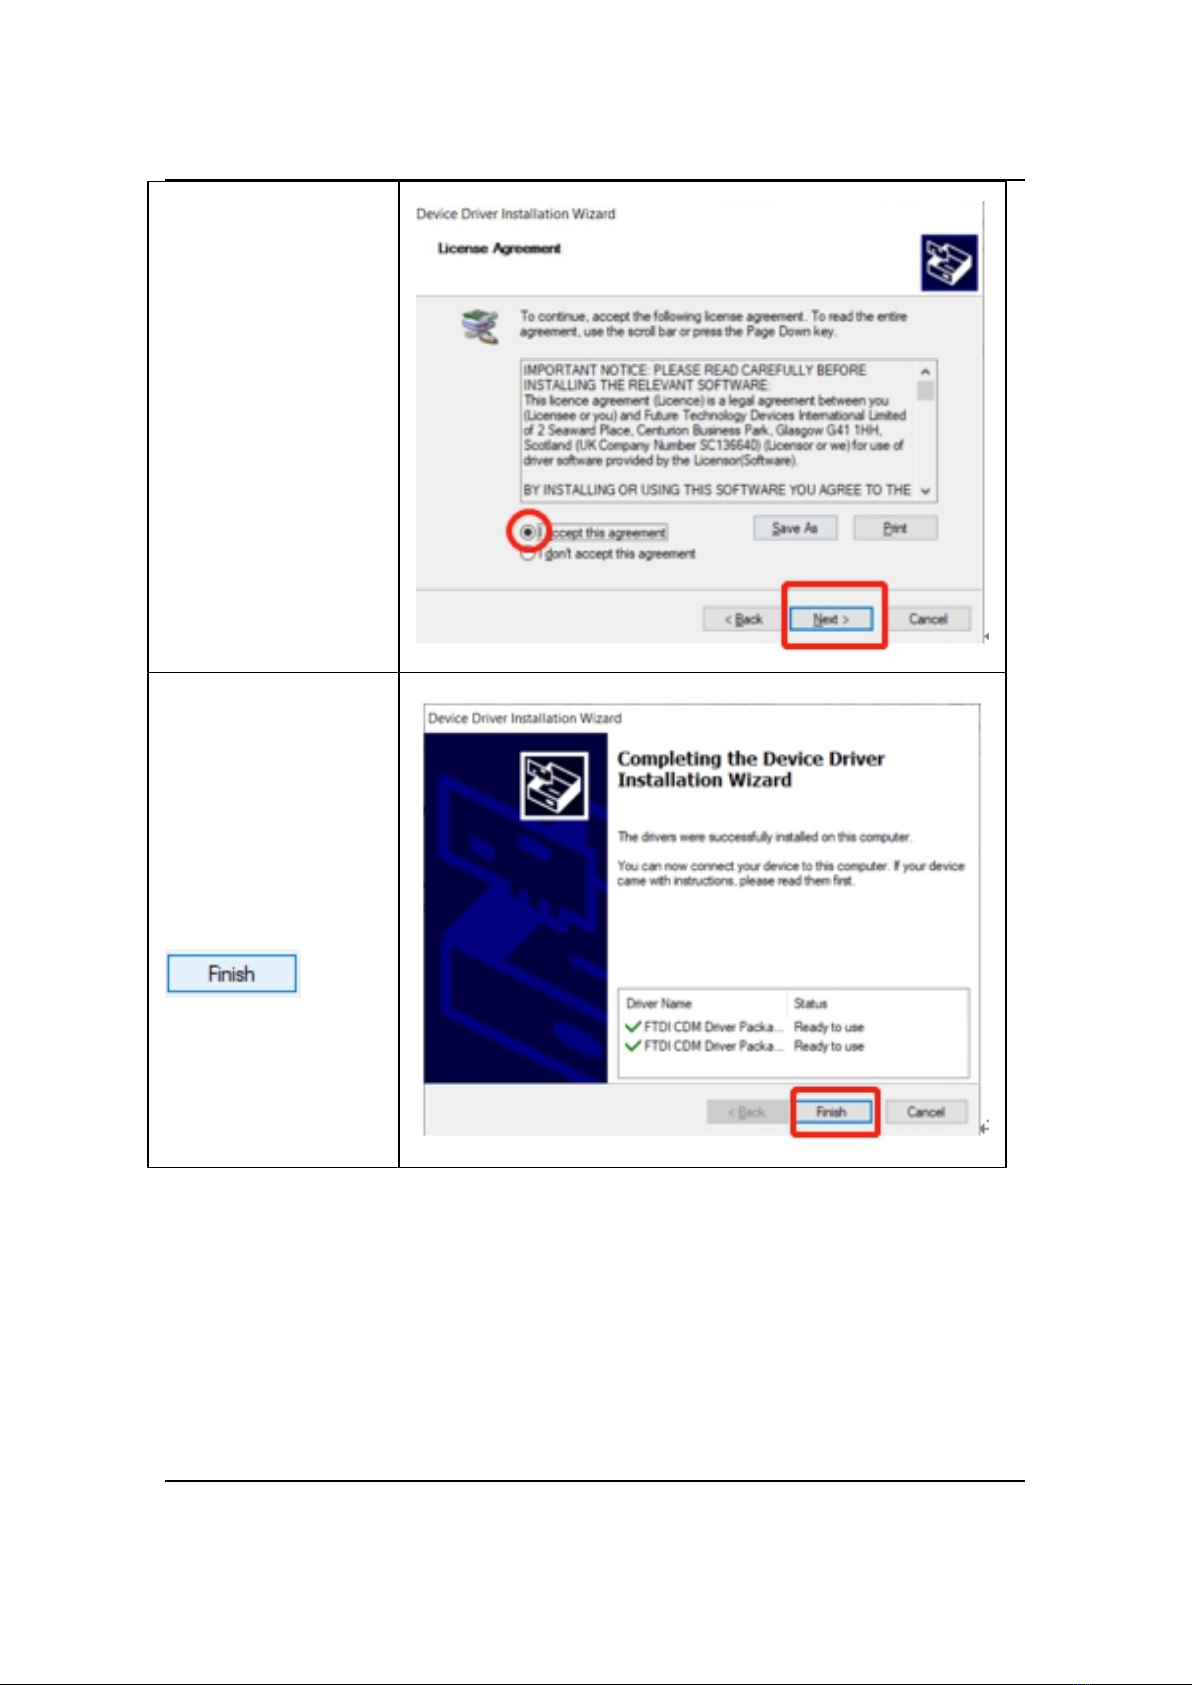
Step 7:
The software pops
up a dialog box on
the right, click
, to
indicate successful
driver installation.
4. Product Installing
Page 16 / 66
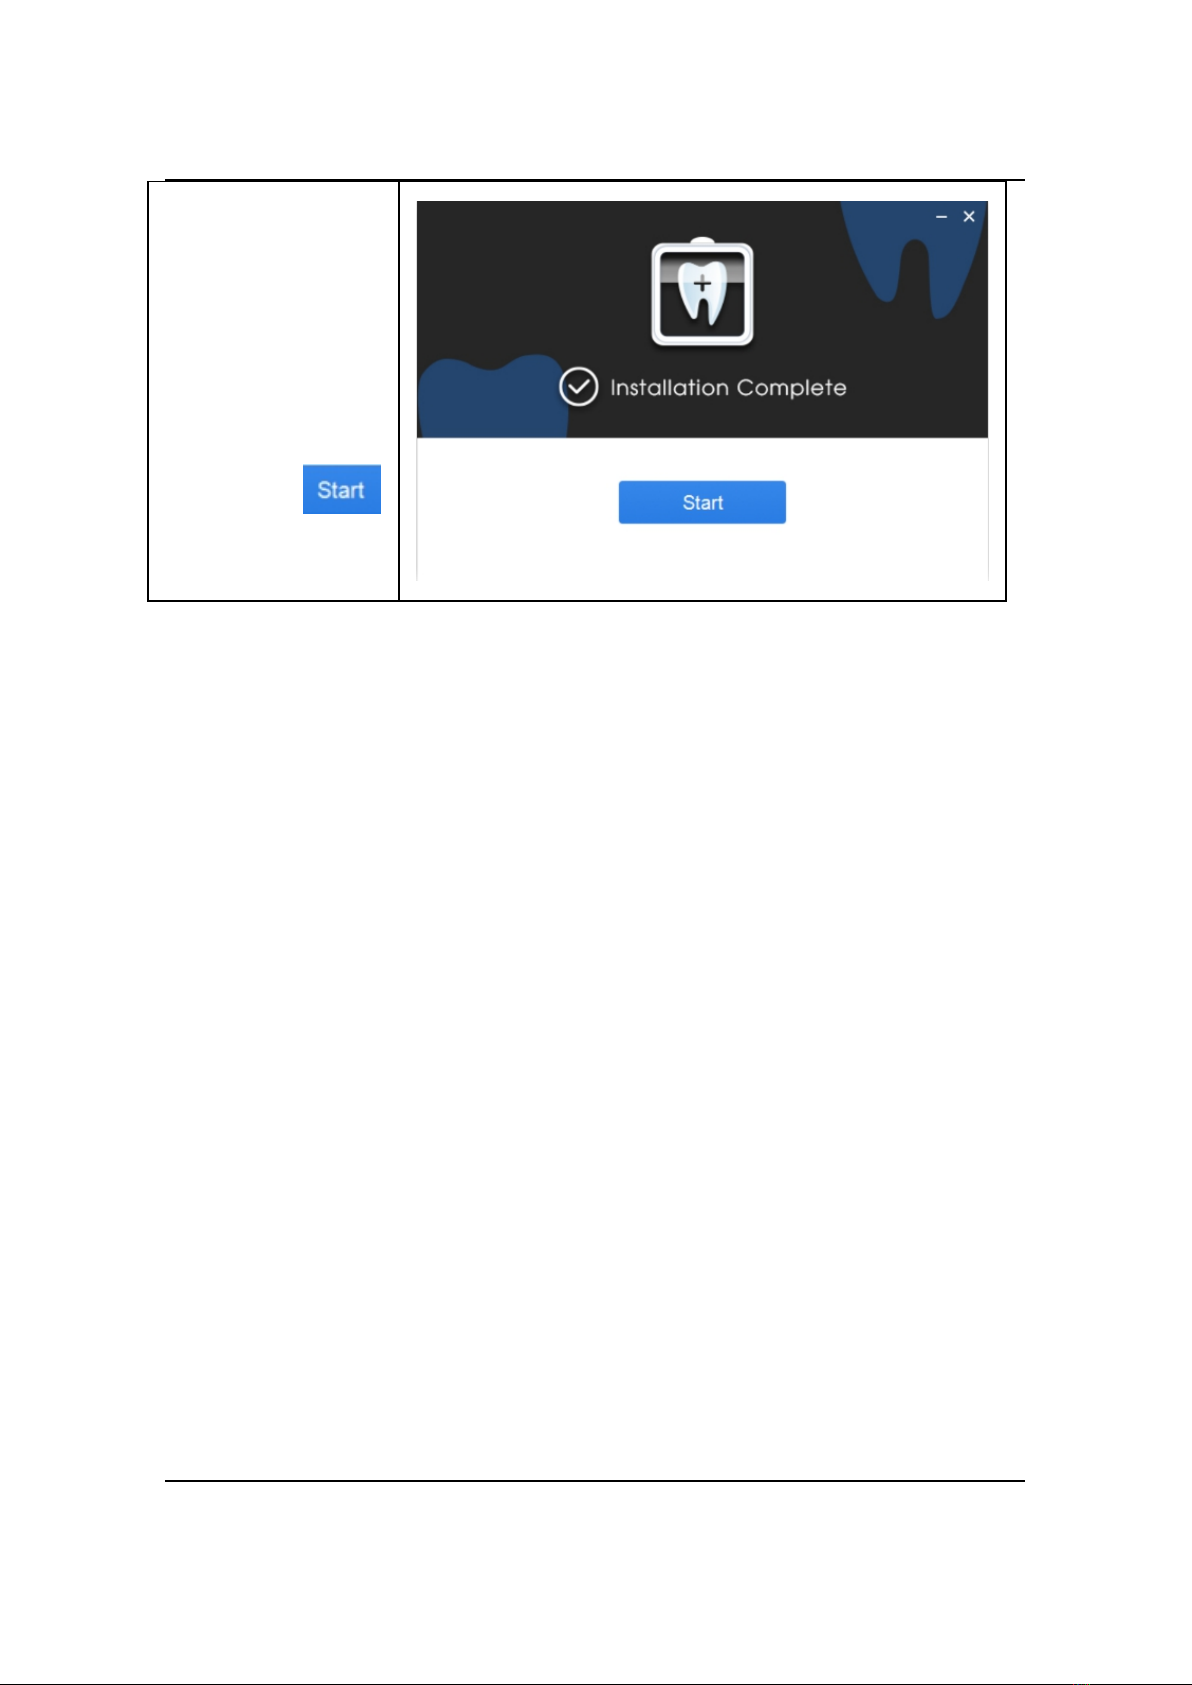
Step 8:
In the last step, the
software installation
successful dialog
box pops up, you
can click
or close it.
4.5 Software Update
If there is an update of NanoPix software, the computer terminal will pop up
the following dialog box, users could choose to update it or ignore it. No network
configuration is required and only network connection. If the connection is
interrupted during the upgrade process, please reconnect to the Internet to upgrade.
The interruption will not cause user data loss. If user really cannot connect to the
Internet or upgrade, please contact the supplier, who will contact the manufacturer
to solve the problem.

4. Product Installing
Page 17 / 66
4.6 Sensor Mounting
It is recommended to use the sensor mounting bracket to place the sensor. The
installation method is as follows:
1. Use screws and vias to fix the
sensor mounting bracket to the
wall.

4. Product Installing
Page 18 / 66
2. Place unused sensors in the
mounting bracket.

4. Product Installing
Page 19 / 66
4.7 Sensor Protection
When the sensor is not in use, it can be wrapped with a silicone protective
cover, which has reduced scratches or wears on the sensor receiving board. The
sensor silicone protective cover is used as follows:
1. Prepare the sensor and the
silicone protective cover
2. Gently put the silicone
protective cover on the sensor
receiving board
4.8 Use of Handheld Bracket
When using the Intraoral Digital Imaging Sensor system for intraoral imaging,
it is recommended to use the sensor with the handheld bracket. The handheld
bracket has 2types for each model, Aand B.
The use of handheld bracket A:
1. Prepare the sensor and the
handheld bracket A.

4. Product Installing
Page 20 / 66
2. Insert the long side of the
sensor into the handheld bracket
A in the vertical direction and fix
the wire.
3. Use a Disposable Sleeve to
cover the sensor and handheld
bracket A and then place it in the
mouth for imaging.
The use of handheld bracket B:
1. Prepare the sensor and the
handheld bracket B.
2. Insert the short side of the
sensor into the handheld bracket
B in the vertical direction and fix
the wire.
3. Use a Disposable Sleeve to
cover the sensor and handheld
bracket B and then place it in the
mouth for imaging.
This manual suits for next models
1
Table of contents
Popular Accessories manuals by other brands


Anker
Anker Powercore 13000 Welcome guide

Hotron
Hotron HR400-IND user manual

Sensopart
Sensopart FT 50 RLA 70-L8 Mounting and operating instructions

SEELEY INTERNATIONAL
SEELEY INTERNATIONAL Breezair EXQ owner's manual

bem wireless
bem wireless BM0100 user manual

Silver Cross
Silver Cross FOOTMUFF instruction manual