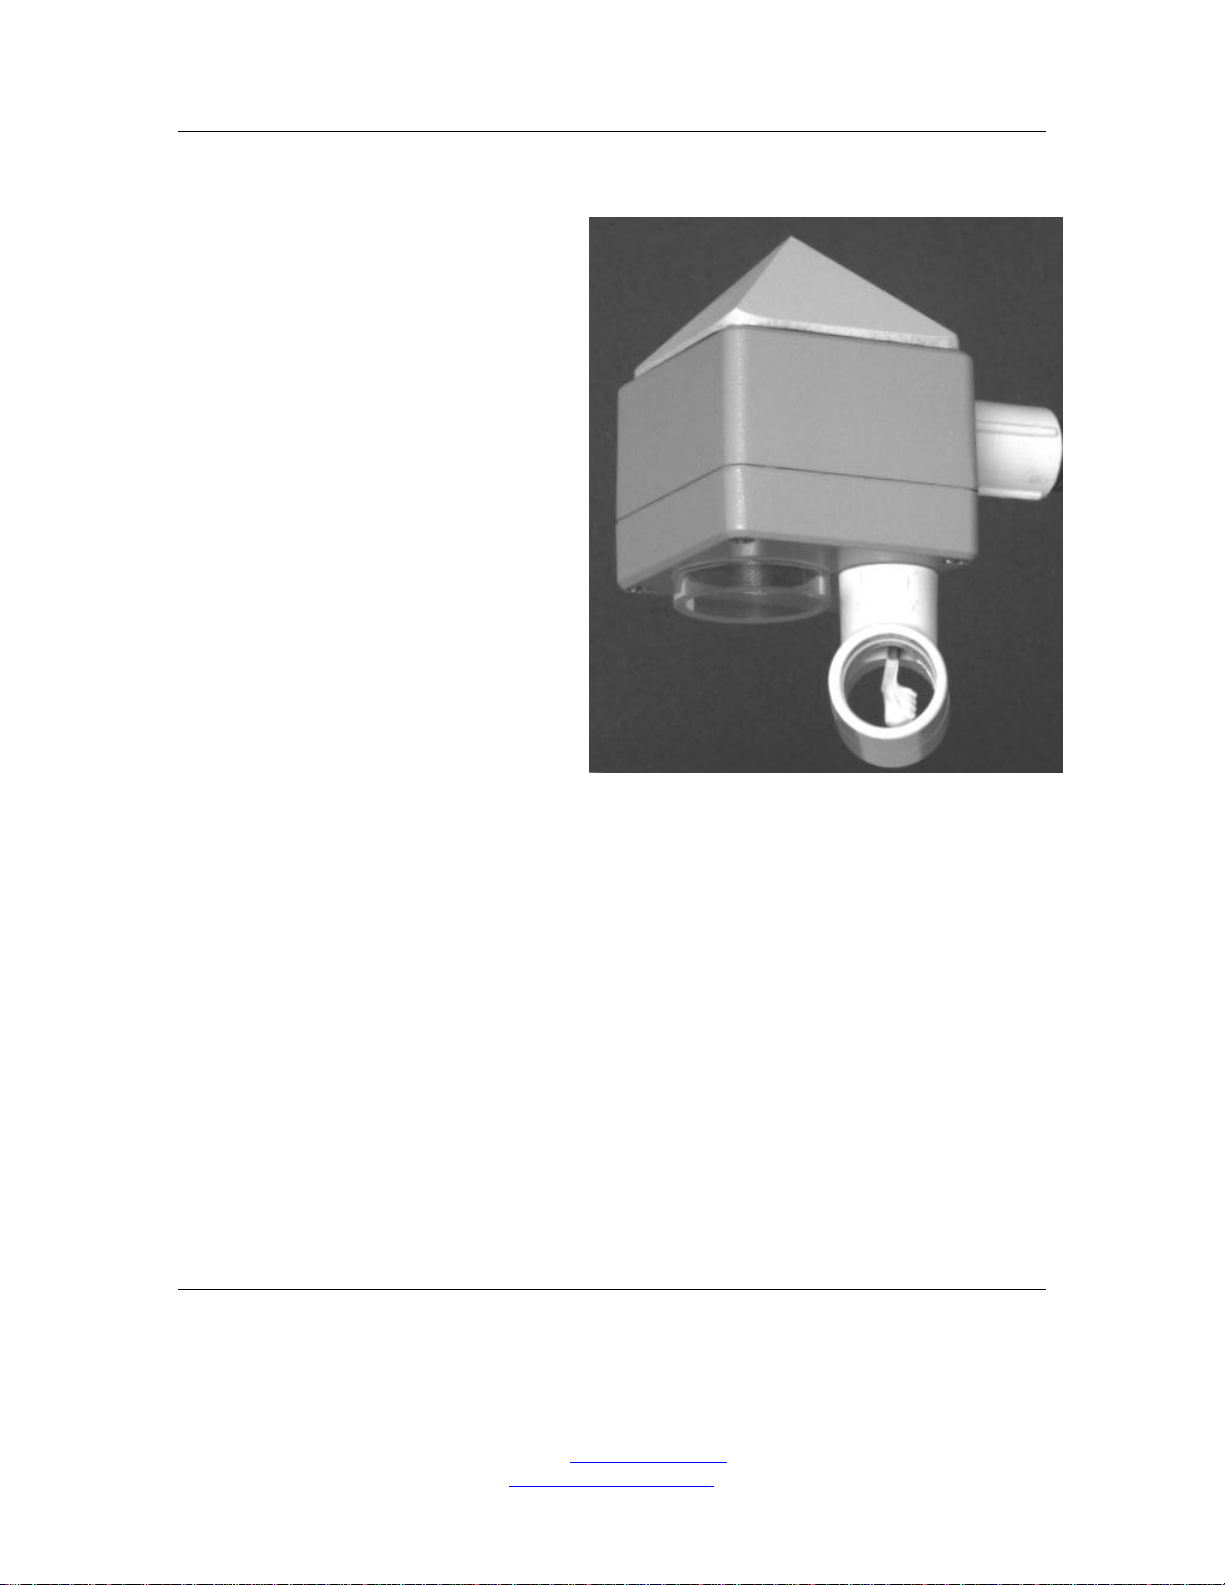
Judd Communications Depth Sensor, Analog Version
* 1 Table 1 Programs
01: 5 Sec. Execution Interval
01: P10 Battery Voltage
01: 1 Loc [:Battery ]
The depth sensor sampling routine works best as a
subroutine. The following command will call
subroutine #1 once an hour.
02: P92 If time is
01: 0 minutes into a
02: 60 minute interval
03: 1 Call Subroutine 1
The following command will allow the user to
activate the depth sensor by pressing the "F1" key
while monitoring the input locations using the
TERM or Graph TERM program.
03: P91 If Flag/Port
01: 11 Do if flag 1 is high
02: 1 Call Subroutine 1
If somebody left the depth sensor on, turn it off
04: P92 If time is
01: 0 minutes into a
02: 60 minute interval
03: 30 Then Do
05: P91 If Flag/Port
01: 11 Do if flag 1 is high
02: 21 Set low Flag 1
End statement terminating IF time then DO command
06: P95 End
--------------------------------------------------
Final Storage, or Output Processing
--------------------------------------------------
One hour output
07: P92 If time is
01: 0 minutes into a
02: 60 minute interval
03: 10 Set high Flag 0 (output)
Send hourly data to final storage
Array ID, Julian day, Time, Air Temp, Depth
Assign an output array ID of 101
09: P80 Set Active Storage Area
01: 1 Final Storage Area 1
02: 101 Array ID or location
10: P77 Real Time
01: 120 Day,Hour-Minute
11: P71 Average
01: 1 Rep
02: 3 Loc Air TempF
12: P70 Sample
01: 1 Reps
02: 4 Loc Depth
13: P End Table 1
--------------------------------------------------
Table 2 not used
--------------------------------------------------
* 2 Table 2 Programs
01: 0.0000 Sec. Execution Interval
01: P End Table 2
-------------------------------------------------
Subroutines
-------------------------------------------------
* 3 Table 3 Subroutines
Assign the depth sensor subroutine a number, note
that this number and the calling number need to be
the same.
01: P85 Beginning of Subroutine
01: 1 Subroutine Number
Turn ON the depth sensor
02: P86 Do
01: 41 Set high Port 1
Wait 0.8 seconds for the sensor to output the
Air Temp.
03: P22 Excitation with Delay
01: 1 EX Chan
02: 80 Delay w/EX (units=.01sec)
03: 0 Delay after EX (units=.01sec)
04: 0 mV Excitation
Air Temp is output in milliVolts, scaled to
Kelvin, and then convert to Celsius.
04: P2 Volt (DIFF)
01: 1 Rep
02: 5 2500 mV slow Range
03: 3 IN Chan
04: 2 Loc [:Air TempC]
05: .2 Mult
06: -273 Offset
Air Temp is also converted and saved in Fahrenheit
05: P37 Z=X*F
01: 2 X Loc Air TempC
02: 1.8 F
03: 3 Z Loc [:Air TempF]
06: P34 Z=X+F
01: 3 X Loc Air TempF
02: 32 F
03: 3 Z Loc [:Air TempF]
The depth sensor needs another 1.8 seconds to make
up to 10 measurements and perform error checking
and temperature compensation.
07: P22 Excitation with Delay
01: 1 EX Chan
02: 180 Delay w/EX (units=.01sec)
03: 0 Delay after EX (units=.01sec)
04: 0 mV Excitation
Distance is output in milliVolts, scaled to
inches, and then converted to depth by subtracting
the distance measured from the reference distance.
Use a multiplier of -.19685 for output in inches
and -.5 for ouput in centimeters.
08: P2 Volt (DIFF)
01: 1 Rep
02: 5 2500 mV slow Range
03: 3 IN Chan
04: 4 Loc [:Depth ]
05: -.19685 Mult Convert to inches
06: 46 Offset Sensor mounted at 46"
Turn OFF depth sensor.
09: P86 Do
01: 51 Set low Port 1
The end of subroutine 1, return to main program
10: P95 End
11: P End Table 3