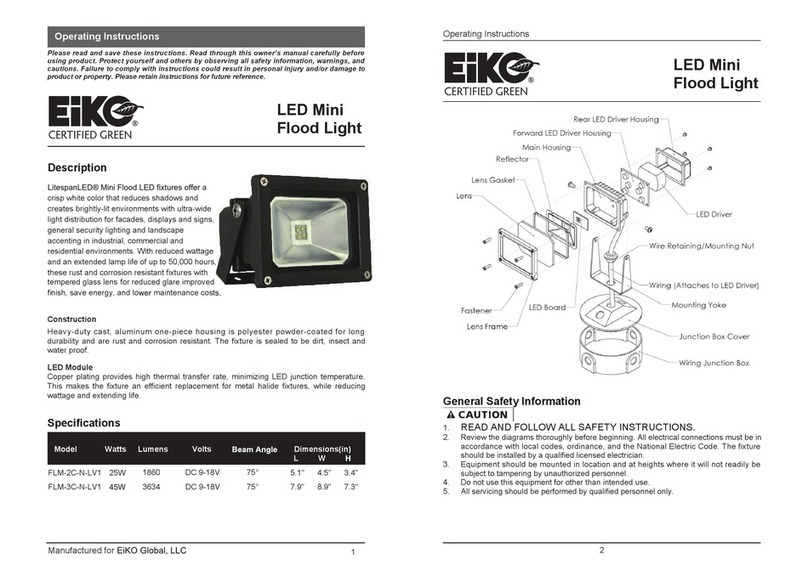
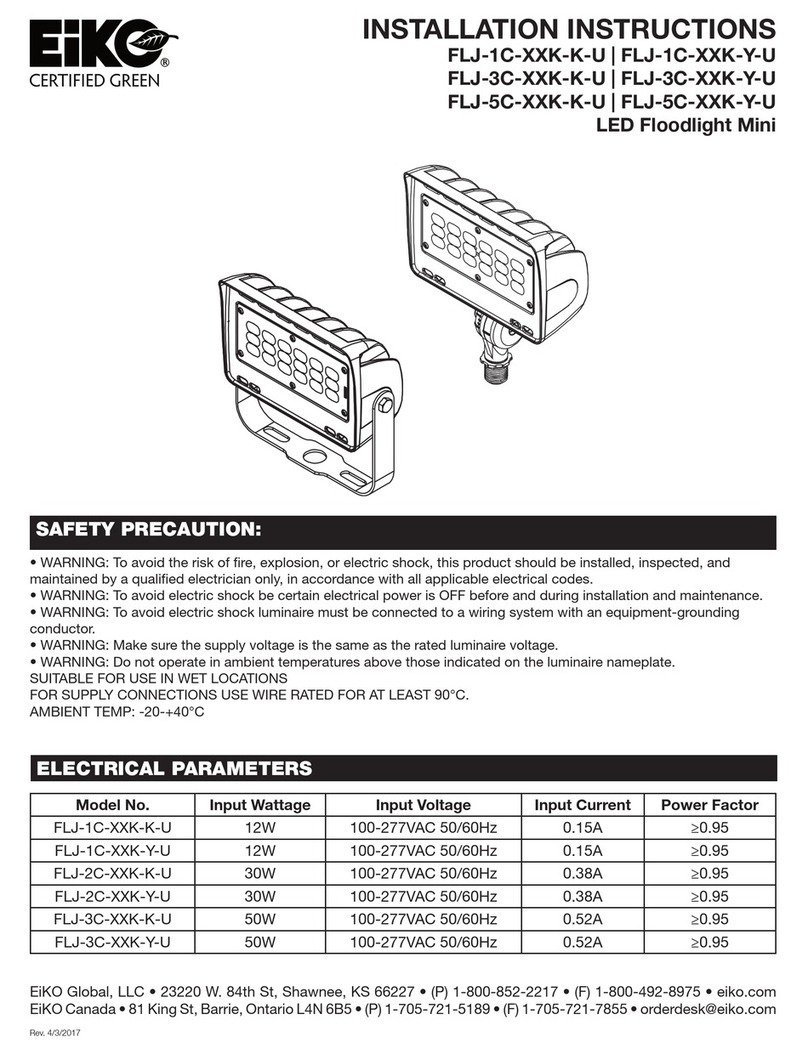
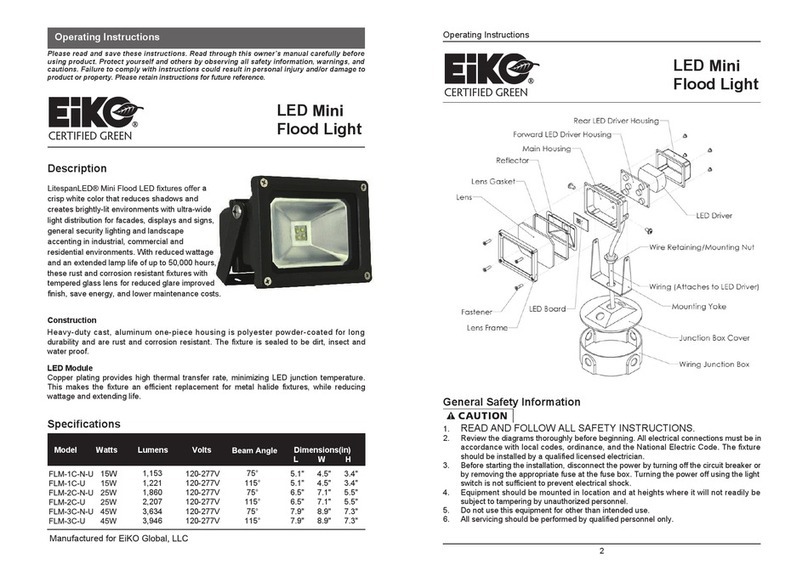
Eiko AFL-3C-W-U Quick guide

Before beginning installation or service, disconnect the power by turning off the circuit breaker. Turning the power off
by using the light switch is not sufficient to prevent electrical shock. This floodlight is for outdoor use and should not be
used in areas of limited ventilation or high ambient temperature. All work should be performed by a qualified
electrician.
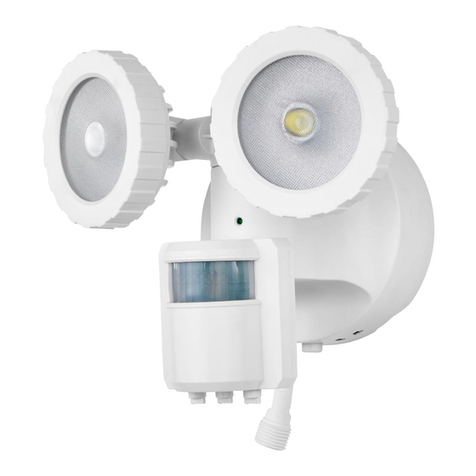
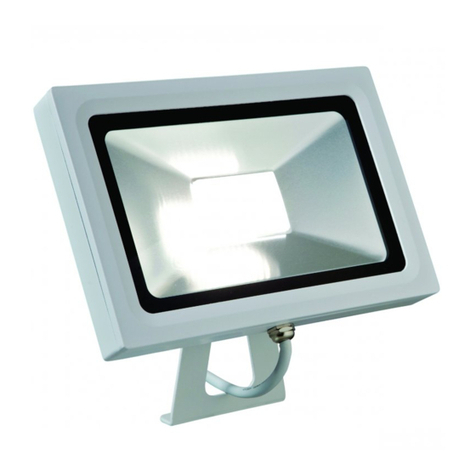
This medium-size square-profile floodlight combines the durable strength of die-cast body construction with an
aesthetically pleasing shape. It is fully sealed and gasketed for both upward and downward aiming. Its faceted reflector
assembly delivers an effective forward throw pattern. This fixture is fitted for several mounting arrangements. It includes
a water-tight bushing and cord, so it is ready for use in wet locations. Typical applications include general lighting of
grounds, storage yards, auto sales lots, parking areas, and floodlighting of signs and building fronts.
TRUNNION/YOKE MOUNT: Drill holes in the mounting surface and bolt the trunnion/yoke in place. Attach the floodlight
to the trunnion/yoke with the two bolts provided. If using the provided watertight cord and bushing: Route the cord
into a nearby junction box and splice the wires to the branch circuit wires, black to black (hot), green to green (ground),
and white to white (neutral). Ensure that the entry hole to the junction box is made watertight with a bushing or other
device. If using electrical conduit: Open the fixture wiring compartment by loosening the two tamper-proof screws.
Remove the watertight cord and bushing from the hole at the base of the fixture. Attach the conduit and route the branch
circuit wires inside the fixture wiring compartment. Splice the fixture wires to the branch circuit wires, black to black (hot),
green to green (ground), and white to white (neutral). Close the wiring compartment by screwing down the two
tamper-proof screws.
POLE MOUNT: Drill holes in mounting surface and bolt pole mount in place. Pull the branch circuit wires through the
pole mount and splice to the floodlight wires: black to black (hot), green to green (ground), and white to white (neutral).
Push the splices inside the pole mount. Attach the floodlight to the pole mount using the two bolts provided.
SLIP FITTER: Remove the watertight bushing from the floodlight. Pull the floodlight wires through the slip fitter and
attach the slip fitter to the floodlight using the provided bolts. Splice the branch circuit wires to the floodlight wires: black
to black (hot), green to green (ground), and white to white (neutral). Push the splices inside the pole. Slide the slip fitter
over the top of the pole and tighten the set screws to hold the floodlight in place.
The driver installed in this fixture is designed for operating voltages in the range 120 to 277 volts AC.
A photocell option is available.
Check your power source. Check the electrical connections.
052015
INSTALLATION AND SERVICE INSTRUCTIONS
AFL-3C-W-U & AFL-5C-W-U LED FLOODLIGHT
PRECAUTIONS
APPLICATION
DRIVER VOLTAGE
ACCESSORIES
TROUBLESHOOTING CHECKLIST: If the luminaire does not work.
INSTALLATION

INSTALACIÓN EINSTRUCCIONES DE SERVICIO
AFL-3C-W-U & AFL-5C-W-U LED FLOODLIGHT
PRECAUCIONES
Antes de comenzar la instalación o servicio, desconecte la energía apagando el interruptor eléctrico general. Apagar la
bombilla no es suficiente para prevenir un choque eléctrico. Este reflector es para uso exterior y no debe ser usado en
áreas con ventilación limitada o una temperatura ambiente muy alta Todo el trabajo debe ser realizado por un
electricista cualificado.
ADVERTENCIA
Asegúrese de que la energía eléctrica estéapagada antes de comenzar la instalación o el mantenimiento.
Todo el cableado debe ser hecho por un electricista cualificado.
APLICACIÓN
Este reflector cuadrado de tamaño mediano combina la durabilidad de su estructura con una forma estéticamente
agradable. Estátotalmente sellada y tapada arriba y abajo. Su ensamblaje tipo reflector produce un patrón de luz
eficaz. Esta luminaria se ajusta para diferentes tipos de montajes. Incluye un forro a prueba de agua y un cable, de
modo que se puede usar en lugares húmedos. Las aplicaciones típicas incluyen iluminación general de terrenos,
áreas de almacenamiento, parqueaderos e iluminación de señales y fachadas de edificios.
INSTALACIÓN:
MONTAJE DE ABRAZADERA/EJE: Perfore la superficie del montaje y atornille la abrazadera/eje en su lugar. Ajuste el
reflector al eje/abrazadera con dos pernos provistos. Si estáusando el forro y el cable a prueba de agua: Introduzca el
cable en la caja de conexiones y empalme los cables con los cables del circuito, negro con negro (fase), verde con verde (tierra), y
blanco con blanco (neutro). Asegúrese que el agujero de entrada de caja de conexiones sea a prueba de agua con un forro u otro
dispositivo. Si estáusando conducto eléctrico: Abra el compartimiento de cableado de la luminaria aflojando los dos
tornillos de seguridad. Remueva el forro y el cable a prueba de agua del agujero en la base de la luminaria. Añada el conducto e
introduzca los cables del circuito derivado en el compartimiento de cableado de la luminaria. Empalme los cables con los cables del
circuito derivado, negro con negro (fase), verde con verde (tierra) y blanco con blanco (neutro). Cierre el compartimiento de
cableado atornillando los dos tornillos de seguridad. MONTAJE DE POSTE: Perfore la superficie del montaje y atornille el
montaje de poste en su lugar. Coloque los cables del circuito derivado a través del montaje de poste y empalme los cables del
reflector: negro con negro (fase), verde con verde (tierra) y blanco con blanco (neutro). Empuje los empalmes en el interior del
montaje del poste. Ajuste el reflector al montaje del poste usando dos pernos provistos. POSICIONADOR DESLIZANTE:
Remueva el forro a prueba de agua del reflector. Coloque los cables del reflector a través del posicionador deslizante y ajuste el
posicionador al reflector usando los pernos provistos. Empalme los cables del circuito derivado a los cables del reflector: negro con
negro (fase), verde con verde (tierra) y blanco con blanco (neutro). Empuje los empalmes en el interior del poste. Ubique el
posicionador deslizante sobre la parte superior del poste y ajuste con tornillos manteniendo el reflector en su lugar.
VOLTAJE DEL CONTROLADOR
El controlador instalado en esta luminaria estádiseñado para voltajes que van de 120 a 277 voltios AC.
ACCESORIOS
Una opción de fotocelda estádisponible.
LISTA DE RESOLUCIÓN DE PROBLEMAS: Si la luminaria no funciona.
Revise su fuente de energía. Revise las conexiones eléctricas.
052015

Avant de commencer l'installation ou service, débranchez l'alimentation électrique en éteignant l'interrupteur
principale. Débranchez l'alimentation électrique avec le interrupteur de lumière ne est pas suffisante pour éviter les
chocs électriques. Cette projecteur est pour l'extérieur et ne doit pas être utilisé dans les zones de ventilation limitée
ou avec la température ambiante élevée. Tout travail doit être effectué par un électricien qualifié.
AVERTISSEMENT:
S’assurer que toute alimentation possible est COUPÉE avant de commencer l’installation ou l’entretien. Tout le
câblage doit être fait par un électricien vérifié.
Ce projecteur carré de taille moyenne combine la solidité avec une forme esthétique. Il est entièrement scellé vers le
haut et vers le bas. Son montage type réflecteur fournit un modèle de lumière efficace. Ce luminaire est équipé pour
plusieurs types de montage. Il comprend une traversée isolée étanche à l'eau et le câble, il est donc prêt à l'emploi
dans des endroits humides. Les applications typiques incluent l'éclairage général des motifs, zones de stockage, lots
de ventes d’automobiles, zones de stationnement, et signes et façades de bâtiments.
MONTAGE DE TOURILLON /ATTELAGE: Percez des trous dans la surface de montage et vissez le tourillon /
attelage en place. Fixez le projecteur sur le tourillon / attelage avec les deux boulons fournis. Si vous utilisez
le traversée isolée étanche à l'eau et le câble: dirigez le câble dans une boîte de jonction et connectez les fils
aux câbles du circuit de dérivation, noir à noir (phase), blanc à blanc (neutre) et vert au vert (terre).Assurez-vous
que le trou de la boîte de jonction est étanche à l'eau avec une bague ou un autre dispositif. Si vous utilisez un
conduit électrique: Ouvrez le compartiment de câblage du liminaire en dévissant les deux vis. Retirez le câble et la
traversée isolée étanche à l'eau du trou à la base du luminaire. Fixez le conduit et dirigez les fils des circuits de
dérivation à l'intérieur du compartiment de câblage du luminaire. Connectez les câbles d'alimentation électrique
à la boîte de dérivation - noir à noir (phase), blanc à blanc (neutre) et vert au vert (terre). Fermez le compartiment
de câblage en vissant lesdeux vis.
MONTAGE DE POSTEAU: Percez des trous dans la surface de montage et vissez le montage de posteau en
place. Tirez les fils des circuits de dérivation à travers du montage et connectez aux fils de projecteur: noir à noir
(phase), blanc à blanc (neutre) et vert au vert (terre).
Poussez les épissures à l'intérieur du montage de posteau. Fixez le projecteur sur le montage deposteau avec les
deux boulons fournis. SLIP FITTER: Retirez la bague étanche à l'eau du projecteur. Tirez les fils de projecteurs à
travers du slip fitter et fixez le slip fitter dans le projecteur en utilisant les boulons fournis. Connectez les câbles
circuits dedérivation aux fils de projecteur - noir à noir (phase), blanc à blanc (neutre) et vert au vert (terre). Poussez
les épissures à l'intérieur du posteau. Placez le slip fitter sur le dessus du posteau et serrez les vis de fixation pour
tenir le projecteur en place.
INSTRUCTIONS DE MONTAGE ET
DE SERVICE
AFL-3C-W-U & AFL-5C-W-U PROJECTEUR LED
:
PRÉCAUTI ON
APPLICATION
INSTALLATION
VOLTAGE DU DRIVER
Le driver installé dans cet appareil est conçu pour 120 à 277 AC.
DÉPANNAGE: Si la lumière ne fonctionne pas.
Vérifiez votre source d'alimentation. Vérifiez les connexions électriques.
052015
ACCESSORIES
Une option de photocellule est disponible.
This manual suits for next models
1
Table of contents
Languages:
Other Eiko Floodlight manuals
Popular Floodlight manuals by other brands

ledxon
ledxon EDOS Pro installation manual
Eaton
Eaton CROUSE-HINDS PRO APF Series instruction manual
Solight
Solight WM-30W-FEL instructions
Professional Entertainment Technology
Professional Entertainment Technology BEAM-2R/PRO user manual

Kosnic
Kosnic VER600-B50 manual
Chauvet
Chauvet Freedom Par Tri-6 Quick reference guide

