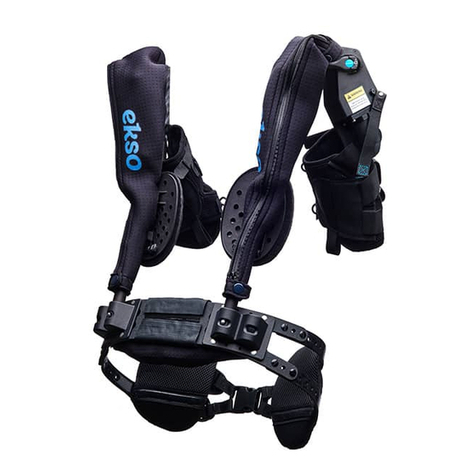
Ekso Bionics EksoVest User manual

EksoBionics,Inc.
EksoVest
Operator Manual
Ekso Bionics, Inc.
© February 2018 106892A

Ekso Bionics, Inc.
EksoVest Operator Manual
2
106892A
This Page Intentionally Left Blank

Ekso Bionics, Inc.
EksoVest Operator Manual
3
106892A
Copyright
© 2018 Ekso Bionics, Inc.
Part Number
106892A2
All Rights Reserved
No part of this publication may be reproduced, transmitted, transcribed, stored in a
retrieval system, or translated into any language or any computer language, in any
form or by any third party, without the prior written permission of Ekso Bionics, Inc.
Trademarks
Ekso®, Ekso Bionics®, Ekso Works®, EksoWorks™, Amplifying You™, and DEFY
GRAVITY®are trademarks of Ekso Bionics, Inc.
Patents/Patents Pending
The EksoVest is U.S. patent pending.
Disclaimer
Ekso Bionics, Inc., its affiliates and vendors (collectively “Supplier”) shall not be
liable for any injury or damage suffered by any person, either directly or
indirectly, as a result of the use or repair of the EksoVest in violation of its
intended use. Supplier does not accept any responsibility for any damage
caused to its products, either directly or indirectly, as a result of use and/or
repair by unauthorized personnel.
Contact Information
Ekso Bionics, Inc.
1414 Harbour Way, South
Suite 1201
Richmond, CA 94804
Office: 510-984-1761
Fax: 510-927-2647
Customer Service: 888-869-7683
www.eksoworks.com

Ekso Bionics, Inc.
EksoVest Operator Manual
4
106892A
Standard Limited Warranty Against Defects in Materials and Workmanship
Ekso Bionics, Inc. warrants the EksoVest to be free of manufacturing defects in
material and workmanship for a period of one year from the original date of
purchase. Consumable parts including all soft goods (arm cuffs, arm straps, hip belt,
hip belt extender, shoulder straps, mesh back, neck roll, and compression arm
sleeves) with a demonstrable defect are covered by this same one-year warranty.
Damage caused to these consumable parts due to normal wear and tear during the
course of normal use is not covered by this warranty. The Standard Limited Warranty
does not cover any repairs required as a result of user errors, accidents, misuse,
neglect or operation outside of the device’s intended use. The Standard Limited
Warranty is void if the EksoVest is altered in any way or has not been used in
accordance with the operator manual. Please review all product documentation for
important product care and maintenance requirements.

Ekso Bionics, Inc.
EksoVest Operator Manual
5
106892A
Table of Contents
MEASUREMENT AND FITTING INFORMATION ........................................................ 7
VEST HARDWARE .............................................................................................10
VEST SOFT GOODS ............................................................................................11
CUSTOMIZING SIZE WITH VEST COMPONENTS ..................................................... 12
ON/OFF SWITCH.............................................................................................. 17
INSTALLING/CHANGING ACTUATOR SPRINGS ..................................................... 19
ADJUSTING VEST ACTIVATION ZONE................................................................... 21
DONNING AND DOFFING THE EKSOVEST............................................................ 23
MAINTENANCE AND TROUBLESHOOTING ........................................................... 26
APPENDIX A: COMPONENTS AND ACCESSORIES ..................................................27

Ekso Bionics, Inc.
EksoVest Operator Manual
6
106892A
This Page Intentionally Left Blank

Ekso Bionics, Inc.
EksoVest Operator Manual
7
106892A
MEASUREMENT AND FITTING INFORMATION
Measurement Recommendations: Another person must take your measurements
using a tailor’s tape; do not measure yourself. When measuring, tape should be kept
as perpendicular or parallel to the ground as possible. Stand straight; wear normal
work clothes.
Hip Belt Measurement Information
Position: Standing straight, arms relaxed at sides
Instructions: Measure torso circumference at top of the
pelvic bones (the iliac crest). Keep measuring tape even at top
of pelvic bones; measure over work clothes.
Torso Tubes Measurement Information
Position: Standing straight; arm away from waist with palm
back
Instructions: Measure from the top of the pelvic bones to the
top of the shoulder. The top of the shoulder is typically where
the seam lines of a shirt intersect.
Measurement:
Measurement:

Ekso Bionics, Inc.
EksoVest Operator Manual
8
106892A
Arm Cuff Length Measurement Information
Position: Standing straight, one arm raised with elbow flexed
Instructions: Measure from armpit to edge of the elbow. Do
not measure above or beyond elbow bend.
Arm Cuff Diameter Measurement Information
Position: Standing straight, one arm raised with elbow flexed
Instructions: Measure circumference of upper arm at bend in
elbow. Keep measuring tape even and vertical.
Upper Arm Strap Measurement Information
Position: Standing straight, arm relaxed at side
Instructions: Measure circumference of upper arm at armpit.
Keep measuring tape even and horizontal.
Measurement:
Measurement:
Measurement:

Ekso Bionics, Inc.
EksoVest Operator Manual
9
106892A
For each table or matrix, circle the size that matches the operator’s measurements.
If one or more of the measurements fall outside of the listed ranges, please note the
measurement(s) next to the specific chart and contact Ekso Bionics for advice.
These measurements are provided as recommendations. Personal comfort and
preference should always guide individual component size choices.
Hip Belt
Size
S/M L/XL
Inches 26in – 36in 36in – 46in
Centimeters 66cm – 92cm 92cm – 118cm
Torso Tubes Size
B1 to B6 A1 to A6
Inches 14.5in – 19in 18.5in – 23in
Centimeters 37cm – 49cm 47cm – 59cm
Arm Cuffs
Upper Arm Length
8in – 10in 10in – 12in 12in – 14in+
20cm - 25cm 25cm - 30cm 25cm - 30cm+
Bicep Diameter
9in - 11.5in S S S
23cm - 29cm
11.5in – 14in S S or M M
29cm - 35cm
14in - 16.5in M M L
35cm - 42cm
Upper Arm
Strap
Size
S M L
Inches 9in – 11in 11in – 14in 14in – 17in
Centimeters 23cm – 28cm 28cm – 36cm 36cm – 44cm

Ekso Bionics, Inc.
EksoVest Operator Manual
10
106892A
VEST HARDWARE
The mechanical and hardware components of each EksoVest are identified in the
following drawing and table.
Component
Identifier Component Name
A Arm Cuff Plate
B Actuator Spring
C ON/OFF Switch and Tether
D Actuator Activation Zone Indicator
E Actuator
F Link Assemblies
G Torso Plate and Mesh
H Torso Tubes (bottom, middle, top)
I Waist Plate

Ekso Bionics, Inc.
EksoVest Operator Manual
11
106892A
VEST SOFT GOODS
Each EksoVest consists of the hardware components described in the previous
section combined with appropriately sized soft goods. Each operator uses the sizing
charts and matrix to select the soft goods that complete his/her vest. The operator
attaches the customized soft goods to the vest’s torso plate, waist plate, and the
arm cuff plates. All vest-related soft goods are identified in the following drawing
and table.
Note: The General Configuration Vest kit includes all items/sizes identified in the
table; the Specific Worker Vest contains only the specific sizes and number of
components selected for an individual operator. (See APPENDIX A for more
information.)
Component
Identifier Kit-Included Items Number Sizes
A Hip Belt 2 S/M, L/XL
B Hip Belt Extender 1 n/a
C Arm Cuffs 3 sets S, M, L
D Upper Arm Straps 3 sets S, M, L
E Neck Roll 1 n/a
F Compression Arm Sleeves* 2 sets S/M, L/XL
* Ekso Bionics recommends that compression arm sleeves are always worn on arms during vest use.

Ekso Bionics, Inc.
EksoVest Operator Manual
12
106892A
CUSTOMIZING SIZE WITH VEST COMPONENTS
The EksoVest is designed to be customized for each operator (see MEASUREMENT
AND FITTING INFORMATION beginning on page 7). Select the sizes that match the
operator’s measurements; assemble and attach or install the customized
components as described in this section.
Torso Tubes
Vest Customized to A4
Vest Customized to B4
1. Based on operator’s measurement, determine if torso tube
setting size is in the A or B range.
2. If A, press lower detent button on the bottom tube and
slide upper tubes until the middle tube is seated at the A
button setting.
3. Once adjusted for A or B, press the highest detent button
and slide top tube until button is seated at the appropriate
number (1 to 6) setting.

Ekso Bionics, Inc.
EksoVest Operator Manual
13
106892A
Hip Belt (S/M or L/XL)
1. Working from the front of vest, slide one side of the hip belt over waist
plate. Position the waist plate side and hip belt so that the plate aligns with
and “sits” completely in the hip belt’s attachment pocket.
2. Press to connect the waist plate and
hip belt’s hook-and-loop fasteners on
chosen side.
3.
Attach hip belt to opposite side
of waist plate, bending plate as
needed to attach belt and secure
hook-and-loop fasteners.
4. Buckle both straps around the waist
plate.
5. Connect each shoulder strap to
hip belt with buckle.

Ekso Bionics, Inc.
EksoVest Operator Manual
14
106892A
Hip Belt Extender
The hip belt extender expands the width of the hip belt, if needed.
1. Put one hip belt strap
through the elastic strap
on the hip belt extender
and fasten buckle.
2. Wrap hip belt with
attached belt extender
around waist and repeat
step 1 on opposite side.
Extender sits inside hip
belt, secured by the elastic
straps and buckles (see
picture).
3. Pull hip belt straps to cinch for a tight but comfortable fit.
Arm Cuff and Upper Arm Strap (S, M, or L)
1. Fit arm cuff onto arm cuff plate and
work plate into arm cuff pocket until the
three snaps line up. Snap in place.
Note: Action will require extra force
until arm cuff pocket is broken-in.
2. Install upper arm strap to plate with
snap.
3. Repeat steps 1 and 2 on opposite side.

Ekso Bionics, Inc.
EksoVest Operator Manual
15
106892A
Link Assemblies Adjustment
Rarely, an operator may need to adjust the
placement of the link assemblies to improve
his/her range of motion. When an operator’s
range of motion is hampered, the links don’t
move freely around the operator’s back and
shoulders. Instead, the links press into the
operator’s back (see photo). This restriction
would be particularly felt when an operator
reaches in front with his/her arms.
Each side of the torso plate has three sets of top-and-bottom holes for link assembly
attachment (these holes are circled in the picture on the left). The vest’s default setting (the
middle pair of holes) is shown in the picture on the right. When range of motion is impeded, the
link assemblies must be shifted to the widest adjustment (i.e., the outermost set of holes).
If such an adjustment is needed, reposition each link assembly to a different hole pair as
described in the following procedure. Note: Both the left link assembly and the right link
assembly must be adjusted to the same placement.

Ekso Bionics, Inc.
EksoVest Operator Manual
16
106892A
1. Using a 4-mm hex key, remove the two (2)
button head socket cap screws from the
torso plate’s (oval) front washer plate.
2. Remove link assembly from torso plate and
retain all parts. Repeat on the other link
assembly.
3. Properly position one of the torso’s
(rectangular) back washer plate on the two
bosses of the link base pivot housing. Each
back washer plate must be positioned as
shown in the adjacent pictures.
Right Arm Link Left Arm Link
4. Position one of the assemblies so that the
two link bosses align with the correct torso
holes for the desired adjustment. Insert link
bosses into these correct holes.
(Note: Picture shows the default adjustment
placement for the link assemblies.)
5. Position (oval) front washer plate on
bosses. Use a 4-mm hex key to install the
two (2) button head socket cap screws
attaching link assembly to torso.
6. Repeat steps 1 to 5 on the other link
assembly.

Ekso Bionics, Inc.
EksoVest Operator Manual
17
106892A
ON/OFF SWITCH
Each EksoVest arm has an ON/OFF switch (with tether) located on the actuator
housing. Switching the vest ON activates the spring support of the actuator. This
spring support triggers the actuator and arm cuff plate to move upward with great
speed and power unless the arm cuff plate is secured. The arm cuff plate is secured
in two ways:
When wearing the vest, the operator
secures the arm cuff plates by
properly wearing the arm cuff safety
straps and buckling the arm cuffs
and upper arm straps around his/her
arms. The operator must also keep
his/her arm fully down (i.e., directly
at his/her side) when flipping the
switch ON/OFF. See adjacent
picture.
When the vest in not being worn, the
arm cuff plate must be firmly held to
secure the plate and actuator as the
arm moves up. See adjacent
pictures.

Ekso Bionics, Inc.
EksoVest Operator Manual
18
106892A
WARNING: High-Pressure Spring
Secure arm cuff plate before turning ON to avoid injury.
The ON/OFF switch and labels
(shown in the OFF position).
Switch is Up and is in the
ON position.
Switch is Down and is in
the OFF position.
Note: The arm cuff plate is being secured.

Ekso Bionics, Inc.
EksoVest Operator Manual
19
106892A
INSTALLING/CHANGING ACTUATOR SPRINGS
The EksoVest has four sets of actuator springs that control the level of assistance
(“the spring support”) in each arm. Each spring level matches an approximate
amount of lift support.
The support level is labeled on each spring’s cap. Level 1 provides the least arm
support and Level 4 provides the most. The following table shows the different
spring labels and the approximate lift support offered by each of the four different
actuator springs.
Spring Cap Labels and Approximate Spring Support (lb./kg)
Support Level 1 Support Level 2 Support Level 3 Support Level 4
5 – 7 lb. 7 – 9 lb. 9 – 12 lb. 12 – 15 lb.
(2.2 – 3.1 kg) (3.1 – 4.0 kg) (4.0 – 5.4 kg) (5.4 – 6.8 kg)
Ekso Bionics ships all General Configuration Vests with four (4) sets of springs; each
Specific Worker Vest is shipped with the selected set of support level springs. When
first using or when sizing the EksoVest, Ekso Bionics recommends beginning with
Level 1 and changing to a spring set with a higher level of support as needed and/or
desired by the operator.

Ekso Bionics, Inc.
EksoVest Operator Manual
20
106892A
WARNING: Actuator contains high-pressure spring. Secure arm cuff plate as you
turn switch lever ON and guide arm cuff plate to full vertical (up) position. Failure
to secure the arm cuff plate may result in injury. Changing the actuator spring
should be done when the vest is not being worn.
The EksoVest is shipped with protective caps covering both actuator cylinder
chambers. These caps must be removed before installing actuator springs for the
first time.
Installing/changing the actuator springs must be done when the vest is not being
worn. To change the actuator springs:
1. If protective cap is present on
actuator, remove cap and store
for future use.
2. Secure an arm cuff plate in the
down position and then enable
that actuator by flipping switch
to the ON position.
3. Continue to secure arm cuff
plate while carefully guiding the
plate to the full vertical (up)
position.
4. Unscrew and remove the spring
from actuator cylinder
chamber.
5. Select the desired spring and
insert into actuator cylinder
chamber.
6. Screw in the spring, tightening
fully by hand.
7. Secure arm cuff plate and then
carefully guide the plate to the
down position.
8. Flip the switch to the OFF
position.
9. Repeat steps 1 to 8 on opposite
side, if needed.
Table of contents
Other Ekso Bionics Industrial Equipment manuals
Popular Industrial Equipment manuals by other brands
Lafferty
Lafferty VC-1016 Installation & operation instructions

HBM
HBM Genesis ISOBE5600 user manual
Elgo
Elgo LIMAX2M Series operating manual
Hubbell
Hubbell KILLARK UGFI 2P Series INSTALLATION, OPERATION & MAINTENANCE DATA SHEET
Jorc
Jorc NUFORS-CR Maintenance instructions
Novexx Solutions
Novexx Solutions LA-SO operating manual
