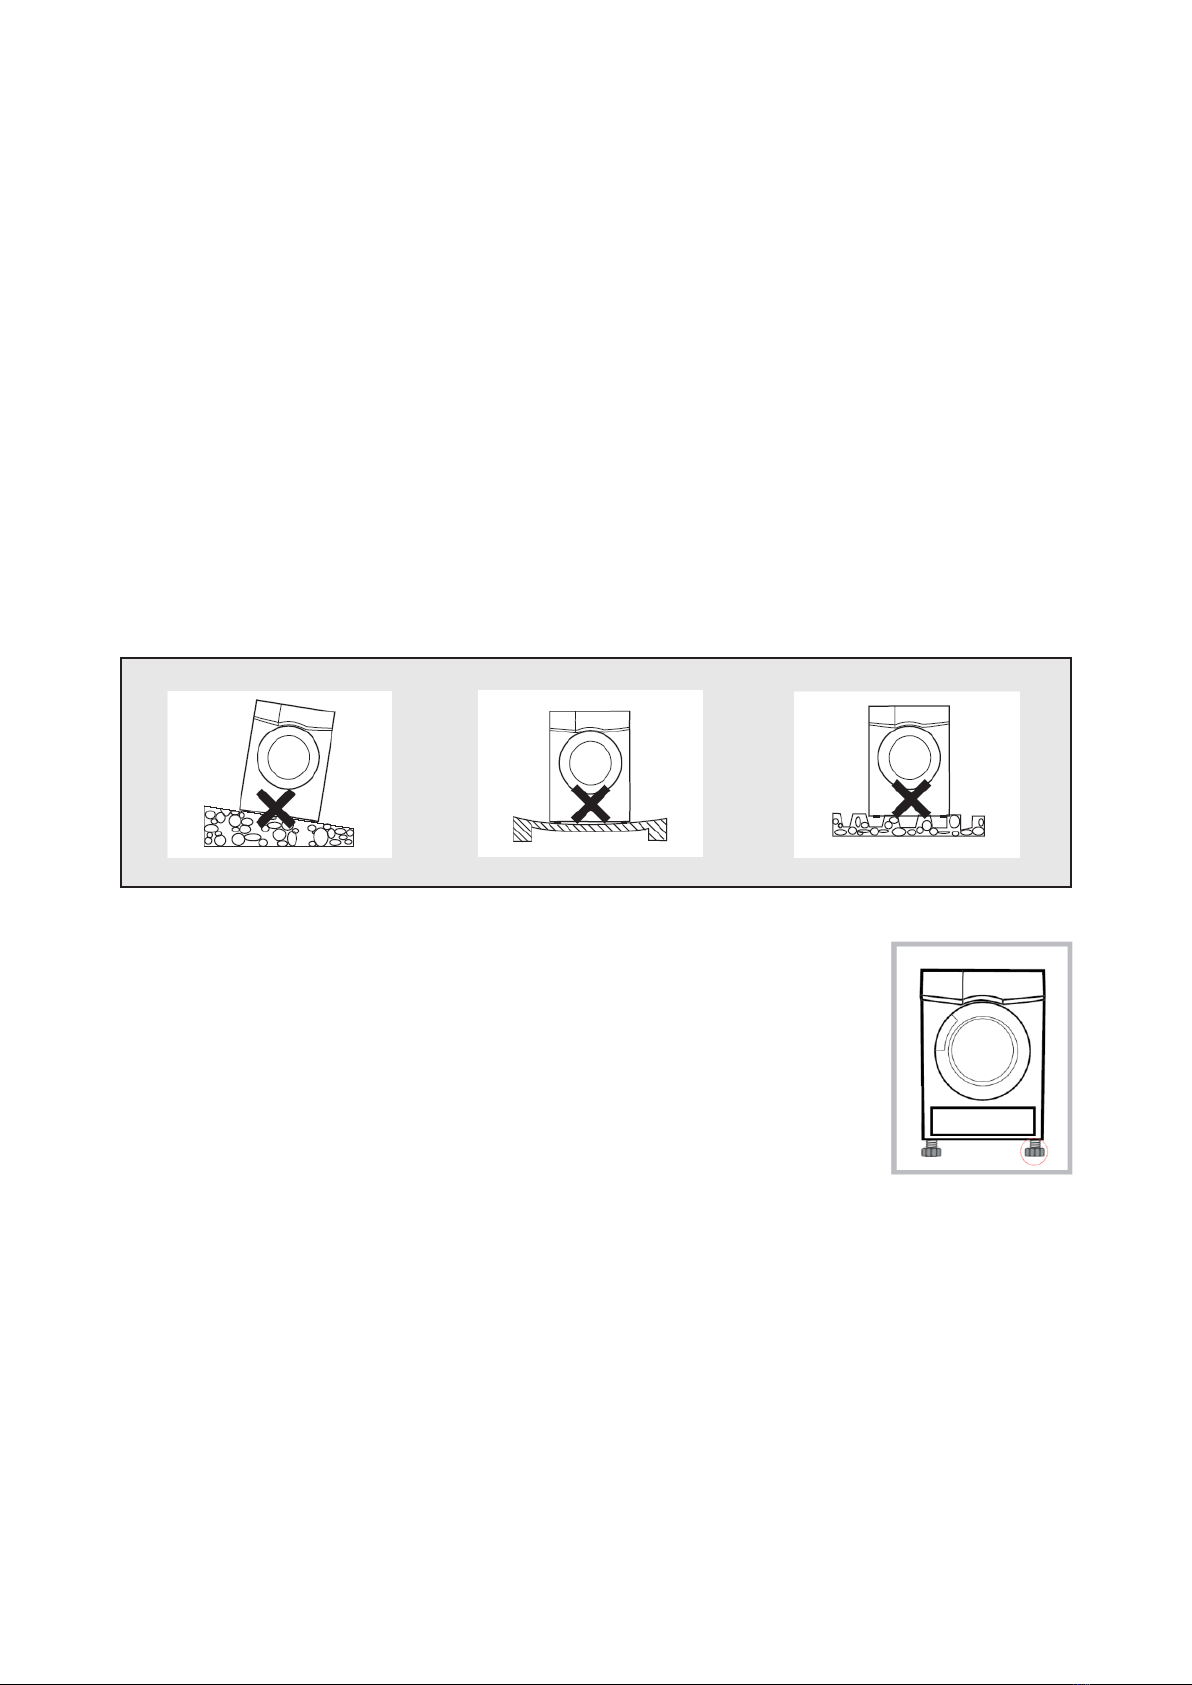
REMOVE ALL PACKING MATERIALS FROM THIS PRODUCT BEFORE USING IT. THIS
APPLIANCE MUST BE INSTALLED IN LEVEL. PLEASE ENSURE THE ELECTRICITY
SUPPLY TO THIS APPLIANCE IS DISCONNECTED BEFORE INSTALLING.
Please read this instruction carefully. It is advisable to keep this instruction manual in a
safe place for future reference.
SAFETY PRECAUTIONS
1. Keep this appliance out of reach from children. Do not let them to operate the
appliance without supervision.
2. Check the current rating on the rating plate and make sure the current supplied is
matched with the appliance before using.
3. This product is for household and indoor use only.
4. This product is not intended for use by person (including children) with reduced
physical, sensory or mental capabilities unless they have been given supervision or
instruction concerning use of the appliance by a person responsible for their safety.
5. If the power cord or plug is damaged, it must be replaced by the service centre or a
qualified service technician to avoid hazard.
6. Any electrical work required to install this appliance should be carried out by a
qualified technician or competent personnel.
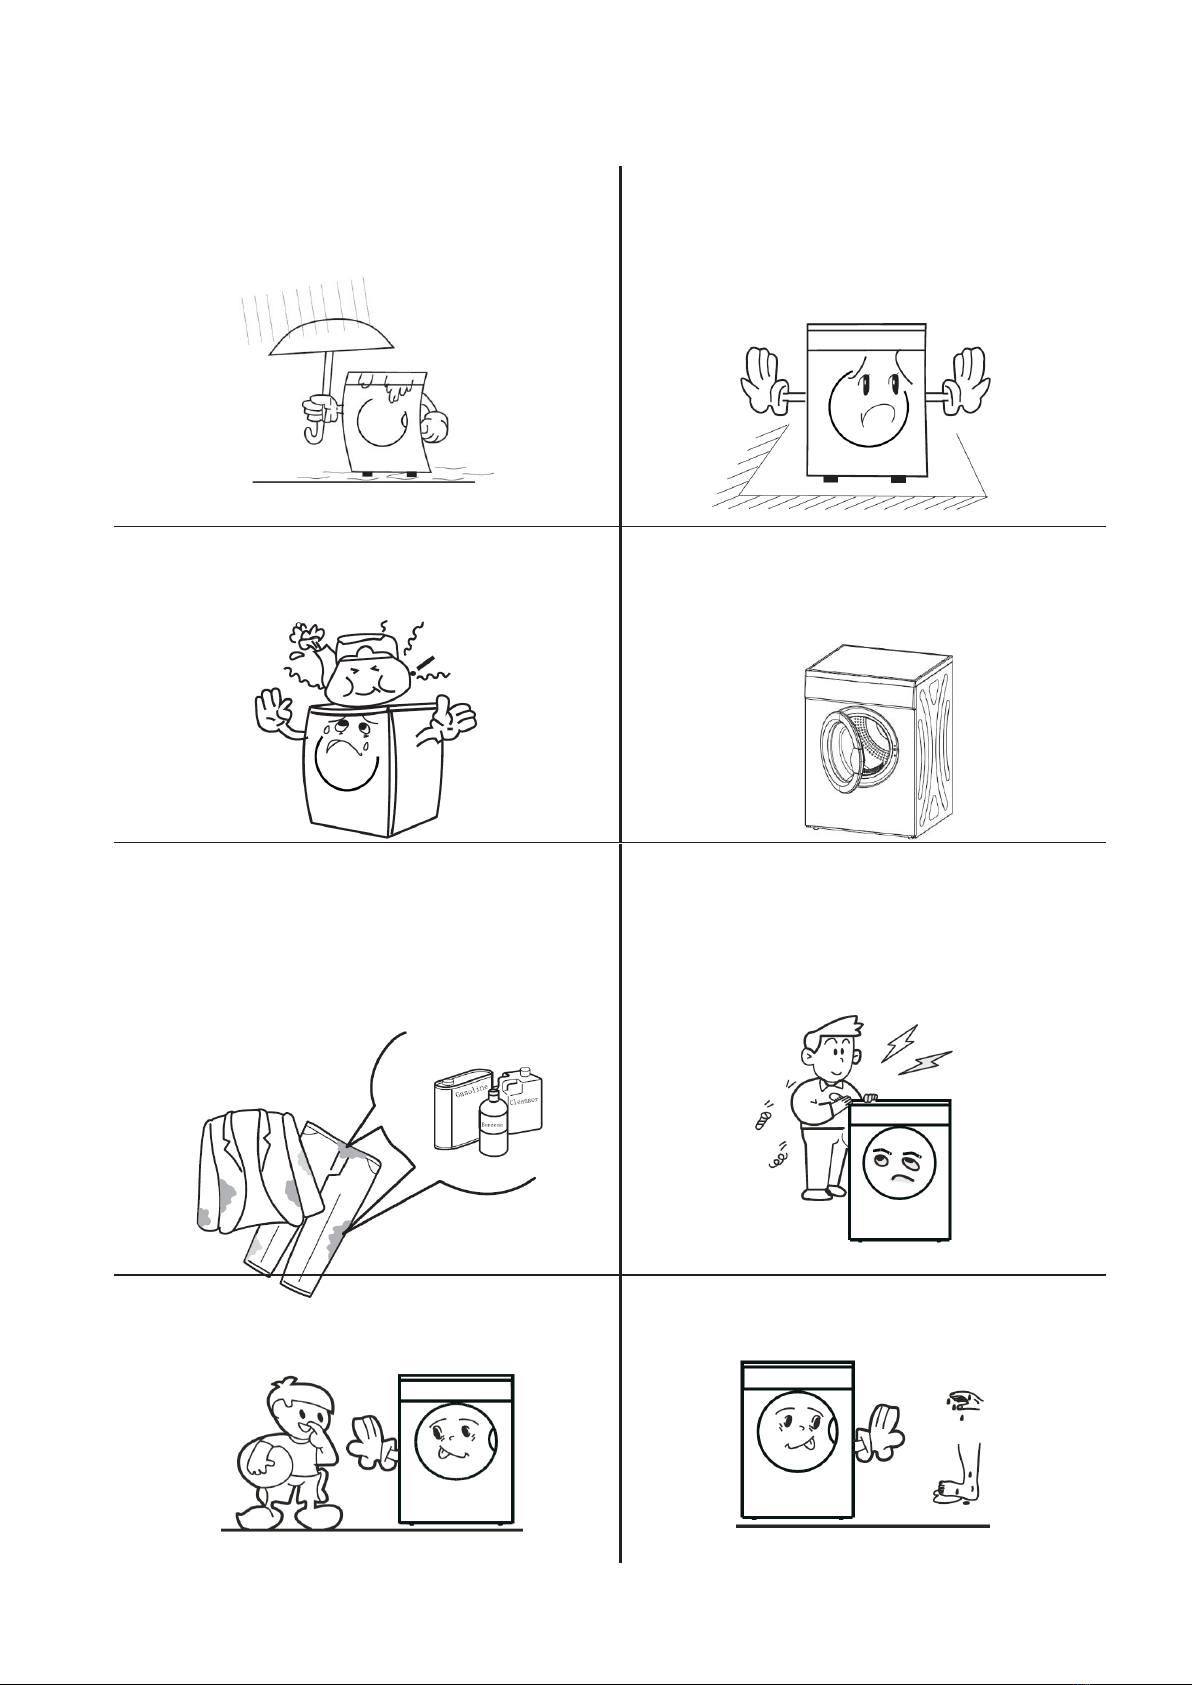
WARNING - to reduce the risk of fire or injury to persons or property, please
read and follow below instructions carefully:
Do not operate this appliance if it has malfunctioned, damaged or appears damaged in
any way. Make enquiry to our service centre and return the complete set to the place
of purchase for inspection, repair or replacement.
This appliance must be grounded and the ground wire should not be connected to any
heating pipe and gas pipe.
Avoid placing any objects into the appliance such as coins, nails, screws, or objects
which may cause severe damage to the drum.
Objects made with rubber or any latex material such as hand gloves and shower caps
should not be dried in the tumble dryer at any time.
Laundry which has been contaminated with flammable substance such as petrol,
kerosene, cooking oil or turpentine should be washed in hot water with detergent
before drying with this appliance. Only tumble dry laundry washed with water.
If the tumble dryer is place on top of a washing machine, it is compulsory to use the
stacking kit (optional accessory) to hold the appliance.
Do not overload the appliance. Laundry which is dripping wet should not be dried with
the appliance.


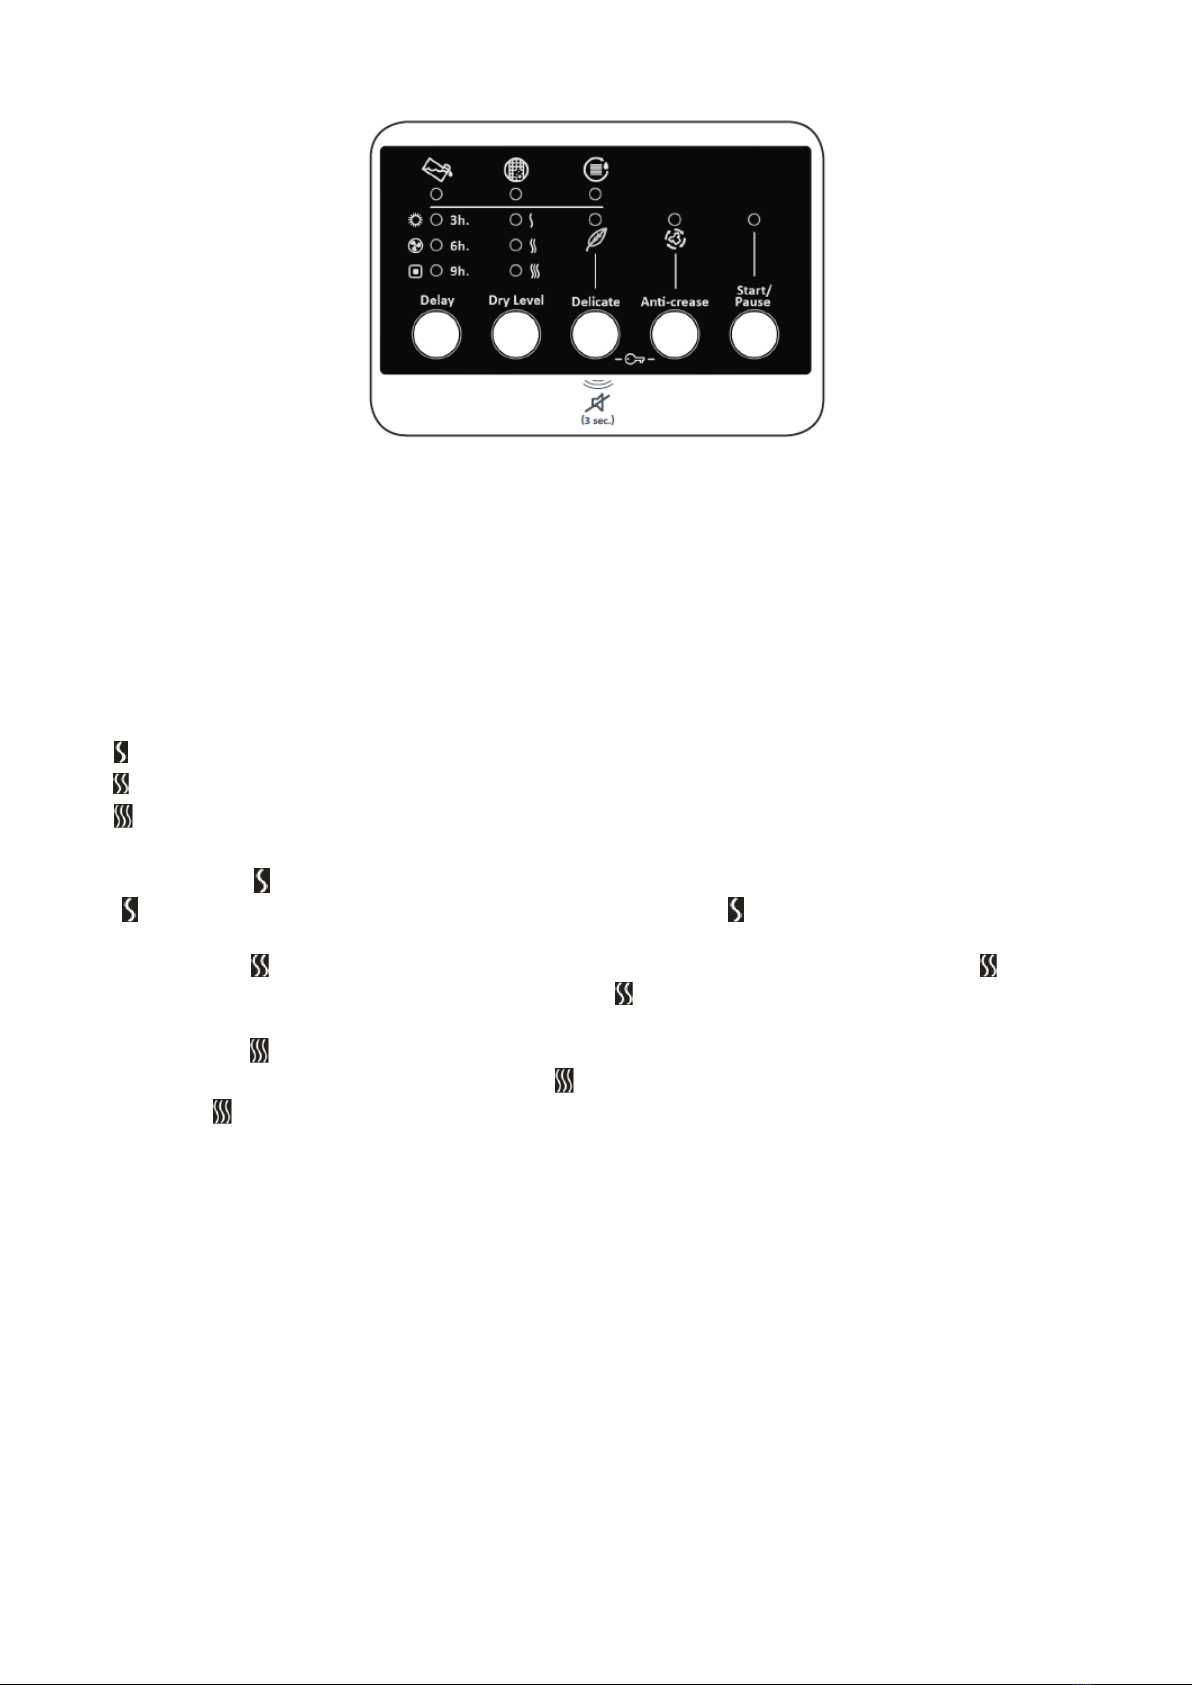
 User manual")

 User manual")