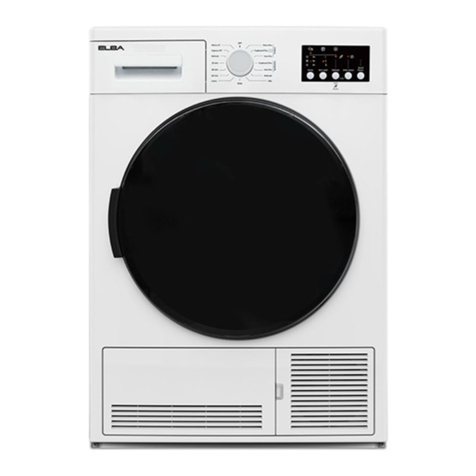
Elba Elba DG60F27EW1 Mounting instructions

@LB
Installationinstructions
U5

the
in must be
followed to minbnize the .risk of fire or
--\VHAT TO DO IF YOU SMELL GAS
° Do not try to light any appliance°
÷ Do not touch any electrical switch; do
not use. any phone _oinyour°....building.
÷ Clear the room> baddmg or area o_ all
occapaatso
÷ Immediately call your gas supplier from
a neighbors phone° Follow the gas
supplier's instructions carefully°
÷ If you. cammt .reach your gas supplier,
call the fire departmemo
must be
per_brmed by a qualified installer, service
agency or the gas supplier°
The Governor of California is required to publish a list of substances known to the
state of Califorma to cause cancer or reproductive harm and requires businesses to
warn customers of potential exposures to such substances,
WARNING!: Gas appliances con'tain or produce substa_ces, which can cause death,
or serious illness and which are known to the State of California to cause cancer,
birth defects, or other reproductive harm, To reduce the risk from subs'tances in
fuel o_ from fuel combus't[on, make sure this app[[ance is installed, operated, and
maintained according to the manufacturers instructions,
In the state of Massachusetts
hsta[[ation must be performed by a qualified or licensed contractor, plumber, or gasfitter
qualified or licensed by the state.

Safety and warnings
Installation instructions
Installer responsibilities, Location requirements
Dimensions
Maximum length of exhaust duct
Alternative exhaust directions
Exhaust venting
Installation
Electrical requirements
Gas requirements
Level machine, Final installation check list
Features
Operating instructions
Reversing the door
Care labels
Drying special items
Other features
Limited warranty
3
4
6
7
8
10
11
13
15
17
18
19
2O
23
26
27
28
30
31
36
37
38
39
41
43
SAVE THESEINSTRUCTIONS
7hemodds showr_in thi UserCuid_,mdTyi'_otbedTvc_i/dTb/ein _;I/mdTrket_dT_d_re
subj_ t to chcmgeotony time.Forcurrer_tdet:;ils <;boutmodalond spe<ifJu;tion
ov(;i/obi/ity inyour country,p/eosevisitour/oc(;/webs/re listedon thebook(:over
or <:onto;tryout/oct';/%ors deo/et:

Thankyou for buying an Elba dryer.
We hope you en}oy using the dryer as much as we have enioyed designing it, We've gone
to a lot of effort to ensure it treats your clothes with the utmost care, drying them gently so
they will look better for longer. We know you'll enjoy the benefits of its easy loading drum.
Please take the time to read this User Guide carefully. It will help you operate and maintain
your new dryer.
Your safety, and the safety of others is very important, Located on your dryer and throughout
this guide are safety messages and instructions it is important that you understand and
follow them.
Fig 1Elba dry_r
It is _mportant that the User Guide should be retained with the appliance for future reference°
Should the appliance be sold or transferred to another owner, Mways ensure that the User
Guide Lsleft with the appliance in order that the new owner can familiarize themsdves with the
appliance and the rdevant warnin#s.

D yer safety
Fire Hazard
To reduce the risk of fire, e_ectric shock, or injury to persons, read the
SAFETYAND WARNINGS before operating this app[ianceo
Failure to follow to do socan _esu[t in death or e[ectdc shock°
Symbols
Symbols will be used in this guide to highlight when extra careis required. Abide by these at all
times to ensureyou andyour family are not harmed while operating your dryer.
[t isimportant to alwaysact with caution and usecommon sensewhen operating ;,,ourdryer.
Useonly as per instructed by the UserGuide.
This isthe safety alert symbol.This symbol alerts you to hazardsthat can kiJ[or
hurt you and others.
The safetyalert symbol and the word WARNINGwill precedeall safetymessages.
Thesewords mean:
YOu can be killed or seriously injured if you don't
follow instructions,
All safetymessageswill identify the hazard,tell you how to reducethe chanceof in}ury,and
tell you what can happen if the instructions are not followed.

Safety and warnings
£_ectM¢Shock Hazard
Fo#ow the safety precautions outlined in this User'Guide°
Failure to de socan result in death or e_ectric shock°
Important sa@ty instructions
Read aH instructions carefu@ before using this dryer°
Use this dryer oMy for its intended purpose as described in this User Guide°
Tominimize the possibility of electric shock, unplug this dryer from the power supply or
disconnect the dryer at the household d\_stribution panel (by removing the fuse or switching off
the circuit breaker) before attempting any user maintenance or cleaning°
InstMlation must conform with local codes, or in absence of local codes, with the National Fuel
Gas Code, ANSi Z223° 1iNEPA 54 or the @nadian Natural Gas and Propane Installation Code,
CSA B149° 1°
Insta#ations and service must be performed bYaquafified or ticensed contractor, plum bet or
gas#trot qualified or ficensed by the state, province, or region where this appliance is being
installe&
This dryer must be property installed and located in accordance with the installation Instructions
before it Lsused°
ThLsdryer, when installed, must be electrically grounded in accordance with IocM codes, or in
the absence of local codes, with the Nadonal Electr£al Code, ANSb'TVEPA70, or the @nadian
Electr£al Code, CSA C22° 1°
Do not install or store the dryer where it will be exposed to water or exposed to the weather°
Connect to aproperly protected, rated and sized power supply c#cuit to avoid electrical ovedoa&
Do not repa# or replace any part of the appliance or attempt any servicing, unless specifically
recommended in the published user repair instructions that you understand and have the skills to
carry out.
When disconnecting the dryer, pull by the plug rather than the cord or junction of the cord plug,
to avoid damage to the cord or junction of the cord plug°
Make sure the cord is located so that it will not be stepped on, tripped over or otherwise subject
to stress or damage,
Do not tamper with the controJs°
Note: Turning the cycle selector dim to an OFF position does NOT d_sconnect the appliance gem
the power supp_yo
Do not operate this dryer if it is damaged, maffunctioning, pardaHy d_sassembled or has missing
or broken parts, including a damaged cord or plug°
This dryer must be directly connected to an approved fixed dectr£M outlet, It cannot be plugged
into an extension cord or an adaptor plug,

Safety and warnings
Fire Hazard
Only dry fabrics that have been washed with waters
Do not use heat to dry articles containing foam rubber or similaHy
textured rubber4ike materiabo Dry on the FLUFF cyc_e_
A clothes dryer produces combustible _intand must be exhausted
outdoors° Take care to prevent the accumulation of Hnt around the
exhaust opening and in the surrounding area°
Failure to follow these instructions can result in death or personal injury,
To reduce the risk of fire in a tumble dryer the following should be observed:
Do not place items in a tumble dryer that have previously been cleaned in, washed in, soaked
in, or spot cleaned with flammable fiquids or solids. They are a fire or explosion hazard, H@Ny
flammable substances commonly used in domestic environments include acetone, denatured
a£ohoL gasdine, kerosene, some brands of spot removers and dry cleaning sob/ants, turpentine,
waxes, wax removers, vegetable oil, fish off, massage oil, and cooking off,
Do not _eave hot of-affected items in a pile or stack. This can prevent heat from escaping and
can create a fire hazard. OiJ...affected items can ignite spontaneously, especially when exposed
to heat sources such as a tumble dryer, The items become warm causing an oxidation reaction in
the oil This oxidation creates heat. ff the heat cannot escape the items can become hot enough
to catch fire.
Do not use heat to dry items containing rubber, foam rubber, plasdc or similar materials, (such
as padded bras, bath mats, rugs, bibs, baby pants, plastic bags, pillows etc), as these materials
might melt or burn. Some rubber materials when heated can under certain drcumstances
produce fire by spontaneous combustion. D#tyonly on the FLUFFcydeo
Unless specifically recommended by their manufacturer, do not use fabric softeners or similar
products in a tumble dryer,
Do not store or use gasoline or other flammable gases and flquids near this or any other
applianceo
Keep the area around the exhaust opening and adjacent surrounding areas free from the
accumulation of combustible materials such as lint, paper, rags, chemicals etco
Do not store any items that may burn or melt (such as paper materials, p_astics or plastic
containers, etc) next to the d#iyer,
Clean the tint filter each time you use the dryer, before or after each toado

Safety and warnings
The dryer must be exhausted to the outside. Carefully follow the venting details in the
'Installation instructions_
Keep the floor around your dryer dean and dry to reduce the possibility of slipping°
If your dryer is running and you want to unload or add dothes, open the dryer dooro
Do not reach into the appliance if the drum is moving.
Close supervL_ion is necessary if this dryer is used near children. Do not aNow children to p_ay
inside, around or with this dryer or any other appliance.
Never climb on, climb into, or stand on the dryer top or drum.
Undergarments that contain metM reinforcements shouM not be placed direcdy in the dryer
Damage to the dryer can result ff the metal reinforcements come _oose during drying, ff you wish
to dry these items use adrying rack (available as an optional accessory refer to page 7).
The interior of the appliance and exhaust duct should be deaned periodically by qualified service
personnel
When discarding or storing old clothes dryer, remove the door.
Your dryer has been made to the highest standards. Years of development and rigorous testing
ensure that you have bought a world-class product, in the unlikely event that a problem should
occur, refer to the 'Limited warranty' section at the back of this guide (refer to page 43).
If you have a problem with your dryer refer to our troubleshooting section. If your problem is not
referenced, please always contact your Fisher & Payke[ Authorized Service Agent or our Customer
Care Center (Tb[[ Free 1.888.9.FNRUSA (1.888.936.7872)) rather than attempting to fix it yourself.

_nsta_ation instructions
[ G[- of fire
Fire Hazard
C_othesdryer installation must be performed by aqualified installer,
hstaH the clothes dryer according to the manufacturer's instructions and
_ocalcodes°
Do not install aclothes dryer with flexiMe p_astic venting mateda_soif
flexiMe meta_ {foil-type) duct isinstalled, it must be of a specific type
identified by the app_bnce manufacturer as suitable for use with clothes
dryers° FlexiMe venting materials are known to collapse, be easily crushed,
and trap lintoThese conditions will obstruct clothes dryer airflow and
increase the risk of fire°
To reduce the risk of sever injury or death, follow aH installation instructions°
Save these instructions,
Readthe safety and warnings on pages 4 - 6 before you start installing your dryer.
Check to make sure you have all the tools and parts necessary to correctly install this appliance.
Toomsrequired
: ZZI S IiT?
Fht-bhde screwd river i
o Adiustab[ewrench_00or2SOmmlS"or_0">forgasconnectionslgasmodelsonly>
Pipe joint compound (pipe dope or tape) for gas pipe connections that is resistant to LP Propane,
Butane and Natural Gas (gas dryer only) i
Level
o Cauminggunandcompound{forinstaUingnewexhaustvent)
Gloves
Safety ghsses i }
Knife !,
Duct tape
Accessories
Mobile Home [nstalhtion Kit Part No 14--D346<:]3
o DryingRackK_tPart.owE_M396
Cover Plate to Rear of Cabinet Kit Part No WE1M4S4 i:
Your local service organisation can convert this dryer for use with Propane (LP) gas.
See the Rating Plate in the door opening to identify the appropriate Conversion Kit number
Parts needed
Checkwithlocalcodesandreadelectrical,gasandventingrequirementsbeforepurchasingparts.
[f you need to purchase a power supply cord kit or power supply cable, they must meet the
requirements on pages 21 to 22.

nsta ation instructions
To the installe_
The correct installation of the dryer isyour responsibility.
Be sure you read the following instructions carefully before you start to install the dryer. These
instructions should be left with the home owner for future reference.
It is your responsibiJity to:
Observe all governing codes and ordinances.
Check code requirements. Some codes limit or do not permit installation of clothes dryers in
garages, closets, mobile homes or sleeping quarters. Contact your local building inspector.
Adhere to these installation instructions.
Allow for spacing requirements with side by side installations (refer page 9).
Make sure you have all items necessary for correct installation.
Properly install the dryer.
Contact a qualified installer as appropriate to ensure that the electrical and gas installation
meets all national and local codes and ordinances (refer to page 4).
Location _equi_ements
£xpIosion Hazard
KeepflammaNe mateMaB and va_rs, such as gasoline, away from the d_er,
P_acedryer at least 460 mm {18 inches} above the floor for agarage
instaHationo
Failure to do socan result in death, explosion, fire, or burns,
The dryer must be installed or stored in an area which is not exposed to water or weather.
It is extremely important that the dryer is installed in a well ventilated location. This dryer must
exhaust air outdoors. Do not install the dryer in any room or closet which does not permit the
free flow of replacement air.
Allow sufficient room behind the dryer for the exhaust. The air intake is at the rear of the dryer.
Ensure that there is a sufficient air passage on each side of the dryer for intake air.
The area in which the dryer is located must be
kept dear and free from combustible materials,
gasoline and other flammable vapors and liquids.
A dryer produces combustible lint so the area
around the dryer must be cleaned regularly to
keep it free of lint.

iiilI!i!,!,!!!!!, I,liiiliii,ill¸IIII IIIiiiiliill,i, iliiii_illiiillIIIlilil_ill,i_,lilii_ii!iI,lii!IIIilII,iiiiiiiil,i iiiliiil!
Ilstallatiol ilstluctiols
Alcove or closet ir_stallation
-[he total ventilation area must be a minimum of 387 cm (60 sq. in,) of open area equally
distributed. If the closet contains both a washer and a dryer, doors must contain a minimum of
774 cm (120 sq, in.) of open area equally distributed. The openings must never be obstructed
(a Iouvered door with the minimum air opening is acceptable). Minimum installation clearances i
arereq°_redb°tmoreclearance_srecommended.
F __/ [ required
_\_ total ver_tllatlon area
___________

nsta ation instructions
Bathroom or bedroom installation
The dryer MUSTbe vented to the outdoors, See EXHAUSTinformation,
Dimensions
Exhaust outlet location
Exhaust outlet
/
i
298 mm (I 1¼')
Fig.5 Exh{_u t outlet dimensions
Mobile or Manufactured Home installation
Installation must comply with the current CAN/CSA Z240 MH series Mobile Home Installation
Codes or the Manufactured Home Construction & Safety Standard, title 24, part 32-80 or, when
such standard is not applicable, with American National Standard for Mobile Home, ANSI/NFPA
NO. 501 B.
The dryer MUST be vented to the outdoors with the termination securely fastened to the mobile
home structure. (See EXHAUST information).
The vent MUST NOT be terminated beneath a mobile or manufactured home.
The vent duct matedal MUST BE METT\L
o The vent MUST NOT be connected to any other duct, vent, or chimney.
Do not use sheet metal screws or other fastening devices which extend into the interior of the
exhaust vent.
In addition to the above, for gasdryers:
Kit 14-D346-33 MUSTbe used to attach the dryer securely to the structure.
Provide an opening with afree area of at least 161cm sq.(25 sq.in.) for introduction of outside
air into the dryer room.

iiilI!i!,!,ii_ilillii,lilili,liiliil,lii,ili ¸iÀÀ¸l,liiii¸ililiililil_,i_,ili_iiiiiiili_li_li_iii_ili!¸I:I!l:ill:ilii!iiil,lii!,i!,iiiiiii,ii_li!ii=!i,i!iiilliii:li/iil!
Installation instructions
E×hoo =og
Failure to follow these instructions can result in death or tim°
Thedryermustbeexhaustedtotheoutdoors.This,,,'illpreventthebuildupoflintandmoisture
in the room in which it is located and reduce the risk of fire.
This app/ance must always be vented to the outdoors. :::i1
Only,g_dorflexiblemetalductshaUbeuseforexhausting.
In Canada and in the United States, only those foil-type flexible ducts, if any, specifically !:ii
identified For use with the appliance by the manufacturer and that comply with the Outline for
Clothes Dryer Transition Duct, Subject 21S8A, shall be used.
In Canada and in the United States, the requi red exhaust duct dia meter is 102mm (4in). niiiiiii
Exhaust ducting products can be purchased from your local Appliance store or Hardware store.
andaffectdr;,eroperation.
A minimum of 100 mm (4")thick wall flexible metal or rigid galvanized metal duct must be used.
Using ducts larger than 100 turn (4")diameter may result in more lint accumulating.
Using straight rigid metal ducting will minimize lint accumulation. Thick wail flexible metal
ducting may be used but care must be exercised to avoid sharp bends which may squash the
duct and cause Mockages. Do not use plastic ducting or thin ,,,,'allflexible metal ducting.
Useducttapetosecureioints.TheductshaUnotbeassembledwithscrewsorotherfastening
means that extend into the duct and catch lint. [[
Keep ducting as short and straight as possible. Do not exceed the maximum exhaust duct
lengths stated later in these installation instructions, i }
Do not exhaust the dryer into a chirnnel/or gas vent, a wall, a ceiling, an attic, a crawl space, or a
concealed space of a building. Do not exhaust the dryer under a house or mobile home or a porch,
Thee×haustduc_shouk_endw_thanexhausthoodw_tha _
swingoutdampertopreventbackdraftsandentryofwUd _ ', 'i
life. Never use exhaust hoods with a magnetic damper.The .I ",,
hood should have at least 305 mm (12 inches) clearance .I
between the bottom of the hood and the ground or other J 305 mm (12 )
obstruction.Thehoodopeningshouldpointdown.never [ - "
install a screen over the exhaust outlet.
___________

nsta ation instructions
To reduce condensation, insulate any ducting which passes through unheated areas.
Slope the duct gently downwards to the hood, to drain condensation and reduce lint build up.
Avoid sag or loops in the duct as they may collect and store water and accumuhte lint.
Before using an existing exhaust duct system for a dryer ensure that:
No plastic or other potentially combustible duct or flexible metal foil ducting has been used.
The duct is not pierced, kinked or crushed.
The duct does not exceed the maximum recommended length for the new dryer.
The exhaust hood damper opens and closes freely and with sufficient movement.
Static pressure in the exhaust ducting does not exceed 250Pa (1 inch of water column), or is not
less than 0 inches of water column (ie negative pressure), when measured with a manometer in
the first 150 mm (6") of the duct, with the dryer running on FLUFF(NO HEAT)setting.
The exhaust duct system meets all relevant local, state, province and national codes.
All ducting should be inspected and cleaned at least once a year to remove accumulated lint.
Frequently check that the damper on the exhaust hood moves sufficiently and opens and
shuts freely.
Mobile Home Installations
A Mobile Home Installation Kit is available (see'Accessories' page 7 and notes page 10).
Determine vent duct length
Different types of vent arrangements are shown below.
F-ig8 Yenting options

Installation instructions
Choose a route that will provide the straightest and most direct path outdoors. Plan the
installation to use the fewest number of elbows and turns.
When using elbows (rigid duct) or making turns (thick wall flexible metal duct), allow as much
room as possible. With thick wall flexible metal duct bend duct gradually to avoid kinking and
avoid 90" turns.
£g.9 Duct configurations
Maximum length of exhaust duct
The maximum length of the exhaust duct system depends upon:
The type of ducts (dgid or thick walled flexible metal).
= The number of elbows or bends used.
1 Refer to the exhaust duc/: lenf_lth chart for the maximum duct lengths you can use. Do not use It
duct runs longer than specified in the exhaust duct length charts (refer to next page). !}
Exhaust duct sy'stems Ionf_ler than specified wilh
Accumulate lint creating a potential fire hazard.
Shorten the life of the dryer, i
= Reduceperformance,resulting_n_ongerdryingt_mesandan_ncreasedene<,,usage. ::i1
Oeterm_nethenumberofelbows/bendsyou,,.,'_IIneed. {[i
S In the following table, find the maximum length of rigid metal duct or, the same line as the
number of elbows/bends to be used (refer tO next page).
4 The total length of flexible metal duct shall not exceed 2.4 m. {1[{

Installation instructions
Maximum length of exhaust duct
Maximum length of 100 mm (4"} diameter metal duct.
Number of 90°
elbows/bends Rigid
0 183 m 60 ft
1 1:5.7 m 45 ft
2 10J m 35 ft
3 7.6 m 25 ft
4 4.6 m 15 ft
For exhaust systems not covered by the exhaust duct length charts (such as multiple unit hook-
ups, plenums, and power-assist fans), ca[[ our Customer Care Center:
TOLL FREE1.88&g.FNRUSA (1.888.936.7872).

iiilI!i!,!,!!!!!' I'liiiliii,ill¸IIII IIIiiiiliill_i, iliiii_illiiillIIIlilil_ill,i!,lilii_ii!iI,lii!IIIi:liii!_iiil,iliiilii!_lli,iii
Installation instructions
Alternative exhaust directions
This dryer can be vented from the rear, right, left, and bottom side of the cabinet and must be
exhausted to the outdoors.
Note: the gas dryer can not be exhausted directly through the right side of the cabinet.
Dryer exhaust to right, left or bottom of cabinet
Detach and remove the bottom, right or
left side knockout as desired. Remove the
screw inside the dryer exhaust duct and
save, Pull the duct out of the dryer. Protect
sharp edges around the knockout and
exhaust opening with tape.
Remove
scYew
and save
Remove desired
knockout (one ony)
Fixing __ole
iiiiiiiils
cuttheductasshownandkeepportionA. B A
°° -- i )
-< 9" _i !i
Tab tocation Bend tab ".... .-" "ii_i:_}i}_::,....
Through the rear opening, locate the tab up 45+ _ /<} %]:: :i ":!':_"
in the middle of the dryer base. Lift the tab _'\, ..... i/,i_ "_:_
to about 45° us ng a f at bade screwdr ver. " _..... ' -'}"} ........ ii,
F_×_ng j:
Adding new duct Hole \ Portion 'W ......
Reconnect the cut portion (,&)of the _,, .................. :::::
ducttotheb_owerhousing.Makingsure _<*'L _
that the shortened duct is aligned with ......::;/, '_;:,!,/",,:;::, ;
the tab in the base. Use the screw saved :i....... i ,/. .........'
previously to secure the duct in place '
through the tab on the dryer base. R_g
sdeexhaus_Fig.70E_,h_._di_<_io__e__,_
___________

nsta ation instructions
AJtemative exhaust directions
Adding elbow and duct for exhaust to
right or left side of cabinet
Preassemble 100 mm (4") elbow with
100 mm (4") duct. Wrap duct tape around joint.
Insert duct assembly, elbow first, through the
side opening and connect the elbow to the dryer
internal duct.
or rght side Ducttape
Besure not to pull or damage the dectrical
wires inside the dryer when inserting the duct°
Apply duct tape as shown on the joint between the
dryer internal duct and the elbow.
internal duct joints must be secured with tape,
otherw;se they may separate and cause a safety hazard,.
Fig.11Leftandright exhousting
i
Fig.12Securingjoints
Adding elbow for exhaust through bottom
of cabinet
Insert the elbow through the rear opening and
connect it to the dryer internal duct.
Apply duct tape on the joint between the dryer
internal duct and elbow; as shown above.
internal duct joints must be secured with tape,
otherwise they may separate and cause a safety hazard,. Fig
Adding cover pUate to rear of cabinet
(sides and bottom exhaust)
Connect standard metal elbows and ducts to
complete the exhaust system. Cover back opening
with a plate (kit WE1M454) available from your local
service provider. Place dryer in final location.
Plate (kit WEI M454)
Fig. 14 Cover p/ate

,_i_/ _ _ Exhaustoutkot
1---
, () , Fig.lSExhautout£_tdim_nsions
S The exhaust vent can be routed up, down, left, right or straight out the back of the dryer. Refer
to d iag rar'n. j

nsta ation instructions
Installation
Partsand literature are packaged inside the dryer drum.
Use two or more people to move and install the dryer,
Failure to do socan result in back or other injury°
Only remove the packaging at the customer's premises.
This will ensure the appliance arrives in pristine condition and reduces the risk of damage when
transporting to the customer's home.
Make sure dryer is in a suitable location for installation.
Consider installing the dryer before the washing machine in a side by side installation, this will
allow better access to electrical and exhaust connections.
Foam removal from dryer legs
Tilt the dryer sideways and remove the foam shipping pads by pulling at the sides and breaking
them away from the dryer legs. Be sure to remove all of the foam pieces around the legs.
This manual suits for next models
1
Table of contents
Other Elba Dryer manuals

Elba
Elba EBD 981H VT User manual

Elba
Elba EBD 781H VT User manual

Elba
Elba EBD881H User manual

Elba
Elba ED-F7160(WH) User manual

Elba
Elba EBD 882H VT User manual

Elba
Elba EBD749V User manual

Elba
Elba ED-H9151C User manual

Elba
Elba EBD 896 C User manual

Elba
Elba EBD750V User manual

Elba
Elba ED-B7610ES(WH) User manual