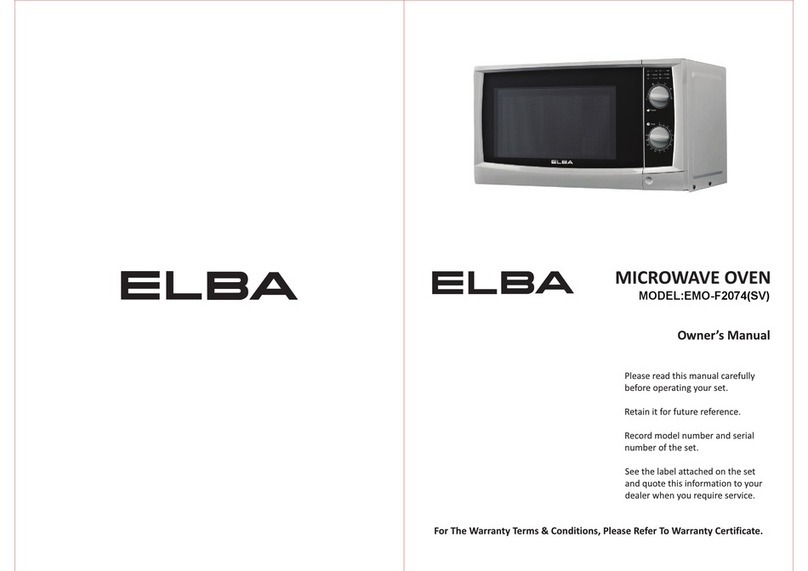
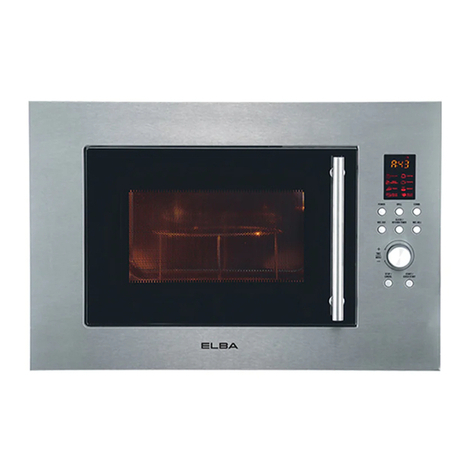
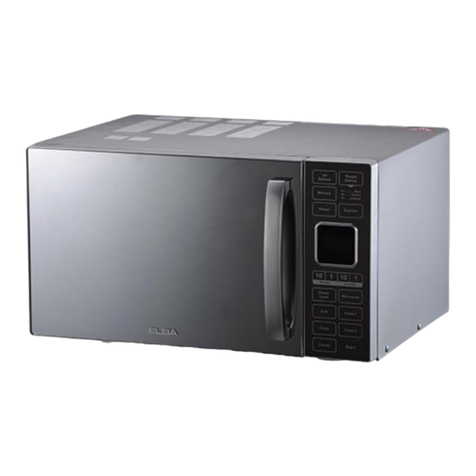
Elba EMO-C3561ST User manual

For The Warranty Terms & Conditions, Please Refer To Warranty Certificate
Owner’s Manual
Please read this manual carefully before
operating your set.
Retain it for future reference.
Record model number and serial number
of the set.
See the label attached on the set and
quote this information to your dealer when
you require service.
45CM BUILT-IN MICROWAVE OVEN
MODEL: EMO-C3561ST(SS)

2
READ these instructions carefully before installing and operating the oven. Keep them
for further reference.
1. Do not attempt to operate this oven with the door opening since open door
operation can result in harmful exposure to microwave energy. It is important not to
modify or tamper the safety interlocks of the oven door.
2. Do not place any object between the oven front panel or near the door or allow soil
or cleaner residue to accumulate on sealing surfaces.
3. Do not operate the oven if it is damaged. It is particularly important that the oven
door closed completely and there is no damage to the oven by:
a) the door (bent),
b) the hinges and latches (broken or loosened),
c) the door seals and sealing surfaces.
4. The oven should not be adjusted or repaired by anyone except authorized service
center.
PRECAUTIONS TO AVOID POSSIBLE EXPOSURE
TO EXCESSIVE MICROWAVE ENERGY

3
CONTENTS
1. SAFETY PRECAUTIONS…………....…………………………………………………………………………………………….5
2. ATTENTIONS………………………………………………………………………………………………………………………………6
3. INSTALLATION…………………..…………………………………………………………………………………………….6
3.1 BEFORE THE INSTALLATION………………………………………………………………………………………….……………6
3.2 INSTALLATION OF BUILT-IN MICROWAVE OVEN…………………………………………………………………………7
4. CONNECTION OF THE APPLIANCE…………………………………………………………………………………….……9
4.1 FITTING ON A POWER SUPPLY CABLE…………………………………………………………………..……………………9
4.2 CONNECTING THE SUPPLY CABLE TO THE MAINS………………………………………………………………………9
5. HOW TO USE YOUR OVEN…………………………………………………………………………………….……………….10
6. PRODUCT DESCRIPTION…………………………………………………..…………………………………………………….10
7. DESCRIPTION OF FRONT PANEL CONTROLS……………………………………………………………………….11
8. PROGRAMME AND FUNCTIONS…………………….…………………………………………………………………….12
8.1 CURRENT TIME SETTING………………….……………………………………………..………………………………………12
8.2 RESET THE CURRENT TIME………………………………………………………………………………………………………12
8.3 SELECTING THE OVEN FUNCTIONS………………………………………………………………………………….………12
8.4 MICROWAVE FUNCTIONS….……………………………………………………………………………………………………12
8.5 GRILL FUNCTIONS………………………………………………………….………………………….……………………………12
8.6 MICROWAVE + GRILL FUNCTIONS……………………………………………………………………………………………12
8.7 PIZZA FUNCTION………….…………………………………………………………………………………………………………13
8.8 DEFROST BY WEIGHT………………………………………………………………………………………………………………13
8.9 DEFROST BY TIME…………….………………………………………………………………….…………………………………14
8.10 DELAY START TIMER SETTING…….……………………………………………………………..……………………………14
8.11 PAUSE DURING THE PROCESS OF COOKING………………………………………………..…………………………15
8.12 CHILD LOCK…………………………………………………………………………………………………..………………………15
8.13 COOLING FAN SYSTEM……………………………………………………………………………………………………………15
8.14 DOOR INTERLOCK SWITCH………………………………………………………………………………………………………15
8.15 LAMP………………………………………………………………………………………………………………………………………15

4
9. RECOMMENDED COOKING MENU……………………………………………………………………………………….16
9.1 COOKING WITH MICROWAVE………………………………………………………………………….………………………16
9.2 DEFROSTING WITH MICROWAVE…………………………………………………………………….………………………17
9.3 COOKING WITH GRILL………………………….………………………………………………………….………………………18
9.4 PIZZA FUNCTION………………………………………………………………………………………………….....................19
9.5 WHAT KIND OF OVENWARE CAN BE USED…….…….………………………………………….………………………19
10. CLEANING AND MAINTENANCE……………………………………………………………………………………….20
10.1 CLEANING THE OVEN CAVITY………………………….…..…………………………………………………….……………20
10.2 CLEANING THE CAVITY CEILING….……….…………………………………………………………………….……………20
10.3 RINSE OF DOOR SEAL AND FRONT PANEL….……………………………………………………………….……………20
10.3 CLEANING THE ACCESSORIES….…………………………………..…………………………………………….……………20
11. REPLACING THE OVEN LAMP……………….…………………………………………………………………………….21
12. TECHNICAL SPECIFICATION…….…………………………….…………………………………………………………….21

5
We recommend that you read the instructions in this owner’s manual carefully before using
it for the best performance and to extend the lifespan of your appliance, as it will provide you
with all the instructions you require to ensure its safe installation, use and maintenance.
1. SAFETY PRECAUTIONS
In order to avoid bump against people or oven during transportation, please grip the
handle on the two external sides. Do not carry the appliance at the front handle, this might
damage the oven door.
To ensure your safety, all electric appliances should only be installed or serviced by
qualified technician. If the supply cord is damaged, it must be replaced by the authorized
service center or similarly qualified technician in order to avoid hazard.
Do not place supply cord on the edge of table and counter, or near any heating appliance.
In order to avoid electric shock, do not immerse supply cord, plug or other parts into water.
Do not place the appliance near electric stove, heated oven, microwave or other heat
source.
In order to avoid burning or explosion, combustibles or flammable material (curtains, cloth,
wallpaper and others) should be kept away from the appliance.
Do not place paperboard, plastic or other similar items in the oven. When the oven is not
being used, everything should be removed except provided accessory.
Do not cover slag pan or other parts with tinsel since it will result overheat.
Accessible parts may become hot during use, please keep away from children.
Never obstruct vents provided for ventilation and heat dispersal.
The ends of door handle may become hot during use, please grip the middle parts.
Disconnect the oven from the power supply before cleaning or maintenance.
When the appliance is faulty, please contact the authorized service center.
Always use insulation gloves to carry ovenware or handle oil plate.
Disconnect the oven from the power supply and waiting until it is cool, before cleaning.
In order to avoid electric shock, never use wire brush to clean the appliance since pieces
of metal is easy to touch live part.
Never use metal scouring pads or sharp scrapers which will damage the door surface or
interior wall, leading to glass broken or scratches of the enamel.
In order to avoid burn or electric shock, never put too much food or metal utensils.
Please make sure the oven function has been switched off when it is not be used.
Unplug from the socket when you are planning not to use the oven for long time.
Never use your oven outside the cabinet.
Other purpose except food heating is not allowed.
Do not lean or rest on the opened oven door. This may damage the oven. The door can
bear a maximum weight of 8 kg.
6
2. ATTENTIONS
Accessible parts may become hot during use. Please keep away from children.
In order to avoid electric shock, please make sure the oven has been shut off before
carrying out the maintenance.
Use only original accessories provided by ELBA or its authorized service center.
Do not use wet parts of body to touch the oven.
Do not pull and push the oven by its supply cord, this may lead to socket disconnection.
Improper or dangerous operations are forbidden.
Do not let the power cord of other appliances to touch the heated parts of the oven.
The oven should not be exposed to rain or direct sunshine.
Do not use or store flammable objects near to the oven.
Eggs in their shell and whole hard-boiled eggs should not be heated in microwave ovens
since they may explode, even after microwave heating has ended.
Distributors decline all liability for not following above instructions or some improper operations
which caused personal injury and property loss.
3. INSTALLATION
3.1 Before the Installation
Please check the products and make sure that there is no damage caused by striking or
heavy load.
The oven door is level, and you can open and close the oven door flexibly.
Specification on the marking plate is in compliance with the regulations.
If the oven appears in an abnormal way, do not install and unplug the power supply before
contacting the authorized service center. Do not attempt to repair or service the oven by yourself.
Repair or maintenance should only be carried out by a qualified technician or the authorized
service center.
This appliance must be installed only by qualified technician or the authorized service center.
Manufacturer declines all responsibility for improper installation, which may harm persons and
cause damage to the property.
Important:
The power supply to the appliance must be cut off before any adjustments or maintenance
work is carried out.
The AC power supply should be supplied with 220-240V, 50/60Hz with minimum 15A
distribution circuit fuse or at least 15A distribution circuit breaker.

7
3.2 Installation of Built-in Microwave Oven
The material of the cabinet should be insulated, and the clearance between the edge of the
cabinet and the oven should be over 100mm for ventilation.
min 550
458
558-565
465
444
594
21
455
542
min500cm2
min500cm2
100
542
455
21
594
444
465
448-452
558-565
min 550
500cm2

8
In order to fix the oven with cabinet, please open the oven door and insert four wood screws into
the four holes around frame and fix them.
Note: Please do not use the handle to carry or move the oven during installation or
handling.
The panels of the adjacent cabinets must be made of heat-resistant material which can
withstand temperatures of up to 100℃. In compliance with current safety standards, contact with
the electrical parts of the oven must not be possible once it has been installed. All parts, which
ensure the safe operation of the appliance, must be removable only with the aid of a tool.

9
4. CONNECTION OF THE APPLIANCE
4.1 Fitting on a Power Supply Cable
The appliance has to be equipped with a three-core power supply cable which is designed to
operate with an alternating current. The AC power supply should be supplied with 220-240V,
50/60Hz and a minimum 16A distribution circuit fuse or at least 16Adistribution circuit breaker.
4.2 Connecting the Supply Cable to the Mains
Install a standardized plug corresponding to the load indicated on the marking plate. The supply
cable should be positioned so that it does not reach a temperature of more than 50ºC with
respect to the room temperature, anywhere along its length, or protected by insulation having an
appropriate rating.
Before making the connection, check that:
The electrical safety of this appliance can only be guaranteed if the appliance is correctly
and efficiently earthed, in compliance with regulations on electrical safety.
Always ensure that the earthling is connected. If you have any doubts please contact a
qualified technician to check the connection. The manufacturer declines all liability of
damage resulting from a connection which has not been earthed properly.
Before plugging the appliance into the mains, check that the specifications indicated on the
marking plate correspond to the electrical mains system of your home.
Check that the electrical capacity of the system and sockets will support the maximum
power of the appliance, as indicated on the marking plate.
If the socket and appliance plug are not compatible, have the socket replaced with a
suitable model by a qualified technician. The latter, in particular, will also have to ensure
that the cross sections of the socket cables are suitable for the power absorbed by the
appliance.
The use of adapters, multiple sockets and /or extensions, is not recommended. If their use
cannot be avoided, remember to use only single or multiple adapters and extensions
which comply with current safety regulations. In these cases, never exceed the maximum
current capacity indicated on the single adapter or extension and the maximum power
indicated on the multiple adapter .The plug and socket must be easily accessible.

10
5. HOW TO USE YOUR OVEN
When the oven is used for the first time, it should be heated to the maximum temperature
long enough to burn off any oily residues left during the manufacturing process, which
might contaminate foods with unpleasant smells.
To avoid condensation produced between the inner glass of the microwave door and
inside the cavity, do not leave cooked food in the microwave for long period.
For all other types of cooking, never place anything on the bottom of the microwave oven
to cook because this could damage the surface of the oven interior. Always place your
cookware in the microwave oven with the use of turntable plate provided.
After cooking food contains sugar and salt, please clean your oven promptly or these will
attach to the oven surface.
6. PRODUCT DESCRIPTION
1. Door handle
2. Oven glass door
3. Door seal
4. Drive shaft
5. Turntable ring
6. Turntable plate
7. Grill
8. Operating button
9. Control panel

11
7. DESCRIPTION OF FRONT PANEL CONTROLS
Standby Function (Microwave, Grill, Defrost)
Cooking Time Setting (Cooking Time, Delay Start Timer)
Other Setting (Power, Weight, Choice of Defrost)
Clock Setting
Child Lock
Increase (Function, Power, Weight Increase)
Decrease (Function, Power, Weight Decrease)
Start / Pause
Functions Description
Microwave Grill
Microwave + Grill Pizza
Defrost by Weight Defrost by Time
Cooking Time Clock
Delay Start Timer Child Lock
Microwave Power Show
Weight End

12
8. PROGRAMME AND FUNCTIONS
8.1 Current Time Setting
During the first use, display screen shows a flashing “0:00”. The symbol of Cooking Time
Setting “ ” will display. Press the button “ ” or “ ” to increase or decrease the hours.
After setting hours press Clock Setting “ ” to set the minutes. Press “ ” or “ ” to
increase or decrease the minutes and press clock setting again “ ” to confirm the current
time.
8.2 Reset the Current Time
Keeping “ ” pressed for 3 seconds if you want to set the current time again. Clock setting
range is from: 00:00 to 23:59.
Notice: After you have set the time, leave the appliance away. The appliance will go to
standby mode after 5 minutes. When the appliance is in standby mode, press“ ”, and
clock will displays on screen; press“ ”again, and clock will not display on screen.
8.3 Selecting the Oven Functions
After pressing “ ” for 1 second under standby mode, the appliance will be on function
selection mode. Suggested time and data (including microwave power, weight, etc) will be
shown on screen. You can select your desired function by pressing “ ” and “ ”.
8.4 Microwave Functions
After selecting this function, the indicator “ ”, “ ” and “ ” will light up. Screen shows
01:00 and 800W. Press “ ” to set the cooking time. Then press “ ” or “ ” to adjust the
cooking time. The maximum timer is 90:00 (The first 30 minutes is 100% power, and the
rest 60 minutes is 80%).
Press “ ” to enter the microwave power setting mode. Then press “ ” or “ ” to adjust
the microwave power. Microwave power can be set 1000/800/600/400/200/0W. Press “ ”
to start cooking and cooking time will count down. The symbol of microwave “ ” will be
flashing.
8.5 Grill Functions
After selecting this function, the indicator “ ” and “” will light up. Screen shows 15:00.
Press “ ” to set the cooking time. Then press “ ” or “ ” to adjust the cooking time. The
maximum time is 90:00. Press “ ” to start cooking and cooking time will count down. The
symbol of grill “ ” will be flashing.
8.6 Microwave + Grill Functions
After selecting this function, the indicator “ ”, “ ” and “ ” will light up. Screen shows
10:00 and 400W. Press “ ” to set the cooking time. Then press “ ” or “ ” to adjust the
cooking time. The maximum time is 90:00. Press “ ” to set the microwave power. Then
press “ ” or “ ” to adjust the microwave power. Microwave power can be set:
600/400/200W. Press “ ” to start cooking and cooking time will count down. The symbol
of microwave + grill “ ” will be flashing.

13
The Microwave + Grill function is ideal for fast cooking and food browning after cooking.
Furthermore, you can also grill and brown cheese covered food. The microwave and the grill
work simultaneously. The microwave cooks and the grill toasts. Before using a dish in the
microwave oven make sure that it is suitable for microwave use. The dish to be used in the
combined function should be suitable for both microwave and grill. See the section on types of
ovenware.
FOOD
QUANTITY (G)
DISH
POWER (W)
TIME
(MIN)
STANDING
TIME (MIN)
CHEESE TOPPED PASTA
500
LOW DISH
400
12-17
3-5
CHEESE TOPPED
POTATOES
800
LOW DISH
600
20-22
3-5
LASANGE
APPROX. 800
LOW DISH
600
15-20
3-5
GRILLED CREAM
CHEESE
APPROX. 500
LOW DISH
400
18-20
3-5
2 FRESH CHICKEN LEGS
200 EACH
LOW DISH
400
10-15
3-5
CHICKEN
APPROX. 1000
LOW AND
WIDE DISH
400
35-40
3-5
CHEESE TOPPED
ONION SOUP
2 x 200G CUPS
SOUP BOWL
400
2-4
3-5
CHICKEN
APPROX. 1000
LOW AND
WIDE DISH
400
35-40
3-5
CHEESE TOPPED
ONION SOUP
2 x 200G CUPS
SOUP BOWL
400
2-4
3-5
8.7 Pizza Function
After selecting the function, the indicator “ ” and “ ” will light up. Screen shows 300.
Press “ ” to set the weight. Then press “ ” or “ ” to adjust the weight. The range of
weight is 300-500. Press “ ” to start cooking and cooking time will count down. The
symbol of pizza “ ” will be flashing.
8.8 Defrost by Weight
After selecting the function, the indicator “ ” and “ ” will light up. Screen shows PR01
and 100. Press “ ” to switch to Defrost by Weight Program. Then press “ ” or “” to
select the corresponding program. There will be 5 programs from PR01 to PR05 for
choosing.
Press “ ” again to set the weight, then press “ ” or “ ” to adjust the weight. The range
of weight is from 100-2500. (Different programs have different weight). Press “ ” to start
cooking and cooking time will count down.
The symbol of defrost by weight “ ” will be flashing.
In the defrosting process, the appliance will stop when the time reached the half set time.
There will be three beeps every 30 seconds for alert. The symbol “ ” will stop flashing
while the word “turn”appears on the screen and flash. You should open the door and turn
the food over. Then close the door and press “ ” to continue defrosting.

14
We can calculate the defrosting time according to different food and weight. Microwave
power can be adjusted to reach the best defrosting effect. The table below shows
reference of defrosting according to weight, which includes defrosting duration.
8.9 Defrost by Time
After selecting the function, the indicator “ ” and “ ” will light up. Screen shows 10:00.
Press “ ” to set the cooking time. Press “ ” or “” to adjust the cooking time. The
maximum time is 90:00. Press “ ” to start cooking and cooking time will count down. The
symbol of defrost by weight “ ” will be flashing.
In the defrosting process, the appliance will stop when the time reached the half set time.
There will be three beeps every 30 seconds for alert. The symbol “ ” will stop flashing
while the word “turn” appears on the screen and flash. You should open the door and turn
the food over. Then close the door and press “ ” to continue defrosting.
8.10 Delay Start Timer Setting
The delay start timer is the continuation of clock time. For example, if the current time is
10:00 and you want appliance start working after 2 hours, you should set delay time at
12:00. Press the “ ” key and wait for confirmation.
After cooking time and function is set, press “ ” to set delay start time. “ ” will light up,
screen displays current time (hour is flashing). Press “ ” or “ ” to set delay start time
(hour). Press “ ” again, time (minutes) will flash. Press“ ”or“ ”to set delay start time
(minutes).
Press“ ” to confirm the delay start timer setting. Press “ ” again the appliance will start
working after the delay start timer. Display screen will show the delay start timer and the
current time alternately when the appliance is in standby mode.
To cancel the delay start timer, press and hold the On/Off button “ ” for 1 second.
PROGRAM
FOOD
WEIGHT (GRAM)
TIME (MIN)
DURATION (MIN)
PR 01
MEAT
100-2000
2:20-43:30
20-30
PR 02
BIRD SPECIES
100-2500
2:10-58:10
20-30
PR 03
FISH
100-2000
2:00-40:00
20-30
PR 04
FRUIT
100-500
2:36-13:00
10-20
PR 05
BREAD
100-800
2:25-19:20
10-20

15
8.11 Pause During the Process of Cooking
Stop cooking and change the settings
Press the Start / Pause “ ” button to interrupt the cooking process. The cooking process
will stop. At this moment you can adjust the cooking time and temperature of the function.
The operating parameters (time, weight, power, etc.) can only be modified when the
cooking process has been interrupted. Proceed as follows:
Press “ ” under standby mode and the appliance will switch to function menu.
Press “ ” and “ ” or “ ” to set cooking time;
Press “ ” to switch to Power Setting Mode;
Press “ ” to continue cooking process.
End cooking and complete the program
When the cooking function is completed, an electronic buzzer will ring 3 times and the
display will show “ ”. In 5 minutes of every 30 seconds intervals the electronic buzzer will
continue ringing or until the door is opened.
Press the Start/Pause “ ” button and set the oven into standby mode.
8.12 Child Lock
To Lock: In standby mode press Child Lock “ ” button for 3 seconds and a "beep” will
sound. The oven will enter into the child lock mode and “ ” indicator will turn on. In any
case after locking, the oven cannot be operated.
To Unlock: In the Child Lock mode, press Child Lock “ ” button for 3 seconds and a
“beep” will sound. The oven will be unlocked and the screen shows the current time with
“ ” indicator light will turn off.
8.13 Cooling Fan System
The appliance is equipped with a cooling system which comes into operation as soon as a
cooking function starts. Operation of the fans generates a normal air flow which comes out
above the door and may continue for a short time even after the appliance is switched off.
8.14 Door Interlock Switch
The light is on when the door interlock switch is not connected or door is not closed
completely. The screen displays “door” when you press Start/Pause button. In this
condition the door interlock switch is not connected or not closed. It will return to setting
interface after 3 seconds.
8.15 Lamp
The oven lamp always light when:
1) working condition except pause;
2) when the oven door is opened in standby status;
3) If the oven door is left open. The oven light will automatically shut-off after 10 minutes.

16
9. RECOMMENDED COOKING MENU
9.1 Cooking with Microwave
Warning! Read the section “Safety Precautions” before cooking with your microwave.
Follow these recommendations when cooking with microwave:
Before heating or cooking foods with skin (e.g. apples, tomatoes, potatoes, sausages)
peel them so that they do not burst. Cut the food up before starting to prepare it.
Before using a container or dish make sure that it is safe for microwave use (see the
section on types of ovenware).
When cooking food with very little moisture (e.g. defrosting bread, making popcorn, etc.)
evaporation is very quick. The oven then works as if it was empty and the food may burn.
The appliance and the container may be damaged in such situation. You should therefore
set just the cooking time necessary and you should keep a close eye on the cooking
process.
It is not possible to heat with much oil (frying) in the microwave.
If you have several containers, such as cups, for example, set them out uniformly on the
turntable plate
Do not seal plastic bags with metal clips. Use microwave safe plastic clips instead. Prick
the bags for several holes so that the steam can escape.
There might be steam on the oven glass door during cooking and may start to drip. This
situation is normal and may be more noticeable if the room temperature is low. The
process of cooking is not affected by this. After you have finished cooking, clean up the
condensation on the glass door.
When heating liquids, use containers with a wide opening, so that the steam can
evaporate easily.
Prepare the foods as per the instructions and keep in mind the cooking times and power
levels indicated in the tables.
Keep in mind that the figures given are only indicative and can vary depending on the initial
state, temperature, moisture and type of food. It is advisable to adjust the time and power levels
according to each situation. Depending on the exact characteristics of the food you may need to
increase or shorten the cooking time or increase or decrease the power levels.
Cooking with Microwave
1. The greater the amount of food, the longer the cooking time.
2. The lower the microwave power, the longer the cooking time.
3. Foods containing a lot of liquid will heat up more quickly.
4. Cooking will be more uniform if the food is evenly distributed on the turntable. If you put
dense foods on the outer part of the plate and less dense ones on the center of the plate,
you can heat up different types of food simultaneously.
5. You can open the oven door at any time. When you do this the oven switches off
automatically. The microwave will only start working again when you close the door and
press the start key.
6. It takes less time if we put a cover over food, but the cover should have vents avoiding
extreme pressure.

17
Vegetables
Name
Weight (G)
Water
(ml)
Microwave
Power
Time
(Min)
Notice
Cauliflower
500
100
800
9-11
Cut into slices and
cover well
Broccoli
300
50
800
6-8
Mushroom
250
25
800
6-8
Peas
Carrots
300
250
100
25
800
800
7-9
8-10
Cut into slices or blocks,
cover well
Potatoes
250
25
800
5-7
Peel and cut into uniform size,
cover well
Chives
250
25
800
5-7
Cut into segments or slices,
cover well
Frozen Cabbage
300
50
800
6-8
Cover well
9.2 Defrosting with Microwave
1. When defrosting, use only dishes that are safe for microwave oven use.
2. The defrost function by weight and the tables refer to the defrosting of raw food.
3. The defrosting time depends on the quantity and thickness of the food.
4. Distribute the food well. You can use aluminum foil for delicate food.
5. Important: The aluminum foil should not come into contact with the oven inner cavity of the
oven.
6. Thick portions of food should be turned over several times in the process of cooking.
7. Distribute the frozen food as evenly as possible since narrow and thin portions defrost
more quickly than the thicker and broader parts.
8. Fat-rich foods such as butter, cheese and cream should not be completely defrosted. If
they are kept at room temperature they will be ready to be served in a few minutes. With
ultra-frozen cream, if you find small pieces of ice in it, you should mix these in before
serving.
9. Place poultry on an upturned plate so that the meat juices can run off more easily.
10.Bread should be wrapped in a napkin so that it does not become too dry.
11.Remove frozen food from its wrapping and do not forget to take off any metal twist-tags.
For containers that are used to keep frozen food in the freezer and which can also be
used for heating and cooking, all you need to do is take off the lid. For all other cases you
should put the food into containers that are safe for microwave oven use.
12.The liquid resulting from defrosting, principally that from poultry should be discarded. In no
event should such liquids be allowed to come into contact with other foods.
13.Do not forget that by using the defrosting function you need to allow for standing time until
the food is completely defrosted.
14.In defrost process, please turn food over when microwave oven alarms and displays
"turn".

18
Please refer to the following table for different temperature of various foods.
Type of Food
Weight (G)
Defrosting Time
(Min)
Follow-up Time
(Min)
Frequency of
turnover
Meat
(Veal, Beef, Pork)
100
200
500
1000
1500
2000
2-3
4-5
10-12
21-23
32-34
43-45
5-10
5-10
10-15
20-30
20-30
25-35
1
1
2
2
2
3
Beef Stew
500
1000
8-10
17-19
10-15
20-30
2
3
Minced Meat
100
500
2-4
10-14
10-15
20-30
2
3
Sausage
200
500
4-6
9-12
10-15
15-20
2
3
Poultry
Chicken
Fish Fillet
Trout
Prawn
250
1000
200
250
100
5-6
20-24
4-5
5-6
2-3
5-10
20-30
5-10
5-10
5-10
1
2
1
1
1
Fruit
200
300
500
4-5
8-9
11-14
5-10
5-10
10-20
1
1
2
Bread
200
500
800
4-5
10-12
15-17
5-10
10-15
10-20
1
1
2
Butter
250
8-10
10-15
Cheese
250
6-8
10-15
Cream
250
7-8
10-15
9.3 Cooking with Grill
IMPORTANT:
1. There will be some smoke and smell when the grill is used for the first time. That is
because of oil left from the manufacture process.
2. The oven glass door becomes hot when the oven is operating. Keep children away.
3. When the grill is used for extended period of time, it is normal to find that the elements
will switch off temporarily due to the safety thermostat.
4. When food is to be grilled or cooked in containers you should check that the container is
suitable for microwave oven safe.
5. When the grill is used it is possible that some splashes of fat may go onto the elements
and be burnt. This is a normal situation and does not mean there is any kind of operation
fault.
6. After you have finished cooking, clean the oven interior and the accessories.

19
GRILL ELEMENT
Name
QUANTITY(G)
TIME(MIN.)
INSTRUCTIONS
FISH
Bass
Sardines
800
6-8 FISH
18-24
15-20
Spread lightly with butter. After half of
cooking time turn and spread with
seasoning.
MEAT
Sausages
6-8 UNITS
22-26
Prick after half cooking time and turn.
Frozen Hamburgers
3 UNITS
18-20
Spare Rib (approx.3 cm thick)
400
25-30
After half of cooking time, baste and turn.
Toast
4 UNITS
3/2-3
Watch toasting.
Toasted Sandwiches
2 UNITS
5-10
Watch toasting.
9.4 Pizza function
It is not necessary to pre-heat the browning plate to cook pizzas. Place the pizza directly
on the browning plate. Place the browning plate on the center of the glass turntable in the
microwave oven.
Warning: The cavity wall and the browning plate become very hot. Care should be taken
to avoid touching heating elements, cavity wall or the browning plate. The usage of oven
gloves is strongly recommended to avoid burns.
9.5 What kind of ovenware can be used?
9.5.1 Microwave Function
For the microwave function, notice that glass, china, clay, plastic, and paper can be used as
container. Metal pans, dishes or containers with metal parts or decorations cannot be used in
the microwave. Glassware and clay with metallic decoration or content (e.g. lead crystal) cannot
be used for microwave oven.
The ideal material for microwave oven is glass, refractory china or clay, or heat resistant plastic.
Very thin, fragile glass or china should only be used for short period of time (e.g. heating)
9.5.2 Grilling Function
For the grill function, the ovenware should be resistant to temperature of at least 300ºC. Plastic
dishes are not suitable for the grill function.
9.5.3 Combination Function (Microwave + Grill)
In the combination functions, the ovenware used should be suitable for both microwave and grill.

20
10. CLEANING AND MAINTENANCE
Before cleaning or performing maintenance on your oven, disconnect the oven from the
power supply. To extend the lifespan of your oven, it must be cleaned frequently.
The enamel or stainless steel parts should be cleaned with lukewarm water without using any
abrasive powders or corrosive substances which could damage the surface. If the stains are
difficult to be removed, use mild cleaner with hot soapy water to clean the area.
10.1 Cleaning the Oven Cavity
WARNING: Microwave should not work without turntable.
The inside of the oven should preferably be cleaned after using. With the oven
temperature cool down, clean the oven with hot soapy water. The soap must be rinsed
away and the interior to dry thoroughly. Avoid using abrasive detergents (for example
cleaning powders, acid, thinner and etc.) as these could damage the enamel part of the
oven. Never use a steam cleaner to clean the inside of the oven.
Never use metal scouring pads or sharp scrapers which may damage the oven.
Use ordinary non-abrasive products with the aid of wooden or plastic utensils if necessary.
Rinse thoroughly and dry with a soft cloth or chamois leather.
Make sure water does not permeate into the microwave ventilation holes.
Regularly take out the turntable plate and the respective support and clean the cavity base,
especially after any liquid spillage.
If the oven cavity is very dirty, put a glass of water on the turntable and switch on the
microwave oven for 2 or 3 minutes at maximum power. The steam released will soften the
dirt which can then be cleaned easily using a soft cloth.
10.2 Cleaning the Cavity Ceiling
If the oven ceiling is dirty, wait until the grill is cold before lowering it.
Do not use abrasive cleaning products or sharp objects.
To avoid any risk, do not remove the mica cover.
10.3 Rinse Of Door Seal And Front Panel
Please rinse in time if there are residues left in door seal or on front panel. Do not use
rough cleaning tools like hard brush, coarse cloth, wire netting, knife or any other sharp
tools, using those sharp tools may scratch door seal or the surface of the front panel.
Please use non-abrasive detergent. You can use wooden or plastic cleaning tools if it is
necessary.
10.4 Cleaning The Accessories
Clean the accessories after each use. If they are very dirty, soak them first of all and then
use a brush and sponge. The accessories can be washed in a dishwasher.
Make sure that the turntable plate and the respective support are always clean. Do not
switch on the oven unless the turntable and the respective support are in place.
This manual suits for next models
1
Table of contents
Other Elba Microwave Oven manuals

Elba
Elba EMO-A2072 User manual

Elba
Elba EMO-2305 User manual

Elba
Elba IMM 25 BG User manual

Elba
Elba EMO-A2071 User manual

Elba
Elba EMO-H3880TFT(BK) User manual

Elba
Elba EMO-2505 User manual

Elba
Elba ELBA45 User manual

Elba
Elba EMO-2306BI User manual

Elba
Elba EMO-F2074(SV) User manual

Elba
Elba DARK 23 User manual
Popular Microwave Oven manuals by other brands

XO Appliance
XO Appliance XOMD24S User and installation manual

Whirlpool
Whirlpool MICROWAVE HOOD COMBINATION user guide

Sharp
Sharp R-360 Operation manual

Panasonic
Panasonic Sonic Steamer NE-3280 Service manual

Whirlpool
Whirlpool AMW 583 Installation and quick start

Panasonic
Panasonic NN-S645 operating instructions