Thank you for choosing the Uniq PC. Please read this user manual before you begin using the equipment in
order to become familiar with its features and functions. Also keep this user manual for future use. It will help
you solve problems that may arise.
IMPORTANT NOTICE
• The device must be under permanent supervision while “ON“ or in “STAND BY“ mode until it is turned
“OFF“ by the central switch and disconnected from the electrical system.
• Do not leave the device unattended while charging.
• Use only the power adapter and cable approved by ELCOM. Unauthorized adapters or cables can
cause batteries to explode or damage the device.
• Improper adapter connection can seriously damage the device. Any damage caused by misuse is not
covered under warranty.
• Do not remove the battery before disconnecting the power adapter. This could damage the device.
• Do not charge the device when the power cord is damaged or if the electrical outlet is not grounded.
This may cause electric shock or fire.
• If the device overheats, starts to smoke, makes strange noises or strange smells, immediately turn off
the main power switch and unplug the device.
• Do not bend the power cord or place heavy objects on it. Stepping on the power cord or its disruption
with heavy object could result in electric shock or fire.
• During a storm or when the device is out of service for longer, unplug the power adapter from the elec-
trical outlet to prevent electric shock or fire.
• Install the product in a place where it will not be exposed to direct sunlight, unusual changes in tem-
perature (below 0°C and over 40°C) or high humidity. Installation in an unsuitable place could cause
damage to the casing and electrical components
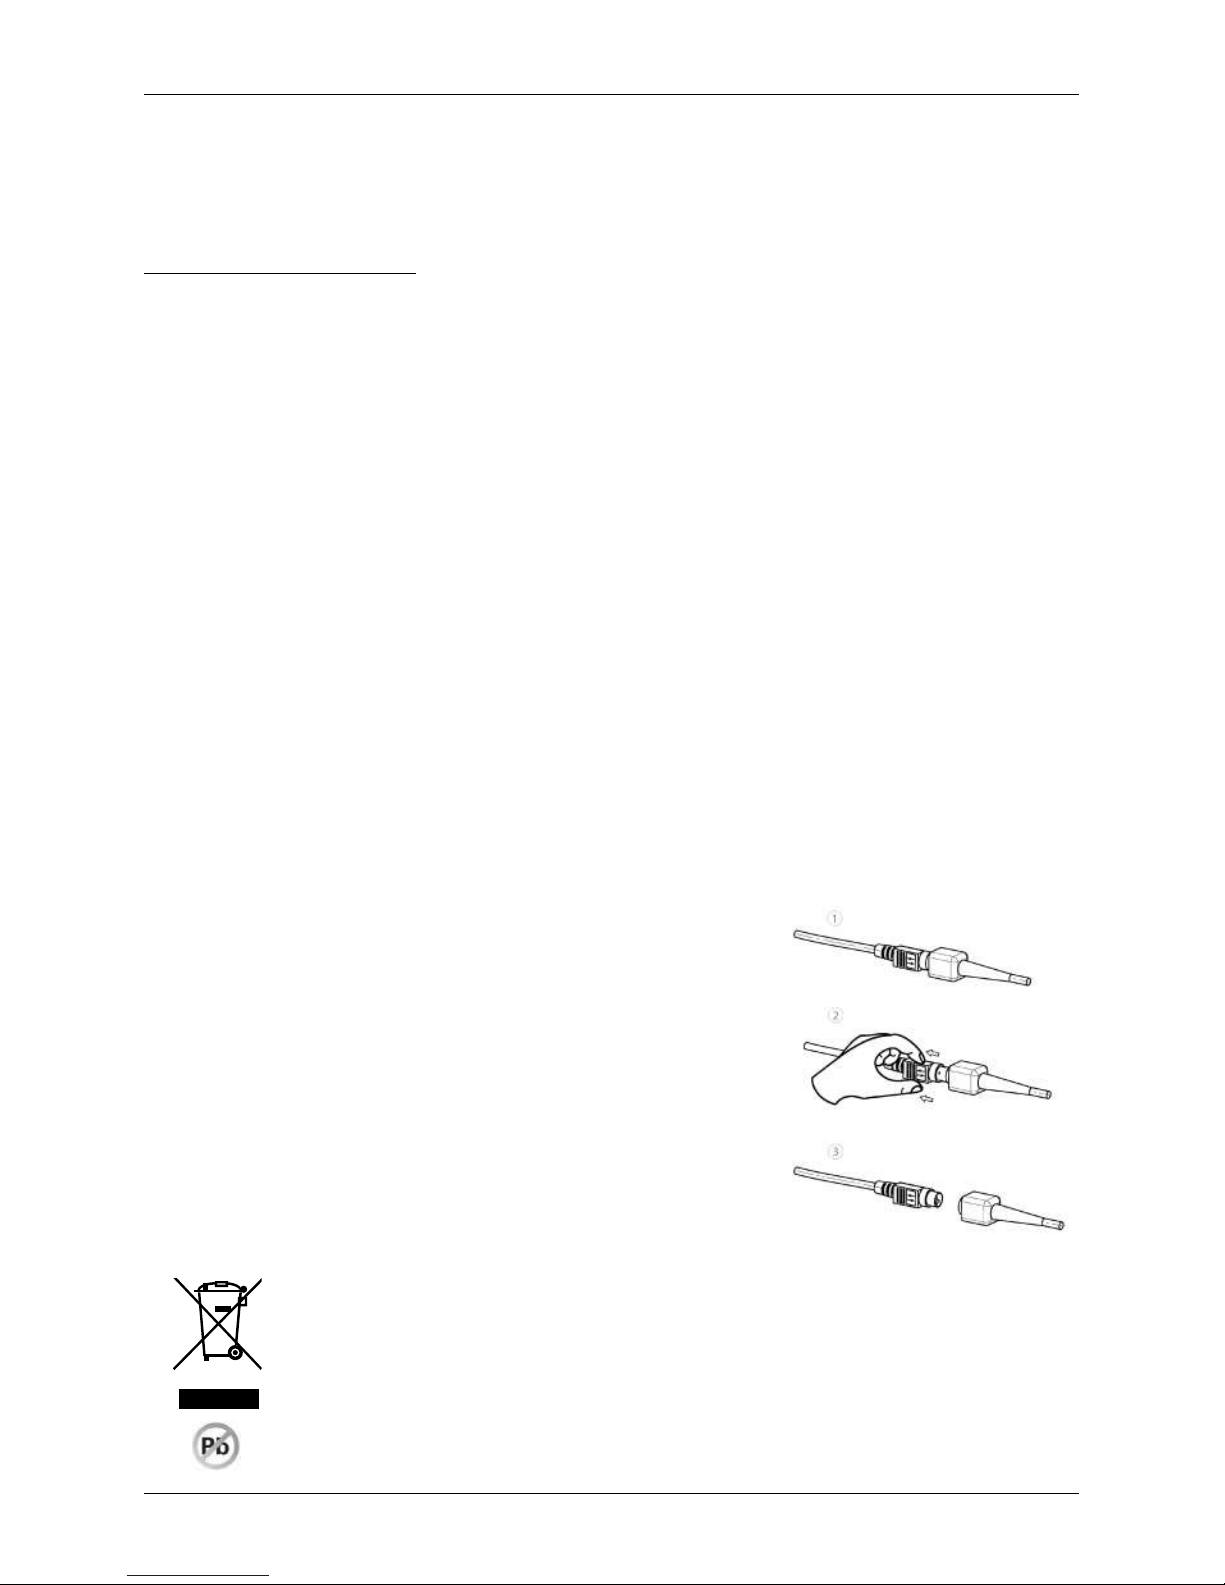
• Procedure for disconnection of the power connector:
1 - Connected connector.
2 - Grab the connector by plastic housing, back pulling of housing
release the safety catch and it enable to discon-nect power
connector strength.
3 – Plastic housing of disconnected connector returns to the starting
position itself
• When transferring the product between environments with differ-
ent temperatures, do not switch it on for at least 60 minutes.
• Never use aggressive cleaning solutions when cleaning the product surface. The use of unsuitable
cleaning solutions can cause damage to the product.
• If the product is not functioning properly, turn to an authorized service technician. Do
not attempt to repair the product yourself. Never open the product casing!
• When plugging in this equipment always use the power adapter supplied or one
exclusively authorized by the seller. The use of another resource can lead to damage to the
source or the product.
• Notice: The adapter is specified for interior use only!
6
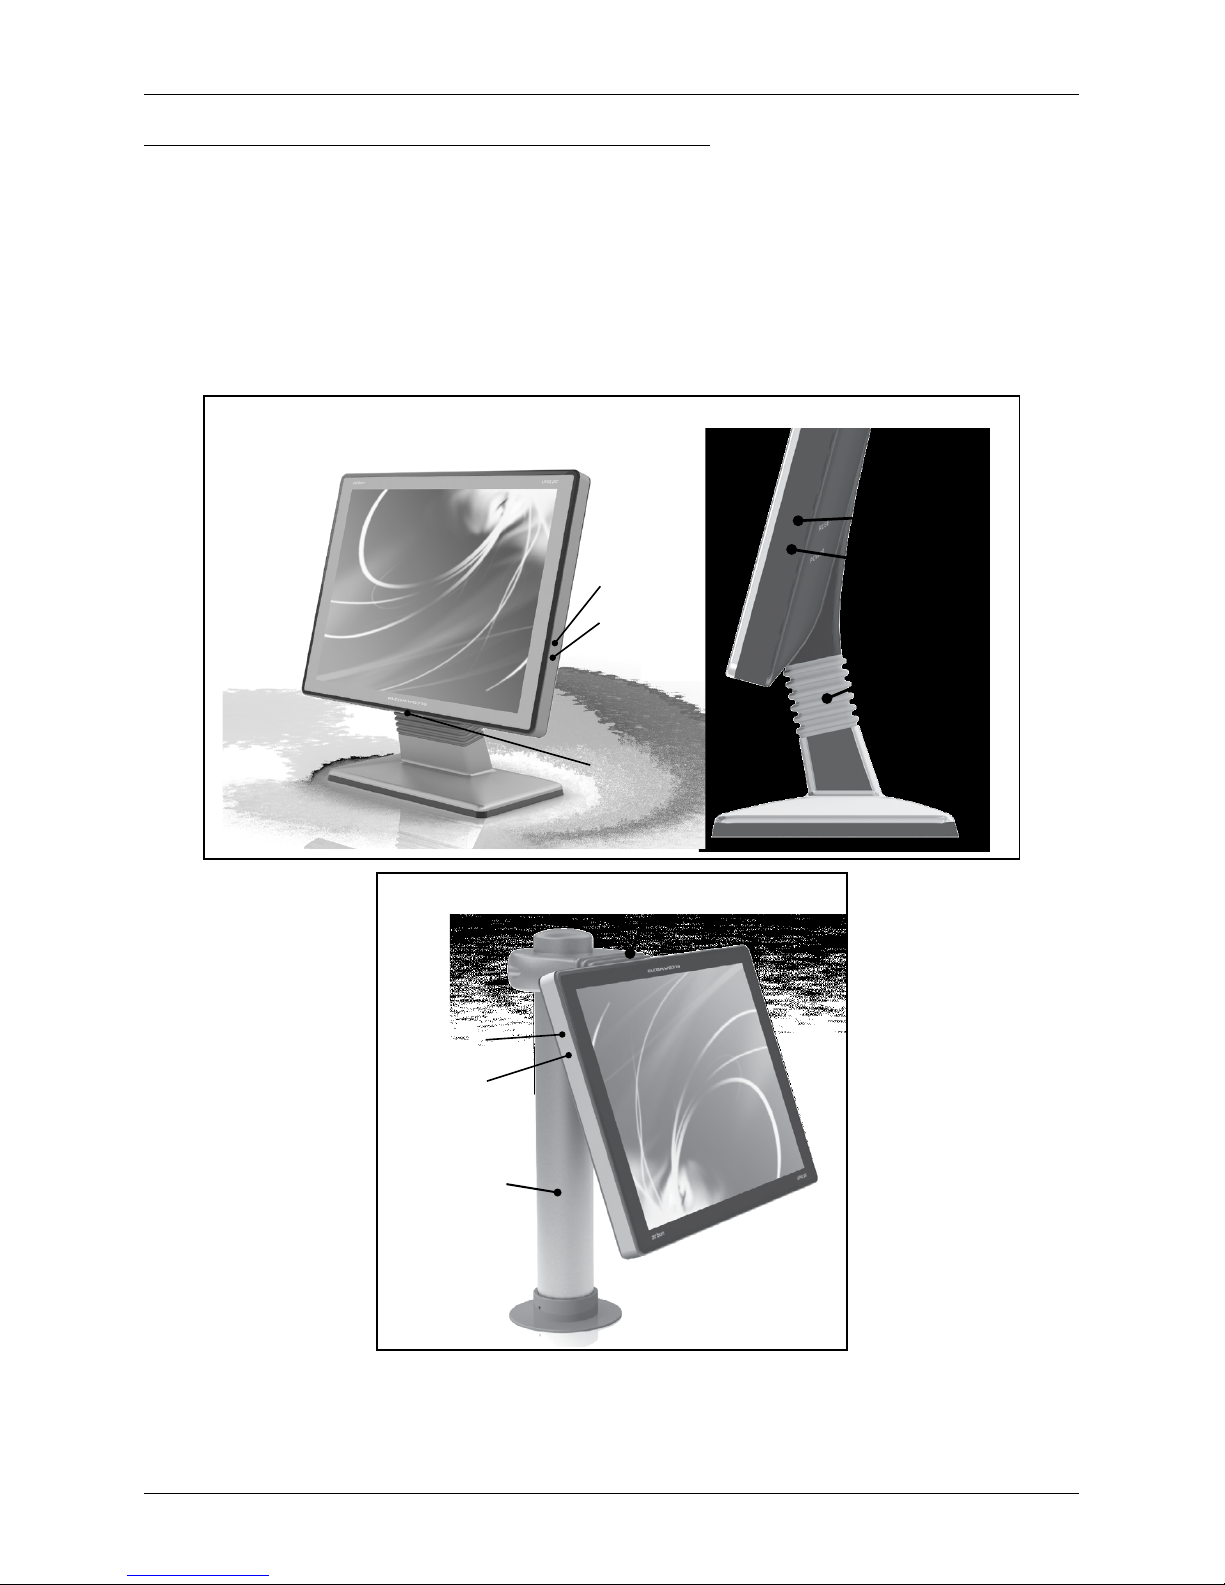
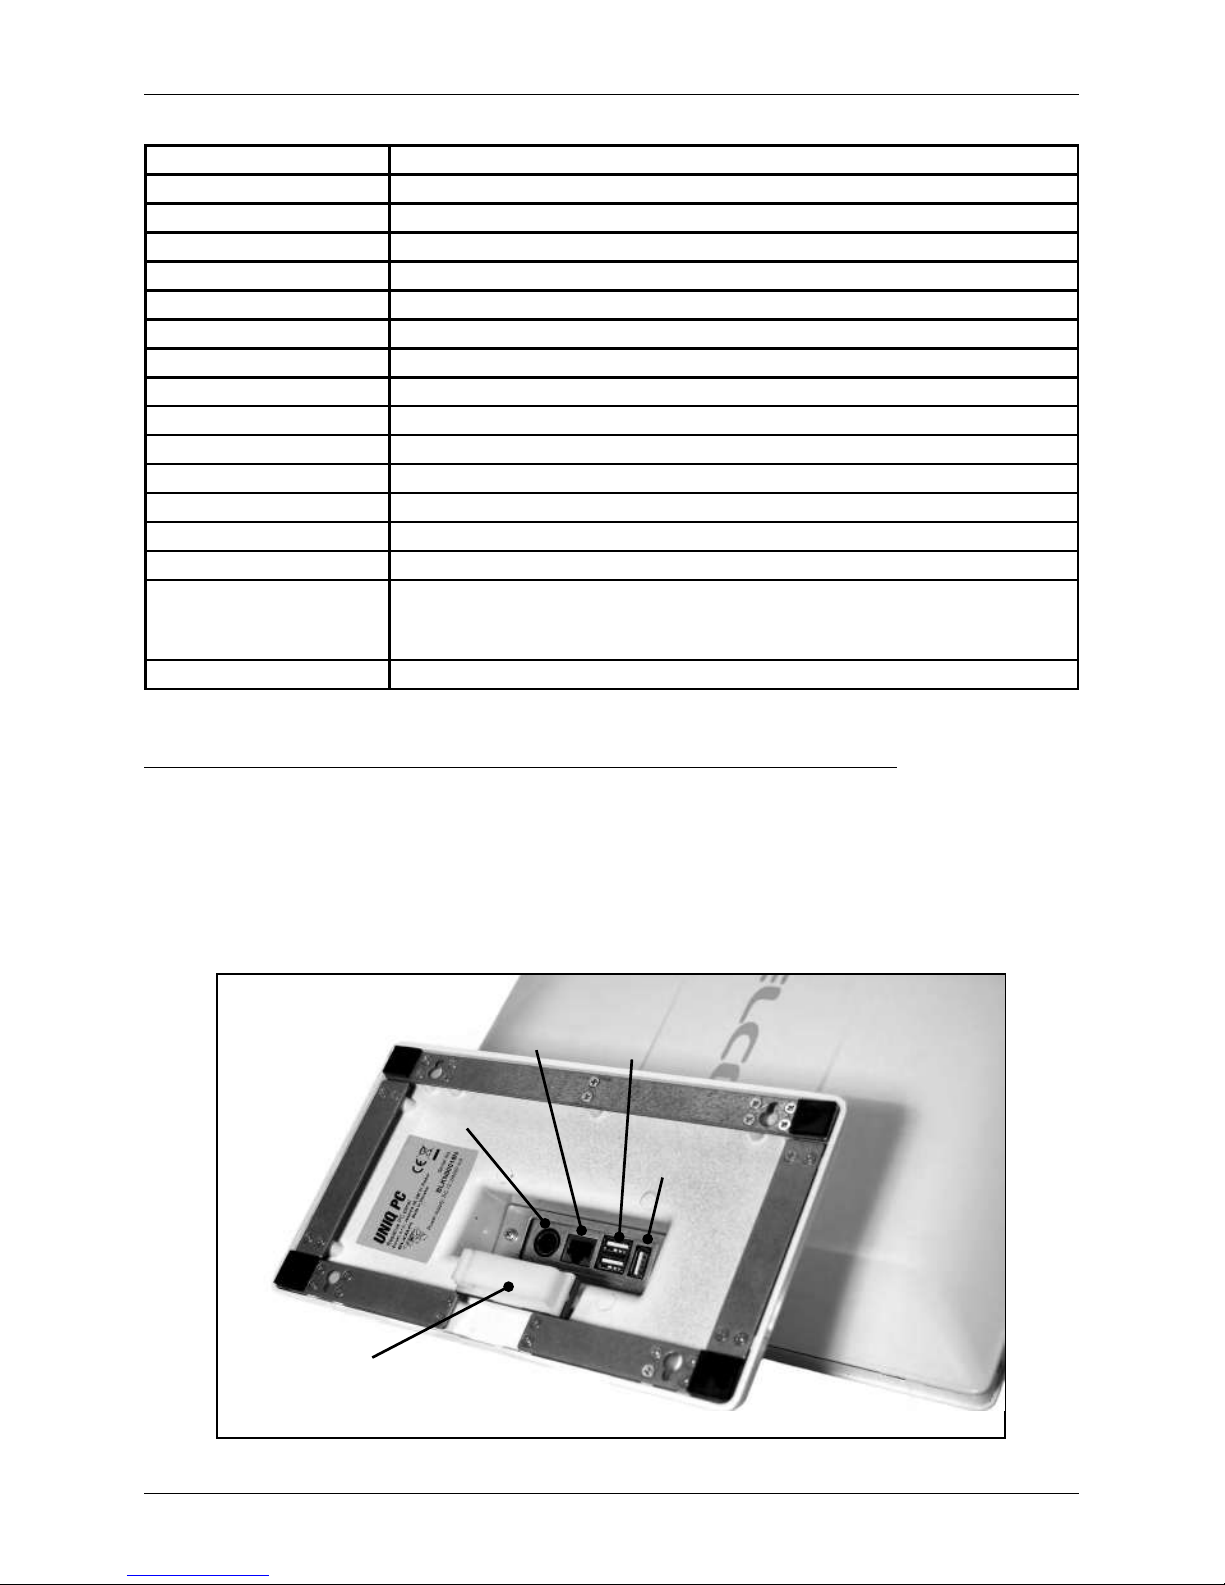
Introduction