Elecdan ePowerSwitch 1XS User manual
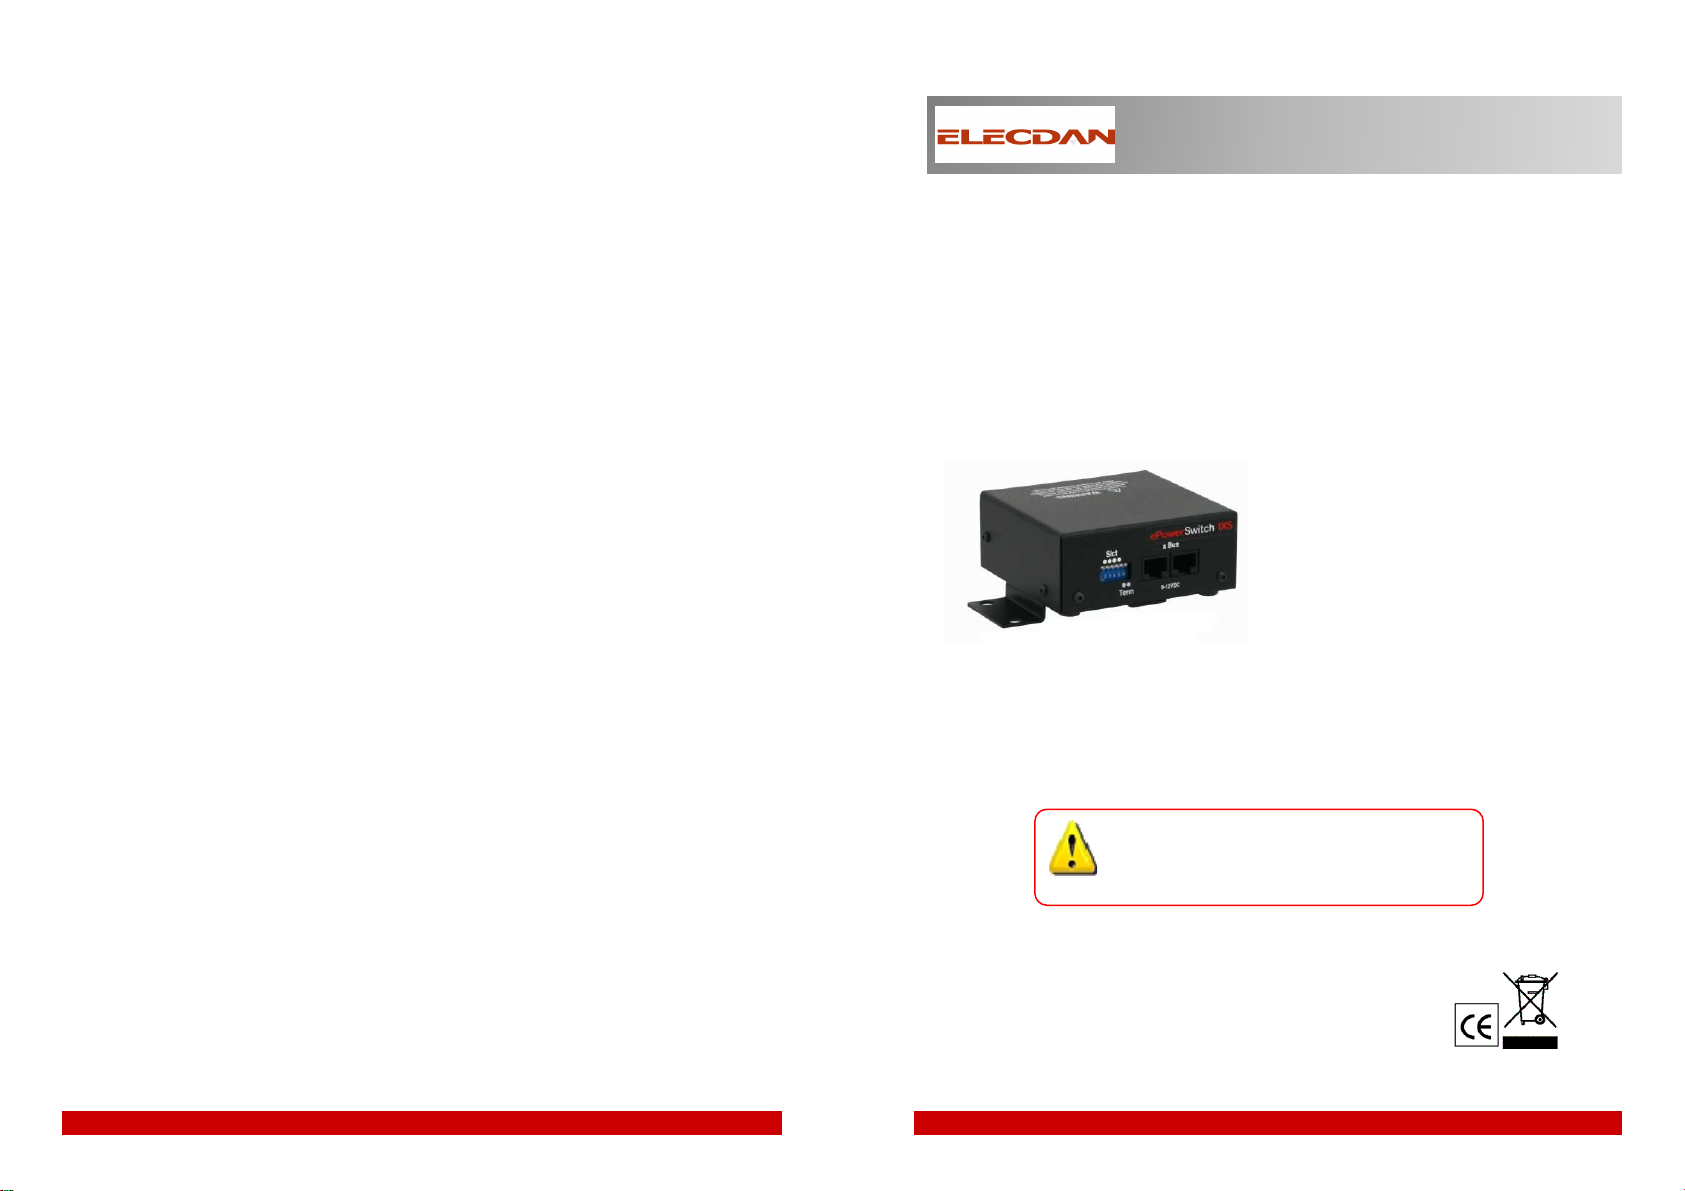
ePowerSwitch 1XS is a power control unit that enables power management of
one device through an ePowerSwitch 4XM, 8XM power control unit or a
ElecGuard environmental monitoring system.
These devices handle up to 16 ePowerSwitch Satellite 1 or 8-port connected
anywhere on the xBus.
Before operating your ePowerSwitch, please
read the safety instructions in the
ElecGuard's User Guide on the provided CD-
ROM.
© Copyright
All rights reserved
Quick Start Guide
ePower
ePowerSwitch
Switch 1XS
1XS
ELECDAN
ELECDANELECDAN
ELECDAN
2 impasse de la noisette - Parc Valad - CE401 - 1370 VERRIERES-LE-BUISSON - FRANCE
July 2007

1. Using the supplied RJ45 cable (or any RJ45 network cable)
link one of the xBus connector of the ePowerSwitch 1XS to
one of the xBus connector on ePowerSwitch 4XM, 8XM or
ElecGuard. To cascade several ePowerSwitch units, link the
next one to the second xBus connector of the previous one.
2. Allocate an address to each ePowerSwitch 1XS by positio-
ning the address selection DIP-switches marked "Slct" on the
front panel according to the following table.
- Unplug the power cord and the xBus cable from the
ePowerSwitch 1XS before changing its DIP switches.
- Do NOT use the same address for two different units
connected on a same xBus network.
Position Off = switch upwards,
Position On = switch downwards
DIP-Switch 1 is located on the left
side
DIP-Switch 5 and 6 are used to
activate the built in termination
resistors.
3. On both devices located at the end of the xBus, switch
the DIP-Switch 5 and 6 to ON to activate the termination
resistors.
4. Plug the power cable into a grounded socket.
1. Installation
EPS Satellite
address
DIP-Switch
1
DIP-Switch
2
DIP-Switch
3
DIP-Switch
4
1Off Off Off Off
2 [ON] Off Off Off
3Off [ON] Off Off
4 [ON] [ON] Off Off
5Off Off [ON] Off
6 [ON] Off [ON] Off
7Off [ON] [ON] Off
8 [ON] [ON] [ON] Off
9Off Off Off [ON]
1 [ON] Off Off [ON]
11 Off [ON] Off [ON]
12 [ON] [ON] Off [ON]
13 Off Off [ON] [ON]
14 [ON] Off [ON] [ON]
15 Off [ON] [ON] [ON]
16 [ON] [ON] [ON] [ON]
1. Open your Web browser and type the IP address of your
EPS 4XM, 8XM or ElecGuard system, for example:
http://192.168.100.202/sysadmin.htm
2. Enter the administrator name and password (default for
both = admin ). The home page appears, allowing you to
configure all settings of your device.
3. Click on Settings and then on Peripherals tab.
The Peripherals page give you an overview of all the
connected peripherals.
- If the peripheral is properly connected it will be
automatically recognized and displayed on this page
after a delay of 1 to 60 seconds. In this case, the colour
of the corresponding Edit and Info symbol is red.
- If you choose any setting that is already in use by
another xBus peripheral, a conflict occurs and the
corresponding Edit and Info symbol of the previous
connected peripheral will be changed to black. In that
case, disconnect your last connected peripheral, change
the DIP switch settings and reconnect the peripheral.
4. Click on the Edit button to configure the settings of the
ePowerSwitch 1XS.
5. Check the box “Activated” to activate your ePowerSwitch
1XS.
2. Configuration
1. Start your web browser and type the IP address of your
EPS 4XM, 8XM or ElecGuard device, for example:
http://192.168.100.202
2. Enter a user or administrator name and its password.
- the Off button allows you to switch OFF the power outlet
- the On button allows you to switch ON the power outlet
- the Restart button allows you to restart the power outlet.
3. Power outlet control
ePower
ePowerSwitch
Switch 1XS
1XS
Elec
ElecElec
ElecGuard
GuardGuard
Guard
Elec
ElecElec
ElecGuard
GuardGuard
Guard
Elec
ElecElec
ElecGuard
GuardGuard
Guard
|

Avant d’utiliser votre ePowerSwitch, lisez
attentivement les consignes de sécurité
indiquées dans le User Guide de
l'ePowerSwitch 4XM, 8XM ou du ElecGuard
contenus sur le CD-ROM.
ePowerSwitch 1XS permet de commander à distance l'alimentation d'une prise
secteur au travers d'un contrôleur d'alimentation ePowerSwitch Master 4XM ou
8XM ou au travers du système de contrôle environnemental ElecGuard.
Ces équipements supportent jusqu'à 16 ePowerSwitch Satellite 1 ou 8-port
connectés en bus ou en étoile à son réseau xBus.
© Copyright
All rights reserved
Guide d'installation rapide
ePower
ePowerSwitch
Switch 1XS
1XS
ELECDAN
ELECDANELECDAN
ELECDAN
2 impasse de la noisette - Parc Valad - CE401 - 1370 VERRIERES-LE-BUISSON - FRANCE
Juillet 2007

1. A l'aide du câble de liaison RJ45 fourni (ou tout autre câble
réseau RJ45), reliez l'un des connecteurs xBus de
l'ePowerSwitch 1XS à l'un des connecteurs xBus de
l'ePowerSwitch 4XM, 8XM ou du système ElecGuard.
Pour cascader plusieurs ePowerSwitch, reliez le suivant au
précédent à l'aide d'un câble réseau RJ45 standard.
2. Allouez une adresse à chaque ePowerSwitch 1XS en
positionnant les micro-interrupteurs marqués "Slct" sur la
face avant selon les indications du tableau ci-dessous.
- Débranchez le câble secteur et le câble xBus de l'appareil
avant de basculer les micro-interrupteurs.
- N'attribuez jamais la même adresse à deux ePowerSwitch
connectés sur un même réseau.
Position Off = switch vers le haut
Position On = switch vers le bas
Le DIP-Switch 1 est situé à gauche
Les DIP-Switch 5 et 6 permettent
d'activer les résistances de
terminaison
Adresse
EPS Satellite
DIP-Switch
1
DIP-Switch
2
DIP-Switch
3
DIP-Switch
4
1Off Off Off Off
2 [ON] Off Off Off
3Off [ON] Off Off
4 [ON] [ON] Off Off
5Off Off [ON] Off
6 [ON] Off [ON] Off
7Off [ON] [ON] Off
8 [ON] [ON] [ON] Off
9Off Off Off [ON]
1 [ON] Off Off [ON]
11 Off [ON] Off [ON]
12 [ON] [ON] Off [ON]
13 Off Off [ON] [ON]
14 [ON] Off [ON] [ON]
15 Off [ON] [ON] [ON]
16 [ON] [ON] [ON] [ON]
3. Sur les 2 appareils situés à chaque extrémité du réseau xBus,
activez les résistances de terminaison en mettant les DIP-
Switch 5 et 6 sur ON.
4. Reliez le câble d'alimentation à une prise secteur avec terre.
1. Démarrez votre navigateur et saisissez l’adresse IP de
votre EPS 4XM, 8XM ou du système ElecGuard :
http://192.168.100.202/sysadmin.htm par exemple.
2. Saisissez le nom et le mot de passe administrateur
(admin par défaut pour les deux). La page d’accueil
apparaît et vous permet de configurer votre appareil.
3. Cliquez sur l’onglet Settings puis sur Peripherals.
Cette page affiche tous les périphériques connectés.
- Si le périphérique est correctement connecté, il sera
reconnu automatiquement et apparaîtra sur cette page
au bout de 1 à 60 secondes. Dans ce cas, les symboles
Edit et Info correspondants sont rouges.
- Si vous avez sélectionné une adresse qui est déjà
utilisée par un autre périphérique sur l'xBus, un conflit
d'adresse se produira et les symboles Edit et Info seront
affichés en noir. Dans ce cas, déconnectez le dernier
périphérique connecté, sélectionnez une autre adresse à
l'aide des micro-interrupteurs et reconnectez-le.
4. Configurez les paramètres de votre ePowerSwitch 1XS
en cliquant sur le bouton Edit.
5. Activez votre ePowerSwitch 1XS en cochant la case
correspondante.
1. Installation
2. Configuration
1. Démarrez votre navigateur et saisissez l’adresse IP de
votre EPS 4XM, 8XM ou du système ElecGuard :
http://192.168.100.202 par exemple.
2. Saisissez le nom et le mot de passe administrateur ou
utilisateur.
- le bouton Off vous permet de mettre la prise hors
tension,
- le bouton On vous permet de mettre la prise sous
tension,
- le bouton Restart vous permet de redémarrer la prise.
3. Contrôle de la prise secteur
ePower
ePowerSwitch
Switch 1XS
1XS
Elec
ElecElec
ElecGuard
GuardGuard
Guard
Elec
ElecElec
ElecGuard
GuardGuard
Guard
Elec
ElecElec
ElecGuard
GuardGuard
Guard
|
Table of contents
Languages:
Other Elecdan Switch manuals


Popular Switch manuals by other brands


Leonton
Leonton PG2-0500 Series user manual

LIBERTY AV SOLUTIONS
LIBERTY AV SOLUTIONS DIGITALINX DL-S42-H2 Quick install guide

Velleman
Velleman WRS4 user manual

VigilLink
VigilLink VLWP-UHU-TR user manual

PROception
PROception proSTR5M Installation and user instructions

NETGEAR
NETGEAR FS700TS Hardware installation guide