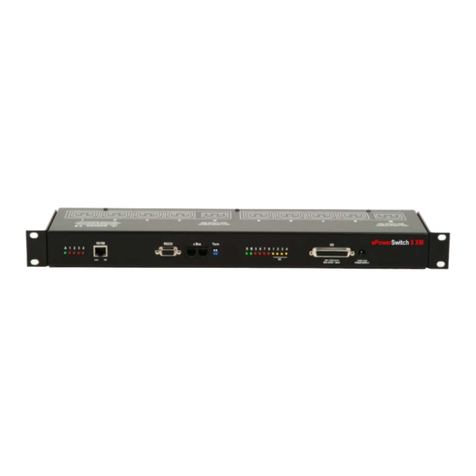
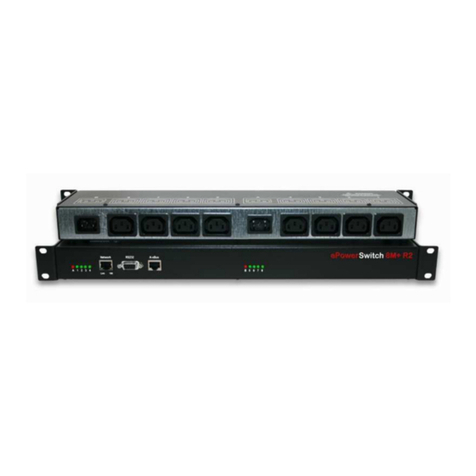
Elecdan ePowerSwitch 8M+ User manual

The power outlets of the ePowerSwitch-8M+ Master and its 4
satellite units can be controlled using a simple ASCII protocol
over an RS232 serial connection.
1.Use the provided RS232 serial cable to connect the
ePowerSwitch-8M+ to an available serial port of your PC.
2.Run a terminal program such as Windows HyperTerminal or
the MicroTerminal program on the CD.
3.Configure the appropriate serial port with the following
settings: 9.600 bauds, 8 bits, no parity, 1 stop bit and no flow
control.
4.On your computer, press <ENTER> until the configuration
menu appears on your screen.
Syntax of the command line: /Pxy=z
(this command line MUST start with a slash)
Example to control the Master:
/P00=1 <ENTER> switch all the 8 power outlets N
/P00=0 <ENTER> switch all the 8 power outlets FF
/P04=r <ENTER> restart power outlet 4
/P08=t <ENTER> toggle power outlet 8
Example to control the first satellite unit connected to the
ePowerSwitch-8M+ Master:
DIP-Switch of the Satellite: 1 to 4 = off
/P10=1 <ENTER> switch all the 8 sockets N
/P15=0 <ENTER> switch socket 5 FF
5. Command through a serial connection
NETWORK INTERFACE PARAMETERS:
IP address on LAN is 192.168.100.100
LAN interface's subnet mask is 255.255.255.0
IP address of default gateway to other networks
is 192.168.1.2
MISCELLANEOUS:
HTTP Port is 80
Finder program is enabled.
HTTP config is enabled.
HARDWARE PARAMETERS:
MAC Address is 00.13.F6.01.1D.A3
Parameter Value Functi n
X 0 to 4 represents the address of the unit:
0 = ePowerSwitch-8M+ Master
1 = ePowerSwitch-8XS Satellite #1
2 = ePowerSwitch-8XS Satellite #2
3 = ePowerSwitch-8XS Satellite #3
4 = ePowerSwitch-8XS Satellite #4
y 0 all 8 outlets are controlled together with 1 command
1 to 8 number of the power outlet you want to control
z 0 Command to switch the socket(s) ff
1Command to switch the socket(s) n
rCommand to restart the socket(s)
tCommand to toggle the state of the socket
Remarks:
The ePowerSwitch accepts lower case and upper case commands.
The ePowerSwitch sends an echo for each received character.
If the Twin mode is activated, sending a command to a specific socket
number will also control its corresponding twin socket.
ePower
ePowerSwitch
Switch 8M+
8M+
© Copyright
All rights reserved
ELECDAN
2 impasse de la noisette •Parc GVIO
91370 VERRIERES LE BUISSON •FRANCE
Tél. +33 (0) 1 60 11 44 44
Fax +33 (0) 1 69 20 39 63
July 2010
Quick Start Guide
ePowerSwitch 8M+ Master is a power control unit with a built-in Web server and
an Ethernet connection. It enables you to control the power supply of eight power
outlets remotely over IP (Intranet or Internet) or an RS232 Terminal connection.
The number of the controlled sockets can be extended up to 40 by cascading up
to four ePowerSwitch 8XS Satellite units.
Thanks to the use of two separate power inputs and the optional Twin mode which
allows you to control at the same time two power outlets, this device is the ideal
solution for power management of servers with redundant power supplies.
It also enables you to monitor 8 IP devices (servers, routers, cameras...) and
automatically reboot them in the event of lock-up.
Bef re perating y ur eP werSwitch, please read
the safety instructi ns in the User Guide n the
pr vided CD-ROM.
1. Installation
Connect the ePowerSwitch-8M+ to your Local Area Network.
Power-up the ePowerSwitch through properly grounded sockets.

2. Configuration
Use one of the three following configuration methods:
- through the LAN using a standard Browser
Change temporarily the network settings of your PC according
to the following ePowerSwitch default network settings:
IP Address: 192.168.100.100 - Port: 80
Gateway: 255.255.255.0
1. Start your Web browser and type the IP address of your
ePowerSwitch.
2. Enter the administrator name and password (default for
both = admin). The home page appears, allowing you to
configure the settings of your ePowerSwitch 8M+.
- through the LAN using the ePS-Finder program
It is the simplest and fastest configuration method if you use
Windows as operating system. It allows you to configure your
ePowerSwitch 8M+ through your local network even if its
network parameters are not compatible with those of your PC.
1. Start the Finder.exe program on the CD.
2. In the tool bar, click on the first left button to discover the
ePowerSwitch connected on your LAN.
3. In the tool bar click on the second left button and
configure the network parameters.
Rules (Settings/Rules) can be used to monitor up to 8 IP
devices by pinging specific IP addresses or scanning specific
port numbers. In the event of lock-up, the corresponding IP
device can be automatically rebooted (power off/on) according
to parameters defined by the administrator.
The supervision function works only if the corresponding
power outlet is switched ON and if the ePowerSwitch 8M+ is
connected to the network (if you disconnect the network cable
of the ePowerSwitch 8M+, the monitoring functions stop).
The PING rule is used to check if a computer or any IP device
is connected to the network.
The SCAN rule is used to check if a specific protocol is
available on a server (for example HTTP, FTP, Telnet, SMTP,
POP...).
3. IP device monitoring
After configuring the network parameters using one of the
previous methods, start your browser and enter the address of
your ePowerSwitch.
By using the administrator account (default name and
password = admin) you will be able to do all settings and to
control all power outlets.
By using a user account you will only be able to control the
power outlets for which one the user has the permission.
The ON button allows you to switch the outlet ON.
The OFF button allows you to switch the outlet OFF.
The Restart button allows you to switch the outlet
immediately OFF. It will be automatically switched ON after
the delay specified in the configuration by the administrator
using the Home/Power Outlets Page (default value is 5 sec).
4. Controlling the power outlets over IP
ePower
ePowerSwitch
Switch 8M+
8M+
- through an RS232 Terminal connection
1. Use the provided RS232 cable to connect the
ePowerSwitch to an available serial port of your PC.
2. Run a Terminal program such as Windows HyperTerminal
or the Micro Terminal program on the CD.
3. Configure the appropriate serial port @ 9.600, n, 8, 1 and
no flow control.
4. On your computer, press <ENTER> until the configuration
menu appears on your screen.
5. Press "M" on your keyboard and follow the instructions on
your screen to modify the settings.

ePowerSwitch 8M+ Master est un système de contrôle et de distribution
d'alimentation qui permet de commander à distance l'alimentation de 8
équipements électriques via un réseau IP (Intranet ou Internet) ou une connexion
Terminal RS232.
Le nombre de prises commandées peut être étendu jusqu'à 40 par la connexion
en cascade de 4 modèles ePowerSwitch 8XS Satellite.
Grâce à ses deux entrées secteurs séparées et au "Twin Mode" permettant de
commander deux prises secteur en une seule action, l'ePowerSwitch 8M+ est la
solution idéale pour gérer l'alimentation de serveurs avec alimentation
redondante.
Il permet également de surveiller le fonctionnement de 8 équipements IP
(routeurs, serveurs, caméras…) et de les redémarrer automatiquement en cas de
blocage.
Avant d’utiliser votre ePowerSwitch, lisez
attentivement les consignes de sécurité
indiquées dans le User Guide contenu sur le
CD-ROM.
1. Installation
Connectez l'ePowerSwitch-8M+ à votre réseau local.
Mettez-le sous tension en utilisant des prises secteur avec terre.
Les prises secteurs de l’ePowerSwitch 8M+ et de ses 4
satellites peuvent être commandées via une connexion
Terminal RS232.
1.A l’aide du câble série fourni, connectez l’ePowerSwitch-
8M+ au port série de votre PC.
2.Démarrez un programme Terminal comme Windows
Hyper Terminal ou le programme Micro Terminal fourni.
3.Configurez le port série de votre PC à 9.600, n, 8, 1, sans
contrôle de flux.
4.Sur le clavier de votre PC, appuyez sur <ENTER> jusqu’à
ce que le menu de configuration apparaisse.
Syntaxe de la commande : /Pxy=z
(la commande doit être précédée d’un slash)
Exemple de commandes destinées au Master :
/P00=1 <ENTER> met toutes les 8 prises secteur sur N
/P00=0 <ENTER> met toutes les 8 prises secteur sur FF
/P04=r <ENTER> restart de la prise 4
/P08=t <ENTER> toggle la prise secteur 8
Exemple de commandes destinées au premier satellite
connecté à l’ePowerSwitch-8M+ Master :
DIP-Switch du Satellite : 1 à 4 = off
/P10=1 <ENTER> met toutes les 8 prises sur N
/P15=0 <ENTER> met la prise secteur 5 sur FF
5. Commande via une liaison série
Paramètre Valeur F ncti n
X 0 à 4 représente l’adresse de l’ePowerSwtich :
0 = ePowerSwitch-8M+ Master
1 = ePowerSwitch-8XS Satellite #1
2 = ePowerSwitch-8XS Satellite #2
3 = ePowerSwitch-8XS Satellite #3
4 = ePowerSwitch-8XS Satellite #4
y 0 toutes les 8 prises sont pilotées ensemble au travers
d’une seule commande
1 à 8 numéro de la prise à piloter
z 0 Met la prise sur ff
1Met la prises sur n
rRestart de la prise
tToggle la prise
Remarques :
L’ePowerSwitch accepte des commandes en majuscules et en minuscules..
L’ePowerSwitch envoie un écho pour chaque caractère reçu.
Si le mode Twin est activé, l’envoi d’une commande vers une prise secteur
pilotera également la prise secteur associée.
NETWORK INTERFACE PARAMETERS:
IP address on LAN is 192.168.100.100
LAN interface's subnet mask is 255.255.255.0
IP address of default gateway to other networks
is 192.168.1.2
MISCELLANEOUS:
HTTP Port is 80
Finder program is enabled.
HTTP config is enabled.
HARDWARE PARAMETERS:
MAC Address is 00.13.F6.01.1D.A3
ePower
ePowerSwitch
Switch 8M+
8M+
Guide d'installation rapide
Juillet 2010
ELECDAN
2 impasse de la noisette •Parc GVIO
91370 VERRIERES LE BUISSON •FRANCE
Tél. +33 (0) 1 60 11 44 44
Fax +33 (0) 1 69 20 39 63
© Copyright
All rights reserved

2. Configuration
Utilisez l’une des trois méthodes pour configurer votre ePowerSwitch-8M+ :
- via le réseau local en utilisant le programme Finder
contenu sur le CD-ROM. C’est la méthode la plus simple et
la plus rapide si vous utilisez Windows. Elle permet de
configurer votre ePowerSwitch au travers de votre réseau
local même si ses paramètres réseau ne sont pas
compatibles avec ceux de votre PC.
1. Démarrez le programme ePS-Finder.exe.
2. Dans la barre d’outils, cliquez sur le premier bouton
pour parcourir votre réseau local et rechercher
l’ePowerSwitch que vous venez de connecter.
3. Dans la barre d’outils, cliquez sur le deuxième bouton
et configurez les paramètres réseau.
Des règles (Settings/Rules) peuvent être utilisées pour
surveiller le fonctionnement de 8 équipements IP en envoyant
une commande Ping vers une adresse IP ou une commande
Scan vers un numéro de port. En cas de blocage,
l'équipement IP correspondant peut être automatiquement
redémarré (off/on) selon les paramètres définis par
l'administrateur.
La fonction de surveillance ne fonctionne que si les prises
secteur correspondantes sont sous tension (On) et si le
ePowerSwitch 8M+ est connecté au réseau (si vous
déconnectez le câble réseau de l'ePowerSwitch, la fonction de
surveillance s'interrompt).
La fonction PING est utilisée pour vérifier si un ordinateur ou
tout autre équipement IP est connecté au réseau.
La fonction SCAN est utilisée pour vérifier si un protocole
spécifique est disponible sur un serveur (par exemple HTTP,
FTP, Telnet, SMTP, POP…)
- via le réseau local en utilisant un navigateur standard
Lors de la toute première installation, modifiez momen-
tanément les paramètres réseau de votre PC en fonction
des paramètres réseau par défaut de l’ePowerSwitch :
Adresse IP : 192.168.100.100 - Port : 80
Passerelle : 255.255.255.0
1. Démarrez votre navigateur et saisissez l’adresse IP de
votre ePowerSwitch.
2. Saisissez le nom et le mot de passe administrateur
(admin par défaut pour les deux). La page d’accueil
apparaît et vous permet de configurer votre appareil.
3. Surveillance d'équipements IP
4. Commandes des prises via IP
Après avoir configuré les paramètres réseau à l'aide de l'une
des précédentes méthodes, démarrez votre navigateur et
entrez l'adresse de votre ePowerSwitch.
A l'aide du compte administrateur (nom et mot de passe par
défaut = admin) vous pourrez effectuer tous les paramétrages
et contrôler toutes les prises secteur.
A l'aide d'un compte utilisateur, vous pourrez uniquement
contrôler les prises secteur pour lesquelles vous disposez des
droits d'accès.
Le bouton ON permet de mettre la prise secteur sous tension.
Le bouton OFF permet de mettre la prise secteur hors
tension.
Le bouton RESTART permet de mettre la prise secteur
immédiatement hors tension puis de la redémarrer après le
délai de redémarrage fixé par l'administrateur (Home/Power
Outlets Page). La valeur par défaut est de 5 secondes.
ePower
ePowerSwitch
Switch 8M+
8M+
- via l’interface série RS232 et une connexion Terminal :
1. Utilisez le cordon série fourni pour relier l’ePowerSwitch à
un port série de votre PC.
2. Démarrez un programme Terminal comme Windows
Hyper Terminal ou le programme Micro Terminal fourni.
3. Configurez le port série de votre PC à 9.600, n, 8, 1,
sans contrôle de flux.
4. Sur le clavier de votre PC, appuyez sur <ENTER>
jusqu’à ce que le menu de configuration apparaisse.
5. Appuyez sur la touche "M" de votre clavier et suivez les
instructions pour modifier les paramètres.
Table of contents
Languages:
Other Elecdan Switch manuals
