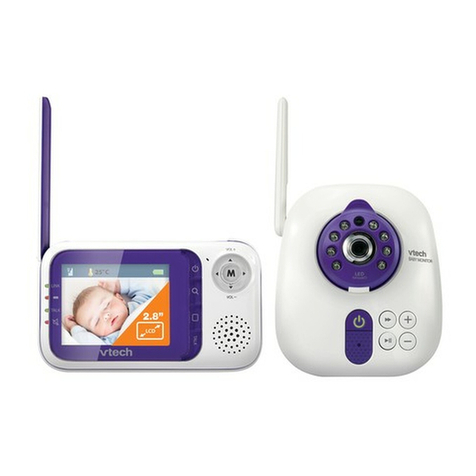
Electramax eM-50T User manual

BABY MONITOR WAREHOUSE
THE
I
N
L
T
A
E
N
R
O
I
N
T
A
R
A
T
M
C
E
A
L
X
E
EIL
I
N
L
T
A
E
N
R
O
I
N
T
A
R
A
T
M
C
E
A
L
X
E
EIL
Please read this Manual before use and retain for future reference.
Wireless Colour Video and Audio Baby Monitor
User Manual
Helpline Number 0845 3304163
Monday to Friday, between 9.00am to 5.00pm
Electramax Model: eM-50T

Please ensure you read this manual before
operating your eM-50T.
IMPORTANT WARNINGS
Wireless Colour Video and Audio Baby Monitor
DECLARATION OF CONFORMITY TO TYPE
2 11
PRIVACY WARNING!
Do remember that you are using public airwaves when you use the system and that sound and
video may be broadcast to other 2.4 GHz receiving devices. Images & conversations, even from
rooms near the camera, may be broadcast. To protect the privacy of your home, always turn the
camera off when not in use.
STRANGULATION WARNING!
Caution to avoid the possibility of entanglement/strangulation keep mains lead/s out of reach of
babies and young children.
SAFE ADAPTER POSITION
The adaptors should be positioned in a safe manner to avoid anyone tripping or stepping on the
leads. Ensure the adaptors are not in contact with water or other liquids/chemicals. Ensure that
they are not placed in direct or indirect contact with heat (e.g, central heating pipes/radiators or
gas fires).
BATTERY SAFEGUARDS
CORRECT USE OF ADAPTERS
The adaptors be interchanged.
For the Baby Unit - Camera (Transmitter) use the smaller adaptor labelled 9V 300mA and
for the Parent Unit - Monitor (Receiver) use the larger adapter labelled 6V 600mA.
Note: The adaptors may become warm - this is quite normal and not a hazard.
MUST NOT
WARNING! WARNING!
MODEL: eM-50T
MODEL: eM-50T
INTRODUCTION
Many congratulations on your purchase of the eM-50T Colour Video and Audio Baby
monitor with the latest state-of-the-art technology.
Please read this manual before operating the unit and keep it for future reference.
Use 1.5 volts AA-size Alkaline batteries only.
Do not use re-chargeable batteries.
Ensure the polarity (+ and -) of the batteries are installed correctly. Incorrect battery
insertion could damage your units.
Batteries should always be replaced or removed by a responsible adult.
Keep batteries away from babies, children and pets.
Dispose of batteries safely, never dispose in fire.
Do not mix partially used and new batteries.
Do not mix batteries of different types, e.g. re-chargeable and non re-chargeable
Do not attempt to charge non re-chargeable batteries.
Remove batteries if units are not going to be used for some time.
Remove worn out batteries immediately, to avoid corrosion/leakage.
eM-50T IS DESIGNED FOR INDOOR USE ONLY.
THIS IS NOT A TOY.
KEEP OUT OF REACH OF BABIES AND CHILDREN.
DO NOT PLACE INSIDE COT.
Description of Equipment: Wireless Colour Video and Audio Baby Monitor
We: Electramax International Limited
Of: Unit 3
Chiswick Business Park
566 Chiswick High Road
London
W4 5YA
Tel:020 8899 6030
Declare under our sole responsibility that the product detailed below:
Is in conformity with the essential requirements and provisions of the R&TTE Directive
1999/5/EC Annex IV
Complies with the following Standards:
EN60 065 : 1998 - General requirements for Safety.
EN301 489 : 2001 - General requirements for EMC
Is subject to the procedures set out in Annex IV of the R&TTE Directive 1999/5/EC
under the supervision of the Notified Body
nd
Date of Declaration: 2 June 2003
For spare parts/replacements or purchase of additional cameras
(indoors or outdoors) please contact:
ELECTRAMAX INTERNATIONAL LIMITED
Unit 3, Chiswick Business Park, 566 Chiswick High Road, London, W4 5YA
Tel: 020 8899 6030 Fax: 020 8899 6001
We hope our product will give you many
years of joyful noises, sights and memories.

1 x Baby Unit - Camera (Transmitter), 1 x Parent Unit - Monitor (Receiver),
1 x A/V (audio/video) cable, 2 x power adapters (9V DC, 300mA for Baby unit;
6V DC, 600mA for Parent unit, 1 x Mounting Plate, 1 set of Fixing screws and Masonry plugs,
1 x User Manual.
BATTERIES NOT SUPPLIED.
When using this product for monitoring your baby, always ensure you are within
reach of the Parent unit and personally check your baby as necessary.
The eM-50T is designed to monitor your baby. It should NOT be considered as a
substitute for adult supervision. Neither is it designed to be used as a medical monitor.
10 3
1.1 Baby Unit - Camera (Transmitter)
1.0 PRODUCT LAYOUT
1
2
3
4
5
6
7
8
9
10
Infrared LEDs.
Lens.
Lens head.
Microphone.
Keyholes.
Battery compartment.
Power indicator LED.
OFF/ON/NIGHT
(Power OFF/Power ON/Night Vision ON)
Channel selection switch.
(Select the channel by sliding the switch
to the desired channel number.)
Note: You must select the same channel
on the Baby and Parent units.
9V 300mA power adapter plug.
1
2
3
4
Voice sensitivity control.
Power/Volume control.
Auto mode (Voice-activated function).
Channel selection button.
(Select the channel you
want by pressing this
button.) Note: You must
select the same channel on
the Baby and Parent units.
Power indicator LED.
Channel indicator LEDs.
Brightness adjustment button.
(7 levels of brightness control.
The power LED will blink when
pressing the (-) or (+) button
to the highest or lowest level.)
Keyholes.
Battery compartment.
6V 600mA Power adapter plug.
AV output jack (mono sound).
1.2 Parent Unit - Monitor (Receiver)
1
2
3
4
5
6
7
8
9
10
11
Fig. 2
IMPORTANT NOTE
5
6
7
8
9
10
3
4
1
2
Fig. 1
YOUR eM-50T MONITOR PACK CONTAINS:
This product conforms with the essential requirements as described in directive
R&TTE 1999/5/EC and satisfies all the technical regulations applicable to the product
within following standard: Safety (73/23/EEC): EN 60065/1998, EMC (89/336/EEC):
EN 301 489/2001, RF: EN 300 440/2001
14.0 FCC STATEMENT
This equipment has been tested and found to comply with the limits for a Class B digital
device, pursuant to Part 15 of the FCC Rules. These limits are designed to provide
reasonable protection against harmful interference in a residential installation. This
equipment generates, uses and can radiate radio frequency energy and, if not installed and
used in accordance with the instructions, may cause harmful interference to radio
communications. However, there is no guarantee that interference will not occur in a
particular installation. If this equipment does cause harmful interference to radio or
television reception, which can be determined by turning the equipment off and on, the user
is encouraged to try to correct the interference by one or more of the following measures:
Reorient or relocate the receiving antenna. Increase the separation between the equipment
and receiver. Connect the equipment into an outlet on a circuit different from that to which
the receiver is connected. Consult the dealer or an experienced radio/TV technician for help.
FCC Label Compliance Statement:
This device complies with Part 15 of the FCC Rules. Operation is subject to the following two
conditions:
(1) this device may not cause harmful interference, and
(2) this device must accept any interference received, including interference that may cause
undesired operation.
Note: The manufacturer is not responsible for any radio or TV interference
caused by unauthorized modifications to this equipment. Such
modifications could void the user's authority to operate the equipment.
13.0 CARE AND MAINTENANCE
Keep all parts and accessories out of young children's reach.
Fingerprints or dirt on the lens surface can adversely affect camera performance.
Avoid touching the lens surface with your fingers.
Should the lens become dirty, use a soft, dry cloth to wipe the lens.
Keep the camera dry. Precipitation, humidity, and other liquids contain minerals that will
corrode electronic circuits.
Do not use or store in dusty, dirty places.
Do not store in hot environment. High temperatures can shorten the life of electronic
devices and warp or melt certain plastics.
Do not store in very cold environment. When the system warms up (to its normal temperature),
moisture can form inside the units, which may damage electronic circuitry.
Do not attempt to open the case. Non-expert handling of the device may damage the system
and will void the guarantee.
Avoid dropping the units or any shocks.
Operate this product using only the power adapters supplied.
Do not overload electrical outlets/extension cords as this can result in fire or electric shocks.
WARNING:
Do remember that you are using public airwaves when you use the system and that
sound and video may be broadcast to other 2.4 GHz receiving devices.
Images & conversations, even from rooms near the camera, may be broadcast. To
protect the privacy of your home, always turn the camera off when not in use.
5
6
7
8
9
10
11

4 9
2.2 Loading The Batteries (See Fig. 3).
1
2
3
Open the battery compartment cover on the rear of the Baby unit.
Insert 4 x AA-size batteries (follow the plus (+) and minus (-) signs on the diagram
inside the battery compartment) and then securely close the battery compartment cover.
(located on the base of the unit)Slide the ON/OFF/NIGHT switch to the ON position .
The LED on the bottom of the camera will light up in red, showing the power is ON.
2.0 SETTING UP THE BABY UNIT - CAMERA (Transmitter)
2.1 Power Supply
The camera uses either 4 x 1.5v AA-Size batteries (use alkaline batteries only) or the
household AC current (using the supplied 9V 300mA adapter).
Fig. 3
13
2
3
1
2
Fig. 4
Plug one end of the provided power adapter into the bottom of the Baby unit.
Plug the other end of the power adapter into the mains supply.
Note: Use the adapter labeled OUTPUT: 9V 300mA with the Baby unit.
Slide the ON/OFF/NIGHT switch to the ON position .
The LED on the bottom of the camera will light up in red showing the power is on.
(located on the base of the unit)
1
2
3
2.3 Using AC Power Adapter
(See Fig. 4)
WARNING
Do not use rechargeable batteries and never mix old batteries with new ones.
Remove the batteries if the unit is not used for a prolonged period of time.
9.0 USING THE eM-50T ABROAD
This monitor is licensed for use in the UK only. Although it will work abroad, its use may be
illegal (due to different permitted frequency regulations) and the receiver unit may experience
severe interference in some countries.
11.0 SPECIFICATIONS
Baby unit - Camera
Frequency
Channel
A/V mod/demod. method
Antenna
Image Sensor
Effective pixels
Lens
Dimensions
Weight
Power
Operating temperature
Parent unit - Monitor
Frequency
Channel
A/V mod/demod. method
Antenna
Display
Display colors
Dimensions
Weight
Power
Operating temperature
2.4 GHz
3 selectable channels
FM
Built-in Omni-directional antenna
1/3” CMOS image sensor
NTSC: 510 (H) x 492 (V)
CCIR: 628 (H) x 582 (V)
f 6.0mm, F 1.8
9.2(W) x 12.3(H) x 5.9(D) cm
(3.6 x 4.8 x 2.3 inches)
175g (6.17 ounces) without batteries
DC 9V, 300mA or 4 x 1.5v AA-size batteries
000 0
0 C ~ 40 C (32 F ~ 104 F)
2.4 GHz
3 selectable channels
FM
Built-in Omni-directional antenna
1.5" LTPS-TFT LCD
Full-color
8.5(W) x 14(H) x 5.3(D) cm
(3.3 x 5.5 x 2.1 inches)
240g (8.52 ounces)
DC 6V, 600mA or 4 x 1.5v AA-size batteries
000 0
0 C ~ 40 C (32 F ~ 104 F)
10.0 GUARANTEE
The product comes with a 12 month guarantee from the date of purchase. We will repair or
replace any units that are found to be defective or faulty provided they have been used in
accordance with the instructions in this manual.
No user serviceable parts inside. Do not open or tamper with the units as this will invalidate
the guarantee.
Please keep your receipt as proof of purchase.

8 5
8.0 TROUBLESHOOTING
4.0 Mounting the Baby Unit (Camera)
Note 1: The monitor reception should be tested before fixing the camera in place. Have
someone hold the camera against the wall in the selected mounting area while you check
the reception on the monitor. If interferences or other problems occur, refer to the
Troubleshooting section. You may need to select a different location in the room for
mounting the camera. A set of fixings for masonry has been included.
Note 2: Where the wall is constructed of plasterboard or an alternative type of material
please consult a qualified person for ascertaining the cor rect fixing to be used.
Note 3: The approximate maximum transmission range is 300 feet (clear line of site),
however the actual transmission distance will be dependant on the number and type of
walls/ceilings/constructions and other obstacles that may reduce the transmission range.
1
2
3
Drill two holes 52mm apart in a line, at the camera mounting position.
Fix the provided mounting plate to the wall using the masonry plugs and fixing screws
supplied, (See Fig. 6).
Place the camera against the mounting plate so that the studs on the mounting plate
are adjusted to the keyholes on the back of camera. Then pull the camera down to
slide the studs into the cutout channels, (See Fig. 7).
Place the camera in a convenient location,
point the lens towards the observation area
and adjust the angle by rotating the lens
head in a vertical direction. (See Fig. 5)
Fig. 6
12
Fig. 7
Fig. 5
Problem Possible Cause How to Resolve
No signal received on
Parent unit.
Poor signal or
inference on
Parent unit.
Should you have any problems operating your eM-50T please refer to the table below. However if the
Picture on screen
on Parent unit is
received in B&W
and not in colour
Batteries may
be weak/flat.
AC adaptors are
not connected properly.
Different channels
selected on both units.
Either or both units are OFF.
Parent unit is in Auto mode
and sensitivity is set too low.
Different channels
selected on both units.
Microwave Oven in use in
the path of units
The units are out of range.
If power LED is ON but
only voice signal is
detected, the Parent unit
may be in Voice-activated
mode.
Baby unit is set to
NIGHT VISION mode
Replace
Batteries.
Ensure adaptors are properly connected.
If either unit works with batteries but
not with the adaptor, then replace adaptor.
Ensure Baby and Parent units are
set to same channel.
Ensure both units are turned ON.
Either increase the sensitivity and/or
turn Auto mode OFF by pressing the
Auto button on Parent unit.
Ensure Baby and Parent units are set to
same channel.
Move Microwave Oven to different location
lor turn off.
Ensure both units are within range of each
other (approx. maximum range is 300
feet in clear line of sight).
Press Auto button to turn the screen ON.
Change setting to ON. During night/Dark
room environment, picture is received in
B&W when Baby unit is set to NIGHT
VISION mode.
5.0 Night Vision Setting on the Baby Unit (Camera)
Fig. 8
Set the sensitivity control on the monitor
to the level you prefer.
Note: The sensitivity level can vary between
0 and 9. A value of 0 gives minimum sensitivity,
a value of 9 gives maximum sensitivity.
Press the Auto button on the front of the monitor.
This will turn off the screen but the power LED will remain on.
When the sound from the camera reaches the set level, the screen will turn on
automatically. It will turn off again after 30 seconds.
Note: Under/In voice-activated mode, the monitor can only detect signal input from one
camera at a time. The CH button is not functional under Voice-activated mode.
1
2
3
WARNING: please ensure you read Important
Warnings on page 2 of this manual prior to use.
3.0 Fine Tuning the Baby Unit (Camera)
Slide the OFF/ON/NIGHT switch to the NIGHT position. Use this night mode when your baby
or child is in a darkened room. The small LED around the lens allow the night vision facility.
Fig. 12
LEVEL
PWR/VOL
1
2
This voice-activated mode allows you to set the sensitivity of
audio level that will trigger the monitor. To use voice-
activated function, follow these steps:
7.3 Voice-Activated Function (Auto Mode), (See Fig. 12).

Fig. 10
2
1
VEL
PWR/VOL
4
3
67
7.0 ADDITIONAL FACILITIES
7.1 Recording on a VCR (See Fig. 11)
7.2 Additional Cameras
The Parent unit has a AV (audio/video) output jack for connecting to a VCR/TV for
recording/viewing.
Connect the mini plug of the provided AV cable to the AV jack on the rear of the
Parent unit.
Connect the other end of the AV cable to the Scart connector on the VCR/TV, usually
labelled LINE IN.
This unit has the added facility of catering for two additional cameras. These cameras can
be purchased as separate accessories. Both indoor and outdoor cameras are available
directly from Electramax. Whilst camera 1 is viewing your baby in the nursery, cameras 2
or 3 could be used either as a security device (ie installed outside your front door/side
entrance) or alternatively for monitoring separate rooms. Each location can be viewed by
changing the channel number on the Parent Unit to channels 1, 2 or 3.
You will be pleased to know that you can also view your baby on your television screen
as well as record your baby on a VCR (via the Parent Unit) so you don’t miss those
special moments. If your television has a picture in picture facility, you can constantly
view your baby at the same time as watching your favourite programme.
6.1 Power Supply
The monitor uses either 4 x AA-Size batteries (use alkaline battery only) or the
household AC current 1.5v
(using the supplied 6V 600mA adapter).
6.0 SETTING UP THE PARENT UNIT - MONITOR (Receiver)
VEL
PWR/VOL
Fig. 9
1
2
3
54
Open the battery compartment cover on the rear of the Parent unit.
Insert 4 x AA-size batteries (follow the plus (+) and minus (-) signs on the diagram inside
the battery compartment) and then securely close the battery compartment cover.
Note: The power indicator LED will flash indicating the batteries need to be replaced,
when the battery power is low.
Turn the unit ON using the dial labelled PWR/VOL.
Set the same channel as on the Baby unit, by pressing the CH button.
Adjust the volume, using the dial labelled PWR/VOL.
1
2
3
4
5
1
2
3
4
5
6.2 Loading the Batteries (See Fig. 9).
Plug one end of the provided power adapter into the bottom of the Parent unit.
Plug the other end of the power adapter into the mains supply.
Turn the unit ON using the dial labelled PWR/VOL.
Set the same channel as on the Baby unit, by pressing the CH button.
Adjust the volume, using the dial labelled PWR/VOL.
Note: Use the larger adapter labelled OUTPUT: 6V 600 mA with the Parent unit.
6.3 Using AC Power Adapter
(See Fig. 10).
You must still ensure that the channel selection on the Baby Unit and Parent Unit
are synchronised.
Note: The picture will be displayed in black and white only.
WARNING
Do not use rechargeable batteries and never mix old batteries with new ones.
Remove the batteries if the unit is not used for a prolonged period of time.
IN VIDEO AUDIO
IN
From the
Parent Unit
to the
Video In.
Fig. 11
1
2
AV (audio/video) Phono to Scart cable
Table of contents
