Electro-Harmonix 95000 Assembly instructions

User Reference Manual
95000
performance loop laboratory

2
TABLE OF CONTENTS
MEET THE 95000… 3
What’s in the Box? | Main Features | Specifications
QUICK START GUIDE… 4
RECORDING AND WORKING WITH MULTITRACK LOOPS |
Make Connections and Set Input Level |Prior to
Recording |Record a Multitrack Loop |Overdub onto a
Track | Undo and Redo | Erase a Track |Erase a Loop |
Record 2 Tracks Simultaneously (Stereo) |Record a
Quantized Loop | MIXING | Prepare to Mix |Perform a
Mix | RESTORE FACTORY SETTINGS
BASIC TERMINOLOGY AND
KEY CONCEPTS… 7
MONITORING… 9
DRY OUTPUT L/R Faders and Pan Knobs | CLIX LVL
Knob | HEADPHONE LVL Knob | MASTER LVL Knob
THE RECORD TRANSPORT… 10
INPUT LEVEL L/ R Knobs and CLIP LEDs | NEW LOOP
Button | TRACK Footswitch | UNDO Footswitch |
RECORD Footswitch | PLAY () Footswitch | LOOP
Selection Footswitches | PUNCH Button | OCT
Button | REVERSE Button | EXT. CLOCK Button |
QUANTIZE Button
TRACKS, TRACK SELECTION, MIXDOWN,
TEMPO… 14
TRACKS OVERVIEW | TRACK Faders | TRACK SELECT
Buttons | MIXDOWN Track | TRACK PAN Knobs |
MIXDOWN Fader | MIXDOWN Button | TEMPO Slider |
TAP Button | CLIX LEDs
LED DISPLAY AND CONTROL… 17
LED DISPLAY | VALUE Push to Jump Knob | PAGE Button |
PRIMARY MODE PAGES | LOOP/DUB Mode | BARS/BEATS
Mode | MIDI CH/SYNC Mode | SYNC Modes | SECONDARY
MODE PAGES | CLIX Metronome | TEMPO Slider
Resolution | Count-In | Loop Fade-Out
REAR CONNECTIONS AND CONTROLS… 20
9VDC 400mA Power Jack | microSDHC Card Slot |
USB Connector | MIDI OUT Connector | MIDI IN
Connector | EXPRESSION PEDAL Jack | HEADPHONE
Jack | MONITOR OUT Jack | L and R OUTPUT Jacks |
AUX IN Jack | +48V Phantom Power Button | L and R
INPUT Combo Jacks
IN DEPTH: RECORDING TRACKS… 22
Prepare to Record a New Loop | Non-Quantize vs.
Quantize Loop Recording | Stereo Mode | Record a
New Loop | End a New Loop | Loop Length and
Storage Capacity | Change Loop Numbers | Erase
Loops and Tracks
IN DEPTH: OVERDUBBING TRACKS… 25
Choose a Track to Overdub | Overdubbing | DUB
Settings (aka Feedback) | Manipulating Sounds While
Overdubbing | Punching-In
IN DEPTH: MIXDOWN… 27
Mixdown Basics | Performing a Mixdown | After the
Mixdown | Constant Tempo Mixdown Mode | Using
Constant Tempo Mixdown Mode
MEMORY CARD AND USB… 29
About the microSDHC Memory Card | Overview of
microSDHC Memory Card Requirements, Size and
Performance | Hot to Format microSDHC Memory
Cards | How to Remove the microSDHC Card | USB
Port: How to Interface the 95000 with a Computer |
95000’s microSDHC Card File System | Backing-Up
Files | Restoring Files | Importing Audio Files
MIDI SYNC… 32
IN (Internal Clock Sync Mode) | XT (Normal External Clock
Mode) | BX (Beat Sync External Clock Mode) | TUTORIAL:
the 95000 as MIDI Clock Slave and MIDI Clock Master
MIDI CONTROLLER AND
PROGRAM MESSAGES… 35
Overview | Set the MIDI Channel | MIDI Control Change
(CC) Messages | MIDI Program Change (PC) Messages |
MIDI Thru | Change Loop Numbers with MIDI | MIDI CC
Tables | MIDI Program Change (PC) Messages
SIGNAL PATH DIAGRAM… 38
FACTORY DRUM LOOPS… 39
WARRANTY… 40
FCC COMPLIANCE… 40
©2017 Electro-Harmonix. All rights reserved. 95000 and Electro-Harmonix and logo are trademarks of
New Sensor/Electro-Harmonix. Product and company names used within the manual are trademarks of
their respective companies.
95000 Manual Version 1.0

3
MEET THE 95000
Thank you for purchasing the Electro-Harmonix 95000 Performance Loop Laboratory. Please set aside
some time to read this manual and familiarize yourself with this unique instrument’s layout and
operation. Then keep the manual close by to use as a reference guide.
The manual is divided into the following basic sections:
What’s in the Box, Main Features, Specifications
Quick Start Guide
Basic Terminology and Key Concepts
Overview of the controls of the 95000
In-depth look at the operation of the 95000
MIDI functions and assignments
What’s in the Box
95000 Performance Loop Laboratory
User Reference Manual
16GB microSDHC Memory Card
9.6VDC 0.5A power supply
Main Features
Total recording time up to 375 minutes
with 16GB card
Stores up to 100 multi-track loops per card
6 tracks plus one stereo Mixdown track
Records one or two tracks (stereo or 2
mono) at once
Stereo dry output level controls
Undo/Redo your last recording/overdub
per track
Overdub (DUB) with adjustable
feedback amount
Reverse button instantly changes
loop direction
Octave button instantly halves the loop’s
playback speed
Quantize function allows for playing along
with CLIX metronome and locking loops to
external devices
Combo Mic/Instrument/Line input with
adjustable gain and phantom power
Headphone output
Data entry rotary knob
4-digit LED display
TAP Tempo
Octave/Reverse/Quantize functions
Removable microSDHC Memory Card (16GB
card included)
USB port for easy transfer of files to and
from computer
MIDI Clock sync and control
Expression pedal input jack to control loop
audio volume
20 Factory-supplied drum loops
Convenient dedicated footswitch functions
Rugged, all-metal stage-worthy chassis
Specifications
Current Draw: 400mA at 9V. Maximum
allowable power supply voltage: 10.5 VDC
Digital Audio Specifications: 16-bit/44.1 kHz
microSDHC Memory Card Size: 4GB-32GB
Maximum Loop Recording Time on Included
16GB microSDHC Memory Card: up to
375 minutes
Headphones Output Power: 0.1W into 16 ohms
9.6VDC 0.5A power supply
Input Impedances:
L and R 1/4" Inputs: 2MΩ
L and R XLR Inputs: 2.5kΩ
AUX Input: 9.5kΩ
Output Impedances:
L and R 1/4" Outputs: 400Ω
Monitor 1/4" Output: 400Ω
Headphones Output: 2Ω

4
QUICK START GUIDE
RECORDING AND WORKING WITH
MULTITRACK LOOPS
Make Connections and Set Input Level
1. Plug your instrument or microphone into
either the L or R INPUT jacks and adjust the
corresponding INPUT knob so that the CLIP
LED barely lights up on your loudest notes.
2. Connect the MONITOR OUT jack to an
amplifier or mixer. Turn up the HEADPHONE
LVL knob to approximately 50%.
3. Plug the supplied AC Adapter into an AC
outlet and insert its output plug into the
power jack on the rear panel of the 95000.
Prior to Recording
1. Raise the corresponding L or R DRY OUTPUT
fader so that you can hear your instrument.
2. Raise the TRACK 1 fader so that you can
hear your recording when you finish.
3. Make sure the QUANTIZE LED is off.
4. If you do not want to hear the metronome,
turn the CLIX LVL knob down to zero; if you
do want to hear the metronome, adjust to
taste. Adjust the tempo of the metronome
with the TEMPO slider or by pressing the TAP
button—in time—at least twice.
5. Set the TEMPO slider to 50% (or your
preferred tempo if listening to the
metronome). You may also tap in the
tempo using the TAP button.
6. Find an empty loop by pressing the LOOP
UP () or DOWN () footswitches. The left
two digits of the display show you the loop
number. If there is a dot next to the loop
number then the loop contains audio; no
dot indicates that the loop is empty.
Record a Multitrack Loop
1. Press the RECORD footswitch to start recording
immediately. The 95000 will begin recording
onto TRACK 1. The red 4-digit LED displays the
progression of the loop in bars and beats.
2. When you are ready to end the loop and set the
loop length, press either the RECORD or PLAY
() footswitches. Press RECORD to stop
recording and immediately begin playback of
the loop you just recorded. Press PLAY to loop
the 95000 back to the beginning, put the 95000
into OVERDUB mode, and automatically
continue recording onto TRACK 2. To exit
OVERDUB mode, press the RECORD button.
3. To record on another track, press the TRACK
footswitch to cycle through the 6 tracks OR go
directly to a track by pressing its illuminated
button. The lit track button indicates the track
is enabled for recording.
Overdub onto a Track
1. You can continuously overdub onto any one (or
pair) of the tracks.
2. Record a New Loop onto TRACK 1. See Record
a Multitrack Loop (above).
3. Press the TRACK footswitch until TRACK 1 is lit,
or you may directly press the TRACK 1 button.
4. Press the RECORD button. Both the RECORD and
PLAY LEDs will light up to show that you are in
Overdub mode. The lit TRACK 1 LED indicates
you are overdubbing onto TRACK 1.
5. Move TRACK 1’s fader to adjust its volume.
6. Repeat these steps to overdub onto any track
number—just press the TRACK footswitch until
the track on which you want to overdub is
selected.

5
Undo and Redo
1. Select the track you want to undo.
2. Press and release the UNDO footswitch. The
last layer of audio on the track is removed
and the previous version of the track begins
playing. The UNDO LED lights up.
3. If only one layer of audio was recorded on
the track, then the track plays back silence.
4. Press and release the UNDO footswitch to
return—or redo—the audio layer that undo
had removed. The previous layer of audio
begins playing back as you last heard it.
Erase a Track
1. Select the track you want to erase.
2. Press and hold the TRACK footswitch.
3. After about a second you will see both the
TRACK LED and selected Track button
blink. Continue to hold down TRACK (for
about one more second) until the TRACK
LED stops blinking.
4. You may now release the footswitch as the
track has been erased. You can UNDO the
Track Erase by pressing the UNDO footswitch.
Erase a Loop
1. Press and hold both the TRACK and
UNDO footswitches.
2. After about one second, all the Track
buttons blink. Continue to hold down the
footswitches for about another second
until the LEDs stop blinking. You may now
release the footswitches. The loop has
been erased.
CAUTION: You cannot undo a loop erase.
Once you erase a loop it is gone forever
(unless you backed it up onto a computer).
Record 2 Tracks Simultaneously (Stereo):
1. Press and hold both buttons of the stereo
pair that you want to record. Stereo mode
is enabled immediately upon pressing the
second button in the pair. You should see
the two tracks in the stereo pair lit up.
2. After connecting to the L and R INPUT
jacks, adjust the INPUT Level knobs so that
the CLIP LEDs barely light. The L INPUT
records to odd numbered tracks only; R
INPUT records to even numbered tracks.
3. Press the RECORD footswitch to begin
recording immediately.
4. To stop recording, press either the RECORD
or PLAY footswitches.
Record a Quantized Loop
1. Press the QUANTIZE button to enable
Quantize mode. The button will light up.
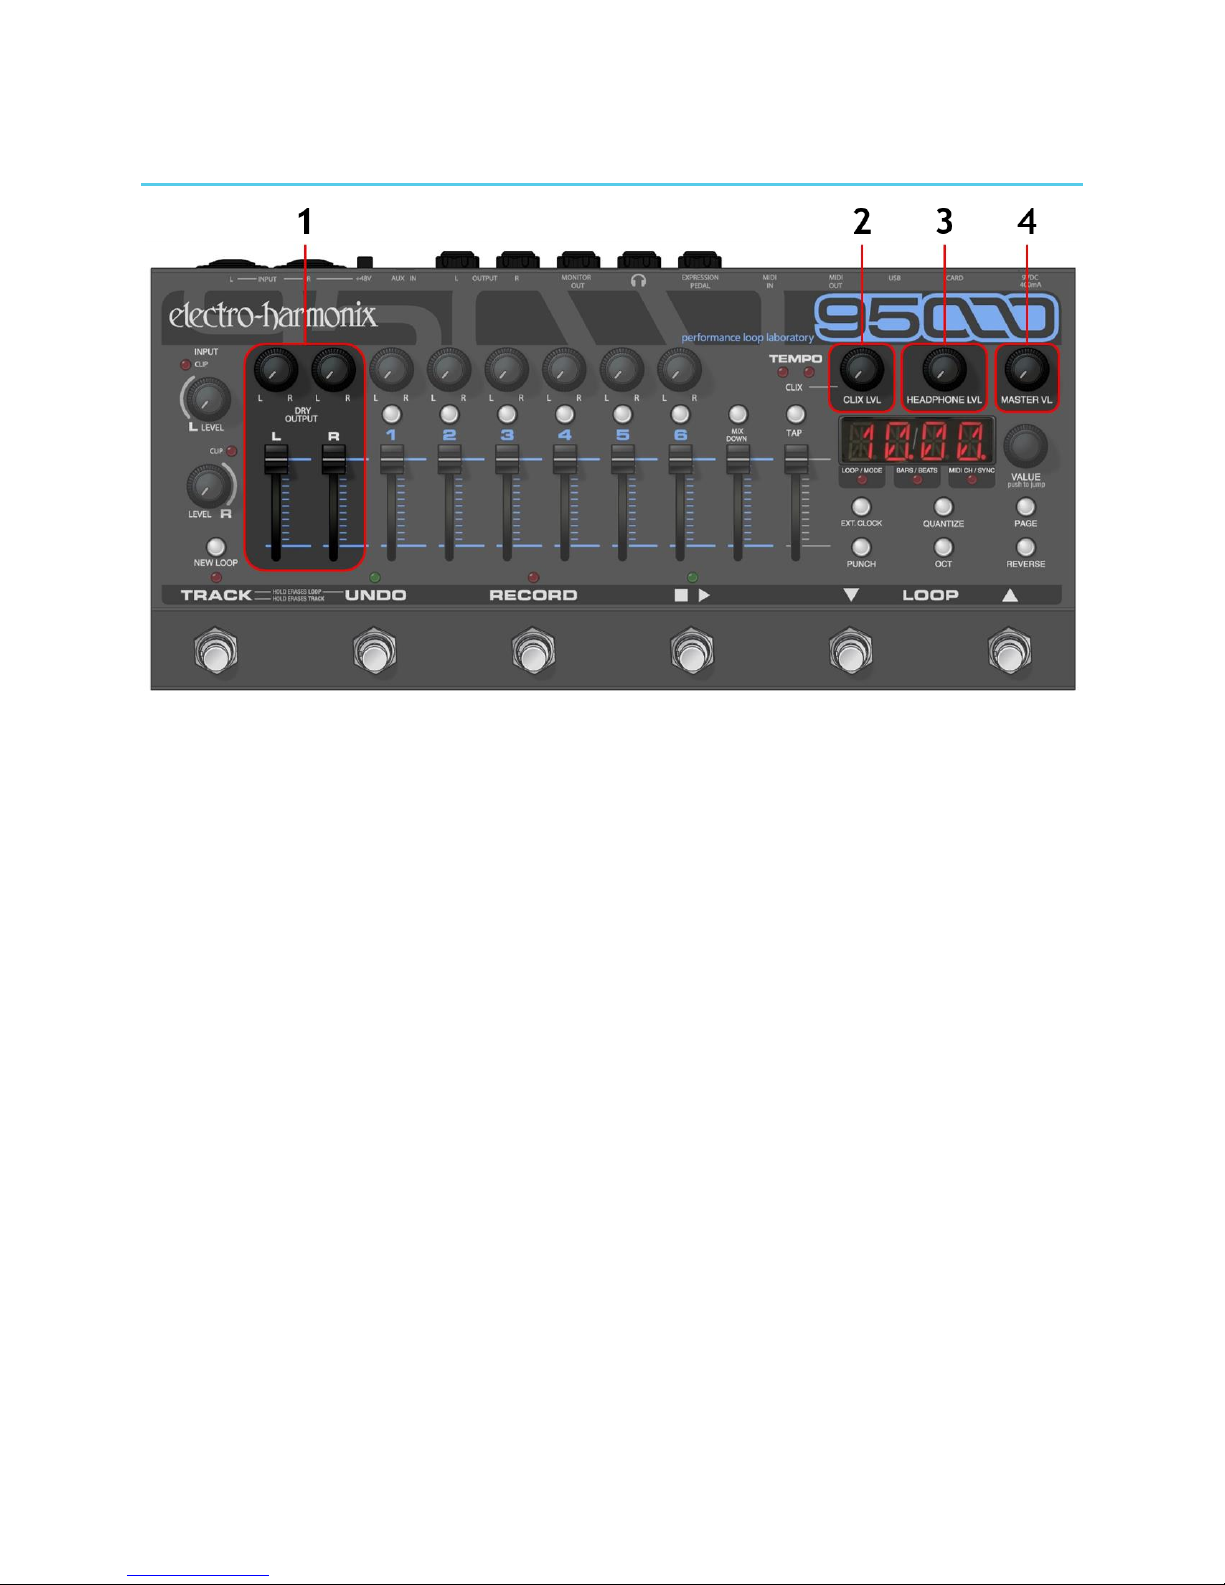
2. Turn the CLIX LEVEL knob up so you hear
the metronome beat coming out of either
the MONITOR or HEADPHONES output.
NOTE: The CLIX metronome is not output
through the L and R OUTPUT jacks.
3. The metronome tempo may be adjusted by
the TEMPO slider or by tapping in a tempo
with the TAP button. When the tempo is
changed, the display will briefly show the
tempo in BPM.
4. Press the RECORD footswitch. The 95000
will not immediately begin recording but
instead will give you a 1-bar count-in,
where beat 1 of the bar occurs at the
moment you press RECORD. After the
Count-In is complete, the 95000 begins
recording on beat 1 of the following bar.
NOTE: The Count-In bar length may be
adjusted or disabled.
5. During Count-In, the bars count down and
the beats count up with a minus sign in
front of the bar number. The Track 1
button also blinks rapidly.
6. The 95000 begins recording at the end of
the Count-In, as indicated by the flashing
Track 1 button going solid and the minus
sign being removed from the display.
7. Stop recording by pressing either the
RECORD or PLAY footswitches. Press RECORD
or PLAY within the first 2 beats of the
current bar and the 95000 will truncate the
loop length to the end of the previous bar.
Press RECORD or PLAY during the 3rd or 4th
beats of the current bar and the 95000 will
finish recording the current bar and then
stop recording. For example, if you want to
record a 2 bar loop, you can press the PLAY
button during the 3rd and 4th beat of the
second bar or within the first 2 beats of the
third bar. The QUANTIZE button will blink
rapidly until the loop has finished recording.

6
MIXING
Prepare to Mix
1. You can mix your 6 tracks down to one
stereo Mixdown track at any time. For now,
let’s start with the 95000 in Idle (stopped)
mode. If the 95000 is playing or
overdubbing a loop, press the PLAY
footswitch to stop.
2. Press the MIXDOWN button once and it will
light solid to indicate that the Mixdown
track has been enabled for overdubbing.
3. Press the PLAY footswitch. Your loop will
play back. Move the Volume and Pan
controls of the 6 tracks to establish a
satisfactory balance.
NOTE: You can adjust the Volume and Pan
controls as much as you like when
recording the Mixdown track.
Perform a Mix
1. When you are ready to record the Mixdown
track, press the RECORD footswitch. You
will immediately begin recording your mix
onto the Mixdown track.
2. The Mixdown track records the audio output
from the 95000’s mixer, enabling you to
record your volume fader and pan movements
as you hear them.
3. To stop recording the Mixdown track, press
either the PLAY or RECORD footswitch.
4. Move the Mixdown slider up, move all of
the track sliders down. Press PLAY to hear
the newly recorded mix.
NOTE: The original audio on the 6 mono
tracks remains after you complete a
mixdown. In other words, the mixdown
operation does not erase the 6 tracks. The
Dry Input signal is not recorded to the
Mixdown track. Only audio that was
previously recorded onto the 6 tracks will
be recorded to the Mixdown track.
RESTORE FACTORY SETTINGS
To restore your 95000 to its original factory
setting: press and hold the REVERSE button for 5
seconds or longer until you see some of the TRACK
buttons blink and all three small LEDs below the
Display are unlit.
Restoring the 95000 factory settings has NO
effect on the audio loops you store on the
microSDHC card.

7
BASIC TERMINOLOGY AND KEY CONCEPTS
ERASE: The act of deleting an entire loop, one track, or a stereo pair of tracks when a stereo pair is enabled.
You cannot undo a loop that has been erased. Once a loop is erased it is permanently deleted.
To erase an entire loop do one of the following:
Press and hold the TRACK and UNDO footswitches simultaneously for two seconds. After the
Track LEDs stop blinking, the loop is erased.
Press the NEW LOOP button while the loop is idle or in playback. Then press the RECORD
footswitch to begin recording. Once you press the RECORD footswitch, the old audio that was
at the current loop location is erased.
While recording a New Loop, press the NEW LOOP button to abort the recording and
immediately erase the tracks.
The 95000 does allow you to undo/redo a Track Erase.
IDLE: Equivalent to stop. When idle, the 95000 is not playing, recording or overdubbing.
LOOP: A loop is made up of 6 mono tracks and one stereo Mixdown track. All tracks are the exact same length.
Think of a loop in terms of multi-track tape: the 6 tracks and the Mixdown track in a 95000 loop
always playback, overdub or record in parallel, at the same speed and in the same direction. The
one exception to this rule occurs with the use of Constant Tempo Mixdown mode, as described
later in this manual.
Loops are recorded and played back directly from the inserted microSDHC card.
Up to 100 loops can be stored on one card.
Upon creating a New Loop, the audio for all 6 mono tracks and the Mixdown track are established
on the microSDHC card as silence; they take up space on the card even though you haven’t actually
recorded those tracks yet.
Recording time: The total recorded audio time; varies with size of microSDHC Memory Card.
Loop time: The actual loop length time that you can record. The loop length time will always be
less than the total recording time. This time difference occurs because each loop consists of 6
mono tracks and the stereo Mixdown track, and every loop you record has all seven of these tracks
as .WAV files at equal length.
OVERDUB/OVERDUBBING: The recording of any track after the initial recording of a New Loop. The
RECORD and PLAY LEDs are both lit but the PUNCH button is off. Overdubbing can mean:
Recording on a track—other than Track 1—that has not been previously recorded.
Layering notes or instruments on top of each other on one track or a stereo pair of tracks. The
tracks’ DUB setting acts like a feedback control that may attenuate any previously recorded audio
with each loop cycle.
QUANTIZE: A mode that allows the user to create loops that are exact bar lengths. Let’s imagine you
need to create a loop that is exactly 3 bars long. Enable Quantize mode to help make this happen.
In Quantize mode, the 95000 starts and stops new-loop recording automatically.
When using Quantize mode, it is best to listen to the 95000’s built-in CLIX metronome or
synchronize the 95000 to an external device that will produce a beat so you know exactly when
recording will stop and start.
By factory default, when Quantize is enabled, a loop begins recording after a one bar Count-In. You
can change the number of bars of the Count-In to up to 8 bars, or you can disable the Count-In
altogether.
When Quantize is disabled, you are able to create loop lengths that are completely freeform.
Loop recording starts immediately upon pressing either RECORD or PLAY footswitch and ends
immediately upon pressing either RECORD or PLAY footswitch.
RECORD: The act of recording a New Loop. When stereo is disabled, the audio is recorded to Track 1. If
stereo is enabled, the audio is recorded onto Tracks 1 and 2.

8
TRACK: A track is a discrete or separate channel of loop audio that may be recorded, overdubbed or
mixed independently from other tracks.
All tracks in a loop are the same length.
All tracks contained in a loop playback, record or overdub at the same speed and direction as the
other tracks.
Each loop contains 6 mono tracks and one stereo track.
UNDO/REDO:
Undo: The undo function allows you to remove the last overdub layer that was recorded on a track.
The 95000 has one level of undo for each track. You can independently undo each track without
affecting the other tracks.
To perform an undo, first ensure the selected track is the one that you want to undo. Then press
and release the UNDO footswitch. The LED above the UNDO footswitch lights to indicate that an
undo has been performed for the selected track.
If you press the RECORD footswitch to overdub after performing an undo on a given track, the
audio layer removed by the undo function will be permanently deleted and cannot be retrieved.
Redo: After performing an undo, restore the layer of audio that was removed by initiating the
redo function.
To perform a redo, first ensure the selected track is the one that you want to redo. Also, ensure
that the UNDO LED is lit—if it is not, there is nothing to redo. Then press and release the UNDO
footswitch to perform the redo.
The redo function restores only the last layer of audio that undo removed.

9
MONITORING
Use the monitoring controls to vary the listening
volume of various signals. None of the following
monitoring controls affect the actual recorded
signal levels.
1. DRY OUTPUT L/R Faders and Pan Knobs
The DRY OUTPUT faders and pan knobs allow
you to monitor your instrument when recording
or to play along with a loop you have already
recorded. Adjust the output volume of your
instrument with the DRY OUTPUT fader. Use the
pan knobs to direct the Left and Right Inputs to
the Left and Right Outputs. When pan is set to
the full CCW position, the Input is monitored at
the Left Output. When pan is set to the full CW
position, the Input is monitored at the Right
Output. When pan is set to the center-detent
middle position, the Input is mixed equally to
both Outputs. When monitoring a stereo signal,
you will generally position the pan pots hard left
and hard right. The settings of the DRY OUTPUT
faders and pan pots have no influence on the
actual recorded signal.
When recording in mono, both inputs are
summed together and recorded onto the same
track. When recording in stereo, the two
inputs remain separate: the Left Input is sent
to the odd-numbered tracks and the Right
Input is sent to the even-numbered tracks.
2. CLIX LVL Knob
Use the CLIX LVL knob to set a comfortable volume
level for the CLIX metronome within the monitoring
chain.
The CLIX metronome is routed to the
MONITOR OUT and Headphones outputs
only. The CLIX metronome is not present
at the L and R OUTPUT jacks.
3. HEADPHONE LVL Knob
The HEADPHONE LVL knob adjusts the output
volume of the rear-mounted Headphone Output
jack and the MONITOR OUT jack. The
HEADPHONE LVL knob is an analog knob placed
in the signal path after the 95000’s D/A
Converter. Therefore, it has no bearing on the
level of the recorded audio that is saved to the
microSDHC card. The signal at the MONITOR OUT
jack is fed from the headphone amplifier, and so
you must turn up the HEADPHONE LVL knob to
hear audio at the MONITOR OUT jack.
4. MASTER LVL Knob
This knob is a master volume control for all
signals and output jacks including the Loop,
Dry levels and CLIX levels, as well as the L, R,
Headphone and MONITOR Output jacks. MASTER
LVL does not control the AUX IN volume.

10
THE RECORD TRANSPORT
1. INPUT LEVEL L/ R Knobs and CLIP LEDs
Use the INPUT LEVEL L and R knobs to adjust
the amplitude of the left and right input signals
before they are sent to the A/D Converter. To
set the proper level, turn each INPUT LEVEL
knob clockwise to the point where the
maximum level causes the CLIP LEDs to barely
blink or not light up at all. These LEDs light up
when the audio signal clips—or is on the verge
of clipping—the A/D Converter. In other words,
the CLIP LEDs light when the signal’s amplitude
is greater than what the A/D Converter can
properly handle. The L LED lights when the
LEFT Input clips and the R LED lights when the
RIGHT Input clips.
The trick to achieving the best quality digital audio
is to record the hottest possible signal without
clipping (overloading) the A/D converter. Typically, you
want to record a signal that is neither too low in
volume nor a signal that clips very often (unless
that is the sound you are going for).
NOTE: When recording in mono, both the
Left and Right inputs are summed together
and recorded onto the active track.
Minimize hiss when recording in mono by
turning down the unused INPUT LEVEL knob.
2. NEW LOOP Button
Press the NEW LOOP button to put the 95000
into Record-Ready mode. The NEW LOOP
button lights green whenever the currently
selected loop is empty. Upon pressing NEW
LOOP, the red RECORD LED above the RECORD
footswitch blinks to indicate that the 95000 is
ready to record. Press the NEW LOOP button
again if you decide you want to exit Record-
Ready mode. Press the RECORD footswitch to
begin recording a New Loop. If the Loop had
been previously occupied with audio, the old
audio is immediately erased upon pressing the
RECORD footswitch. If you press the NEW LOOP
button while recording a New Loop, the recording is
canceled and whatever you recorded up to that
point is discarded. Use the table on the next
page to explore how pressing the NEW LOOP
button acts depending on the current mode of
the 95000.

11
Current Mode
+ NEW LOOP press
NEW LOOP LED state
Idle
Record-Ready
ON
Playback
Record-Ready; continues playing loop
ON
Overdubbing
Overdubbing; NEW LOOP Button is ignored
OFF
Record-Ready
Reverts to previous mode before Record-Ready
OFF
Recording New Loop
Cancels New Loop recording and discards the audio
that had been recorded; loop remains empty
ON
3. TRACK Footswitch
Use the TRACK footswitch to advance tracks,
erase tracks or to erase an entire loop.
Advance Tracks
Each press and release of the TRACK footswitch
advances to the next track or pair of tracks and
simultaneously activates the newly selected
track(s). The buttons associated with each
track or pair of tracks light green when active.
Erase Tracks
Erase a track so that it plays silence. Typically,
the Track Erase procedure takes about 2 seconds:
Select a track (or stereo pair).
Press and hold the TRACK footswitch until
the TRACK LED and the active Track Select
button(s) blink rapidly.
Keep holding the TRACK switch until the
LEDs stop blinking; the track is now erased.
To abort the erase track operation, release
the TRACK switch early, either while the LED
is blinking or prior to the start of it blinking.
Tracks can be erased while the 95000 is
idle, playing-back or overdubbing.
A track-erase operation can be undone in
the same way as a regular recording.
See Undo/Redo later on this page.
Erase a Loop
Completely erase (delete) a loop, including the
contents of the loop's folder on the microSDHC
card. Once this action is performed, you
CANNOT use UNDO to restore an erased loop.
Simultaneously press and hold the TRACK
and UNDO footswitches until the TRACK
LED and all track-select buttons start to
blink rapidly.
Continue holding the TRACK and UNDO
footswitches until the LEDs stop blinking.
Once the LEDs extinguish, the loop has
been erased. The NEW LOOP button lights
up green to indicate the loop is empty.
To abort the erase operation, release the
TRACK and UNDO footswitches before the
buttons stop blinking.
Abort New Loop Recording
While recording a New Loop, you may abort the
recording and delete all audio files just recorded
by simultaneously pressing both the TRACK and
UNDO footswitches. Once both footswitches are
pressed, the New Loop recording will be aborted.
The audio files are permanently deleted.
4. UNDO Footswitch
The 95000 supports one level of undo/redo per
track. This functionality allows the last
recorded audio layer on a given track to be
removed and then subsequently restored. Each
track’s UNDO operation is independent from
the other tracks.
Undo/Redo
Press and release the UNDO footswitch to undo
the last recording or overdub layer on the
currently selected track. You can select and
undo either a mono track, a stereo-pair track
or a Mixdown track. If only one layer of audio
has been recorded on the track, pressing UNDO
will cause the track to play back silence.
Press and release the UNDO footswitch again to
restore (REDO) the last recording/overdub layer
that had previously been undone.
The UNDO footswitch can be pressed while
the 95000 is idle, playing or overdubbing. If
you are overdubbing, the 95000 will switch
to playback mode and then undo the last
overdub on the currently selected track.
Press the UNDO footswitch again to
redo/restore the previous overdub.
The green LED just above the UNDO
footswitch lights if an undo operation has
been performed on the currently selected
track. A lit UNDO LED indicates that redo
could be performed. Press UNDO again to
redo/restore the last audio layer; the
UNDO LED turns off.

12
5. RECORD Footswitch
Depending on the 95000’s current mode, the RECORD footswitch serves a few purposes, all of which
enable the 95000 to enter/exit one of the recording modes: Record, Overdub or Punch-In. The red
RECORD LED will light up solid anytime the 95000 is recording or overdubbing audio. The RECORD LED
blinks at a medium rate when the 95000 is in Record-Ready mode. The table below explains the result
of pressing the RECORD footswitch in relation to the current mode of the 95000.
Current Mode
+ RECORD
Record LED State
Idle (no loop in memory)
Begin Recording New Loop
LED ON
Idle (with loop in memory)
Overdubbing
LED ON
Playback
Overdubbing
LED ON
Overdubbing
Playback
LED OFF
Record-Ready
Begin Recording New Loop
LED ON
6. PLAY ()Footswitch
The PLAY () footswitch is used to toggle Playback on and off. The green PLAY LED will light
anytime the 95000 is playing or overdubbing audio. The table below explains the result of pressing the
PLAY button in relation to the current Record/Playback mode of the 95000. NOTE: Each time a loop
cycles back to the beginning, the PLAY LED blinks once to signify the start of the loop.
Current Mode
+ PLAY
Play LED State
Idle (no loop in memory)
Idle, No Change
LED OFF
Idle (with loop in memory)
Playback
LED ON
Playback or Overdubbing
(Fade-out disabled)
Idle
LED OFF
Playback or Overdubbing
(Fade-out enabled)
Fade-Out
LED BLINKS until fade-out is
complete, then LED OFF
Record-Ready
(loop in memory)
Playback of current loop if it
contains audio
LED ON
Recording New Loop
Overdubbing, sets loop length
LED ON
7. LOOP Selection Footswitches
Loop selection is incremented or decremented using the LOOP UP and LOOP DOWN footswitches.
Press and hold either footswitch to advance through the loops at a faster speed. The table below
explains the result of pressing the LOOP UP and LOOP DOWN footswitches in relation to the
current mode of the 95000. NOTE: You can also change the current loop by using the VALUE knob.
Refer to the LED DISPLAY AND CONTROL section later in this manual to learn about the use of the
VALUE knob.
Current Mode
+ LOOP or
Idle
Loop increments or decrements by one with each press and release
of the LOOP and footswitches.
Playback
Current loop continues to play. Loop increments or decrements and
loop display number blinks. If the blinking loop number contains
audio, the New Loop number begins playback when the old loop
reaches its end point. If the blinking loop number has no audio, the
old loop continues playing indefinitely.
Overdubbing
Overdubbing (no change)
Record-Ready
Cancels Record-Ready. Loop increments or decrements by one with
each press and release of the LOOP and footswitches.
Recording New Loop
Recording New Loop (no change)

13
8. PUNCH Button
Press the PUNCH button to enable/disable PUNCH
(“Punch-In”) mode. While recording with Punch-In
enabled, all audio previously recorded on the
active track is erased each time the loop cycles.
The Punch-In function is particularly useful for
fixing bad notes or mistakes. When Punch-In mode
is active, the PUNCH button lights green.
9. OCT Button
The OCT (Octave) button lowers the speed of the
loop by exactly one-half: the pitch will go down
one octave and the tempo will be halved. The OCT
button can be used at all times except when
recording a New Loop or when syncing to external
MIDI Clock. The OCT button lights green when the
Octave function is active.
10. REVERSE Button
Press the REVERSE button to reverse the loop’s
playback/overdub direction. Reverse can be used
at all times except when recording a New Loop.
The REVERSE button lights green when the reverse
function is active.
With EXT. CLOCK activated, if you press the
REVERSE button while the 95000 is playing or
overdubbing, the Reverse function will activate.
But the 95000 will most likely lose its place within
the bar, even though its tempo is still synchronized
to the external MIDI clock. In situations where you
want a Reverse loop to remain synchronized to the
bar, we recommend you stop loop playback, toggle
the REVERSE button, and then begin loop playback.
11. EXT. CLOCK Button
Press the EXT. CLOCK button to synchronize the
95000 with external MIDI Clock messages received
at the MIDI IN jack. With each press of the EXT.
CLOCK button, the 95000 cycles through the
following modes of synchronization:
IN (EXT. CLOCK Button OFF): Internal Clock
Sync mode. The 95000 uses its internal clock
for loop speed. Either the TEMPO slider, TAP
button, or both set the tempo or loop speed.
This mode should be employed if the 95000 is
used on its own or is the MIDI Clock master for
a slave device.
XT (EXT. CLOCK Button LIT): Full External
Clock mode. The 95000 is in full external clock
mode—it synchronizes to an external device’s
MIDI Clock and responds to MIDI Start, Stop and
Song Position Pointer (SPP) commands. This
mode is recommended for most situations
where the 95000 needs to synchronize to an
external device.
BX (EXT. CLOCK Button BLINKS): Beat Sync
External Clock mode. The 95000 synchronizes
the loop tempo to an external device’s MIDI
Clock but ignores the MIDI Start command. When
a MIDI Start command is received from the MIDI
master, the 95000 follows external MIDI Clock
and resets to beat 1; but it does not begin
playback of its loop. You must press PLAY on the
95000 to start playback. Playback will start from
the beginning of the loop on the next MIDI Clock
beat received from the master device. To begin
playback of the loop on the MIDI master’s beat
1, press the PLAY footswitch just before you
hear beat 1 from the MIDI master.
12. QUANTIZE Button
The QUANTIZE button toggles between Quantize
and Non-Quantize (NQ) modes. The QUANTIZE
button lights when the 95000 is in Quantize mode.
QUANTIZE Mode Use Quantize mode to create
loops that are exact bar lengths. When you create
a New Loop in Quantize mode, there will be a
Count-In of up to 8 bars. The factory default is 1
bar; Count-In can also be disabled. After the
Count-In, the loop begins recording on beat 1.
When ending a loop, the loop length is either
extended or truncated to the nearest full bar. In
Quantize mode, you can be sloppy about ending
the loop; the 95000 adjusts the loop length to the
nearest bar to yield loops that cycle perfectly in
sync with the CLIX metronome. A bar may be 1-8
beats in length (factory default is 4). To change
the number of beats per bar:
First select the BARS/BEATS page with the
PAGE button.
Then press and hold the VALUE knob. The
display changes to “BAR” followed by a
blinking number. This number indicates the
number of beats in a bar.
Rotate the VALUE knob to change the number
of beats in a bar.
Press the VALUE knob to save the setting and exit.
NON-QUANTIZE Mode: The length of the loop is
defined by the time between pressing the RECORD
footswitch to begin recording and then pressing
the RECORD or PLAY footswitch to end the loop.
When setting the 95000 to EXT. CLOCK mode, we
recommend you enable Quantize mode. If
Quantize is not enabled, the loop lengths will not
line up with the MIDI master device’s bar lengths.
This misalignment will cause the loops to sound
out of sync even though the loop’s tempo is
actually in sync with the MIDI Clock master.

14
TRACKS, TRACK SELECTION, MIXDOWN, TEMPO
TRACKS OVERVIEW
There are 6 tracks available for you to record your instruments and vocals.
You can record a maximum of 2 tracks simultaneously.
Each of the 6 tracks contains a volume fader and pan knob to balance your levels and place your
tracks within the stereo spectrum.
Each track also contains an illuminated button above each track number. When a button is lit, that
particular track is active. Press the RECORD footswitch to record an overdub on the active track.
The tracks are available in mono or stereo pairs (1 & 2, 3 & 4 or 5 & 6).
1. TRACK Faders
The Track faders independently control the
playback level of each track.
2. TRACK SELECT Buttons
The illuminated Track Select buttons (1-6)
are used to select mono or stereo pairs of
tracks for recording, overdubbing, and other
functions such as Track Erase and undo/redo.
Press a Track Select button to activate a
track. Simultaneously press a pair of Track
Select buttons (1 & 2, 3 & 4 or 5 & 6) to
enable stereo tracks. Press and hold a pair of
track buttons to toggle between mono and
stereo track selection. Press the TRACK
footswitch to advance the currently selected
track or pair of tracks. The Track Select
buttons illuminate to indicate they are
selected.
MIXDOWN Track
The MIXDOWN track is a stereo track that
records the audio from the six mono tracks
through their pan knobs and faders. Use the
Mixdown track to create a stereo mix, bounce
tracks or create special effects. The Mixdown
track is automatically set to the exact same
length as the six mono tracks. There are two
modes of Mixdown: Normal Mixdown and
Constant Tempo Mixdown.
3. TRACK PAN Knobs
The Track Pan knobs allow you to place Tracks
1-6 to the left and right outputs.
4. MIXDOWN Fader
The MIXDOWN fader controls the volume of the
Mixdown track.

15
5. MIXDOWN Button
The MIXDOWN button gives you access to the
Normal and Constant Tempo Mixdown modes.
Use Normal Mixdown mode when you want to
bounce the 6 mono tracks or create a clean
stereo mix. Use Constant Tempo Mixdown mode
to create pitch-related special effects.
Enter Normal Mixdown mode by pressing the
MIXDOWN button once. When in Normal
Mixdown mode, the MIXDOWN button lights
solidly. Normal Mixdown can be selected while
the 95000 is overdubbing, playing or idle.
You can use the TRACK footswitch to enter
Normal Mixdown mode if the 95000 is idle.
Constant Tempo Mixdown may only be entered
while the 95000 is idle. If the MIXDOWN button
is off, press it twice to activate Constant
Tempo mode. In Constant Tempo mode the
MIXDOWN button blinks rapidly.
Use Constant Tempo Mixdown mode to add
flanging or pitch-bending effects to your
Mixdown track. The Mixdown track records at
a constant speed or tempo, but the TEMPO
slider allows you to vary the speed of the 6
recorded tracks. As the Mixdown track is
recorded, the speed variations you perform
with the TEMPO slider will be recorded onto
the Mixdown track. Create subtle effects
such as flanging, or more drastic effects that
feature radical pitch bending.
To EXIT either Mixdown mode, press the
MIXDOWN button (while the 95000 is idle) until
the MIXDOWN LED turns off. You can also exit
Mixdown mode by pressing any of the Track
Select buttons or the TRACK footswitch.
See the IN DEPTH: MIXDOWN section of
this manual for a complete overview of
Normal and Constant Tempo Mixdown
modes.
6. TEMPO Slider
When the 95000 runs off of its internal clock
(External Clock Sync mode is disabled), the
TEMPO slider may be used to set a loop’s
tempo or BPM as well as the tempo of the CLIX
metronome. If the currently selected loop is
empty, the TEMPO slider ranges from 60 BPM to
240 BPM in 1 BPM increments. The tempo
increases as the slider is pushed up, and
decreases as the slider is pushed down.
After recording a New Loop, the integrated TAP
button lights up solidly. This lit button shows
you that the TEMPO slider is set to the original
tempo at which the loop was initially recorded.
The TAP light shuts off when the tempo is set
to anything other than the original tempo.
Two options are available to adjust the action
of the TEMPO slider on recorded loops: COARSE
or FINE. Enter the Secondary Mode pages mode
(see the LED DISPLAY AND CONTROL section
later in this manual) to choose either COARSE
or FINE mode. The factory default is COARSE.
COARSE Mode: the TEMPO slider increments
tempo and pitch in semitone (1/2) steps.
To illustrate how this works, imagine you
record a loop in the key of E and then push
the TEMPO slider upwards. You will hear
the speed of the loop change in discrete
1/2 steps. Thus, going upward to the next
position plays the loop in the key of F. The
next position upward is F#, and so on.
FINE Mode: the TEMPO slider changes
tempo and pitch in one BPM increments
between 60 BPM and 240 BPM. If the OCT
button is lit, the tempo ranges from 30 BPM
to 120 BPM.
To use the TEMPO slider to create pitch
changing and bending effects:
After you have recorded a New Loop, move
the TEMPO slider (and/or press the OCT
button) on subsequent tracks to record
notes at different speeds. When played
back at the loop’s original speed, the pitch
of the notes will change accordingly. For
example, record Track 1 with some guitar
chords. Move the TEMPO slider up one
octave and record some single low notes
with the same guitar. Play both tracks back
at the original tempo and you will have
guitar and bass tracks.
While recording, try moving the TEMPO slider.
When you play the loop back at a set tempo,
the notes will bend opposite to how you
moved the TEMPO slider during recording.
Whenever the TEMPO slider is moved, the
display momentarily shows the current BPM.
The display continues to show the BPM setting
for two seconds after you stop moving the
TEMPO slider.

16
7. TAP Button
In addition to moving the TEMPO slider, you can
also change tempo by pressing the TAP button
two or more times to put the 95000 into Tap
Tempo mode. The 95000 produces a set tempo
by calculating the average of the four most
recent taps in a grouping of TAP button
presses. The TAP button’s integrated LED blinks
at the current tempo.
In normal use, Tap Tempo ranges from 60
BPM to 240 BPM. The TEMPO slider can then
adjust the tempo from half the current tap
tempo, with the slider fully down, to twice
the current tempo with the slider fully up—
maxing out at a tempo of 240BPM. The
original tap tempo setting is located at the
TEMPO slider’s center position. The TEMPO
slider position is activated when it is first
moved after tapping in the tempo.
Tempo changes entered with the TAP
button are shown on the LED display for
2 seconds.
To view the current tempo (in BPM) on the
LED display, press the TAP button once.
Press the PAGE and TAP buttons at the
same time to cancel Tap Tempo mode and
return tempo control to the TEMPO slider.
8. CLIX LEDs
The CLIX LEDs blink on the beat at the tempo
to which the 95000 is set. The left LED lights
briefly on every beat; the right LED only blinks
on the first beat of a bar. When the 95000 uses
its internal tempo, the TEMPO slider and/or
TAP button set the tempo at which the LEDs
blink. When EXT. CLOCK is activated, the CLIX
LEDs blink at the received MIDI Clock tempo.
Use the CLIX LEVEL knob to adjust the
volume of the built-in CLIX metronome.

17
LED DISPLAY AND CONTROL
1. LED DISPLAY
The 4-digit LED display provides visual feedback
and control for a number of functions. These
functions are accessible by cycling the display
through three Primary Mode pages and four
Secondary Mode pages. Press and release the
PAGE button to cycle through these Primary
Mode pages: LOOP/DUB, BARS/BEATS, MIDI
CH/SYNC. Press and hold the PAGE button to
access the Secondary Modes.
Each Primary Mode page is indicated by the
small round LED that lights below the display.
The Secondary Mode pages are indicated when
the PAGE button blinks rapidly and all three
LEDs below the main display are off.
Each Primary Mode page displays two
parameters. The left parameter is active by
default. A dot in the bottom right-hand corner
of the display indicates that the right
parameter is active. Press and release the
VALUE knob to toggle between activating the
left or right parameter.
The LED display may also be used to display
tempo change. When you move the TEMPO
slider or tap in a new tempo with the TAP
button, the display momentarily displays the
new tempo in BPM for two seconds, and then
the LED reverts to the previously-set function.
All lit PAGE LEDs turn off during tempo display.
2. VALUE Push to Jump Knob
The VALUE knob modifies the active parameter.
Push/click the knob to toggle between the left
and right parameters. Turn the knob to change
the value of the selected parameter.
3. PAGE Button
Press and release the PAGE button to cycle the
LED display through the three Primary Pages:
LOOP/DUB, BARS/BEATS, and MIDI CH/SYNC.
Press and hold the PAGE button for one second
to access the Secondary Mode pages: CX (CLIX),
TM (TEMPO slider), CT (Count-In) and FD (Fade-
Out). Press and release the VALUE knob to
cycle through these four pages. Turn the VALUE
knob to change the setting of the displayed
parameter. Press and release the PAGE button
to exit Secondary Mode.

18
PRIMARY MODE PAGES
4. LOOP/DUB Mode
The LOOP/DUB page shows the current loop
number and the active track’s overdub
feedback level.
The left field displays the selected loop
number. Turn the VALUE knob or press the
LOOP Up and Down footswitches to select a
different loop.
The right field shows the DUB feedback level
for the active track(s). The feedback level
ranges from 0 to 10, which equates to 0% to
100%. While overdubbing on a track, the
number in the DUB field determines the volume
level of the previously recorded portion of the
loop that is recorded back onto the currently
recorded loop. Each value between 0 and 10
allows you to reduce the volume of previously
recorded audio; the lower the number, the
quieter the previously recorded audio will be
for each overdub cycle. Set DUB to 10 for no
volume reduction with each overdub cycle.
When DUB is set to 0, previously recorded audio
will be fully erased with each loop cycle.
PRO TIP: Set DUB to a value under 10 and the
looper acts as a type of digital delay in which
the loop length equals the delay time.
Loop Status: The middle dot next to the loop
number indicates the loop status:
Off = no loop (NEW LOOP button will
also illuminate)
Blinking = loop loading
On = loop present and ready
5. BARS/BEATS Mode
The BARS/BEATS page displays the current position
of the loop in bars and beats.
The three-digit field to the left of the dot
shows the current bar number.
The single-digit field to the right of the dot
represents the current beat number.
The 95000 temporarily switches to BARS/BEATS
display mode while recording a New Loop.
When Count-In is set to a bar length between 1
and 8 and the QUANTIZE button is lit: during
the New Loop Count-In period the display
counts down the bars while the beats count up.
The minus sign before the BARS number
indicates that the 95000 is performing the
Count-In.
While a loop is playing or idle, turn the VALUE
knob to move the loop to a specific bar and
beat location. If you turn the VALUE knob while
the loop is playing, the 95000 will jump to the
new location and continue playback. When you
stop a loop, the loop automatically goes back
to the beginning of the loop (position 1.1). You
cannot jump to a new location while the loop is
recording or overdubbing.
BEATS PER BAR: The number of beats per bar
may be set to a number between 1 and 8. The
factory default is 4 beats per bar for a 4/4 time
signature. To change the number of beats per
bar, press and hold the VALUE knob for two
seconds until “BAR x" appears in the display. The
blinking “x” will show the current number of
beats per bar. Turn the VALUE knob to adjust
the number of beats. Press and release the
VALUE knob to save the new setting and return
to BARS/BEATS mode. To save the new beats per
bar setting for all future loop recordings, set the
number of beats per bar on an empty loop. You
may change the beats per bar setting on a loop
after it has been recorded, but only that loop’s
setting will be updated.
6. MIDI CH/SYNC Mode
Select the MIDI CH/SYNC page to view and adjust
the MIDI Channel and Sync options. The parameter
on the left indicates the MIDI receive channel 01-16
or OM (Omni) for Program Change (PC) and Control
Change (CC) messages. The right parameter displays
the Sync mode.
SYNC Modes
In
Choose the IN setting to select Internal Clock Sync
mode. In this mode, the 95000 uses its own tempo
as set with either the TEMPO slider or the TAP
button, and External sync is disabled.
External
XT = Full External Clock mode: the 95000
receives and responds to MIDI CLOCK, START,
STOP and SPP messages.
BX = Beat Sync External Clock mode: the 95000 only
responds to MIDI CLOCK and STOP messages; it does
not respond to MIDI START or SPP messages.
Cycle through the Sync options at any time by
pressing the EXT. CLOCK button.
The EXT. CLOCK button blinks in BX mode.
To fully explore how to use either Sync option,
see the MIDI Sync section of this manual.

19
SECONDARY MODE PAGES
Press and hold the PAGE button for about
one second to activate the Secondary Mode
pages. The PAGE button will blink rapidly
and the red Primary Mode LEDs will be unlit.
Once Secondary Mode has been entered,
release the PAGE button.
Press and release the VALUE knob to cycle
through the four available pages. Then turn
the VALUE knob to change a
specific parameter.
Exit Secondary Mode at any time by pressing
the PAGE button. The PAGE button will no
longer be lit.
New settings are global; they affect all
loops and are saved in internal memory so
that the 95000 recalls your last used
settings during power up.
Once in Secondary Mode, select the following
functions and manipulate their associated
parameters:
CLIX Metronome
1. CX.ON: The CLIX metronome runs
continuously (default).
2. CX.PL: The CLIX metronome only sounds
when a loop is playing or recording; when
the loop is stopped, the CLIX metronome
is muted.
3. CX.NL: The CLIX metronome only runs
while recording a New Loop; when not
recording a New Loop, the CLIX metronome
is muted.
TEMPO Slider Resolution
Sets the “action” of the TEMPO slider after a
loop has been recorded and EXT. CLOCK is
disabled:
1. TM.CR: The TEMPO slider resolution is
COARSE, and the loop speed changes in
semitones (default).
2. TM.FN: The TEMPO slider resolution is FINE
and changes in one BPM increments.
Count-In
Count-In only occurs prior to a New Loop
recording and when QUANTIZE is enabled:
1. CT.OF: Count-In is disabled (or OFF).
2. CT.01-08: Count-In is enabled. The number
of Count-In bars is represented by the
number shown in the display. The default
setting is 1 bar.
Loop Fade-Out
Upon stopping loop playback, the 95000 has
the option to either stop immediately or to
continue playing the loop while the loop volume
fades out. The loop then stops playback when
the volume hits zero. If you would like the loop
volume to fade-out gradually, set this parameter
to a number between 1 and 99.
1. FD.OF: Loop fade-out function is
disabled (default).
2. FD.01-99: Loop fade-out is enabled, and
the loop fade-out time (in seconds) is
indicated by the number in the display.

20
REAR CONNECTIONS AND CONTROL
1. 9VDC 400mA Power Jack
Connect the output plug of the factory-supplied
AC Adapter into this 9VDC power jack. The
current requirement is 400mA at 9VDC. The
polarity of the power jack is center negative.
The maximum allowable power supply voltage
is 10.5 VDC.
Once power is applied, the 95000 begins its
startup procedure. The 4-digit LED display
shows the following:
1. “EHX 95000” scrolls across the display.
2. Then the firmware’s version number “V
x.y” will appear briefly to indicate the
currently loaded software version.
3. Finally, the screen settles on the last used
LOOP number and DUB setting for Track 1.
2. microSDHC Card Slot
Insert a microSDHC Memory Card in this slot to
store your loops.
3. USB Connector
Plug a standard USB cable into this port to
interface the 95000 with your computer.
4. MIDI OUT Connector
Use a standard 5-pin DIN MIDI cable with this
connector. When the EXT. CLOCK function is
off, the 95000 continuously generates MIDI
Clock and outputs it through the MIDI OUT jack.
Connect to MIDI OUT when you want the 95000 to
be the MIDI Clock master; you can slave another
device, such as another 95000, drum machine, 8-
Step Program sequencer, x0xb0x or beat box to
the 95000.
When either of the EXT. CLOCK modes is enabled,
the 95000 uses the MIDI OUT jack as a MIDI THRU
jack. Whatever messages the MIDI IN jack receives
are passed back through the MIDI OUT jack.
5. MIDI IN Connector
Connect a standard 5-pin DIN MIDI cable to this
connector to receive MIDI Clock, Control Change (CC)
and Program Change (PC) messages. When the EXT.
CLOCK function is enabled, the 95000 can sync to
MIDI Clock through the MIDI IN jack. You can use
another 95000, a drum machine, sequencer, x0xb0x,
beat box or any other device that outputs MIDI Clock
as the MIDI Clock master; the 95000 will slave to the
external device.
Using MIDI CC and PC messages, you can control nearly
every parameter on the top panel of the 95000. The
only controls not available via MIDI are the L and R
INPUT LEVEL knobs and the HEADPHONE LVL knob.
6. EXPRESSION PEDAL Jack
Connect an expression pedal with a 1/4" TRS plug to
the EXPRESSION PEDAL jack of the 95000. Use this
pedal to control the Master Level of the loop audio.
When an expression pedal is connected, the 95000
MASTER LVL knob sets the maximum volume that can
be achieved with an expression pedal. The expression
pedal only sweeps the volume of the loop audio—Tracks
1–6 and MIXDOWN. It does not sweep the volume of the
DRY audio present at the two input connectors.
Accepted expression pedals include:
Electro-Harmonix Expression Pedal
Electro-Harmonix Dual Expression Pedal
Electro-Harmonix Next Step Expression Pedal
Boss® FV-500L
Moog® EP-3
M-Audio® EX-P
Table of contents
Other Electro-Harmonix Music Equipment manuals

Electro-Harmonix
Electro-Harmonix SLAMMI User manual

Electro-Harmonix
Electro-Harmonix HOLIEST GRAIL User manual

Electro-Harmonix
Electro-Harmonix Holier Grail User manual

Electro-Harmonix
Electro-Harmonix THE POG User manual

Electro-Harmonix
Electro-Harmonix B9 Operation manual

Electro-Harmonix
Electro-Harmonix NEO HOLY GRAIL User manual

Electro-Harmonix
Electro-Harmonix 22500 User manual

Electro-Harmonix
Electro-Harmonix TUBE ZIPPER User manual

Electro-Harmonix
Electro-Harmonix 22500 User manual

Electro-Harmonix
Electro-Harmonix Stereo Talking Machine User manual