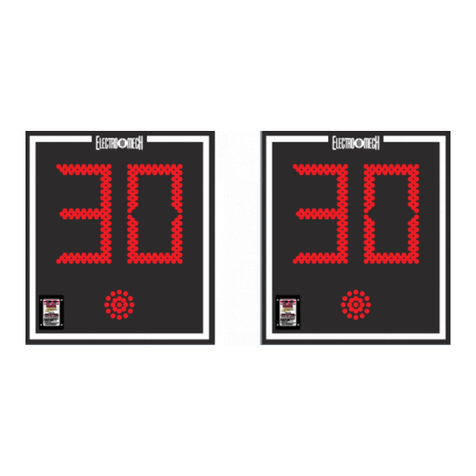
Electro-mech LX7406 User manual

Model LX7406
Owner's Manual
Indoor Locker Room Clock
The purpose of this manual is to explain how to install and maintain the Electro-Mech
Model LX7406 Indoor Locker Room Clock. Operation of the clock is covered in the
manual that ships with the control console for the main scoreboard display.
Original Filename: LX7406_Owner
Document Version: 1.6
Document Date: February 21, 2019

LX7406 Owner's Manual Revised February 21, 2019
Page 2 800.445.7846 · www.electro-mech.com
TABLE OF CONTENTS
Best Practices for Personal Safety and Product Care..................................................... 3
Product Specifications..................................................................................................... 4
Planning Your Scoreboard Installation ............................................................................ 6
Electrical Installation........................................................................................................ 8
Mechanical Installation.................................................................................................. 12
Testing, Operation, and Ongoing Care.......................................................................... 14
Maintenance.................................................................................................................. 15
Limited Warranty Statement.......................................................................................... 21

Revised February 21, 2019 LX7406 Owner's Manual
www.electro-mech.com · 800.445.7846 Page 3
BEST PRACTICES FOR PERSONAL SAFETY AND PRODUCT CARE
Thank you for choosing Electro-Mech products for your athletic facility. We hope you
will be pleased with the performance and appearance of your locker room clock. The
information in this document will help you maintain the equipment in its best condition.
Receiving Your Locker Room Clock
A locker room clock cabinet typically ships in a cardboard box. It is important to inspect
the packaging for damage when the cabinet arrives ─before signing any paperwork
telling the trucking company that you have received the clock in good condition. If
damage has occurred to the packaging, then damage may have occurred to the clock.
Where you find dents, scrapes, or holes in the packaging, peel back the cardboard to
expose the cabinet. Make notes on the paperwork provided by the trucking company
before accepting delivery. If the damage appears to be severe, refuse the shipment.
Contact Electro-Mech as soon as possible if you suspect shipping damage.
We recommend keeping the locker room clock cabinet in its packaging until the day of
installation. It is important to keep the box dry while the clock is inside. Wet cardboard
can adhere to the surface and damage the finish.
Conditions of Installation and Use for an Indoor Locker Room Clock
This locker room clock display is designed for installation and use in a dry environment.
Do not attempt to install or operate a locker room clock outdoors or in a wet location.
An indoor locker room clock display is typically attached to a locker room wall.
Accordingly, the cabinet includes keyhole slots for hanging the display on lag bolts.
(This document uses the term "lag bolt" to generically represent whatever fastener is
best suited for the type of structure on which the clock display will hang – bolts, hooks,
nails, etc.) Whatever method you choose for hanging the display, it is important to
make sure the wall and other materials can support the weight. Vibration may also be a
factor in selecting mounting techniques for locker room clocks.
In its standard configuration, the locker room clock display receives power through its
detachable power cord, which should plug into a 120 VAC electrical outlet. When the
display is not in use, you should disconnect it from power. For this reason, we
recommend installing a dedicated disconnect switch within sight of the locker room
clock display. In the "off" position, the switch should isolate all load-carrying conductors
(not the ground). This will help protect the locker room clock electronics from nearby
lightning strikes and other power fluctuations that might otherwise travel along the
power cables.

LX7406 Owner's Manual Revised February 21, 2019
Page 4 800.445.7846 · www.electro-mech.com
PRODUCT SPECIFICATIONS
General Description:
•Model LX7406 is an electronic scoreboard designed for permanent installation
indoors. The purpose of Model LX7406 is to display timing information in the
locker room during games or practice.
Standard Package Includes:
•One scoreboard cabinet
•One detachable power cable for standard configurations
* Note: For configurations with concealed wiring, attach power and data
cables to terminal blocks inside the cabinet.
•One stereo plug tip
Cabinet Dimensions and Weight:
•23 in (W) x 10 in (H) x 4 in (D), 12 lb
Cabinet Construction and Finish:
•The cabinet is formed from sheet aluminum and finished with black enamel paint.
Optional vinyl accent striping is available in eighteen standard colors.
Overview of LED Display Circuit Boards:
•Red LEDs (light emitting diodes) mounted on PCBs (printed circuit boards) form
all lighted digits. The illuminated PCBs are mounted behind the face of the
scoreboard cabinet. The face allows the epoxy shells of the LEDs to protrude,
maximizing viewing angle while providing impact-absorbing protection from
contact with stray balls and other flying objects. The LEDs may be dimmed to
reduce glare during night games. They are rated for 100,000 hours of use.
Display Features:
•4-Digit Period Clock, 6 inches tall, shows Time in MM:SS up to 99:59, counts up
or down, can show Tenths of Seconds during the final minute of a down-counting
Period, can show HH:MM in Time of Day Mode
Additional Standard Scoreboard Features:
•All serviceable components accessible from the front of the cabinet
•Integrated keyhole slots for hanging the display

Revised February 21, 2019 LX7406 Owner's Manual
www.electro-mech.com · 800.445.7846 Page 5
Optional Equipment and Features:
•Data cable for hard-wired installations
•ScoreLink RF communications system for wireless data transmission
* Receiver must be positioned with line of sight to transmitter
•MP-series control console
•Hard carrying case for control console and accessories
Power Requirements:
•The LX7406 locker room clock requires one circuit providing 0.3 amps, 120 VAC,
60 Hz.
•The detachable power cord shipped with standard configurations must be
plugged into a standard (NEMA 5-15R) power receptacle.
•Electro-Mech recommends installing a dedicated breaker to control power to the
locker room clock.
Mounting Requirements:
•Locker room clocks are designed to be mounted on a wall. The cabinet includes
two keyhole slots in the back to accept lag bolts with a maximum shaft diameter
of 3/8 inches.
•Lag bolts should be spaced 18 inches apart from center to center.
Safety Listing, Support, and Warranty Information:
•All LX-series scoreboard displays are ETL Listed to UL Standard 48 for Electric
Signs.
•Electro-Mech offers technical support at no charge over the phone or via the
Internet for the life of the product.
•The standard limited warranty covers factory labor on parts returned to Electro-
Mech within five years of the scoreboard's date of invoice.
•Additional support plans are available.
•The complete standard warranty statement is included near the end of this
document available.

LX7406 Owner's Manual Revised February 21, 2019
Page 6 800.445.7846 · www.electro-mech.com
PLANNING YOUR SCOREBOARD INSTALLATION
A good plan is important to the success of any project, and installing a locker room
clock is no exception. An important first step in planning for your locker room clock is
determining the optimal location. Key factors here are visibility and accessibility.
By "accessibility" we mean the ease with which you can get people, equipment, cabling,
etc. to the locker room clock display during installation, as well as ease-of-access for
future service. If you position a clock so that using a lift or ladder to reach it is
impractical, you will almost certainly add cost to the installation and to service calls.
By "visibility" we mean the ease with which players, coaches, and/or the scoreboard
operator can see the display. Most locker room clock displays are mounted on locker
room walls or other structures. Because every sports facility is unique, there is no one-
size-fits-all way to describe the perfect locker room clock location. We can tell you that
the vertical placement of a clock should be high enough to give players and coaches a
clear line of sight over the heads of others but low enough to prevent them from
straining their necks. For safety, you will want to keep the bottom of the cabinet at least
eight feet above the floor (to prevent people from smacking their heads against it).
For some indoor facilities, it is important to make sure people cannot – accidentally or
intentionally – interfere with the locker room clock display or cables connected to it. It is
advisable to keep the display away from direct exposure to showers or other sources of
moisture.
If you are planning for the construction or renovation of a new facility, then you will likely
have more options for locating your locker room clock. In addition, you may be able to
choose helpful positions for electrical outlets, plan for conduits, and control other details
that will make installation, operation, and service easier. Your scoreboard sales rep
should be able to answer questions and offer advice that will help you with these plans.
If you are adding this locker room clock to an existing facility, your options may be more
limited. In some cases, we can modify the clock cabinet to meet special needs. An
obvious example would be accommodating power entry through the back of the cabinet
rather than via the standard power cable on the side. These sorts of details must be
worked out prior to the release of a scoreboard order. Your sales rep can guide you
through the process.
The sections that follow in this document primarily discuss the details of the mechanical
and electrical installation of a single room clock. If your project includes multiple clocks,
scoreboards, or other electronic displays, please check with your scoreboard sales rep
to make sure you have any project-level documentation you may need.

Revised February 21, 2019 LX7406 Owner's Manual
www.electro-mech.com · 800.445.7846 Page 7
Before You Spend Your Time and Money...
Please keep in mind that the dimensions and other details referenced throughout this
document are specific to the standard configuration of this particular locker room clock
model. Before purchasing materials, running cabling, etc. you should verify with the
factory that you have the right documentation for your unique project.
It is possible that a government agency, such as your local city council, will require a
building permit or other documentation and approval forms related to the installation and
operation of your shot clock displays. In some cases the installation plan may require a
stamp from a locally licensed Professional Engineer (P.E.).

LX7406 Owner's Manual Revised February 21, 2019
Page 8 800.445.7846 · www.electro-mech.com
ELECTRICAL INSTALLATION
This section of the manual provides information that is important for locating power
receptacles, running cable, planning for conduit, and other steps needed in preparation
for bringing power and data to a locker room clock display. The final hookups for power
and data will happen after the mechanical installation, but it is wise to plan for key
pieces of the electrical installation prior to physically mounting the cabinet.
If your total scoreboard package includes other special accessories such as a sound
system, electronic message center, or video display, there may be additional cabling
and conduit needed to support this equipment. Please consult the documentation
provided with these items.
The standard configuration of this locker room clock includes a power cable that can be
plugged into a socket on the side of the cabinet. Input and output ports for data are
located here as well. For concealed wiring configurations, power and data cables enter
the cabinet via cutouts in the back. At the factory, it is possible to relocate these
connection points to accommodate special needs. Let your scoreboard sales rep know
about any custom requirements BEFORE we begin building your cabinets.

Revised February 21, 2019 LX7406 Owner's Manual
www.electro-mech.com · 800.445.7846 Page 9
Power Considerations
In standard configuration, each locker room clock display requires a standard (NEMA 5-
15R) AC power receptacle providing 120 VAC at 60 Hz. We recommend providing a
disconnect switch to kill power to this receptacle when the clock is not in use. Here we
will assume that the receptacle is available, or that power is being supplied directly via a
concealed wiring configuration. A Model LX7406 locker room clock draws a maximum of
0.3 amps.
Junction Boxes and Data Cable
In the unusual situation that your locker room clock includes a ScoreLink wireless
communication system, your work is done here. Skip to the next section.
A standard locker room clock usually acquires data as it is daisy-chained from the main
scoreboard display. However, some situations may require one or more junction boxes,
which you should permanently mount to
provide a stable point of termination for the
data cables. The idea is to connect the clock
to a junction box via a patch cable. So the
junction box will need to be mounted near the
clock (usually no more than 10 feet apart). In
many gyms, junction boxes are concealed
inside a larger floor box. They can be flush
mounted on a wall, externally mounted on
bleachers, or positioned anywhere else that
is convenient. Choose a location that is
protected so that the junction boxes and
cables are not likely to be stepped on, tripped
over, or have liquid (or anything else) spilled on them.
It is also important to label your junction boxes. The connectors used for scoreboard
data look very much like the type used in some audio systems. Plugging audio devices
into a scoreboard data line can damage the scoreboard system.
Each junction box ships with a length of cable
soldered to the stereo socket and tucked
inside the box. There should be no need to
solder cable to this socket during the
installation. Instead, splice the wires from the
data cable to the pigtail inside the junction
box, matching colors. The wires in the pigtail
are 22 AWG, and the cable should use the
same size conductors. The installer must

LX7406 Owner's Manual Revised February 21, 2019
Page 10 800.445.7846 · www.electro-mech.com
provide wire nuts, crimp splices, or other means to connect the wires.
The splice point should stay inside the junction box. That is, you want to feed the long
run of data cable into the box rather than pulling the pigtail out. Electro-Mech provides
a strain relief on one side of the junction box to secure the cable. You may choose to
connect conduit directly to the junction box, in which case the strain relief will not be
needed. The junction box is designed to accept 3/4-inch conduit fittings.
We recommend running data cable in conduit from the junction boxes to the shot clock
displays ─especially where the cable would otherwise be exposed. You should never
run data cable in the same conduit as power cable. Having more than one run of
scoreboard data cable in a single conduit is perfectly fine.
One more warning about data cable: Never split or branch the cable. The current loop
signal we use to transmit data to the scoreboard and shot clock displays will behave
unpredictably if it is divided between two destinations. There are other options for
getting synchronized data to two locations, including daisy chaining ─which will be
discussed below. If your facility calls for a more complicated cabling plan, it is best to
work out the details with your scoreboard sales rep prior to installation.
Stereo Plug
In standard configuration, data enters the locker room clock cabinet through a port
located along the side. There are two common methods for bringing the last few feet of
data cable to the clock. One method involves installing a junction box on the wall or
other structure near the display. From here you can run a patch cable to the shot
clock's data input port. The standard clock package does not include extra junction
boxes and patch cables for this type of cable
routing. However, the materials are readily
available from Electro-Mech.
The other method requires the right-angle
stereo plug assembly, which Electro-Mech
provides with all hard-wired indoor scoreboard
packages. In the case of locker room clocks,
there will be two plug assemblies to terminate
the two cable runs required. The assembly
consists of the main plug body, an insulating
sleeve, and a cover.

Revised February 21, 2019 LX7406 Owner's Manual
www.electro-mech.com · 800.445.7846 Page 11
Connecting data cable to the stereo plug requires soldering to two terminals. Slide the
cover and sleeve over the data cable before soldering. The terminal nearer the center
of the plug body connects to the tip of the socket. The black wire from the data cable
should be soldered to this terminal. The terminal that extends further from the center of
the plug body connects to the ring of the plug.
Solder the red wire here. The strain relief tabs
are connected to the shaft of the plug. When
you bend the tabs around the data cable, they
should be in contact with the shielding or the
bare drain wire.
Slide the insulator sleeve over the terminals and
screw the cover in place to complete the
assembly. Now you will be ready to plug the
data cable into the port at the top of the shot
clock cabinet when it is installed.

LX7406 Owner's Manual Revised February 21, 2019
Page 12 800.445.7846 · www.electro-mech.com
MECHANICAL INSTALLATION
This section of the manual describes options for installing locker room clock cabinets. If
your scoreboard project includes customizations or requires other special mounting
considerations, please contact Electro-Mech to request details specific to your project.
If you have unique requirements and would like to change the position or size of our
mounting hardware to accommodate them, we can probably help you out. But we need
to find out BEFORE we start building the cabinet. Let your scoreboard sales rep know
about any special needs as early in the process as possible.
Additional Materials and Tools
Most locker room clock displays are installed on locker room walls. Each locker room
clock cabinet includes a set of keyhole mounting points in the back to facilitate this type
of installation with the back of the display flat against a wall. Other techniques may
more appropriate for hanging the display on other structures. However, for the sake of
clarity and brevity, we will assume a wall. We will further assume that the wall is
capable of supporting the weight of the scoreboard cabinet and any accessories to be
mounted with it.
The wall could be made of cinder blocks, framed with wood and covered in drywall, or
constructed any number of other ways. Because different fasteners are appropriate for
different walls, we cannot specify a particular type of fastener. As previously indicated,
this document uses the term "lag bolt" to generically represent whatever fastener is best
suited for the type of structure on which the scoreboard display will hang. To use the
mounting tabs provided with the scoreboard, you will need two such lag bolts. The
keyhole slots stamped into the back of the display allow for a bolt diameter of 3/8 inches
or less.
In addition to the wall and the two lag bolts, this document also assumes the installer
has access to tools and skills for...
•Working at the height designated for positioning of the scoreboard display
•Anchoring the lag bolts
•Lifting the scoreboard cabinet into position

Revised February 21, 2019 LX7406 Owner's Manual
www.electro-mech.com · 800.445.7846 Page 13
Below are the standard dimensions of an LX7406 locker room clock. Lag bolts
for hanging the clock should be placed 18 inches apart from center to center.

LX7406 Owner's Manual Revised February 21, 2019
Page 14 800.445.7846 · www.electro-mech.com
TESTING, OPERATION, AND ONGOING CARE
After all power, data, and other connections are in place, it is time to test the locker
room clock. Apply power to the locker room clock display first. Although there is no
harm in powering the control console first, powering the clock first should result in the
numeric displays remaining blank. Seeing any LEDs illuminated on a locker room clock
display prior to the availability of data from the control console would indicate a problem
inside of the locker room clock cabinet.
Next, power up the control console. For wired setups, connect any stereo patch cables
to the data output ports on the back of the control console. The other ends of these
patch cables are typically plugged into junction boxes, but may be plugged directly into
the data input port on the side of the locker room clock.
The locker room clock display should begin showing data within a few seconds,
displaying the same information as the clock on the main scoreboard display. The
console buttons that control the main scoreboard clock also control the locker room
clock. For more details about how the control console works, consult the
documentation that ships with it.
Scheduled Testing and Maintenance
The locker room clock does not require scheduled maintenance procedures. However,
it is important to check for problems prior to a game. We recommend running through
the tests described above between two and four weeks prior to the start of a season (or
anytime you plan to use the locker room clock after a gap of more than a month).
During the season, test out the locker room clock the day before each game.
After the Game, and After the Season
Whenever you are not using your locker room clock, use the disconnect switch to cut
power to the display. You should unplug the control console from its power source and
from the data cables as well. It is not necessary to take steps beyond this, even if the
locker room clock will not be used for several months.

Revised February 21, 2019 LX7406 Owner's Manual
www.electro-mech.com · 800.445.7846 Page 15
MAINTENANCE
We hope your scoreboard system provides years of trouble free service. In the event of
a problem, the material that follows will provide some information about contacting
technical support as well as some details about the parts inside your scoreboard
display.
Contacting Technical Support
Our support staff is available via phone or e-mail Monday through Friday 8:00 through
5:00 Eastern. Our web address and phone number is printed at the bottom of this page.
When contacting Electro-Mech for support, it helps to have the scoreboard model
(LX7406) handy as well as the version of the software running on your control console.
If your control console includes an LCD display, you will see the software version flash
briefly (for about three seconds) on the screen when you first apply power. Whether
you have the LCD display or not, you should find on the bottom of the control console a
product label which gives the software version.
If you are reading this manual in search of help with a different scoreboard model, for
outdoor scoreboards, you can find the model number printed on a metal plate attached
to the back of the scoreboard cabinet near where the power enters. For indoor
scoreboards, the model number is usually printed on a label at the top center of the
cabinet near the attachment point for the power cable.
If you are troubleshooting a problem, the most important information to have is an exact
description of which parts of your scoreboard system are working and which parts are
not working. The best person to make contact with our support team is someone who
has seen the problem first hand. Better yet, give us a call when you are there at the
scoreboard display and can walk through a few simple tests with one of our technicians.
Scoreboard problems are rarely so complicated that diagnosing them requires skills
beyond using a screwdriver and a ladder. Similarly, replacing parts is straightforward
process that does not require complex tools or special knowledge.

LX7406 Owner's Manual Revised February 21, 2019
Page 16 800.445.7846 · www.electro-mech.com
Parts Exchange
If, after working with our support staff, you discover that a part needs to be serviced or
replaced, the next step is to send the part to Electro-Mech for repair. During the
warranty period, we repair parts and return them via UPS ground service at no charge.
We can ship parts via overnight service for an additional charge. For work that falls
outside of the warranty terms, we can, upon request, provide an estimate of repair costs
on returned parts before performing the work. The typical turnaround on repair work is
less than three business days
Electro-Mech maintains a supply of common parts for immediate shipment. Some
customers choose to purchase new parts for immediate use and will later send old parts
back to us to be repaired and returned as "backup" stock. In some cases our support
plans include the option for shipping replacement parts to the customer once our
service staff has identified a problem. The customer will then return the damaged part
after receiving the replacement. Electro-Mech requires a valid credit card number
before initiating a shipment of this type. We do not apply charges to the card unless the
customer does not return parts within ten days or if the returned parts require work
outside of our warranty terms.
Our shipping address:
Electro-Mech Scoreboard Co.
72 Industrial Blvd.
Wrightsville, GA 31096

Revised February 21, 2019 LX7406 Owner's Manual
www.electro-mech.com · 800.445.7846 Page 17
Location of Serviceable Parts
All serviceable components are accessible by removing the face of the locker room
clock cabinet. The next section of this document discusses removing and replacing the
illuminated PCB assembly.
* In the unusual situation that your locker room clock includes a ScoreLink wireless data
kit, the receiver unit will be accessible on the bottom right side.

LX7406 Owner's Manual Revised February 21, 2019
Page 18 800.445.7846 · www.electro-mech.com
Illuminated PCB Assemblies
LED assemblies and circuit boards (but not individual LEDs) are field replaceable parts.
Each LED is soldered to a PCB (printed circuit board) which is, in turn, attached to the
metal face of the clock with machine screws. You will need a 1/4-inch nut driver to
remove these screws.
Removing an LED Assembly, Step-By-Step:
•Disconnect power to the locker room
clock cabinet before performing any
service work.
•Remove the machine screws from the
face of the display, leaving for last one
of the screws along the top.
•Support the face piece with one hand
as you remove the final screw.
•Rotate the face so that you can see
the PCB behind it and the cable
connections along the back side.
•Unplug the ribbon cables, and, if present, the power cables from the PCBs.
•Set the LED assembly aside and save the screws for later.
If your purpose in removing the LED assembly was to provide access to the
components behind it, you may skip the next part about removing and replacing the
LED printed circuit board.
The LED circuit board is held to the face by
several nuts, which you can remove using a
3/8-inch nut driver. Be careful to keep the
whole assembly right side up when you
return it to the locker room clock cabinet.

Revised February 21, 2019 LX7406 Owner's Manual
www.electro-mech.com · 800.445.7846 Page 19
Power Supplies and Fuses
In standard configuration, the AC power socket on the side of the locker room clock
serves as the point of entry for power. In the concealed wiring configuration, AC power
enters through the cutouts on the back of the clock cabinet. In this case, the installer
brings the power cable to a terminal block, accessible by removing the digit assembly
from the front of the cabinet. From the power terminal block, or from the back of the AC
socket, the line side of AC passes through a 5-amp fuse on the way to the Mean Well
RSP-320-24 power supply module. This is an AG style fuse, which should only be
replaced with a fuse of the same style and rating.
Power connections are made along a row of screw terminals on one side of the power
supply module. The Mean Well RSP-320-24 module in the cabinet provides 18.9 VDC
to the illuminated digits and driver. If you replace a power supply module, check the
output voltage to make certain it is set to 18.9 VDC.

LX7406 Owner's Manual Revised February 21, 2019
Page 20 800.445.7846 · www.electro-mech.com
LX Driver
LX Driver circuit boards do the work of
interpreting data sent from the control
console to the scoreboard display. Using that
information, the drivers decide which of the
LEDs should be illuminated and which should
not. The single LX Driver in a locker room
clock decodes data representing each digit
used in the scoreboard. The driver sends
signals to the LED circuit boards via ribbon
cables. The table below lists the names and
purposes of the various connectors on the LX
Driver.
LX17 Driver Functions
Connector
Function
J2 (Data In)
N/A (or rarely from ScoreLink)
J3 (Data Out)
To Data Out Socket
J4 (Word 1 Low)
Minutes Ones
J5 (Word 1 High)
Minutes Tens
J6 (Word 2 Low)
Seconds Ones
J7 (DC Power In)
18.9 VDC
J8 (Word 3)
N/A
J9 (Word 2 High)
Seconds Tens
J10 (Word 4)
N/A
J15
N/A
H5/BLK (Data In)
From Data In Socket
H6/RED (Data In)
From Data In Socket
H7/SHLD (Data In)
From Data In Socket
Jumper Pins
X = Shunt Installed
H13 (J4/J5 Blanking)
H16 (J4/J5 Blanking)
X
H14 (J6/J9 Blanking)
H17 (J6/J9 Blanking)
H15 (Not Used)
H18 (Test Prog)
H3 (Horn2 No Dim)
X
H11 (Horn1 No Dim)
X
H19 (Not Used)
H1 (Memory Ret.)
H2 (Group +1)
X
H4 (Bank +2)
H12 (Bank +1)
X
Table of contents
Other Electro-mech Clock manuals
Popular Clock manuals by other brands

L’Epee
L’Epee LA TOUR User instructions
Perel
Perel WC219 user manual
Renesas
Renesas VersaClock 6E Series Register Descriptions and Programming Guide

TMI Products
TMI Products VD54B Technical guide & parts catalogue

WESTERSTRAND
WESTERSTRAND Analogue NTP Clock manual

American Time
American Time Global Series Quick start installation guide
