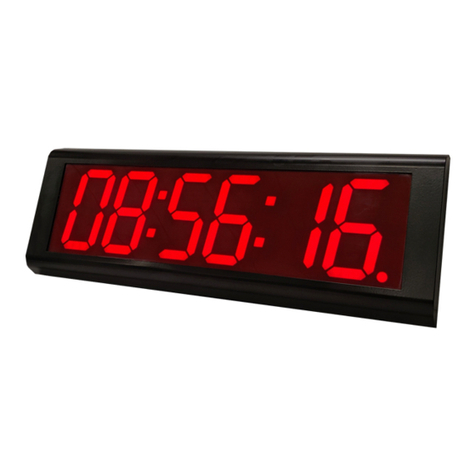
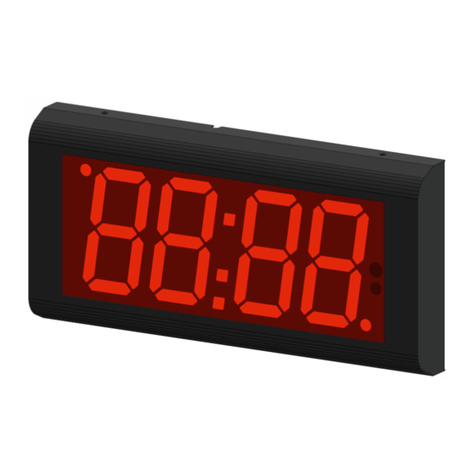
RGB Technology ZB series User manual

v2.26 1
DEVICE OPERATION MANUAL
ZA, ZB and ZAH, ZBH Series Clock
. Introduction
The devices of ZA, ZB and ZAH, ZBH series are compact clocks with various configuration options. An intuitive user menu operated y a
remote control allows you to fully customise the device.
The clock equipped with a network communication module allows remote configuration through the “We site” and time
synchronization using the Internet time servers.
The clock enables:
−adjusting the time of the presentation: the clock, the date, and the temperature,
−adjusting the date format and the time format (12-hour or 24-hour),
−automatic and manual rightness control,
−working in the ECO mode allowing you to reduce power consumption,
− signaling 30 alarms through a uilt-in transmitter,
−choosing the shape of the display font,
−automatic time change from the standard time to the daylight saving time and from the daylight saving time to the standard time
for various locations (Europe, Australia, the United States of America, Canada, Israel),
−GPS time synchronization (availa le with GPS option),
−synchronization using the NTP Internet servers (function availa le in the Ethernet option, requires the Internet access),
−Master Mode – a local time server compati le with NTP (function availa le in the Ethernet option, does not require the Internet
access),
−synchronization with the local “Master Mode” server (function availa le in the Ethernet option, does not require the Internet
access),
−configuration through the uilt-in “We site” (function availa le in the Ethernet option, does not require the Internet access).
−Display (content) synchronization in 3 modes (master, asic slave – master transmits only display information, full slave – master
transmits display information and temperature) etween any types of clocks (the function availa le in the Ethernet option,
requires the access to the local network),
−setting a unit of measurement for the displayed temperature (Celsius degrees or Fahrenheit degrees),
−setting temperature offset,
−setting an individual clock name (the function availa le in the Ethernet option, requires the access to the local network),
−setting a language of WWW page (English or Polish, the function availa le in the Ethernet option, requires the access to the local
network),
−stopwatch function, a timer counting up and a timer counting down. The end of counting is signalled y a uilt-in relay.
2. Clock connectors
Fig. shows the device connectors that are availa le after removing the housing cover.
NOTE! Removing the housing cover should e carried out with the power disconnected. This task must e performed with caution.

2
Fig. . Prestige Line clock connectors
Tab. . List of the Prestige Line clock connectors
Sy
mbol
Function
Comments
RA, RB Transmitter (alarm signalling device)
Closing contact, normally open,
permissi le load:
- resistive: 5 A 250 VAC, 5A 30 VDC
- inductive: 2 A 250 VAC, 2A 30 VDC
TX+
Ethernet (option)
Pin no. 1 of RJ
–
45 plug
TX
-
Pin no.
2
of RJ
–
45
plug
RX+
Pin no.
3
of RJ
–
45 plug
RX
-
Pin no. 6 of RJ
–
45 plug
POE1, POE2 PoE Lines (Power over Ethernet)
Compati le with standard
IEEE 802.3at (PoE+
,
phantom (
active
)
power )
GPS
GPS module signal
Works with GPS GM
-
2
TEM
Thermometer
–
5V
Power supply for
the
external modules
Power supply for the GPS and the thermometer
GND
System
ground
–
3. Configuring the clock using the menu
The asic configuration method is y means of the remote control through the user menu.
Fig. 2 shows the remote control, along with the explanation of the function of each utton. You enter the user menu using the MENU
utton. You navigate and modify the respective parameters using the uttons ↑ ,↓, ← and →.
Fig. 2 Remote control

3
Tab. 2 shows the structure of the main menu functions with the description.
Tab. 2. Main menu structure
Menu position Function description
F1 Manual setting of the time and the date
F2 Configuration of the presented parameters
F3 Configuration of the date format
F4 Configuration of the time synchronization
1
F5 Configuration of the display rightness
F6 Configuration of the alarms
F7 Configuration of the ECO mode
F8 Configuration of the display font
F9 Restoring the default settings
F10 Configuration of temperature offset
F11 Configuration of display synchronization
F12 Displaying information a out the signal strength or disconnection of the GPS module
F13 Regional settings, such as location, time zones, daylight saving time/standard time
F14 Stopwatch function / timer counting up / timer counting down
To set the clock (enter the current date and time), you should:
1) Call the configuration menu y pressing the MENU key.
2) Select the „F ” function using the ↑ and ↓ keys and confirm it with the → key. →.
3) Using the ↑ and ↓ keys, modify the date and the time. Successively enter: the day of the month, the month, the year, the
hour, the minute, and confirm the parameters with the → key.
4) After entering the complete time, the clock will automatically exit the menu.
NOTE! Before setting time from the website, the menu or automatically, configure regional settings.
NOTE! A linking num er indicates the time or date parameter which is eing modified.
NOTE! To ensure that your device makes automatic changes etween the daylight saving time and the standard time
correctly, you should properly configure the time zone and activate taking into account the daylight saving time.
NOTE! When you set the clock on the last Sunday in March or on the last Sunday in Octo er, take into account the
information included in point 4. Daylight Saving Time.
To activate/deactivate displaying individual information and to modify the time of its presentation (the clock, the date, the
thermometer), you should:
1) Call the configuration menu y pressing the MENU key.
2) Select the „F2” function using the ↑ and ↓ keys and confirm it with the → key.
3) To activate displaying the clock (C) set Y using the ↑ and ↓ keys and confirm it with the → key.
4) Next, using the ↑ and ↓ keys, modify the clock display time „Cd” and confirm it with the → key.
5) To activate the display of the date (d) set Y using the ↑ and ↓ keys and confirm it with the → key.
6) Next, using the ↑ and ↓ keys, modify the date display time „dd” and confirm it with the → key.
7) To activate the display of the thermometer (t) set Y using the ↑ and ↓ keys and confirm it with the → key.
8) Using the ↑ and ↓ keys modify the temperature display time „td” and confirm it with the → key.
9) The clock will return to the main menu, to exit the main menu, press the ← key.
NOTE! If the respective parameter of the presentation (the clock, the date or the thermometer) is deactivated y setting N,
the parameter presentation time step will e skipped.
1
Option availa le in the variant equipped with the network synchronizations module or the GPS module.

4
To change the displayed date format, you should:
1) Call the configuration menu y pressing the MENU key.
2) Select the „F3” function using the ↑ and ↓ keys and confirm it with the → key.
3) Using the ↑ and ↓ keys, select your preferred format of displaying the date and confirm it with the → key.
dny DD-MM YYYY
ndy MM-DD YYYY
ynd YYYY MM-DD
ydn YYYY DD-MM
dn DD-MM
nd MM-DD
4) Using the ↑ and ↓ keys , select your preferred format of displaying the time and confirm it with the → key.
tf 2 12-hour format
tf 24 24-hour format
5) The clock will return to the main menu, to exit the main menu, press the ← key.
To configure time synchronization or to activate the Master Mode
2
, you should:
1) Call the configuration menu y pressing the MENU key.
2) Select the F4 function using the ↑ and ↓ keys and confirm it with the → key.
3) Using the ↑ and ↓ keys, select your preferred synchronization mode and confirm it with the → key.
S no synchronization inactive (inactive Master Mode)
S GP GPS satellite synchronization
S nt NTP network synchronization
4) Using the ↑ and ↓ keys, activate/deactivate the Master Mode and confirm it with the → key.
tb y Master Mode active
tb n Master Mode inactive
5) The clock will return to the main menu, to exit the main menu press the ← key.
NOTE! Before setting time from the website, the menu or automatically, configure regional settings
NOTE! The satellite synchronization requires the GPS module.
The network synchronization requires the network module and the Internet access.
NOTE! The Master Mode cannot be activated, if the reference clock does not have the active GPS or NTP synchronization.
To activate the automatic display brightness control, you should:
1) Call the configuration menu y pressing the MENU key.
2) Select the „F5” function using the ↑ and ↓ keys and confirm it with the → key.
3) Using the ↑ and ↓ keys, activate the automatic rightness control „br A” and confirm it with the → key.
br Minimum rightness
… …
br 0 Maximum rightness
br A Automatic rightness
4) Using the ↑ and ↓ keys, select your preferred automatic rightness control profile and confirm it with the → key.
Pr Profile 1: Internal standard
Pr 2 Profile 2: Internal dynamic
Pr 3 Profile 3: External standard
Pr 4 Profile 4: External dynamic
To set the display brightness manually, you should:
1) Call the configuration menu y pressing the MENU key.
2) Select the „F5” function using the ↑ and ↓ keys and confirm it with the → key.
3) Using the ↑ and ↓ keys, activate your preferred rightness and confirm it with the → key.
br Minimum rightness
… …
br 9 Maximum rightness
2
Option availa le in the variant equipped with the network synchronizations module or the GPS module.

5
4) The clock will return to the main menu, to exit the main menu, press the ← key.
To enter or modify the alarm, you should:
1) Call the configuration menu y pressing the MENU key.
2) Select the „F6” function using the ↑ and ↓ keys and confirm it with the → key.
3) Using the ↑ and ↓ keys, select one of the availa le alarms (from A to A30) and confirm it with the → key.
A alarm 1
…
A 30 alarm 30
4) Using the ↑ and ↓ keys, activate an alarm (On Y) and confirm it with the → key.
5) Using the ↑ and ↓ keys, modify the time of activating the alarm. Successively enter: first the hour, next the minute, and
confirm the parameters with the → key.
6) Using the ↑ and ↓ keys, enter the alarm duration period in seconds (t) and confirm it with the → key.
7) Using the ↑ and ↓ keys, select your preferred alarm mode: ALLd (ever day) SELd (selected days) and confirm it with the →
key.
8) If you choose the SELd mode (selected days), you should su sequently select the days in which the alarm is to e active (e.g.
active on Monday d Y, inactive on Monday d n), every time proceeding y using the → key.
d Monday
d2 Tuesday
…
d7 Sunday
To activate the ECO mode of the display, you should:
1) Call the configuration menu y pressing the MENU key.
2) Select the „F7” function using the ↑ and ↓ keys and confirm it with the → key.
3) Using the ↑ and ↓ keys, activate the ECO mode „ECO Y” and confirm it with the → key.
ECO Y yes
ECO n no
4) Using the ↑ and ↓ keys, modify the value of the entered time of activating the clock display, next confirm it with the → key.
5) Using the ↑ and ↓ keys, modify the value of the entered time of deactivating the clock display, next confirm it with the →
key.
6) The clock will return to the main menu, to exit the main menu, press the ← key.
NOTE! When the ECO mode is active (ECO Y) and the time of activating and deactivating the clock is the same, the clock will
e on for 24 hours.
To change the display font shape, you should:
1) Call the configuration menu y pressing the MENU key.
2) Select the „F8” function using the ↑ and ↓ keys and confirm it with the → key.
3) Using the ↑ and ↓ keys, select your preferred font shape and confirm it with the → key.
Fnt rounded font
Fnt2 seven-segment font
To restore factory settings of the clock by using the remote control, you should:
1) Call the configuration menu y pressing the MENU key.
2) Select the „F9” function using the ↑ and ↓ keys and confirm it with the → key.
3) Using the ↑ and ↓ keys, select res Y and confirm it with the → key.
NOTE! This function is used to fully restore factory settings, including resetting the alarm and making the default network
configuration. This function doesn't reset a remote control codes. When the device is equipped with LAN module the
network settings will e reset as well.
To set a unit of measurement for the displayed temperature and its offset using a remote control, you should:
1) Call the configuration menu pressing the MENU key.
2) Select the F 0 function using the keys ↑ and ↓ and confirm it with the key →.
3) Using the ↑ and ↓ keys, select a unit of measurement for the temperature and confirm it with the → key.
tU °C Cesius degrees
tU °F Fahrenheit degrees
4) Using the keys ↑ and ↓ select „Of Y” and confirm it with the key →.

6
5) Using the keys ↑ and ↓ set the appropriate temperature offset value within the range of ±9.9°C and confirm it with
the key →.
Of Y yes
Of N no
To configure the display (content) synchronization using a remote control, you should:
1) Call the configuration menu pressing the MENU key.
2) Select the F function using the keys ↑ and ↓ and confirm it with the key →.
3) Using the keys ↑ and ↓ select „SC Y” and confirm it with the key →.
4) Using the keys ↑ and ↓ set the appropriate synchronization mode „SC Cb” (Slave - Content Basic), „SC Cf” (Slave - Content
Full), „SC Sr” (Master – Server Content) and confirm it with the key →.
NOTE! The only result of the a ove configuration is setting / switching over to the selected operation mode. Full
configuration of display synchronization requires configuring through the we page. For a Slave device ( asic or full),
you should configure the IP address of the Master eing the synchronization source.
To view information about the signal strength or disconnection of the GPS module using the remote control as follows:
1) Call the configuration menu pressing the MENU key.
2) Select the „F 2” function using the ↑ and ↓ keys and confirm it with the → key.
GP Un GPS unconnected
GP NO GPS no signal
GP PS GPS poor signal
GP GS GPS good signal
To configure the clock location, the time zone, taking into account the daylight saving time, you should:
1) Call the configuration menu y pressing the MENU key.
2) Select the F 3 function using the ↑ and↓ keys and confirm it with the → key.
3) Using the ↑ and ↓ keys, select the clock location and confirm it with the → key.
LO EU location Europe
LO AU location Australia
LO US location the United States
LO CA location Canada
LO IL location Israel
4) Using the ↑ and ↓ keys, activate/deactivate taking into account the daylight saving time and confirm it with the → key.
dst y yes
dst n no
5) Using the ↑ and↓ keys, activate/deactivate the time zone and confirm it with the → key.
G y yes
G n no
6) Using the ↑ and ↓ keys, select a time zone and confirm it with the → key.
- 2 UTC zone -12:00
… …
4 UTC zone +14:00
7) The clock will return to the main menu, to exit the main menu, press the ← key.
NOTE! While configuring regional settings, the user must e aware of the time zones in the availa le locations.
NOTE! For the Polish official time, you should enter the UTC+1 (G 01) time zone and activate taking into account the daylight
saving time „dst y”
NOTE! When you are setting the time zone, remem er to maintain the conformity with the preset location. The illustration
elow will help you to choose the appropriate time zone.

7

8
To configure and activate the stopwatch/timer function, you should:
1) Call the configuration menu, y pressing the MENU key.
2) Select the F 4 function using the ↑ and ↓ keys and confirm it with the → key.
3) Using the ↑ and ↓ keys, select a particular special function of the clock and confirm it with the → key.
STO Stopwatch
tiUP (Timer Up) timer counting up from 0 to the preset value,
tiDO (Timer Down) timer counting down from the preset value to 0
4) After selecting the STO (stopwatch) function, press the A key to start counting.
5) After selecting the tiUP or tiDO function (timers), you should set the value to/from which the timer is supposed to count.
Setting the particular value on the hour/minute/second position is done using the ↑ , ↓ and → keys.
6) After configuring the selected timer mode, press the A key to start counting.
7) Functions of the keys:
•A – stop the counter/restart counting,
•B – erase the counter (active only when counting is stopped),
•← – return to the F14 menu.
8) Range/resolution dependent on the clock type:
•ZAXX: maximum value 99:59 (Minutes:Seconds)
•ZBXX: maximum value 99:59:59 (Hours:Minutes:Seconds)
NOTE! Timer settings egin from hours for the clocks of the ZBXX type and from minutes for the clocks of the ZAXX type.
NOTE! After exiting the F14 menu, counting is active in the ackground – after re-entering the previously selected function,
the current counter value will e displayed regardless of the state (counting, stop).
NOTE! Activating any function such as counting, exiting the F14 menu and re-entering the F14 menu and selecting another
function will stop counting and cause erasing the counter.
NOTE! Setting the timer counting values is possi le only when the timers are stopped. In addition, setting the counting value
to 00:00 or 00:00:00 (depending on the clock type) causes looping and resetting the counting value – protection
against the 0 setting.
NOTE! Resetting the counter is possi le only after having it stopped, otherwise pressing the B key will cause no action.
NOTE! When the selected timer finishes counting, the relay will e activated for 2 seconds. After deactivating the relay,
recounting with the same settings starts after pressing the A key.
NOTE! After pressing the → key in the F14 menu, the name of the latest set function will e displayed, and, if no function has
een set/activated efore, the selection will egin from the stopwatch function "STO" y default.
To do a hardware restore factory settings of the clock, you should:
1) Disconnect the device from the power supply.
2) Make sure that the GPS connector ca le is not connected (disconnect if there is).
3) Connect the GPS pin to GND pin inside the connector.
4) Switch on the power.
5) Wait (a out 3 seconds) until the clock signals reset y flashing of middle-segment digits.
6) Disconnect the GPS pin and GND pin inside the connector
NOTE! This function is used to fully restore factory settings, including resetting the alarm and making the default network
configuration. This function doesn't reset a remote control codes. When the device is equipped with LAN module the
network settings will e reset as well.

9
4. Daylight Saving Time
a) Europe
In accordance with EU Directive 2000/84/EC:
- the standard time is changed to the daylight saving time on the last Sunday in March ( y adding one hour),
- the daylight saving time is changed to the standard time on the last Sunday in Octo er ( y taking away one hour).
Considering the a ove, in the countries following EU Directive 2000/84/EC, when the option of taking into account the daylight saving
time is activated in the clock:
a) On the last Sunday in March there is no time interval etween 01:00UTC + TimeZone and 01:59UTC + TimeZone. If you try to set the
clock to the time within this interval, one hour earlier value is adopted, and it is assumed that the time has not yet een changed to the
daylight saving time. As a result, within the nearest 60 minutes, the clock will take into account the change to the daylight saving time
and will add one hour automatically.
) On the last Sunday in October, the time interval etween 01:00UTC + TimeZone and 01:59UTC + TimeZone appears twice. If you set
the clock to the time within this interval, the clock will e set to the time indicated y the user, and it is assumed that the time has
already een changed to the standard time.
) Australia
- the standard time is changed to the daylight saving time on the first Sunday in Octo er at 2:00 AM of the local time (adding one hour),
- the daylight saving time is changed to the standard time on the first Sunday in April at 3:00 AM of the local time, taking into account
DST, (taking away one hour).
The daylight saving time is not applied in North Australia, Queensland and West Australia. Setting time change, the user must consider
the fact if the particular Australian territory (time zone) uses DST.
c) United States and Canada
- the standard time is changed to the daylight saving time on the second Sunday in March at 2:00 AM of the local time (adding one
hour),
- the daylight saving time is changed to the standard time on the first Sunday in Novem er at 3:00 AM of the local time, taking into
account DST, (taking away one hour).
The states of Arizona, Puerto Rico, Hawaii, Virgin Islands and Samoa do not change time. Setting time change, the user must consider
the fact if the particular state, situated in the respective time zone, uses DST.
a) Israel
- the standard time is changed to the daylight saving time on Friday efore the last Sunday in March at 2:00 AM of the local time to 3:00
AM (adding one hour),
- the daylight saving time is changed to the standard time on the last Sunday in Octo er at 2:00 AM of the local time to 1:00 AM (taking
away one hour).

10
Appendix A: Supporting the “Website”
The ZA, ZB and ZAH, ZBH series clocks equipped with the network communication module (Ethernet module) allow intuitive
configuration through the uilt-in “We site”.
To configure the network connection, follow the document Network Card Configuration Manual, to e downloaded from the following
we site:
http://rg technology.pl/soft/
. Connection with the device
The connection with the device is made through the Ethernet interface, while supporting the integrated „We site” is done via the
Internet rowser (recommended rowser: Mozilla Firefox, version 16.0.2 or later).
To connect with the device, enter the IP address assigned to the device into the rowser (default: 92. 68.0. ).
Then, the device will ask you to enter: username and password (default User: admin, Password: dbps).
Note! If you include a few clocks to the same network, the devices must e connected in succession and given a unique IP address,
which will avoid an address conflict (initially all of them have the same default IP address).
2. Supporting the “Website”
The integrated “We site” consists of five we pages which allows you to configure various functions of the device.
NOTE! Always confirm the changes of the settings of the device parameters with the "Save" button.
2. . Time tab
This ta allows you to configure the parameters connected with time.
•Local date & time – manual setting of the local time and date.
•Remote time synchronization – configuration of the remote synchronization of time, of the time zone, of allowing for daylight
saving time, and of the IP addresses of NTP time servers.
•Local Time synchronization – configuring time synchronization (the time source, the time zone, the daylight saving time, the IP
addresses of time servers, the Master Mode).
Note! To make the time synchronization using the NTP servers work, you need the proper (taking into account local network
addresses) configuration of the following parameters: "IP Address", "
Su net mask", "
Gateway" in the Advanced ta and the
connection of the device to the Internet.
2.2. Display tab
This ta allows you to configure the parameters connected with the device display.
•Format – configuring the displayed functions and their duration (the clock, the date, and the thermometer) and the date
format.
•Brightness – configuring the display rightness and activating the automatic rightness control.
•Eco – setting the energy saving mode (the time of activating the device, the time of deactivating the device).

11
•Fonts – selecting the display font.
•Temperature offset – configuration of the environment temperature offset .
•Display synchronization – configuration of the display (content) synchronization, of selecting the operation modes, and of the
field of the master clock IP address (required for the Slave operation modes).
2.3. Alarms tab
This ta allows you to configure the parameters connected with the alarms.
•Set alarm – configuring a single alarm (activating, the operating time, the duration, the mode, the days of the week).
•Alarms – status of all availa le alarms.
The meanings of the alarm status sym ols are descri ed in Tab. 3.
Tab. 3. Alarm status sym ols
Symbol Colour Meaning
red not set, inactive
yellow set, inactive
green set, active
2.4. Advanced tab
This ta allows you to configure the advanced parameters of the device.
Clock name – an individual clock name.
Network – network settings (the IP address, the su net mask, the default gateway).
Password – setting the user password.
Default settings – restores the factory settings.
NOTE! The "Default settings" function fully restores the factory settings, including resetting the alarm and making the default
network configuration.
2.5. Status tab
This ta allows you to read the device status.
Date & time – reading the time and the date.
Sensors – reading the sensors: the temperatures and the environment rightness.
GPS status – reading information a out the signal strength or disconnection of the GPS module.
Network – reading the network interface configuration.
Device – reading the software version, hardware version, an individual clock name and product name.

12
3. Default network settings
Tab. 4 shows the network settings of the Prestige Line clock. Restoring the factory settings is possi le using the respective function in
the user menu or in the “We site”.
Table 4. Default network settings
Parameter Default value
User admin
Password d ps
IP address 192.168.0.11
Su net mask 255. 255. 255.0
Default gateway 192.168.0.1
4. Master Mode configuration
The ZA, ZB and ZAH, ZBH series clocks allow local synchronization of the slave clocks with the master clock. Tab. 5 shows a sample
configuration of clocks. NOTE! Time server IP addresses can e entered y the user only via the "We site".
Tab. 5. Master Mode configuration
Master clock (Master) Slave clock (Slave)
Master Mode active inactive
Synchronization
source
GPS or Ethernet Ethernet
Comments When you choose the Ethernet as the
synchronization source, the Time server oxes from
1 to 5 should include sever addresses compati le
with NTP.
In the Time server ox 1, you should enter the master
clock (Master) IP address. The Time server IP oxes
from 2 to 5 should e filled in with the addresses
0.0.0.0
5. Changing the language of web page
To change the language, click at the ottom right corner on a flag sym olising the language. Availa le languages are Polish
and English (default). After clicking on the desired flag, next to it should e displayed an information “
Ustawiono język
polski
” or “
Set english language
”, which means the correct language setting in the memory clock (feed ack from the device).
This manual suits for next models
3
Table of contents
Other RGB Technology Clock manuals