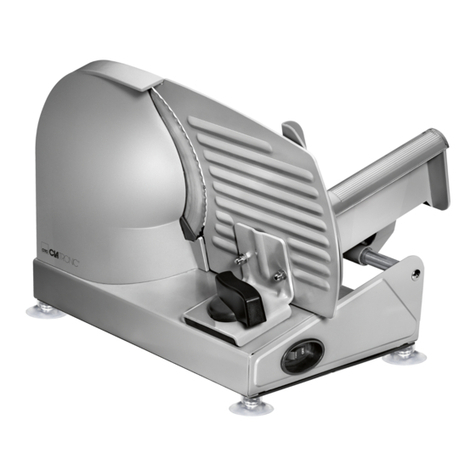
Electrolux Professional 601138 User manual

26
Foreword ...................................................................... 27
A.1 General information ............................................. 28
A.1.1 General safety instructions ....................................................28
A.1.2 Additional Indications...............................................................28
A.1.3 Introduction....................................................................................28
A.1.4 Intended use and restrictions..............................................28
A.1.5 Test and inspection ...................................................................28
A.1.6 Definitions........................................................................................28
A.1.7 Machine and manufacturer's identification data.....29
A.1.8 Appliance identification..........................................................29
A.1.9 Copyright..........................................................................................29
A.1.10 Responsibility ..............................................................................29
A.1.11 Personal protection equipment ......................................30
A.1.12 Keeping the manual................................................................30
A.1.13 Recipients of the manual.....................................................30
A.2 Technical data........................................................ 31
A.2.1 General description....................................................................31
A.2.2 Main data..........................................................................................31
A.2.3 Performance, electric energy consumption and wire
diagrams........................................................................................................31
A.2.3.1 Characteristics............................................................................31
A.2.3.2 Wiring diagrams........................................................................32
B.1 Transport, handling and storage ......................... 33
B.1.1 Introduction.....................................................................................33
B.1.2 Transport: instructions for the carrier...............................33
B.1.3 Handling ............................................................................................33
B.1.4 Procedures for handling operations.................................33
B.1.5 Shifting................................................................................................33
B.1.6 Placing the load.............................................................................33
B.1.7 Storage................................................................................................33
B.2 Installation and assembly..................................... 34
B.2.2 Machine space limits..................................................................34
B.2.3 Positioning........................................................................................34
B.2.3.1 Opening of the packaging .................................................34
B.2.3.2 Installation.....................................................................................34
B.2.4 Disposal of packing.....................................................................34
B.2.5 Electrical connection .................................................................34
C.1 Operation............................................................... 35
C.1.1.1Controls...........................................................................................35
C.1.1.2 Mechanical safety devices..................................................35
C.1.1.3 Testing.............................................................................................35
C.2 Settings .................................................................. 35
C.2.1 Setting the work set point......................................................35
C.2.2 Maintenance and care of the slicer ..................................35
C.2.3 Sharpening operations.............................................................35
C.2.4 Sharpening blade........................................................................35
C.8 General safety rules .............................................. 36
C.8.1 Introduction....................................................................................36
C.8.2 Protection devices installed on the machine.............36
C.8.2.1 Mechanical safety ....................................................................36
C.8.2.2 Electrical safety..........................................................................36
C.8.3 Safety signs to be placed on the machine or near its
area ...................................................................................................................36
C.8.4 End of use.........................................................................................36
C.8.5 Instructions for use and maintenance............................36
C.8.6 Reasonably foreseeable improper use ...........................37
C.8.7 Residual risks...................................................................................37
D.1 Machine cleaning and maintenance.................... 38
D.1.1 General instructions...................................................................38
D.1.2 Parts removal..................................................................................38
D.1.3 Cleaning ............................................................................................38
D.1.1 Routine maintenance ..............................................................39
D.1.1.1 Precautions for maintenance ..........................................39
D.1.1.2 Blade change..............................................................................39
D.1.1.3 Precautions in case of long idle periods....................39
D.1.2 Extraordinary maintenance...................................................40
D.1.2.1 Quick troubleshooting guide...........................................40
D.1.3 Maintenance intervals..............................................................40
D.1.3.1 Maintenance frequency ......................................................40
D.1.3.2 Training...........................................................................................41
D.1.4 Disassembly ....................................................................................41
D.1.5 Decommissioning.......................................................................41
D.2 Machine disposal .................................................. 41
D.2.1 Waste storage.................................................................................41
D.2.2 Procedure regarding appliance dismantling macro
operations.....................................................................................................42
D.3 Enclosed documents............................................. 42

27
Foreword
The installation, use and maintenance manual (hereinafter Manual) provides the user with information necessary for
correct and safe use of the machine (hereinafter “machine” or “appliance”).
The following must not be considered a long and exacting list of warnings, but rather a set of instructions suitable for improv-
ing machine performance in every respect and, above all, preventing injury to persons and animals and damage to property
due to improper operating procedures.
All persons involved in machine transport, installation, commissioning, use and maintenance, repair and disassembly must
consult and carefully read this manual before carrying out the various operations, in order to avoid wrong and improper actions
that could compromise the machine's integrity or endanger people. Make sure to periodically inform the user regarding the
safety regulations. It is also important to instruct and update personnel authorised to operate on the machine, regarding its
use and maintenance.
The manual must be available to operators and carefully kept in the place where the machine is used, so that it is always at
hand for consultation in case of doubts or whenever required.
If, after reading this manual, there are still doubts regarding machine use, do not hesitate to contact the Manufacturer or the
authorisedServiceCentretoreceivepromptandpreciseassistance forbetteroperationandmaximumefficiencyofthemachine.
During all stages of machine use, always respect the current regulations on safety, work hygiene and environmental protec-
tion. It is the user's responsibility to make sure the machine is started and operated only in optimum conditions of safety for
people, animals and property.
The manufacturer declines any liability for operations carried out on the appliance without respecting the in-
structions given in this manual.
No part of this manual may be reproduced.

28
A.1 General information
A.1.1 General safety instructions
To ensuresafeuse ofthe machine and a properunderstanding
of the manual it is necessary to be familiar with the terms and
typographical conventions used in the documentation.
The following symbols are used in the manual to indicate and
identify the various types of hazards:
WARNING
Danger for the health and
safety of operators.
WARNING
Danger of electrocution -
dangerous voltage.
Words further explaining the type of hazard are placed next
to the symbols in the text.Warnings serve to ensure the safety
of personnel.
A.1.2 Additional Indications
In this manual the risks arising from incorrect use will be
marked with:
ATTENTION
Risk of damage to the machine or the product.
The parts of the text preceded by the following symbol:
NOTE
Clarications and explanations
provide recommendations to keep in mind during the entire
life-cycle of the product.
The drawings and diagrams given in the manual are not in
scale. They supplement the written information with an out-
line, but are not intended to be a detailed representation of
the machine supplied.
The numerical values given on the machine installation dia-
grams refer to measurements in mm.
A.1.3 Introduction
Given below is some information regarding the machine's in-
tended use, its testing, and a description of the symbols used
(thatidentifythetypeofwarning),thedefinitionsoftermsused
in the manual and useful information for the appliance user.
A.1.4 Intended use and restrictions
Our appliances are designed and optimised in order to obtain
high performance and efficiency. These slicers have been
manufactured to slice cooked and raw charcuterie, warm and
cold meats, bread and cheese, stoneless fruit and vegetables.
They can slice thicknesses up to 15mm. They are not suitable
for cutting frozen goods, charcuterie and meat on the bone or
fruit with stones. Any attempt to slice said products or similar
foods may result in serious damage to the machine and shall
cause the warranty to become void.
Any other use is deemed improper. The appliance must not
be used by people (including children) with limited physi-
cal, sensory or mental abilities or without experience and
knowledge of it, unless supervised or instructed in its use by
those responsible for their safety.
ATTENTION
The machine is not suitable for installation out-
doors and/or in places exposed to atmospheric
agents (rain, direct sunlight, etc.).
A.1.5 Test and inspection
Our appliances are designed and optimised, with laboratory
testing, in order to obtain high performance and efficiency.
The product is shipped ready for use.
Passingofthetests(visualinspection-electricaltest-functional
test) is guaranteed and certified by the specific enclosures.
A.1.6 Denitions
Listed below are the definitions of the main terms used in
the manual. It is advisable to read them carefully before use.
Operator
machineinstallation, adjustment, use,maintenance,cleaning,
repair and transport personnel.
Manufacturer
Electrolux Professional SpA or any other service centre autho-
rised by Electrolux Professional SpA.
Operator for normal machine use
anoperatorwho has been informed and trained regardingthe
tasks and hazards involved in normal machine use.
After-sales service or specialised technician
an operator instructed/trained by the Manufacturer and who,
basedon hisprofessionalandspecifictraining,experience and
knowledge of the accident-prevention regulations, is able to
appraise the operations to be carried out on the machine and
recogniseandpreventanyrisks.Hisprofessionalismcoversthe
mechanical, electrotechnical and electronics fields.
Danger
source of possible injury or harm to health.
Hazardous situation
any situation where an operator is exposed to one or more
hazards.
Risk
a combination of probabilities and risks of injury or harm to
health in a hazardous situation.
Protection devices
safety measures consisting of the use of specific technical
means (guards and safety devices) for protecting operators
against risks.
Guard
an element of a machine used in a specific way to provide
protection by means of a physical barrier.
Safety device
a device (other than a guard) that eliminates or reduces the
risk; it can be used alone or i n combination with a guard.

29
Customer
theperson whopurchasedthemachine and/orwhomanages
and uses it (e.g. company, entrepreneur, firm).
Electrocution
an accidental discharge of electric current on a human body.
A.1.7 Machine and manufacturer's identication data
A reproduction of the marking or data plate on the machine
is given below:
(1) Slicer model
(2) Voltage
(3) Single- or three-phase
(4) Frequency
(5) Power
(6) Amperage
(7) Serial number
(8) Year of production
(9) Name and address of the manufacturer
When installing the appliance, make sure the electrical con-
nection is carried out in compliance with that specified on
the data plate.
ATTENTION
Do not remove, tamper
withormakethemachine's
marking illegible.
NOTE
Refertothedatagivenonthemachine'smarking
for relations with the Manufacturer (e.g. when
ordering spare parts, etc.).
NOTE
When scrapping the machine, the marking must
be destroyed.
A.1.8 Appliance identication
This manual applies to various appliance models. For further
details regarding your model, refer to par.“xxx Dimensions,
performance and consumption”.
A.1.9 Copyright
Thismanualisintendedsolelyforconsultation by the operator
and can only be given to third parties with the permission of
Electrolux Professional SpA.
A.1.10 Responsibility
The Manufacturer declines any liability for damage and mal-
functioning caused by:
`non-compliance with the instructions contained in this
manual;
`repairs not carried out in a workmanlike fashion, and
replacements with parts different from those specified
in the spare parts catalogue (the fitting and use of non-
original spare parts and accessories can negatively affect
machine operation and invalidates the warranty);
`operations by non-specialised technicians;
`unauthorised modifications or operations;
`inadequate maintenance;
`improper machine use;
`unforeseeable extraordinary events;
`use of the machine by uninformed and untrained per-
sonnel;
`non-application of the current provisions in the count-
ry of use, concerning safety, hygiene and health in the
workplace.
The Manufacturer declines any liability for damage caused
by arbitrary modifications and conversions carried out by the
user or the Customer.
The employer, workplace manager or service technician are
responsible for identifying and choosing adequate and suita-
ble personal protection equipment to be worn by operators,
in compliance with regulations in force in the country of use.
ElectroluxProfessionalSpAdeclinesanyliabilityforinaccuracies
containedin the manual,ifduetoprintingortranslationerrors.
Any supplements to the installation, use and maintenance
manual the Customer receives from the Manufacturer will
form an integral part of the manual and therefore must be
kept together with it.

30
A.1.11 Personal protection equipment
Given below is a summary table of the Personal Protection Equipment (PPE) to be used during the various phases of the machi-
ne's service life.
Phase
Protection
garments
Safety
footwear
Gloves Glasses Ear
protectors
Mask Safety
helmet
Transport
Handling
Unpacking
Installation
Normal use
Adjustments
Routine cleaning
Extraordinary cleaning
Maintenance
Dismantling
Scrapping
Legend: PPE required; PPE available or to be used if necessary; PPE not required.
(*) During Normal use, gloves protect hands from the cold tray when being removed from the appliance.
Note: The gloves to be worn during cleaning are the type suitable for contact with the cooling fins (metal plates).
Failure to use the personal protection equipment by operators, specialised technicians or users can involve exposure to chemical
risk and possible damage to health.
A.1.13 Recipients of the manual
This manual is intended for:
`the carrier and handling personnel;
`installation and commissioning personnel;
`theemployerofmachineusersandtheworkplacemanager;
`operators for normal machine use;
`specialised technicians - after-sales service (see service
manual).
A.1.12 Keeping the manual
The manual must be carefully kept for the entire life of the
machine, until scrapping.
The manual must stay with the machine in case of transfer,
sale, hire, granting of use or leasing.

31
A.2 Technical data
A.2.1 GENERAL DESCRIPTION
The models listed on page 1 are designed to:
`Continuously cut any type of cold cuts, ham without bones,
meat and cheese
`Be safe to use, clean and service
`Ensure the highest degree of hygiene for all contact food
parts thanks to its stainless material
`Ensure the maximum cutting precision
`Be used between +5°C and +40°C
A.2.2 MAIN DATA
`External polished and anodised parts made in magnesium
aluminum alloy suitable for food contact, as prescribed by
1935/2004/CE European regulation
`Small parts and details made in stainless steel to avoid
oxidation
`Blade run by a high quality Poly-V transmission motor
`Noise and vibration of the machine are not disturbing for
the user
`Built-in blade sharpener to make sharpening and cleaning
easier
`Mechanical protection in compliance with the current
legislation
`Protection of the electrical parts in compliance with the
current legislation
`The pressure of sound emission on work station is below
70 dB(A)
`The vibration the user’s arm is subject to is below 2,5m/s2
A.2.3PERFORMANCE,ELECTRICENERGYCONSUMPTION
AND WIRE DIAGRAMS
WARNING!! THE ELECTRICAL STANDARDS FOR WHICHTHE
MACHINEISDESIGNEDARESTATEDONTHEPLATEONTHELEFT
SIDE OF THE SLICER. PLEASE MAKE SURE THAT THE VOLTAGE
OF THE POWER GRID IS THE SAME AS THE ONE STATED ON
THE MACHINE PLATE. MAKE SURE THAT A PROTECTION FROM
ELECTRIC OVERLOAD IS IN PLACE BEFORE CONNECTING THE
EQUIPMENT TO THE POWER GRID
A.2.3.1 CHARACTERISTICS
SLICER MODEL
601138
601114
LUX 250
EASY 250
601139
601115
603330
LUX 300P
601142
EASY 300P
601140
603331
LUX 350
EASY 350
601141
603332
LUX 370
EASY 370
LUX 390
EASY 390
BLADE DIAMETER 250 250 300 300 350 370 390
ABILITY OF CUT (mm)
ROUND PRODUCT 180 180 220 220 265 270 280
SQUARE PRODUCT 180X180 180X180 220X220 220X220 265X265 270X270 280X280
RECTANGULAR PRODUCT 220X180 220X180 230X220 230X220 340X265 340X270 340X280
CUTTING THICKNESS 0-15 0-15 0-15 0-15 0-24 0-24 0-24
TECHNICAL CHARACTERISTICS
VOLTAGE SINGLE PHASE
230V
SINGLE PHASE
230V
SINGLE PHASE
230V
THREE PHASE
380V
SINGLE PHASE
230V
THREE PHASE
380V
SINGLE PHASE
230V
THREE PHASE
380V
SINGLE PHASE
230V
THREE PHASE
380V
SINGLE PHASE
230V
THREE PHASE
380V
MOTOR POWER 0,20KW 0,25KW 0,22KW 0,25KW 0,37KW 0,37KW 0,37KW
ABSORPTION 0,85 A 1,3 A 2,8 A
1,2 A
1,3 A
1 A
2,8 A
1,1 A
2,8 A
1,1 A
2,8 A
1,1 A
WEIGHT (KG) 28 28 32 32 49 53 56
STANDARD EQUIPMENT BRUSH, OILCAN BRUSH, OILCAN BRUSH, OILCAN BRUSH, OILCAN BRUSH, OILCAN BRUSH, OILCAN BRUSH, OILCAN
PACKING DIMENSIONS
(mm) 660X660 H650 660X660 H650 850X660 H660 850X660 H660 850X660 H660 850X660 H660 850X660 H660

32
A.2.3.2 WIRING DIAGRAMS
SLICING
MACHINES
R
SLICING
MACHINES
R
SLICING
MACHINES
R
SLICING
MACHINES
R
601138 - 601114 - 601139 - 601115 - 603330 -
LUX 250 - LUX 300P - LUX 350 - LUX - 370 -
LUX 390 - EASY 250 - EASY 300P - EASY 350 -
EASY 370 - EASY 390
601140 - 603331 - 601141 - 603332 -
LUX 250 - LUX 300P - LUX 350 - LUX 370 -
LUX 390 - EASY 250 - EASY 300P -
EASY 350 - EASY 370 - EASY 390

33
B.1 Transport, handling and storage
B.1.1 Introduction
Transportation, either from one facility to another or inside
the same one, must be done with means with suitable ma-
ximum load.
B.1.2 Transport: instructions for the carrier
ATTENTION
Do not stand under sus-
pended loads during load-
ing/unloading operations.
Unauthorised personnel
must not enter the work
area.
Theweightoftheappliance
alone is not sucient to
keep it steady.
NOTE
The transported load can shift:
`when braking;
`when accelerating;
`in corners;
`on rough roads.
B.1.3 Handling
Arrange a suitable area with flat floor for machine unloading
and storage operations.
B.1.4 Procedures for handling operations
For correct and safe lifting operations:
`use the type of equipment most suitable for characteri-
stics and capacity (e.g. electric pallet truck or lift truck);
`cover sharp edges;
Before lifting:
`send all operators to a safe position and prevent persons
from entering the handling area;
`make sure the load is stable;
`make sure no material can fall during lifting. Manoeuvre
vertically in order to avoid impacts;
`handle the machine, keeping it at minimum height from
the ground.
ATTENTION
For machine lifting and
anchoring,donotusemov-
able or weak parts such as:
plastic protections (Fig.1
Pos.K),meatcarriage(Fig.1
Pos.B) meat pusher and its
knob (Fig.1PosC, P),on-o
buttons protruding from
themachine(Fig.2,Pos.I,D).
B.1.5 Shifting
The operator must:
`have a general view of the path to be followed;
`stop the manoeuvre in case of hazardous situations.
ATTENTION
Do not push or pull the
appliance to move it, as it
may tip over.
B.1.6 Placing the load
Before placing the load, make sure the way is free and that
the floor is flat and can take the load. Remove the appliance
from the wooden pallet, move it to one side, then slide it
onto the floor.
B.1.7 Storage
The machine and/or its parts must be stored and protected
from damp, in a non-aggressive place, free of vibrations and
with room temperatures between -10°C and 50°C. The place
wherethemachineis storedmusthavea flatsupportsurfaceto
avoid deforming the machine or damage to the support feet.
ATTENTION
Appliance positioning, in-
stallation and disassembly
must be carried out by a
specialised technician.
ATTENTION
Do not make modications to the parts sup-
plied with the appliance. Any missing or faulty
parts must be replaced with original parts.

34
B.2.3.2. Installation
Place the slicer on a smooth, flat and stable surface. Any une-
venness of the surface on which the machine is rested can
be compensated using the adjustable feet. In the event the
motor ventilation area faces a wall, make sure that a space of
at least 200mm is left between it and the wall.
Leave enoughroomaroundtheslicersothatitcanbe properly
operated, cleaned and serviced.
It is advisable to leave a space of at least 300mm free around
the machine.The slicer works properly in places with a relative
humidity level of less than 80% and near sources of heat of
no more than 30°C.
B.2.4 Disposal of packing
The packing must be disposed of in compliance with the cur-
rent regulations in the country where the appliance is used.
Allthepackingmaterialsareenvironmentallyfriendly.Theycan
be safely kept, recycled or burned in an appropriate waste in-
cinerationplant.Recyclableplasticparts aremarkedasfollows:
PE
polyethylene: outer wrapping,
instructions bag
PP
polypropylene: straps
The parts in wood and cardboard can be disposed of, re-
specting the current regulations in the country where the
machine is used.
B.2.5 Electrical connection
ATTENTION
If the power cable is dam-
aged it must be replaced
by the After-Sales Service
or in any case by qualied
personnel,inorderprevent
any risk.
Plug the machine into the outlet, making sure that the system
featuresanelectricaloverloadcutout.Toimprovesafetyfurther,
in the wall power supply insert a 50% higher amperage fuse
than the consumption (Ampere) marked in the rating plate
(see paragraph A.1.7).
The blade should rotate anticlockwise seen from theblade
guard side. Should the direction of rotation of the three-phase
slicers be incorrect, invert two of the three wires in the plug.
The connection to the electrical grid must be done in com-
pliance with the local regulation.
ATTENTION
Work on the electrical sys-
tems must only be carried
out by a qualied electri-
cian.
B.2 Installation and assembly
To ensure correct operation of the appliance and maintain
safe conditions during use, carefully follow the instructions
given below in this section.
ATTENTION
Theaboveoperationsmust
be carried out by the spe-
cialised technician in con-
formity with the current
safety regulations, regard-
ingtheequipmentusedand
the operating procedures.
Before moving the appli-
ancemakesurethecapacity
of the lifting equipment
used is suitable for its
weight.
B.2.2 Machine space limits
A suitable space must be left around the machine (for ope-
rations, maintenance, etc.). This space must be increased in
case of use and/or transfer of other equipment and/or means
or if exit routes are necessary inside the workplace. Refer to
par. “B.2.3 Positioning” for information regarding distances
from any other machines present in the room (in fact, close
proximity can create problems of condensate forming on the
walls of the appliance).
B.2.3 Positioning
On receiving the box containing the slicer, make sure that it is
intact and has not been damaged during transit.
B.2.3.1 Opening of the packaging
1- Cut and remove the plastic straps;
2 - Remove the metal staples;
3 - Open the box on its upper side, locate the user guide,
maintenance manual and CE conformity declaration;
4 - Remove the slicer from the box by lifting it upwards;
WARNING!! USERS MUST FOLLOW THE INSTRUCTIONS OF
PARAGRAPH B.1.3 THOROUGHLY TO AVOID ANY DAMAGE TO
THE EQUIPMENT AND DANGER FOR PEOPLE DURING THE
WHOLE PROCEDURE.
5 - Remove the polyethylene bag;
6- Lift the machine: two people are required to handle the
machine, using the feet as handholds;
7 - Check the contents of the packaging, making sure they
correspond to the specifications on the documents;
WARNING:THEPACKAGINGCANBEDISPOSEDOFASMUNICIPAL
SOLIDWASTE:COMPLYWITHTHELAWDISPOSITIONSINFORCE
IN THE PLACE OF INSTALLATION. DO NOT LITTER: DISPOSE OF
THE PARTS MAKING UP THE PACKAGING APPROPRIATELY.

35
C.1 Operation
Use the slicer as it was designed to be used. Never push the
product towards the blade by hand. The product carriage is
tilted so as to enable the product to slide towards the blade
under its own weight. Keep hands well away from the blade
and use the relevant handle to move the product carriage
safely back and forth.
C.1.1.1 Controls
The slicers are switched on and off electrically by means of
two buttons, I (start) and O (stop). Both feature a white lamp
which indicates when the blade is rotating. The machine fe-
atures a safety switch in the blade guard connected with a
no voltage relay. Every time the supply voltage is cut off, the
button“I”(start)mustbepressedtostartthe machineupagain.
C.1.1.2 Mechanical safety devices
`With the exception of the actual cutting section, the
blade is totally protected by an irremovable guard which
cannot be removed.
`The product carriage can be removed only if the fence
covers the blade and the graduated knob position is
between 15 and 0.
`Thesliceassemblycanonly beopened(usingthe gradua-
ted knob) if the product carriage is secured in its normal
operating position.
`The blade can only be removed using the bladeremoval
tool supplied.
`None of the safety devices can be removed; dismant-
ling or tampering with them would make the machine
unsafe, and result in the manufacturer no longer being
responsible for any accidents.
C.1.1.3 Testing
`Make sure all the slicer components are assembled
properly.
`Check the handwheel securing the blade guard is locked
in place.
`Press the start button and check the machine can be
switched on and off.
`Check the sliding of the product carriage and product
press.
`Check the sharpening device works properly.
`Check the opening of the slice assembly
C.2 Settings
C.2.1. Setting the work set point
WARNING!! WITH SWITCHED OFF MOTOR, MAKE SURETHE
EDGE OF THE BLADE IS COVERED AND PROTECTED BY THE
FENCE BEFORE PUTTING THE PRODUCT ON THE MACHINE.
WARNING!! THE PRODUCT CUT MUST BE DONE BY USING
THE SPECIAL HANDLES AND KNOBS.
WARNING!! IT IS THEREFORE FORBIDDEN TO BLOCK THE
PRODUCT ON THE CARRIAGE WITH HANDS.
1) Put the graduated knob (A) in the position between 15
(fifteen) and 0 (zero) by turning the knob clockwise on full
lock. Make sure the blade edge is fully covered and protected
by the fence.
2) Move the product carriage “B” as far away from blade “K”
as possible.
3) Lift the product press“C”using the relevant handle. Set the
product down on the product carriage, lower the product
press onto or behind the product.
4) Select the desired thickness by means of knob“A”.
5) Press the button “I”(start).
WARNING!! ALWAYS CHECKTHATTHELIGHTINTHEON-OFF
BUTTON TURNS ON AS THE EQUIPMENT IS SWITCHED ON.
6) Push the product carriage to slice the product by means
of handle “D”.
7) Once you have finished using the machine, swith it off by
pressing the “O” (stop) button and set the graduated knob
in the space between 15 (fifteen) and “0” (zero) by turning it
clockwiseonfulllock.Makesuretheblade edgeisfullycovered
and protected by the fence.
C.2.2. Maintenance and care of the slicer
For the sake of hygiene, the slicer must be kept clean.The ma-
chine must be disassembled and cleaned at the end of each
working day, and whenever the type of product being sliced
is changed (e.g. change from raw meats to cooked meats)
following the sequence illustrated in fig. 2.
C.2.3. Sharpening operations
WARNING!! the sharpening operation must be performed
by skilled personnel.
Never attempt to clean the blade whilst it is moving. The
sharpening device can no longer sharpen the blade once its
diameter is worn down by 6 mm.
If the slicer is to work properly, the blade must be kept sharp.
It is better to sharpen it a little daily than a lot once a week.
WARNING!! THE BLADE MUST BE CLEANED AS DESCRIBED
IN PARAGRAPH D.1.3 BEFORE SHARPENING.
DO NOT SHARPEN THE BLADE ANY FURTHER WHEN THE
DISTANCE BETWEEN BLADE EDGE AND BLADE GUARD
INTERNAL BORDER REACHES 6MM. AT THIS POINT IT IS
COMPULSORY TO CHANGE THE BLADE BY THOROUGHLY
FOLLOWING THE INSTRUCTIONS OF PARAGRAPH D.1.1.2
Sharpening a dirty blade results in a poor sharpening and
the deterioration of the sharpener and its stones, leading to
muchworseperformance.Remove anystoneremainfrom the
blade and the machine with a cloth soaked with soapy water
or alcohol after sharpening.

36
C.8.2.2 Electrical safety
The slicer’s electrical system is EN 60204 -1 compliant.
A relay in the control circuit makes that the re-start of the
equipment after an accidental power failure has to be done
manually (voluntary reset).
C.8.3 Safety signs to be placed on the machine or near
its area
Danger Meaning
danger of electrocution
(shown on electrical parts with
indication of voltage)
ATTENTION
Do not remove, tamper
with or make illegible the
safety, danger and instruc-
tion signs and labels on
the machine.
C.8.4 End of use
When the appliance is no longer to be used, make it unusable
by removing the mains power supply wiring.
C.8.5 Instructions for use and maintenance
Risks mainly of a mechanical, thermal and electrical nature
exist in the machine.
Where possible the risks have been neutralised:
`directly, by means of adequate design solutions,
`indirectly by using guards, protection and safety devices.
Any anomalous situations are signalled on the control panel
display.
During maintenance several risks remain, as these could not
be eliminated, and must be neutralised by adopting specific
measures and precautions.
Donotcarryoutanychecking,cleaning,repairormaintenance
operations on moving parts.
Workers must be informed of this prohibition by means of
clearly visible signs.
To guarantee machine efficiency and correct operation, pe-
riodical maintenance must be carried out according to the
instructions given in this manual.
Inparticular,makesuretoperiodicallycheckcorrect operation
of all the safety devices and the insulation of electrical cables,
which must be replaced if damaged.
WARNING!! Before sharpening make sure the graduated
knob is in the position between 15 (fifteen) and 0 (zero), that
is on full clock clockwise with blade edge fully covered and
protected by the fence.
C.2.4. Sharpening blade (Fig. 4)
1) Remove the grease from the blade both inside and out
using a cloth dampened with alcohol.
2)Turn the knob half a turn fig. 4.1. Lift the sharpening device,
rotate it 180° and lower it again fig. 4.2, secure the sharpening
device in place by tightening the knob half a turn.
3) Start the machine up, press the button until the grinding
wheel presses slightly against the blade. This operation is
complete when a slight burr forms on the front edge of the
blade: this is checked by switching off the machine Fig. 4.3.
4) Start the machine up, press the appropriate knob Fig. 4.4
until the deburring wheel approaches the blade for a maxi-
mum of 2 seconds. Switch off the machine and make sure the
burr has been removed.
5) Return the sharpening device to its initial position by tur-
ning the knob Fig. 4.1. Clean the blade and all the parts cove-
red with the dust produced by the sharpening using a cloth
dampened with alcohol.
C.8 General safety rules
C.8.1 Introduction
The machines have electric and/or mechanical safety devices
for protecting workers and the machine itself. Therefore the
user must not remove or tamper with such devices.
The Manufacturer declines any liability for damage due to
tampering or their non-use.
C.8.2 Protection devices installed on the machine
C.8.2.1 Mechanical safety
As far as mechanical risk is concerned, the slicer is
EN1974:1998+A1 “Slicing machines - Safety and hygiene re-
quirements”Europeanregulationcompliant,andthereforealso
complies with 2006/42/CE Machinery Directive.
The most important protection devices are:
a) FIXED blade guard ring to protect the whole pat of the
machine not used while cutting.
b)Carriage removable for cleaning only with graduated knob
in full lock clockwise, and therefore with fully covered and
protectedbladeedge.Theseconditionsremainmechanically
unchanged as long as the carriage is removed.
c) Removable blade cover for cleaning.
d) Clear plastic fingers protection fixed to the carriage. Built-in
aluminum thumb protection on the carriage.
e) Meat pusher with hilt handle positioned at least 150mm
from the blade
f) Plastic blade remover tool for a safe blade removal.
WARNING!! The protectionare not removable.Anyattempt
to remove or disassemble them makes the slicer a dangerous
equipmentforwhichtheproducerisnottobeheldresposible.

37
ATTENTION
Extraordinary machine
maintenance operations
must only be carried out
by specialised technicians
provided with all the ap-
propriate personal pro-
tection equipment (safe-
ty shoes, gloves, glasses,
overalls, etc.), tools, uten-
sils and ancillary means.
Never operate the ma-
chine, removing, modify-
ing or tampering with the
guards, protection or safe-
ty devices.
Before carrying out any
operation on the machine,
always consult the manu-
al, which gives the correct
procedures and contains
important information on
safety.
C.8.6 Reasonably foreseeable improper use
Improper use is any use different from that specified in this
manual. During machine operation, other types of work or
activities deemed improper and that in general can involve
risks for the safety of operators and damage to the appliance
are not allowed.
Reasonably foreseeable improper use includes:
`lack of machine maintenance, cleaning and periodical
checks;
`structuralchangesormodificationstotheoperatinglogic;
`tampering with the guards or safety devices;
`failure to use personal protection equipment by opera-
tors,specialisedtechniciansand maintenancepersonnel;
`failure to use suitable accessories (e.g. use of unsuitable
equipment or ladders);
`keeping combustible or flammable materials, or in any
case materials not compatible with or pertinent to the
work, near the machine;
`wrong machine installation;
`placing in the machine any objects or things not com-
patible with refrigeration, freezing or preservation, or
that can damage the machine, cause injury or pollute
the environment;
`climbing on the machine;
`non-compliance with the requirements for correct ma-
chine use;
`other actions that give rise to risks not eliminable by the
Manufacturer.
ATTENTION
The previously described
actions are prohibited!
C.8.7 Residual risks
The machine has several risks that were not completely eli-
minated from a design standpoint or with the installation of
adequate protection devices.
Nevertheless,throughthismanualthe Manufacturerhastaken
steps to inform operators of such risks, carefully indicating the
personal protection equipment to be used by them.
Sufficient spaces are provided for during the machine instal-
lation stages in order to limit these risks.
To preserve these conditions, the areas around the machine
must always be:
`kept free of obstacles (e.g. ladders, tools, containers,
boxes, etc.);
`clean and dry;
`well lit.
For the Customer's complete information, the residual risks
remaining on the machine are indicated below: such actions
are deemed improper and therefore strictly forbidden.
Residual risk Description of hazardous situation
EXPOSED BLADE
PART NOT
PROTECTED
BY THE BLADE
GUARD RING
FOLLOW THE INSTRUCTIONS OF
PARAGRAPHC.2OFTHEMANUALWHILE
USING THE SLICER
BLADE GUARD
PLEASE NOTE THAT THE BLADE GUARD
RING DOES NOT COMPLETELY PREVENT
CUTTING RISK INTHE SHARPENER AREA,
EVEN THOUGH THE POSSIBILITY AND
SERIOUSNESS OF ANY ACCIDENT IS
HIGHLY DECREASED
MEAT PUSHER
WITH SPIKES
THE MEAT PUSHER SPIKES MAY HURT
USERS IF TOUCHED WITH HANDS

38
Do not use sodium hypochlorite based products or abrasive
detergent for cleaning to prevent the anodised parts of the
machine from damage.
D.1.2 Parts removal
REMOVALOFTHECARRIAGEWITHINTERLOCK(Fig. 2 eFig.2/A)
1) Isolate the machine from the power supply by unplugging
it, or switching off the automatic switch located near the
outlet. Never settle for simply pressing the slicer’s “O”button.
2) Put the graduated knob (A) in the position between 15 (fif-
teen) and 0 (zero) by turning the knob clockwise on full lock.
Make sure the blade edge is fully covered and protected by
the fence. (Fig. 2/A)
3) Unscrew handwheel“Q”completely in any position.
4) With a relatively firm jerk, pull the product carriage towards
the stop “R” so that the locking mechanism engages. Slide
the product carriage unit vertically from its guide. The slice
assembly remains locked in the“0” position.
5) Unscrew the fastening handwheel“F”completely, hold the
blade guard“L” and remove it from the machine completely
6) Always check that in these conditions the fence is blocked.
REMOVAL OF THE COVER BLADE (Fig.2)
1) Unscrew the cover blade knob completely (F)
2) Press the knob in order to slightly press the internal part of
the cover blade (L) too and move it from its position
3) Remove the cover blade by holding the knob or the upper
edge of the disk.
Make sure that the user has been properly trained to use the
machine as prescribed by this manual.
Use only water and neutral detergent / disinfectant (PH 7-8)
for degreasing and disinfection, rinse and dry only with clean
water and a soft, dry cloth.
Do not use the aforementioned products at temperatures
above 45°C.
REMOVAL OF THE SHARPENER (FIG.2)
WARNING!! beware of the exposed cutting blade edges
that could injure the user when the sharpener is not in place.
`Unscrew the knob with 3 turns (H)
`Hold the knob (V) and lift the sharpener upwards removing
it from the slicer.
D.1.3 Cleaning
BLADE CLEANING
WARNING!! The maximum attention must be paid during
the procedure due to cutting risk. Before cleaning the blade,
unplug the machine from the power grid.
`Close the fence: put the graduated knob (A) in the posi-
tion between 15 (fifteen) and 0 (zero) by turning the knob
clockwise on full lock. Make sure the blade edge is fully
covered and protected by the fence (Fig. 2/A).
`To do this make sure that the cover blade and the carriage
have already been removed.
`Press the front surface with a wet cloth and slowly move it
from the center to the edge of the blade while turning the
blade with a hand.
`Repeat for the back of the blade.
`Dry the blade following the same procedure with a soft,
dry cloth.
D.1 Machine cleaning and
maintenance
ATTENTION
Before carrying out any
cleaning or maintenance,
disconnect the appliance
from the power supply and
carefully unplug it.
During maintenance, the
cableandplugmustbekept
in a visible position by the
operator carrying out the
work.
Do not touch the appliance
with wet hands or feet or
when barefoot.
ATTENTION
Do not remove the safety
guards.
Use suitable personal pro-
tectionequipment(protec-
tive gloves).
WARNING!! BEFORE CLEANING OR SERVICING THE SLICER,
MAKE SURE THAT:
`THE PLUG IS NOT CONNECTED TO THE POWER GRID
`THE FENCE HAS BEEN CLOSED BY TURNING THE
GRADUATEDKNOB“A”CLOCKWISEONFULLLOCKTILLTHE
POSITION BETWEEN “15” (FIFTEEN) AND “0” (ZERO), AND
THEREFORE THE BLADE EDGE IS COMPLETELY COVERED
AND PRTECTED BY THE FENCE.
D.1.1 General instructions
In order to maintain the highest degree of hygiene, the slicer
hastobecleanedattheendof everyworking dayandanytime
a new product is cut (ex.: cooked meat is cut after fresh meat),
as showed in picture 2.
Make sure that the user has been properly trained to use the
machine as prescribed by this manual.
Use only water and neutral detergent / disinfectant (PH 7-8)
for degreasing and disinfection, rinse and dry only with clean
water and a soft, dry cloth.
Do not use the aforementioned products at temperatures
above 45 ° C.

39
BLADE GUARD RING CLEANING
WARNING!! The maximum attention must be paid during
the procedure due to cutting risk. Before cleaning the blade,
unplug the machine from the power grid.
`Close the fence: put the graduated knob (A) in the posi-
tion between 15 (fifteen) and 0 (zero) by turning the knob
clockwise on full lock. Make sure the blade edge is fully
covered and protected by the fence (Fig. 2/A).
`To do this make sure that the cover blade and the carriage
have already been removed.
`Slightly press the cloth against the ring and manually rotate
it on the whole ring.
REMOVED PARTS CLEANING
All parts removed as instructed in paragraph D.1.2, with the
exception of the sharpener, must be cleaned with neutral
detergents or disinfectants. Once cleaned, the parts must be
dried with a dry cloth and assembled again by following the
procedure of paragraph D.1.2 in reverse order.
`The cleaning of the sharpener must be done only with a dry
brush.Use onlybrushandsolventtocleanthestonesaswell.
SLICER CASTING CLEANING
`Remove with hands or a wet cloth the bigger remains of
the product.
`Thoroughly clean the casting with a wet cloth and/or a
brush/spray and neutral detergent.
`Sanitise it with a cloth or brush and the products approved
by the Ministerial Supervisory Organisations mentioned in
paragraph D1.1
`Rinse with clear water and a cloth or brush.
WARNING!! Do not use water jets to clean the upper parts
of the casting and the lower ones inside.
D.1.1 Routine maintenance
ATTENTION
Disconnect the power sup-
ply before cleaning the
appliance.
D.1.1.1 Precautions for maintenance
Routine maintenance operations can be carried out by non-
specialised personnel, carefully following the instructions
given below. The manufacturer declines any liability for
operationscarriedoutonthemachinewithoutfollowing
these instructions.
`Clean the slicer thoroughly as described in section D.1
depending on the use frequency, but at least once a day
`Sharpen the blade when necessary
`Lubricate the marked parts in Fig.3 every two months
or anytime the carriage does not move properly. Please
only use MARCOL 82 ESSO or WHITE OIL 105 BERGOIL.
Lubrication should be done frequently with moderate
amounts of product.
ATTENTION
Do not clean the machine
with jets of water.
ATTENTION
Do not use steel wool or similar material to
clean the stainless steel surfaces. Do not use
detergents containing chlorine, solvent-based
detergents (e.g. trichloro-ethylene) or abrasive
powders.
`The power cord can be changed only by a specialised tech-
nician or the technical assistance service.
`A specialised technician or the technical service will also
change the sharpening and honing stones when worn
out or too greased.
D.1.1.2 Blade change
ATTENZIONE!! WHEN THE DISTANCE BETWEEN BLADE
EDGE AND BLADE GUARD INTERNAL BORDER REACHES 6MM.
AT THIS POINT IT IS COMPULSORY TO IMMEDIATELY CHANGE
THE BLADE.
ATTENZIONE!! Themaximumattentionmustbepaidduring
the procedure due to cutting risk. Before cleaning the blade,
unplug the machine from the power grid.
ATTENZIONE!! This procedure can be carried out only by
a specialised technician or the technical assistance service as
described in paragraph D.1.1.3
`Close the fence: put the graduated knob (A) in the posi-
tion between 15 (fifteen) and 0 (zero) by turning the knob
clockwise on full lock. Make sure the blade edge is fully
covered and protected by the fence (Fig. 2/A).
`To do this make sure that the cover blade and the carriage
have already been removed.
`Position the blade remover“J”(Fig. 2) and fix it on the threa-
dedholes of thebladeusingthetwo“W”handwheels (Fig.2).
With a screwdriver unscrew the 4 or 3 blade screws, then
remove the blade, grabbing the two handwheel.
ATTENZIONE!! The maximum attention must be paid
during the procedure due to cutting risk: PLEASE NOTE THAT
THE PRESENCE OFTHE BLADE REMOVER ONTHE BLADE DOES
NOT COMPLETELY PREVENT CUTTING RISK, EVEN THOUGH
THE POSSIBILITY AND SERIOUSNESS OF ANY ACCIDENT IS
HIGHLY DECREASED.
`To mount the blade back again, follow the instructions of
paragraph D.1.1.2 in reverse order.
D.1.1.3 Precautions in case of long idle periods
If the appliance is not going to be used for some time, take
the following precautions:
`Make sure the power cord is intact
`Make sure the on-off buttons are intact
`Lubricate the marked parts on paragraph D.1.1.1 before use
`Sharpen the blade as described in paragraph C.2.3 – C.2.4
ATTENTION
Work on the electrical
equipment must only be
carried out by a special-
ised electrician or the Af-
ter-Sales Service.

40
B. During operation the blade slows down or stops:
`Unsuitable products are being sliced (frozen ones or
products with bones)
`Blunt blade
`Appliance designed for three-phase 380-400V power
supply, but connected to three-phase 220-240V supply
C. The machine is very noisy:
`Wear of drive system or motor
`Wear of blade support bearings
D. The carriage is difficult to remove:
`The graduated knob is not on full lock
`Users have to pull the carriage towards themselves
`Wear of cinematic system components
D.1.3 Maintenance intervals
The inspection and maintenance intervals depend on the
actual machine operating conditions and ambient condi-
tions (presence of dust, damp, etc.), therefore precise time
intervals cannot be given. In any case, careful and periodical
machine maintenance is advisable in order to minimise ser-
vice interruptions.
It is advisable to stipulate a preventive and scheduled
maintenance contract with the After-Sales Service.
D.1.3.1 Maintenance frequency
To ensure constant machine efficiency, it is advisable to carry
outthecheckswiththefrequency givenin the followingtable:
Maintenance, inspections, checks and cleaning Frequency
Routine cleaning
general cleaning of machine and surrounding area
daily
Mechanical protection devices
check their condition and for any deformation,
loosening or removed parts
monthly
Control
check the mechanical part, for cracks or
deformation, tightening of screws: check the
readability and condition of words, stickers and
symbols and restore if necessary
yearly
Machine structure
tightening of main bolts (screws, fixing systems,
etc.) of machine
yearly
Safety signs
check the readability and condition of safety signs
yearly
Blade
check that the distance between the blade and
the blade guard ring is below 6mm. Otherwise the
blade must be changed immediately (see section
D.1.1.2)
weekly
Sharpening stones
check their wear and abrasiveness. Replace them if
they are worn out
monthly
Lubrication
lubricate the marked parts in fig.3 with the
supplied oil
monthly
Electrical connection cable and plug
check the connection cable (replace if necessary)
and plug
yearly
General machine overhaul
check all components, electrical equipment,
corrosion, pipes…
every
10years*
ATTENTION
Machine maintenance,
checking and overhaul
operations must only be
carried out by a special-
ised technician or the Af-
ter-Sales Service, provided
withsuitablepersonal pro-
tection equipment (safety
shoesandgloves),toolsand
ancillary means.
Put the machine in safe
conditions before starting
any maintenance opera-
tion.
Respect the requirements
for the various routine and
extraordinarymaintenance
operations. Non-compli-
ance with the instructions
can create risks for person-
nel.
Aftercarryingout maintenance makesurethe machine isable
to work safely and, in particular, that the protection and safety
devices are efficient.
D.1.2 Extraordinary maintenance
ATTENTION
WEARPROTECTIVEGLOVES
AND A MASK WHEN CAR-
RYING OUT ANY EXTRAOR-
DINARY MAINTENANCE
OPERATIONS.
NOTE
Extraordinary maintenance must be carried out
by specialised personnel, who can ask the man-
ufacturer to supply a servicing manual.
D.1.2.1 Quick troubleshooting guide
In some cases, faults can be eliminated easily and quickly by
following a brief troubleshooting guide:
A. The machine cannot be switched on:
`No power supply in appliance
`No main power supply
`Faulty electrical circuit

41
(*) the machine is designed and built for a duration of about
10 years. After this period of time (from commissioning) the
machine must undergo a general inspection and overhaul.
Some examples of checks to be carried out are given below.
`check for any oxidised electrical components or parts; if
necessary, replace them and restore the initial conditions;
`check the structure and welded joints in particular;
`check and replace bolts and/or screws, also checking for
any loose components;
`check the electrical and electronic system;
`check the functionality of safety devices;
`checkthegeneralconditionofprotectiondevicesandguards.
ATTENTION
Machine maintenance,
checking and overhaul
operations must only be
carried out by a special-
ised technician or the Af-
ter-Sales Service, provided
withsuitablepersonal pro-
tection equipment (safety
shoesandgloves),toolsand
ancillary means.
ATTENTION
Work on the electrical
equipment must only be
carried out by a special-
ised electrician or the Af-
ter-Sales Service.
D.1.3.2 Training
During the machine’s installation, it is absolutely essential that
an operator of age be trained in the regular use-cleaning-
care-sharpeningoftheblade,especiallyregardingthehazards
which are likely to be encountered if the machine is used
incorrectly. The training will be given by the suitably autho-
rized installer who is familiar with the European community
machine standards.
D.1.4 Disassembly
Iftheappliancehastobedisassembledandthen reassembled,
make sure the various parts are assembled in the correct order
(if necessary mark them during disassembly).
Beforedisassemblingthemachine,makesuretocarefullycheck
its condition, and in particular any parts of the structure that
can give or break. Before starting disassembly:
`remove all the pieces (if present) in the machine;
`disconnect the power supply;
`enclose the work area;
`place a sign on the Main Electrical Panel indicating that
themachineisundergoingmaintenance and not to carry
out manoeuvres;
`carry out the disassembly operations.
ATTENTION
All scrapping operations
must occur with the ma-
chinestoppedandcoldand
theelectricalpowersupply
disconnected.
Work on the electrical
equipment must only be
carried out by a qualied
electrician, with the power
supply disconnected.
ATTENTION
To carry out these opera-
tions,appropriatePPEmust
be used.
During disassembly and
handling of the various
parts, the minimum height
from the floor must be
maintained.
D.1.5 Decommissioning
If the machine cannot be repaired, carry out the decommis-
sioning operations, signalling the failure with a suitable sign,
andrequestassistanceofthemanufacturer'safter-salesservice.
D.2 Machine disposal
ATTENTION
Dismantling operations
mustbecarriedoutbyquali-
ed personnel.
ATTENTION
Work on the electrical
equipment must only be
carried out by a qualied
electrician, with the power
supply disconnected.
D.2.1 Waste storage
Attheend of theproduct's life-cycle, makesureitis not disper-
sed in the environment. The doors must be removed before
scrapping the appliance.
special waste materials can be stored temporarily while awai-
ting treatment for disposal and/or permanent storage.

42
ATTENTION
Make the appliance unus-
ablebyremovingthepower
cableandanycompartment
closing devices, to prevent
the possibility of someone
becoming trapped inside.
NOTE
When scrapping the machine, the“CE”marking,
thismanualandotherdocumentsconcerningthe
appliance must be destroyed.
D.3 Enclosed documents
`Wiring diagram
`Installation diagram
`”CE”Declaration of Conformity
In any case, the current environmental protection laws in the
user's country must be observed.
D.2.2Procedureregardingappliancedismantlingmacro
operations
Before disposing of the machine, make sure to carefully check
its physical condition, and in particular any parts of the struc-
ture that can give or break during scrapping.
The machine's parts must be disposed of in a differentiated
way, according to their different characteristics (e.g. metals,
oils, greases, plastic, rubber, etc.).
Different regulations are in force in the various countries, the-
refore comply with the provisions of the laws and competent
bodies in the country where scrapping takes place.
In general, the appliance must be taken to a specialised col-
lection/scrapping centre.
Dismantletheappliance,groupingthecomponentsaccording
to their chemical characteristics, remembering that the com-
pressor contains lubricant oil and refrigerant fluid which can
be recycled, and that the refrigerator components are special
waste assimilable with urban waste.
The symbol on the product indicates that this product
should not be treated as domestic waste, but must be
correctly disposed of in order to prevent any negative
consequences for the environment and human health.
For further information on the recycling of this product,
contact the local dealer or agent, the after-sales service
or the local body responsible for waste disposal.
This manual suits for next models
19
Table of contents
Other Electrolux Professional Kitchen Appliance manuals
