electronics trading & production SwayStar User manual

V3.00
Manual English
Manual UK SwayStar v3 20 02_eng.odt | Date: 2 /01/2007 10:43:46 PM| Version: 2.00.02 Page 1 of 28

1 Contents
1 CONTENTS................................................................................................................2
2 INTRODUCTION........................................................................................................4
2.1 GENERAL.............................................................................................................................4
2.2 TECHNICAL SAFETY................................................................................................................
2.3 INSTRUCTIONS FOR USE........................................................................................................... 6
2.4 SYSTEM REQUIREMENTS.......................................................................................................... 7
2. DURABILITY.......................................................................................................................... 7
3 DELIVERY..................................................................................................................8
3.1 ACCESSORIES....................................................................................................................... 8
4 DESCRIPTION OF SWAYSTAR™............................................................................9
4.1 THE SYSTEM........................................................................................................................ 9
4.2 APPLICATIONS....................................................................................................................... 9
4.3 PROCEDURES..................................................................................................................... 10
4.4 SPECIAL ADVANTAGES...........................................................................................................10
NEW FUNCTIONS...................................................................................................11
6 INSTALLATION OF RECOMMENDED SOFTWARE AND DRIVER..................... 12
6.1 INSTALLATION OF THE SOFTWARE............................................................................................. 12
6.1.1 Installation of the Bluetooth® driver for the Dongle................................................................................ 12
6.2 SWAYSTAR™ SOFTWARE UPDATE......................................................................................... 13
7 GETTING STARTED / ASSEMBLY........................................................................14
7.1 STEP 1: CONNECTING THE SWAYSTAR™ DEVICE.......................................................................14
7.1.1 Checking the Bluetooth® connection ..................................................................................................... 1
7.2 STEP 2: SETUP OF THE SWAYSTAR™ SOFTWARE..................................................................... 16
7.3 STEP 3: ATTACH THE SWAYSTAR™ TO THE PATIENT................................................................... 17
7.3.1 Placement of the belt.............................................................................................................................. 17
8 CHARGING THE BATTERIES................................................................................18
9 INDICATOR LIGHTS...............................................................................................19
9.1 UPPER LED (POWER STATUS).............................................................................................. 19
9.2 MIDDLE LED (SENSOR STATUS)............................................................................................ 19
Manual UK SwayStar v3 20 02_eng.odt | Date: 2 /01/2007 10:43:46 PM| Version: 2.00.02 Page 2 of 28

9.3 LOWER LED (CHARGING STATUS).......................................................................................... 19
10 CLEANING / CARE / MAINTENANCE..................................................................21
10.1 CLEANING AND CARE.......................................................................................................... 21
10.2 MAINTENANCE...................................................................................................................21
11 STORAGE AND TRANSPORT.............................................................................22
12 TROUBLESHOOTING...........................................................................................23
12.1 ONE OR MORE LEDS ARE NOT LIGHT.....................................................................................23
12.2 NO CONNECTION TO THE SWAYSTAR™ DEVICE (THROUGH BLUETOOTH®)......................................23
13 WARRANTY...........................................................................................................24
14 DECLARATION OF CONFORMITY......................................................................2
1 TECHNICAL DATA................................................................................................26
1 .1 SWAYSTAR™ DEVICE........................................................................................................ 26
1 .2 BLUETOOTH® MODULE.......................................................................................................26
1 .3 POWER SUPPLY.................................................................................................................26
1 .4 LABELLING....................................................................................................................... 27
1 . DISPOSAL........................................................................................................................ 27
16 MANUFACTURER.................................................................................................28
Manual UK SwayStar v3 20 02_eng.odt | Date: 2 /01/2007 10:43:46 PM| Version: 2.00.02 Page 3 of 28
2 Introduction
2.1 General
You have purchased a SwayStar™ System from etp and BII to measure balance and perform movement
analyses. We thank you for your trust in our product. SwayStar™ has been developed and manufactured
according to the specifications and regulations of the current available technology. All components fulfil the
demands for functionality and safety and have the CE-mark according to the requirements 93/42/EWG for
medical products.
To facilitate the use of the system,
we created this manual….
…which describes the technique and use of the system
…which provides you with advice for storage and care of the system
…which helps you with troubleshooting.
Every person, who uses this product, should have read the paragraphs of this manual, which are
marked with this symbol. Please retain this manual. It should be available for all employees at all
times. This will avoid handling errors and insures undisturbed operating of the system.
The texts and pictures in this manual do not necessarily correspond to the shipment received, and the symbols
are not mapped to scale.
Technical alterations to the system may occur.
Manual UK SwayStar v3 20 02_eng.odt | Date: 2 /01/2007 10:43:46 PM| Version: 2.00.02 Page 4 of 28
2.2 Technical safety
Before using the device for the first time, check it for any transportation damage. Before connecting and starting
up the SwayStar™ it is imperative to read the manual in order to avoid faulty installation. Please carry out the
instructions carefully to be able to use SwayStar™ without any problems.
Please notice, that the device has an active power source (lithium-ion-battery). To recharge the battery, use the
cables provided with the device.
Do not open the device or one of its components!
When you have a problem with the device or one of its components, please contact your supplier or technical
contact person.
As a power source (in Europe) you should use a properly installed power socket (220 / 230 Volt, 0 Hz). The
power cord is only to be removed from the power socket by grasping and pulling out the plug. Do not touch the
plug with wet hands. Do not loop or bend the power cord or connecting cable around sharp edges. In general;
protect the connecting cable and power cord against any mechanical damage. Lay the cables from the device
avoiding the risk of compressing the cables and do not place anything on the power cord.
Following DIN EN 60601-1-2 you should notice that for the SwayStar™ device special precautions
should be taken conceerning electromagnetic (EM) exposure. The device was tested according to
EM-guidelines and is safe for use under normal circumstances. Portable and mobile HF-equipment
can influence the function of the device, but not its safety.
Manual UK SwayStar v3 20 02_eng.odt | Date: 2 /01/2007 10:43:46 PM| Version: 2.00.02 Page of 28
2.3 Instructions for use
General instruction: Handle your device with care! Always store the device properly in the suitcase and hold it
safely in your hands when manipulating it. This will prevent the device from being dropped and therefore damage
to the device. Always check the attachment of the device to the belt, to prevent unintended detachment or
dropping of the device from the belt.
Only use the accessories (Bluetooth® Adaptor, power supply, power cord etc.) that were provided to
you with the SwayStar™ device. You cannot perform a measurement while the device is connected
with the power cord. The device recognizes connection to the power cord and will only allow
measurements when the battery has been charged (notice chapter 8 „Charging the battery“!). You
can check the power-status by looking at the control-LED (see chapter 9 „Lower LED (control-LED)“).
The device should be shut down after use, by switching it off at the main switch (see left), because
the device remains active when turned on until the battery is empty. Please check the control-LED
(see chapter 9) and the position of the switch, so that you do not have to recharge the battery
between measurements; this will save you time.
The device should not be exposed to temperatures under +20°C and over +40°C during
measurements but also when the device is stored. In lower or higher temperatures, safe use of the
device is not possible; moreover it can influence the measurement results.
The SwayStar™ device is not protected against water sprays. To guarantee that it functions safely, it
should not be used in bath or simming rooms, nor should it be exposed to high humidity. Optimal use
is warranted in dry rooms. The device should not be used outside and should be kept (especially
when operating) far from water sources, e.g. bassins or filled waterbuckets.
The use of the device with patients is only allowed by specialized medical staff. During
measurements, an assistant should be present to help the patients with the tasks and prevent falling
in case of balance loss. This warrants a safe use of SwayStar™ .
The SwayStar™ system (device and accessories) should only be transported and stored in the
suitcase that is delivered with the device. The suitcase has been specially developed, so that the
system and its accessories can be stored in a safe manner.
Manual UK SwayStar v3 20 02_eng.odt | Date: 2 /01/2007 10:43:46 PM| Version: 2.00.02 Page 6 of 28
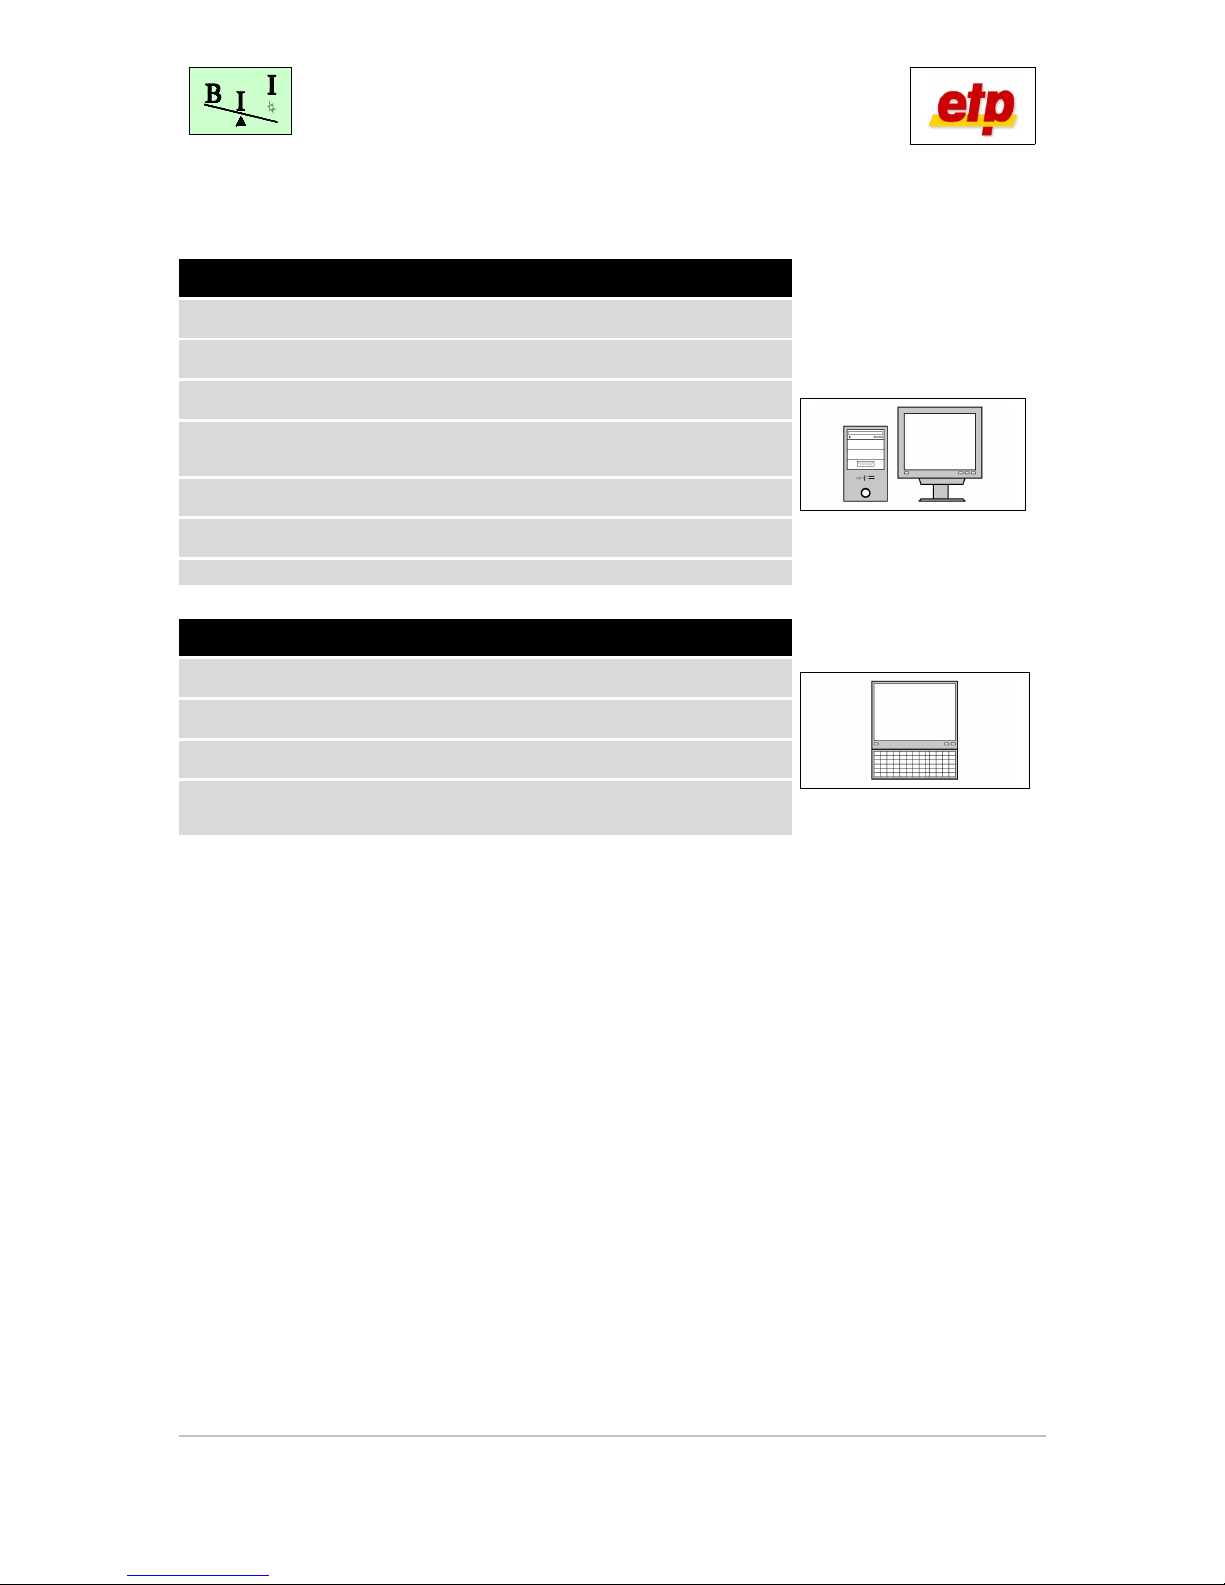
2.4 System requirements
Hardware minimal requirements PC:
Pentium III / 8 0 MHz
128 MB memory (Network-PC: 2 6 MB)
8-fold CD-ROM or DVD-ROM drive
Graphic-card with 16 MB memory
(Laptops with „Shared Video Memory“ are not recommended)
USB-port
30 MB free hard-disc memory for the installation
00 MB free hard-disc memory, (for Network-PC: 1GB) for saving the data
Software minimal requirements PC:
Windows NT, 2000 or XP (Home and Professional)
Internet-Explorer (Version 4.0 and higher)
Adobe Reader
Administrator rights to install the driver and software
(contact your system administrator)
If you would like to print the measurements and analyses, you will need an additional printer (not provided in
shipment).
2. Durability
The expected durability of SwayStar™ is dependent on the quality of the handling, cleaning, as well as transport
and storage. With appropriate use and cleaning, a life-span of 10 years is presumed. Exceptions are the plugs
and lithium-ion-batteries, and other non-durable components.
Manual UK SwayStar v3 20 02_eng.odt | Date: 2 /01/2007 10:43:46 PM| Version: 2.00.02 Page 7 of 28

3 Delivery
Please check that the product was delivered to you with all its components.
Nr. Description Product number
01 SwayStar™ device V3.00
(distributor specific product numbers)
One of the following numbers:
109939, 10999 , 109996,
109997 or 109998
02 SwayStar™ USB Adapter (Bluetooth™ Dongle) 109984
03 Power supply unit FRIWO MPP1 with power cord (2 m) 109978
04 Power adapter EURO 00813
0 Power adapter UK 008136
06 Power adapter USA 008137
07 Power adapter Australien 008138
08 Power adapter ROW (Rest of the World) 008407
09 SwayStar™ Belt size M 109993
10 SwayStar™ Belt size XXL 109992
11 SwayStar™ Manual 110210
12 SwayStar™ Suitcase 016441
Note:
The SwayStar™ device housings have distributor specific logos.
Accessories can be ordered for replacement, using the product number.
3.1 Accessories
Nr. Description Product number
13 Operator software SwayStar™ (accompanying CD-ROM)
14 Software manual SwayStar™ (accompanying CD-ROM)
1 Standard Windows-PC or Laptop with USB-port Not included in delivery
Manual UK SwayStar v3 20 02_eng.odt | Date: 2 /01/2007 10:43:46 PM| Version: 2.00.02 Page 8 of 28

4 Description of SwayStar™
4.1 The System
SwayStar™ is an easy to use and precise measuring system of body movements during standing and gait, or
during other movements. It is designed for use with patients that have balance or orthopaedic problems, which
could be caused especially by ageing, neurological deficits, whiplash injuries or hip joint problems.
SwayStar™ consists of a measuring device, which is held in place on the upper part of the patient’s back with
the help of a belt. Its very sensitive sensors measure angle and angular velocity of the trunk. The connection to
the PC, in which the movements of the patients are recorded, is established using a wireless radio communication
(Bluetooth®). By means of a proprietary SwayStar™ software program, the different variables are processed,
recorded and calculated. The level of accuracy is extremely high (<0,01 °/s).
4.2 Applications
The device and its software can be used for the following purposes:
Clinical examinations of balance and other motor dysfunctions
Checking the progress of a treatment or a surgical operation
Scientific studies on standing and walking capacities in humans
Use for other applications should be communicated in written form to etp and BII.
Manual UK SwayStar v3 20 02_eng.odt | Date: 2 /01/2007 10:43:46 PM| Version: 2.00.02 Page 9 of 28
4.3 Procedures
The patient makes various movements, while walking and standing, spontaneously or on instruction. Inside the
SwayStar™ device are high-precision sensors that recognize and record minute and large changes in the
movement and orientation of the patient. The device measures exactly movements of the patient because it is
directly attached to the patient and does not significantly interfere with or hinder the patient’s movements. In this
way, all the body movements of the patient; for instance, bending sideways or making backwards and forwards
movements, can be recorded precisely by the SwayStar™.
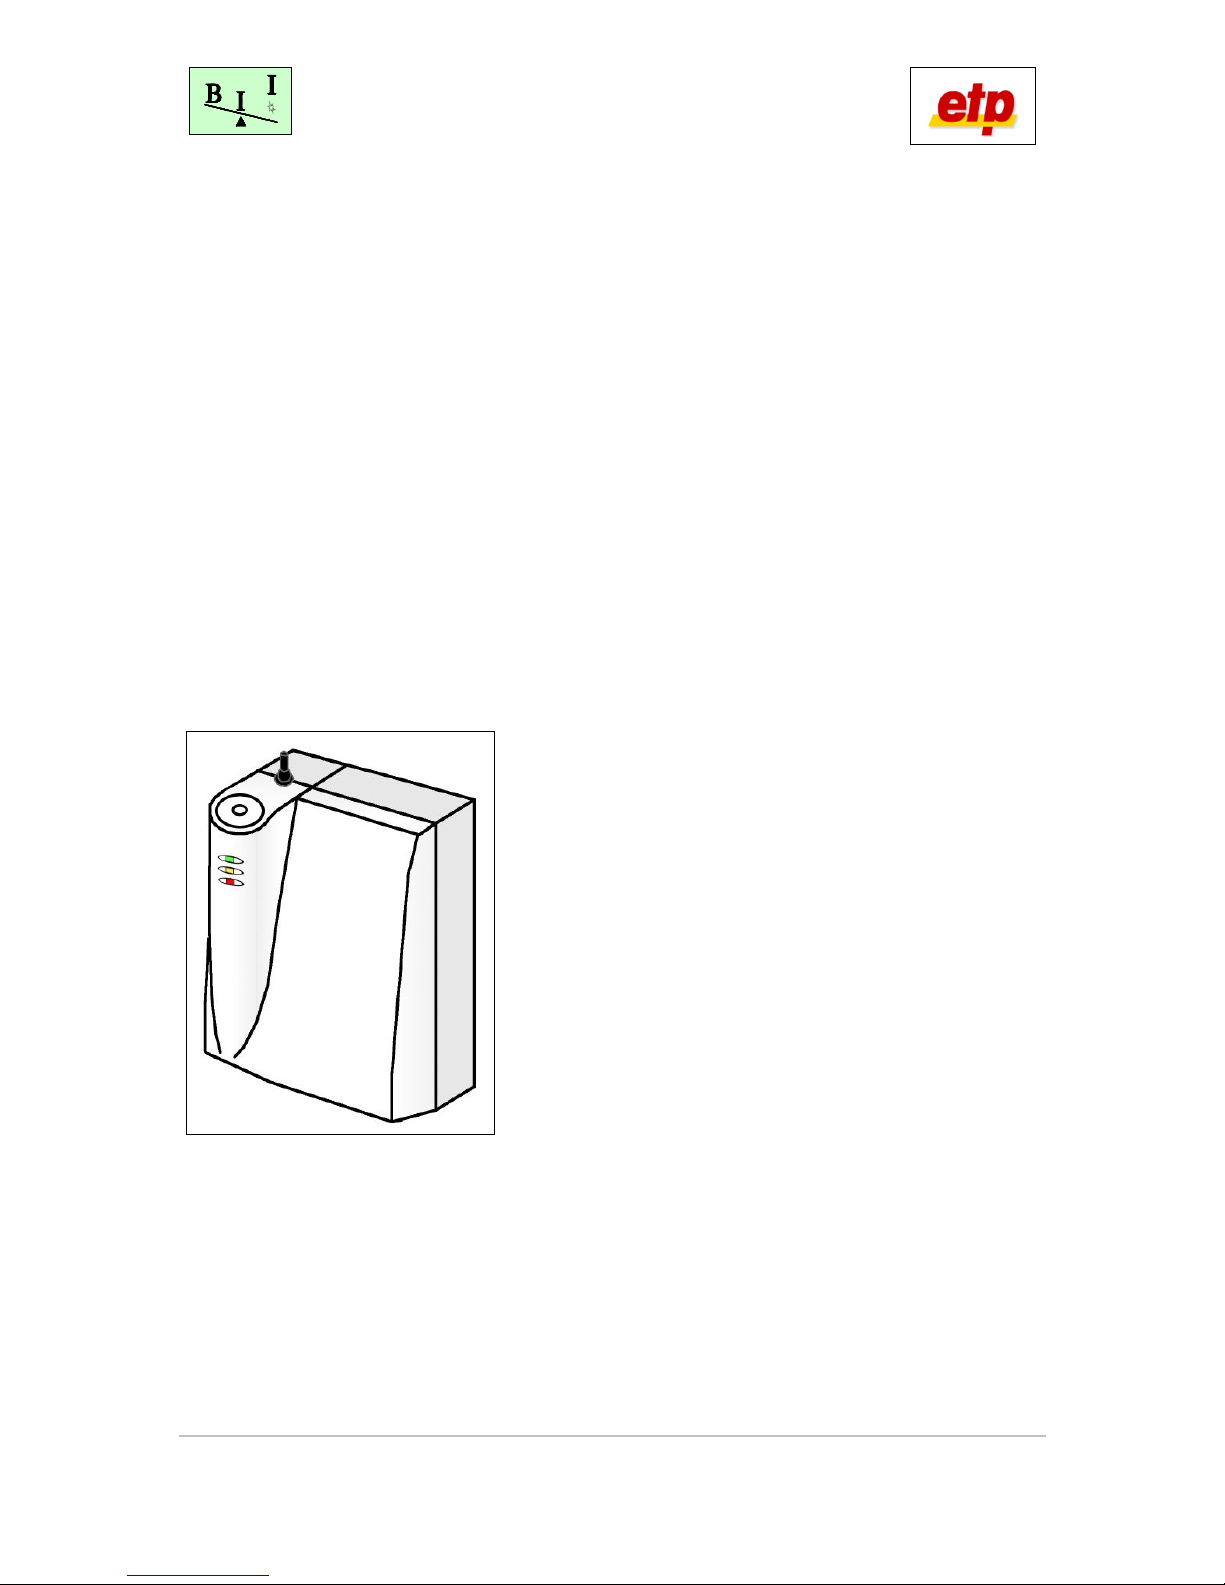
4.4 Special advantages
Its small size and light weight make SwayStar™ (figure 1) easy to operate and comfortable for the patient while in
use. The assembly and use of the SwayStar™ system is fast and uncomplicated, because the system consists
of few elements. The patient can move freely, as the connection from the SwayStar™ device to the PC is
established through a wireless Bluetooth® connection. SwayStar™ can be used in many environments, which
makes it possible to examine individual patients with different clinical signs.
Figure 1
Manual UK SwayStar v3 20 02_eng.odt | Date: 2 /01/2007 10:43:46 PM| Version: 2.00.02 Page 10 of 28

New functions
New and revolutionary is the wireless transmission of measurement data using
Bluetooth®, which replaces the 10-meter connection cable, used in earlier versions, and
expands the possible mobility of the patient during tests.
The wireless range is maximum 100m (Bluetooth® Class 1, outside). The data is received through the USB-
Bluetooth® Dongle (Bluetooth® Class 1), which are provided with the device.
The power supply of the SwayStar™ device is provided with integrated lithium-ion-batteries. Charging occurs
through the integrated charging-electronics corresponding to the battery type used. The power supply occurs
using a multi-pin slide-on connector of the power cord to the power supply unit.
The capacity of the (fully charged) battery guarantees a measurement duration (continuous operation; middle
LED is green) of maximum 40 minutes. Afterwards, the system is ready for operation, but the sensors cannot be
activated before the battery is charged again.
It is not possible to charge the battery and perform measurements with the device at the same time..
Please note the instructions for use!
The meaning of the control-LEDs on the front of the SwayStar™ device has been changed in comparison with
earlier versions (Version 1) of the system. These now provide extra information about the power status of the
device (see indicator lights).
Manual UK SwayStar v3 20 02_eng.odt | Date: 2 /01/2007 10:43:46 PM| Version: 2.00.02 Page 11 of 28

6 Installation of recommended software and driver
6.1 Installation of the software
Before the SwayStar™ system can be used with Bluetooth®, it is mandatory to install its software
and driver on the PC. The software is provided to you on the accessory CD. Please, put the CD in
the CD-drive. The CD will start automatically, when „Auto start“ is not deactivated. In this case, start
Windows-Explorer and click on the CD-drive. Please follow the instructions on the screen.
6.1.1 Installation of the Bluetooth® driver for the Dongle
First install the driver for the Bluetooth® Dongle. After, plug the dongle in a free USB-port.
To start the installation of the Bluetooth® driver for the dongle, click on the designated link in the main menu of the
CD. Follow the instructions. Afterwards, read the following:
Figure 2
After installing the driver successfully, the dongle can be
plugged in a free USB-port (see figure 2). The USB-port can be
located at the front or the back of your PC, or at the side of
your laptop.
Do not plug the Bluetooth-dongle in an external USB-adaptor
or similar device, to guarantee a trouble-free use.
Notes:
The benefit of plugging the dongle in the same socket every time is that Windows will not have wait for hardware
recognition every time you want to use the dongle. When the hardware recognition has been completed the first
time, you should restart the system, even when you are not asked to do this. In Windows XP SP2 the Bluetooth
driver of Windows will bed itself into the system software. After restarting the computer, this will be exchanged
with the Bluesoleil software.
When the version of the Bluesoliel software is lower than 2.3, you should actualise it, by using the update that you
can find here: http://www.bluesoleil.com/download/index.asp
Choose the standard (evaluation) version.
Manual UK SwayStar v3 20 02_eng.odt | Date: 2 /01/2007 10:43:46 PM| Version: 2.00.02 Page 12 of 28

6.2 SwayStar™ Software Update
When the software is successfully installed, an internet update can be performed after starting the SwayStar™
programme: click on the internet update in the menu ‘Help’.
It is also possible to perform the update manually through the internet. You can download the update here:
http://www.b2i.info (click on „SwayStar Installation“ on the left in the menu and then click on „Download Area“.
Then you can select the designated update-link in the main screen).
Manual UK SwayStar v3 20 02_eng.odt | Date: 2 /01/2007 10:43:46 PM| Version: 2.00.02 Page 13 of 28
7 Getting started / Assembly
The batteries are not charged when delivered. After installing the software and driver, as well as connecting all
elements, you should charge the battery completely before a measurement is started. See chapter 8 ,,Charging
the battery’’!
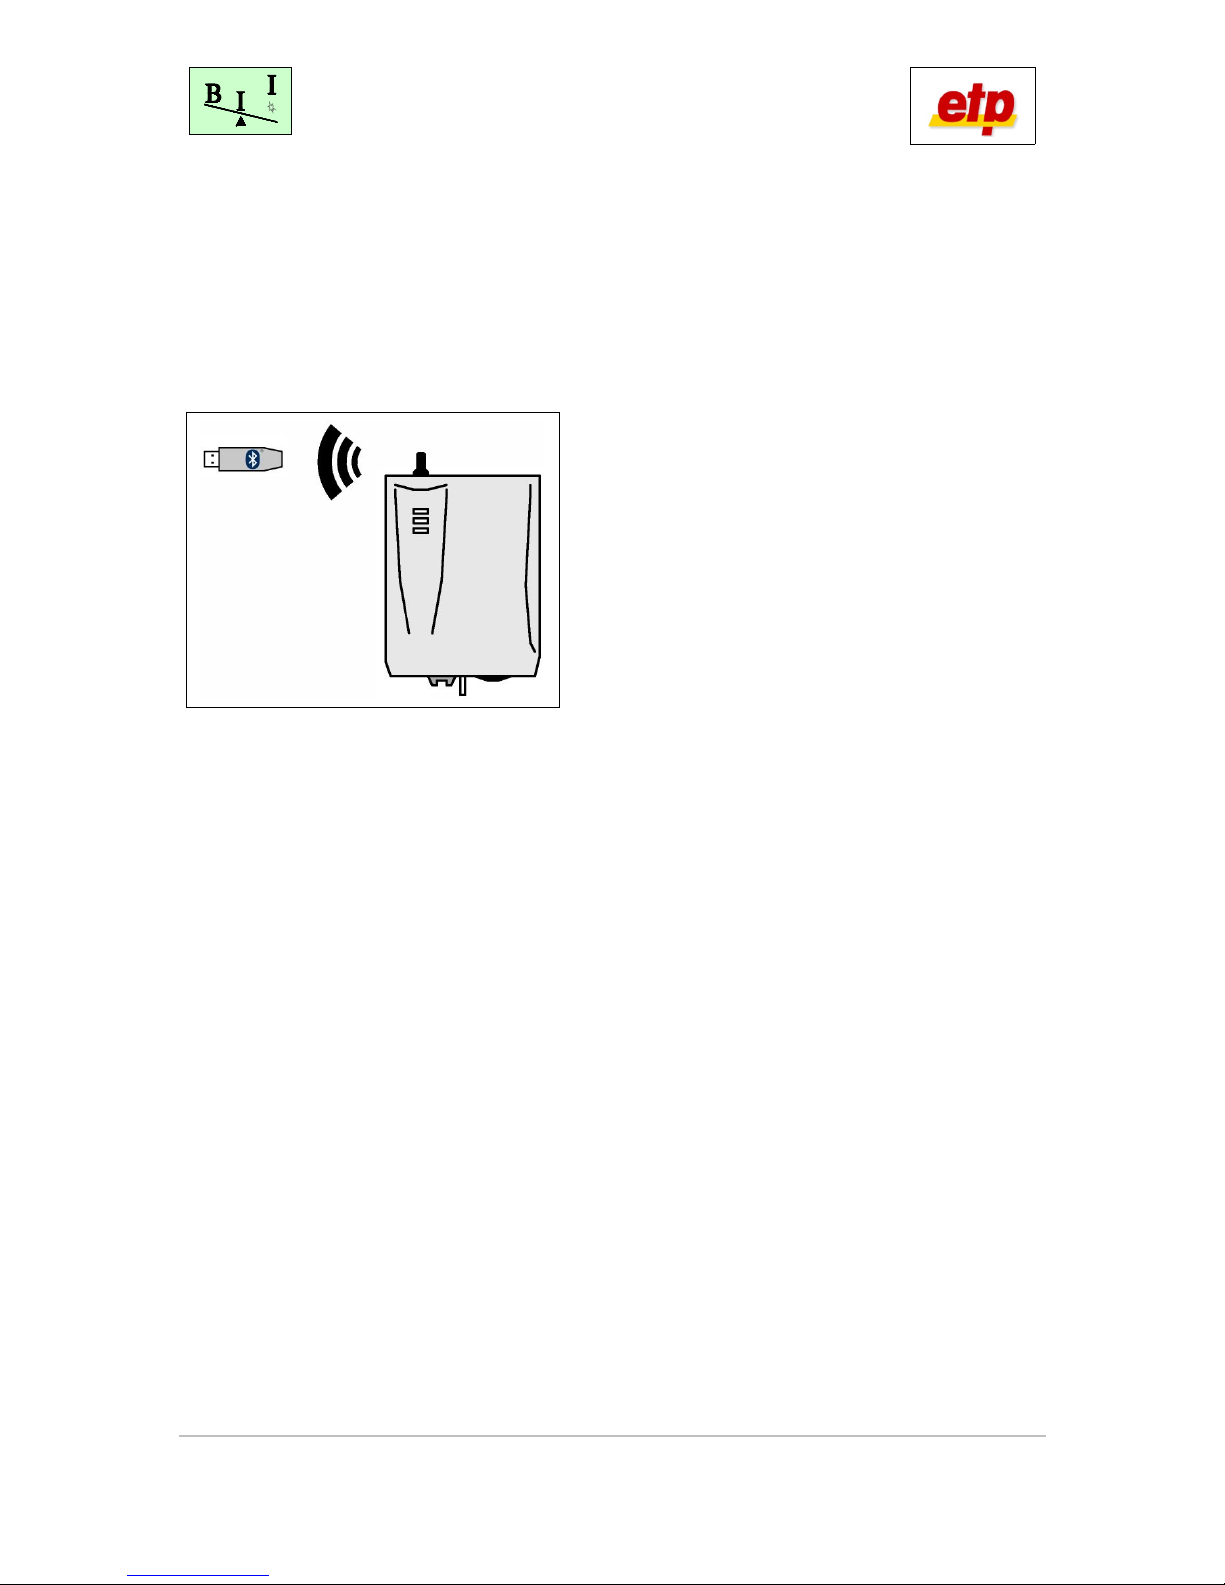
7.1 Step 1: Connecting the SwayStar™ device
Figure 3
The SwayStar™ hardware for connecting to the PC, is
made up of the device itself and the Bluetooth® dongle
(Figure 3). The data transfer occurs wireless.
Be sure that the device is switched off and the battery is charged.
The PC must be switched on and the driver for the Bluetooth® dongle must be installed (Chapter 6.1.1 „Installation
of the Bluetooth® driver for the dongle“).
Plug the Bluetooth® Dongle in the same USB-port as during the installation (Figure 2). Wait until the system
recognises the dongle (Bluetooth® symbol appears on the Windows-Taskbar and changes in colour from red to
white).
Note: The Bluetooth® standard contains several communication- and authorisation procedures, which can take up
to 10 seconds. When your PC does not respond immediately, please wait!
Manual UK SwayStar v3 20 02_eng.odt | Date: 2 /01/2007 10:43:46 PM| Version: 2.00.02 Page 14 of 28

7.1.1 Checking the Bluetooth® connection
This is only obligatory for the first installation, after you can proceed to 7.3.
The description given here is only one example; it can differ from the true installation routine. Please
read the manual of the Bluetooth® Dongle that was delivered with the device.
Double-click the Bluetooth® symbol in the task list or click the Bluetooth-icon on the desktop, when available.
Turn the device on and make sure the power supply cable is disconnected. The upper and middle LED will be
orange for one second. Afterwards, the upper LED should be green (Status: OK).
Please wait 3 seconds, before proceeding.
Click the ‘sun’ or press F („Bluetooth® device
discovery“). The software will search for available
devices in the area. Please wait 3 seconds before
proceeding.
When the SwayStar™ device is found, each
Bluetooth® device has its own identification name.
The identification name of the device is „SwayStar-Box“ with the corresponding Serial number, e. g. „SN1004“
Double-click on the device to see the available services (yellow symbols).
The SwayStar™ device makes one service available. Double-click on this service; the Bluetooth® will
try to make a connection.
When a connection could be made with the device, a yellow authorisation balloon tip will open which points at the
Bluetooth® symbol in the task list. Do not close this balloon tip, but click in the middle of it. An authorisation dialog
opens and demands a PIN (Personal Identification Number). The PIN is the serial number of the device, e.g.
„SwayStar-Box SN1004“ has a PIN that is: „1004“.
Please insert the PIN code and click [OK].
The Bluetooth® connection has now been established; this is confirmed by the symbol that is now
green.
Manual UK SwayStar v3 20 02_eng.odt | Date: 2 /01/2007 10:43:46 PM| Version: 2.00.02 Page 1 of 28

7.2 Step 2: Setup of the SwayStar™ software
Start the SwayStar™ programme. You can now press F or select ‘’Record’’ in the menu, and select ‘’Discover
port’’.
The SwayStar™ programme looks in the Bluetooth®-area for the
device. When this is found, it is shown in a small dialog. Make sure the
device is selected and click [OK].
After the connection is successfully made, and the availability of the
system is checked, the record symbols are unlocked.
Option – especially when the record symbols were not unlocked – you can do the following:
Select „Settings“ in the menu list „Options“ and open the section „Sensors“. Select „Model 2“. Now, click on the
animated picture. The procedure mentioned above, is started and the availability of the device is tested. After the
device was successfully recognised and the functionality was successfully tested, please leave the dialog
„Settings“ by clicking [OK]. The system has now been configured for Bluetooth® and the record symbols are
unlocked. Now you can start with the measurements.
When problems occur, check whether the device is switched on, the power supply cable is not connected and the
Bluetooth® dongle is successfully installed. Repeat the procedure mentioned above when necessary. When the
problem still occurs, please contact your distributor.
When the authorisation-balloon appears again after switching the device on, you can close the balloon tip without
any further action.
Manual UK SwayStar v3 20 02_eng.odt | Date: 2 /01/2007 10:43:46 PM| Version: 2.00.02 Page 16 of 28

7.3 Step 3: attach the SwayStar™ to the patient
7.3.1 Placement of the belt
Figure 4
The SwayStar™ device locks onto a belt, which is stretched around the
waist of the patient (see figure 4). Four pins on the sensor box assure
correct location on the belt and Velcro adhesion holds the box on the belt.
The belt is held at kidney height and then the flexible flap, is stretched
over the stomach and closed so that the belt is tight around the body. (For
heavy-built individuals, the second belt (larger size) can be used.) For
stabilising the device, the two bands on the outside of the belt are
stretched and closed. The plate for attaching the SwayStar™ device is
located at the back of the patient.
The device has to be attached and pressed onto the belt, and the attachment needs to be
checked before putting the belt around the patient. When the device is not firmly attached to the
belt, it should be pressed on the belt harder and moved around on it to improve the Velcro adhesion.
When the adhesion is insufficient, the device can fall off!
The belt should not be worn directly on the skin. Take care that the patient wears a T-Shirt or
something similar.
Put the belt around the patient, with the device already attached to it.
The belt can be adjusted to body circumferences. The belt must sit firmly in place so that precise measurements
can be achieved. It should not, however, restrict the patient’s movements. Two belts, in size M and XXL, are
delivered to you with the system to meet all possible waist requirements for patients.
On the topside of the SwayStar™ device, is an integrated water level. With this, the SwayStar™ device, now
attached to the patient, can be aligned exactly so that the sensors can detect all fluctuations accurately. A slightly
incorrect angle will not be significant for the measurements. Larger deviations, recognisable by an offset of the
water level, should be corrected with help of belt adjustments or altering the placement of the device on the belt.
You should make sure the device is attached to the body as is shown in figure 4.
After every measurement the elements of the SwayStar™ system should be put in the suitcase, to avoid damage
to the system.
Manual UK SwayStar v3 20 02_eng.odt | Date: 2 /01/2007 10:43:46 PM| Version: 2.00.02 Page 17 of 28
8 Charging the batteries
The device recognises the power connection automatically and will stop sensor use for
measurements. During the whole charging procedure, measurements are not possible for safety
reasons. Charging the battery of the device, while it is attached to the belt on the patient is not
permitted, because the patient could for example stumble over the cord.
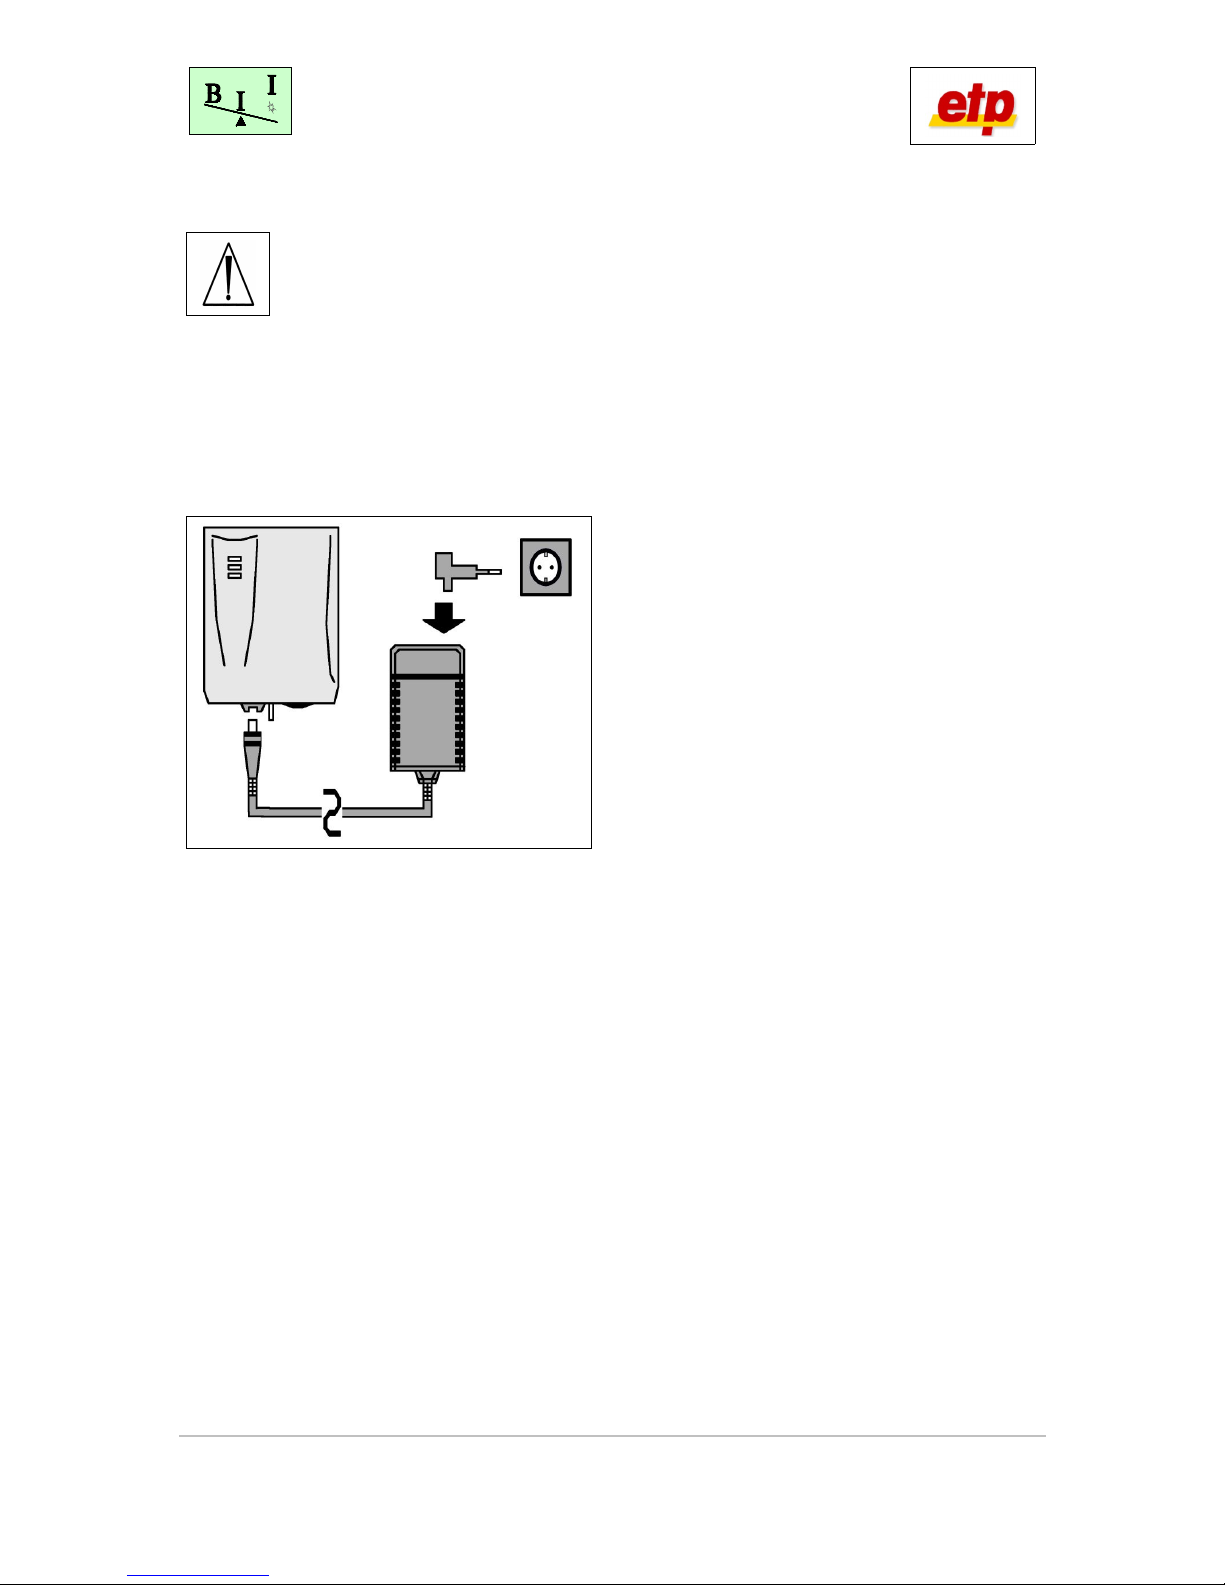
To charge the battery the country-specific adapter (figure ) should be plugged on the power supply unit. We
recommend to switch off the device during this procedure. To start the charging, you plug the power cord in the
multi-pin socket on the SwayStar™ device. Connecting the power supply unit to the power wall socket completes
the procedure to start charging the battery. The battery will be charged automatically through a charging current-
controller.
Figure
1 Country-specific adapter
2 Power supply unit
3 Power cable
4 Multi-pin plug
Device socket
6 SwayStar™ device
7 Power wall socket
The charging procedure will be stopped automatically, when the battery is fully charged. This takes about 4,
hours. When you turn on the device, you can check whether the battery is fully charged by looking at the
indicator lights (chapter 9: Indicator lights). When this is the case you can proceed with measuring.
Manual UK SwayStar v3 20 02_eng.odt | Date: 2 /01/2007 10:43:46 PM| Version: 2.00.02 Page 18 of 28
1
2
3
6 7
4
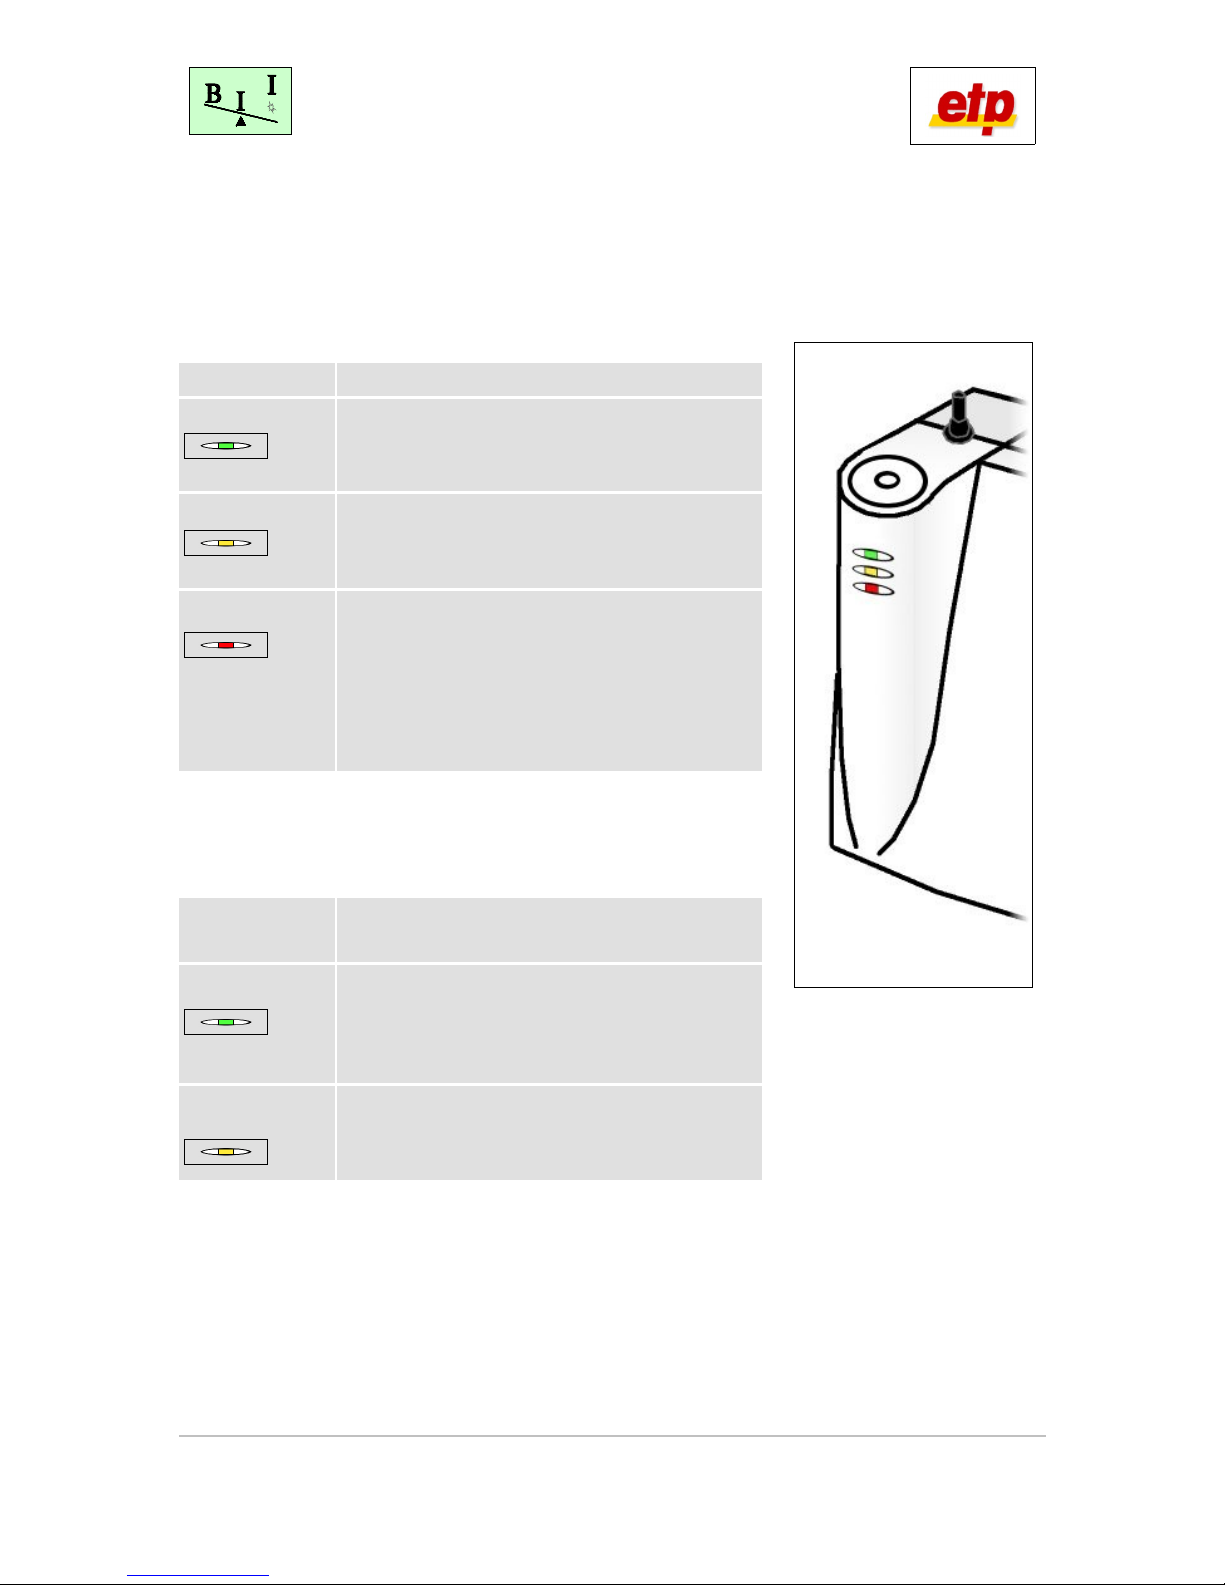
9 Indicator lights
On the front side of the SwayStar™ device there are three indicator lights (LEDs).
9.1 Upper LED (Power status)
Off The device is switched off.
Green The device is switched on. Power supply is okay
(battery fully charged) and the device is ready for
measurements.
Orange The device is switched on. The power supply is critical.
Please end the measurement and recharge the battery
(chapter 8).
Red The device is switched on, but a measurement is not
possible, because no power is available. Current
measurements will be aborted and the sensors will be
switched off and cannot be switched on again. Please
turn the device off, using the main switch and recharge
the battery (chapter 8).
9.2 Middle LED (Sensor status)
Off The sensors are off. A measurement has not yet been
started.
Green The function test was performed succesfully. The
sensors are on. A measurement has not yet been
started.
Orange The sensors are on and a measurement has been
started.
9.3 Lower LED (Charging status)
Manual UK SwayStar v3 20 02_eng.odt | Date: 2 /01/2007 10:43:46 PM| Version: 2.00.02 Page 19 of 28

Off The charging-controller is off and the battery is not
being charged.
Red The battery is being charged (the power cord has been
connected, see chapter 8)
Flashing red Internal charging error. Please turn the device off and
contact your distributor for technical support.
Manual UK SwayStar v3 20 02_eng.odt | Date: 2 /01/2007 10:43:46 PM| Version: 2.00.02 Page 20 of 28
Table of contents
Popular Medical Equipment manuals by other brands


Breas
Breas Vivo 45 LS Quick reference guide

Synovis
Synovis GEM FlowCoupler Instructions for use

Tandem
Tandem AutoSoft 30 Instructions for use

orfit
orfit HP PRO Instructions for use

Fresenius Medical Care
Fresenius Medical Care 4008 S Service manual

Verathon
Verathon GlideScope Go Operation & maintenance manual

PercuVision
PercuVision DirectVision Technical reference manual

SeQual Technologies
SeQual Technologies ECLIPSE 1000 user manual

Vermeiren
Vermeiren ILLICO instruction manual

Mentalab
Mentalab EXPLORE quick start guide

Ziehm Imaging, Inc.
Ziehm Imaging, Inc. VISION installation manual

Spencer
Spencer SHELL Use and maintenance manual