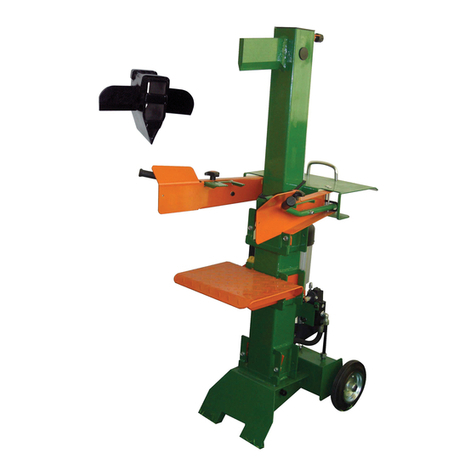
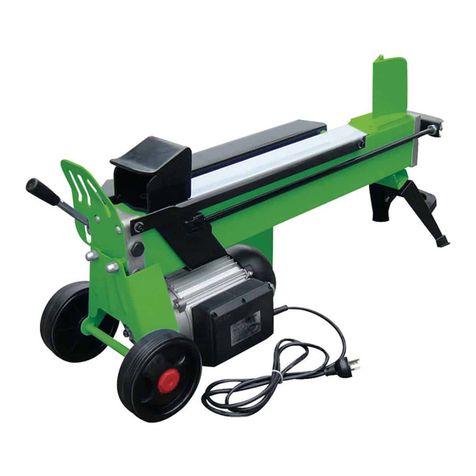
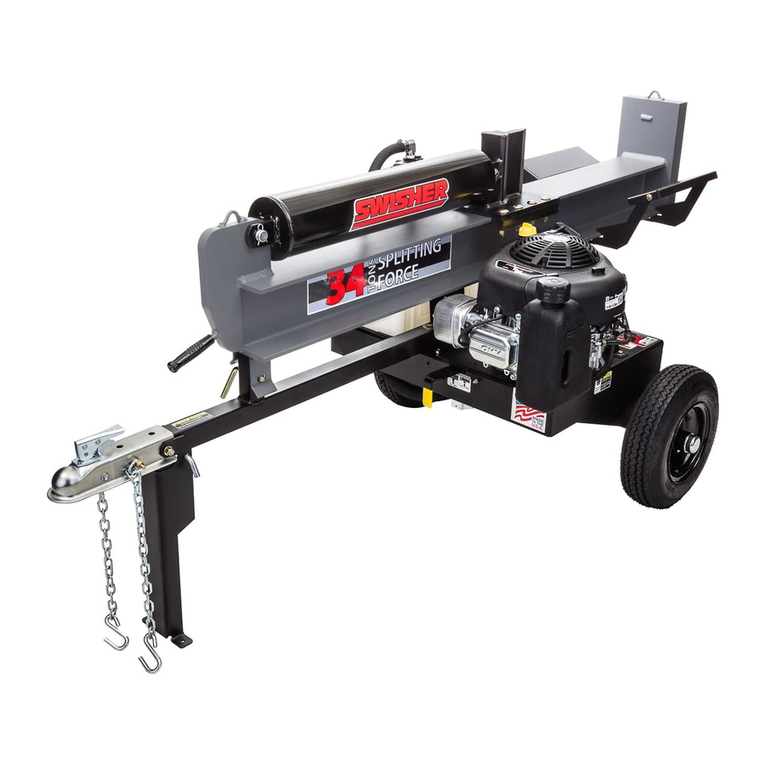
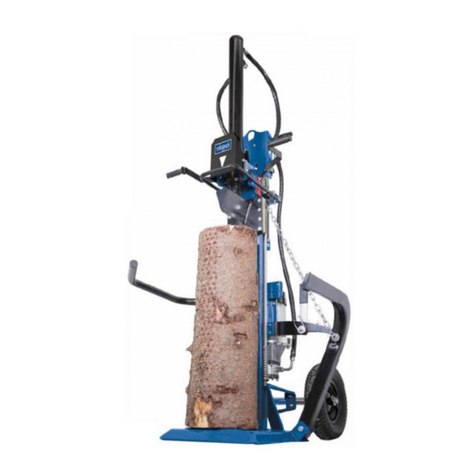
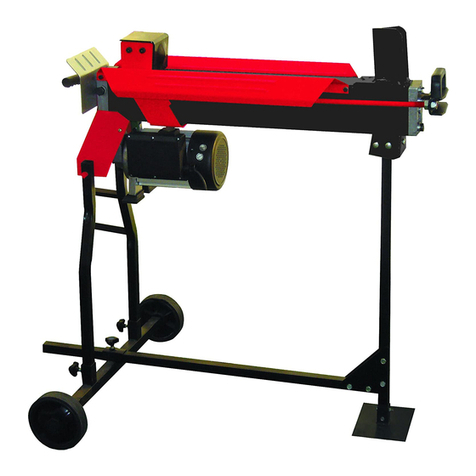
Elem Garden Technic FB1500-5TEG52STAND User manual

FR
FENDEUSE DE BUCHES
NL HOUTKLOOFMACHINE
GB WOOD SPLITTER
Avis! Let op!
Warning
Lire le manuel
avant d’utiliser
cette machine
Lees voor het gebruik
de gebruiksaanwijzing
aandachtig door.
Consult the
manual.
Prenez des
mesures de
protection
oculaire
Portez une
protection
auditive.
Draag een
veiligheidsbril.
Draag
gehoorbescherming
.
Wear safety
goggles.
Wear hearing
protection.
Portez des gants.
Portez des
chaussures de
protection.
Draag
handschoenen.
Draag
veiligheidsschoenen.
Wear gloves.
Wear safety
shoes.
N’utilisez pas
l’appareil sous la
pluie ni dans des
endroits
humides.
Gebruik het apparaat
niet bij
neerslag of in een
vochtige
omgeving.
Do not use the
appliance in
precipitation or in
humid
surroundings.
Ne laissez pas
les autres
personnes
s’approcher de
l’appareil.
Houd omstanders uit
de buurt van het
apparaat.
Keep bystanders
away from the
appliance.
Avant de
procéder à
l’entretien de
l’appareil,
débranchez
toujours la fiche
de la prise de
courant.
Neem voordat u
onderhoud aan het
apparaat verricht
altijd eerst de
stekker uit het
stopcontact.
Before
performing
maintenance to
the appliance,
always unplug the
machine.
Double
isolation. Dubbel geïsoleerd. Double insulated.
FB1500
-
5TEG52STAND


DIAGRAMME DE CÂBLAGE DIAGRAMME
HET BEDRADINGSDIAGRAM HET DIAGRAM
WIRING DIAGRAM PLUMBING DIAGRAM


FR / FENDEUSE DE BUCHES
FB1500-5TEG52STAND
MISE EN GARDE
Pour votre propre sécurité, lisez préalablement ce
manuel d’utilisation avant d’utiliser la machine.
CONSIGNES DE SÉCURITÉ
Lors d’emploi de la machine, observez toujours
scrupuleusement les consignes de sécurité fournies
ainsi que les consignes de sécurité
complémentaires ci-dessous.
INSTRUCTIONS DE SÉCURITÉ
SUPPLÉMENTAIRES POUR FENDEUSES
Les fendeuses ne doivent pas être utilisées par
des enfants ou des personnes non formées.
Avant emploi, vérifiez toujours l’état du
mécanisme de fente.
N’utilisez pas l’appareil si le mécanisme de fente est
usé.
N’approchez pas les membres du coin fendeur.
Ne déplacez pas l’appareil pendant qu’il est en
marche.
Évitez le contact du mécanisme de fente avec les
objets durs pendant l’utilisation.
Fendez toujours les bûches uniquement dans le
sens de la longueur de la bûche.
Fendez toujours les bûches une à une.
N’utilisez pas un marteau ou une hache pour
retirer les bûches bloquées dans le coin fendeur.
N’utilisez pas de cales entre le poussoir et la
bûche.
Utilisez la machine uniquement de jour ou avec
un bon éclairage.
Pendant l’utilisation, maintenez pieds et mains
éloignés du coin fendeur.
Ne passez pas par-dessus et n’enjambez pas
l’appareil pendant qu’il fonctionne.
Ne vous étendez pas et ne vous penchez pas
par-dessus l’appareil pour ramasser des bûches.
N’essayez jamais de charger l’appareil en
mouvement.
N’essayez jamais de fendre des bûches trop
petites.
Veillez à ce que le câble d’alimentation électrique
ne touche pas le coin fendeur.
Arrêtez l’appareil uniquement lorsqu’il tourne à
vide.
Arrêtez immédiatement l’appareil en cas de
blocage pendant son fonctionnement.
Assurez-vous que le poussoir est en position de
repos avant de transporter ou de stocker l’appareil.
L’huile hydraulique peut être très dangereuse pour
la santé. Évitez tout contact de la peau avec l’huile
hydraulique.
SÉCURITÉ ÉLECTRIQUE
Vérifiez si le voltage mentionné sur la plaque
signalétique de la machine correspond bien
à la tension de secteur présente sur lieu.
DESCRIPTION
Votre fendeuse a été conçue pour fendre les
bûches.
1. Réservoir d'huile
2. Poussoir
3. Plan de travail
4. Coin fendeur
5. Poignée de transport
6. Support - Pied
7. Guide bûche
8. Interrupteur
9. Moteur
10. Boitier électronique
11. Roues
12. Poignée de transport
13. Levier de commande Hydraulique
14. Protection levier de commande
15. Purgeur
16. Bouchon de carter + jauge
17. Pression Maximum NE PAS Y TOUCHER
(préréglé d’usine)
INSTRUCTIONS D’EMPLOI
Vérifiez la purge d’air correcte du système
hydraulique avant un premier usage.
Vérifiez le niveau d’huile.
Placez l’appareil sur une surface plane ou une
table solide.
Placez une bûche en ligne droite contre le coin
fendeur.
Poussez le poussoir de pression contre le coin
fendeur pour fendre la bûche.
Ramenez le poussoir en position de repos.
Retirez la bûche.
FONCTIONNEMENT DU POUSSOIR
Pour faire avancer le poussoir , enfoncez
l’interrupteur marche/arrêt et poussez ensuite la
poignée de commande hydraulique..
Pour ramener le poussoir en arrière, relâchez
d’abord l’interrupteur marche/arrêt puis la poignée.
Pour arrêter le poussoir, relâchez l’interrupteur
marche/arrêt.
NETTOYAGE ET ENTRETIEN
Nettoyez régulièrement les orifices d’aération.
Nettoyez l’extérieur de l’appareil avec un chiffon
humide.
Contrôlez régulièrement les éventuels dommages
et fuites sur l’appareil.
PURGE D’AIR DU SYSTEME HYDRAULIQUE
Le système hydraulique doit être purgé avant une
première utilisation et après une vidange d’huile.
Desserrez le bouchon de quelques tours.
Attendez la purge complète du système.
Serrez le bouchon.

VIDANGE D’HUILE
L’huile du réservoir doit être changée toutes les 400
heures de service.
Retournez l’appareil.
Posez un bac de récupérateur pour l’huile.
Retirez le bouchon de vidange.
Pour le remplissage, retournez l’appareil dans
l’autre sens.
Faire l’appoint d’huile et vérifier le niveau d’huile.
Replacez le bouchon.
Replacez l’appareil en position horizontale.
Purgez le système hydraulique.
VERIFICATION DU NIVEAU D’HUILE
Le niveau d’huile doit être vérifié avant chaque
utilisation.
Vérifiez le niveau d’huile dans le réservoir.
Au besoin, faire l’appoint d’huile
AFFUTAGE DU COIN FENDEUR
Faites affûter le coin de préférence par un
technicien expérimenté.
Amenez l’appareil chez le revendeur pour faire
affûter le coin.
TRANSPORT
L’appareil est équipé de roues pour faciliter le
transport.
Utilisez la poignée de transport pour déplacer
l’appareil.
RANGEMENT
Rangez toujours l’appareil dans un endroit propre
et sec, hors de portée des enfants.
Appliquez une fine couche d’huile sur le longeron
et le coin pour éviter l’oxydation.
Placez une housse de protection sur l’appareil.
SPÉCIFICATIONS TECHNIQUES
Tension du réseau V 230
Fréquence du réseau Hz 50
Puissance W 1.500
Force de pression max. kg 5000
Longueur max. de bûche cm 52
Diamètre de bûche cm 5 - 25
Capacité de réservoir d’huile l 2,4
Huile Huile hydraulique standard
Température de travail °C 5 - 40
Poids kg 50
LpA (pression sonore) dB(A) < 70
GARANTIE
Pour les clauses de garantie, reportez-vous aux
conditions de garantie ci-jointes.
ENVIRONNEMENT
Si, après un certain temps, vous décidez de
remplacer votre machine, ne vous en
débarrassez pas avec les ordures
ménagères mais destinez-la à un traitement
respectueux de l’environnement.

NL / HOUTKLOOFMACHINE
FB1500-5TEG52STAND
WAARSCHUWING
Voor uw eigen veiligheid deze handleiding
zorgvuldig doorlezen vooraleer u de machine in
gebruik neemt.
VEILIGHEIDSRICHTLIJNEN
Bij het gebruik van de machine moet u steeds
zorgvuldig de meegeleverde veiligheidsrichtlijnen
naleven en de onderstaande aanvullende
veiligheidsrichtlijnen.
BIJKOMENDE VEILIGHEIDSINSTRUCTIES VOOR
HOUTKLOOFMACHINES
Houtkloofmachines mogen niet door kinderen of
ongeschoolde personen worden gebruikt.
Controleer voor gebruik steeds de toestand van
het kloofmechanisme.
Gebruik het apparaat niet als het kloofmechanisme
versleten is.
Kom niet in de buurt van de delen van de
kloofhoek.
Verplaats het apparaat niet terwijl het in werking
is.
Vermijd contact van het kloofmechanisme met
harde voorwerpen tijdens het gebruik.
Kloof de houtblokken steeds alleen in de
lengterichting van het houtblok.
Kloof de houtblokken steeds één voor één.
Gebruik geen hamer of een hakbijl om de in de
kloofhoek geblokkeerde houtblokken weg te
trekken.
Gebruik geen spieën tussen de stoter en het
houtblok.
Gebruik de machine alleen overdag of met een
goede verlichting.
Houd tijdens het gebruik voeten en handen uit de
buurt van de kloofhoek.
Stap niet over de machine en ga er ook niet
schrijlings over staan terwijl deze werkt.
Strek u niet uit en buig u niet over het apparaat
om houtblokken te vergaren.
Probeer het apparaat nooit in beweging te laden.
Probeer nooit te kleine houtblokken te kloven.
Let op dat de stroomkabel niet contact komt met
de kloofhoek.
Zet het apparaat alleen uit als het leeg draait.
Zet het apparaat onmiddellijk uit in geval van
blokkering tijdens zijn werking.
Zorg dat de stoter in rusttoestand staat vooraleer
u het apparaat vervoert of opbergt.
De hydraulische olie kan heel gevaarlijk voor de
gezondheid zijn. Vermijd elk contact van de huid
met de hydraulische olie.
ELEKTRISCHE VEILIGHEID
Ga na of de op het identificatieplaatje van de
machine vermelde spanning wel overeenkomt met
de ter plaatse aanwezige netspanning.
BESCHRIJVING
Uw kloofmachine werd ontworpen om houtblokken
te kloven.
15. Oliereservoir
16. Stoter
17. Werkvlak
18. Kloofhoek
19. Transportgreep
20. Steun - Voet
21. Houtblokgeleider
22. Schakelaar
23. Motor
24. Elektronicadoos
25. Wielen
26. Transportgreep
27. Hydraulische bedieningshendel
28. Bescherming bedieningshendel
18. Ontluchtingskraan
19. Carterstop + meter
20. Maximum druk NIET AANRAKEN (door
fabriek vooringesteld)
21. Zuigercilinder
22. Regelingsaanslag
GEBRUIKSINSTRUCTIES
Ga na of een correcte ontluchting van het
hydraulische systeem plaatsvindt voor het eerste
gebruik.
Controleer het oliepeil.
Plaats het apparaat op een vlak oppervlak of op
een stevige tafel.
Plaats een houtblok in rechte lijn tegen de
kloofhoek.
Regel de aanslag (19) volgens de lengte van het
houtblok.
Duw de drukstoter tegen de kloofhoek om het
houtblok te kloven.
Zet de stoter in ruststand.
Verwijder het houtblok.
WERKING VAN DE STOTER
Om de stoter te doen vorderen de aan/uit-
schakelaar indrukken en vervolgens tegen de
hydraulische bedieningsgreep duwen..
Om de stoter terug naar achter te brengen eerst
de aan/uit-schakelaar loslaten en dan ook de
handgreep.
Om de stoter te stoppen de aan/uit-schakelaar
weer loslaten.
REINIGING EN ONDERHOUD
Maak de verluchtingsopeningen regelmatig
schoon.
Reinig de buitenkant van het apparaat met een
vochtige doek.
Controleer regelmatig de eventuele
beschadigingen en lekken op het apparaat.
ONTLUCHTING VAN HET HYDRAULISCH
SYSTEEM
Het hydraulisch systeem kan worden ontlucht voor
een eerste gebruik en na een olieaftapping.
Draai de stop enkele slagen los.

Wacht op een volledige ontluchting van het
systeem.
Draai de stop weer dicht.
OLIEVERVERSING
De olie in het reservoir moet om de 400 bedrijfsuren
worden ververst.
Draai het apparaat om.
Plaats een olieopvangbak onder het reservoir.
Neem de aftapdop af.
Voor het vullen van het reservoir het apparaat
weer omdraaien.
De olie ingieten en het oliepeil controleren.
De dop weer aanbrengen.
Het apparaat weer horizontaal opstellen.
Het hydraulisch systeem ontluchten.
CONTRÔLE VAN HET OLIEPEIL
Het oliepeil moet voor elk gebruik worden
nagekeken.
Controleer het oliepeil in het reservoir.
Indien nodig olie bijvullen
SLIJPEN VAN DE KLOOFHOEK
Laat de kloofhoek bij voorkeur slijpen door een
ervaren technicus.
Breng het apparaat naar een dealer om de hoek
te laten slijpen.
TRANSPORT
Het apparaat is uitgerust met wielen om het
transport te vergemakkelijken.
Gebruik de transportgreep om het apparaat te
verplaatsen.
OPBERGEN
Berg het apparaat steeds op een schone en
droge plaats op, buiten bereik van kinderen.
Breng een fijne laag olie aan op de langsdrager
en op de hoek om oxidatie te voorkomen.
Breng een beschermhoes aan op het apparaat.
TECHNISCHE SPECIFICATIES
Netspanning V 230
Netfrequentie Hz 50
Vermogen W 1.500
Max. drukkracht kg 5.000
Max. houtbloklengte cm 52
Diameter van houtblok cm 5 - 25
Capaciteit van oliereservoir l 2,4
Olie Standaard hydraulische olie
Bedrijfstemperatuur °C 5 - 40
Gewicht kg 50
LpA (geluidsdruk) dB(A) < 70
WAARBORG
Raadpleeg voor de waarborgbepalingen de
bijgevoegde waarborgvoorwaarden.
MILIEU
Als u na enige tijd beslist van uw machine te
vervangen, mag u deze niet bij het
huishoudafval gooien, maar moet u deze
milieuvriendelijk opruimen.

GB / WOOD SPLITTER
FB1500-5TEG52STAND
WARNING
Read this manual carefully before using the
machine, for your own safety.
SAFETY INSTRUCTIONS
When using the machine, always observe the
enclosed safety instructions as well as the additional
safety instructions.
ADDITIONAL SAFETY INSTRUCTIONS FOR
WOOD SPLITTERS
Wood splitters must not be used by children or
untrained persons.
Before use, always check the condition of the
splitting mechanism. Do not use the appliance when
the splitting mechanism is worn.
Keep body parts away from the splitting wedge.
Never attempt to move the appliance during use.
Prevent the splitting mechanism from touching
hard objects during use.
Always split logs in the direction of the grain only.
Always split logs one at a time.
Do not use a hammer or an axe to remove
clamped logs from the splitting wedge.
Do not use strange packing blocks between the
pressure cam and a log.
Only use the machine in daylight or with good
lighting.
During use, always keep your hands and feet
away from the splitting wedge.
Do not step over or straddle the appliance during
operation.
Never reach or bend over the appliance to pick up
logs.
Never attempt to load the appliance when it is in
motion.
Never attempt to split extremely small logs.
Make sure that the mains cable does not touch
the splitting wedge.
Only switch off the appliance when it runs at no
load.
Immediately switch off the appliance if it jams
during operation.
Make sure that the pressure cam is in the rest
position before transporting or storing the appliance.
Hydraulic oil may cause a severe health risk. Avoid
skin contact with hydraulic oil.
ELECTRICAL SAFETY
Always check that the power supply corresponds to
the voltage on the rating plate.
DESCRIPTION
Your wood splitter has been designed for splitting
logs.
1. Oil Tank
2. Log Pusher
3. Work Table
4. Wedge
5. Lift Handle
6. Support Leg
7. Work Table Extension w/ Log Retaining
Plates
8. Switch
9. Motor
10. Pushbutton Box
11. Wheels for Minor Moving ONLY.
12. Lift Handle
13. Hydraulic Control Lever
14. Control Lever Guard
15. Bleed Screw
16. Oil Drain Bolt w/ Dipstick
17. Max Pressure Limiting Screw
DO NOT ADJUST THE MAX PRESSURE
LIMITING SCREW !
INSTRUCTIONS FOR USE
Check that the hydraulic system is vented before
first use.
Check the oil level.
Place the appliance on a level surface or on a
sturdy table.
Place a log in a straight line against the splitting
wedge.
Move the pressure cam toward the splitting
wedge until the log splits.
Move the cam back to its rest position.
Remove the log.
OPERATING THE PRESSURE CAM
To move the cam (3) forward, push the on/off
switch (1) and subsequently push the handle (2)
down.
To move the cam backward, release the on/off
switch and subsequently release the handle.
To stop the cam, release the on/off switch.
CLEANING AND MAINTENANCE
Regularly clean the ventilation slots.
Clean the outside of the appliance with a moist
cloth.
Regularly check the appliance for possible
damages and leakage.
VENTING THE HYDRAULIC SYSTEM
The hydraulic system must be vented before first
use and after changing the oil.
Loosen the plug (8) a few turns.
Wait until the system has been vented.
Tighten the plug.

CHANGING THE OIL
The oil in the reservoir must be changed after every
400 working hours.
Place a receiving bin under the draining point (9).
Remove the plug (8) from the draining point.
Turn over the appliance to remove all oil out of
the reservoir.
Replace the plug.
Remove the plug (10) from the filling point.
Refill the prescribed amount of oil.
Replace the plug.
Place the appliance in the horizontal position.
Check the oil level.
Vent the hydraulic system.
CHECKING THE OIL LEVEL
The oil level must be checked before each use.
Check the oil level in the reservoir.
If necessary, refill the oil.
SHARPENING THE SPLITTING WEDGE
The wedge should preferably be sharpened by a
recognised technician.
Take the appliance to your dealer to have the
wedge (6) sharpened.
TRANSPORT
The appliance is equipped with wheels for easy
transport.
Take hold of the transport handle (7) to move the
appliance.
STORAGE
Always store the appliance in a clean and dry
location outside the reach of children.
Apply a thin layer of oil to the beam and the
wedge to avoid oxidation.
Place a protective cover over the appliance.
TECHNICAL DATA
Mains voltage V 230
Mains frequency Hz 50
Power input W 1,500
Max. pressure force kg 5000
Max. log length cm 52
Log diameter cm 5 - 25
Oil reservoir capacity l 2.4
Oil Standard hydraulic oil
Operating temperature °C 5 - 40
Weight kg 50
LpA (sound pressure) dB(A) < 70
GUARANTEE
Refer to the enclosed guarantee conditions for the
terms and conditions of guarantee.
ENVIRONMENT
Should your machine need replacement
after extended use, do not put it in the
domestic waste but dispose of it in an
environmentally safe way.


Montage du pied / Montage van de voet / Assembly of the foot /
Square pipe
Front stand
Wheel
Figure 1
Figure 3
Support stand
Horizontal steel bar
Figure 2
Figure 4

2008
Figure 5
Back steel support
Figure 6
Back steel
support
Square
pipe
Figure 7
M8X45
screw
Plate under
wedge
Vertical bar
Figure 8 Figure 9 Figure 10
Table of contents
Languages:
Other Elem Garden Technic Log Splitter manuals

Elem Garden Technic
Elem Garden Technic FB1500-5TEG52 User manual

Elem Garden Technic
Elem Garden Technic FBHT65-12TCH User manual

Elem Garden Technic
Elem Garden Technic FBHT65-22TCH User manual

Elem Garden Technic
Elem Garden Technic FB1500-5TEG52SC User manual

Elem Garden Technic
Elem Garden Technic FBV3000-7TEGCW User manual