Element Aireo User manual

User’s Manual

2
Table of Contents
TABLE OF CONTENTS........................................................................................................................................................2
INTRODUCTION...................................................................................................................................................................5
Welcome .............................................................................................................................................................................................................................................. 5
Aireo™ User’s Guide ......................................................................................................................................................................................................................... 6
Communications Regulation Information........................................................................................................................................................................................ 7
Caring for Aireo.................................................................................................................................................................................................................................. 8
Before You Begin................................................................................................................................................................................................................................ 9
Tour Aireo......................................................................................................................................................................................................................................... 11
Basic Connections............................................................................................................................................................................................................................. 13
LET’S GET STARTED........................................................................................................................................................16
Installation Procedure...................................................................................................................................................................................................................... 16
The Installation Wizard ................................................................................................................................................................................................................... 19
LOADING MUSIC ON AIREO™.........................................................................................................................................22
Using SoniqSync ............................................................................................................................................................................................................................... 22

3
AIREO FEATURES.............................................................................................................................................................25
MP3 / WMA Player .......................................................................................................................................................................................................................... 25
FM Stereo .......................................................................................................................................................................................................................................... 25
FM Transmitter ................................................................................................................................................................................................................................ 25
File Caddy ......................................................................................................................................................................................................................................... 26
SD/MMC Flash Storage ................................................................................................................................................................................................................... 26
Aireo Status Displays........................................................................................................................................................................................................................ 26
Using Aireo™.................................................................................................................................................................................................................................... 29
MP3 PLAYER APPLICATION ............................................................................................................................................32
Playing Aireo Music ......................................................................................................................................................................................................................... 32
Browse ............................................................................................................................................................................................................................................... 33
Aireo Preferences.............................................................................................................................................................................................................................. 39
FM STEREO APPLICATION ..............................................................................................................................................46
FM Stereo Music............................................................................................................................................................................................................................... 46
SONIQSYNC APPLICATION .............................................................................................................................................48
Connecting Wirelessly...................................................................................................................................................................................................................... 48
Dock To PC ....................................................................................................................................................................................................................................... 49

4
FILE CADDY APPLICATION .............................................................................................................................................58
Managing Files.................................................................................................................................................................................................................................. 58
APPENDIX A - TECH SPEC...............................................................................................................................................60
Aireo™ Technical Specifications..................................................................................................................................................................................................... 60
APPENDIX B – LICENSE AGREEMENT ...........................................................................................................................64
Aireo™ License Agreement .......................................................................................................................................................................................................... 64
CONTACT US ..................................................................................................................................................................68

5
Introduction
Welcome
Congratulations! Thank you for purchasing the Element Aireo™ MP3 Player. Advanced features found only on Aireo are
now at your fingertips. Your music, your way! Aireo now provides access to your music through WiFi (wireless)
technology. Aireo’s 1.5GB hard drive will store more than 300 4-minute songs for you that can be refreshed when you
wish through wireless synchronization. Aireo includes:
• MP3/WMA Player
• FM Stereo
• FM Transmitter
• SD/MMC Card drive
• File Caddy
• USB Connectivity
• Behind-the-head Headphones
• Backlit LCD Display
• AC Power Adaptor (120/220V)
• Long Lasting Rechargeable Battery
• Deluxe Carrying Case
Thank you for purchasing an Element Aireo™ MP3 Player. The latest technology in portable audio!
More Information
• Refer to the Aireo™ Quick Start Guide for fast information on how to setup and use your Aireo system.
• Visit the Aireo Website at www.SoniqCast.com.

6
Aireo™ User’s Guide
Element Aireo™ MP3 Player
Information in this document is subject to change without notice and does not represent a commitment on the part of
SoniqCast LLC. No part of this manual may be reproduced or transmitted in any form or by any means, electronic or
mechanical, including photocopying or recording, for any purpose without written permission of SoniqCast, LLC. The
software described in this document is furnished under a license agreement and may be used or copied only in
accordance with the terms of the license agreement. It is against the law to copy the software on any other medium
except as specifically allowed in the license agreement. The licensee may make one copy of the software for backup
purposes.
The Software License Agreement is located in Appendix B of this documentation.
Copyright 2004 SoniqCast LLC All rights reserved.
Version 1.0
January 2004
Microsoft, MS-DOS, and Windows are registered trademarks of Microsoft Corporation. All rights reserved.
All other products are trademarks or registered trademarks of their respective owners.

7
Communications Regulation Information
FCC Compliance Statement
This MP3 Player complies with Part 15 of the FCC rules. Operation is subject to the following two conditions: (1) This device may not cause harmful interference, and (2) this device
must accept any interference received, including interference that may cause undesired operation. See instructions if interference to radio or television reception is suspected.
Radio and Television Interference
This device generates, uses, and can radiate radio-frequency energy. If not installed and used properly – it may cause interference with radio and television reception.
This equipment has been tested and found to comply with the limits for a Class B digital device in accordance with the specification in Part 15 of the FCC rules. These specifications
are designed to provide reasonable protection against such interference in a residential installation. However, there is no guarantee that interference will not occur in a particular
installation. You can determine whether your MP3 Player system is causing interference by turning it off. If the interference stops, it was probably caused by the MP3 Player or one
of the peripheral devices.
If your MP3 Player system does cause interference to radio or television reception, try to correct the interference by using one or more of the following measures:
• Turn the television or radio antenna until the interference stops.
• Move the computer to one side or the other of the television.
• Move the computer farther away from the television or radio.
• Plug the computer into an outlet that is on a different circuit from the television or radio. (That is, make certain the computer and the television or radio are on circuits
controlled by different circuit breakers or fuses.)
If necessary, consult a SoniqCast-authorized service provider or SoniqCast. See the service and support information available in this users guide. Or, consult an experienced
radio/television technician for additional suggestions.
Important: Changes or modifications to this product not authorized by SoniqCast LLC could void the EMC compliance and negate your authority to operate this product.
This product was tested for EMC compliance under conditions that include use of SoniqCast peripheral devices and SoniqCast shielded cables and connectors between MP3 Player
system components. It is important that you use SoniqCast peripheral devices and shielded cables and connectors between system components to reduce the possibility of causing
interference to radios, television sets, and other electronic devices. You can obtain SoniqCast peripheral devices and the proper shielded cables and connectors through a SoniqCast-
authorized dealer. For non-SoniqCast peripheral devices, contact the manufacturer or dealer for assistance.
Industry Canada Statement
This Class B device meets all requirements of the Canadian interference-causing equipment regulations.
Cet appareil numérique de la classe B respecte toutes les exigences du Règlement sur le matéteriel brouilleur du Canada.

8
Caring for Aireo
Safety and Handling
Caring for your MP3 Player – Although Aireo is quite robust, please observe safety and handling instructions:
1. Do not store or use Aireo in areas exceeding 45° C, or 113° F
2. Do not subject Aireo to excessive force or impact
3. Keep Aireo away from excessive moisture
4. Do not expose Aireo to heat or flame
5. Keep Aireo away from strong magnetic fields
6. Please do not dismantle
7. Store Aireo out of direct sunlight
8. Do not crush or puncture
Caring for Aireo’s Battery – Aireo contains a long-lasting Lithium-ion battery that is NOT removable. Please
observe the following precautions:
1. Do not attempt to change Aireo’s internal battery. Please contact our Technical Support
personnel for service of the battery.

9
Before You Begin
Package Contents – The following items are included with your Aireo purchase:
• Aireo 1.5 Gig MP3 Player
• Stereo Headphones
• USB Cable
• AC Power Adapter
• Quick Start Guide
• Deluxe Carry Case
• Limited Warranty
Website Information – Visit the Aireo website for more information and support:
• Aireo Software and Firmware Updates
• Online Technical Support
• Troubleshooting
• FAQ’s
• How-To Tutorials
• Documentation
• Accessories
• Product Information

10
Before You Begin (continued)
Documentation & Software – Documentation and software necessary for your Aireo player and Host PC are
included on the Aireo player hard-drive. See: Let’s Get Started - Installation Setup for more instruction.
• An Installation Wizard will guide you through the installation process
• Internet connection is required for proper installation
Minimum System Requirements – The following is required as a minimum for your Aireo host PC operations:
• Microsoft® Windows® 2000, or Windows® XP
• Intel® Pentium II 200 MHz, AMD®-K6-2® 200 MHz or better processor (Pentium III 450 MHz or higher
recommended)
• USB 1.1 or 2.0 port connection
• 64 MB RAM (128 MB recommended)
• 20 MB free hard disk space (more if storing music files)
• Internet connection for Internet content downloading and website support
• Installed Mouse
• SVGA graphics adapter (256 colors, 800 x 600 resolution or better)
• 802.11 B/G Wireless Access Point required for wireless PC to player transfers

11
Tour Aireo
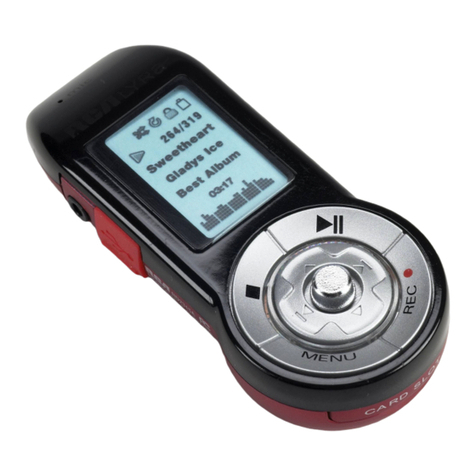
Picture of Aireo
Backlit LCD Display
The LCD Display provides a
window to player music
information, application and
setting options.
Menu Button
Use the Menu button
to change songs and
preferences.
Play/Select Button
Press this to perform an action on
a highlighted menu item or to
navigate to the next menu. Also,
press to play, pause, or stop play.
Navigation
Keypad
Scroll Up or Down
through a menu or
adjust the volume while
playing music.
Aireo LED Display
T
he LED’s provides a visual
status indication.
Mode Button
This button will takes you
to the next application
available on your player.

12
Tour Aireo (continued)
Headphone Jacks (On Top)
Share your player with a friend.
Reset Button (On Back)
Insert paperclip on the back of the
player to reset the system.
Power Button (On Side)
Press and hold to turn player on
and off.
USB Port (On Side)
Connects to USB cable.
Connector Port (Bottom)
Connects player to AC power
adapter and other dock
accessories.
SC/MMC Slot (On Side)
Additional removable storage.

13
Basic Connections
AC Power Adapter – CHARGE AIREO’S BATTERY! With Aireo’s design, take it with you wherever you go.
Occasionally you will need to charge the internal battery pack installed in your Aireo player. You may use Aireo when
connected to an external power source as well. Aireo battery will charge three different ways:
• AC Power Adapter – Connect the AC power adapter to the connection port found at the bottom of your
player. The AC adapter will recharge the battery from 0% to 60-70% of its capacity in about 2 hours. The battery
will fully charge in about 4 hours. A red dome LED will be lit while charging the player if powered off.
1. Plug the AC adapter into and electrical outlet.
2. Connect the AC Power Adapter to Aireo™.
3. When the battery is fully charged, the battery icon will display four solid bars on your
player or, the red dome LED will turn off.
4. Disconnect the adapter from Aireo – and enjoy.
• Desktop Player Dock (Optional) – Place Aireo into the Desktop Player Dock accessory. The Player Dock
accessory provides power for your Aireo and an interface to your stereo system or computer. The Player Dock is a
convenient way to store Aireo and charge the battery.
• Auto-Dock Accessory (12 V Adaptor) – While traveling, plug Aireo into your automobile’s power jack. You
can listen to music transmitted from Aireo to your car stereo keeping Aireo’s battery fully charged.

14
Basic Connections (continued)
Aireo Headphones – You can connect one or TWO sets of headphones to your Aireo player. Plug headphones into
either jack on top of the player. Enjoy your music and share it with a friend!
USB – Initially, connect Aireo into the USB port on your computer to upload important software and information for
your Aireo player system. See: Let’s Get Started - Installation Setup for more information.
• The USB connection also provides another way to download music to Aireo through the
SoniqSync Mix Manager.
• Using the USB connection, Aireo will appear as a local storage device to your computer. By
double-clicking on or opening Aireo’s drive letter, you can view files on Aireo’s internal hard-
drive (HDD). See: File Caddy Operations in this manual for more information about transferring
files.
Note: Never move or delete any system folders on your Aireo hard drive. These files are required to allow
proper operation of your Aireo player.

15
Basic Connections (continued)
Additional Accessories – Element provides the following accessories to help provide Aireo a wide range of
connectivity and usage:
• Desktop Player Docking Station – is available to provide a power cradle for your Aireo™. The Player
Dock also provides:
o USB connectivity – for connecting to your PC
o SPIDIF Digital Audio-Out jack – for digital home stereo
o Headphone Jack – for computer input
o Analog Line-Out jack – for external speakers
• Vehicle Player Docking Station – provides a power cradle for your Aireo in your car!
o Power is provided through a 12V connector
o Audio Output Tee connector
o Enabled On/Off feature

16
Let’s Get Started
Installation Procedure
1. Connect the AC Power Adapter to your Aireo
player.
• If your Aireo player is new, the internal
battery may not be fully charged.
2. Connect your Aireo player to a USB port on your
PC:
• If the SoniqSync Installation Wizard does not
automatically run on your PC then continue
the following procedure. Otherwise, see:
The Installation Wizard.
3. Verify that communications is established
between your PC and your Aireo player:
• Microsoft® Windows 2000 may automatically open a window for Aireo. If so, go to step #6.
4. Double-click on the My Computer icon on your desktop to verify the drive letter assigned for your Aireo player. It
may appear to your PC as a Local Disk in My Computer.
5. Double-click on the drive to view files and folders stored on your Aireo player.
6. Along with folders and this Let’s Get Started - Installation Guide.pdf file, find the setup.exe file.
7. Double-click the setup.exe file to start the SoniqSync Installation Wizard.

17
Let’s Get Started (continued)
Application Software
The SoniqSync Installation Wizard allows the installation of the following:
• SoniqSync for Aireo
• Windows Media® Player – 9 Series (Required
Installation)
• MUSICMATCH® Jukebox
• Documentation and Support information is
provided for your use
• Installation may be cancelled at any time
• Software Installation may be uninstalled later if
desired
SoniqSync™
SoniqSync is the link between your PC and your Aireo MP3 Player. SoniqSync allows you to put playlists of music created
with your favorite playlist creation application on to your Aireo player. You can manually put playlists on your Aireo or let
SoniqSync automatically manage the playlists on your player. SoniqSync works seamlessly with Microsoft® Windows
Media Player, MUSICMATCH Jukebox, or other .m3u or .wpl playlists stored on your PC.
• Sync Playlist – Send a playlist from your PC to your Aireo player right away.
• Sync Scheduler – Manage Synchronization Schedules for your Aireo player.
• SoniqSync Players List – View the players associated with SoniqSync.
• Manage Mixes – Create mixes of playlists that you can send to your Aireo player.
• View Player – See music that is currently on your Aireo player.
• Upgrades – Upgrade the firmware on your Aireo player for the latest available features.

18
Let’s Get Started (continued)
Windows Media® Player
The SoniqSync Installation Wizard will install Windows Media Player 9 Series. SoniqSync requires this version (or newer)
of Windows Media Player. If Windows Media Player 9 Series (or newer) is already installed on your PC, the SoniqSync
Installation Wizard will not re-install the application.
MUSICMATCH ® Jukebox
The SoniqSync Installation Wizard also recommends the latest version of MUSICMATCH Jukebox. MUSICMATCH Jukebox
is available for installation as an option. If a newer version of MUSICMATCH Jukebox is already on your PC, simply
uncheck the selection box on the SoniqSync Installation Wizard installation window.
Note: For more information about Windows Media® Player or MUSICMATCH ® Jukebox
please review respective user guides or websites for assistance.
Note: If the SoniqSync Installation Wizard fails to begin the installation process, please visit us at
www.soniqcast.com for further instruction and customer support.

19
Let’s Get Started (continued)
The Installation Wizard
The SoniqSync Installation Wizard will guide you through the installation of applications on your PC for your Aireo player.
With active Internet communication on your PC, SoniqSync will install the most recent version of Aireo player firmware to
provide the latest available features for your Aireo player.
SoniqSync will also let you to add your Aireo player to the SoniqSync players list as part of the installation process. Once
installed, you can begin to sync your favorite playlists to Aireo. Load SoniqSync on any host computer you want to
associate with your Aireo player.
Step 1
On the Custom Setup window, select the applications you
want to install. Remember that SoniqSync is required on your
PC for Aireo as well as the latest Windows Media® Player
application.
Press Next >.

20
Let’s Get Started (continued)
Step 2
Begin the SoniqSync application installation by reviewing these information screens. Then press the ‘Next’ button to
continue. Press Next >.
Step 3
Review the SoniqSync™ License Agreement. Select: “I accept the terms of the license agreement” to continue
installation. Press Next >.
Step 4
Enter your User Name and Organization. You may choose to make SoniqSync available to all users of your PC, or just the
current user. Press Next >.
Step 5
You may choose where you wish to install SoniqSync files on your computer. If the default file location is acceptable,
press the ‘Next’ button. Press Next >.
Step 6
Before continuing the installation, review the information on the “Current Settings” view. You may change any settings
by pressing the < Back button. If the information is correct, press the ‘Install’ button to continue.
Press Install.
Other manuals for Aireo
2
Table of contents
Other Element MP3 Player manuals
