Element GC-920 User manual

USER MANUAL
FOR MODEL GC-920/921/922/940

1
Operating Guide
INDEX
Introduction
Knowing your p ayer functions
The contro s and connections
To Operate Your P ayer
Step 1: Charge your p ayer
Step 2: Setting basic functions
Step 3: Connecting to PC
The Main Menu
Basic contro s
Music mode
Movie mode
Record mode
Voice mode
Photo Mode
SYS Setup
FM Radio mode
Text mode
AMV Converter Pack
AMV Converter
AMV P ayer
P ayer Disk Manager
Media Manager
Firmware Upgrade Too
Safety & Upkeep
FCC Part 15 Statement

2
Congratulations! Your Element GC 920(GC 940) is a music
and video player, Calendar, Clock, recorder, radio, and
photo album, all in one. Increase your player’s capacity
anytime by inserting a Mini SD memory card.
Before use your player, check what’s inside of your
package:
Accessories:
An USB cab e
An earphone
A CD
This user manua
Knowing your Player Functions
2.0” LCD Disp ay
Supports MP3,WMA music formats
Bui t-in rechargeab e Lithium battery
Supports Mini SD card up to 2GB
Supports AMV video format, up to 208 * 176 reso ution.
Supports JPEG,BMP and GIF format photo browse
Bui t-in Microphone, Digita Voice Recorder
Mu tip e P ayback Mode
FM Radio
Supports WIN98SE/2000/XP/VISTA operating system
USB 2.0 High Speed
Supports E-Book P ayback
Please fully charge the battery before first time use. Use the
USB cable supplied to connect to the USB port of a
computer to charge the player.

3
Please read this manual carefully to obtain the best
possible performance from your player. Please keep this
manual for future reference.
The controls and connections
ON/OFF/Hold
Push downwards and ho d unti the disp ay turns on or off
Push upwards to disab e a buttons
Mini SD Memory Slot
Headphone jack & USB port
Reset hole (RESET) To reset p ayer to factory defau t setting,
insert a straightened paperc ip or tip.
Control Buttons
M – Press to se ect or confirm, or press and ho d to exit to main
menu. May perform other functions depending on menu
opened. Press and ho d to return to Main Menu

4
EQ - Press to change audio equa izer mode whi e p aying
music
Direction Pad
UP – to increase audio vo ume
DOWN - to decrease audio vo ume
LEFT - to se ect next item in the menu
RIGHT - to se ect the previous item in the menu
O - P ay or Pause during the Music or Video mode
To operate your player:
Step 1 Charge your Player
Fully charge your player before 1
st
use
Charge the p ayer for minimum 4 hours at the 1
st
time.
Charge from the USB port of a
PC
Turn on your PC, and make
sure the PC is not in power
saving mode whi e p ayer is
charging.
Avoid using a USB hub
(Note: whi e ow battery
icon appears, charge your
p ayer as soon as possib e)
To charge the unit via the USB cab e, simp y keep the cab e

5
p ugged into the computer.
On the bottom right of your computer screen on the taskbar
you wi see the “safe y remove hardware” Icon.
Left C ick the icon and you wi see the removab e storage
(MP4) and then eft c ick again. This wi remove the MP4 as a
removab e disk connection and now wi charge the p ayer.
Step 2 Setting Basic functions
Set menu language:
Turn on the p ayer, move to “SYS Setup” and se ect “Language”
option to set the anguage you want, then press “M” button to
confirm your se ection.
Set the date or time
Move to “SYS Setup” mode and se ect “System time” option. Use
UP and DOWN buttons to move between date and time boxes,
use < and > buttons to set the date and time. Press “M” button to
confirm the time or date setting.
Set the FM Radio Channels
Always use the earbugs when using radio, the earbugs acts
as FM antenna for the radio.
In the main menu, go to “FM Radio” screen and enter.
Press buttons “<” and “>” to fine tune the channe , or press and
ho d the buttons < / > to scan the channe
Press “M” and se ect “SAVE” to preset the Radio channe (s)
Step 3 Connecting to the PC:
The p ayer can connect to a PC via the USB port, the p ayer

6
works as an USB Mass storage device when connecting to the
PC. You can save the fi es from the p ayer to the PC or vise
versa.
The P ayer on y works as USB Mass Storage Device when
connecting to the PC. You can switch to other operating
modes by turning ON the p ayer.
The fi e(s) you saved to the p ayer can be direct y run by the
corresponding mode(s) in the p ayer
The jpg photo fi es can be disp ayed in the “PHOTO” mode of
the p ayer; the MP3 music fi es can be p ayed in the ‘MUSIC”
mode of the p ayer,…and so on.
The p ayer is connected to the PC, the USB port from the PC
wi provide the power to charge on the p ayer simu taneous y.
Removable Storage
You a so have the option to increase the memory by inserting a
Mini SD card. This MP4 p ayer can support up to 2GB Inserting:
P ace the MINI SD card face down (side without words) (with the
direction of the disp ay screen as the face), and s ight y push the
card into the socket of the card, i.e. connecting the unit. Under
this state, you can p ay the content on the card. Removing:
S ight y push the MINI SD card, and it wi spring back, you can
then take it out.
Caution: P ease perform inserting and pu ing operation when
power is off! Otherwise, it wi ead to the oss or damage to the
fi es within the unit.
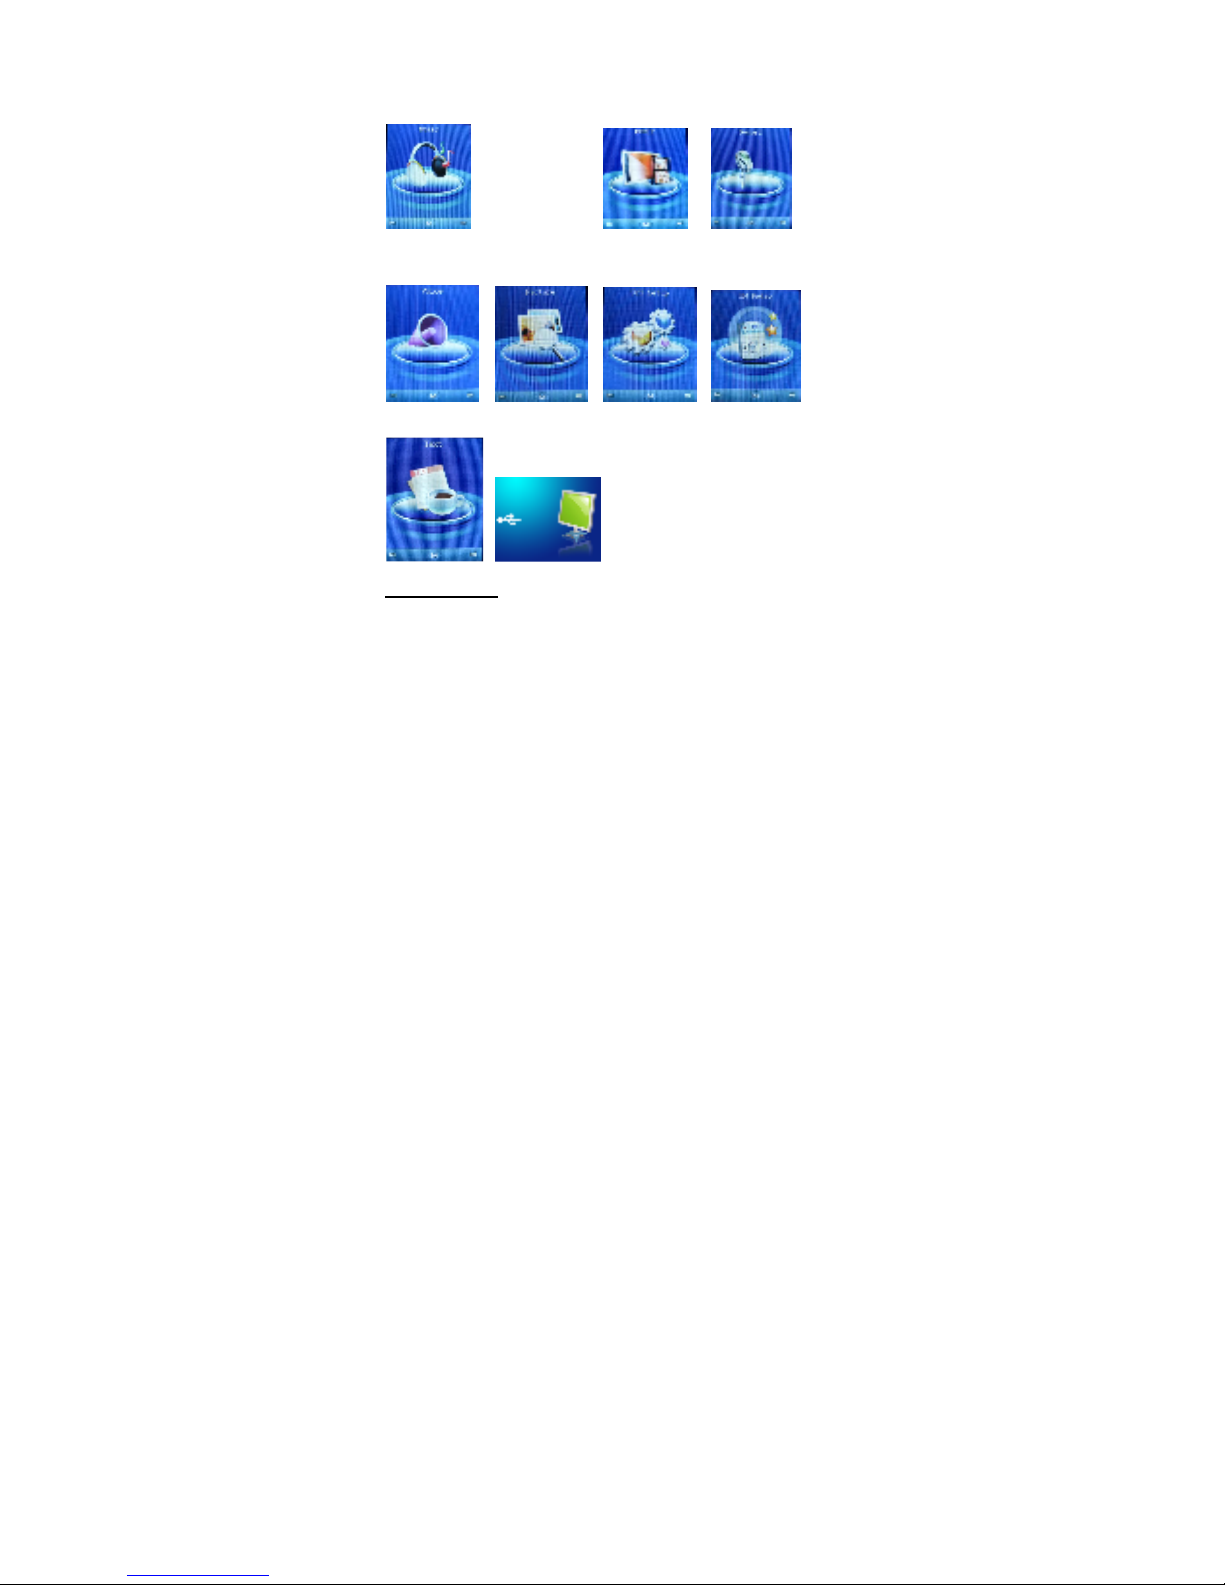
The Main Menu to enter and operate in different function
modes
7
There are 8 function modes in your p ayer:
Turn ON the P ayer to show main menu
Basic Controls
Main menu: Music mode:
Movie mode:
Record mode:
Voice mode: Photo mode: SYS Setup: FM Radio mode:
Text Mode: USB mode:

8
M – Press to se ect or confirm; press and ho d to exit to main
menu. This button may perform other functions depending on
menu opened.
EQ Press to change audio equa izer mode whi e p aying music
Direction Pad
UP – to increase audio vo ume
DOWN - to decrease audio vo ume
RIGHT - to se ect next item in the menu
LEFT - to se ect the previous item in the menu
O - P ay or Pause during the Music or Video mode
Music Mode
Press “M” to enter to Music mode
UP/DOWN to set the vo ume
< / > to move to previous or next music fi e
O to start p aying the se ected music or pause
the music.
“EQ” to change and set equa izer mode
Press and ho d “M” to exit to main menu
Movie Mode
Press “M” to enter to Music mode
UP/DOWN to set the vo ume
< / > to move to previous or next music fi e
O to start p aying music or pause the music.

9
Record Mode
Press “M” to enter to Recording mode
Press “O” to start recording, press “O” again to
pause or to continue recording.
Press and ho d “M” to exit to main menu. The
recorded fi e wi be automatica y saved.
Voice Mode (to play the recorded voice file)
Press “M” to enter to Voice mode
UP/DOWN to set the vo ume
< / > to move to previous or next recorded
voice fi e
O to start p aying or to pause the p ayed voice
fi e.
Picture Mode
Press “M” to move to the photo fi e ist
< / > to move to previous or next photo
Press “O” to disp ay the se ected photo, press
“O” again to exit to photo fi e ist.
SYS Setup
Press “M” to enter to setup ist
< / > to move to previous or next setup item
Press “M” to enter to the setup menu of
se ected item, press “M” again to exit to
This manual suits for next models
3
Other Element MP3 Player manuals


