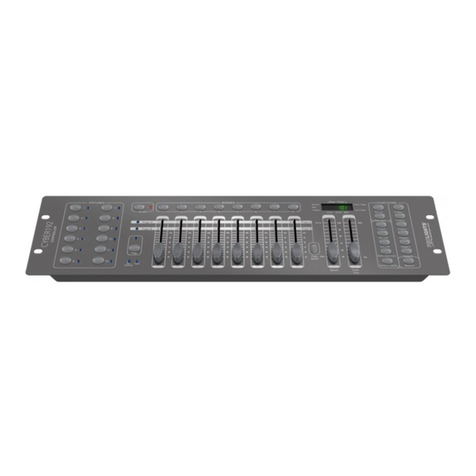
elero QuinTec-868 User manual

138210501_EN_0919
QuinTec-868
Operating instructions
(translation)
Product contents
• Wall transmitter module
• CR 2032 battery (installed)
• elero frame
• Black xing plate with xing set (wall plugs
and screws)
• Operating instructions
Technical data
Power
supply
3 V
battery, CR 2032
Radio frequency [MHz]
(band)
868
Transmission power
[mW] | [dBm]
≤ 500 | ≤ 10
Number of channels 5 + 1
Connections, terminals None
Operating temperature
[°C]
0 ... 50
Protection class (IP) 20
Dimensions (WxHxD)
[mm]
Wall transmitter module
Fixing plate
elero frame
50 x 50 x 9.6
approx. 75 x 75
approx. 80 x 80
Weight [g] approx. 50
Type of mounting Wall mounting
Item number 286550001
Safety instructions
Please read this operating manual carefully
as the procedure in this manual is a prere-
quisite for correct use of the product.
Only operate the transmitter within sight
of the devices being controlled.
It is not recommended to operate all drives
simultaneously. For safety reasons, at least
one drive should be controlled independently
from others to provide a safe escape route
in the event of an emergency.
The gures in this operating manual are for
illustration purposes only. The illustrations
may dier from your product with respect to
minor details and are provided for general
information only.
elero GmbH continuously strives to improve
all products. As a result, the specications,
features and technology of this product may
be changed at any time. The information in
this operating manual is based on current
information at the time of publication.
No claims can be derived from the technical
data, images and information in this opera-
ting manual.
&$87,21
Intended use
Foreseeable misuse
Only use in dry rooms for controlling elero
radio receivers. Do not perform any modi-
cations to the device. Do not operate the
transmitter inadvertently or carelessly. The
manufacturer will not assume liability for
damage caused by the above.
General
• 5-channel wall transmitter with 5 individual
channels and 1 central channel for operating
roller shutters, venetian blinds and awnings
• Suitable for standard device deployment
50 x 50 mm
• Radio frequency for reliable transmission
• Large operator buttons
• Display of system statuses using LEDs
Assembly / commissioning
Important: The battery is not activated at
delivery. For commissioning, remove the
insulating strip Ⓐ .
Make sure the radio link is unobstructed.
Avoid installing the unit in a distributor box
or metal housing, in direct proximity to large
metal objects, or on or close to the oor.
Check the installation surface for hidden
cables, etc.
Installation:
1. Attach the xing plate to the installation
location using the screws and wall plugs.
2. For programming the wall transmitter to
the radio control or receiver:
see “Programming the transmitter / channel”.
3. Insert the wall transmitter and the elero
frame into the xing plate at a right angle
with the wall.
Asynchronous
programming mode
Programming the transmitter / channel for
multiple receivers
Requirement: The receiver is installed
Programming can only be performed in one selec-
ted channel. Several receivers can be program-
med to one channel.
1. Switch the circuit o and on again: The receiver
will remain ready to program / in programming
mode for approx. 5 minutes.
2. Position yourself with the transmitter to be pro-
grammed within sight and radio range of the blind.
3. Press the [P] programming button for approx.
1 second.
The blind will move up and down for approxima-
tely 2 minutes (programming mode).
If several receivers are connected to the same
feed line, then all are simultaneously ready to
program / in programming mode. The blinds will
start moving up and down randomly. The longer
programming is delayed, the greater the oset
will be. Individual receivers can now be assigned
to the respective channel of the transmitter.
4. Immediately (maximum 1 second) after the
start of upward travel, press the [UP ▲] button.
The blind will stop for a short time.
5. Immediately (maximum 1 second) after the
start of downward travel, press the
[DOWN/CLOSE ▼] button. The blind will stop.
Important: You can stop receivers that you
do not want to program by pressing the STOP
button ■ on an already programmed transmit-
ter. You can now make the channel assignment/
change without having to disconnect the indivi-
dual receivers.
6. If the blind moves in the opposite direction or the
blind does not stop after programming, delete
the transmitter from the receiver and repeat the
programming process.
7. QuinTec-868 is now programmed.
Stopping programming mode in the transmitter
Press the [STOP ■] button for at least 6 seconds
until the LED status ashes orange.
Programming additional transmitters /
channels to one receiver
1. Press the [UP ▲]+[DOWN/CLOSE ▼]+[P]
buttons simultaneously for 3 seconds on a trans-
mitter that has already been programmed to the
receiver. The LED status and operating mode ④
goes out after about 3 seconds. The receiver will
remain in programming mode for approximately
5 minutes. Press the programming button [P] on
the transmitter to be programmed for approxi-
mately 1 second.
2. Immediately (maximum 1 second) after the start
of upward travel, press the [UP ▲] button.
The LED status and operating mode ④ lights
up briey. The blind stops, starts moving again,
stops again, and then moves downwards.
3. Immediately (maximum 1 second) after the
start of downward travel, press the
[DOWN/CLOSE ▼] button.
The indicator light will light up briey.
The blind will stop.
4. The transmitter or the transmitter channel has
been programmed.
Deleting individual transmitters / channels
1. Press the [STOP ■]+[P] buttons simultaneously
and hold them down for approx. 6 seconds.
2. The indicator light will light up orange and
then red.
Delete all transmitters and receivers
To perform a factory reset, all selected drives must
be supplied with power.
1. Press the [UP ▲]+[DOWN/CLOSE ▼]+
[STOP ■]+[P] buttons and hold them down for at
least 6 seconds.
2. LED status ④ shines orange rst and then red.
Follow these instructions to ensure proper
and safe use. Retain for future use.
Control elements, front
1
2
3
4
5
6
7
8
9
① Fixing plate
② eleroframe
③Wall transmitter module
④ LED status and operating mode
⑤ LEDs channels 1 to 5
⑥ UP ▲ button
⑦ STOP ■ button
⑧ DOWN/CLOSE ▼ button
⑨ Selection button for channel and operating
mode
Back / battery replacement
123456
A
B
C
D
78
E
F
12345678
A
B
C
D
E
F
-
286550001RM
286550001RM.asm
24.10.17 HERMANNC
-
Rohteil QuinTec-868
für Adapterrahmen 50x50 mm
1:5
-
Diese Maße werden besonders geprüft
This dimensions are particularly examined
Gratfrei
burr-free
Allgemeintoleranzen
General Tolerances:
DIN ISO 2768-1 m-E
DIN ISO 2768-2 K-E
Maßstab / Scale:
Werkstoff / Material:
Datum / Date: Name:
A-EW
geprüft
proofed:
Benennung / Title:
Zeichnungsnummer / Drawingnumber:
Werkzeug-Nr
Tool-Number:
Gemäß RoHS-Richtlinie 2011/65 EG / according to RoHS directive 200/11/EU
Index: Kurzbeschreibung / Short Comment: Name:Datum / Date:
elero GmbH
Antriebstechnik
Maybachstr. 30, D-73278 Schlierbach
Fon: (0049) 7021 / 9539-0
Fax: (0049) 7021 / 9539-212
Verwendung , Kennzeichnung / Used in, Spezification:
Gewicht / weight:
Solid Edge
-
-
-
-
-
-
-
-
-
-
-
-
-
-
-
-
-
-
-
-
-
-
-
-
-
-
-
-
-
-
-
-
-
-
1
CAD-Nr / CAD-No:
DIN A4
Format / format:
rev. Nr.
-
Lieferantenkennzeichnung nach Absprache
Supplier ID according to prior agreement
0,000 kg
Reg. Nr
Fehler: Keine Referenz
Fehler: Keine Referenz
Fehler: Keine Referenz
Fehler: Keine Referenz
Fehler: Keine Referenz
Fehler: Keine Referenz
Fehler: Keine Referenz
Fehler: Keine Referenz
Fehler: Keine Referenz - -
A
B
C
Ⓐ Insulating strip
Ⓑ Battery compartment with marking
Ⓒ Programming button P

Disposal
Batteries and old units may not be disposed
of with household waste!
1. Dispose of packaging in the recycling bin
for cardboard and paper.
2. Dispose of old batteries in the recycling
bin for used batteries or have a retailer
recycle them.
3. Dispose of old units at an electronic waste
recycling facility or have a retailer recycle
them.
Conformity
elero hereby declares that QuinTec-868 wall
transmitter is in compliance with Directive
2014/53/EU. The full text of the EU Declaration
of Conformity is available at the following
internet address:
www.elero.com/downloads-service/
Service/manufacturer's
address
If malfunctions have occurred or the device
has been damaged despite proper handling,
contact your contractor or dealer.
elero GmbH
73278 Schlierbach
GERMANY
www.elero.de
Repairs
Please specify the item number, item
description, type of fault, situational circum-
stances, presumed cause, unusual events
prior to the problem.
Cleaning
Clean the device with a damp cloth only.
Do not use cleaning agents because they
can damage the surfaces.
Warranty
Within the legal warranty period, we will
remedy any defects caused by material or
manufacturing defects by repairing or
replacing the unit. Unauthorised modica-
tions will void the warranty.
LED status and
operating mode ④
Green - steady If the Selection button
pressed previously:
Operating mode Auto
Red - steady If the Selection button
pressed previously:
Operating mode Manual
Orange - as-
hing slow
Channel (transmitter)
not programmed in any
receiver
Orange - as-
hing fast
(approx. every
2 seconds)
Channel (transmitter) is
in programming mode.
Operation of receivers
already programmed is
not possible.
Orange - ashing
fast (approx.
every 2 seconds)
More than 10 receivers are
ready for programming.
Orange or green -
ashing multiple
times, then red
after 6 seconds
Channel (transmitter)
has been deleted
Red - ashing
quickly
Battery almost depleted
Synchronous
programming mode
For programming one transmitter to multiple
receivers at the same time.
1. Press the [DOWN/CLOSE ▼]+ [P] but-
tons simultaneously for 3 seconds on a
transmitter that has already been pro-
grammed to the receiver. The status LED
ashes orange and green multiple times.
The receivers are now synchronously in
programming mode. The blind moves in
briey in the down direction.
2. With the transmitter to be programmed,
perform steps 1 to 7 as described under
“Programming the transmitter / channel”.
Conguring the drive
Dening the intermediate position
Requirement:
The blind is in the upper end position.
1. Press the [DOWN/CLOSE ▼] button until
the desired intermediate position is reached.
2. Additionally, briey press the [STOP ■] button.
The blind will stop. The intermediate positi-
on has now been stored.
Dene one of the ventilation/tilting/fabric
tautening positions
Requirement:
The blind is in the lower end position.
1. Press the [UP ▲] button until the ventilati-
on gaps open, the venetian blind slats are
tilted or the awning fabric is taut.
2. Additionally, briey press the [STOP ■] button.
The blind will stop. The ventilation / tilting /
fabric tautening position has been stored.
Moving to the intermediate position
Requirement:
The intermediate position is dened and the
blind is in the upper end position (combined
with Combio).
1. Press the [DOWN/CLOSE ▼] button twice
(in quick succession): The blind moves to
the saved intermediate position.
If no intermediate position has been dened,
the blind moves to the lower end position.
Important: If you are using venetian blinds
and a dened tilt position, the venetian blind
slats will also tilt.
If no tilt position has been dened, the blind
will stop at the intermediate position with the
slats closed.
Moving to the ventilation / tilting / fabric
tautening positions
Requirement:
The position of the ventilation / tilting / fabric
tautening is dened and the blind is in the
lower end position (combined with Combio).
1. Press the [OPEN ▲] button twice in quick
succession:
The blind moves to the saved position.
If no ventilation / tilting / fabric tautening
position is dened, the blind moves to the
upper end position.
Deleting the intermediate position
Requirement: The transmitter is programmed.
1. Press the [DOWN/CLOSE ▼]+ [STOP ■]
buttons simultaneously for approx. 3 seconds.
The intermediate position is now deleted.
The indicator light will light up briey.
Deleting the ventilation position / tilting
position / fabric tautening position
Requirement: The transmitter is programmed.
1. Press the [UP ▲]+ [STOP ■] button simul-
taneously for approx. 3 seconds.
The ventilation / tilting / fabric tautening posi-
tion has now been deleted. The LED status
and operating mode ④ lights up briey.
Selection button ⑨
Auto Manual
A receiver that is
programmed res-
ponds to the timer
function of a corres-
ponding control unit
or to commands by
sensors.
A receiver that is
programmed does
not respond to the
timer function of a
corresponding con-
trol unit or to com-
mands by sensors.
• Short operation: Display of the current
operating mode Auto / Manual with
selection Next channel / Central channel.
• Operation approx. 1 s duration: Display of
the current operating mode Auto / Manual
without channel change.
• Long press approx. 2 s duration:
Switch between operating modes Auto
and Manual.
Important:
Wind sensors trigger corresponding travel
movements in both operating modes.
Notes on troubleshooting
Fault Cause Remedy
Drive not
running,
indicator
light not
illuminating
Battery
depleted
The battery
is incorrectly
installed
Install a new
battery
Insert the
battery
correctly
The drive is
not running,
the status
LED shines
or ashes
red
1. The
receiver
is outside
radio
range
2. Receiver
not ope-
rating or
faulty
1. Reduce
distance
to the
receiver
2. Switch on
or replace
receiver
Drive runs
in the wrong
direction
Directions
are incorrec-
tly program-
med
Delete
transmitter
and program
correctly
LEDs channels 1 to 5 ⑤
shining green
Display active channel(s)
(1 or 5 channels) (one
channel / the central chan-
nel is always selected)
Replacing the battery
After a battery change, the transmitter pro-
gramming is retained; QuinTec does to have
to be reprogrammed into the radio receiver/
transmitter.
1. Pry the wall transmitter module ③ and the
elero frame ② out of the xing plate ①.
2. Carefully pull the battery out of the battery
compartment Ⓑ using a blunt, insulated
tool. Use only a CR 2032 battery. Make
sure the polarity is correct. The positive
terminal must be visible.
3. Reinsert the wall transmitter ③ into the
xing plate ①.
Dispose of the used battery in accordance with
environmental regulations.
Central channel
• Same control system for several receivers
with one travel command.
• All programmed receivers can be controlled
in the central channel.
• QuinTec-868 can be programmed in several
receivers.
Table of contents
Other elero Control System manuals
