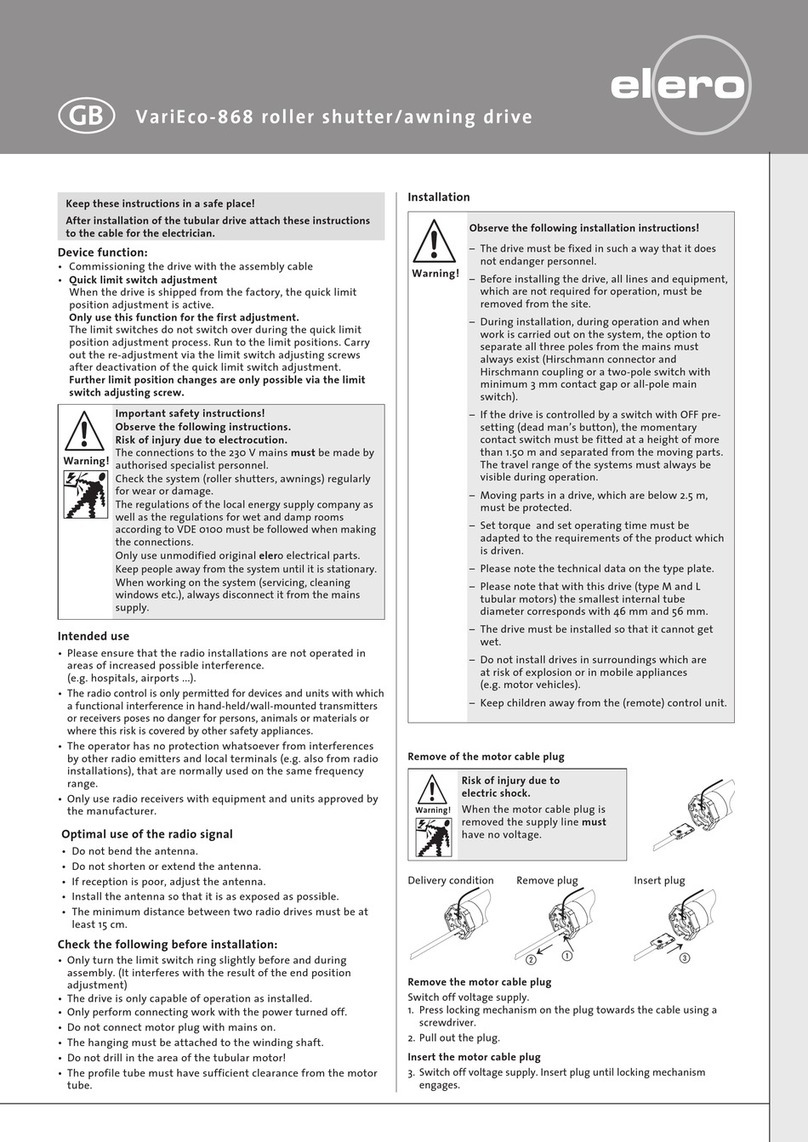
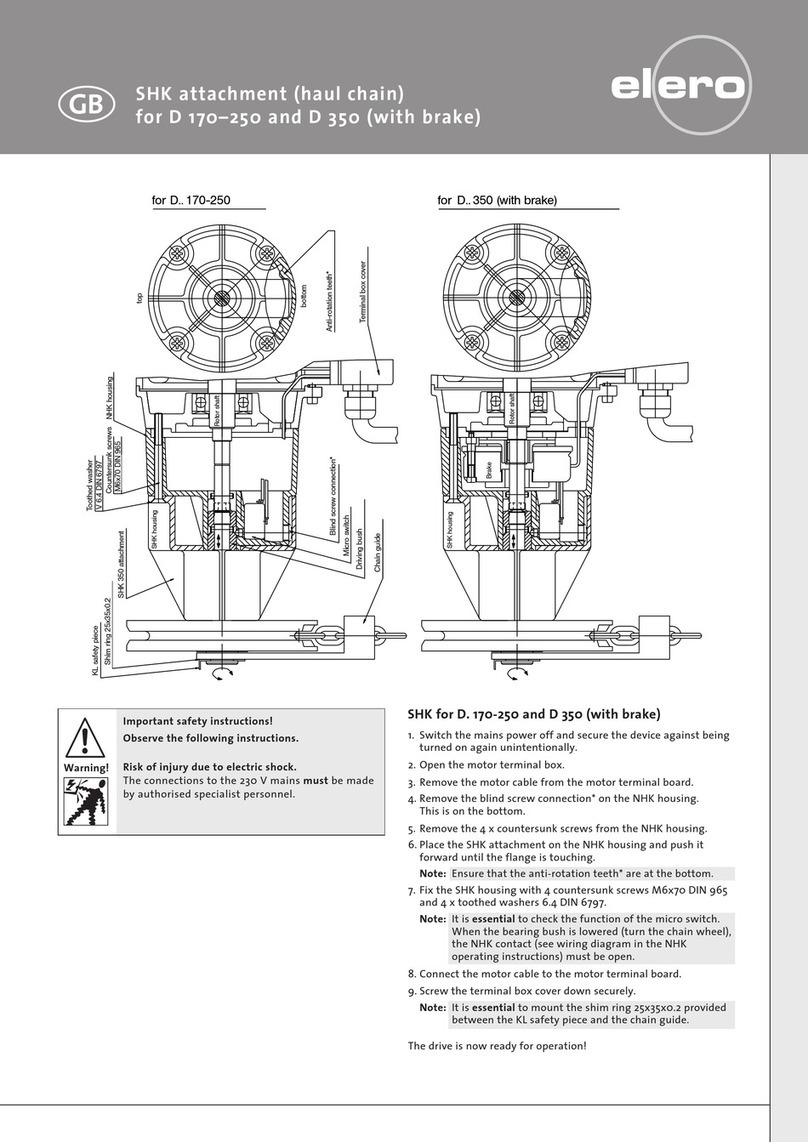
elero JAR User manual

After the venetian blind motor has been installed, attach these
instructions to the cable for the use of the electrician.
Mounting instructions
Mounting of the safety cut-out „right hand installation“
Remove label on the bottom side of the limit switch housing and
insert the safety cut-out with orange or black cap in the openings
and engage it in such a way that the orange or black pressure pin
points towards the side of the orange adjustment push-button UP.
If the supplied safety cut-out cannot be used, e.g. due to lack of
space, then the label must not be removed since it protects the
inside of the limit switch against dirt.
If the safety cut-out is not long
enough, it can be extended by
10 mm at a time with the safety
cut-out extension (article
number 16 101.4501).
(Maximum of 3 safety cut-out
extensions can be plugged on).
Insert the blade of a small flat
screwdriver into one of the
grooves on the orange cover and by pressing the blade towards
the middle of the safety cut-out, lever off the cover. Clip on the
extension and then clip on the cover again.
Mounting of the QuickSnap coupling for JA
1. Apply coupling at an angle whilst observing the position of the
coupling with respect to the shaft: The stop spring should slide
on the upper surface of the hexagonal shaft.
2. Push coupling a little further until the spring audibly latches
into the groove. (Click).
3. If the groove is covered by a bearing or lockwasher, the
hexagonal shaft can be correspondingly pushed back until the
coupling spring latches into place.
4. By pulling it by jerks check that the coupling is securely seated.
Dismantling of the QuickSnap coupling for JA
Do not forcibly remove the coupling.
1. Lift up the motor coupling retaining spring on the shaft with a
small screwdriver.
2. Pull off the coupling.
Installation in headpiece
Installation instructions:
• Install drive without restraint, in
correct position (safety cut-out
showing downwards), and properly
aligned with the shafts in the
venetian blind head.
• Impacts (e.g. hammer blows) are not
permitted on drive, shaft or coupling.
• The axle height of the drive is
27.5 mm. See JA accessories for
dampers for different bearing blocks
axle heights.
• Make sure that the shaft is not radially loaded.
• Make electrical connection with installation
cable (article number 23 246.0001) and check
the turning direction of the drive shaft
according to the direction advice on the front
of the limit switch housing. Travel to the lower
end position again with the DOWN pushbutton.
• Couple drive to shaft. Note the correct setting
for the slats.
Left-hand installation is not possible with JAR drives.
JAR Venetian Blind Motors
GB
removable label
damper
countersunk bolt
withcross recess
H no. 3
22
32
Setting instructions: Venetian blind drives are supplied
from the factory already set to the
lower end position “Ab1” (Down1).
Connect installation cable to
venetian blind drive
.
Setting the upper end position::
Setting of the upper end point is
only necessary if the end position is
located ahead of switch-off by the
safety cut-out. Otherwise the
venetian blind is only switched off
by the safety cut-out.
• Move venetian blind upwards with
the corresponding push button.
• Simultaneously press the
orange adjustment button
and hold it down for at
least 5 seconds. (Adjustment
button remains latched.)
Adjustment push
button (white)
DOWN
Adjustment push
button (white)
DOWN
Adjustment push
button (white)
DOWN1
Safety
cut-out
elero
ZU
Button 1
Button 2
Button 3
Working setting
Advice
This must have taken place at latest 0.5 m before reaching the
end position. After pressing the adjustment button it must stay
latched in.
• With the help of the installation cable travel directly to the upper
end position (fine adjustment by means of inching operation
with the installation cable).
• By changing the direction of travel the adjustment button is
automatically unlatched and the upper end position is then set.
Setting the lower end position:
It is not normally necessary to set the lower end position since the
ventian blind drives are set to the lower end position in the factory.
If it is necessary however the setting takes place in the same way as
for the upper end position.
• Move venetian blind downwards with the corresponding push
button.
• Not less than 0.5 m before reaching the lower setting press in the
two white adjustment buttons AB1 and AB2 (Down1 and
Down2)at the same time and keep them pressed for at least 5
seconds.
Advice:
This must have taken place at latest 0.5 m before reaching the
end
position. After pressing the adjustment button it must stay
latched in.
• With the help of the installation cable travel directly to the lower
end position (fine adjustment by means of inching operation
with the installation cable).
•
By changing the direction of travel the adjustment button is
automatically unlatched and the lower end position is then set.

20
JAR Venetian Blind Motors
www.elero.com 16 801.9901
We reserve the right to make technical changes 08/04
Adjustment of the working setting:
•Run venetian blind approx. 0.5 m in the “up” direction from the
lower end position. Then close the Venetian blind by means of the
“ZU” (closed) button and press in the “single white” individual
button “Ab2/zu” (down/closed) and keep it pressed for approx.
2 turns of the shaft.
•In inching mode press the “ZU” (closed) button meticulously until
the slats are completely closed.
•By reversing direction (upwards movement) unlatch the “Ab2/ZU”
(Down2/Closed) adjustment button – the working setting is adjusted.
Advice
When making adjustments with the “Ab2/ZU” (Down2/Closed)
adjustment button the lower end position is over-run, see also the
wiring diagram.
Readjustments:
If the respective end position is not accurately set or if the end
positions have changed due to changed winding behaviour of the
venetian blind, then the end positions will have to be reset as
described above.
With the help of the installation cable the venetian blind should be
moved back to about 0.5 m before the desired end position.
The limit switch range is 85 revolutions of the shaft.
Advice
When changing direction the drive must first be dead for at least
0.5 seconds.
Caution!
Due to feedback voltage from the capacitor motors must not be
connected in parallel!
Connection of 2 or more venetian blind drives is only possible with:
– a central or decentral control system or
– a multi-pole interlocking venetian blind switch.
(see elero control system catalogue)
The connecting cable may only be replaced by an authorised elero
service workshop or at the elero works.
Connection Example
e1 – final end switch “AB1” (Down1)
e2– final end switch “AUF” (Up) with
safety lever
e3– additional final end switch
“AB2/ZU” (Down2/Closed)
During installation provision must be
made for an all-pole disconnection
from the mains supply, e.g. with a
4-pole Hirschmann plug.
Capacitor
Safety cut-
out lever
PE
N
421 3
e3
e1
e2
Ab2
Down2
PE N P
Ab1
Auf
Up
3x1,5
Y
Down1
brown
black 1
black 2
blue
yellow-green
Thermal-
protector
Press switch with separate button
for venetian blind motors with
additional limit switch.
Important safety advices!
Observe the following instructions.
Risk of injury due to electrocution.
The connections to the 230 V mains must be made by
authorised specialist personnel.
The regulations of the local energy supply company as
well as the regulations for wet and damp rooms accor-
ding to VDE 0100 must be followed when making the
connections.
Only use unmodified original elero electrical parts.
This drive is suitable only for interior and exterior
venetian blinds. For other applications please contact
the manufacturer.
Assembly
– The drive must be fixed in such a way that it is not a
danger to personnel.
– Before the drive is installed, make sure that the fuses
are switched off.
– During installation, during operation and when work
is carried out on the system, the option to separate
all three poles from the mains must always exist
(Hirschmann connector and Hirschmann coupling or
a two-pole switch with minimum 3 mm contact gap
or all-pole main switch).
– When installing JA drives in systems, devices or
machines the installer must ensure that
electromagnetic compatibility is maintained.
– The system should be checked at regular intervals
for wear or damage.
– The drive may only be installed in such a way that it
is not directly subject to the influence of the weather.
– Note the technical data for the motor.
– Keep children away from the controller and remote
controller.
– If the drive unit is operated by a pushbutton, it
should be fitted in a position from where the window
can be seen and at a height of not less than 1.5 m.
Advice
The guarantee will lapse if the electrical connections are
incorrect, if the installation work has been carried out
improperly or if repairs, interventions and changes have
been made by unauthorised people!
Warning!
Closed
Other elero Engine manuals
Popular Engine manuals by other brands

GMC
GMC 1 Series Maintenance manual

Nice
Nice NX FIT MZ 2017 SH BD Instructions and warnings for installation and use

Golen
Golen Jeep Six-Cylinder Setup guide

Sinovo
Sinovo SD90 Series user manual

Briggs & Stratton
Briggs & Stratton 31Q700 Series Illustrated parts list

Calpeda
Calpeda 4CS Series Original operating instructions