Elisa Viihde User manual
Elisa Viihde
TV service manual

2
Table of Content
1. Kit contents 3
2. Remote control 3
2.1 Remote control 4
3. Installation of the equipment 4
3.1. Quick guide to installation 4
3.2 Digibox installation 5
3.2.1 Digibox connection to antenna or cable network 5
3.2.2 Digibox connection to broadband 5
3.2.3 Digibox connection to TV 5
3.2.4 How to start using the remote control 6
3.2.5 Power cable connection 6
3.2.6 Digibox connection to your stereo or home theatre 7
4. TV service access 8
4.1 Quick guide to TV service access 8
4.2 Guide to TV service access 8
4.2.1 Before you start 8
4.2.2 Language selection 9
4.2.3 Image settings 9
4.2.4 Aspect ratio selection 10
4.2.5 Network selection 10
4.2.6 Channel search 10
4.2.7 Parental Control PIN Code 11
IMPORTANT NOTE ON INSTALLATION 11
4.2.8 Broadband connection 12
5. TV services 12
5.1 Quick guide to watching TV 12
5.1.1 Channel navigation 12
5.1.2 Channel list 12
5.2 Time settings 13
5.3 Programme Guide and programme recording
with the aid of the remote control 13
5.4 Elisa Viihde menu 14
5.4.1 Recorded programmes and playing back recorded programmes 14
5.4.2 Video Store 15
5.4.3 Pay channels 16
5.4.4 News releases 16
6. Menu button 17
6.1 Elisa Viihde portal 17
6.2 TV Programme guide 17
6.3 Settings 18
6.3.1 Picture 18
6.3.2 Sound 18
6.3.3 Display 18
6.3.4 Network 19
6.3.5 Channel search 19
6.3.6 Favourites 19
6.3.7 Parental control 19
6.3.8 Diagnostics 20
7. Computer access to the services 21
8. Mobile access to the services 23
8.1 Mobile user interface 23
8.2 Smartphone remote access 24
9. Digibox settings 25
9.1 TV settings 25
9.2 Network settings 25
10. Digibox specications 25
11. Digibox connection ports 26

3
1. Kit contents
The Elisa Viihde kit includes one digibox and all the necessary
accessories.
.
Elisa Viihde digibox Elisa Viihde remote control Antenna cable
HDMI cable Ethernet cable Power supply unit
2. Remote control

4
2.1 Remote control
The Elisa Viihde digibox is operated with the aid of the remote control
included in the kit. The functions assigned to the remote control
buttons may vary depending on the operation mode. When the remote
control signal is sent to the digibox, the power button LED will ash,
indicating that the digibox is receiving a signal from the remote control.
NOTE! The remote control has two power buttons. To turn on the Elisa
digibox use the left-hand power button.
Please note that during operation the remote control should always
be directed towards the front panel of the digibox. Any obstructions
between the remote control and the digibox will interfere with the
remote control’s signal to the digibox.
3. Installation of the
equipment
3.1. Quick guide to installation
1. Connect the digibox to the antenna and cable network with the
antenna cable.
2. Connect the Elisa Viihde digibox to a broadband modem: plug
one end of network cable to a Network port and the other end to a
free port in the Elisa Viihde broadband modem.
3. Connect the digibox and the TV together: connect one end of the
cable to the digibox HDMI port and the other end to the TV HDMI
port. If your TV has no HDMI port or no free HDMI port, use a SCART
cable. Connect one end of the SCART cable to the digibox TV port
and the other end to the TV SCART port.
4. Install batteries in the remote control.
5. Connect the power cable to the digibox: connect the power cord
to the digibox port and the other end to the mains outlet.
6. Turn the TV on. Select your TV IN port (normally AV IN port). If the
digibox is connected to the TV with an HDMI cable, select the HDMI
IN port.
7. Turn the digibox on.
8. The Elisa Viihde digibox is now ready for use. Please refer to
section 4 of this manual for more information on how to start using
the services.
Digibox connection to various devices

5
3.2 Digibox installation
3.2.1 Digibox connection to antenna or cable
network
3.2.2 Digibox connection to broadband
.
Note! If the digibox and broadband modem are located far from each
other or cannot be connected via the network cable, you can connect
the devices using electrical cables. For further information on electrical
connection, please refer to the Elisa Services page at: www.elisa./
viihde/tekniset/.
3.2.3 Digibox connection to TV
We recommend using an HDMI cable for device connection to a TV. This
connection provides the best picture and sound quality. If your TV has
no HDMI port, please use the SCART port.
Note! If you use the SCART port, please be careful during cable
connection – most image quality problems are caused by a poor SCART
connection.
Digibox antenna ports and antenna cable
Digibox network port and network cable
HDMI and SCART ports

6
Connect one end of the HDMI cable to the digibox HDTV port and the
other end to the HDMI port in your TV (for TVs with HD Ready and Full
HD labels). If you use the SCART port, connect one end of the SCART
cable to the digibox TV port (TV) and the other end to the SCART port in
your TV
3.2.4 How to start using the remote control
Install the batteries supplied in the kit into the remote control. To open
the battery compartment lid, press on the lid with your thumb and push
the lid down. Install the batteries correctly, matching the symbols, then
push the lid back in to place to close.
3.2.5 Power cable connection
Connect the cable to the digibox power port and the other end to the
mains outlet.
Note! Use only the original power cable supplied with the kit!
SCART and HDMI cables
Power port and power supply unit with cables
7
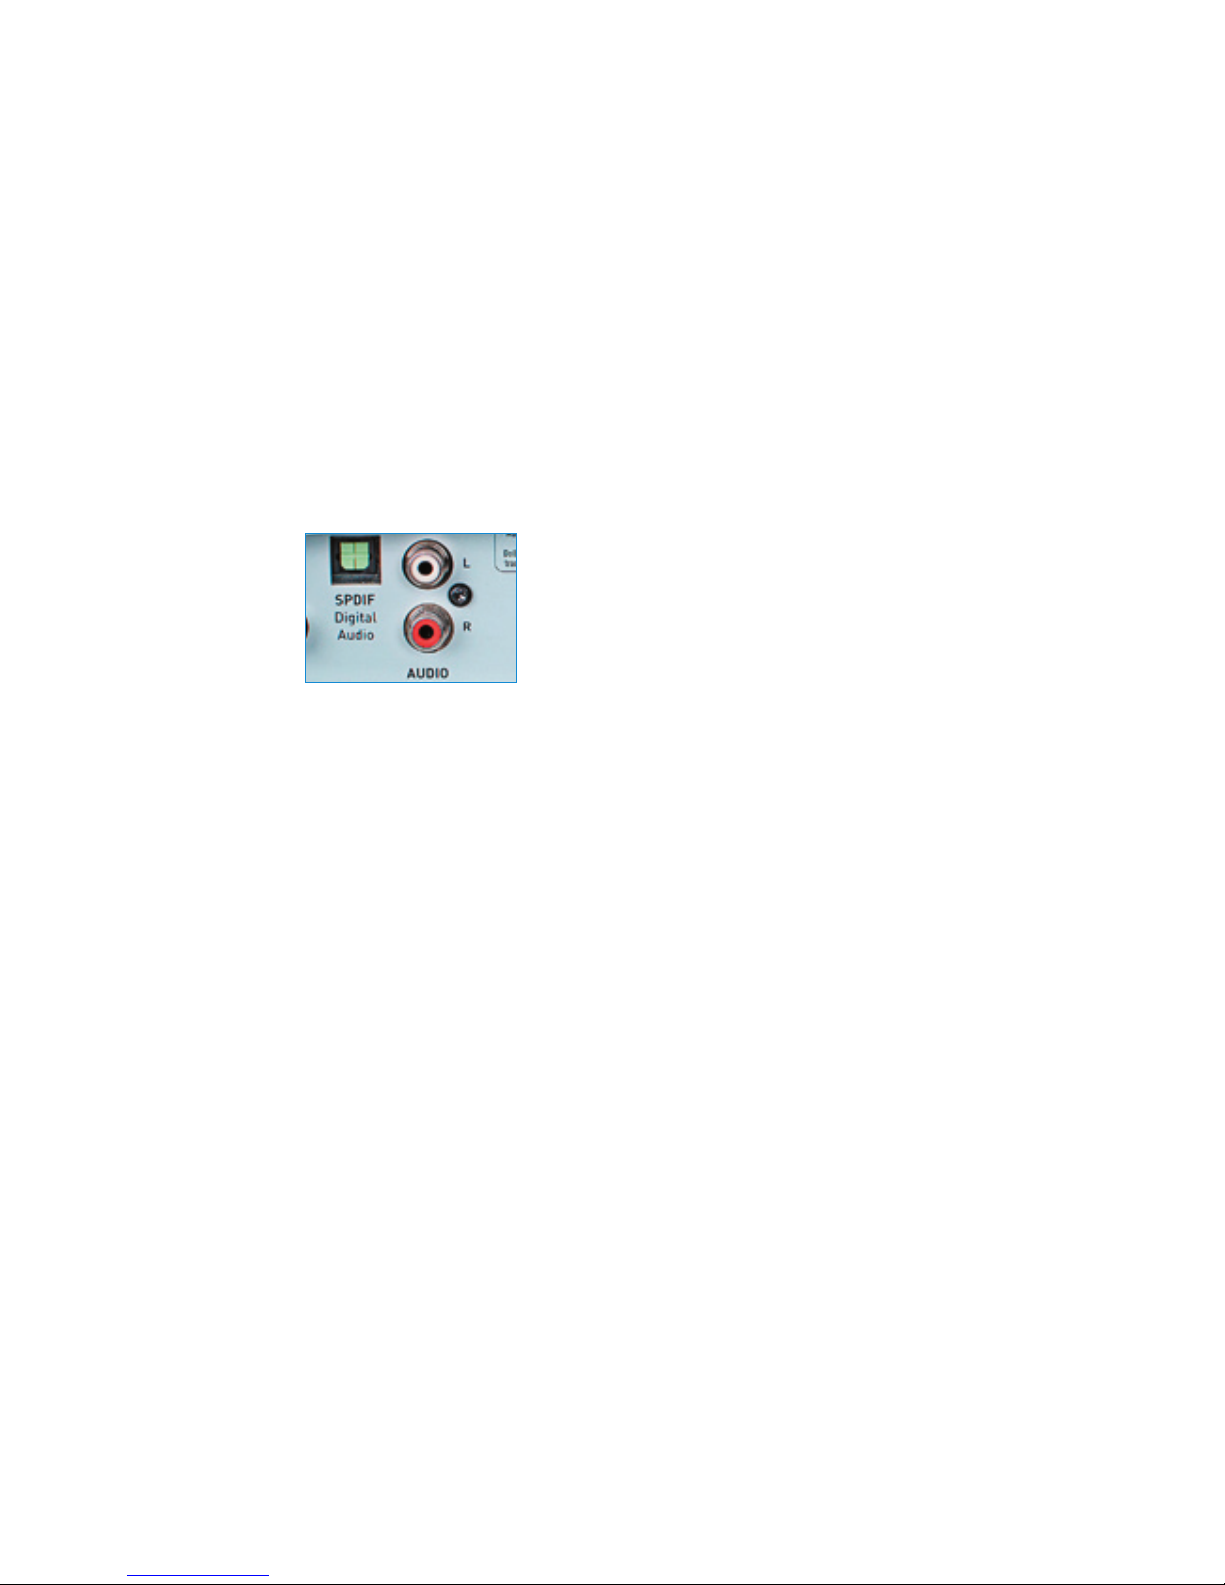
3.2.6 Digibox connection to your stereo or
home theatre
Elisa Viihde can be plugged into your stereo/home theatre to achieve
best sound and picture quality. The connection can be either analogue
RCA or optical. Sound output can be either a stereo or Dolby Digital
signal. When using a Dolby Digital signal, you can take advantage of
multi-channel sound while, for example, watching rental video DVDs on
TV.
The Elisa Viihde digibox can be connected to some of the latest
home theatres with the aid of an HDMI cable. In this case, for image
transmission to the TV a separate HDMI cable connection between the
home theatre and TV is necessary.
Please note that the Elisa Viihde kit does not include audio cables for
digibox connection to a stereo/home theatre.
Audio ports – optical port on the left and RCA port on the right
8
4. TV service access
4.1 Quick guide to TV service access
Start using Elisa Viihde TV services by following the TV screen
instructions and the instructions below:
1. Turn on your TV and select the input interface (normally AV).
2. If you are using HDMI for the digibox connection to the TV,
select the appropriate symbols by following the TV’s on-screen
instructions.
3. Activate the TV service by pressing the OK button on the remote
control.
4. Select English or Finnish as the user language.
5. Select the appropriate picture settings.
6. Enter your Parental Control PIN code by using the remote control
numeric pad and re-enter this PIN-code.
7. Select antenna or cable network for the digibox. If you have
selected cable network, select the TV channel search mode and
start channel searching by pressing the OK button.
8. Wait until the TV channel auto tuning is completed. Channel
search may take several minutes. Channel search progress will be
displayed on the screen. When the channel search is completed, a
summary of the channels found will be displayed.
9. Select your TV screen type: 16:9 (widescreen TV) or 4:3
(conventional TV).
10. Exit the start menu by pressing the OK button on the remote
control.
4.2 Guide to TV service access
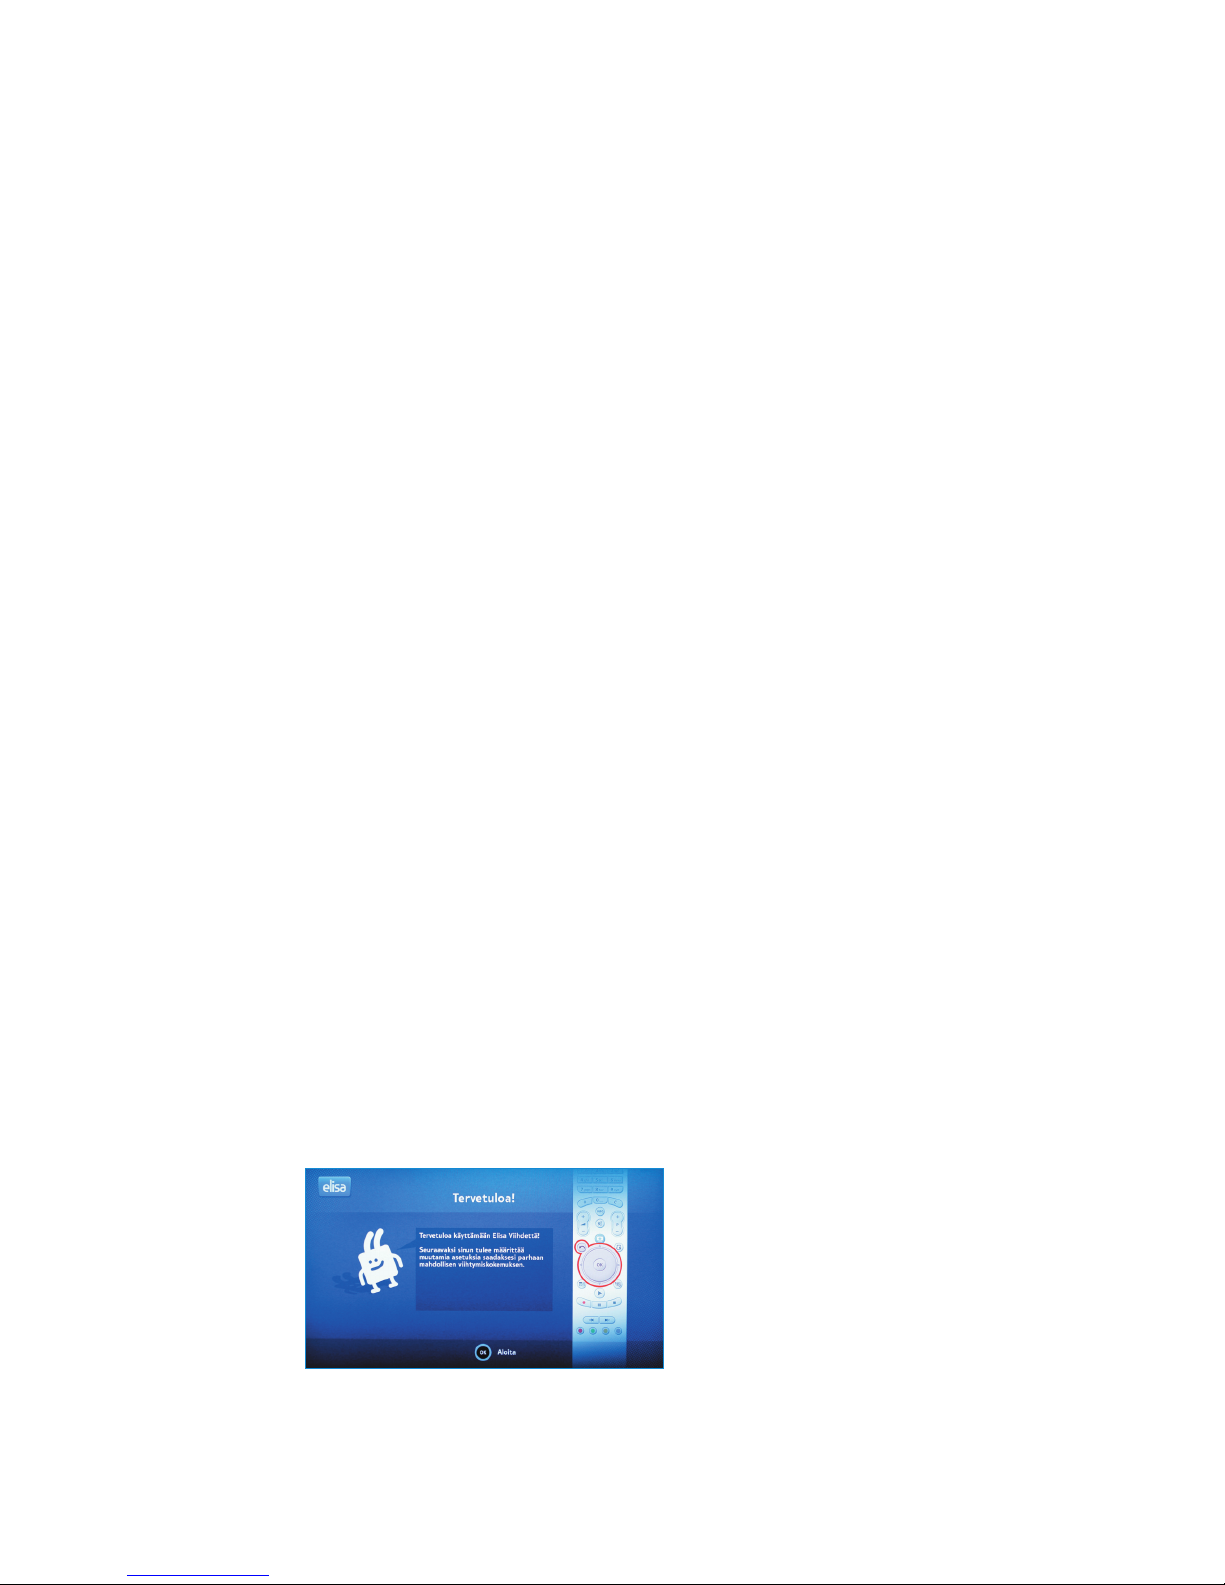
4.2.1 Before you start
Turn on your TV, then turn on the digibox. Select from your TV input
interface (channel) for the digibox connection (normally the AV
channel).
Continue to access start by pressing the OK button on the remote
control in the Welcome (Tervetuloa) screen.
Digibox installation start-up
9
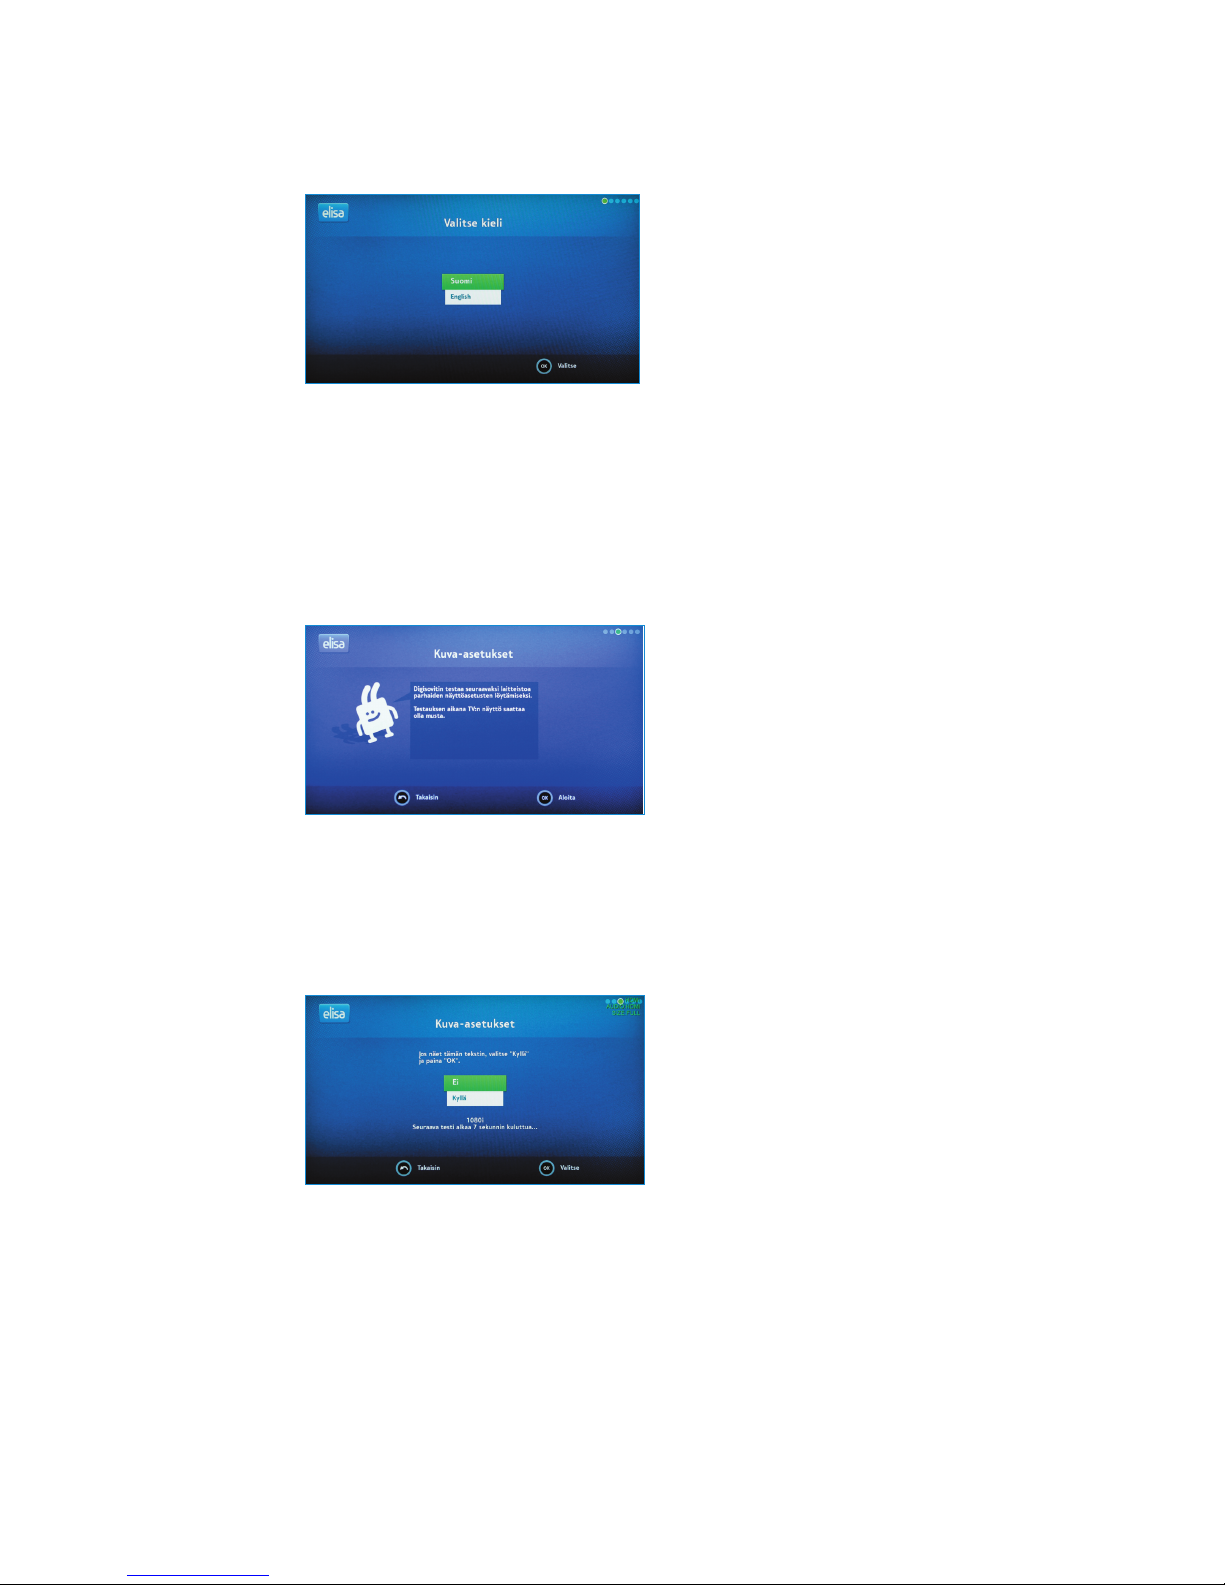
4.2.2 Language selection
Select Finnish or English as the user language.
.
4.2.3 Image settings
If you are using an HDMI cable for the digibox connection to the TV,
you will need to select the desired image settings at the beginning of
service access. At the start, the device will oer various display modes
by scrolling from the highest resolution HD mode to lower resolution
modes.
Each display mode will be displayed for 15 seconds; when you nd the
mode suitable for your TV, select it by pressing the OK button. If you
have not selected any of the modes, the display mode will stop at the
lowest resolution mode. If necessary, you can restart display mode
scrolling.
The most appropriate display mode for your TV can be recognized by a
clear picture with no black areas on the screen.
Note! If you are using a SCART cable for the digibox connection to the
TV, the display mode will be selected automatically.
Display mode selection for HDMI cable connection
Display mode selection for HDMI cable connection
Display mode selection for HDMI cable connection

10
4.2.4 Aspect ratio selection
Select your TV screen type: 16:9 Normaali or 4:3 Pan & Scan. After
selecting the desired aspect ratio, save the selection and continue by
pressing the OK button on the remote control.
4.2.5 Network selection
Select the connection type and press OK.
4.2.6 Channel search
Use the remote control to select the digibox connection to the antenna
or cable network and press the OK button on the remote control. If you
have selected the cable network, use the arrow keys on the remote
control to select the desired search mode. After network selection, the
device will start the TV and radio channel search.
Channel search progress will be displayed on the screen. When the
channel search is completed, a summary of the channels found will be
displayed. To proceed, press the OK button. To start using the TV, press
the OK button again.
TV screen type selection
Network selection
Channel search started

11
Note! All TV channels found will be displayed in the channel list,
including encrypted channels available via antenna or cable network.
Encrypted channel viewing with the aid of the Elisa Viihde digibox is not
possible.
Pay channels can be ordered via the Elisa Viihde menu and will be
delivered to the digibox by broadband network. If you want, you can
delete the antenna and cable network pay channels shown in the list.
To learn more about the favourite channel list, please refer to section
6.3.6 of this manual.
4.2.7 Parental Control PIN Code
Enter the Parental Control PIN Code using the remote control’s numeric
keypad. Enter the PIN Code twice.
Note! Choose a PIN combination that is easy to remember. The PIN code
is required for channels with an 18 rating.
IMPORTANT NOTE ON INSTALLATION
Once you have installed the device in accordance with the instructions,
you will see the “Installation complete” message on your TV screen.
Conrm this step by pressing the OK button. The device will then
perform a network search for software updates and install any updates
automatically.
The software update search and download may take up to 30
minutes. During this step, do not turn o the devices or disconnect any
cables. During update installation, the screen will go dark, the yellow
power button light will be ashing, the device will restart twice and
you will see the message “loading…” on the screen. In addition, Yle TV1
channel will restart after a brief pause. This extended and thorough
software update is performed only during the initial access to services.
The appearance of Yle TV1 text on the screen for several minutes
indicates that the software update is completed.
Entering the PIN code
Ready for use

12
4.2.8 Broadband connection
The Elisa Viihde digibox automatically connects to the broadband
network via the Elisa Viihde broadband modem.
5. TV services
5.1 Quick guide to watching TV
1. Turn on the digibox. After the start, the last viewed TV channel will
be displayed.
2. Use the remote control’s numeric buttons or P+ button for channel
navigation. Pressing “+” scrolls the channel list down and “-” scrolls
the channel list up.
3. Press the V+ button to the adjust volume.
4. Pressing the Info button will display the information bar for the
current programme. Press the Info button again for a more detailed
programme description. After pressing the Info for a third time, the
information bar will disappear from the screen.
5. To open the channel list, press the button 123 on the remote
control. You can navigate through the channel list by pressing the
“Up” and “Down” navigation keys. To switch to the desired channel
press the OK button on the remote control.
5.1.1 Channel navigation
You can navigate between TV channels using one of the following
methods:
1. Pressing the numeric button corresponding to the channel number
2. Using the P ± button
3. Opening the channel list by pressing 123 button.
5.1.2 Channel list
To open the channel list, press the 123 button on the remote control.
You can navigate through the channel list by pressing the “Up” and
“Down” navigation keys.
All available channels are available in the channel list. You can watch
the basic service channels, additional channels as well as subscription
pay channels. You can remove channels from the channel list and create
your favourite channel list. For further information, please refer to
section 6.3.6.
You can subscribe to pay channels either via the Elisa Viihde TV screen
menu or the elisaviihde. website.
More information is available in section 5.4.3 of this manual.
13
5.2 Time settings
While watching a TV programme you can press the 4II button to stop
watching the TV. To resume watching, press the4II button again. Use
the 8 button for programme fast forward. To switch to “live” mode,
or a real-time broadcast, press the < button. For further information,
please refer to section 5.4.1. of this manual.
Time settings can be changed only for the channel you are currently
viewing. You can change time settings for each new channel you start
viewing.
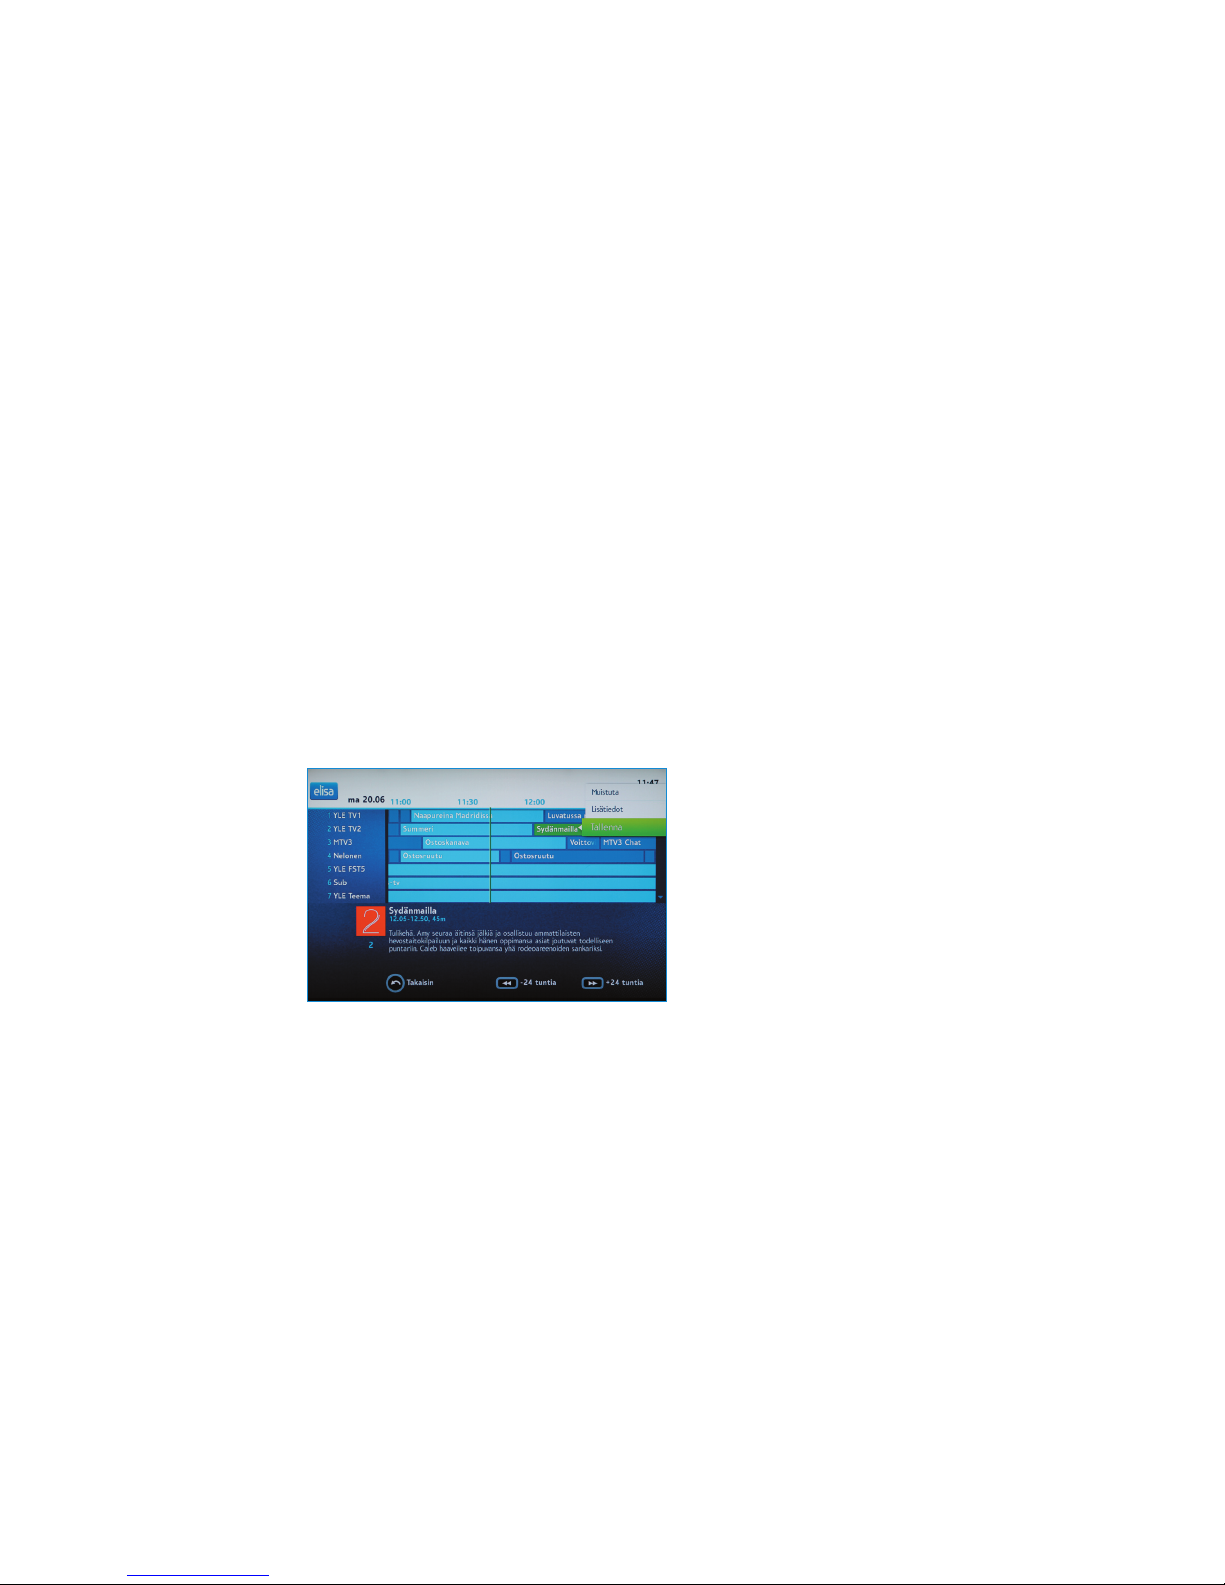
5.3 Programme Guide and programme
recording with the aid of the remote
control
Open Programme Guide with the Programme Guide button on the
remote control.
Programme Guide shows the current day’s TV programmes for seven
channels for the next two hours. You can navigate through Programme
Guide with the aid of the navigation key – an active programme will be
highlighted in green. Programme information will be displayed in the
info box at the bottom of the screen.
To scroll through the programme list up and down use the 8 and 7
keys. To add channels, press the navigation key downwards.
After nding the desired programme, you can record it by pressing
the Function menu button and selecting Record. In Programme
Guide the programme being recorded will be highlighted in red. By
default, recorded programmes are stored in the root folder. For more
information on the Programme Guide structure, please refer to section
5.4.1.
To cancel recording press the Function menu button on the remote
control and select Cancel.
Note! Only free basic channel programmes can be recorded (14
channels). Pay TV and additional free channel programmes cannot be
recorded.
To exit from Programme Guide press the Programme Guide key or
“Return” button on the remote control.
You can view recorded programmes using the Elisa Viihde menu. For
more details, please see the next section.
TV guide screen
14
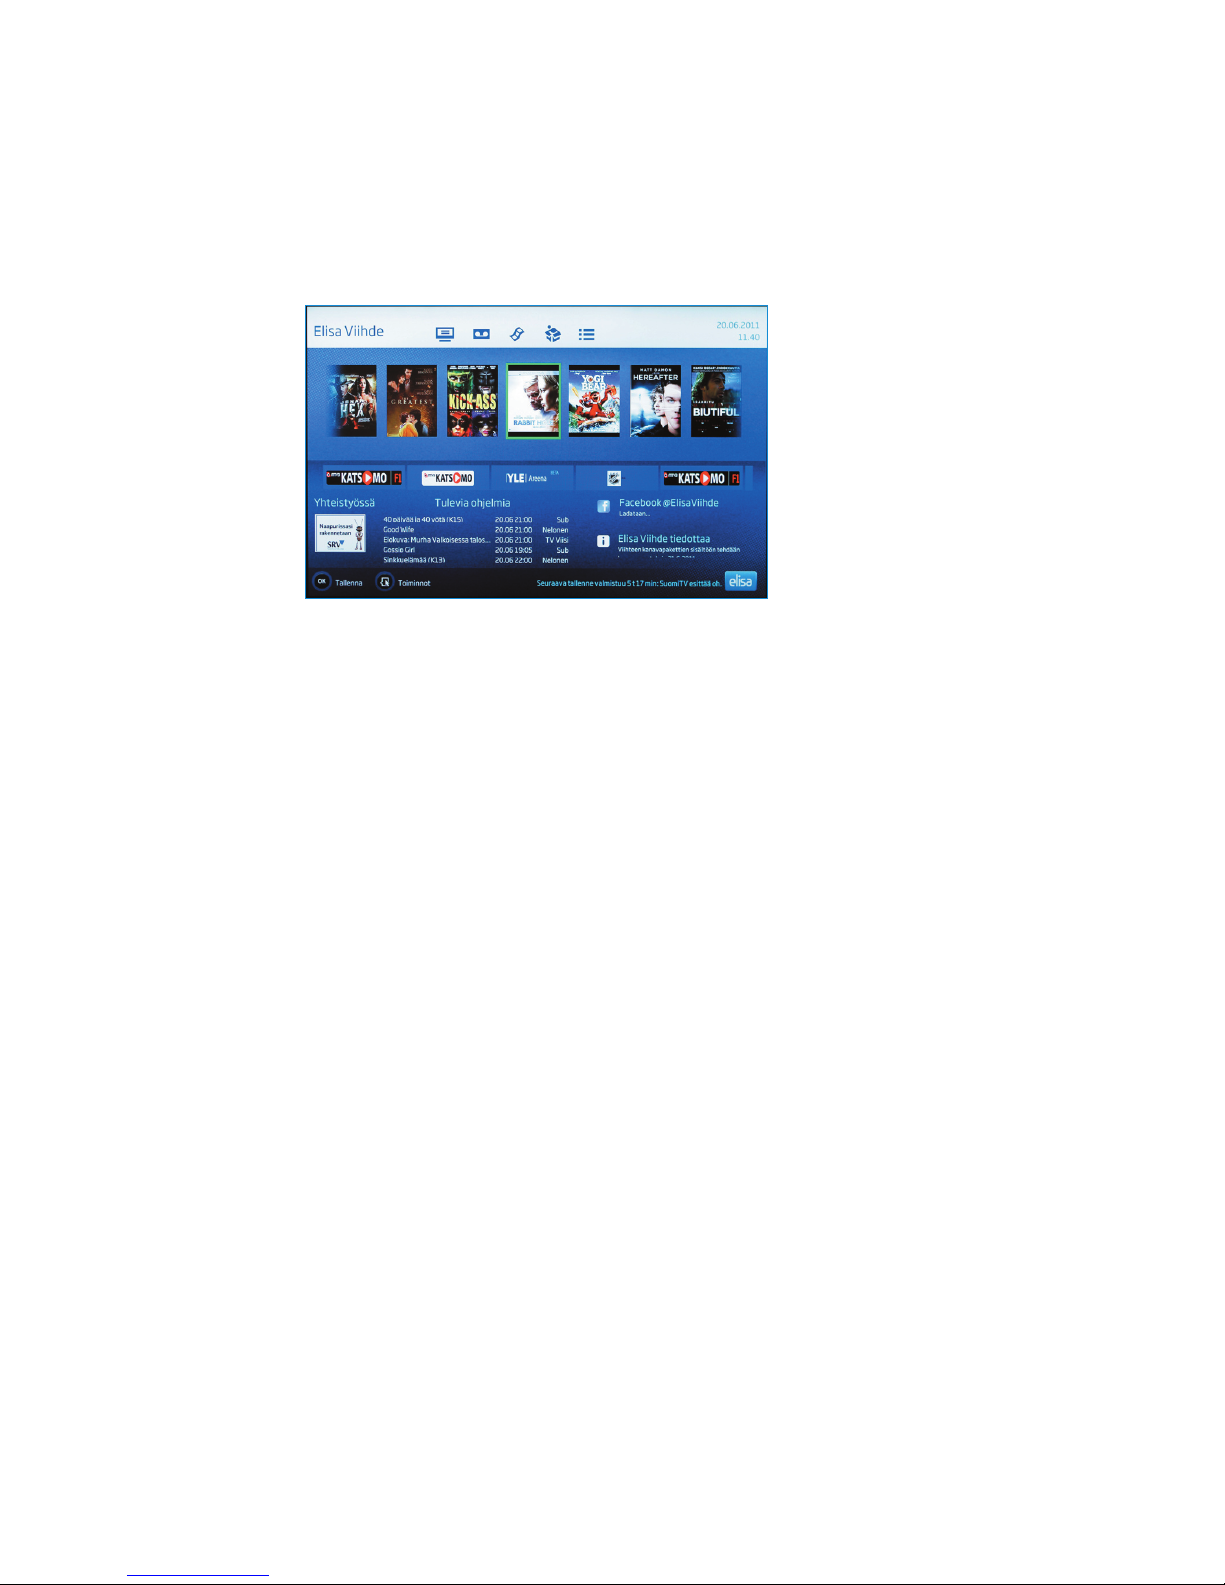
5.4 Elisa Viihde menu
From the Elisa Viihde menu you can watch recorded programmes, rental
movies, subscribe to pay channels and read news releases.
To access the Elisa Viihde menu press the blue Elisa Viihde Portal
button. You can also access the Elisa Viihde menu by pressing the Menu
button and selecting Elisa Viihde.
Use the Up, Down, Left and Right navigation keys to navigate in the
Elisa Viihde menu. To conrm a selection, press the OK button. An active
selection will be highlighted.
5.4.1 Recorded programmes and playing
back recorded programmes
From the Elisa Viihde Webcasts menu, you can view and delete
recorded TV programmes. In the recordings list, the programme
title, broadcast time, channel, duration and viewing (star symbol)
information is displayed.
Elisa Viihde provides 5000 GB memory space for storing recorded
programmes. Used memory space is indicated in the top right-hand
corner of the screen.
To playback a recorded programme, select it and press the OK button.
You can pause playback by pressing the 4II key once. To resume
playback press the 4II again. To stop playback press the < button on
the remote control. To rewind and fast forward use the 8 and 7 keys.
To change the rewind or forward speed rate, press the appropriate
button again. Three rewind and fast forward speed modes are available:
triple, 10-fold and 30-fold.
Use the navigation button to navigate within a recorded programme.
Press the button to the right to move 5 minutes forward, to the left
to rewind 5 minutes. Press the button upwards to move 30 seconds
forward and downwards to rewind 30 seconds back.
At the end of the recorded programme a message will be displayed. To
exit the recorded programme playback, press the Return button.
The Recorded programmes list displays 14 programmes. If the number
of recorded programmes increases, the list will be split into pages. To
navigate between pages use the arrow keys on the remote control.
Elisa Viihde menu

15
You can record and manage programmes at www.elisaviihde. accessed
from a PC or smart-phone.
For further information, please refer to sections 7 and 8.
5.4.2 Video Store
To access the Video Store, select Store from the navigation bar in the
top section of the Elisa Viihde menu.
The Video Store front page displays the most popular titles. To browse
between categories, use the Return and Next buttons on the remote
control.
New movies are added to Elisa Viihde Video Store every week.
Once the title you have been looking for is found in the Video Store
list, you can get extra information about the movie and rental price by
pressing the OK button or Info button on the remote control. For movies
with the “Traileri” label you can playback a trailer by pressing the 4
button.
To order a movie, enter the PIN1-code in the appropriate eld and press
the OK button. Now you can watch the movie as many times as you
want in the next 24 hours. The rental fee will be included in your Elisa
Viihde invoice for the following month.
Note! To watch movies with a rating of 18, use the PIN2-code.
PIN1 and PIN2 codes are provided to you during service subscription.
If necessary, you can check or change your PIN-codes through the
oma.elisa. service.
Recorded programmes
Video Store front page

16
4II
4II<
8 and 7.
Notes! For Video Store movies only 12-fold rewind and fast forward
speed rates are available.
Note! Video Store categories highlighted in orange are from digital
libraries available on pay channels and services, such as Elisa Elokuvat
and Viaplay.
5.4.3 Pay channels
In the Pay Channels sections of the Elisa Viihde menu you can see you
existing subscriptions and subscribe to additional pay channels. Further
information on channel packages is available at www.elisa./viihde.
For pay channel subscription a PIN-1 code is required. You can check
your code through the OmaElisa service at oma.elisa..
A new package subscription fee will be included in your next Elisa
Viihde invoice.
5.4.4 News releases
In the Elisa Viihde menu the most recent releases are displayed.
To exit the menu press the “Return” button.
News Release example
17
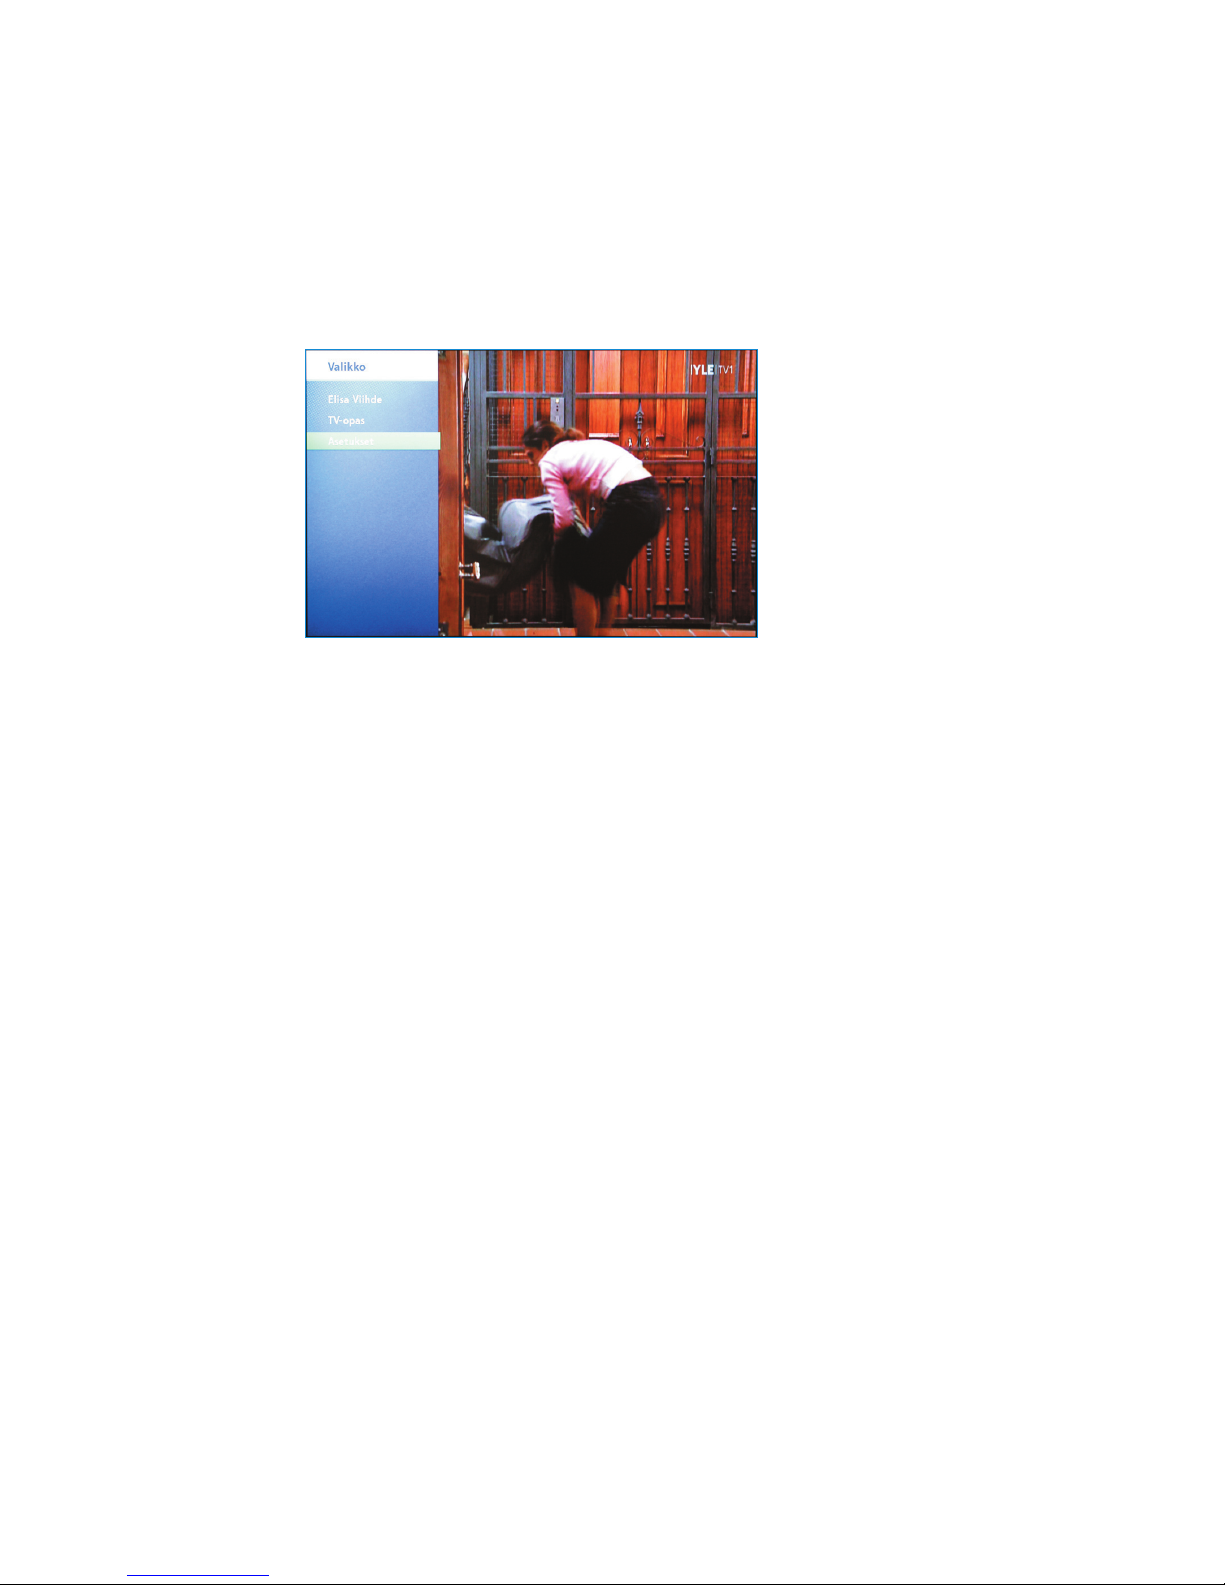
6. Menu button
Press the Menu button to go to the Elisa Viihde menu, TV Programme
Guide and Settings section.
Select Settings to launch, for example, the troubleshooting help
function. You can also restart the digibox or restore the factory
settings. After restarting or restoring the factory settings, the digibox
will check and install digibox software updates automatically.
For menu navigation, use the remote control’s up, down, left and right
navigation keys. To conrm a selection, press the OK button. An active
selection will be highlighted in green.
6.1 Elisa Viihde portal
Select Elisa Viihde to enter the Elisa Viihde menu. You can also enter
the Elisa Viihde menu by pressing the blue Viihde Portal button.
6.2 TV Programme guide
Select the TV Programme Guide to enter the TV Programme Guide. You
can also enter the TV Programme Guide by pressing the Programme
Guide button on the remote control.
Menu (button in the remote control)

18
6.3 Settings
Select the Elisa Viihde digibox settings, for example, to restore factory
settings, perform channel search, create favourite listings, adjust sound
and picture, activate Parental Control function and check network
service settings.
6.3.1 Picture
If necessary, you can select the digibox image, resolution and aspect
ratio settings. These settings are selected during installation.
6.3.2 Sound
You can select Stereo or Multi-Channel (Dolby) sound. If you are using
a SCART connection for your TV and later change it for HDMI, you
will need to reset the sound parameters. This can be done during
installation.
6.3.3 Display
You can dene such setting as program summary display duration
by pressing the Information button (Info). Use the Hidden Channels
settings to stop displaying the channels you have no access to (for
example, channels which required a card reader for viewing).
Image settings
Sound settings
Display settings

19
6.3.4 Network
Elisa Viihde network parameters are set automatically. We recommend
that you do not change them.
6.3.5 Channel search
Channel search works in the same way as during the initial installation
of the device. If necessary, channel search is used after relocation,
addition of new channels to the service or channel relocation.
6.3.6 Favourites
You can add to Favourites the channels to be ignored during channel
list browsing (skip) or not displayed at all in the channel list (delete). To
edit the channel list, select the channel by pressing the Function menu
button and choose the appropriate option (display, skip or delete).
6.3.7 Parental control
Parental control allows you to limit access to the TV channels. Limited
access channels can be viewed only after Parental Control PIN Code
entry. The Parental Control PIN Code is set during the initial access to
the service. Please refer to section 4.2.7.
Editing favourites.
Network settings
Parental control.
20
If you want to limit access to channel viewing, select “Limit Channels”
and enter your initial Parental Control PIN Code. Select channels by
pressing the OK button on the remote control.
To remove a channel from the Parental Control list, press OK again.
Locked channels will be displayed in the list and Programme Guide with
a lock symbol.
You can change the Parental Control PIN Code in the Change PIN Code
section.
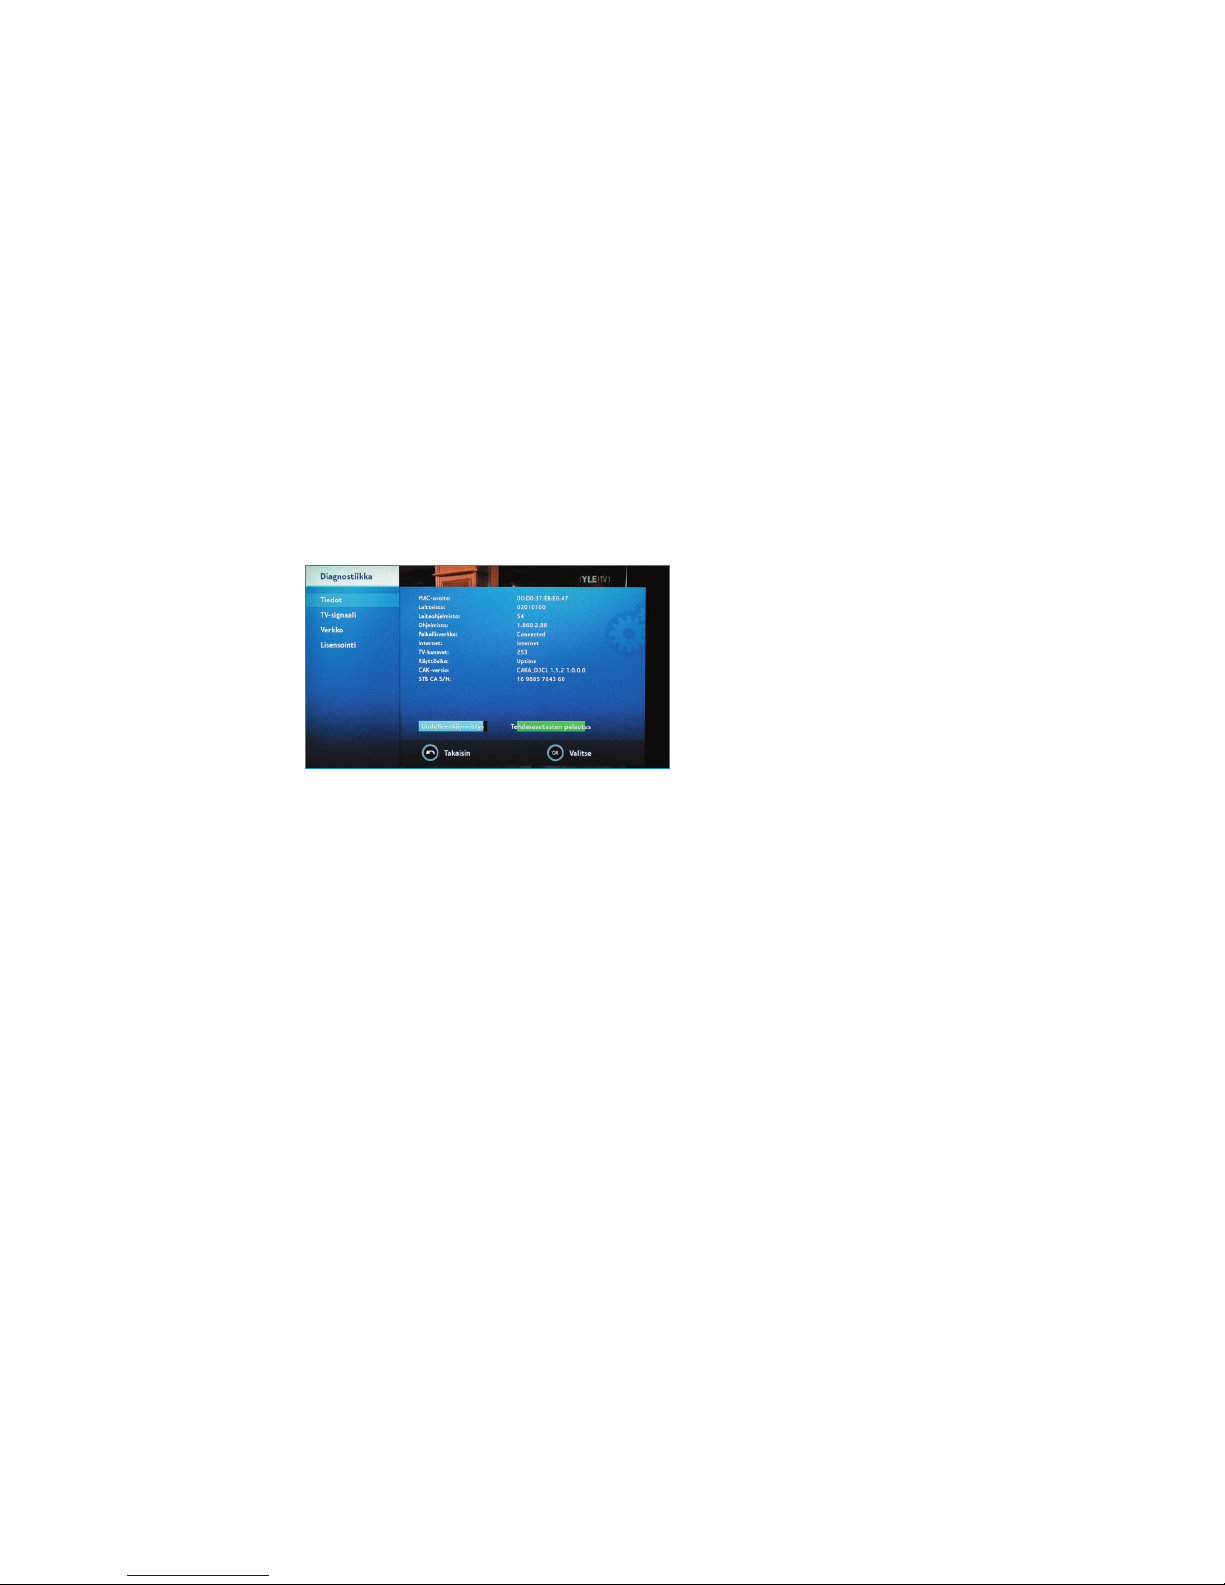
6.3.8 Diagnostics
In the Diagnostics section you can see the digibox settings information,
restore factory settings, if necessary, and check the image signal power.
Factory settings restoration may be useful if the digibox locks up or if
you have forgotten your Parental Control PIN Code combination.
The Diagnostics Info display shows the MAC address of the device
(unique device network card identier), hardware and software data
(rmware, software), Internet connection performance, number of TV
channels and the Elisa Viihde digibox operation time (uptime).
In the TV Signal section, you can see the TV channel signal values.
In the Network section, you can see the time of device connection to
the Internet.
Service information menu.
Table of contents


