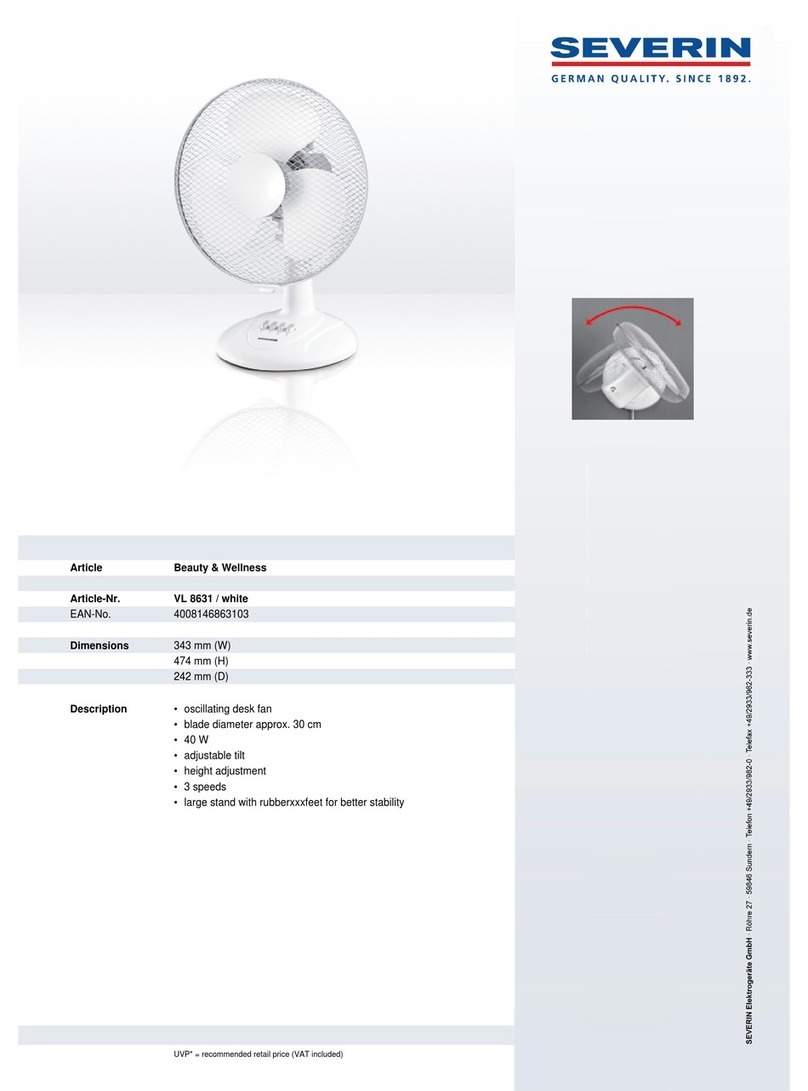
elix BELGIUM 24.171 User manual

INSTRUCTION MANUAL
16 INCH DESK FAN
MODEL NO.: 24.171
READ AND SAVE THESE SAFETY INSTRUCTIONS
BEFORE USING THIS FAN
220-240V 50Hz 45W

When using electrical appliances, basic precautions should
always be followed to reduce the risk of fire, electric shock, and
injury to persons, including the following:
1. Use this fan only as described in this manual. Other use not
recommended may cause fire, electric shock or injury to persons.
2. This product is intended for household use ONLY and not for
industrial or outdoor use.
3. To protect against electric shock, do not place fan in window,
immerse unit, plug or cord in water or spray with liquids.
4. If the plug does not fit fully in the outlet, reverse the plug. If it still
does not fit, contact a qualified electrician. DO NOT attempt to defeat
this safety feature.
5. Close supervision is necessary when any appliance is used by or
near children.
6. Press the OFF button and unplug the fan from the outlet when not in
use, when moving the fan from one location to another and before
cleaning.
7. To disconnect the fan, first press the OFF button, grip the plug and
pull it from the wall outlet. Never pull by the cord.
8. Do not operate the fan in the presence of explosive and/or
flammable fumes.
9. Do not place the fan or any parts near an open flame, cooking or
other heating appliance.
10. Do not operate the fan with a damaged cord or plug or if the
product malfunctions, is dropped or damaged in any manner (see
warranty).
11. Avoid contact with moving fan parts.
12. The use of attachments not recommended by the manufacture may
be hazardous.
13. Place the fan on a dry, level surface.
14. Do not hang or mount fan on a wall or ceiling.
15. Do not operate if the fan housing is removed or damaged.
16. A loose fit between the AC outlet (receptacle) and plug may cause
overheating and a distortion of the plug. Contact a qualified electrician
to replace loose or worn outlet.

Drawing:
1. Front Grill 8. Screws
2. Blade 9. Spinner (Blade Knob)
3. Plastic Nut 10. Base
4. Rear Grill 11. Speed Control Buttons
5. Motor Shaft 12. Tighten - turn to left
6. Oscillation Knob 13. Loosen - turn to right
7. Fan Body
PART 1:
1. Insert the Fan Body assembly into the base.
2. Secure by putting the 4pcs of screws provided into the holes under
the base cover.
3. Tighten the screws fully in the base but do not over tighten.
PART 2: ASSEMBLY
1. Unscrew the spinner (blade knob) clockwise and the nut counter
clockwise and remove both of them.
2. Set the rear grill in the proper position with the handle up.
3. Screw on plastic nut tightly to attach rear grill.
4. Discard plastic sleeve on shaft.
5. Install the blade onto the shaft until the retaining pin fits into the
notch on the blade.
6. Screw spinner (blade knob) to the motor shaft counter clockwise
(tighten by turning to the left)
7. Mount Front Safety Grill onto Rear Grill by hanging the top hook
clip of front
guard over the top of the Rear Grill. Tighten the safety screw and
close the clasps all around the grill.
PART 3: BOPERATION
• Place your fan on a level and dry surface.
• Plug the power cord into AC220-240V wall outlets.
Speed Control
Speed is controlled by the button switch.

(0=OFF, 1=Low, 2=Medium, 3= High).
To turn the fan on, press the desired button switch.
Oscillation Control
To make the fan oscillate, push down on the oscillation knob located
on the top of the motor housing. To stop the fan from oscillating, pull up
on the oscillation knob when the fan is in the desired position.
Tilt Control
The airflow can be adjusted upward or downward by tilting the fan
head as desired.
• UNPLUG the fan before cleaning.
• Use only a soft, damp cloth to gently wipe the fan clean.
• DO NOT immerse the fan in water and never allow water to drip into
the motor housing.
• DO NOT use gasoline, paint thinner or other chemicals to clean the
fan.
• Remove the Front Grill.
• Unscrew the Spinner (blade knob) by turning it CLOCKWISE
(REVERSE THREAD).
• Pull the Fan Blade away from the Motor Housing.
• Gently wipe the Fan Blade and Grills with a damp cloth.
• Re-assemble the fan by following the last three steps in ASSEMBLY
OF BLADE AND GRILLE.
• For storage, disassemble and clean the fan carefully as instructed
and store in its original box. You may leave the fan assembled and
covered to protect it from dust. Store the fan in a cool, dry place.

Correct Disposal of this product
This marking indicates that this product should not be
disposed with other household wastes throughout the EU.
To prevent possible harm to the environment or human
health from uncontrolled waste disposal. Recycle it
responsibly to promote the sustainable reuse of material resources. To
return your used device, please use the return and collection systems
or contact the retailer where the product was purchased. They can take
this product for environmental safe recycling.
Imported by ELIMEX SA – Avenue des Saisons 98 – B-1050 Brussels – Belgium.
Made in China.

NOTICE D’UTILISATION
VENTILATEUR DE TABLE 40 CM
MODELE: 24.171
VEUILLEZ LIRE ATTENTIVEMENT CETTE NOTICE AVANT
UTILISATION
220-240V 50Hz 45W

IMPORTANT
Nous vous remercions d’avoir acheté ce ventilateur. Nous accordons
une très haute importance à votre sécurité. Lorsque vous utilisez cet
appareil ou tout autre appareil électrique, suivre les précautions de
base pour réduire les risques d’incendie, de choc électrique et de
blessures sur les personnes.
AVANT LA MISE EN SERVICE
Lire attentivement ces instructions avant de commencer l’assemblage
et la mise en service du ventilateur et conservez-les pour une
utilisation ultérieure.
INSTRUCTIONS IMPORTANTES DE SECURITE
1. Avant d’utiliser votre appareil, vérifier que la tension du secteur
corresponde bien à celle mentionnée sur la plaque signalétique
de l’appareil.
2. Si le câble d’alimentation est endommagé, il devra être remplacé
par le service après-vente ou une personne de qualification
similaire afin d’éviter un danger.
3. Ne pas utiliser l’appareil s’il est endommagé. Il doit être réparé par
le service après-vente ou une personne de qualification similaire
afin d’éviter un danger.
4. Ne pas exposer l’appareil à la pluie et ne pas l’utiliser à proximité
d’eau, de flammes ou de toute source de chaleur. Installer l’appareil
sur une surface horizontale et stable.
5. Ne pas utiliser l’appareil sans grill de protection.
6. Ne pas manipuler l’appareil quand il fonctionne.
7. L’appareil doit être débranché pour les opérations de nettoyage et

de maintenance.
8. Ne jamais mettre, les doigts, crayons ou tout autre objet au travers
de la grill lorsque le ventilateur est en fonctionnement.
9. Afin d’éviter les risques d’incendie, ou de choc électrique, ne jamais
utiliser votre appareil devant une fenêtre.
10.Retirer toujours la prise du secteur avant de nettoyer l’appareil, de
le déplacer ou lorsqu ‘il faut assurer la maintenance.
11. Placer l’appareil sur une surface plane et stable pendant le
fonctionnement, afin d’éviter qu’il ne se renverse.
12.Ne pas placer le ventilateur dans un espace humide ou mouillé tel
que salle de bains, cuisine…..
13.La garantie ne pourra intervenir si l’appareil est endommagé à
cause d’un mauvais montage ou d’un branchement électrique
défectueux. Toute modification apportée à l’appareil annulera la
garantie.
14.AVERTISSEMENTS
Cet appareil n’est pas prévu pour être utilisé par des personnes (y
compris les enfants) dont les capacités physiques, sensorielles ou
mentales sont réduites, ou des personnes dénuées d’expérience
ou de connaissance, sauf si elles ont pu bénéficier, par
l’intermédiaire d’une personne responsable de leur sécurité, d’une
surveillance ou d’instruction préalables concernant l’utilisation de
l’appareil.
Il convient de surveiller les enfants pour s’assurer qu’ils ne jouent
pas avec l’appareil.

DESCRIPTION
1/ Grill frontale
2/ Hélice
3/ Ecrou plastique
4/ Grill arrière
5/ Axe moteur
6/ Bouton d’oscillation
7/ Bloc ventilateur
8/ Visserie
9/ Ecrou de serrage d’hélice
10/ Base
11/ Boutons de contrôle de vitesse
12/ Serrer (à gauche - sens anti-horlogique)
13/ Desserrer ( à droite – sens horlogique)
ASSEMBLAGE
ATTENTION :
NE PAS FORCER LORS DU SERRAGE AFIN DE NE PAS ABIMER
LE FILETAGE.
Ce modèle de ventilateur est livré avec la base désassemblée avant la
mise en service.
Placer le bloc ventilateur dans le logement de la base en s’assurant de
bien positionner les clips. Visser la base à l’aide des vis fournies et
s’assurer d’un serrage correct.
Mettre en place la grill arrière en s’assurant de bien positionner les
ergots de la partie frontale du moteur avec les orifices de la grill arrière
et le bloquer au moyen de l’écrou (3)
Mettre en place l’hélice, en ayant soin de bien placer en regard de la
goupille d’arbre du moteur dans les 2 encoches du noyau d’hélice.
Visser l’écrou de serrage (9) sur le moyeu. Attention, l’écrou, se visse
dans le sens inverse des aiguilles d’une montre. Serrer fermement

l’écrou.
Mettre en place la grill avant sur la grill arrière en faisant coïncider les
orifices de passage de la visse de sécurité.
Ajuster correctement les pattes de serrage de la grill et refermer
POUR AJUSTER L’ANGLE VERTICAL DE LA VENTILATION
Basculer verticalement l’ensemble du bloc de ventilateur, il est
contrôlé et stabilisé par un système à cliquet.
POUR ACTIVER L’OSCILLATION HORIZONTALE DE LA
VENTILATION
Tirer sur le bouton oscillation (6), le ventilateur oscille de gauche à
droite.
Pour arrêter l’oscillation, repousser le bouton (6).
MISE EN SERVICE
1. Brancher le cordon secteur.
2. Pour mettre en marche et régler la vitesse de ventilation : En
appuyant sur le bouton
O = arrêt, 1 = vitesse lente, 2= vitesse moyenne,
3=vitesse rapide.
NETTOYAGE ET ENTRETIEN
Débrancher l’appareil de la prise secteur avant toute manipulation.
Nettoyer avec un savon doux à l’aide d’un torchon ou d’une éponge
humide les pales, le corps et la grill de l’appareil puis passer un
chiffon sec et doux.
Ne pas utiliser d’appareil à vapeur.
Ne jamais immerger le ventilateur. Danger d’électrocution et de
destruction de l’appareil.

Tout équipement électronique ou électrique défectueux dont
vous souhaitez vous débarrasser, doit être déposé dans un
centre de recyclage approprié: consultez votre revendeur.
Importé par ELIMEX SA – Avenue des Saisons 98 – B-1050 Bruxelles – Belgique.
Fabriqué en Chine.

GEBRUIKSAANWIJZING
TAFELVENTILATOR 40CM
Model 24.171
220-240V 50Hz 45W

BELANGRIJK!
Wij bedanken u voor de aankoop van deze ventilator. Wij hechten
bijzonder veel belang aan uw veiligheid. Als u dit of elk ander elektrisch
apparaat gebruikt, moet u de basisvoorzorgsmaatregelen volgen om
het risico op brand, een elektrische schok en lichaamsverwondingen te
vermijden.
VOOR DE INGEBRUIKNAME
Lees deze instructies aandachtig voordat u de ventilator monteert en in
gebruik neemt en bewaar ze voor later gebruik.
BELANGRIJKE VEILIGHEIDSINSTRUCTIES
1. Voordat u uw apparaat gebruikt, controleert u of de netspanning
overeenstemt met de spanning op het typeplaatje van het
apparaat.
2. Als de voedingskabel beschadigd is, moet deze door de fabrikant,
zijn dienst na verkoop of personen met gelijkaardige kwalificaties
vervangen worden om gevaar te vermijden.
3. Gebruik het apparaat niet als het beschadigd is. Het moet
gerepareerd worden door de dienst na verkoop of een persoon
met een gelijkaardige kwalificatie om gevaar te vermijden.
4. Stel het apparaat niet bloot aan regen en gebruik het niet in de
buurt van water, vlammen of elke andere warmtebron. Installeer
het apparaat op een horizontaal en stabiel oppervlak.
5. Gebruik het apparaat niet zonder beschermingsrooster.
6. Verplaats het apparaat niet tijdens zijn werking.
7. Het apparaat moet ontkoppeld worden voor de reinigings- en
onderhoudswerkzaamheden.
8. Stop nooit uw vingers, potloden of enige andere voorwerpen door

het rooster terwijl de ventilator werkt.
9. Om de risico’s op brand of elektrische schokken te vermijden, mag
u uw apparaat nooit voor een venster gebruiken.
10. Trek de stekker altijd uit het stopcontact voordat u het apparaat
reinigt, verplaatst of als u het moet onderhouden.
11. Plaats het apparaat op een vlak en stabiel oppervlak tijdens de
werking om te voorkomen dat het omvalt.
12. Plaats de ventilator niet in een vochtige of natte ruimte zoals een
badkamer, keuken...
13. De garantie is niet geldig indien het apparaat beschadigd werd
door een verkeerde montage of foutieve elektrische aansluiting.
Elke wijziging aan het apparaat annuleert de garantie.
14. WAARSCHUWINGEN
Dit apparaat is niet ontwikkeld om gebruikt te worden door
personen (inclusief kinderen) waarvan de fysieke, zintuiglijke of
mentale capaciteiten beperkt zijn of personen met een gebrek aan
ervaring of kennis, behalve indien zij onder controle staan van een
persoon die verantwoordelijk is voor hun veiligheid of voorafgaand
instructies gekregen hebben over het gebruik van het apparaat.
Kinderen moeten in de gaten gehouden worden om te vermijden
dat ze met het apparaat spelen.

BESCHRIJVING
1/ Voorrooster
2/ Schoepen
3/ Achterrooster bevestigingsmoer
4/ Achterrooster
5/ Motoras
6/ Oscillatiebediening
7/ Ventilatorbloc
8/ Schroeven
9/ Schoepen bevestigingsmoer
10/ Basis
11/ Snelheidbediening
12/ Spannen (links – tegen de klok richting)
13/ Lossen (rechts – klok richting)
MONTAGE
LET OP:
GEEN DRUK UITOEFENEN TIJDENS HET VASTDRAAIEN OM DE
SCHROEFDRAAD NIET TE BESCHADIGEN.
Dit ventilatormodel wordt geleverd met een gedemonteerde basis voor
de ingebruikname.
Schroef de bevestigingsmoer van de schoepen op de motoras los door
haar rechtsom te draaien en bewaar de moer.
Plaats de ventilatorbloc in de uitsparing van de basis en bevestig de
clips op de juiste wijze. Schroef de basis met de meegeleverde
schroeven vast en zorg voor een correct aanhaalmoment.
Plaats het achterrooster en let erop dat de stiften van het frontdeel van
de motor samenvallen met de openingen in het rooster en blokkeer
het geheel met de moer. (3)
Monteer de schroef en plaats de pen goed in de 2 inkepingen in de
motornaaf.

Plaats en schroef de bevestigingsmoer (9) vast door haar rechtsom te
draaien. Draai haar stevig vast.
Plaats de voorrooster op de achter rooster en laat de
doorgangsopeningen van de veiligheidsschroef samenvallen.
Plaats de klemmen in de correcte positie en span deze tegen de
rooster
DE VERTICALE VENTILATIEHOEK AFSTELLEN
Kantel het volledige ventilatorblok in verticale richting, het wordt
gecontroleerd en gestabiliseerd met een ratelsysteem.
DE HORIZONTALE OSCILLATIE AFSTELLEN
Trek op de oscillatie bedieningsknop (6) de ventilator draait van links
naar rechts.
Om de oscillatie te stoppen, druk op de knop (6)
INGEBRUIKNAME
1. Stop de stekker in het stopcontact.
2. De ventilator opzetten en de ventilatiesnelheid regelen : druk op de
knop
O = uit, 1 = trage snelheid, 2= gemiddelde snelheid, 3=hoge
snelheid.

REINIGING EN ONDERHOUD
Trek de stekker uit het stopcontact voordat u de ventilator
behandeld.
Reinig de schoepen, het behuizing en het rooster van het apparaat
met een doek of een vochtige spons en zachte zeep en veeg ze
daarna droog met een droge en zachte doek.
Gebruik geen stoomapparaat.
Dompel de ventilator nooit onder. Gevaar op elektrocutie en
vernietiging van het apparaat.
Elke defecte elektronische of elektrische uitrusting die u wilt
verwijderen, moet bij een geschikt recyclagecentrum
binnengebracht worden. Neem contact op met uw dealer.
Geïmporteerd door ELIMEX SA – Avenue des Saisons 98 – B-1050 – Brussel – Belgïe.
Gemaakt in China.
Table of contents
Languages:
Popular Fan manuals by other brands

Yamagata
Yamagata YFT2012M instruction manual

Sunshine Solar
Sunshine Solar SSS224G installation guide

Clarke
Clarke air movers Operating and maintenance instructions

Tornado
Tornado HI-FAN-20HVWM-A-1P instruction manual

AERMEC
AERMEC GIUGIARO Omnia HL Technical and Installation Booklet

Hunter
Hunter 28150 Parts guide