8
Programming Continued
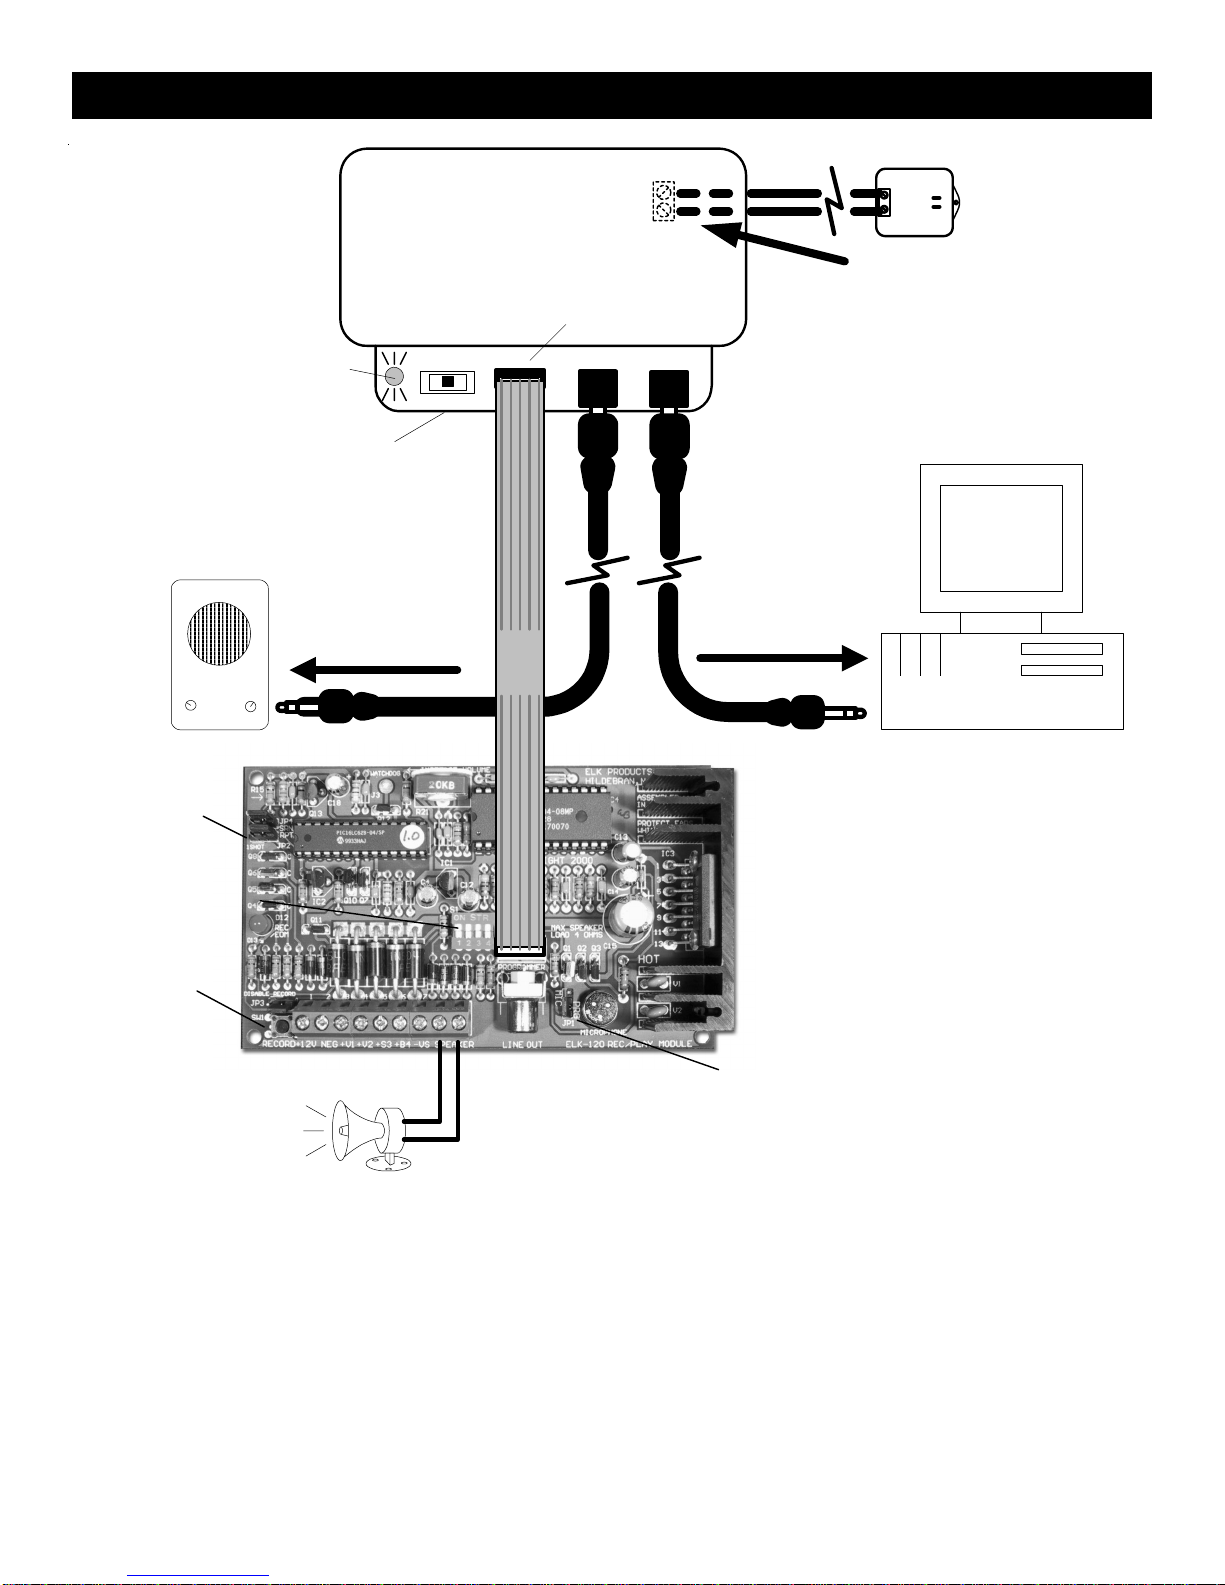
11. Adjust yourcomputer’svolume to the half-way mark.Placeribbon cable from ELK-129 toJ1on the Recordable Module.
Youmustapplypower toa channelin orderto recordit. Channelsare activateddifferentlydependingonwhichversionof
RecordableModuleyouhaveasnotedbelow.
12a For ELK-120 Version 1 Modules, (has no dip switch) .. skip to step 13.
12b. For ELK-120 Version 2 Modules, (has dip switch) ... Move DIP Switch #1 to the ON position .. skip to step 13.
12c. For ELK-124 Version 1 Modules, (has no dip switch) ... skip to step 13.
12d. For ELK-124 Version 2 Modules, (has dip switch) ... Move DIP Switch #1 to the ON position .. skip to step 13.
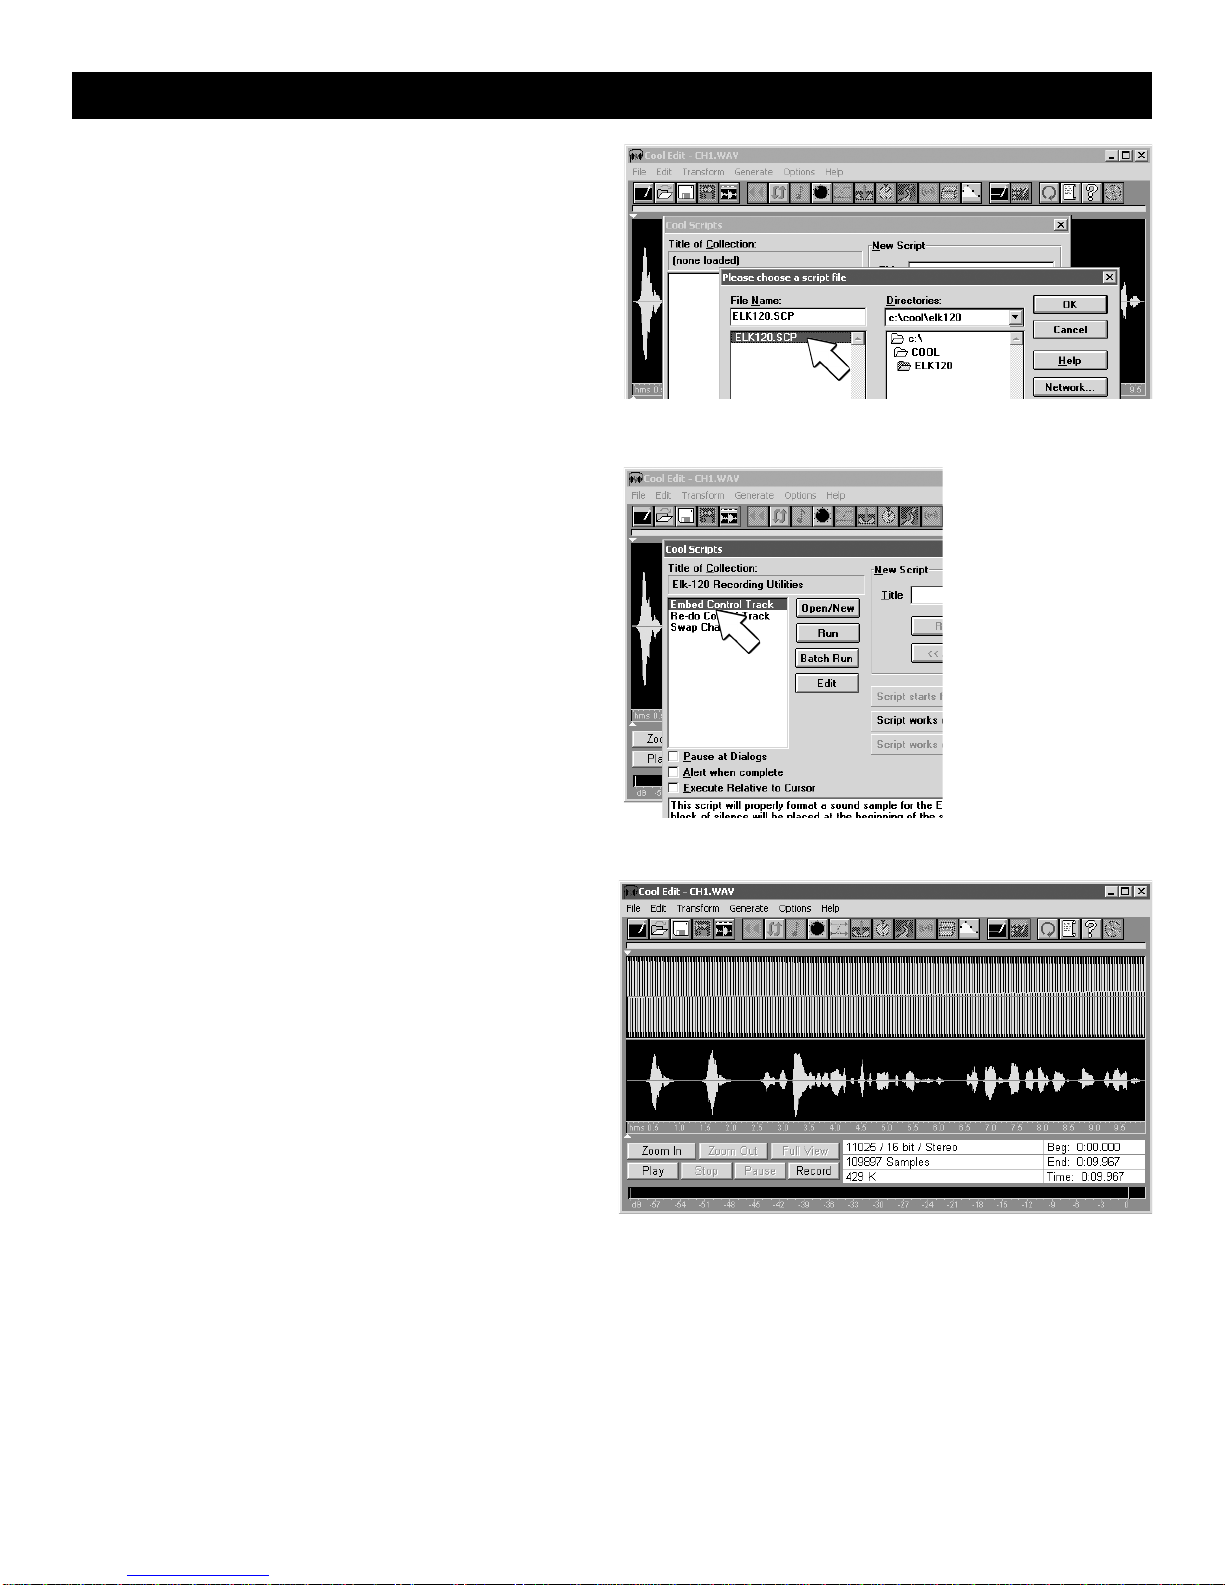
13. Turn SW1 on the ELK-129 to CH1. Channel one's message should start playing. In Cool Edit, click on the PLAY button or
press the spacebar to start playing ch1.wav. If the computer’s volume level is high enough, the RECORD / EOM LED on
theRecordable Moduleshould comeonsolid, indicatingthe messageisbeing recorded.The RecordableModulewill
playback the message just recorded. If the LED does not come on solid while Cool Edit is playing the file, you will need
to increase your computer’s volume output before trying again. If your volume is already set to maximum, see the
Troubleshootingsectionformorehelp.
14. IftheRecordableModule’smessagesoundsdistortedduringplayback,tryreducingyourcomputer'svolumecontrol and
repeating step 13. You can normally double-click the small speaker icon in the task bar to adjust the volume or L-R
balance. To reduce distortion, use the lowest volume setting that will trigger the Recordable Module. If the message still
sounds distorted, try shifting the L-R balance toward the left control track channel (if your computer supports balance
adjustment). You may need to run the "mixer" program that came with your computer to do this. Do not shift the balance
completely to the left (this mutes the right channel). The balance control will be directly above the Master Volume slider.
Click on the center triangle shaped pointer and slide it to the left. If it does not slide, your computer may not support
balanceadjustment.
15. Whenyouhavesuccessfullyprogrammedthe messageforChannelOne,youmayproceedtoprogramChannelTwoby
placingSW1 on the ELK-129 totheCH2position. For ELK-120 or 124version2 Recordable Modules, also moveDIP
switch #1 to the OFF position, then turn DIP Switch #2 to the ON position. Repeat Steps 1-14, loading the file ch2.wav
instead of ch1.wav.
16. Once youhavemastered the programming process, tryrecordingyour own custom messages orsoundeffects with Cool
Edit. With a little experimenting, you can build an impressive library of custom sounds and messages.
17. After installation, the ELK-120 / 124 selection jumpers should be set for the desired operation. i.e. disable record switch,
repeat / 1shot mode, DIP switches OFF, and the channel polarity jumpers on the ELK-124 v2.
Note: If you wish to record by speaking directly in to the on-board microphone, the ELK-129 can still be utilized for providing
powertotheRecordableModule.However,youmustunplugthecablesfromtheAUDIOINandAUDIOOUTjackstoprevent
interference.Makecertainthattheon-boardmicrophoneisenabledbyplacingJP1in the correct position. For example: To
recorda messageonChannel One,placeSW1 ontheELK-129 toCH1,(for ELK-120or 124 version2 Recordable Modules,
alsomove DIP switch #1 to the ON position), then press andhold the RECORDpush-button on theELK-120 or ELK-124
RecordableModulewhilespeakingintothebuilt-inmicrophone. ForChannelTwo, repeatthe abovestep, placingSW1 on
theELK-129to CH2. (for ELK-120 or 124 version2RecordableModules, also move DIP switch #2 totheONposition, and
DIP switch #1 OFF).